
Little Guard VCH 7630 - Vacuum Cleaner GRUNDIG - Free user manual and instructions
Find the device manual for free Little Guard VCH 7630 GRUNDIG in PDF.


| Product Type | Handstick cordless vacuum cleaner |
| Brand | Grundig |
| Model | Little Guard VCH 7630 |
| Power Supply | 230 V, 50 Hz (wall socket); DC 22 V (charging station) |
| Battery Type | Nickel-cadmium (Ni-Cd) rechargeable |
| Charging Time | 20 hours for first use or after long storage |
| Runtime | 8 minutes |
| Weight | 1800 g |
| Protection Class | III |
| Dust Container | Removable, washable |
| Filter | Washable with hot soapy water; air dry completely |
| Included Accessories | Universal vacuum brush, motorised brush, narrow vacuum tube, upholstery brush, 3 extension tubes, charging station with wall mount |
| Motorised Brush Use | Suitable for short pile carpets; removes animal hairs; not for deep pile |
| Charging Indicator | Red LED during charging; turns off when fully charged |
| Operating Temperature | 5°C to 40°C |
| Wall Mounting Height | Approximately 30 cm above floor |
| Safety Features | Do not vacuum wet surfaces, hot ashes, large objects; keep away from water |
| Intended Use | Domestic only; not for commercial use |
| Environmental Disposal | Contains Ni-Cd batteries; recycle at designated collection points |
| Battery Replacement | By authorized technician only; safety gloves required |
Frequently Asked Questions - Little Guard VCH 7630 GRUNDIG
User questions about Little Guard VCH 7630 GRUNDIG
0 question about this device. Answer the ones you know or ask your own.
Ask a new question about this device
Download the instructions for your Vacuum Cleaner in PDF format for free! Find your manual Little Guard VCH 7630 - GRUNDIG and take your electronic device back in hand. On this page are published all the documents necessary for the use of your device. Little Guard VCH 7630 by GRUNDIG.
USER MANUAL Little Guard VCH 7630 GRUNDIG
Please note the following when starting up the appliance:
■ This appliance is intended for domestic use only. All guarantee claims expire if it is used for industrial or commercial purposes.
■ To avoid damage and risks due to improper use, please read the instructions for use and store in a safe place.
■ Do not use it to clean wet surfaces.
■ Do not use the appliance in a wet environment.
■ Never hold the appliance in water or other liquids.
- Keep the appliance and accessories away from your eyes and ears while the appliance is in use.
■ The appliance is intended to be used for vacuuming dirt and dust particles. Do not use it to vacuum large objects which block the appliance and can damage it as a result.
■ Do not sweep up cigarette butts, fireplace ashes or matchsticks. This could cause a fire.
■ Never use the appliance without the dust container and filter.
- Do not use the appliance if the air inlet and ventilation slits are blocked. Keep the air inlet and ventilation slits free at all times of dust, hairs and other elements which could block or prevent the air flow.
If using with the motorised brush, ensure you constantly move the brush backwards and forwards and do not allow it to rotate too long on a stain.
■ The motorised brush may only be cleaned if it is not connected to the appliance.
■ Never start up the appliance if it shows signs of visible damage. This also applies to an accidentally wetten appliance. In such cases, contact your local specialist store.
■ Use the mains adapter supplied only to charge the appliance.
- Keep the appliance out of reach of children.
■ Store the appliance in a dry and safe environment only.
■ Never open up the appliance. All rights to claim under the guarantee are invalidated for damage caused by improper interventions.
Fold out page 2 to clearly see the diagram at all times.
A Dust container.
B Filter (inside the dust container).
c Vacuum intake.
D Pushbutton for opening the dust container.
E Charging indicator (LED).
F Switch for switching on and off.
G Handle.
H Motor housing.
1 Compartment for the rechargeable battery (underside of the appliance).
Accessories
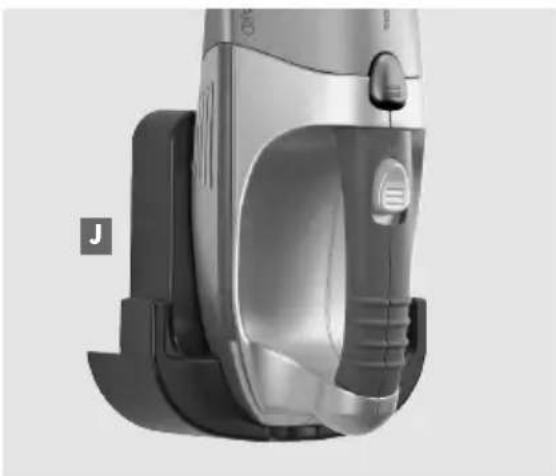
J Charging station for mounting on the wall with mains adapter (see page 9).
K Universal vacuum brush.
L Motorised brush.
M Narrow vacuum tube.
N Upholstery brush.
3 Extension tubes.
Floor brush
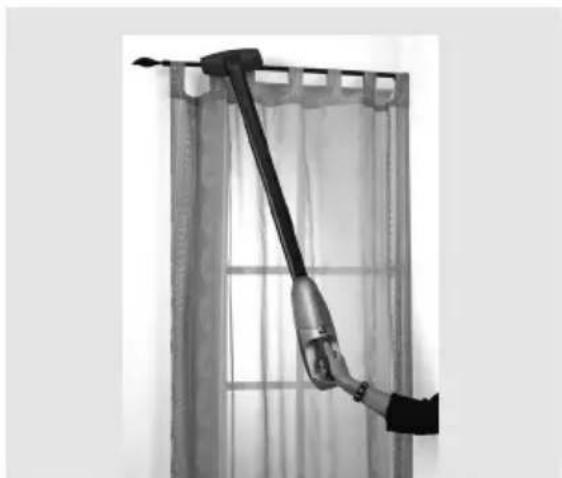
Use the universal vacuum brush Kgether with the three extension tubes C clean small floor areas or curtains.
1 Switch off the appliance.
2 Firmly push an extension tube into the appliance's vacuum intake C
3 Depending on your requirements, insert one or two extension tubes into the first extension tube.
4 Push the universal vacuum brush K to the bottom extension tube.
natural_image
Close-up of a robotic arm cleaning a curtain window (no text or symbols visible)Motorised brush
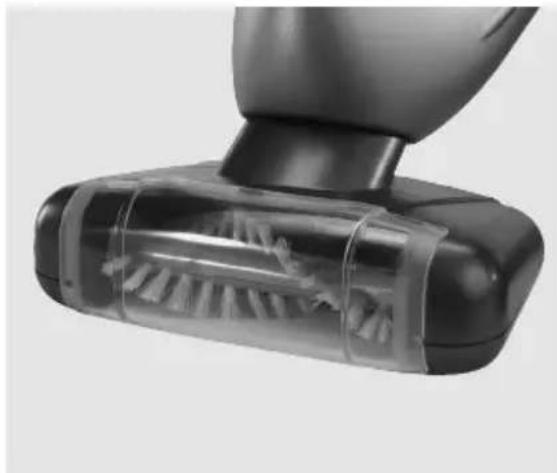
Use the motorised brush b clean short pile carpets or carpeting. It is particularly suitable for removing animal hairs. Never use the motorised brush on long hair/deep pile carpets.
1 Switch off the appliance.
2 Firmly push the motorised brush into the appliance's vacuum intake
Note
■ When you install the motorised brush ensure the contacts of the brush touch the contacts in the appliance's vacuum intake.
Important
■ Do not use the motorised brush to vacuum up hair or long fibres.
■ Do not touch the motorised brush during use. Risk of injuries.
If using with the motorised brush, ensure you constantly move the brush backwards and forwards and do not allow it to rotate too long on a stain.
natural_image
Close-up of a black hairdryer brush head with transparent plastic casing (no text or symbols visible)Narrow vacuum tube and upholstery brush
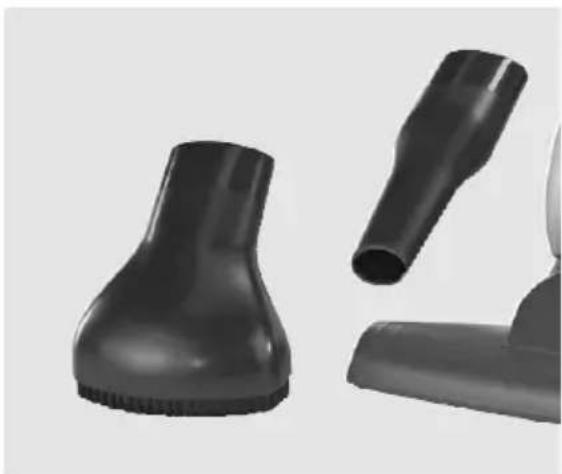
Use the narrow vacuum tube M clean places difficult to reach, e.g. crevices and corners.
Use the upholstery brush N clean small areas of upholstery.
1 Switch off the appliance.
2 Firmly push the narrow vacuum tube or the upholstery brush into the appliance's vacuum intake C.
natural_image
Two black hair blower tools with different tip shapes, shown from different angles (no text or symbols visible)Charging station for mounting on a wall
Fix the charging station ⬆ a wall.
1 Ensure the place you have chosen to install the charger is free of concealed electric cables, water or gas pipes.
2 Choose an installation location near a wall socket (230 V, 50 Hz) for connecting the mains adapter.
Important
- Do not install the charging station anywhere where it is exposed to direct sunlight or near a heater/radiator.
Do not install the charger outdoors.
3 Choose a suitable drill bit for the screws and wall plugs supplied.
4 Drill two holes approx 30 cm above the floor, push in a wall plug and screw in the screws, then hang up the charging station.
natural_image
Close-up of a modern vacuum cleaner with black handle and control panel (no visible text or symbols)If run with the installed rechargeable nickel cadmium batteries, use the charging station with the mains adapter as a charger.
Charging
If run with the installed rechargeable nickel cadmium batteries, use the charging station with the mains adapter as a charger.
1 Remove the accessory used.
2 Insert the appliance in the charging station so that it precisely fits.
– The charging contacts of the appliance and the charging station touch each other.
3 Plug the mains adapter into the wall socket.
- The charging process begins, the charging indicator lights up red.
- The charging indicator remains lit until the appliance is removed from the charging station or the mains adapter plug is disconnected.
- If charging has finished the red charging indicator goes out.
Note
■ Fully charge the batteries before using for the first time or if the batteries have not been used for a long time. (20 hours).
- Charge the appliance at room temperature. Lower or higher temperatures have a negative effect on the life of the batteries.
■ The ambient temperature should be between 5^ C and 40^ C.
■ After charging the running time is 8 minutes.
Switching on and off
1 Remove the appliance from the charging station J.
2 Depending on the requirements, insert one of the accessories into the appliance's vacuum intake C.
3 Switch on the appliance by pushing forward switch F.
4 Switch off the appliance by pushing back switch F.
5 Remove the accessory used.
6 Insert the appliance in the charging station so that it precisely fits.
Empty dust container and clean
1 Hold the appliance vertically with the vacuum intake C facing downward.
2 Press pushbutton Dnd remove the dust container from underneath.
3 Remove the holder and filter Bom the dust container.
Note
■ You can wash the filter from time to time with hot soapy water.
After washing, allow the filter to completely dry.
4 Empty the dust container Avash out and dry.
Note
- Allow the dust container to completely dry before you replace it in the appliance.
5 Hold the appliance vertically facing upwards.
6 Press button D
7 Replace the dust container Aensure that both plug-in contacts of the dust container are precisely inserted in the correct position.
8 Release button D Ensure the latch clicks into place.
Cleaning and care
■ Do not clean the appliance with chemical cleaning agents. These could damage the housing
■ Clean the appliance with a soft cloth and mild soap only.
■ Brush out the filter over a dustbin.
■ The filter and the inside of the dust container can be washed with hot soapy water. Do not wash the filter in the washing machine.
■ The filter and dust container must be completely dry before they are used again.
■ Before using, ensure the motorised brush is free of hairs and fibres.
Replace the rechargeable batteries
If damaged, the appliance may only be opened by an authorised technician. Safety gloves must be worn when the rechargeable batteries are replaced.
1 Undo the screw on the cover of the compartment (underside of the appliance).
2 Carefully remove the cover.
3 Remove the safety clasp.
4 Remove the rechargeable batteries and undo the cable connections.
5 Connect the cable connections to the new batteries, then insert the batteries and the safety clasp.
6 Replace the cover and tighten screw.
Environmental information
■ Never throw the rechargeable batteries in the domestic waste. Used batteries must be placed in the used battery collection containers in shops or handed in to public bodies responsible for waste disposal.
Environmental information
This product has been made from high-quality materials and parts, which are suitable for recycling and can be reused.
Therefore, at the end of its life, the product must not be disposed of in the normal domestic waste but must be taken to a collection point for recycling electrical and electronic appliances. This is indicated by the following symbol on the product, in the instructions for use or on the packaging.
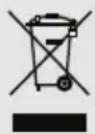
Please contact your local authority to find out where your local collection points are.
Reusing and recycling old appliances is an important contribution to protecting our environment.
Technical specifications

This product fulfils the European Directives 89/336/EEC and 73/23/ EEC.
Serial number
GML 4000
Power supply
230 V, 50 Hz at the wall socket
DC 22 V at the charging station
Rechargeable batteries: Nickel cadmium
Protection class
III
Weight (WEEE)
1800 g

Ni-Cd
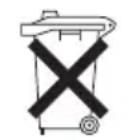

Subject to technical and visual changes!
- Accessories
- Floor brush
- Motorised brush
- Note
- Important
- Narrow vacuum tube and upholstery brush
- Charging station for mounting on a wall
- Charging
- Switching on and off
- Empty dust container and clean
- Cleaning and care
- Replace the rechargeable batteries
- Environmental information
- Technical specifications
- Serial number
- Power supply
- Protection class
- Weight (WEEE)
Brand : GRUNDIG
Model : Little Guard VCH 7630
Category : Vacuum Cleaner