
VP 4121 BS eco - Vacuum Cleaner ECG - Free user manual and instructions
Find the device manual for free VP 4121 BS eco ECG in PDF.


| Product Type | Floor Vacuum Cleaner |
| Brand | ECG |
| Model | VP 4121 BS eco |
| Nominal Input Power | 1000 W |
| Suction Power | 225 W |
| Maximum Suction Pressure | 20 kPa |
| Voltage / Frequency | 220–240 V ~ 50 Hz |
| Dust Container Capacity | 1.6 L |
| Operating Radius | 8.5 m |
| Weight | 8.7 kg |
| Noise Level | < 63 dB |
| Filtration System | Washable output HEPA filter F6 |
| Motor Protection | Thermostat fuse against overheating |
| Telescopic Tube | Stainless steel |
| Cord Rewind | Automatic, with pedal |
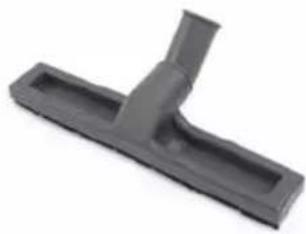
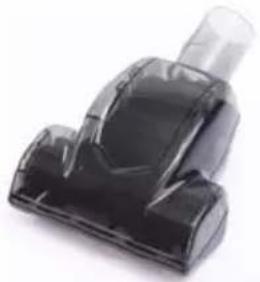
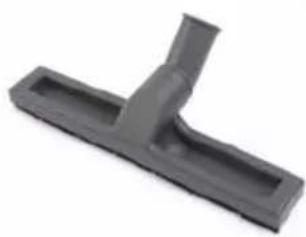
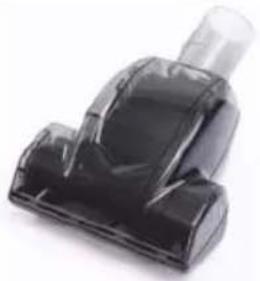
| Included Accessories | Metal floor brush, tapered nozzle, combo brush, turbo brush, parquet brush |
| Filter Maintenance | Clean or replace HEPA and felt filters every 6–12 months |
| Safety Features | Thermal protection, automatic motor shut-off |
| Disposal | Recycle as electronic waste; do not dispose as household waste |
| Certifications | Complies with EU directives on electromagnetic compatibility and electrical safety |
Frequently Asked Questions - VP 4121 BS eco ECG
User questions about VP 4121 BS eco ECG
0 question about this device. Answer the ones you know or ask your own.
Ask a new question about this device
Download the instructions for your Vacuum Cleaner in PDF format for free! Find your manual VP 4121 BS eco - ECG and take your electronic device back in hand. On this page are published all the documents necessary for the use of your device. VP 4121 BS eco by ECG.
USER MANUAL VP 4121 BS eco ECG
natural_image
Exterior view of a silver ECG vacuum cleaner with handle and ventilation slots (no text or symbols visible)VP 4121 BS eco
PODLAHOVÝ VYSAVAČ
NÁVOD K OBSLUZE
PODLAHOVÝ VYSÁVAČ
NÁVOD NA OBSLUHU
ODKURZACZ PODŁOGOWY
INSTRUKCJA OBSŁUGI
PADLÓPORSZÍVÓ
HASZNÁLATI ÚTMUTATÓ
BODENSTAUBSAUGER
BEDIENUNGSANLEITUNG
FLOOR VACUUM CLEANER
INSTRUCTION MANUAL
CZ
SK
PL
HU
DE
EN
BEZPEČNOSTNÍ POKYNY
Seznam součástí
natural_image
Simple line drawing of a brush on a surface (no text or symbols)③
natural_image
Close-up of a black vacuum cleaner with a transparent cap (no visible text or symbols)④
natural_image
Gray plastic T-shaped object with a protruding handle (no text or symbols visible)SESTAVENÍ VYSAVAČE
natural_image
Line drawing of a mechanical device with no visible text or symbolsnatural_image
Diagram of a curved mechanical or biological structure with an arrow pointing to a specific component (no text or symbols present)Tepelná ochrana motoru
natural_image
Technical line drawing of a vehicle chassis with internal components and a hand holding the engine compartment (no text or symbols present)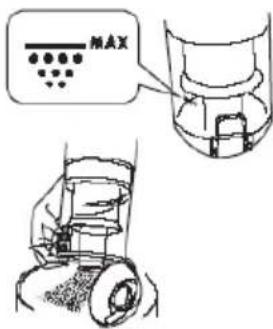
natural_image
Two hand-drawn diagrams of a container with liquid and a lid, showing different actions (no text or symbols)Uložení vysavače
natural_image
Line drawing of a vacuum cleaner with a hand operating the lever (no text or symbols)
ODSTRAŇOVÁNÍ PROBLÉMŮ
Zoznam súčastí
natural_image
Simple line drawing of a brush on a textured surface (no text or symbols)③
natural_image
Close-up of a black vacuum cleaner with a transparent cap (no visible text or symbols)④
natural_image
Gray plastic mechanical component with a Y-shaped notch (no text or symbols visible)ZOSTAVENIE VYSÁVAČA
natural_image
Line drawing of a vacuum cleaner with attached component, showing mechanical parts and wiring (no text or symbols)SK
natural_image
Line drawing of a vacuum cleaner with attached device (no text or symbols)natural_image
Diagram of a mechanical linkage or cable assembly with a gear-like component and an arrow indicating direction (no text or symbols present)Tepelná ochrana motora
natural_image
Two hand-drawn diagrams of a container with liquid and a lid, showing different actions (no text or symbols present)Upozornenie:
natural_image
Technical line drawing of a vehicle chassis with hand operating controls (no text or symbols)Uloženie vysávača
-
Po použití vysávač vypnite a vytiahnite vidlicu napájacej šnúry zo zásuvky.
-
Potom zošliapnite pedál navíjača a napájaciu šnúru kompletne naviňte.
-
Podlahovú kefu zaveste pomocou háčika do držiaka na vysávači, pozrite obrázok.
-
Vysávač uložte na suché miesto. Vysávač nikdy neukladajte na priame slnko alebo na vlhké miesto.
natural_image
Line drawing of a vacuum cleaner with a hand operating the lever (no text or symbols)
ODSTRAŇOVANIE PROBLÉMOV
natural_image
Simple line drawing of a brush applying material to a surface (no text or symbols)③
natural_image
Close-up of a black vacuum cleaner with a transparent cap (no visible text or symbols)④
natural_image
Black plastic mechanical component with a Y-shaped handle and rectangular body (no text or symbols)MONTAŻ ODKURZACZA
natural_image
Line drawing of a vacuum cleaner with attached device (no text or symbols)natural_image
Line drawing of a mechanical device with no visible text or symbolsPL
natural_image
Diagram of a curved mechanical or biological structure with an arrow pointing to a component (no text or symbols present)natural_image
Two hand-drawn diagrams of a container with liquid and a lid, showing the process (no text or symbols)Uwagi:
natural_image
Technical line drawing of a mechanical assembly with hands operating a component (no text or symbols)natural_image
Line drawing of a vacuum cleaner with a hand tool, showing mechanical components and part outline (no text or symbols)USUWANIE PROBLEMÓW
natural_image
Simple line drawing of a brush applying paint to a surface (no text or symbols)③
natural_image
Close-up of a black vacuum cleaner with a transparent cap (no visible text or symbols)④
natural_image
Black plastic T-shaped object with a sharp neck and rectangular base (no text or symbols)natural_image
Line drawing of a vacuum cleaner with a small device attached, showing no text or symbols.natural_image
Line drawing of a vacuum cleaner with attached device (no text or symbols)natural_image
Diagram of a mechanical linkage or cable assembly with no visible text or symbolsnatural_image
Two-step illustration of a hand holding a cylindrical object, showing the process from opening to opening (no text or symbols present)
Figyelmeztetés!
natural_image
Technical line drawing of a car's front wheel assembly, showing internal components and wiring (no text or symbols)A porszívó tárolása
natural_image
Line drawing of a robotic vacuum cleaner with a hand tool inserted, showing body positioning and component assembly (no text or symbols)PROBLÉMAMEGOLDÁS
natural_image
Simple line drawing of a brush applying paint to a surface (no text or symbols)③
natural_image
Close-up of a black vacuum cleaner with a transparent cap (no visible text or symbols)④
natural_image
Gray plastic mechanical component with a Y-shaped handle and rectangular body (no text or symbols visible)ZUSAMMENSETZEN DES BODENSTAUBSAUGERS
natural_image
Line drawing of a vacuum cleaner with a small device attached, showing no text or symbols.natural_image
Line drawing of a mechanical device with a cylindrical base and handle (no text or symbols)DE
natural_image
Diagram of a curved mechanical or biological structure with an arrow pointing to a specific feature (no text or symbols present)natural_image
Illustration of two hand-drawn diagrams showing a bottle being placed on top and bottom, with no text or symbols present.Hinweis:
natural_image
Technical line drawing of a vehicle chassis with hand operating controls (no text or symbols)natural_image
Line drawing of a vacuum cleaner with a hand tool inserted, showing body structure and component details (no text or symbols)Read carefully and save for future use!
Warning: The safety measures and instructions, contained in this manual, do not include all conditions and situations possible. The user must understand that common sense, caution and care are factors that cannot be integrated into any product. Therefore, these factors shall be ensured by the user/s using and operating this appliance. We are not liable for damages caused during shipping, by incorrect use, voltage fluctuation or the modification or adjustment of any part of the appliance.
To protect against a risk of fire or electric shock, basic precautions shall be taken while using electrical appliances, including the following:
- Read all instruction before using the appliance.
- Make sure the voltage in your outlet corresponds to the voltage provided on the appliance label and that the socket is properly grounded. The outlet must be installed according to valid safety instructions.
- Do not use the vacuum cleaner if the power cord is damaged. All repairs including cord replacements shall be performed by a professional service centre! Do not remove protective covers of the appliance, risk of electric shock!
- Protect the vacuum cleaner from direct contact with water and other liquids, do not place on it containers with liquids to prevent electric shock.
- Keep the vacuum cleaner away from heat sources (oven, radiators) to prevent the deformation of plastic components and aff ecting the proper functioning of the appliance.
- Do not leave the plugged in vacuum cleaner unattended. Disconnect the cord from the electrical outlet prior to performing maintenance. When unplugging the appliance, hold the power cord by the plug. Do not pull the cable.
- Do not use the vacuum cleaner outdoors or in a damp environment. Risk of electric shock.
- Do not allow children to play with the vacuum cleaner. A vacuum cleaner is not a toy. Be more attentive if you are using the vacuum cleaner near children.
- Use only attachments and accessories approved by the manufacturer.
- If the vacuum cleaner does not work properly, if it fell (e.g. into water), if it is damaged or if it was forgotten outdoors, have it inspected professionally at an authorized service center.
- Do not hold the vacuum cleaner by the power cord when moving it. Make sure that the power cord is not broken or bent over sharp objects and edges. When working with the vacuum cleaner, do not drive over the power cord. Keep the power cord
away from heat sources.
-
Do not touch the power cord or the vacuum cleaner with wet hands.
-
Do not insert any objects into the vacuum cleaner openings. Do not use the vacuum cleaner if the openings are blocked in any way. Make sure that the vacuum cleaner is clean, without dirt and any debris, which can reduce the suction power of the vacuum cleaner.
-
Keep hair, loose clothing, hands and other parts of the body away from openings or moving parts of the vacuum cleaner.
-
Do not use the vacuum cleaner on the following objects, which could result in damaging the device or injury:
-
sharp objects like glass, screws, coins, nails, etc.
- hot or smouldering objects such as cinders, cigarettes or flammable or volatile liquids
-
wet surfaces, water or other liquids
-
Use extra care when cleaning stairs.
-
Do not carry the vacuum cleaner by the dust container handle. Always use the vacuum cleaner handle to move it.
-
Use the vacuum cleaner only in accordance with the instructions given in this manual. This vacuum cleaner is designed for home use only. The manufacturer is not liable for damages caused by the improper use of this appliance.
-
This appliance can be used by children ages 8 and older and by the physically and mentally impaired or by individuals with insufficient experience and knowledge, if supervised or trained to use the appliance in a safe manner and understand potential dangers. Children shall not play with the appliance. Cleaning and maintenance operations performed by the user shall not be carried out by children, if they are not older than 8 years and under supervision. Children under the age of 8 shall keep away from the appliance and its power supply.
DESCRIPTION OF THE VACUUM CLEANER
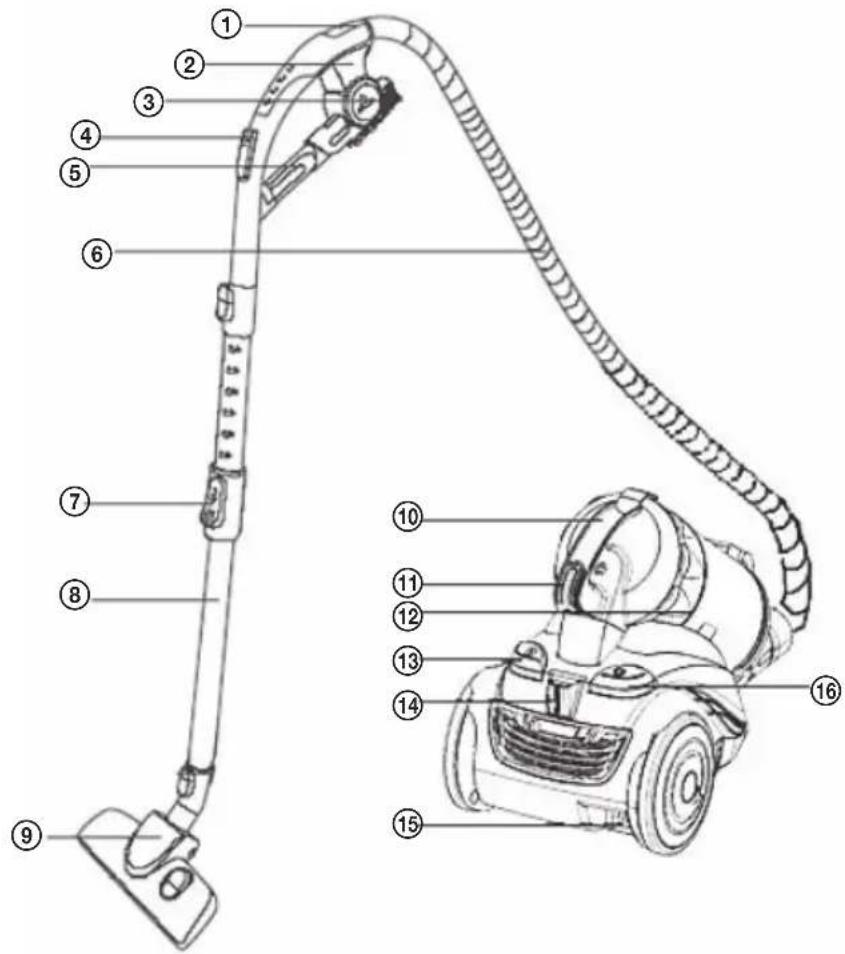
List of parts
- Tube grip handle
- Attachment holder (not included)
- 2 in 1 attachment (not included)
- Suction control
- Tapered nozzle
- Hose
- Hose extension lock
- Telescopic metal tube
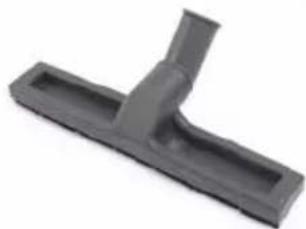
- Metal floor brush
- Dust container handle
- Dust container lock
- Cyclone container lock
- On/Off pedal
- Tube holder
- Power cord plug
- Power cord reel
Accessories
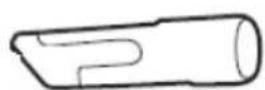
- Tapered nozzle
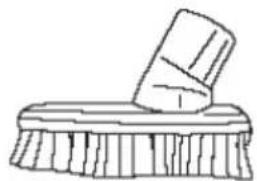
- Combo brush
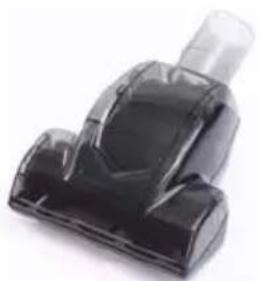
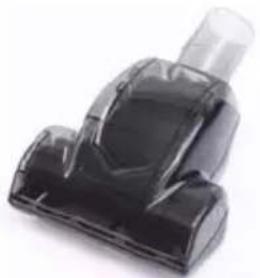
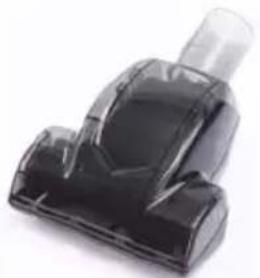
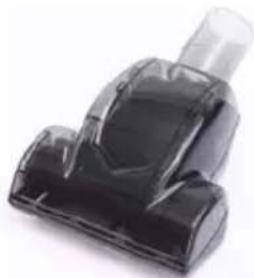
- Turbo brush
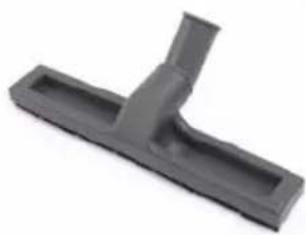
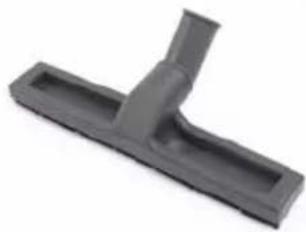
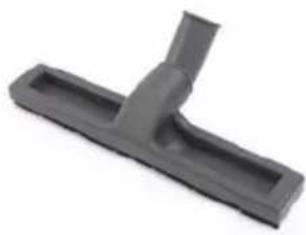
- Parquet brush
①
②
natural_image
Simple line drawing of a brush applying paint to a surface (no text or symbols)③
natural_image
Close-up of a black vacuum cleaner with a transparent cap (no visible text or symbols)④
natural_image
Gray plastic mechanical component with a Y-shaped notch (no text or symbols visible)EN
VACUUM CLEANER ASSEMBLY
- Before you begin with the assembly of the vacuum cleaner, ensure all components and accessories were included in the package, see list of parts.
- The vacuum cleaner must be switched off and unplugged prior to the assembly.
Connecting the hose to the vacuum cleaner
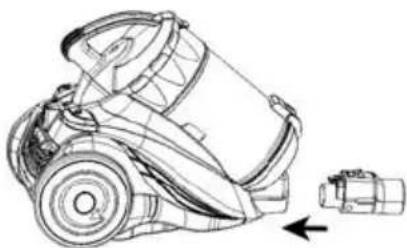
Insert the hose horizontally into the suction hole on the vacuum cleaner unit, as shown on the following image.
Make sure the orientation of the two stubs is correct. Once the hose is fully inserted, turn the hose to the right. A clicking sound indicates the hose is properly secured.
natural_image
Line drawing of a vacuum cleaner with attached device (no text or symbols)Attaching and removing the dust container
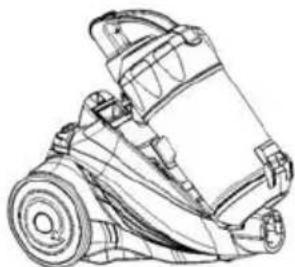
Place the bottom of the dust container onto the stub in the front part of the vacuum cleaner unit and press down. A clicking sound the dust container is properly secured in the lock on the vacuum cleaner unit.
To remove the container, press the lock on the container handle. The container can be removed from the vacuum cleaner while holding the lock.
natural_image
Line drawing of a vacuum cleaner with attached mechanical components (no text or symbols)Telescopic tube and floor brush assembly
Insert the front end of the tube grip handle into the metal telescopic tube. Insert the other end of the telescopic tube into the round opening of the floor brush and adjust properly. You are now finished with the vacuum cleaner assembly.
OPERATING INSTRUCTIONS
Let's start
-
First of all, unwind the necessary length of the power cord from the reel. The yellow symbol on the power cord indicates the optimal unwinding length. Do not unwind the cord past the red symbol.
-
Plug the power cord into the electric outlet. Turn on the vacuum cleaner.
Suction power control
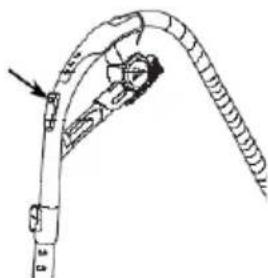
High suction power causing the suction, of e.g. textile into the brush and tube, can be regulated by the suction power control on the grip handle, see image.
natural_image
Diagram of a mechanical linkage or cable assembly with no visible text or symbolsThermal protection for the motor
-
Thermal protection is found inside the motor area, which can automatically disconnect the power supply to the motor and prevent overheating. The temperature of the motor increases in case the motor is overloaded or the suction or air vents are clogged. Upon reaching a specific threshold, the protection automatically disconnects the power supply to the motor, allowing it to cool down and prevent damage.
-
If the protection disconnects the power supply to the motor, immediately switch the vacuum cleaner off and unplug the power cord from the outlet. Allow the vacuum cleaner to cool down and remove the impurities blocking the suction (as well as the hose and grip handle) and if necessary, replace the HEPA fi liter or felted fi liter.
-
Once the motor has cooled down, after about 30 minutes, plug the power cord back in and ensure the thermal protection has been deactivated. If the vacuum cleaner was not unplugged from the power, the thermal protection can not be deactivated even after the motor cools down.
CLEANING AND MAINTENANCE
• Always disconnect the power cable from the AC outlet before cleaning and maintenance.
- Remove impurities from the dust container on a regular and frequent basis to prevent vacuum cleaner defects.
- Do not treat the surface of the vacuum cleaner with benzine or other solvents or oily liquids. Wipe the surface with a towel immersed in water or light detergent solution.
Attention! Wring the towel before use. Water must not get into the electrical components of the vacuum cleaner.
Cleaning the dust container
- Always unplug the power cord from the outlet before cleaning the dust container.
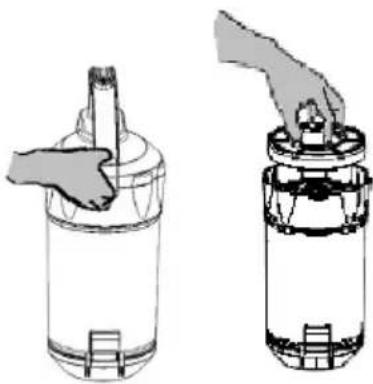
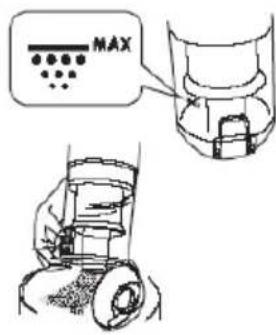
- Place the dust container over the waste bin (trash bag) and press the container lock. The bottom cover of the container will automatically open.
- Empty and clean the dust container, see image.
Cleaning the front fi Iter
Warning:
- Before continuing with the next steps, make sure the vacuum cleaner is switched off.
- Unplug the power cord from the outlet.
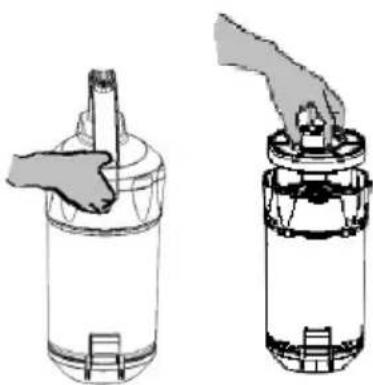
- Press the dust container handle to remove the dust container and remove the cover of the front filter, see image.
- Use a brush (porous and felted fi lter with composite covering) to clean the fi lter or rinse under water.
Attention:
- It is normal for the colour of the central white filter to change. This does not affect the filtration performance. If cleaning the hose and central filter is difficult, we recommend rinsing them with water. In this case, however, allow the components 24 hours to dry before use.
Notes:
- If the dust container and filter cover are not in place, the vacuum cleaner will not function without the capability of collecting dust. In this case, you should carefully check whether the dust container and filter cover are properly installed in place.
- Keep the suction nozzle clean to prevent overheating and damaging the appliance.
natural_image
Two hand-drawn diagrams of a container with liquid and a lid, showing the process (no text or symbols)Replacing the back fi Iter
Warning:
- Before continuing with the next steps, make sure the vacuum cleaner is switched off.
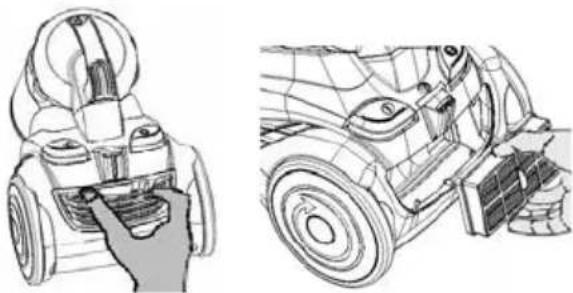
The back fi Iter is located behind the air vent and can be washed. If the surface of the fi Iter contains a greater amount of dust, the fi Iter can be replaced for a new piece or washed in water in order to maintain sufficient suction power, see image.
The fi Iter shall normally be replaced or cleaned after 6 to 12 months of operation. Before using the vacuum cleaner, do not forget to check that all fi Iters are properly installed in place.
natural_image
Technical line drawing of a vehicle chassis with hand operating controls (no text or symbols)Storage
- Switch the vacuum cleaner off and unplug the power cord from the outlet after use.
- Then step on the power cord reel pedal to reel in the entire power cord.
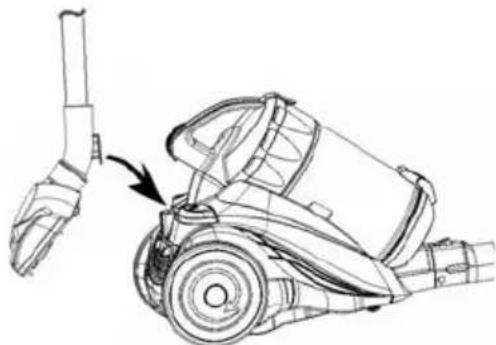
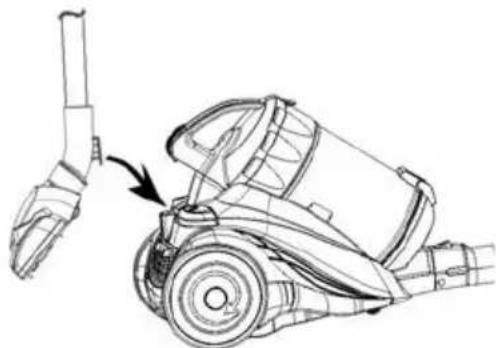
- Hang the floor brush on the hook found on the vacuum cleaner holder, see image.
- Store the vacuum cleaner in a dry area. Do not keep the vacuum cleaner in an area exposed to direct sunlight or moisture.
natural_image
Line drawing of a vacuum cleaner with a hand tool inserted, showing body positioning and component assembly (no text or symbols)TROUBLESHOOTING
Do not use an appliance showing any signs of damage. Damaged power cords must be replaced by a qualified authorized service centre. Only this way can you prevent safety risks.
See the troubleshooting guide if your vacuum cleaner does not operate correctly. Refer to an authorized service centre if you are not able to resolve an issue yourself.
Before referring to a service centre, check the following list of common problems and how to remove them.
| Problem Correction | |
| The vacuum cleaner does not work. | · Ensure the vacuum cleaner is properly plugged into the outlet. Pull the plug out of the outlet and plug it back in.· Make sure the outlet is powered.· Ensure the On switch of the vacuum cleaner is “On”. |
| Limited suction power. | · Ensure the floor brush, tube and hose are not clogged. Remove the obstacle.· Ensure the suction fi Iter is not clogged. Remove impurities and clean or replace the input fi Iter and output HEPA fi Iter on a regular basis. |
| Unusual noise when the motor is running. | · Turn the motor off immediately.· Ensure the floor brush, tube and hose are not clogged. Remove the obstacle. |
EN
TECHNICAL DATA
Suction power 225 W
Maximum suction pressure: > 20 kPa
Washable output HEPA fi Iter F6
Thermostat fuse against motor overheating
Dust container capacity: 1.6 l
Stainless steel telescopic tube
Automatic power cord rewind
Operating radius 8,5 m
Accessories:
Metal floor brush
Tapered nozzle
Combo brush
Turbo brush
Parquet brush
Nominal voltage: 220–240 V\~ 50 Hz
Nominal input power: 1000 W
Weight: 8.7 kg
Noise level: < 63 dB
USE AND DISPOSAL OF WASTE
Wrapping paper and corrugated paperboard – deliver to scrapyard. Packing foil, PE bags, plastic elements – throw into plastic recycling containers.
DISPOSAL OF PRODUCTS AT THE END OF LIFETIME
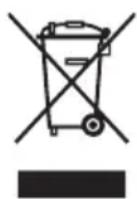
Disposal of electric and electronic equipment (valid in EU member countries and other European countries with an implemented recycling system)
The represented symbol on the product or package means the product shall not be treated as domestic waste. Hand over the product to the specified location for recycling electric and electronic equipment. Prevent negative impacts on human health and the environment by properly recycling your product.
Recycling contributes to preserving natural resources. For more information on the recycling of this product, refer to your local authority, domestic waste processing organization or store, where you purchased the product.
This product complies with EU directive requirements on electromagnetic compatibility and electrical safety.
Changes in text and technical parameters reserved.
08/05


K+B Progres
K+B Progres, a.s. (dále jen K+B), IČO: 61860123

- VP 4121 BS eco
- PODLAHOVÝ VYSAVAČ
- PODLAHOVÝ VYSÁVAČ
- ODKURZACZ PODŁOGOWY
- PADLÓPORSZÍVÓ
- BODENSTAUBSAUGER
- FLOOR VACUUM CLEANER
- BEZPEČNOSTNÍ POKYNY
- Seznam součástí
- SESTAVENÍ VYSAVAČE
- Tepelná ochrana motoru
- Uložení vysavače
- ODSTRAŇOVÁNÍ PROBLÉMŮ
- Zoznam súčastí
- ZOSTAVENIE VYSÁVAČA
- Tepelná ochrana motora
- Upozornenie:
- Uloženie vysávača
- ODSTRAŇOVANIE PROBLÉMOV
- MONTAŻ ODKURZACZA
- Uwagi:
- USUWANIE PROBLEMÓW
- Figyelmeztetés!
- A porszívó tárolása
- PROBLÉMAMEGOLDÁS
- ZUSAMMENSETZEN DES BODENSTAUBSAUGERS
- Hinweis:
- Read carefully and save for future use!
- DESCRIPTION OF THE VACUUM CLEANER
- List of parts
- Accessories
- VACUUM CLEANER ASSEMBLY
- Connecting the hose to the vacuum cleaner
- Attaching and removing the dust container
- Telescopic tube and floor brush assembly
- OPERATING INSTRUCTIONS
- Let's start
- Suction power control
- Thermal protection for the motor
- CLEANING AND MAINTENANCE
- Cleaning the dust container
- Cleaning the front fi Iter
- Warning:
- Attention:
- Notes:
- Replacing the back fi Iter
- Storage
- TROUBLESHOOTING
- TECHNICAL DATA
- USE AND DISPOSAL OF WASTE
- DISPOSAL OF PRODUCTS AT THE END OF LIFETIME
- K+B Progres
Brand : ECG
Model : VP 4121 BS eco
Category : Vacuum Cleaner