
MXM800FM4GB - Mp3 player GoGen - Free user manual and instructions
Find the device manual for free MXM800FM4GB GoGen in PDF.


| Product Type | MP4 Player / MP3 Player |
| Model | MXM800FM4GB |
| Brand | GoGen |
| Display | 1.8-inch TFT color display, 128x160 pixels |
| Storage Capacity | 4 GB (built-in) |
| Dimensions (W x H x D) | 90 x 48 x 13.2 mm |
| Weight (Net) | 30.8 g |
| Battery | Built-in rechargeable lithium-ion, 190 mAh |
| Battery Life | Up to 12 hours music playback, up to 4 hours video playback |
| Charging Time | Approximately 2 hours for 80%, 4 hours for full charge |
| Audio Formats | MP3, WMA, WAV |
| Photo Formats | JPEG, BMP |
| Video Formats | MTV (conversion software included for AVI, WMV, MPEG, etc.) |
| FM Radio | Yes, 20 presets, bands: US (87.5-108.0 MHz), Europe (87.5-108.0 MHz), Japan (76.0-90.0 MHz) |
| Recording | Voice and FM recording, WAV format |
| E-book | TXT format, bookmark support |
| Equalizer | Normal, Pop, Rock, Classic, Jazz, Bass, Custom EQ, 3D effect |
| Playback Rate | Adjustable (0.67X, 0.80X, 1.00X, 1.14X, 1.33X) |
| Connection | USB 2.0 (Mini USB) |
| Headphone Jack | 3.5 mm |
| Microphone | Built-in |
| Signal-to-Noise Ratio | 80 dB (30 kHz filter) |
| Distortion | < 0.2% |
| Frequency Response | 20 Hz - 20 kHz |
| Operating System Compatibility | Windows 98SE/2000/ME/XP/Vista (driver required for 98SE) |
| Safety & Maintenance | Clean with dry cloth only; do not disassemble; avoid moisture, heat, and magnets |
Frequently Asked Questions - MXM800FM4GB GoGen
User questions about MXM800FM4GB GoGen
0 question about this device. Answer the ones you know or ask your own.
Ask a new question about this device
Download the instructions for your Mp3 player in PDF format for free! Find your manual MXM800FM4GB - GoGen and take your electronic device back in hand. On this page are published all the documents necessary for the use of your device. MXM800FM4GB by GoGen.
USER MANUAL MXM800FM4GB GoGen
natural_image
Abstract logo design with white stylized 'S' inside a circle on black background (no text or symbols)MXM 800 FM
YETTI
GoGEN
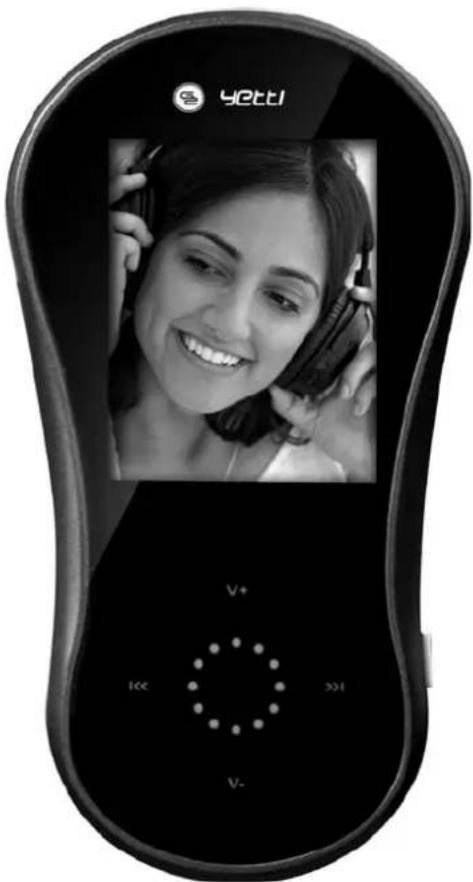
PŘEHRÁVAČ MP4
PREHRÁVAČ MP4
MP4 PLAYER
CZ SK GB
NÁVOD K POUŽITÍ
NÁVOD NA POUŽITIE
USER MANUAL
OBSAH
Úvod 3
HLAVNÍ PRVKY „HLAVNÍ PRVKY ZAŘÍZENÍ“
- Uložení stanice
natural_image
Black-and-white photo of a crowded scene with people in boats and a distant building (no visible text or symbols)HLAVNÍ PRVKY „HLAVNÍ PRVKY ZARIADENIE“
- Uloženie stanice
natural_image
Black-and-white photo of a crowded outdoor scene with people gathered around a central structure (no visible text or symbols)Regulatory Information: FCC Part 15 43
Important Safety Precautions 44
Main Features 45
Overview 45
Connecting to the Computer 46
System requirements 46
Installing the driver for windows 98 SE 46
Connecting player to computer 46
Copy Files from computer 46
Disconnecting from the computer 46
Charging the battery 46
Basic operation 47
Turn on/off the Player 47
Adjusting the volume 47
Resetting the Player 47
Unlock All Buttons 47
Entering the main menu 47
Listening to Music 48
Playing music 48
Display 48
Using Music Function Menu 49
Lyric Displaying 50
FM radio 50
Listening to FM radio 50
Display 50
Using FM radio function menu 51
Voice Recording and Playing 52
Recording a Voice 52
Setup the recording quality 53
Using voice function menu 53
Viewing Photos 53
Viewing a Photo 53
Using photo function menu 54
Watching a Video 54
Playing a video 54
E-book Reading 54
Save and Load a bookmark 55
Managing Files 55
Browsing all files and deleting a file 55
Changing Player Setups 56
Setup items 56
Time setup 56
Power setup 57
Adjust the brightness 57
System tools 57
Converting Video to MTV Format 58
Troubleshooting 59
Specifications 59
INTRODUCTION
Thank you for purchasing this MP4 Player.
This manual contains important safety information and operation instructions, so please read all these instructions carefully before using the player and keeps it for future reference.
This manual will help you use all of the exiting features to make your player view more enjoyable.
We have done our best to produce a complete and accurate manual; however, we cannot ensure that there are no errors or omissions. We have no responsibility for damages or loss of data caused by improper operation.
The instruction manual is subject to change for improvement without notice.
The player may power off if suffers in lightning strikes or certain static electricity. You can turn on the player again or press the RESET hole to re-initialize the system of your player.
Trademarks and trade names used in this instruction manual are owned by their respective companies or organizations.
REGULATORY INFORMATION: FCC PART 15
This device complies with part 15 of the FCC rules.
Operation is subject to the following two conditions:
- this device may not cause harmful interference, and this device must accept any interference received, including interference that may cause undesired operation.
Note:
This equipment has been tested and found to comply with the limits for a Class B digital device, pursuant to part 15 of the FCC Rules. These limits are designed to provide reasonable protection against harmful interference in a residential installation.
This equipment generates, uses and can radiate radio frequency energy and, if not installed and used in accordance with the instructions, may cause harmful interference to radio communications. However, there is no guarantee that interference will not occur in a particular installation. If this equipment does cause harmful interference to radio or television reception, which can be determined by turning the equipment off and on, the user is encouraged to try to correct the interference by one or more of the following measures:
- Reorient or relocate the receiving antenna.
- Increase the separation between the equipment and receiver.
- Connect the equipment into an outlet on a circuit different from that to which the receiver is connected.
- Consult the dealer or an experienced radio/TV technician for help.
WARNING: THE MANUFACTURER IS NOT RESPONSIBLE FOR ANY RADIO OR TV INTERFERENCE CAUSED BY UNAUTHORIZED MODIFICATIONS TO THE DEVICE. ANY SUCH MODIFICATIONS COULD VOID THE USER'S AUTHORITY TO OPERATE THE EQUIPMENT.
IMPORTANT SAFETY PRECAUTIONS
Always follow these basic safety precautions when using your player.
This will reduce the risk of product damage and personal injury.
- Do not disassemble, repair or modify the player by yourself.
Refer servicing to qualified personnel.
- Do not dispose of the player in fire to avoid explosion because the player has built-in battery.
- Do not touch the player with bare hands if the built-in battery is leaking. In this case, contact service center for help since the liquid may remain in the player. If your body or clothes has contacted with the battery liquid, wash it off thoroughly with water. Also, if some of liquid gets into your eyes, do not rub your eyes but immediately wash them with clean water, and consult a doctor.
- Keep the player away from direct sunlight and heat source.
- Do not expose the unit to rain or moisture to avoid any malfunction.
- Do not use the player in rather dry environment to avoid static.
- Never apply heavy impact on the player like dropping it or placing it on the magnet.
- Route USB cable so that people and pets are not likely to trip over or accidentally pull on them as they move around or walk through the area.
- Disconnect the USB cable from the computer when you do not use the player for a long time.
- Clean only with dry cloth. Make sure the player is turned off before cleaning.
Do not use liquid cleanser.
- Be sure to back up your files. We will not be liable for the loss of data due to improper operation, repair or other causes.
- At full power, the prolonged listening of the walkman can damage the ear of the use.
• Maximum output voltage ≤150mV
Precautions in using the headphone
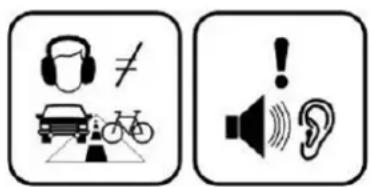
- Do not use the headphone while driving an automobile or riding a bicycle.
It is not only dangerous, but also against the law. To avoid an accident, do not turn up the volume of the headphones too high while walking.
- It's not recommended that you use the headphones at a high volume for an extended time as this may cause hearing damage.
MAIN FEATURES
• 1.8 TFT color display 128*160pxl
• Built-in rechargeable lithium battery
• Using the player even if the player is connected to the computer
- Playback of MP3, WMA, WAV music files
- Multiple equalizers (EQ) and 3D sound effects
• Display titles, artists and albums of music files (ID3 tag)
• Lyrics synchronization while music is playing
• Supports JPEG and BMP photo formats
• Supports MTV video format converter included)
- Reading e-book in TXT format
• FM and Voice recording
- Folder navigation
• USB 2.0 high speed transmission
OVERVIEW
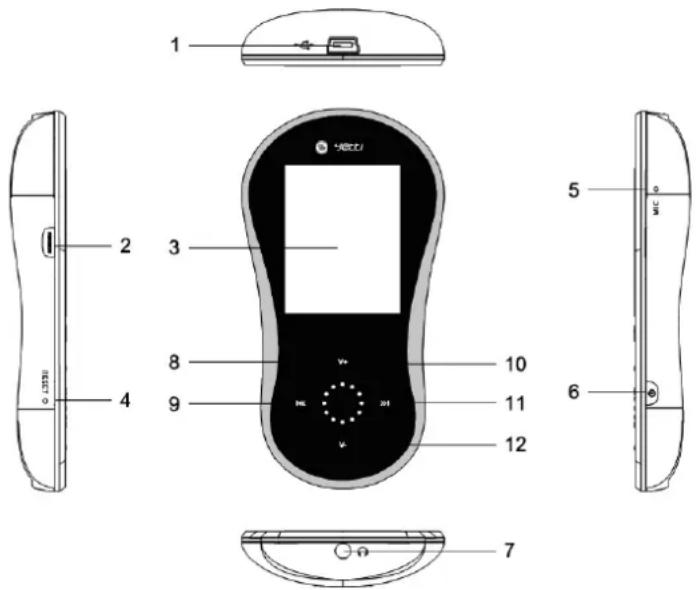
- Mini USB connection
- [FUNC] Enter/Exit function menu for each mode
- Display screen
- Reset hole
- Microphone
- [💡] Press and hold to turn on/off the player
-
Headphone jack
-
[V+] Increase volume; Up button
- [◀] Left/Previous/Back button; press and hold to fast rewind
- [O] Play/Pause/Confirm button; Press and hold to enter the main menu; Press and hold to unlock the buttons
- [▶] Right/Next/Forward button; press and hold to fast forward
- [V-] Decrease volume; Down button
CONNECTING TO THE COMPUTER
SYSTEM REQUIREMENTS
Your computer system must meet the following requirements:
- Pentium 200MHz or above
• Microsoft Windows 98SE/2000/ME/XP/Vista
• 120MB of available hard disk space - USB port supported
- CD-ROM drive
INSTALLING THE DRIVER FOR WINDOWS 98 SE
If your computer is running Windows ME/2000/XP/Vista, no driver is required to install. If your computer is running Windows 98 SE, you must install the driver provided on the CD before connecting the player to your computer.
- Insert the CD into the CD-ROM drive.
- Execute the "USB Disk Win98 Driver Version xxx.exe" file in the CD.
- Follow the instructions from the pop-up windows to complete the installation.
- Restart the computer.
Note: Make sure the player is not connected to the computer while installing the driver.
CONNECTING PLAYER TO COMPUTER
Files can be transferred directly into the player by using the USB data cable.
- Make sure that your computer has been started before you start.
- Connect the mini plug of the USB cable to the mini USB port on the player, and push the other end into a free USB port on your computer.
- When the MP4 player is connected to your computer, a "Removable Disk" will be created in "My computer".
COPY FILES FROM COMPUTER
- Open the Windows Explorer or My computer. "Removable Disk" is displayed.
- Drag and drop the files on your computer to the "Removable Disk".
Note:
- Please do not disconnect the USB cable during file transferring. It may cause malfunction of the player and the files.
DISCONNECTING FROM THE COMPUTER
After finishing transferring, please disconnect the player from the computer as the following:
- Left click the " ” icon at the taskbar.
- Click the pop-up mini-window with message of "Stop the USB Mass Storage Device – Driver (X)".
- When you are prompted to remove the device, you can unplug the player safely.
CHARGING THE BATTERY
- The battery of the player is charging automatically when the player is connected to the computer. Make sure the computer has been started.
- The battery of the player is 80-percent charged in about two hours and fully charged in about four hours. If you charge the player while downloading files to the player, it might take longer
- Read the battery level indication of your player:
 Full Three-quarters full Half full Low Empty Full Three-quarters full Half full Low Empty |  |  |  |  |
Important:
- Recommended temperature for battery charging is 0^ to 35^ .
- Fully charge it before you use the player for the first time or when you haven't used it for a long time.
- Charge the player right now when the "Low battery" message is displayed.
- Do not over charge or discharge the player. Over charging or discharging will shorten the battery life.
- The battery could be over discharged if the player is not used for a long time (over three months). To avoid over discharge, fully charge the player every three months and always keep the voltage of the battery above 50 %.
- If the player is not used for a long time, keep it under the temperature of 23^ ± 5^ and the moisture of 65 ± 20% RH to maintain the performance of the battery.
BASIC OPERATION
Make sure the battery is sufficient and the headphone is connected correctly.
- To turn on the player, press and hold the [⏻] button.
- To turn off the player, press and hold the [⏻] button.
Note:
- If it is the first time for you to turn on the player or turn on the player after default settings or resetting, you have to select a display language by pressing [V+] or [V-] buttons and then press [O] button to confirm.
- While the player is connected to the computer, you can also press and hold the [+] button to turn on the player.
ADJUSTING THE VOLUME
- To increase the volume, press the [V+] button while music playing.
- To decrease the volume, press the [V-] button while music playing.
RESETTING THE PLAYER
If a malfunction of the player occurs, take a metal pin, e.g. the end of a paper clip, and press it into the RESET hole to re-initialize the system of your player.
UNLOCK ALL BUTTONS
All buttons of the player will be locked after you do not use it in a certain time (you can set the time in setup menu). This prevents you from accidental pressing the buttons while using the MP4 player on the move. Press and hold the [O] buttons to unlock all buttons.
ENTERING THE MAIN MENU
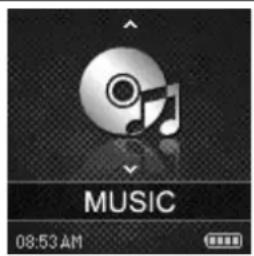
- In standby or playing mode, press and hold the [O] button to enter the main menu.
- Press the [V+] or [V-] button to select: MUSIC, PHOTO, VIDEO, FM RADIO, VOICE, E-BOOK, FILE BROWSE and SETUP.
- Then press the [O] button to enter the desired setting.
| Main menu items | Description | Main menu items | Description |
| MUSIC Play music tracks. VOICE Voice recording and playing. | |||
| PHOTO View photos. E-BOOK Reading E-books. | |||
| VIDEO Play video files. FILE BROWSE | Browse all files in the player and delete a file or not. | ||
| FM RADIO | Listen to FM radio; FM recording. | SETUP | Customize the settings of your player. |
LISTENING TO MUSIC
PLAYING MUSIC
Make sure that the battery is enough and the headphone is connected correctly.
- Access Main menu by holding [O].
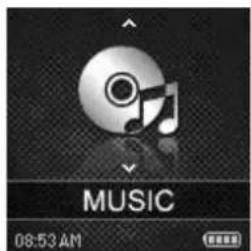
- Select "MUSIC" with [V + ] / [V-] , then [O]
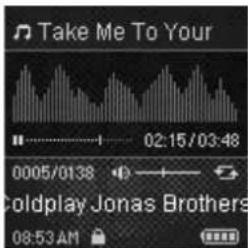
While music playing, you can:
- Pause/Resume Playing: Press [O] button to pause playing.
To resume playing, press [O] button again.
- Skipping Tracks: Press [◀◀] or [▶◀] button to skip to previous/next track.
- Searching: Press and hold [◀] button to fast rewind within a track.
Press and hold [▶▶] button to fast forward within a track.
- Adjust Volume: Press [V+] or [V-] button to increase/decrease the volume.
- Music function menu: Press [FUNC] button to enter music function menu, and press it again to exit.
DISPLAY
1—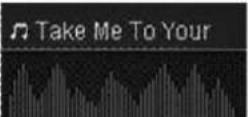 2— 2—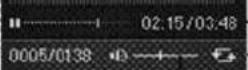 3— 3— 4—5—6—10 4—5—6—10 | 1. Mode/File name/ID3 tag2. Progress bar3. Track No./Total Tracks4. Lyrics5. Clock time | 6. Key locked7. Time Elapsed/Total time8. Music repeat mode9. Volume level10. Battery status |
While music playing, press the [FUNC] button, the music function menu appears for you to shuffle all songs, set the music repeat mode, equalizer, classification, play rate, 3D effects, file browse and back.
- Press [◀] or [▶] button to select among All Songs, Repeat Mode, Equalizer, Classification, Play rate, 3D, ACL and Back.
- Press [O] button to enter.
- Press [FUNC] button to exit and return to music playing mode.
- All songs: shuffle all songs or choose a song from the playlist. Select “Shuffle all” and then press [O] to shuffle all songs. Select “Playlist” and then press [O], use [V+] or [V-] to select a song or folder, and then press [▶] or [O] to play the song or open the folder.
- Repeat Mode: set the music repeat mode. Use [V+] or [V-] button to select among: No repeat, Repeat One, Repeat All, Folder Normal, Folder All Repeat and Folder Shuffle All. And then press [O] button to confirm, or press [◀] button to back to previous screen.
a) No Repeat: Play all songs in order once.
b) Repeat One: Repeat the current or selected song.
c) Repeat All: Repeat all songs.
d) Folder Normal: Play all songs in the current folder in order once.
e) Folder All Repeat: Repeat all songs in the current folder.
f) Folder Shuffle All: Play all songs in the current folder at random.
- Equalizer: set the music playing equalizer. Use [V+] or [V-] button to select among: Normal, Pop, Rock, Classic, Jazz, Bass, and Custom EQ. And then press [O] button to confirm, or press [◀◀] button to back to previous screen.
TO CUSTOMIZE EQ:
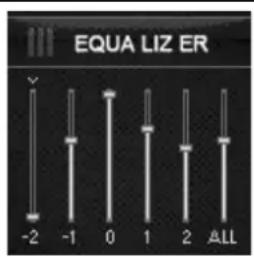
a. Select "Custom EQ", and then press [O] button.
b. Press [◀] or [▶] button to navigate among value bars.
c. Press [V+] or [V-] button to adjust the value.
d. Press [O] button to confirm and exit.
- Classification: classify songs by their genre, artist, album and title. If it is the first time for you to classify your songs, choose “Classification” and select “Yes”, and then press [O] to refresh your classification. When the classification is finished, use [V+] or [V-] to select among genre, artist, album or title, then press [O], press [V+] or [V-] to choose a song, and then press [O] to play it.
- Play rate: set the music-playing rate. Use [V+] or [V-] button to select among: 1.00X, 1.14X, 1.33X, 0.67X, 0.80X. And then press [O] button to confirm, or press [O] button to back to previous screen.
- 3D: to open 3D effect or not. Use [V+] or [V-] button to select "Off" or "On", and then press [O] button to confirm, or press [◀] button to back to previous screen.
- ACL: to open ACL effect or not. Use [V+] or [V-] button to select "Off" or "On", and then press [O] button to confirm, or press [◀] button to back to previous screen.
- Back: exit and return to music-playing interface.
Note: The play rate function is not available for WMA music format.
LYRIC DISPLAYING
This player supports lyrics display while music playing.
Only the lyrics in LRC format can be displayed.
To add lyrics to the music, take "love music. Mp3" for example:
- Download the corresponding lyrics with extension ".lrc" from the Internet.
- Rename the lyrics file as "love music.lrc". Make sure the lyrics filename is the same as the music file name.
- Copy both files into the same folder on the player.
- The lyrics will be displayed on the screen while the music is playing.
FM RADIO
LISTENING TO FM RADIO
Important: Always connect your headphone to the headphone jack, since the headphone cable serves as antenna for the internal radio.
- Access Main menu by holding [O].
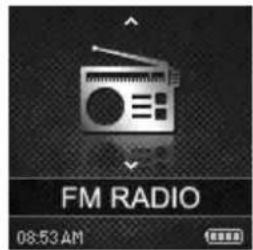
- Select "FM RADIO" with [V+]/[V-], then [O]
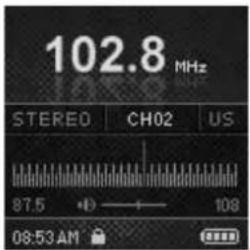
While listening to FM radio, you can:
- Adjust Volume: Press [V+] or [V-] button to increase/decrease the volume.
- FM radio function menu: Press [FUNC] button to enter FM radio function menu, and press it again to exit.
• Power off: Press and hold [ ⏻] button to power off the player.
DISPLAY
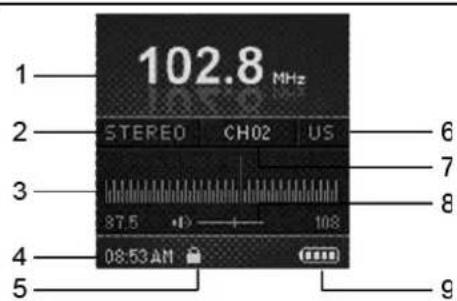
- Current frequency
- MONO or STEREO
- Frequency Indicator
- Clock time
-
Key locked
-
FM band
- Current channel
- Volume level
- Battery status
USING FM RADIO FUNCTION MENU
While listening to FM radio, press [FUNC] button to enter FM radio function menu.
- Press [◀] or [▶] button to select among Auto Scan, Manual scan, Band, Save Station, Del Station, Record and Back.
- Press [O] button to enter.
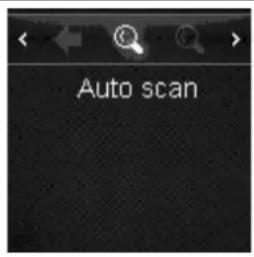
- Auto Scan
Use [◀] or [▶] button to select "Auto Scan" and press [O] button to start searching. The MP4 player searches automatically for all radio stations with the strongest reception and save them in the 20 memory locations (CH01-CH20).
The player will start from the first channel automatically after finishing searching. Use [◀] or [▶] to select a channel.
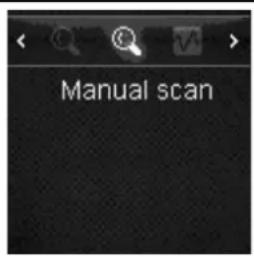
- Manual scan
Use [◀] or [▶] button to select "Manual scan" and press [O] button to start searching a radio station manually.
Use [◀◀] or [▶◀] to manually change the frequency (fine-tune).
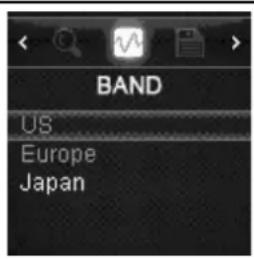
- Band
When you travel overseas, change the FM Band to search the local radio station. Use [V+] or [V-] button to select a FM Band from US (87.5-108.0), Europe (87.5-108.0) and Japan (76.0-90.0), then press [O] button to confirm.
Note: Once you return to the FM radio mode after changing the FM Band, the player will search automatically for all radio stations in the region and save them in the 20 memory locations.
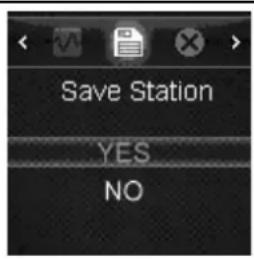
- Save Station
To save a manual searched station, use [V+] or [V-] button to select "Yes", and then press [O] button to save the station.
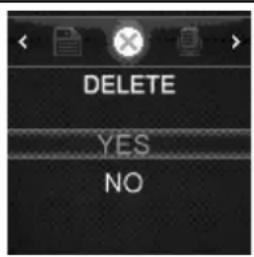
- Del Station
To delete a station, use [V+] or [V-] button to select "Yes" or "No", and then press [O] button to confirm.
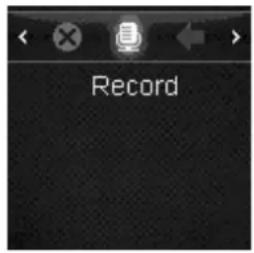
- Record
Use [◀◀] or [▶▶] button to select "Record" and press [O] button to start FM recording.
To pause recording, press [O]. To resume recording, press [O] again.
Press [ ⏻] button to save the recording and return to FM radio mode.
Note:
- The recorded files are saved in the FM folder of the MP4 player as WAV files (format: FM000001.WAV, FM000002.WAV) and can be listened to in the Voice mode.
- FM recording is automatically stopped when the memory of the player is full or the battery power is no longer sufficient. Date for recording is automatically saved.
- The volume adjustment is not available during recording.
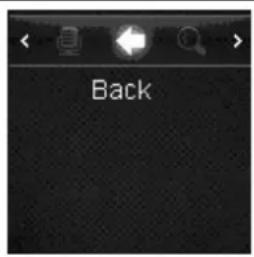
- Back
To exit and back to FM Radio interface, use [◀◀] or [▶▶] button to select "Back", and then press [O] button to confirm.
- Access Main menu by holding [O].
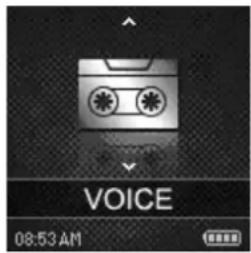
- Select "VOICE" with [V+]/[V-], then [O]
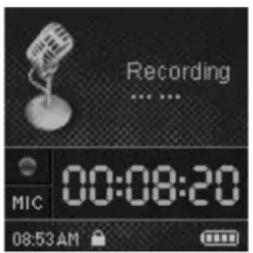
While recording a voice, you can:
- Pause/Resume Recording: Press [O] button to pause recording. To resume recording, press [O] button again.
- Save the Recording: Press [⏻] button to save the recording and return to voice recording interface.
Note:
- The recorded voice files are saved in the VOICE folder of the MP4 player as WAV files (format: MIC00001.WAV, MIC00002.WAV).
- Voice recording is automatically stopped when the memory of the player is full or the battery power is no longer sufficient. Date for recording is automatically saved.
SETUP THE RECORDING QUALITY
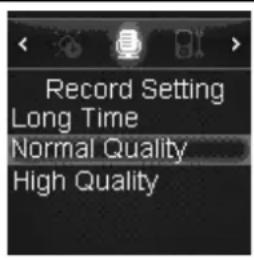
Before starting the recording, you can set the recording quality.
- Press and hold [O] to access the main menu.
- Use [V+] or [V-] to select SETUP mode and press [O] . The SETUP menu appears.
- Use [◀] or [▶] to select Record Setting and press [O]. The record options appear.
| Item Occupy memory Quality | ||
| Long Time | Occupy least memory | Normal recorded quality |
| Normal Quality | Occupy less memory Better | recorded quality |
| High Quality | Occupy much memory | Best recorded quality |
-
Use [V+] or [V-] to select Long Time, Normal Quality or High Quality.
-
Press [O] to confirm.
USING VOICE FUNCTION MENU
While in standby mode of voice mode, press [FUNC] button to enter voice function menu.
- Press [◀] or [▶] button to select among Record, Playlist and Back.
- Press [O] button to enter.
-
Press [FUNC] button to exit.
-
Record: start recording. Use [◀] or [▶] button to select "Record", and then press [O] button to start recording.
- Playlist: select a voice and play it. Use [V+] or [V-] button to select a voice, and then press [O] button to play it.
- Back: exit and return to recording interface.
Note: File selecting, file searching, and playback function in the Voice mode are same to the functions in the Music mode.
VIEWING PHOTOS
VIEWING A PHOTO
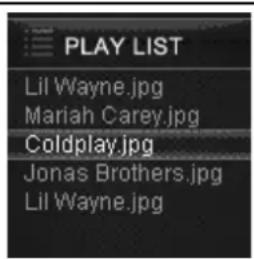
- Press and hold [O] to access the main menu.
- Use [V+] or [V-] to select PHOTO and press [O] . The photo list appears on the screen.
- Use [V+] or [V-] to select a folder or photo and press [O] to open the folder or view the selected photo.
- Press [O] to return to previous screen.
While viewing photos, you can:
- Skipping photos: Press [V+] or [V-] button to skip to previous/next photo.
- Photo function menu: Press [FUNC] button to enter Photo function menu.
- Power Off: Press and hold the [ ⏻] button to turn off the player.
USING PHOTO FUNCTION MENU
While viewing photos, press [FUNC] button to enter photo function menu.
- Press [◀] or [▶] button to select among Slide Show, Manual Scan and Back.
- Press [O] button to confirm.
- Slide Show: All photos on your player start playing a slideshow.
- Manual Scan: To scan photos manually. Select "Manual Scan", the first photo appears on the screen. Use [V+] or [V-] to select previous or next photo.
WATCHING A VIDEO
PLAYING A VIDEO
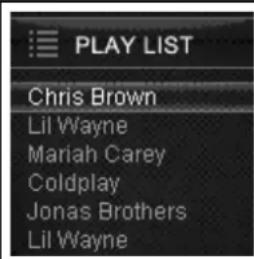
natural_image
Black-and-white photo of a crowded outdoor scene with people in boats and a building in the background (no visible text or symbols)- Press and hold [O] to access the main menu.
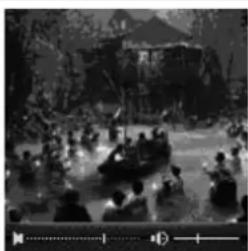
- Use [V+] or [V-] to select VIDEO and press [O] . The video list appears on the screen.
- Use [V+] or [V-] to select a folder or a video and press [O] to open the folder or play the selected video.
- Press [◀] to return to previous screen.
While video playing, you can:
- Pause/Resume Playing: Press [O] button to pause playing.
To resume playing, press [O] button again.
- Skipping videos: Press [◀◀] or [▶▶] button to skip to previous/next video.
- Searching: Press and hold [◀] button to fast rewind within a video;
Press and hold [▶] button to fast forward within a video.
- Adjust Volume: Press [V+] or [V-] button to increase/decrease the volume.
- Exit: Press and hold [O] button to return to video list menu.
- Power Off: Press and hold the [ ⏻] button to turn off the player.
E-BOOK READING
This player only supports E-Book in TXT format. Other formats must be saved as TXT format before transfer.
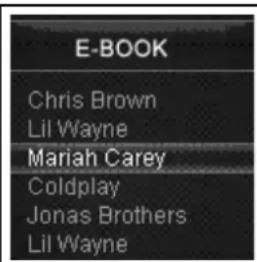
- Press and hold [O] to access the main menu.
- Use [V+] or [V-] to select E-BOOK and press [O] .
The E-Book list appears on the screen. - Use [V+] or [V-] to select a folder or file and press [O] to open the folder or view the selected file.
- Press [◀] to return to previous screen.
WHILE READING AN E-BOOK, YOU CAN:
- Auto paging: Press [O] button to start auto paging for every 6 seconds.
- Page Up/Down: Press [V+] or [V-] button to page up/down.
- Fast browse: Press and hold [V+] or [V-] button to fast browse.
- Exit: Press [◀] button to back to previous screen.
- E-Book function menu: Press [FUNC] button to enter E-Book function menu. Use [◀] or [▶] button to choose a percentage, and then press [O], it will move to approximate page of the E-Book according to the percentage.
- Power Off: Press and hold the [ ⏻] button to turn off the player.
SAVE AND LOAD A BOOKMARK
This function helps you to save the page you have read and recall it to continue reading next time. While reading an E-Book, press and hold [FUNC] button to enter "Bookmark List".
- Save a Bookmark:
- Press [V+] or [V-] button to select "New Bookmark", and the press [O]. "Save Bookmark" appears on the screen.
- Press [O] button to confirm. There pops up a window for you to select "Yes" or "No".
- Use [V+] or [V-] button to select "Yes" (Save bookmark) or "No" (back to previous screen).
- Press [ FUNC] button to exit.
- Load a Bookmark:
- Press [O] button in "Bookmark List" interface.
- Use [V+] or [V-] button to select "Load Bookmark".
- Press [O] button to confirm. Then you can skip to the page you have been saved.
- Delete a Bookmark:
- Press [O] button in "Bookmark List" interface.
- Use [V+] or [V-] button to select "Delete Bookmark".
- Press [O] button to confirm. There pops up a window for you to select "Yes" or "No".
- Use [V+] or [V-] button to select "Yes" (Delete bookmark) or "No" (back to previous screen).
- Press [ FUNC] button to exit.
Note: While in E-Book list mode, you also can press [FUNC] button to enter "Bookmark List". However, you can only load or delete a bookmark here.
MANAGING FILES
BROWSING ALL FILES AND DELETING A FILE
- Press and hold [O] to access the main menu.
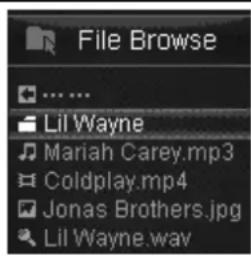
- Use [V+] or [V-] to select FILE BROWSE and press [O]. The file list appears on the screen.
- Press [V+] or [V-] to navigate between files or folders. To open a folder, select the folder and press [O] .
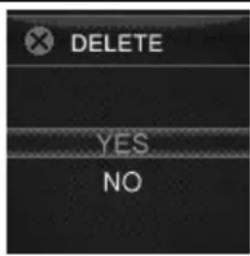
- Use [V+] or [V-] to highlight a file, and then press [FUNC] button, there will pop up a DELETE option menu.
- Press [V+] or [V-] to select "Yes" or "No", and then press [O] to confirm.
- Press [◀] to return to previous screen.
CHANGING PLAYER SETUPS
The system setups let you customize and configure your MP4 player.
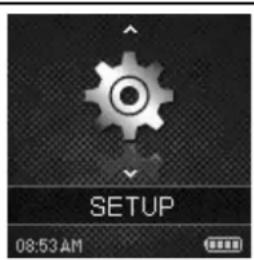
- In standby or playing mode, press and hold [O] to access the main menu.
- Use [V+] or [V-] to select SETUP and press [O] . The setup menu appears on the screen.
- Use [◀◀] or [▶◀] button to select a setup item.
- Then press the [O] button to enter the submenu.
- Use the [V+] or [V-] button to select a value.
- Press the [O] button to confirm. Or press the [◀◀] button to exit and not confirm.
SETUP ITEMS
| Setup Items Description | |
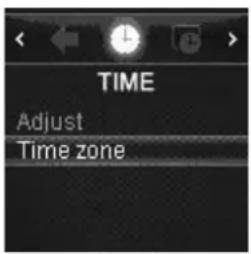
| Time To adjust the time and select a time zone. | |
| Power | Set how long it will power off automatically after it is not used for a certain time.The available options include: 15 Minutes,30 Minutes,60 Minutes,90 Minutes,120 Minutes, Close |
| Language Set up the display language. | |
| Display Setting | Set the brightness and backlight time.The available options of backlight time include: 15 Seconds, 30 Seconds,1 Minute and Close |
| Record Setting Set the recording quality | |
| Sys Tools | Delete a file on the player; format the player; reset the player; get to know the system information; refresh playlist and sort files. |
| Hold Time | Set how long the keys will be locked if no button is pressed.The available options include: 10 Seconds, 30 Seconds,1 Minute, 3 Minutes, 5 Minutes, Off |
| Back Exit and return to the main menu. | |
TIME SETUP
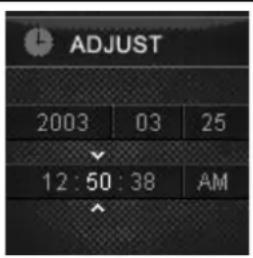 | 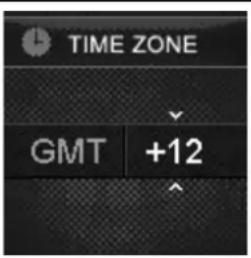 | Adjust: To change the current time.Press [◀] or [▶] to navigate between setup filed.Press [V+] or [V-] to adjust the date and time.Press [O] to confirm and exit.Time Zone: To change the time zone.Press [V+] or [V-] to select a time zone.Press [O] to confirm and exit. |
POWER SETUP
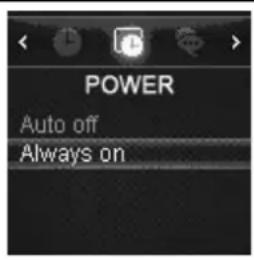
- Auto off: To set how long it will power off automatically after it does not used for a certain time.
Press [V+] or [V-] to select a time, and then press [O] to confirm - Always on
Press [V+] or [V-] to select "Yes" or "No", and then press [O] to confirm Yes: The player will be always on while playing. However, it will power off automatically in standby mode if no button is pressed after the set time.
No: The player will power off automatically if no button is pressed after the set time.
- Press [◀] or [▶] to select "Display setting" in SETUP menu, and then press [O] to confirm.
- Use [V+] or [V-] to select “Brightness”, and then press [O] to enter.
- Press [V+] or [V-] to adjust the brightness, and then press [O] to confirm or press [◀◀] to exit.
SYSTEM TOOLS
- Delete: To delete a file in the player.
- Format: To format the player quickly or completely.
After formatting, all the data on the player will be erased. - Reset: To restore all settings of the player to factory default settings.
- System info: To check the free memory and firmware version of the player.
- Refresh: To refresh all the playlist of the player.
- File Sort: To sort all files on the player.
Note: Back up important files in the player before formatting. The erased files cannot be restored.
CONVERTING VIDEO TO MTV FORMAT
This player supports the playback of videos in MTV format. Other formats (AVI, WMV, MEPG1, Quick Time, MPEG2, RealMedia, MPEG4, 3GP) must be converted to MTV format. The “MTV Video Converter” is supplied on the CD to enable you to convert the other formats to MTV format.
- Insert the provided CD to the CD-ROM driver of your computer.
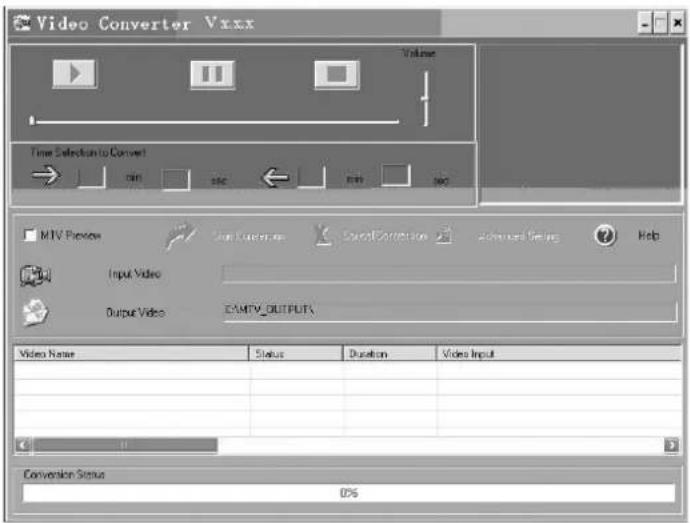
- Double-click the file "VideoConvert.exe" in the folder "MTV Video Converter" of the CD. The Video Converter window appears.
![Open Look jr: Removable Disk (H:) Video converter_Y2.9 (314x234).jpg (480x234).jpg (500X477).jpg (640x427).jpg (720X540).jpg (800X500).jpg (1280x962).jpg (1600x1200).jpg (720X100).jpg (750X500).jpg (800X520).jpg (958X641).jpg 5(1600x1200).jpg 5(1805x1325).jpg 7(800X600).jpg 7(1024X768).jpg 7(1800x1200).jpg 76RbbCGA[1].jpg 8(800X600).jpg 8(1024X768).jpg 8(1024X551).jpg 9(800X600).jpg 9(1024X768).jpg 23 MovieAntonette_Mob_ASP.mp4 63(540X800).jpg My Recent Documents Desktop My Documents My Computer: File name: 23 MovieAntonette_Mob_ASP.mp4 Files of type: All Files (*.*) Open as read only Open Cancel](/content/2026/05/844845/images/cf99343e2e83650b88d09617e3a3db98a055f078db0ab116178bf7ce29435349.jpg)
Video Converter Open dialog box
- Click Input Video, and then select the input source from the Open dialog box.
Note: To input MP4 files, select All Files (*.*) in the File of type box so that the MP4 files can be found in the Open dialog box.
- Click Output Video to select an output directory.
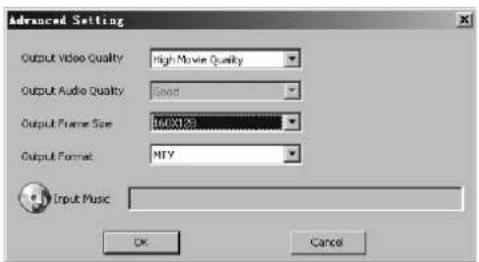
- Click Advanced Settings. Select 160 x 128 in the Output Frame Size box and select MTV in the Output Format box.
- Click Start Conversion. For detailed operations, click Help.
Note:
- To make your video playable on the player, you must select 160 x 128 or less in the Output Frame Size box (Advanced Setting). Otherwise, the message "Device Not Support" will appear on the screen when you play the video file.
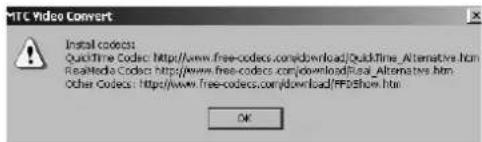
- You have to install relevant codec package before running "Video Converter.exe". If not, the system will prompt "Load Video Failed!" when you attempt to convert the video files. Click "OK" and follow the prompt to download and install codec from the web sites.
TROUBLESHOOTING
If you have problems in operating your player, please check the points below before sending it to service center.
Cannot power on
- The battery may be exhausted. Please recharge the battery.
Files cannot be downloaded
- Check if the driver is installed correctly in the computer.
- Check the connection between the player and PC.
No sound from the headphone
- Please ensure the volume is not 0, and the connection of headphone is no problem.
- Check if the format of music file is supported by the player.
Recording cannot be done
- Check if there is enough memory and battery capacity.
The words of LCD display abnormality
- Please ensure you select the correct language.
The buttons do not work
- The key may be locked. Press and hold [O] to deactivate the lock function.
- Press the reset hole with metal pin to re-initialize the system of the player.
Poor FM reception
- Check whether a headphone is connected correctly to the headphone jack. The headphone cord functions as an antenna.
- Adjust the position of the player and headphone.
- Turn off the power of the electric devices near the player. If it is effective, move and use the player away from those electric devices.
SPECIFICATIONS
| Audio Format MP3/WM | A/WAV Size 90 x 48 x 1 | 3.2 mm | |
| Photo Format JPEG/BM | MP Weight (NETTO) 30.8 g | ||
| Video Format MTV Freq | quency response 20Hz ~ 20KHz | ||
| MP3 bit Rate 8 Kbps ~ | 320 Kbps Dynamic current 15 mA | ||
| WMA bit rate 5 Kbps ~ | 320 Kbps Storage condition | Humidity <90%, Normal temperature | |
| S/N rate 80 db (30 K filter) | Working condition | Humidity < 85%, -10 ~ 40°C | |
| Dynamic range | >80 db (1 KHz) | Recorded format | WAV |
| Distortion | < 0.2% | EQ | Normal/ Pop/Rock/ Classic/ Jazz/Bass/ Custom EQ/3D |
| Battery | 190 mAh, up to 12 hours playback for music and 4 hours for video | ||
| Support video format to converter | AVI (*.avi), WMV (*.wmv, *.asf), MPEG1 (*.mpg), QuickTime (*.mov, *.qt), MPEG2 (*.vob), Real Media (*.rm, *.rmvb, ...), MPEG4, 3GP (*.3gp) | ||
* We reserve the right to change technical specifications.
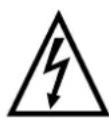
WARNING: Do not use this product near water, in wet areas to avoid fire or injury of electric current. Always turn off the product when you don't use it or before a revision. There aren't any parts in this appliance which are reparable by consumer. Always appeal to a qualified authorized service. The product is under a dangerous tension.
Old electrical appliances, used batteries and accumulators disposal
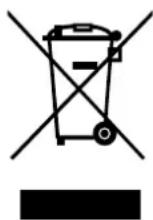
This symbol appearing on the product, on the product accessories or on the product packing means that the product must not be disposed as household waste. When the product/ battery durability is over, please, deliver the product or battery (if it is enclosed) to the respective collection point, where the electrical appliances or batteries will be recycled. The places, where the used electrical appliances are collected, exist in the European Union and in other European countries as well. By proper disposal of the product you can prevent possible negative impact on environment and human health, which might otherwise occur as a consequence of improper manipulation with the product or battery/ accumulator. Recycling of materials contributes to protection of natural resources. Therefore, please, do not throw the old electrical appliances and batteries/ accumulators in the household waste. Information, where it is possible to leave the old electrical appliances for free, is provided at your local authority, at the store where you have bought the product. Information, where you can leave the batteries and accumulators for free, is provided to you at the store, at your local authority.
ZÁRUČNÍ LIST
ZÁRUČNÍ PODMÍNKY
natural_image
Abstract black and white logo with a stylized white 'S' inside a circle (no text or symbols)GoGEN


- GoGEN
- OBSAH
- HLAVNÍ PRVKY „HLAVNÍ PRVKY ZAŘÍZENÍ“
- - Uložení stanice
- HLAVNÍ PRVKY „HLAVNÍ PRVKY ZARIADENIE“
- - Uloženie stanice
- INTRODUCTION
- REGULATORY INFORMATION: FCC PART 15
- Note:
- IMPORTANT SAFETY PRECAUTIONS
- Precautions in using the headphone
- MAIN FEATURES
- OVERVIEW
- CONNECTING TO THE COMPUTER
- SYSTEM REQUIREMENTS
- INSTALLING THE DRIVER FOR WINDOWS 98 SE
- CONNECTING PLAYER TO COMPUTER
- COPY FILES FROM COMPUTER
- DISCONNECTING FROM THE COMPUTER
- CHARGING THE BATTERY
- Important:
- BASIC OPERATION
- ADJUSTING THE VOLUME
- RESETTING THE PLAYER
- UNLOCK ALL BUTTONS
- ENTERING THE MAIN MENU
- LISTENING TO MUSIC
- PLAYING MUSIC
- DISPLAY
- TO CUSTOMIZE EQ:
- LYRIC DISPLAYING
- FM RADIO
- LISTENING TO FM RADIO
- USING FM RADIO FUNCTION MENU
- - Auto Scan
- - Manual scan
- - Band
- - Save Station
- - Del Station
- - Record
- - Back
- SETUP THE RECORDING QUALITY
- USING VOICE FUNCTION MENU
- VIEWING PHOTOS
- VIEWING A PHOTO
- USING PHOTO FUNCTION MENU
- WATCHING A VIDEO
- PLAYING A VIDEO
- E-BOOK READING
- WHILE READING AN E-BOOK, YOU CAN:
- SAVE AND LOAD A BOOKMARK
- - Save a Bookmark:
- - Load a Bookmark:
- - Delete a Bookmark:
- MANAGING FILES
- BROWSING ALL FILES AND DELETING A FILE
- CHANGING PLAYER SETUPS
- POWER SETUP
- SYSTEM TOOLS
- CONVERTING VIDEO TO MTV FORMAT
- TROUBLESHOOTING
- Cannot power on
- Files cannot be downloaded
- No sound from the headphone
- Recording cannot be done
- The words of LCD display abnormality
- The buttons do not work
- Poor FM reception
- Old electrical appliances, used batteries and accumulators disposal
- ZÁRUČNÍ LIST
- ZÁRUČNÍ PODMÍNKY
Brand : GoGen
Model : MXM800FM4GB
Category : Mp3 player