
TR 1088 SU3SB - Radio HYUNDAI - Free user manual and instructions
Find the device manual for free TR 1088 SU3SB HYUNDAI in PDF.

| Product Type | Portable Radio |
| Brand | Hyundai |
| Model | TR 1088 SU3SB |
| Dimensions (Approx) | 200 x 120 x 70 mm |
| Weight (Approx) | 0.5 kg |
| Power Source | 3V DC (2x AA batteries) or AC adapter (not included) |
| Frequency Bands | FM (87.5-108 MHz) and AM (530-1710 kHz) |
| Tuning Type | Digital |
| Presets | Up to 20 stations (10 FM + 10 AM) |
| Display | LCD with backlight |
| Audio Output | Built-in speaker (mono) and 3.5mm headphone jack |
| Controls | Volume dial, tuning knob, mode switch, preset buttons |
| Antenna | Built-in ferrite bar for AM, telescopic rod for FM |
| Battery Life | Approximately 40 hours with alkaline batteries |
| Material | ABS plastic |
| Care Instructions | Wipe with a soft, dry cloth. Do not use liquid cleaners. |
| Safety Warnings | Do not expose to rain or moisture. Keep away from heat sources. |
| Repairability | No user-serviceable parts. Contact authorized service center. |
| Included Accessories | User manual, warranty card |
Frequently Asked Questions - TR 1088 SU3SB HYUNDAI
User questions about TR 1088 SU3SB HYUNDAI
0 question about this device. Answer the ones you know or ask your own.
Ask a new question about this device
Download the instructions for your Radio in PDF format for free! Find your manual TR 1088 SU3SB - HYUNDAI and take your electronic device back in hand. On this page are published all the documents necessary for the use of your device. TR 1088 SU3SB by HYUNDAI.
USER MANUAL TR 1088 SU3SB HYUNDAI
natural_image
Hyundai portable radio with LCD display and control knobs (no visible text or symbols on device body)NÁVOD K POUŽITÍ / NÁVOD NA POUŽITIE INSTRUKCJA OBSŁUGI / INSTRUCTION MANUAL HASZNÁLATI UTASÍTÁS
natural_image
Silhouette of a person climbing a ladder inside a circular frame (no text or symbols)natural_image
Symbol of a trash bin with crossed lines and a blank rectangular base (no text or labels)DÔLEŽITÉ BEZPEČNOSTNÉ POKYNY
natural_image
Symbolic icon of a person climbing a ladder inside a circle (no text or symbols)natural_image
Symbol of a trash bin crossed with a diagonal line and a horizontal bar below (no text or labels)natural_image
Silhouette of a person climbing a ladder inside a circular frame (no text or symbols)natural_image
Symbol of a trash bin crossed with no text or labels, accompanied by a solid black rectangle below (no readable text or symbols)Producent: Hyundai Corporation, Seoul, Korea
Importer: DIGISON Polska sp. z o. o., ul. Krzemieniecka 46, Wrocław 54 613 Poland
Dear customer, thank you for purchase of our product. To achieve the utmost in enjoyment and performance, please read this manual carefully before attempting to operate the unit in order to become familiar with its features, and assure you years of faithful, trouble free performance.
IMPORTANT NOTES
- Keep instructions the safety and operating instructions should be retained for future reference.
- Ensure you read the safety warnings carefully below before you operate the unit.
- When the unit distorts because of strong smoke and heat, remove the batteries and cut off the power supply quickly.
- When the set is not going to be used for a long time, unplug the AC lead and remove the batteries.
- Clean the cabinet with soft cloth. Detergent or alcohol is forbidden.
- Don't attempt to disassemble or repair this unit casually. Go to consult the properly qualified center when malfunction happened.
- Avoid installing the unit in locations described below:
- Places exposed to direct sunlight or close to heat radiating appliances such as electric heaters.
-On top of other stereo equipment that radiate too much heat.
-Places locking ventilation or dusty places.
-Places subjected to constant vibration.
-Humid or moist places. - Operate turning controls and switches as instructed in the manual.
- This book is only a guide for user's operation, not a criterion for configuration.
WARNING
TO PREVENT FIRE OR SHOCK HAZARD, DO NOT USE THIS PLUG WITH AN EXTENSION CORD, RECEPTACLE OR OTHER OUTLET UNLESS THE BLADES CAN BE FULLY INSERTED TO PREVENT BLADE EXPOSURE. TO PREVENT FIRE OR SHOCK HAZARD, DO NOT EXPOSE THIS APPLIANCE TO RAIN OR MOISTURE.
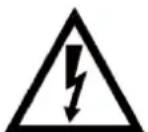
The lighting flash with arrowhead symbol, within an equilateral triangle is intended to alert the user to presence of uninsulated dangerous voltage within the products enclosure that may be of sufficient magnitude to constitute a risk of electric shock to persons.
CAUTION
RISK OF ELECTRIC SHOCK DO NOT OPEN
WARNING: TO REDUCE THE RISK OF ELECTRIC SHOCK, DO NOT REMOVE COVER (OR BACK), NO USER SERVICEABLE PARTS INSIDE, REFER SERVICING TO QUALIFIED SERVICE PERSONNEL.

The exclamation point within an equilateral triangle is intended to alert the user to the presence of important operating and maintenance (servicing) instructions in the literature accompanying the appliance.
The Caution Marking is located at the bottom enclosure of the apparatus.
IMPORTANT SAFETY INSTRUCTIONS
- Read these instructions.
- Keep these instructions.
- Heed all warnings.
- Follow all instructions.
- Do not use this apparatus near water.
- Cleaning-Unplug this product from the wall outlet before cleaning. Do not use liquid cleaners or aerosol cleaners. Clean only with dry cloth.
-
Do not block any ventilation openings. Install in accordance with the manufacturer's instructions.
-
Do not place this product on an unstable cart, stand, tripod, bracket, or table.
The product may fall, causing serious injury to a child or adult, and serious damage to the product. Use only with a cart, stand, tripod, bracket, or table recommended by the manufacturer, or sold with the product. Any mounting of the product should follow the manufacturer's instructions, and should use a mounting accessory recommended by the manufacturer. A product and cart combination should be moved with care-quick stops, excessive force and uneven surfaces may cause the product and cart combination to overturn

natural_image
Silhouette of a person climbing a ladder inside a circular frame (no text or symbols)-
Do not install near any heat sources such as radiators, heat registers, stoves, or other apparatus (including amplifiers) that product heat.
-
Do not defeat the safety purpose of the polarized or grounding-type plug. A polarized plug has two blades with one wider than the other. A grounding type plug has two blades and a third grounding prong. The wide blade or the third prong is provided for your safety. If the provided plug does not fit into your outlet, consult an electrician for replacement of the obsolete outlet.
-
Protect the power cord from being walked on or pinched particularly at plugs, convenience receptacles, and the point where they exit from the apparatus.
-
Only use attachments/accessories specified by the manufacturer.
-
Unplug this apparatus during lightening storms or when unused for a long periods of time.
-
Refer all servicing to qualified service personnel. Servicing is required when the apparatus has been damaged in any way, such as power-supply cord or plug is damaged, liquid has been spilled or objects have fallen into the apparatus, the apparatus has been exposed to rain or moisture, does not operate normally, or has been dropped.
-
This appliance shall not be exposed to dripping or splashing water and that no object filled with liquids such as vases shall be placed on the apparatus.
- Do not overload wall outlet. Use only power source as indicated.
- Use replacement part as specified by the manufacturer.
- The product may be mounted to a wall only if recommended by the manufacturer.
- Upon completion of any service or repairs to this product, ask the service technician to perform safety checks.
- Power Sources - This product should be operated only from the type of power source indicated on the marking label. If you are not sure of the type of power supply to your home, consult your product dealer or local power company. For products intended to operate from battery power, or other sources, refer to the operating instruction.
- Object and Liquid Entry - Never push objects of any kind into this product through openings as they may touch dangerous voltage points or short-out parts that could result in a fire or electric shock. Never spill liquid of any kind on the product.
- Damage Requiring Service - Unplug this product from the wall outlet and refer servicing to qualified service personnel under the following conditions:
a) When the power-supply cord or plug is damaged,
b) If liquid has been spilled, or objects have fallen into the product,
c) If the product has been exposed to rain or water,
d) If the product does not operate normally by following the operating instructions. Adjust only those controls that are covered by the operating instructions as an improper adjustment of other controls may result in damage and will often require extensive work by a qualified technician to restore the product to its normal operation.
e) If the product has been dropped or damaged in any way, and
f) When the product exhibits a distinct change in performance - this indicates a need for service.
-
The mains plug/appliance coupler/direct plug-in adapter is used as disconnect device, the disconnect device shall remain readily operable.
-
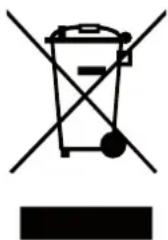
Correct Disposal of this product. This marking indicates that this product should not be disposed with other household wastes throughout the EU. To prevent possible harm to the environment or human health from uncontrolled waste disposal, recycle it responsibly to promote the sustainable reuse of material resources. To return your used device, please use the return and collection systems or contact the retailer where the product was purchased. They can take this product for environmental safe recycling.
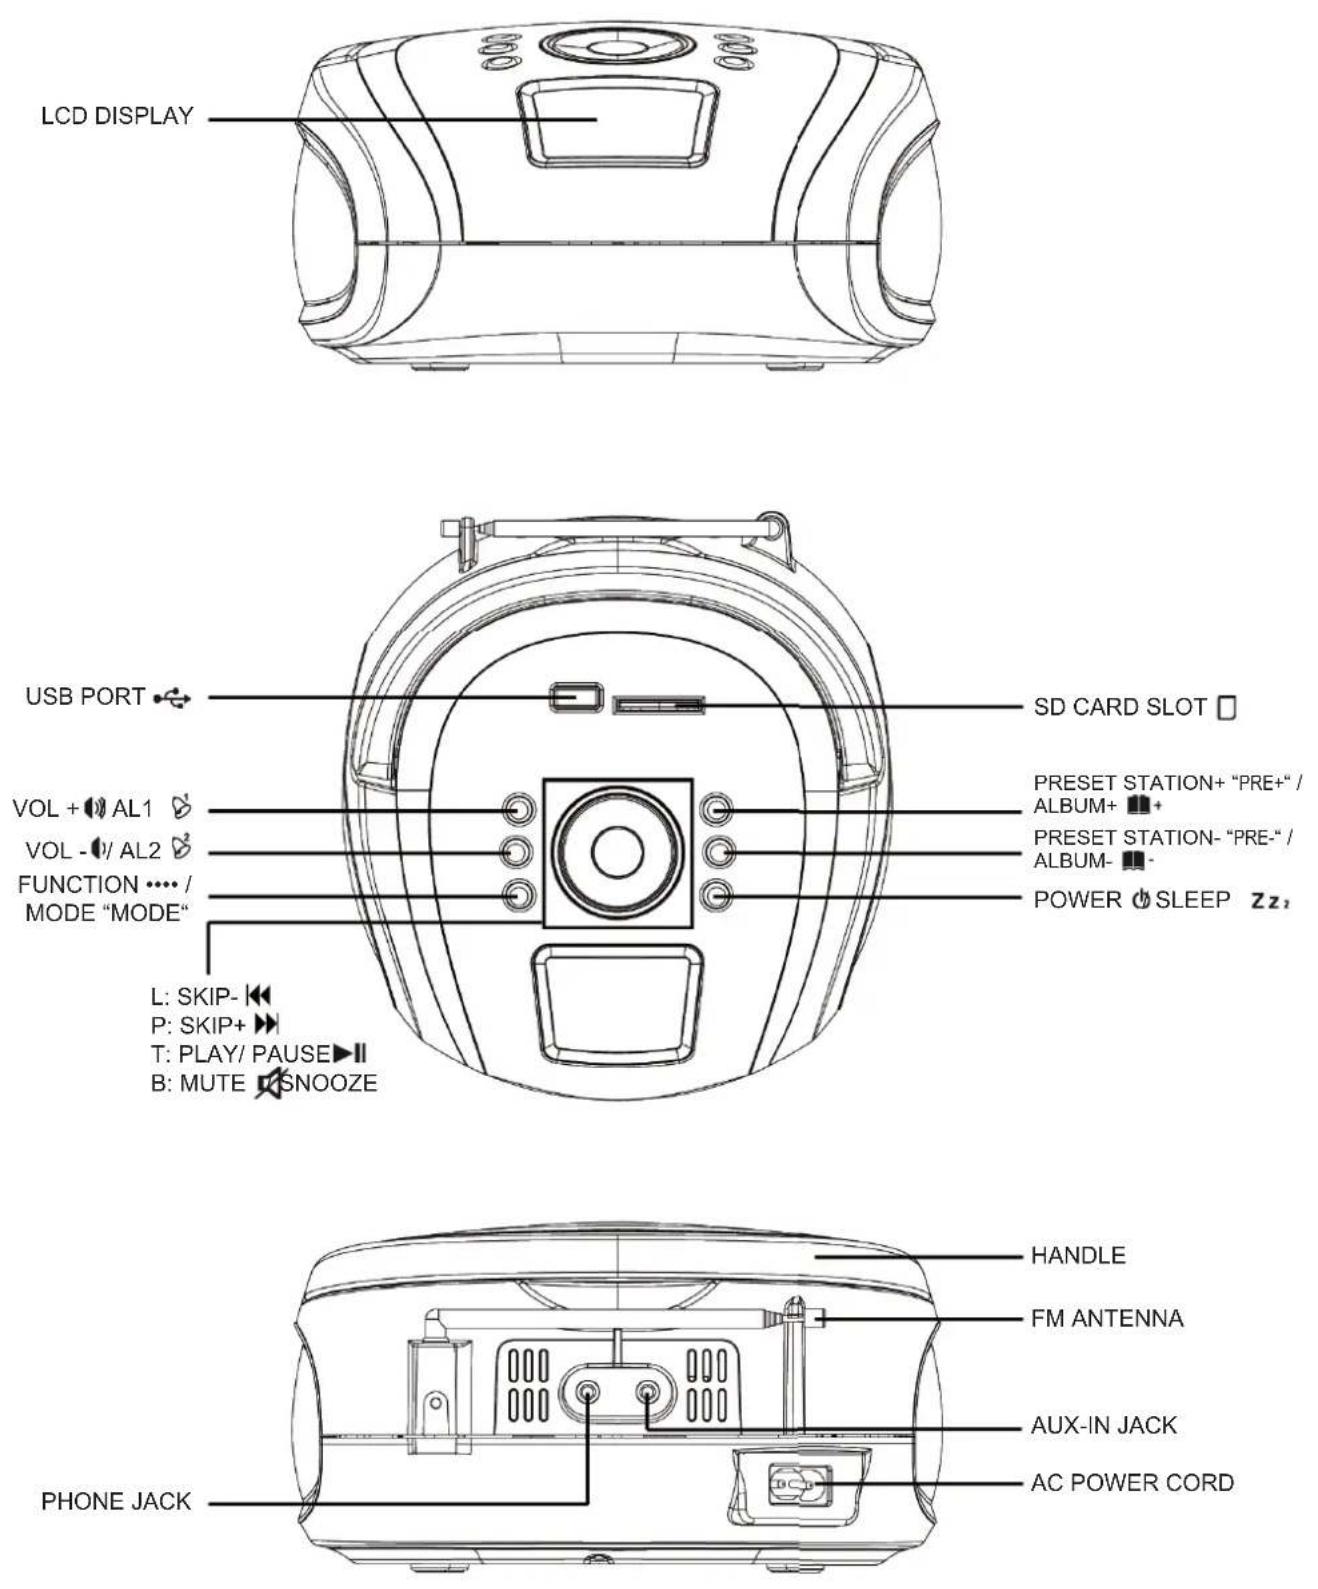
LOCATION OF CONTROL
IMPORTANT NOTES
Avoid installing the unit in locations described below:
- Places exposed to direct sunlight or close to heat radiating appliances such as electric heaters.
- Dusty places.
- Places subject to constant vibration.
• Humid or moist places.
POWER SOURCES
This unit operates with AC 220-240V\~50Hz or 4 x DC1.5V "C" (UM-2) batteries. Do not attempt to operate the unit on any other power source. You could cause damage to the unit and void your warranty.
Please be sure the power outlet you plug this unit into is working and receives constant power.
AC OPERATION
- When the AC power cord (included) is connected to the AC Power Socket on the back of the unit and the other end is plugged into a AC 220-240V\~50Hz wall outlet, the unit will disconnect the batteries automatically, and operate on AC Power only.
- Press the “ ⏻ ” button once to power on, press and hold the “ ⏻ again to power off!
- Press the "MODE" button switch to "FM" or "USB" or "CARD" or "AUX" mode.
BATTERY OPERATION
- Remove the BATTERY DOOR.
- Install 4 x DC1.5V "C" (UM-2) batteries (not included) according to the polarity diagram inside the battery compartment.
- Close the BATTERY DOOR.
IMPORTANT: Be sure that the batteries are installed correctly. Wrong polarity may damage the unit and void the warranty. For best performance and longer operating time, we recommend the use of good quality alkaline-type batteries.
CAUTION
- Do not mix old and new batteries.
- Do not mix alkaline, standard (carbon-zinc) or rechargeable (nickel-cadmium) batteries.
- If the unit is not to be used for an extended period of time, remove the battery. Old or leaking battery can cause damage to the unit and may void the warranty.
- Do not dispose of batteries in fire, batteries may explode or leak.
BATTERY OPERATION
BATTERY REPLACEMENT
When the output sound of this unit becomes distorted, the batteries are weak. You need to replace all the exhausted batteries at the same time as soon as possible to avoid battery leakage.
FM OPERATION
- Press the "button to switch on the unit."
- Press the "MODE" button until the system entered the FM Radio mode.
- Press once the “▶” button for 2-3 s, and the high side of FM will seeking channel automatically and fix the channel.
- Press once the “◀◀” button for 2-3 s, and the low side of FM will seeking channel automatically and fi x the channel.
- During FM reception, always keep the FM TELESCOPIC ANTENNA fully extended for best performance. However, if FM reception is weak, try repositioning the unit near an open window until you get the best reception.
- Press the “or” to control the volume level.
- Press and hold the " button to power off.
Preset Radio Station
- This product equipped auto station searching & saving function.
- In FM mode, Press and hold “▶” unit will auto search and save all available radio station.
- Press "PRE.+" once to select the previous preset station or press "PRE.-" once to select the next preset station.
USB OPERATION
- Press the "button to switch on the unit
- Press the "MODE" button unit the system entered the USB/SD mode
- Connect the USB flash to the USB port. The unit will start playing automatically
- Press the "button once for selecting the previous track, press and hold for backward searching
- Press the "button once for selecting the next track, press and hold for forward searching
- Press “ for playing the next album. Press “ ” for playing the previous album
- Press " nor " to control the volume level
- Press and hold the "button to switch off the unit
REPEAT
Press and hold the "MODE" button during USB or Card mode each press switches the mode function as following.
-
- Repeat 1
-
- Repeat Album
The unit cannot read my USB device.
- Once you have plugged your device to the unit, you may need to switch on the USB device before it can operate.
- This unit does not support a direct USB connection with a computer. You need to use a USB device, or a MP3 player.
- If you are using a USB external hard disk: you need to connect your device simultaneously to an external power source and to the unit. If you are using a self-powered PMP, make sure that the battery is sufficiently loaded.
- Check that the files system of your USB device is formatted into the FAT or FAT 32 format. USB device formatted into NTFS are not compatible with this unit.
Caution: if you attempt to modify your file system, formatting your device will erase all data.
Please refer to your USB device's instruction manual fi rst.
SD CARD OPERATION
- Press the "STANDBY" button to switch on the unit
- Press the "MODE" button unit the system entered the USB/SD mode
- Connect the SD Card to the card slot. The unit will start playing automatically
- Press the "button once for selecting the previous track, press and hold for backward searching
- Press the "button once for selecting the next track, press and hold for forward searching
- Press "Album +" for playing the next album. Press "Album-" for playing the previous album
- Press "VOL+" or "VOL-" to control the volume level
- Press and hold the "STANDBY" button to switch off the unit
REPEAT
Press and hold the "MODE" button during USB or Card mode each press switches the mode function as following.
-
- Repeat 1
-
- Repeat Album
The unit cannot read my memory card.
Check firstly that your memory card is compatible with the unit. Supported memory cards are SD, SDHC, MMC formats. We have tested this unit with most of the market's memory cards; we cannot however guarantee a full compatibility with all the cards in the market because of the multiple technology standards in use. Should you have a compatibility problem: please use a memory card with a lower capacity (2GB or lower) or else connect the unit through a USB device.
CLOCK OPERATION
- Clock setting only available in the OFF mode
- Press and hold the “▶” until the unit entered the clock setting mode. The display will flash and entered the 12/24 hour display setting
- Press " nor " to select desire setting
- Press " ▶to confirm and enter the next setting
- Repeat step 3 and 4 for setting the Hour and Minutes
ALARM OPERATION
- Alarm setting only available in OFF mode
- Press and hold the " " or " " button until the system entered the alarm setting mode.
- Display will flash and entered the hour setting
- Press " nor " " select desire setting
- Press " "or " "to confirm and enter the next setting
- Repeat step 3 and 4 to setting the minutes, wake up sound sources (Buzzer/FM Radio/USB or SD)
- After setting, the alarm will activities
- Press " "or " "button once to active or disable the alarm
SNOOZE
When the alarm is triggered. Press the “ 🔊 ” button to delay the alarm for 9 mintues.
AUX IN OPERATION
- Connect 3.5 mm cable to this unit and your device with 3.5 mm output jack.
- Press the "MODE" button until the system entered the AUX mode
- Press "▶II" on your device and enjoy.
Remark: AUX mode will only appear when the unit connected with the 3.5mm jack cable (3.5 mm Aux-in cable not include)
SLEEP OPERATION
- Press the “ Z button to set the auto switch off timer (90>80>70>60...10>OFF>)
- Unit can also switch off anytime by press and hold the " ⏻" button
SPECIFICATIONS
General
Power Supply: AC100V - 240V\~ 50/60Hz
DC: 4 x 1.5V 'C' (UM-2) Batteries (Not included)
Power Consumption: 4W
Standby Power Consumption: 0,18W
Output Power (RMS): 2 x 1W
Unit Dimensions: 182 x 170 X 90 mm Unit Weight: 0.6 kg
Radio
Tuning Frequency: FM: 87.5–108MHz
CARE AND MAINTENANCE
- Children should be supervised when using this appliance.
- Never wrap the earphone lead around any animal or person. Special care should be taken with long wires.
- Clean your unit with a damp (never wet) cloth. Solvent or detergent should never be used.
- Avoid leaving your unit in direct sunlight or in hot, humid or dusty places.
- Keep your unit away from heating appliances and sources of electrical noise such as fluorescent lamps or motors.
TROUBLESHOOTING GUIDE
| Symptom Possible Cause Solution | ||
| Noise or sound distorted on FM broadcast | -Station not tuned properly for FM.-FM telescopic antenna is not extended. | -Retune the FM broadcast station.-FM: Extend FM telescopic antenna. |
| FM no sound | -Unit not in “FM” function mode.-Volume set at minimum | -Press Function Switch to “FM” position.-Increase Volume. |
| Sound appears distorted at high volume setting | -Volume control is set to -maximum. | -Adjust Volume Control to a lower comfortable level. |
Note:
• Use a pin to press the reset button (B13) if the Unit does not work properly.
- Avoid placing the clock near interference sources/metal frames such as computer or TV sets.
• The clock loses its time information when the battery is removed.
- Buttons will not function while scanning for DCF time signal or thermo sensor's signal unless they are well received or stopped manually.
• All Setting Mode will automatically exit in 15 seconds without any adjustment.
WARNING: Do not use this product near water, in wet areas to avoid fire or injury of electric current. Always turn off the product when you don't use it or before a revision. There aren't any parts in this appliance which are reparable by consumer. Always appeal to a qualified authorized service. The product is under a dangerous tension.
Old electrical appliances, used batteries and accumulators disposal
natural_image
Symbol of a trash bin crossed with a diagonal line and a horizontal bar below (no text or labels)This symbol appearing on the product, on the product accessories or on the product packing means that the product must not be disposed as household waste. When the product/ battery durability is over, please, deliver the product or battery (if it is enclosed) to the respective collection point, where the electrical appliances or batteries will be recycled. The places, where the used electrical appliances are collected, exist in the European Union and in other European countries as well. By proper disposal of the product you can prevent possible
negative impact on environment and human health, which might otherwise occur as a consequence of improper manipulation with the product or battery/ accumulator. Recycling of materials contributes to protection of natural resources. Therefore, please, do not throw the old electrical appliances and batteries/ accumulators in the household waste. Information, where it is possible to leave the old electrical appliances for free, is provided at your local authority, at the store where you have bought the product. Information, where you can leave the batteries and accumulators for free, is provided to you at the store, at your local authority.
WE RESERVE THE RIGHT TO CHANG E TECHNICAL SPECIFICATIONS.
natural_image
Silhouette of a person climbing a ladder inside a circle with a diagonal line (no text or symbols)natural_image
Symbol of a trash bin crossed with a diagonal line and a horizontal bar below (no text or labels)Licensed by Hyundai Corporation, Korea.