
PM1800 - Food processor DCG - Free user manual and instructions
Find the device manual for free PM1800 DCG in PDF.


| Product Type | Multi-function Food Processor |
| Model | PM1800 |
| Brand | DCG |
| Functions | Pasta making, meat grinding, slicing, shredding, slow juicing, frozen treats |
| Control Panel | Power button, time display, Start/Pause, Backward, Forward, Mixing, Batch buttons |
| Pasta Discs Included | Penne, Spaghetti, Linguine, Tagliatelle, Udon, Angel Hair, Fettuccine, Lasagna |
| Batch Sizes (Pasta) | Batch 1: 1 1/2 cups flour; Batch 2: 3 cups flour |
| Meat Grinder Parts | Grinder housing, auger, grinder blade, grinder plate, extrusion cap, pusher, chute/tray |
| Slicer/Shredder Parts | Shredder housing, slicer blade, shredder blade, pusher |
| Slow Juicer Parts | Juicer housing, auger, juice pulp filter, seal cap, juice collector, pulp collector |
| Frozen Treat Mode | Uses solid filter and star tip; includes frozen treat blocker and star extrusion cap |
| Power Supply | Dedicated 3-prong 120V wall outlet |
| Safety Features | Safety switch; lid stops operation when opened; E1 error indicates motor block |
| Cleaning | Detachable parts are dishwasher safe; use cleaning brush for discs; wipe control panel with dry cloth |
| Storage | Unplug, clean and dry all parts, store in clean dry place |
| Included Accessories | Dry measuring cup, liquid measuring cup, food pulp collector, juice collector, spatula/cleaning tool, storage tray, pasta discs (8), pushers |
| Additional Features | Backward button for unjamming; forward for extrusion; mixing button for dough without extruding |
| Note | Some accessories may be sold separately; components color-coded and marked with letters |
Frequently Asked Questions - PM1800 DCG
User questions about PM1800 DCG
0 question about this device. Answer the ones you know or ask your own.
Ask a new question about this device
Download the instructions for your Food processor in PDF format for free! Find your manual PM1800 - DCG and take your electronic device back in hand. On this page are published all the documents necessary for the use of your device. PM1800 by DCG.
USER MANUAL PM1800 DCG
natural_image
Three black industrial feeders with visible internal components and mounting holes, shown from different angles (no text or symbols)
natural_image
Black and white photo of a cooking machine with a cooking pan and 'DCG' branding (no visible text or symbols on the device itself)MANUALE D'USO/USER MANUAL
ROBOT DA CUCINA MULTIFUNZIONE MULTI-FUNCTION FOOD PROCESSOR
PER LA VOSTRA SICUREZZA E PER UN CORRETTO USO DELL'APPARECCHIO LEGGERE ATTENTAMENTE E CONSERVARE QUESTO MANUALE
natural_image
Two cylindrical containers with internal components and mounting holes, no text or symbols visible
COLLETTORE PER ALIMENTI E POLPA
natural_image
Row of eight circular objects with grid patterns, no visible text or symbolsnatural_image
3D wireframe model of a mechanical device inside a transparent enclosure (no text or symbols visible)SPATOLA/STRUMENTO PER LA PULIZIA
natural_image
Technical line drawing of a mechanical component with labeled parts L and K (no text or symbols beyond labels)
natural_image
Close-up of a mechanical component with visible internal structure and textured surface (no text or symbols)natural_image
Black and white photo of a laboratory brush or instrument with a cylindrical component mounted on a base, no visible text or symbols.natural_image
Black-and-white photo of a laboratory brush with a glass base and mechanical component (no visible text or symbols)USARE IL TRITACARNE
natural_image
Exterior view of a modern kitchen grater with a circular top and side panel (no visible text or symbols)USARE L'ACCESSORIO PER AFFETTARE/SMINUZZARE
natural_image
Illustration of a portable electronic device with a cylindrical component and meshed base (no visible text or symbols)NOTE: Unpack all listed
Control Panel
Control panel
contents from the packaging
Contents vary by model
Please remove any clear or blue protective film on the components before use.
Some accessories may not be included with purchase.
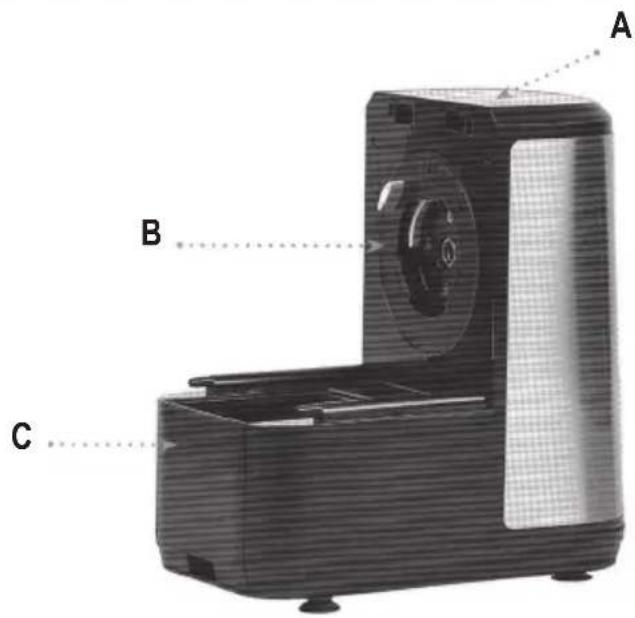
A Control Panel
B Backplate
C Storage Tray.
LIQUID MEASURING CUP
Use for measuring liquid ingredients including eggs, oil, and water.
FOOD PULP COLLECTOR
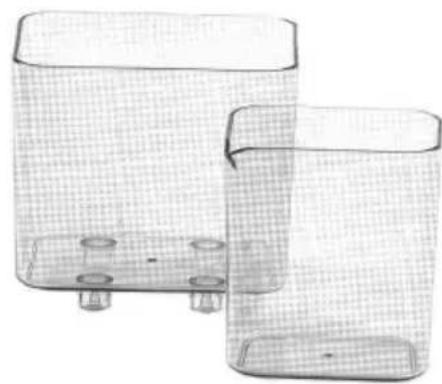
Place in front of the appliance when juicing to collect fruit pulp. May also be used when grinding meat or making frozen desserts.
JUICE COLLECTOR
Place under the Juice Housing for juice collection The Juice Collector has a pouring spout.
natural_image
Technical line drawing of two cylindrical containers with mounting holes and a grid-patterned casing (no text or symbols)DRY MEASURING CUP
Use for measuring dry ingredients
Capacity: 1 cups

MIXING CHAMBER LID

PASTA DISCS

natural_image
Row of eight identical circular objects with grid patterns, no text or symbols visiblePasta Discs included for these pasta shapes Tagliatelle, Spaghetti, Fettucine, Penne Angel Hair, Linguine, Lasagne & Udon
SPATULA/CLEANING TOOL CLEANING BRUSH


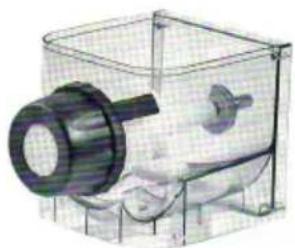
For cutting pasta to the desired length The metal ends are used to clean clogged dough from the Pasta Disc holes.
MIXING CHAMBER
natural_image
3D rendering of a mechanical component inside a transparent cube, showing internal parts and no visible text or symbols.IMPORTANT: Your appliance has been shipped with the components shown above. Check everything carefully before use. If any part is missing or damaged, do not use this product and contact customer service using the number on the back of this manual.
natural_image
Close-up of a metallic cylindrical mechanical component with flanged ends and central hub (no visible text or symbols)natural_image
Close-up of a transparent cylindrical mechanical component with internal structure (no visible text or symbols)CHUTE/TRAY\*

MEAT GRINDER HOUSING\*
SLICER AND SHREDDER HOUSING\*
PUSHER\*
PUSHER\*
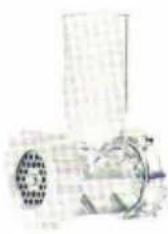
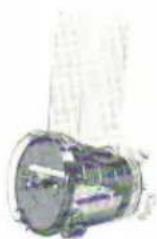

NOTE: The slow juicer and frozen treat modes use the same housing with different parts (refer to the "Assembling the Slow Juicer Housing and" Assembling the Frozen Treat Housing" sections)
WARNING:
Blades and other metal parts used with this appliance are sharp. Great care should be taken to avoid personal injury.
May be sold separately
USING THE CONTROL PANEL

- Power Button: Once the power cord has been connected to a dedicated 3-prong 120V wall outlet, pressing the Power Button will cause the word"ON"to be displayed on the Control Panel, indicating that the appliance is in Ready mode.
2.Time Display: Shows the total time and elapsed time for the selected process. - Start/Pause Button: Press to pause or resume a selected function during operation.
- Backward Button: Rotates counterclockwise for 5 minutes. Can also be used to unjam during juicing, slicing, shredding, and grinding and to mix dough. During the forward or batch cycles, press the Pause/Start Button anytime and hold the Backward Button down to mix counterclockwise. Once done mixing or unjamming, press the Start/Pause. Button to resume the cooking cycle
- Forward Button: Used when slicing shredding, grinding meat, juicing, and making frozen treats.
Can be used to extrude pasta Default time: 6 mins
- Mixing Button: Used to mix dough without extruding(see"Flour Mixing "section). Default time: 6 mins. You can press the Start/Pause Button at any time to pause the process. You can press the Start/Pause Button after the mixing cycle is complete to restart the process
- Batch Button: Press the Batch Button once to select the one-batch program, which is equal to 1/2 lb pasta. Press the button twice to select the two-batch program, which is equal to 1 b pasta. NOTE: Pasta needs to be cut to length by hand during this process.
MAIN UNIT HOUSING BACKPLATE
SLOTS FOR MIXING CHAMBER LID:
The appliance's lid slides into these slots and locks in place.
MOUNTING RING: Attach the Juicer/Frozen Treat Housing, Slicer/Shredder Housing, and Meat Grinder Housing to the Mounting Ring by twisting the chosen housing left to lock in place.
WHITE BUTTON: The White Button is used to release attachments from the base. Press the button and turn the attachment to the right to remove
NOTE: This unit will not operate unless Housing Accessories are set in place and locked properly.

ASSEMBLING THE PASTA MAKER HOUSING
- Hold the Kneading Paddle(D) at a downward angle and place it into the Mixing Chamber.
- Slide the Mixing Chamber(B) into place on the Base Unit(A) while inserting the metal end of the Kneadingpaddle into Base Unit's receptacle.
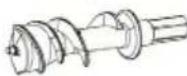
- Insert the Auger(F) into the Auger Sleeve(E). Slide the assembled Auger and Sleeve through the Mixing Chamber's mouth so that the Auger shaft fits into the opening of the kneading paddle.
- Place your selected Pasta Disc(G) on the front tip of the Auger.
- Place the Extrusion Collector Ring(H) on the front of the appliance. NOTE: The Extrusion Ring shaft fits through the front slot of the Mixing Chamber.
- Place the Screw Cap(1)on the front of the appliance and hand tighten until all parts are secure.
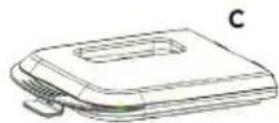
- Place the Mixing Chamber Lid(C)on top and snap in place. CAUTION: Operating this appliance with misaligned or missing parts will cause damage to the appliance.
- To remove the Mixing Chamber Lid, pinch the lid's latch and the ridge area to unlock the lid from the Mixing Chamber.
PASTA MAKER PARTS
A Basic Unit Housing
B Mixing Chamber
C Mixing Chamber Lid
D Kneading Paddle
F Auger
G Pasta Disc
H Extrusion
I Screw Cap


natural_image
Line drawing of a rectangular mechanical housing with a coiled pipe and a side outlet (no text or symbols)NOTE: All pasta parts are marked with a "P" to identify which attachments are used for pasta making. The parts of each housing are also color coded to help you identify which parts are used with which housing
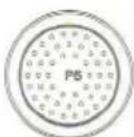
PASTA DISC TYPES (G)

P1

P2

P3

P4

P5
P6

P7

P8
P1= Penne
P2= Spaghetti
P3= Linguine
P4 = Tagliatelle
P5= Udon
P6= Angel Hair
P7= Fettuccine
P8 = Lasagna
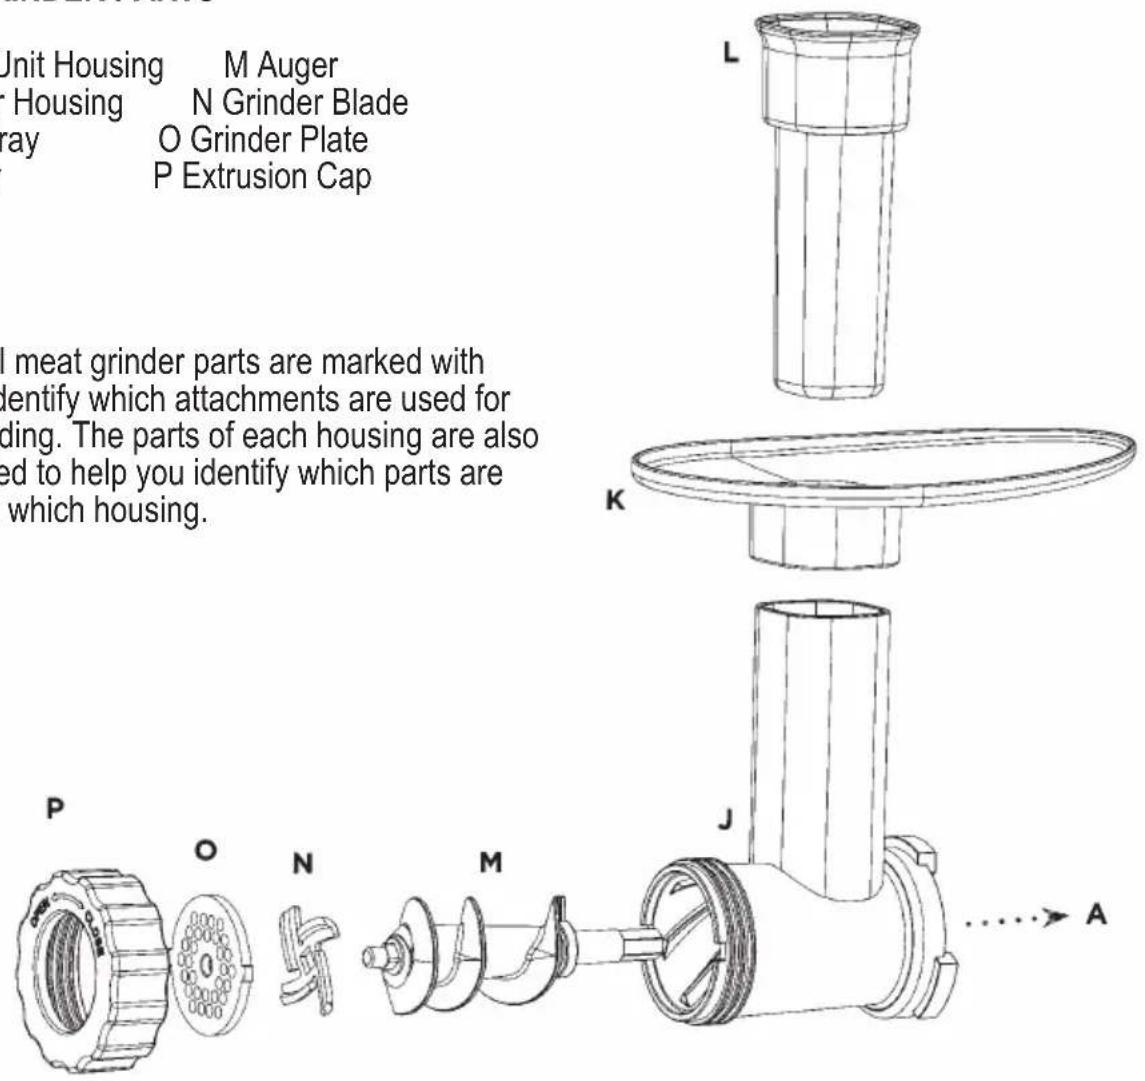
ASSEMBLING THE MEAT GRINDER HOUSING
- Attach the Grinder Housing(J) by pushing it into the matching slots on the Basic Unit Housing (A). See notes in "Main Unit Housing Backplate section for assembly
- Slide the Auger(M) through the Grinder Housing into the shaft portal in the Basic Unit Housing
- Fit the Grinder Blade(N) in place on the front of the Auger shaft Face the Grinder Blade with the sharp edges facing toward the Grinder Plate(O) Fit the Grinder Plate to the tip of the Auger shaft and secure in place by setting the Grinder Plate tabs into the slots on the front of the Grinder Housing.
- Secure everything in place by screwing the Extrusion Cap (P) on the threads on front of the Grinder Housing
- Remove the black storage tray from the Basic Unit Housing and replace it with Food Pulp Collector when grinding meat
- Use the Pusher(L) to feed meat into the grinder.
MEAT GRINDER PARTS
A Basic Unit Housing
M Auger
J Grinder Housing
N Grinder Blade
K Chute/ray
O Grinder Plate
L Pusher
P Extrusion Cap
NOTE: All meat grinder parts are marked with an "M" to identify which attachments are used for meat grinding. The parts of each housing are also color coded to help you identify which parts are used with which housing.
ASSEMBLING THE SLICER ANT AD SHREDDER HOUSING
- Attach the Shredder Housing (Q) by pushing it into the matching slots on the Basic Unit Housing(A). See notes in"Main Unit Housing Backplate "section for assembly.
- Select either the Slicer Blade (S) or the Shredder Blade (T) and insert the blade onto the three fins at the back of the Shredder Housing. While holding the Outer Tab, rotate the blade so it locks into the housing.
- Place the Food and Pulp Collector where food will exit the appliance.
- Remove the blade prior to removing the housing CAUTION: To avoid personal injury, do not gro the sharp parts of the blades.
SLICER/SHREDDER PARTS
A Basic Unit Housing S Slicer Blade
Q Shredder Housing T Shredder Blade
R Pusher
NOTE: All slicer parts are marked with an "S" to identify which parts are used for slicing. The parts of each housing are also color coded to help you identify which parts are used with which housing.

Outher Tab
Use the tab to twist the Slicer or Shredder Blade to lock and unlock. Do not put your finger into the blades to remove because the bl lades are sharp.
ASSEMBLING THE SLOW JUICER HOUSING
- Attach the Slow Juicer Housing (U) by pushing it into the matching slots on the Basic Unit Housing (A). See notes in "Main Unit Housing Backplate" section for assembly
- Slide the Auger into the Slow Juicer Housing
- Slide the Juice Pulp Filter(W) in place over the Juice/Frozen Treat Auger(V)
- Attach the Seal Cap(Y) by twisting it until it locks in place. The Seal Cap has an arrow that will be centered on the housing when the Seal Cap is locked
- Place the Juice Collector pitcher horizontally inside the Basic Unit Housing and then place the Pulp Collector on the outside(refer to the Slow Juicer Mode"section)
SLOW JUICER PARTS
A Basic Unit Housing W Juice Pulp Filter
K Chute/Tray Y Juice/Frozen Treat
L Pusher Seal Cap
U Juicer Housing Z Extrusion Cap
Round Center
V Juice/Frozen Treat Auger
NOTE: All juicer attachments are marked with a "J" to identify which parts are used for juicing. The parts of each housing are also color coded to help you identify which parts are used with which housing.
When choosing a filter and tip for juicing or making frozen foods:
The solid filter and star tip are for frozen foods. The perforated filter and round tip are for juicing.

natural_image
Technical line drawing of a cylindrical component (L) and a circular base with a small hole, both without any text or symbols.
ASSEMBLING THE FROZEN TREAT HOUSING
- Attach the Slow Juicer Housing(U)by pushing it into the matching slots on the Basic Unit Housing (A). See notes in"Main Unit Housing Backplate"section for assembly.
- Slide the Auger into the Slow Juicer Housing
- Slide the Frozen Treat Blocker(X) in place over the Juice/Frozen Treat Auger(V).
- Attach the Seal Cap (Y) by twisting it until it locks in place. The Seal Cap has an arrow that will be centered on the housing when the Seal Cap is locked.
- Place and twist the Star Extrusion Cap (A1) until it locks into place.
- Place the Pulp Collector on the outside of the Basic Unit Housing (refer to the "Frozen Treat Mode" section).
FROZEN TREAT PARTS
A Basic Unit Housing
X Frozen Treat
K Chute/Tray
Blocker
L Pusher Y Juice/Frozen Treat
U Juicer Housing Seal Cap
V Juice/Frozen Treat A1 Extrusion Cap Star Center*
NOTE: All juicer attachments are marked with a "J" to identify which parts are used for juicing. The parts of each housing are also color coded to help you identify which parts are used with which housing.
*May be sold separately

natural_image
Technical line drawing of a mechanical component with labeled parts L and K (no text or symbols beyond labels)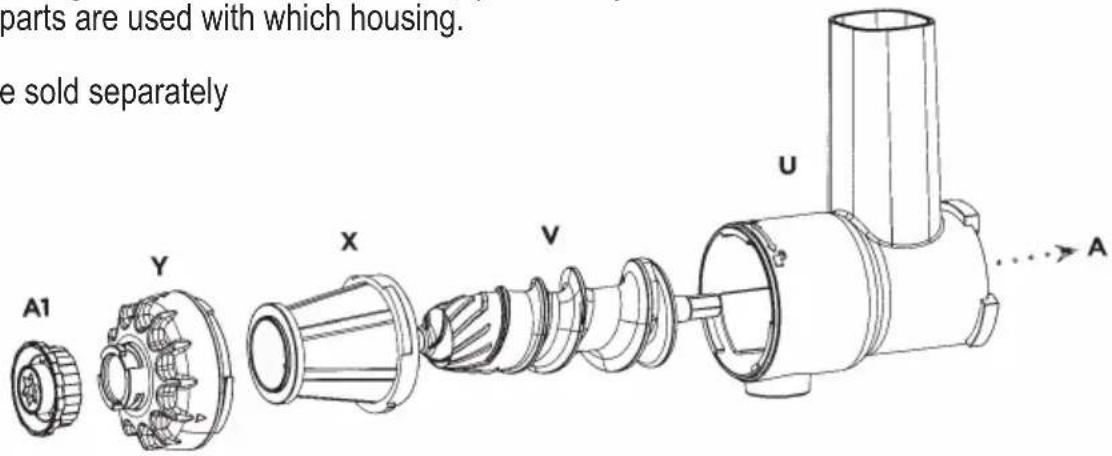
GENERAL OPERATING INSTRUCTIONS
Before First Use
When making pasta dough in this appliance, the first part of the dough that is extruded from the appliance might be a little dry. As the dough continues to be mixed, it will become more pliable. You can cut off and discard the first inch of the dough if desired
When making pasta dough in this appliance, you can experiment with adding different flavors to your dough. Consult the recipe guide for examples of some of the many different kinds of pasta doughs you can make in this appliance.
- Read all material, warning stickers, and labels
- Disassemble all components, including the Mixing Chamber, Screw Cap, Storage Bin, and other detachable components and wash with warm, soapy water. Then, rinse and wipe dry
- Never wash or submerge the appliance base in water. Wipe the inside and outside of the appliance base with a clean, moist cloth. Rinse with a warm, moist cloth
GENERAL OPERATING INSTRUCTIONS
Using the Pasta Maker
- Plug the appliance into a three-pronged wall outlet. The appliance will beep once and the LED display will show four dashes.
- Press the Power Button to turn the appliance on. The LED Display will read "ON."
- Use a spoon to fill flour into the Dry Measuring Cup until slightly overfull. Do not pack the flour into the cup: lightly scoop it in until the
cup is full and a small peak has formed in the center Level it off. Use the Spatula/Cleaning Tool or the back of a knife to level off the top by running it against the rim of the cup. You are now ready to use the flour in your recipe. If it calls for additional cups, measure them the same way. - Beat the eggs and add the egg to the measuring cup if your recipe calls for eggs. Then, add oil and water to the same measuring cup with the ggs until you reach required measurement.
Stir to mix all the wet ingredients - Add your flour and salt to the Mixing Chamber
- Place the lid on the Mixing Chamber. Press the Batch Button according to your recipe size. The paddle will begin mixing the flour.
- Add all the liquid in slowly through the opening
on top of the lid. The paddles will knead the mixture for serval minutes. The mixture will have a consistency of coarse sand. See the Flour Mixing"section for more information on consistencies.
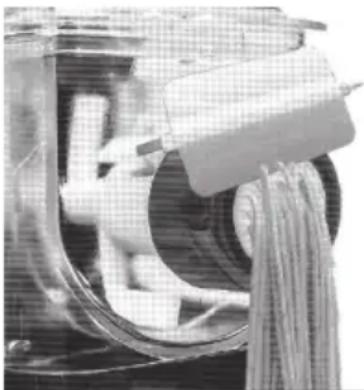
NOTE: Only pour your liquid into the Mixing Chamber once the appliance is mixing the flour. - The appliance will pause to let the dough rest and then begin turning in the opposite direction to begin extruding the dough. While the pasta is extruding, cut it to size using the Spatula/Cleaning Tool with a downward motion. Cut to your desired length. For most pasta, cut at about 10 inches for each portion(see Fig. a).
natural_image
Close-up of a mechanical component with tassels and a circular housing (no visible text or symbols)Using the Dry and Liquid Measuring Cups
Use the markings on the Dry and Liquid Measuring Cups to measure the appropriate amount of ingredients for one or two batches of pasta.
For the Dry Measuring Cup:
•One batch: One full scoop of flour in the Dry Measuring Cup
- Two batches: Two full scoops of flour in the Dry Measuring Cup
For the Liquid Measuring Cup
•One batch: Add 1 egg, 1 tsp. oil, and enough water to fill the Liquid Measuring Cup to the single batch(70 m) line
- Two batches: Add 2 eggs, 2 tsp. oil, and enough water to fill the Liquid Measuring Cup to the double batch (150 ml) line.
NOTE: Refer to the recipe guide for pasta dough recipes that include specific instructions and Ingredient amounts
MIXING BUTTON PROGRAMMING
Press the Mixing Button to mix flour. The mixing Cycle will perform the following actions:
| Mix | Pause | Mix | Total Time |
| 4mins. | 10 secs. | 2 mins. | 6 mins. |
Batch Programming
Press batch button once for batch 1, press again For batch 2
| Batch 1 Program: 1 12 cups | |||||
| Mix | Extrude | Mix | Extrude | Mix | TotalTime |
| 4mins. | 5mins. | 30secs. | 4m,ins. | 30secs, | 14mins. |
| Batch 2 Program: 3 3 cups | |||||
| Mix | Extrude | Mix | Extrude | Mix | TotalTime |
| 4mins | 7mins. | 30secs. | 7mins. | 30secs. | 19mins. |
Flour Mixing
Dough Consistency
Too Dry: Press the Start/Pause Button to pause, add 12 tbsp. of liquid, and press and hold the Backward Button to mix. Then, press the Start/Pause to resume the program Just Right: The dough should look moist and crumbly in the Mixing Chamber. The dough Will look drier than handmade dough but Will gain a tighter consistency when extruded from the appliance. Too Wet: Press the Start/Pause Button, remove the lid, add flour, press and hold the Backward Button to mix the dough, and press the Start/Pause Button to resume the program.
Troubleshooting Pasta Dough
Dough clumps up into large balls
Too much liquid was added
Dough clumps up into sand-like grains
Too little liquid Was added
Dough will not extrude or the appliance struggles to push dough out
Too little liquid was added
Pasta Discs are clogged should be cut away
The first inch of pasta
Pasta is not coming out smooth
Pasta Discs are clogged
PASTA MAKING TIPS
- When making a mixture with eggs, first whisk the egg and add the egg into the liquid cup, then add oil, and finally add water and fill to the desired measurement.
- Beet juice, carrot juice, and spinach juice can be used as substitutions for water to flavor and color your pasta dough
- Add the liquid slowly in a steady stream through the slot on the lid top
•The humidity level in your home may affect your recipes. Use a bit less liquid when your kitchen is humid and a bit more liquid when there is less humidity(like winter - Before placing a Pasta Disc in the appliance, spray or brush the disc with oil to aid in the extrusion process.
- If you see large clumps of dough stuck on the paddle, pause the appliance and scrape the paddles. Then, close the lid and resume the mixing process
- If the timer runs out before all dough is extruded, press the Forward Button to resume extrusion.
NOTE: It may take a small amount of time for the dough to extrude evenly and consistently from the appliance. A small amount of steam may emit from the front of the appliance while extrusion is occurring.
Cooking Pasta
- Make sure water is boiling. Add a pinch of salt and a teaspoon of oil. Add the pasta. Most pasta cooks in 2-3 minutes(1-2 minutes for thin pasta). Once the water foams, the pasta is done.
- Strain pasta immediately after it is done cooking
- Lightly toss the pasta with oil to prevent sticking.
•TOSS With your favorite sauce and serve. - If saving the cooked pasta for later use, lightly oil and cool the pasta before storing in the refrigerator for up to 2-3 days.
Freezing Pasta
After extruding, carefully toss the pasta in a light flour/cornmeal mix. Portion into containers or sealable plastic bags. When cooking frozen pasta, you may need to add 1-2 minutes to the cooking time
Reheating Pasta
Add the pasta to boiling water for 30 seconds
Cleaning
- Ensure all parts are free of debris
- Use the Cleaning Brush to clean the Pasta Discs
SLOW JUICER MODE
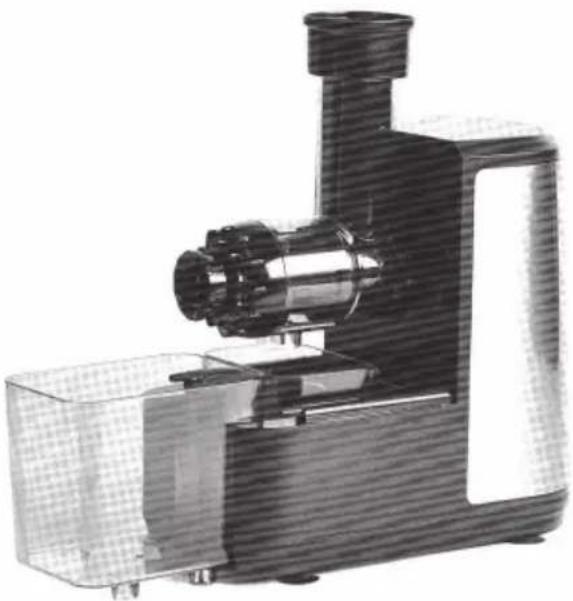
- Remove the Storage Tray and insert the Juice Collector Cup to collect juice. Place the Pulp Collector Cup in front of the housing.
- Press the Forward Button to extrude clockwise for 6 minutes
NOTE: Pulp may clog the auger or filter after heavy use or after juicing pulpy fruit/vegetables.
To unjam the appliance, see the "Using the Control Panel" section
- Press the Start/Pause Button at any time to pause the juicing process
REMINDER: Use the perforated screen and round tip for juicing
TIP: Cut vegetables into smaller chunks or strips to allow for an easier feed into the slow juicer and to reduce the risk of blockage
natural_image
Mechanical device with glass enclosure and mounted optical components (no visible text or symbols)FROZEN TREAT MODE
- Press the Power Button to turn the appliance on.
- Press the Forward Button to extrude clockwise for 6 minutes.
- Press the Start/Pause Button at any time to pause the process.
REMINDER: Use the solid screen and star tip for frozen treat mode.
TIP: Remove fruit from the freezer about 10 minutes before using the fruit with this attachment. Doing so will allow for the fruit to soften slightly and lower the risk of blockage.

natural_image
Mechanical device with glass base and mechanical components (no visible text or symbols)Meat Grinder Mode
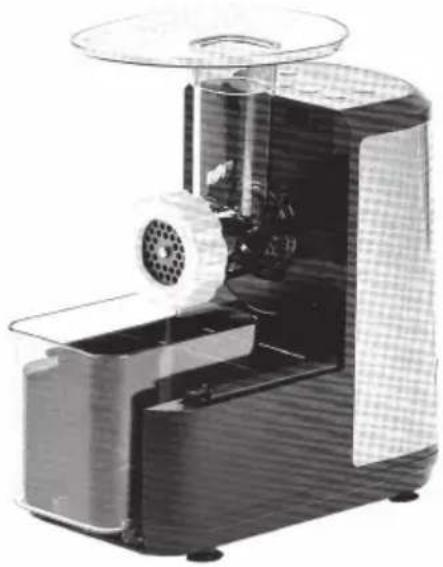
- Press the Power Button to turn the appliance on
- Press the Forward Button to grind clockwise for 6 minutes
- Press the Start/Pause Button at any time to pause the grinding process
TIP: Cut meat into small cubes or strips to allow for an easier feed into the grinder and to reduce the risk of blockage
natural_image
Industrial cutting machine with a central processing unit and meshed base (no visible text or symbols)SLICER/SHREDDER MODE
- Assemble the Slicing Blade or Shredding Blade (see the "Assembling the Slicer and Shredding Housing" section).
- Press the Power Button to turn the appliance on
- Press the Forward Button to slice or shred clockwise for 6 minutes
NOTE: To unjam the appliance, see the
"Using the Control Panel" section
- Press the Start/Pause Button at any time to pause the slicing or shredding process

natural_image
Industrial machine with cylindrical chamber and mesh casing (no visible text or symbols)CLEANING
Clean the appliance after each use. The parts and other accessories are durable and dishwasher safe.
Never use abrasive cleaning materials or utensils on these surfaces. Remove the power cord from the wall socket and be certain the appliance is thoroughly cooled before cleaning.
- Remove the Mixing Chamber Lid
- Loosen the Screw Cap
- Disassemble all components in order from front to back
-
Clean all detachable parts with warm, soapy water and wipe them dry
TIP: It is easier to clean the excess dough residue from the Pasta Discs after the dough has dried in the extrusion holes -
Use a dry cloth to clean flour residue on the Appliance.
- Clean the Pasta Disc with the supplied Spatula/Cleaning Tool to remove the dough residue.
Afterward, clean the Pasta Disc with water - Clean all detachable parts and wipe them dry.
- Use a dry cloth to clean the Control Panel and the exterior of the appliance.
9.Any other servicing should be performed by an authorized service representative.
STORAGE
- Unplug the appliance
- Make sure all components are clean and dry.
- Place the appliance in a clean, dry place
Troubleshooting
| Symptom | Possible | Solution |
| The appliance does not work | The appliance is not plugged in. | Plug the power cord into a wall socket |
| After pressing the Power Button, the appliance chimes/rings but does not work | Some part of the appliance is assembled incorrectly. | Ensure the assembly instructions in the "Parts & Accessories"section have been followed correctly |
| The safety switch is triggered and the appliance has suddenly stopped or suddenly restarts. | The front panel knob is loose. | Make sure the front panel is securely assembled |
| Excessive ingredients in the pasta maker. | Remove the dough and start a new batch Using recommended measurements | |
| During processing, the appliance stops working when opening the lid. | For safety reasons, the appliance always stops working when the lid is opened During processing. | If you need to resume the previous operation, close the lid properly and press the Start/Pause Button. |
| E1 displays on the screen | The motor is blocked | Contact customer service |
| Pasta dough is too sticky. | Cooking environment might be more humid than the recipe assumes or too much liquid was used | First, try adding 1 tbsp flour at a time to absorb extra moisture |
| Pasta dough is too dry. | Cooking environment might be humid than the recipe assumes or not enough liquid was used. | Add 1 tsp of liquid at a time until the dough looks like coarse wet sand. |
| Pasta dough is sticking to side of mixing chamber. | it is common for flour to stick and then gradually mix in Dough could be too wet. | Dough will gradually mix into a larger dough ball If not, stop the appliance and use the spatula to remove four from the Mixing Chamber wall. |
| The cycle stopped and there is remaining dough | The dough is too wet and the dough balled together | Press the Forward Button to allow another cycle to run |
natural_image
Symbol of a trash bin crossed with a diagonal line, no text or labels present

- PER LA VOSTRA SICUREZZA E PER UN CORRETTO USO DELL'APPARECCHIO LEGGERE ATTENTAMENTE E CONSERVARE QUESTO MANUALE
- COLLETTORE PER ALIMENTI E POLPA
- SPATOLA/STRUMENTO PER LA PULIZIA
- USARE IL TRITACARNE
- USARE L'ACCESSORIO PER AFFETTARE/SMINUZZARE
- LIQUID MEASURING CUP
- FOOD PULP COLLECTOR
- JUICE COLLECTOR
- DRY MEASURING CUP
- PASTA DISCS
- SPATULA/CLEANING TOOL CLEANING BRUSH
- MIXING CHAMBER
- CHUTE/TRAY\*
- MEAT GRINDER HOUSING\*
- SLICER AND SHREDDER HOUSING\*
- PUSHER\*
- WARNING:
- USING THE CONTROL PANEL
- MAIN UNIT HOUSING BACKPLATE
- ASSEMBLING THE PASTA MAKER HOUSING
- PASTA MAKER PARTS
- PASTA DISC TYPES (G)
- ASSEMBLING THE MEAT GRINDER HOUSING
- MEAT GRINDER PARTS
- ASSEMBLING THE SLICER ANT AD SHREDDER HOUSING
- SLICER/SHREDDER PARTS
- ASSEMBLING THE SLOW JUICER HOUSING
- SLOW JUICER PARTS
- ASSEMBLING THE FROZEN TREAT HOUSING
- FROZEN TREAT PARTS
- GENERAL OPERATING INSTRUCTIONS
- Before First Use
- Using the Pasta Maker
- Using the Dry and Liquid Measuring Cups
- For the Dry Measuring Cup:
- For the Liquid Measuring Cup
- MIXING BUTTON PROGRAMMING
- Batch Programming
- Flour Mixing
- Dough Consistency
- Troubleshooting Pasta Dough
- PASTA MAKING TIPS
- Cooking Pasta
- Freezing Pasta
- Reheating Pasta
- Cleaning
- SLOW JUICER MODE
- FROZEN TREAT MODE
- Meat Grinder Mode
- SLICER/SHREDDER MODE
- STORAGE
Brand : DCG
Model : PM1800
Category : Food processor