
DVF-5500 - DVD player KENWOOD - Free user manual and instructions
Find the device manual for free DVF-5500 KENWOOD in PDF.

| Product Type | DVD Player |
| Brand | KENWOOD |
| Model | DVF-5500 |
| Dimensions (W x D x H) | 430 x 250 x 50 mm |
| Weight | 2.5 kg |
| Power Supply | AC 230 V, 50 Hz |
| Power Consumption | 15 W |
| Compatible Disc Formats | DVD, DVD±R/RW, CD, CD-R/RW, MP3, JPEG |
| Playback Functions | Normal playback, fast forward (x2, x4, x8), slow motion (x1/2, x1/4, x1/8), frame by frame, A-B repeat |
| Video Outputs | Composite (RCA), S-Video, SCART |
| Audio Outputs | Stereo RCA, digital coaxial, optical |
| Audio Signal-to-Noise Ratio | 100 dB |
| Maximum Video Resolution | 576p (PAL), 480p (NTSC) |
| Remote Control Included | Yes |
| Region Code | 2 (Europe) |
| Maintenance and Cleaning | Clean with a soft, dry cloth. Do not use solvents. For the lens, use a specific cleaning kit. |
| Safety | Do not expose to moisture or extreme temperatures. Use on a flat, stable surface. Unplug before cleaning. |
| Spare Parts and Repairability | Available from KENWOOD after-sales service. Repairability index not provided. |
| General Information | User manual downloadable in PDF format from the manufacturer's website. Warranty 2 years. |
Frequently Asked Questions - DVF-5500 KENWOOD
User questions about DVF-5500 KENWOOD
0 question about this device. Answer the ones you know or ask your own.
Ask a new question about this device
Download the instructions for your DVD player in PDF format for free! Find your manual DVF-5500 - KENWOOD and take your electronic device back in hand. On this page are published all the documents necessary for the use of your device. DVF-5500 by KENWOOD.
USER MANUAL DVF-5500 KENWOOD
Declaration of Conformity with regard to the EMC Directive 2004/108/EC
Manufacturer:
Kenwood Corporation
2967-3 Ishikawa-machi, Hachioji-shi, Tokyo, 192-8525 Japan
EU Representative's:
Kenwood Electronics Europe BV
Amsterdamseweg 37, 1422 AC UITHOORN, The Netherlands
Caution: Read this page carefully to ensure safe operation.
Units are designed for operation as follows.
Australia ......AC 240 V only
Europe ......AC 230 V only
Information on Disposal of Old Electrical and Electronic Equipment (applicable for EU countries that have adopted separate waste collection systems)

Products with the symbol (crossed-out wheeled bin) cannot be disposed as household waste.

Old electrical and electronic equipment should
be recycled at a facility capable of handling these items and their waste byproducts.
Contact your local authority for details in locating a recycle facility nearest to you.
Proper recycling and waste disposal will help conserve resources whilst preventing detrimental effects on our health and the environment.
Safety precautions
WARNING: TO PREVENT FIRE OR ELECTRIC SHOCK, DO NOT EXPOSE THIS APPLIANCE TO RAIN OR MOISTURE.
 | CAUTIONRISK OF ELECTRIC SHOCKDO NOT OPEN |  | CAUTION: TO REDUCE THE RISK OF ELECTRIC SHOCK, DO NOT REMOVE COVER (OR BACK). NO USER-SERVICEABLE PARTS INSIDE. REFER SERVICING TO QUALIFIED SERVICE PERSONNEL. |
 | THE LIGHTNING FLASH WITH ARROWHEAD SYMBOL, WITHIN AN EQUILATERAL TRIANGLE, IS INTENDED TO ALERT THE USER TO THE PRESENCE OF UNINSULATED “DANGEROUS VOLTAGE” WITHIN THE PRODUCT’S ENCLOSURE THAT MAY BE OF SUFFICIENT MAGNITUDE TO CONSTITUTE A RISK OF ELECTRIC SHOCK TO PERSONS. | ||
 | THE EXCLAMATION POINT WITHIN AN EQUILATERAL TRIANGLE IS INTENDED TO ALERT THE USER TO THE PRESENCE OF IMPORTANT OPERATING AND MAINTENANCE (SERVICING) INSTRUCTIONS IN THE LITERATURE ACCOMPANYING THE APPLIANCE. | ||
CAUTION
The marking of products using lasers

The marking this product has been classified as Class 1. It means that there is no danger of hazardous radiation outside the product.
Location: Back panel
Caution: Read this page carefully to ensure safe operation.
Read Instructions – All the safety and operating instructions should be read before the product is operated.
Retain Instructions – The safety and operating instructions should be retained for future reference.
Heed Warnings – All warnings on the product and in the operating instructions should be adhered to.
Follow Instructions – All operating and use instructions should be followed.
-
Cleaning – Unplug this product from the wall outlet before cleaning. Do not use liquid cleaners or aerosol cleaners. Use a damp cloth for cleaning.
-
Attachments – Do not use attachments not recommended by the product manufacturer as they may cause hazards.
-
Water and Moisture – This product shall not be exposed to dripping and splashing – for example, near a bath tub, wash bowl, kitchen sink, or laundry tub; in a wet basement; or near a swimming pool; and the like. Do not place an object containing liquid, such as a flower vase, on the appliance.
-
Accessories – Do not place this product on an unstable cart, stand, tripod, bracket, or table. The product may fall, causing serious injury to a child or adult, and serious damage to the product. Use only with a cart, stand, tripod, bracket, or

table recommended by the manufacturer. Any mounting of the product should follow the manufacturer's instructions, and should use a mounting accessory recommended by the manufacturer. A product and cart combination should be moved with care. Quick stops, excessive force, and uneven surfaces may cause the product and cart combination to overturn.
-
Ventilation – Slots and openings in the cabinet are provided for ventilation and to ensure reliable operation of the product and to protect it from overheating, and these openings must not be blocked or covered. The openings should never be blocked by placing the product on a bed, sofa, rug, or other similar surface. This product should not be placed in a built-in installation such as a bookcase or rack unless proper ventilation is provided or the manufacturer's instructions have been adhered to.
-
Power Sources – This product should be operated only from the type of power source indicated on the product. If you are not sure of the type of power supply to your home, consult your product dealer or local power company.
-
CAUTION – Polarization – This product may be equipped with a polarized alternating-current line plug (a plug having one blade wider than the other). This plug will fit into the power outlet only one way. This is a safety feature. If you are unable to insert the plug fully into the outlet, try reversing the plug. If the plug should still fail to fit, contact your electrician to replace your obsolete outlet. Do not defeat the safety purpose of the polarized plug.
-
Power Cord Protection – Power-supply cords should be routed so that they are not likely to be walked on or pinched by items placed upon or against them, paying particular attention to cords at plugs, convenience receptacles, and the point where they exit from the product.
-
Lightning – For added protection for this product during a lightning storm, or when it is left unattended and unused for long periods of time, unplug it from the wall outlet and disconnect the antenna or cable system. This will prevent damage to the product due to lightning and power-line surges.
-
Overloading – Do not overload wall outlets, extension cords, or integral convenience receptacles as this can result in a risk of fire or electric shock.
11.Object and Liquid Entry – Never push objects of any kind into this product through openings as they may touch dangerous voltage points or short-out parts that could result in a fire or electric shock. Never spill liquid of any kind on the product.
-
Servicing – Do not attempt to service this product yourself as opening or removing covers may expose you to dangerous voltage or other hazards. Refer all servicing to qualified service personnel.
-
Damage Requiring Service – Unplug this product from the wall outlet and refer servicing to qualified service personnel under the following conditions:
a) When the power-supply cord or plug is damaged,
b) If liquid has been spilled, or objects have fallen into the product,
c) If the product has been exposed to rain or water,
d) If the product does not operate normally by following the operating instructions.
e) If the product has been dropped or damaged in any way, and
f) When the product exhibits a distinct change in performance – this indicates a need for service.
g) If an abnormal smell or smoke is detected.
-
Replacement Parts – When replacement parts are required, be sure the service technician has used replacement parts specified by the manufacturer or have the same characteristics as the original part. Unauthorized substitutions may result in fire, electric shock, or other hazards.
-
Safety Check – Upon completion of any service or repairs to this product, ask the service technician to perform safety checks to determine that the product is in proper operating condition.
-
Wall or Ceiling Mounting – This product should be mounted to a wall or ceiling only as recommended by the manufacturer.
-
Heat - This product should be situated away from heat sources such as radiators, heat registers, stoves, or other products that produce heat. Do not place a flaming object, such as a candle or lantern, or near the product.
-
Power Lines – An outside antenna system should not be located in the vicinity of overhead power lines or other electric light or power circuits, or where it can fall into such power lines or circuits. When installing an outside antenna system, extreme care should be taken to keep from touching such power lines or circuits as contact with them might be fatal.
-
Outdoor Antenna Grounding – If an outside antenna or cable system is connected to the product, be sure the antenna or cable system is grounded so as to provide some protection against voltage surges and built-up static charges. Article 810 of the National Electrical Code, ANSI/NFPA 70, provides information with regard to proper grounding of the mast and supporting structure, grounding of the lead-in wire to an antenna discharge unit, size of grounding conductors, location of antenna-discharge unit, connection to grounding electrodes, and requirements for the grounding electrode.
EXAMPLE OF ANTENNA GROUNDING AS PER NATIONAL ELECTRICAL CODE

Notes:
-
Item 7 is not required except for grounded or polarized equipment.
-
Item 19 complies with UL in the U.S.A.
Accessories
Check that all accessories are present in the package.
Audio cord (Red, White)
(x 1)
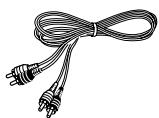
Video cord (Yellow)
(x 1)

Coaxial cable (Black) (x 1)

Remote control unit (RC-D0314 x 1)
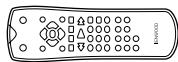
Remote control batteries (R03 x 2)

If any accessories are missing, or if the unit is damaged or fails to operate, notify your dealer immediately. If the unit was shipped to you directly, notify your shipper immediately. Kenwood recommends that you retain the original carton and packing materials in case you need to move or ship the unit in the future.
Keep this manual handy for future reference.
Special features
- High Definition Multimedia Interface (HDMI) for the finest audio and video digital quality (version 1.1)
• Graphical User Interface (G.U.I.) - MPEG1, MPEG2 files, DivX ^ video playback
• MP3, WMA and JPEG files playback
This document classifies the applications of each feature using the following marks.
CD : Description of a feature that can be used with audio CD (CD-DA).
DVD : Description of a feature that can be used with DVD video.
VCD : Description of a feature that can be used with VCD.
DivX : Description of a feature that can be used with DivX®video.
JPEG : Description of a feature that can be used with JPEG.
MP3 : Description of a feature that can be used with MP3.
WMA : Description of a feature that can be used with WMA.
Contents
⚠️ To ensure safety, read the items carrying this marking carefully.
⚠️ Before applying power....2
⚠️ IMPORTANT SAFETY INSTRUCTIONS ...... 3
Accessories....4
Special features ....5
Contents....5
Disc information......6
Types of playable discs....6
Unplayable discs....6
Region codes 7
Region codes in the world....7
Icons on the DVD VIDEO discs....7
playable files with this unit 8
File Specifications....8
Creating media for playing back on this equipment...8
Video formats 9
For your information.... 10
Preparation
Connections.... 11
Controls and indicators 14
Main unit....14
Remote control unit.... 14
Set Up functions 16
When you turn on for the first time.... 16
Set up menu.... 16
LANGUAGE....17
DISPLAY....17
AUDIO....17
LOCK (Parental Control).... 18
OTHERS....19
Resolution setting 20
Hierarchical structure of VCD menus (P.B.C. function) 20
DVD menu language code list 21
Area Code code list 21
Operations
Basic playback of disc 22
On screen display....22
Last Scene Memory 22
Basic play....23
Disc playback features 24
Repeat play 24
A-B Repeat play 25
Program play 25
Movie disc playback....26
Select Audio Language 27
Select the Audio channel....27
Using Marker 27
Select Camera angle 28
Select Subtitle Language 28
Zoom function 28
Time Search 29
Music disc playback 30
Using the TV screen to start playback....30
Playback from desired track....30
To display the ID3 tag 30
Random play....30
Photo files playback (JPEG files only)...... 31
To start playback 31
Zoom function 31
To rotate picture.... 31
To hide the menu bar 31
Slide show.... 31
Knowledge
Troubleshooting.... 32
Specifications 34
Types of playable discs
The system this unit is using does not only play music from CD but can also play the discs listed below to offer you high-quality entertainment of video of movies and live concerts.
| Playable Disc | DVD VIDEO(DVD-R/RW, DVD+R/RW) | CD (CD-R, CD-RW) | VCD (SVCD*) | ||||
| Logo mark on disc |  |  |  |  |  | ||
| Disc size |  8 cm 8 cm |  12 cm 12 cm |  8 cm 8 cm |  12 cm 12 cm |  8 cm 8 cm |  12 cm 12 cm | |
| Played sides | One or both | One or both | One side only | One side only | One side only | One side only | |
| Contents | Video + Audio | Approx. 41 min.(1 side, 1 layer)Approx. 75 min.(1 side, 2 layers)Approx. 82 min.(2 sides, 1 layer)Approx. 150 min.(2 sides, 2 layers) | Approx. 133 min.(1 side, 1 layer)Approx. 242 min.(1 side, 2 layers)Approx. 266 min.(2 sides, 1 layer)Approx. 484 min.(2 sides, 2 layers) | Max. 20 min. | Max. 74 min. | ||
| (In case of an SVCD, the possible play-back time becomes shorter.) | |||||||
| Audio | Max. 20 min., digital | Max. 80 min., digital | |||||
Please refer to page 8 for the CD-R, CD-RW, DVD-R, and DVD-RW file formats which can be played back by this unit.
- * This unit can play SVCDs, but some functions will not work.
- A Dual Disc is a two-sided disc combining a DVD side according to the DVD standard and a music side. The video content recorded on the DVD side can be played back. As the music side is not compatible with the Compact Disc (CD) standard, playback on this unit is not assured.
- This unit can play back DVD-R and DVD-RW discs recorded in the DVD VIDEO format and DVD+R and DVD+RW discs, but depending on the recording unit, the disc manufacturer, etc., playback sometimes may not be possible.
- This unit may also be incapable of playing certain CD-R/RW discs depending on their properties, recording conditions, etc.
- This player cannot play back discs compatible with CPRM. CPRM is the abbreviation of Content Protection for Recordable Media, and it is a technique for copyright protection for recording media.
Unplayable discs
This player cannot play back any of the following discs.
DVD AUDIO discs
DVD-RAM discs
SACD discs
VSD discs
CDV discs (Only the audio part can be reproduced.)
CD-G/CD-EG/CD-EXTRA discs (Only the audio can be reproduced.)
- A DVD video disc with a region code which does not match this unit or without a region code. For details, see "Region codes". (See page 7.)
- When the video format of a disc differs from that of the TV in use, the disc cannot be played normally. For details, see "Video Formats". (See page 9.)
Restrictions due to difference between discs
Some DVD and VCD discs can be played only in certain playback modes according to the intentions of the software producers. Depending on the condition of this unit, operation may be restricted. As this player plays discs according to their intentions, some functions may not work as intended by you. Please be sure to read the instructions provided with each disc. When an inhibition icon is displayed on the TV screen connected to the player, it indicates that the disc being played is under the restriction as described above.
Inhibition icon

Every player of this model has a certain region code assigned to it based on the country where the player is used. When the player is used to play back DVD VIDEO discs, it can only play the DVD VIDEO discs carrying the region codes matching the region code of the player.
The region code for this player is described on the rear panel of the player.
Region codes in the world
The DVD players are given a region code according to the country or area it is marketed, as shown in the following map.
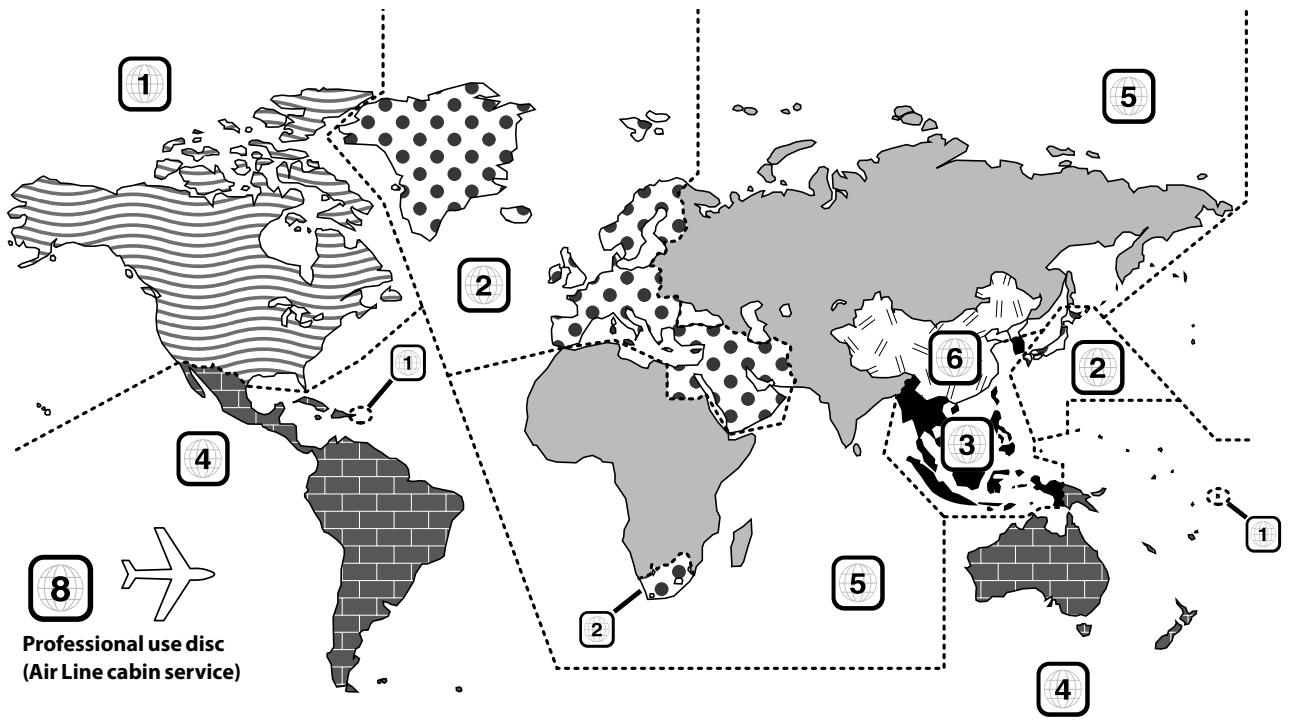
Region codes of the DVD VIDEO discs that can be played with this player
This player can play back a DVD VIDEO disc which carries the corresponding code to the region code of the player shown in the table above, a marking containing the region code of the player or the "ALL" marking shown below. Even when a DVD VIDEO disc does not carry any indication of the region code, it may sometimes unable to be played on this player due to certain restrictions.

Icons on the DVD VIDEO discs
| Icon | Description |
 | Indicates the region code where the disc can be played. |
 | Number of voice languages recorded with the audio function. The number in the icon indicates the number of voice languages. (Max. 8 languages) |
 | Number of subtitle languages recorded with the subtitle function. The number in the icon indicates the number of subtitle languages. (Max. 32 languages) |
 | Number of angles provided by the angle function. The number in the icon indicates the number of angles. (Max. 9 angles) |
 | Aspect ratios that can be selected. "4:3 Letter box" stands for Letter Box and "4:3 Panscan" for Pan/Scan. (See page 17)In the example on the left, the 16:9 video can be converted into letter box video. |
File Specifications
| Category / Item | Extension | Detail | (Audio) | Media |
| MOVIE [file size : 4GB (Max.)] | CD-ROMCD-RCD-RWDVD-ROMDVD-RDVD+RDVD-RWDVD+RW(See page 6.) | |||
| MPEG1 | .MPG, .MPEG | Video resolution : 352 x 240 (Max.)Bit Rate : 2M bps (Max.) | Mpeg1 Layer1 & 2 | |
| MPEG2 | .MPG, .MPEG | Video resolution : 720 x 576 (Max.)Bit Rate : 9.8M bps (Max.) | Mpeg1 Layer1 & 2 | |
| DivX®VIDEO * | .AVI, .DIVX | Video resolution : 720 x 576 (Max.)Bit Rate : 6M bps (Max.) | WAV, MP3, WMA Dolby Digital | |
| MUSIC [file size : 4GB (Max.)] | ||||
| MPEG Audio | .MP3 | Layer III Bit Rate 8 - 320 kbps, CBR/VBRFS 32k, 44.1k, 48k | ||
| WMA | .WMA | Bit Rate 32 - 192 kbps, CBR/VBRFS 32k, 44.1k, 48k | ||
| PHOTO [file size : 4MB (Max.)] | ||||
| JPEG | .JPG, .JPEG | Video resolution : 3072 x 2048 (Max.)24 bit True color | ||
- Depending on the data recording condition and other factors, playback may not be possible.
- Usable formats for MP3/WMA/JPEG : ISO9660 level 1, 2 (excluding expanded formats : Joliet, Romeo)
* Official DivX® Certified product.
Plays all versions of DivX ^® video (including DivX ^® 6) with standard playback of DivX ^® media files.
Creating media for playing back on this equipment
Compressing MP3/WMA
Please set up the transfer bit rate setting for the compression software when compressing MP3/WMA files as follow.
MP3 Files : 128 kbps recommended (8 - 320 kbps)
WMA Files : 128 kbps recommended (32 - 192 kbps)
• This unit is compatible with 32 kHz, 44.1 kHz (recommended) and 48 kHz sampling frequencies.
• This unit is compatible with ID3-TAG Ver. 1. (Alphanumeric sign : up to 30 characters)
• DIGITAL output of MP3/WMA data is done not as MP3/WMA data, but as PCM data.
Naming folders and files
Single-byte characters between A and Z, single-byte numerals between 0 and 9, and the single-byte underscore(_) can be displayed. Ensure that the extension log is attached to all file names.
- Never add the wrong extension log to any files, the equipment will assume that they can be played back, and this will produce loud noises in the speakers, resulting in damage of adverse effects.
Note:
Folder names and file names are displayed up to 20 characters. When folder names and file names are recorded with more than 20 characters, the names will be displayed in abbreviated form.
Confirming media and files
Check to ascertain that MP3/WMA files can be played back correctly on the personal computer in use prior to saving them onto the media.
Check to ensure that the saved file can be played back normally.
- It is not possible to confirm that files can be played back correctly while they are being saved onto the media.
When saving files onto media
Ensure that the session is closed or finalized when data has been written on media. There are cases where media on which the session has not be closed or finalized will not be played back correctly with this equipment.
- There are cases where the folder names and file names will not be displayed correctly depending on the software used to save them.
- Do not store files or folders other than playable files on media to be played back with this equipment.
- It is recommended that ten or less sessions are stored when recording MP3/WMA files onto a media.
• In case of a multisession disc, some time may be required until playback begins. - There are cases where playback is not possible when DivX/MP3/WMA/JPEG files (CD-ROM) and music CD information (CD-DA) are saved on the same media.
Example for a hierarchical structure
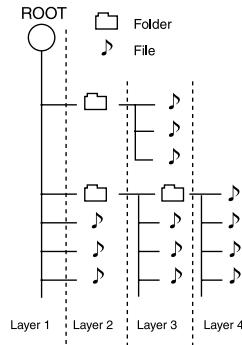
flowchart
graph TD
    A["ROOT"] --> B["Folder File"]
    B --> C["Layer 1"]
    B --> D["Layer 2"]
    B --> E["Layer 3"]
    B --> F["Layer 4"]
    style A fill:#fff,stroke:#000
    style B fill:#fff,stroke:#000
    style C fill:#fff,stroke:#000
    style D fill:#fff,stroke:#000
    style E fill:#fff,stroke:#000
    style F fill:#fff,stroke:#000
The TV picture display and disc signal systems can be divided roughly into two TV formats (NTSC and PAL).
They are variable depending on countries and areas.
This unit has a function for changing the video format according to the TV type. Please confirm the type of your TV.
Checking the Video Format
Check the video format of the TV to be used
When the video formats are different :
Try playing the disc. If the video formats of the disc and TV do not match, the played video may be black and white or become as shown below.
Top and bottom edges are not displayed.

Top and bottom areas are dark.
Picture turbulence due to sync unmatching.
TV formats of major countries
| TV Format | Major Countries & Areas |
| NTSC | Japan, Taiwan, Korea, USA, Canada, Mexico, Philippines, Chile, etc. |
| PAL | China, U.K., Germany, Australia, New Zealand, Kuwait, Singapore, etc. |
To select TV Type
1 Press the [▲] key to remove the disc from the unit, then close the tray.
2 Press and hold the [II] key on the remote control for more than 5 seconds to be able to select a TV type (PAL or NTSC).
Handling of disc
Handling precautions
Hold a disc taking care not to touch the played surface.
Notes on CD-R/CD-RW discs
If the CD-R or CD-RW disc in use has a printable label surface, the disc may be unable to be taken out of the system due to sticking of the label surface. To prevent malfunction of the system, do not use such a disc.
Cautions on discs
The disc rotates at a high speed during playback. Never use a cracked, chipped or greatly warped disc. Otherwise, damage or malfunction of the player may result.
Also, do not use a disc with a non-circular shape as this may result in malfunction.
Care and storage
Care and storage of main unit
■ Do not place in the following locations.
- Place exposed to direct sunlight.
- Place subjected to excessive humidity or dirt.
- Place exposed to direct heat from heating equipment.
■ Be careful against condensation
When the difference in temperatures between the main unit and the environmental air is large, dew may be condensed inside the main unit and may cause malfunction of the main unit. If this happens, leave the main unit for a few hours until its internal mechanisms are dried up.
Take special care against condensation when the main unit is moved between places with a large temperature difference or into a room with high humidity.
■ When a main unit becomes dirty
When the front panel or case gets dirty, wipe with a soft dry cloth. Do not use lacquer thinner, benzine, alcohol or contact revitalizer for these chemicals will cause discoloration or deformation.
Care and storage of disc
■ Before storing the disc
When the main unit is not to be used for a long period, take out the disc and store in the case.
■ When a disc becomes dirty
- When a disc is contaminated with fingerprints or other stains, wipe gently in the radial direction using a soft dry cloth.
- Do not use an analog disk cleaner, lacquer thinner, benzine or alcohol.
- Do not use a disc accessory (stabilizer, protective sheet, protective ring, etc.) or lens cleaner.
■ Other cautions
- Do not write letters on a disc using a pencil or ball-point pen.
- Do not use a disc if the sticker or label on it is peeled off or bond is overflowed around the sticker or label.
- Do not stick a sheet of paper, sticker or label on a disc.
Caution for transport or movement
Before transporting or moving the system, prepare it as described below.
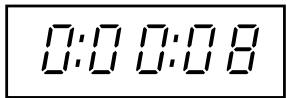
① Switch the system ON without placing a disc in it.
② Ensure that is displayed.
③ Wait a few seconds, and then switch the system OFF.
CAUTION
Observe the following cautions when installing the system. Insufficient heat radiation may build up internal heat and cause a malfunction or fire hazard.
- Do not place an object that may hinder heat radiation on the system.
- Leave the spaces specified below around the cabinets of the main unit.
Top panel: 50 cm or more Side panel: 10 cm or more Back panel: 10 cm or more
Install the system so that the power outlet is easily accessible from the user, and unplug the power cord from the power outlet immediately in case of a trouble. Note that the power supply to the system is not shut down completely by simply setting the power key to OFF. To shut down the power supply completely, it is required to unplug the power cord.
Caution for connection
Do not plug the power cord into the power outlet until all other connections are completed. Before unplugging a connected cord or cable, be sure to set the power key to OFF and unplug the power cord from the power outlet in advance.
Malfunction of microcomputer
If the system does not work properly or the display shows wrong information even when correct connections are made, reset the microcomputer referring to "Operation to reset". (See page 32.)
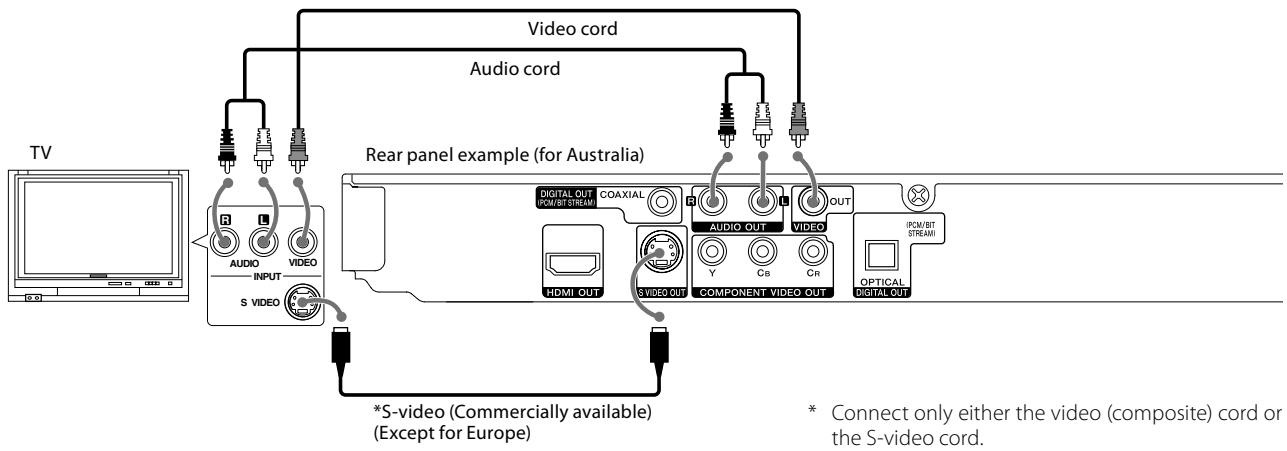
Connecting to a TV with video (composite) or S-video input terminal
flowchart
graph TD
    A["TV"] --> B["Audio INPUT"]
    B --> C["S VIDEO"]
    C --> D["Video cord"]
    D --> E["Audio cord"]
    E --> F["Rear panel example (for Australia)"]
    F --> G["Digital OUT PCM/BIT STREAM"]
    G --> H["COAXIAL"]
    H --> I["AUDIO OUT"]
    I --> J["VIDEO"]
    J --> K["OUT"]
    K --> L["(PCM/BIT STREAM)"]
    L --> M["OPTICAL DIGITAL OUT"]
    M --> N["VIDEO OUT"]
    N --> O["COMPONENT VIDEO OUT"]
    O --> P["Y"]
    O --> Q["Cb"]
    O --> R["CR"]
    R --> S["(PCM/BIT STREAM)"]
    S --> T["*S-video (Commercially available) (Except for Europe)"]
    T --> U["* Connect only either the video (composite) cord or the S-video cord."]
Connecting to a TV with SCART input terminal (For Europe)
Refer to "TV Output Select (only for Europe)" on page 17.

Note:
Make sure the DVD player is connected directly to the TV and not to a VCR, otherwise the DVD image could be distorted by the copy protection system.
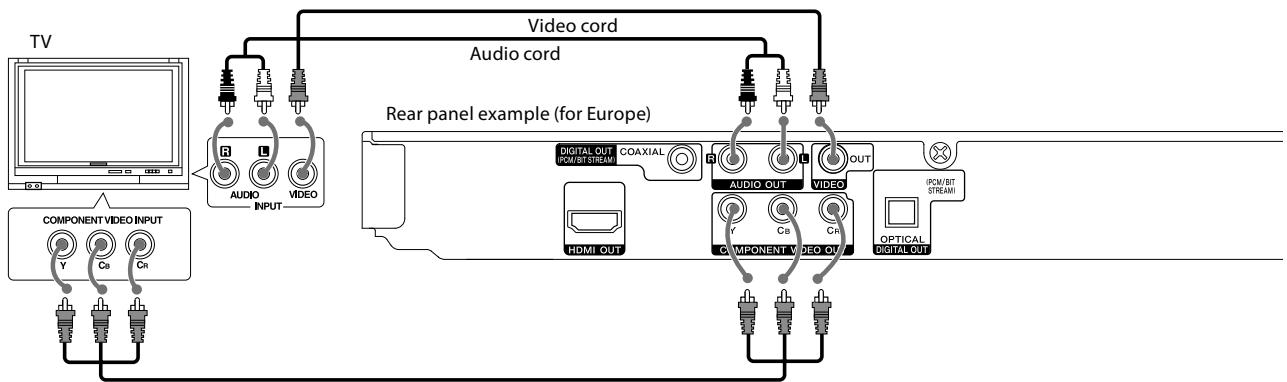
Connecting to a TV with Component input terminal
Refer to "TV Output Select (only for Europe)" on page 17.
flowchart
graph TD
    A["TV"] --> B["COMPONENT VIDEO INPUT"]
    B --> C["VIDEO INPUT"]
    C --> D["Audio cord"]
    D --> E["Video cord"]
    E --> F["Rear panel example (for Europe)"]
    F --> G["VIDEO OUT"]
    G --> H["OPTICAL DIGITAL OUT"]
    style A fill:#f9f,stroke:#333
    style F fill:#ccf,stroke:#333
Component cords (Commercially available)
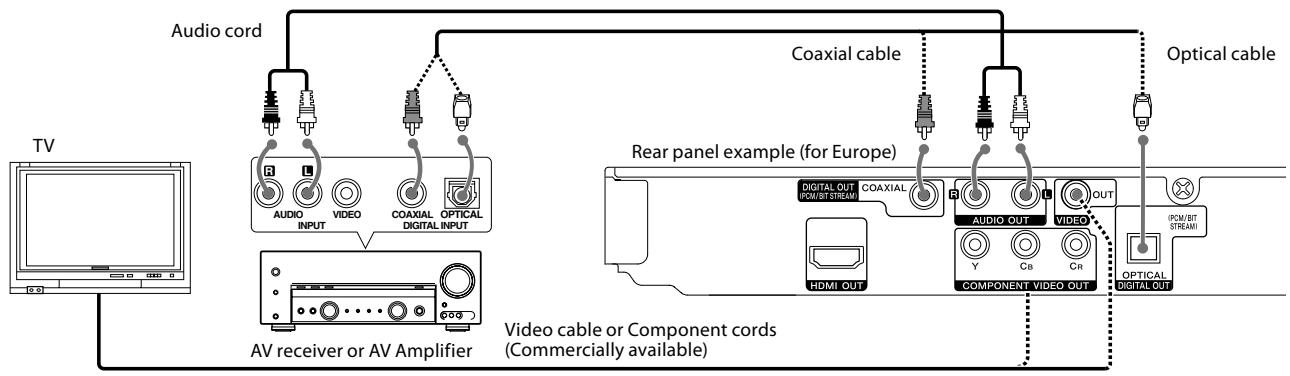
Connecting to an Audio component
For playback of DTS audio, please connect an AV receiver or an AV amplifier which can decode DTS by digital connection.
flowchart
graph TD
    A["TV"] --> B["Audio cord"]
    B --> C["Coaxial cable"]
    C --> D["Optical cable"]
    B --> E["AV receiver or AV Amplifier"]
    E --> F["Video cable or Component cords (Commercially available)"]
    F --> G["Extracable components: HDMI OUT, Y, Cb, Cr, PCM/87 STREAMI"]
    G --> H["Close-up of video cable or component cords"]
    style A fill:#f9f,stroke:#333
    style D fill:#ccf,stroke:#333
    style F fill:#cfc,stroke:#333
Amplifier equipped with 2-channel analog stereo or Dolby Pro Logic II / Pro Logic:
Connect the left and right AUDIO OUT jacks on the DVD player to the audio left and right IN jacks on your amplifier, receiver, or stereo system, using the audio cords.
Amplifier equipped with 2-channel digital stereo (PCM) or a multi-channel decoder (Dolby Digital™ or DTS):
Connect one of the DVD Player's DIGITAL OUT jacks (COAXIAL/OPTICAL) to the corresponding in jack on your amplifier. Use a digital (coaxial/optical) cable. Select "Bitstream" if you connect the DVD player to an amplifier or other equipment with a multi-channel decoder. (See page 17.)
DTS disclaimer clause
When playing DTS-encoded (CDs, DVDs), excessive noise will be exhibited from the analog stereo outputs. To avoid possible damage to the audio system, the consumer should take proper precautions when the analog stereo outputs of the DVD player is connected to an amplification system.
To enjoy DTS Digital Surround™ playback, an external 5.1 channel DTS Digital Surround™ decoder system must be connected to the digital output (S/P DIF, AES/EBU, or TosLink) of the DVD player.
Notes:
• In case an associated system component is connected, also read the instruction manual of the component.
- If the audio format of the digital output does not match the capabilities of your receiver (amplifier), the receiver produces a strong, distorted sound or no sound at all.
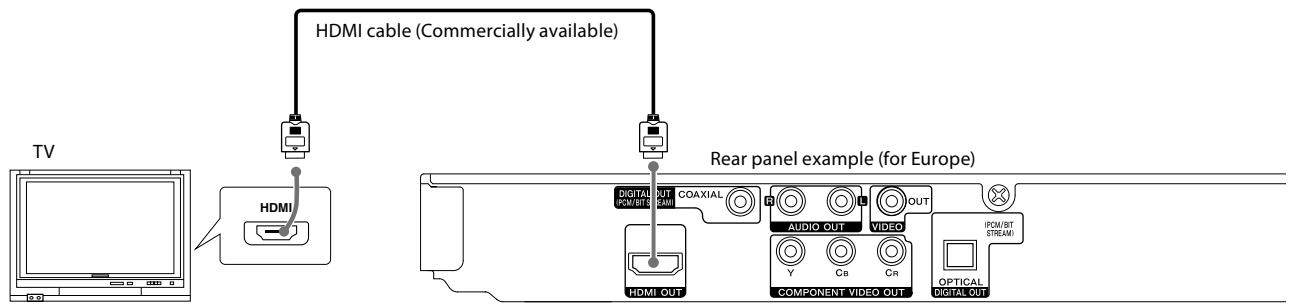
Connecting to a TV with HDMI input terminal
HDMI (High Definition Multimedia Interface) supports both video and audio on a single digital connection for use with DVD Players and other AV devices. If you have an HDMI TV or a monitor, you can connect it to this player using an HDMI cable.
- If you connect the DVD player's DIGITAL OUT jack to an amplifier or other equipment with a multi-channel decoder, select "Bitstream" to enjoy Dolby Digital or DTS playback. (See page 17.)
- When the audio output option of DIGITAL OUT is set by the AUDIO setup, it is applied in both HDMI and digital out (Coaxial, Optical).
- When you use HDMI connection, you can change the resolution (576i (480i), 576p (480p), 720p, 1080i, 1080p) for the HDMI output. (See page 20.)
About HDMI
HDMI was developed to provide the technologies of HDCP (High-bandwidth Digital Content Protection). HDCP is used to protect digital content transmitted and received.
HDMI has the capability to support standard, enhanced or high-definition video plus standard to multi-channel surround-sound audio, HDMI features include uncompressed digital video, a bandwidth of up to 5 gigabytes per second, one connector (instead of several cables and connectors), and communication between the AV source and AV devices such as DTVs.
Notes:
- Both PCM and Bitstream Audio out is available when the sample frequency is set to 48 kHz in HDMI connection.
- If Audio setup is set to bitstream and your TV does not support Bitstream Audio out in HDMI connection, audio sound may not be outputted or distorted.
- When the no sound or noisy sound are outputted with HDMI connection, set the Audio option [Dolby Digital, DTS or MPEG] in SETUP menu to PCM or Off.
- If there is noise or lines on the screen, please check the HDMI cable.
- Not all HDCP-compatible DVI devices will work with this unit.
- If your HDMI TV does not support HDCP, the blue screen appears on the screen.
- If the abnormal picture appears on the TV screen, turn off the unit and then turn the unit on again.
- The unit is able to provide a 1080p full HD image to most 1080p-capable TVs in the market today. However, there are some 1080p TVs available from certain companies that are limited in the types of 1080p images that can be accepted. Specifically, 1080p-capable TVs that don't accept images in 60Hz can't display an image from this unit.
Main unit
Standby mode
At the time of power off with the power cord inserted into a power outlet, a small amount of power is supplied to the system to back up the memory. This status is referred to as the standby mode. During this mode, the system can be switched ON from the remote control unit.
Display
- DVD video:
Elapsed time of the title being played.
• Audio CD, VCD, DivX, MP3, WMA:
Elapsed time of the track (or file) being played.

① Power key (See page 16.)
Switches the unit ON and standby.
② Disc tray (See page 23.)
③ Disc tray open/close (▲) key (See page 23.)
Opens or closes the disc tray.
4 Remote control sensor (See page 15.)
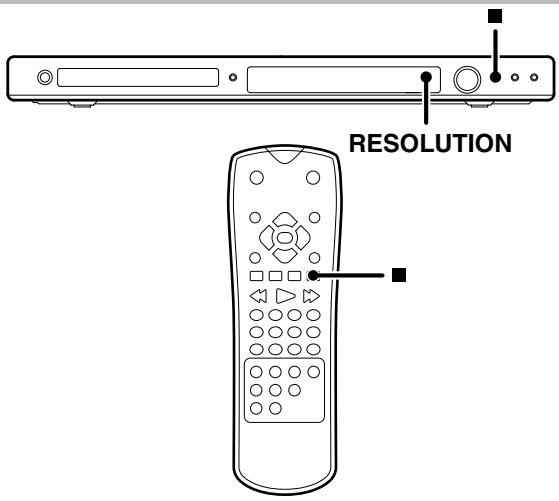
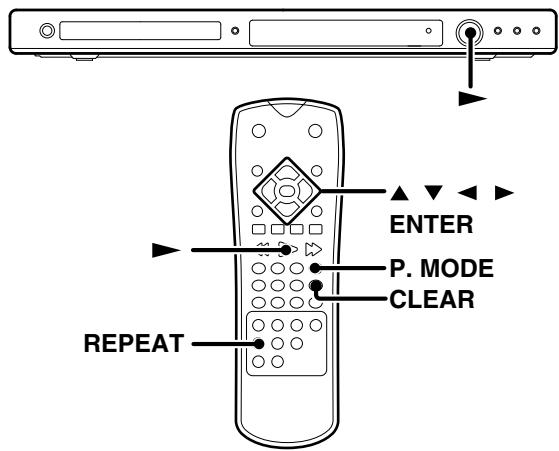
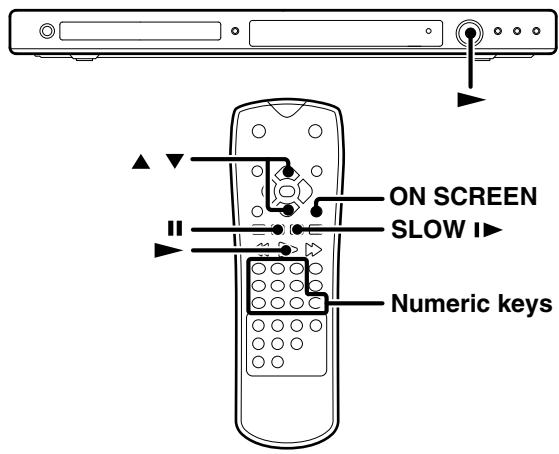
⑤ RESOLUTION key (See page 20.)
Changes the resolution depending on your TV.
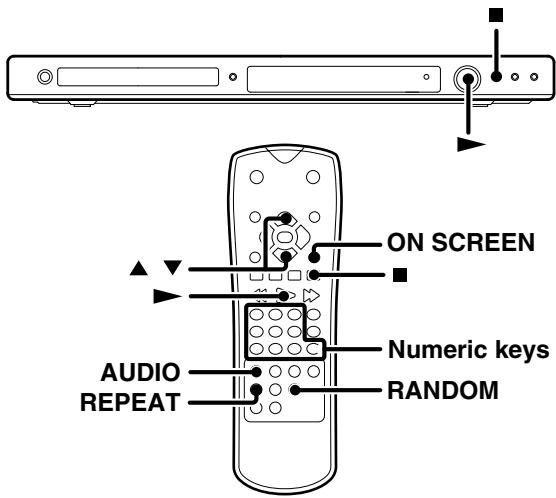
6 ▶ key (See page 23.)
Starts playback.
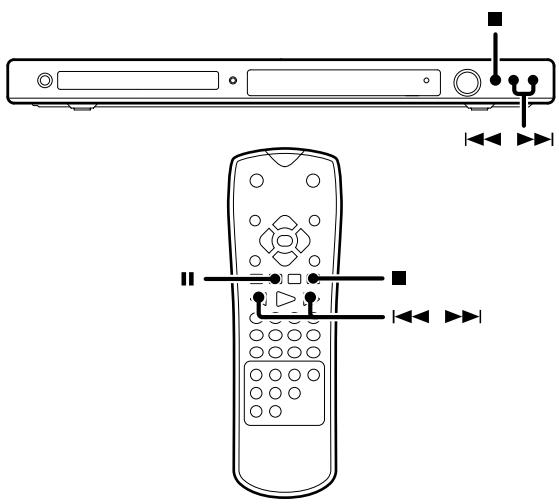
7 ■ key (See page 24.)
Stops playback.
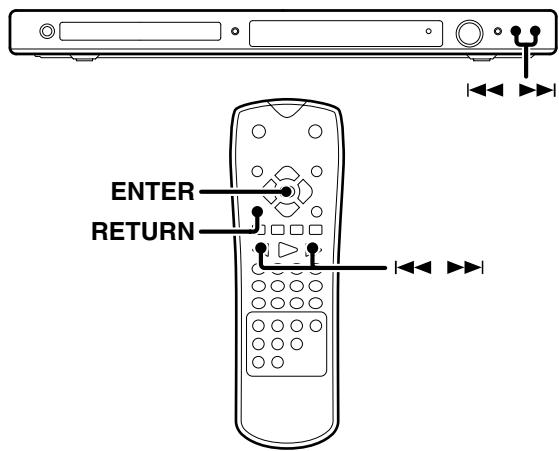
8 |◀◀,▶▶| keys (See page 24.)
Skips or searches (by fast forward or fast reverse) a chapter or track.
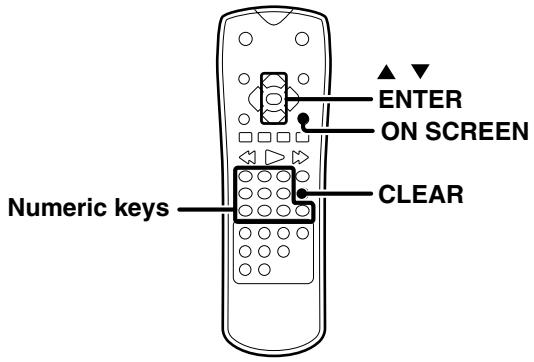
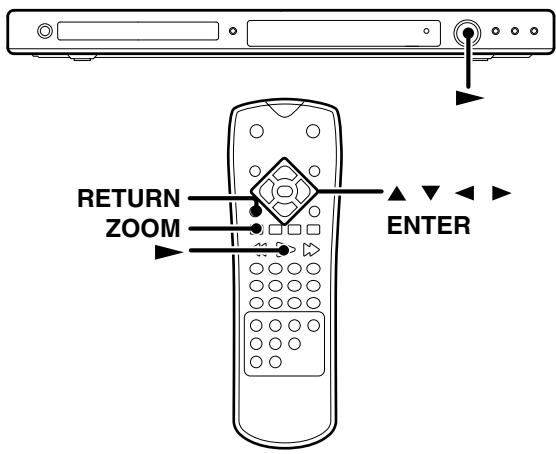
Remote control unit

The remote control keys with the same names as the keys on the main system function in the same way as the keys on the main system.
① Power key (See page 16.)
Switches the unit ON and standby.
② TOP MENU key (See page 23.)
Accesses menu on a DVD disc.
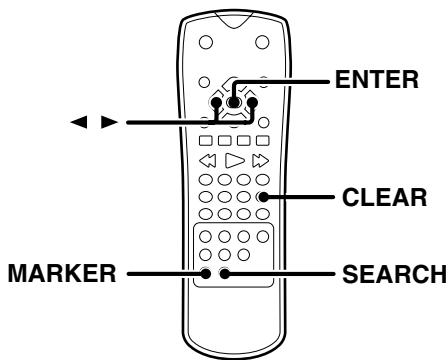
③ ▲, ▼, ◀, ► keys
Selects an item in the menu.
ENTER key
Confirms menu selection.
4 RETURN key (See page 20.)
Returns on a VCD with PBC.
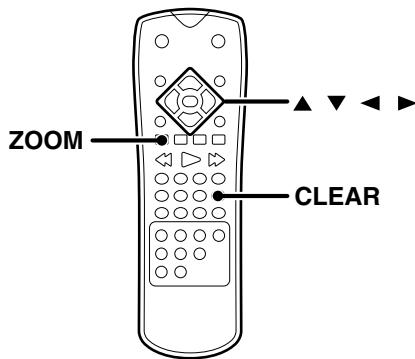
⑤ ZOOM key (See pages 28, 31.)
Enlarges video image.
II key (See pages 24, 26.)
Pauses playback temporarily/press repeatedly for frame-by-frame playback.
SLOW▶ key (See page 26.)
Starts slow motion playback.
■ key (See page 24.)
Stops playback.
6 Numeric keys (See pages 26, 29.)
Selects numbered items in a menu.
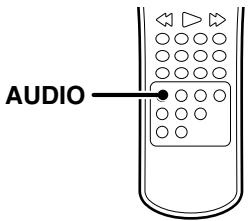
7 AUDIO key (See page 27.)
Selects an audio language or an audio channel.
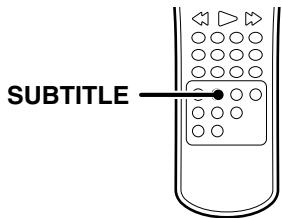
SUBTITLE key (See page 28.)
Selects a subtitle language.
⑧ REPEAT key (See page 24.)
Repeats playback.
A-B key (See page 25.)
Repeats sequence from point A to point B.
⑨ MARKER key (See page 27.)
Marks any point during playback.
SEARCH key (See page 27.)
Displays Marker Search menu.
10 OPEN/CLOSE ▲ key (See page 23.)
Opens or closes the disc tray.
11 MENU key (See page 23.)
Accesses menu on a DVD disc.
12 ON SCREEN key (See page 22.)
Accesses On-Screen display.
13 |◀◀,▶▶| keys (See page 24.)
Skips or searches (by fast forward or fast reverse) a chapter or track.
▶ key (See page 23.)
Starts playback.
14 P. MODE key (See page 25.)
Enter the program edit mode.
15 CLEAR key (See pages 26, 27.)
Removes a track number on the Program List or a mark on the Marker Search menu.
16 ANGLE key (See page 28.)
Selects a DVD camera angle.
SETUP key (See page 16.)
Accesses or removes the Setup menu.
17 RANDOM key (See page 30.)
Plays tracks in random order.
Loading batteries
1 Remove the cover.
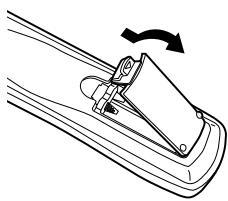
natural_image
Diagram of a mechanical clamp or lever mechanism with a rotating arrow indicating rotation (no text or symbols present)2 Insert batteries.
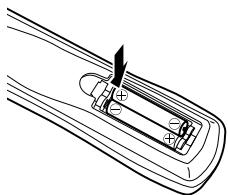
natural_image
Technical line drawing of a mechanical component with a pointed tool inserted (no text or symbols)- Insert two R03 batteries following the polarity indications.
3 Close the cover.

natural_image
Diagram of a mechanical clamp or bracket with an arrow indicating rotational motion (no text or symbols present)Operation
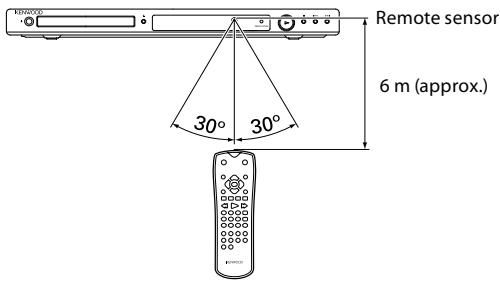
Plug the power cord of the system to a power outlet and press the power key on the remote control unit to turn the system ON. After the system is switched ON, press the desired operation key.
- When pressing more than one remote control keys in sequence, leave a period of about 1 second or more between each press.
- The provided batteries are intended for use in checking operations and their life may be shorter than usual.
- When the remote controllable distance becomes short, replace both of the batteries with new ones.
- The system may malfunction if the remote control sensor is exposed to direct sunlight or the light of a fluorescent lamp with high-frequency lighting system (inverter system, etc.). In this case, change the system installation to prevent malfunction.
When you turn on for the first time
The menu for a language selection will appear when you turn on the unit for the first time. You must select a language to use the unit.
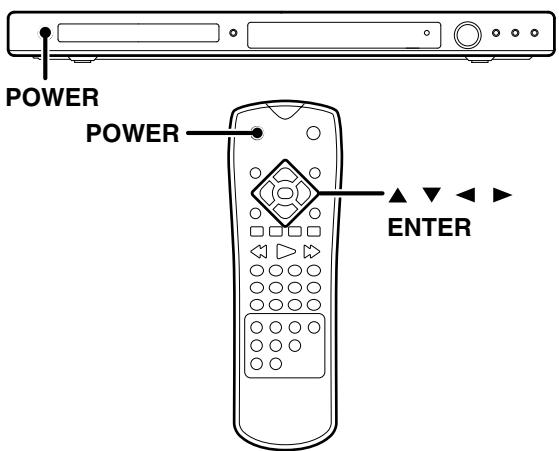
1 Press the [POWER] key to power on.
2 Use [▲/▼/◄/►] keys to select a language then press [ENTER] key and the confirm menu will appear.
3 Use [◀/▶] keys to select [Enter] then press [ENTER] key.
Note:
When the power cord is plugged, wait for several seconds, and then switch the power on.
Set up menu
By using the Setup menu, you can make various adjustments to items such as picture and sound.
You can also set a language for the subtitles and the Setup menu, among other things. For details on each Setup menu item, see pages 17 to 19.
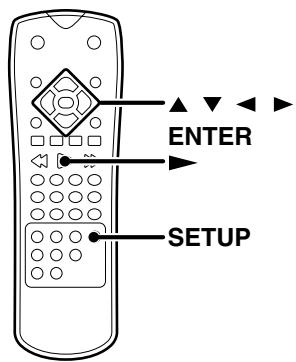
To display and exit the Menu
1 Press the [SETUP] key to display the menu. A second press of the [SETUP] key will take you back to initial screen.
To go to the next level:
Press the Cursor right [▶] key.
To go back to the previous level:
Press the Cursor left [◀] key.
General Operation
1 Press the [SETUP] key.
• The Setup menu appears.
2 Use the Cursor up/down [▲/▼] keys to select the desired option, then press the Cursor right [▶] key to move to the second level.
- The screen shows the current setting for the selected item, as well as alternate setting(s).
3 Use the Cursor up/down [▲/▼] keys to select the second desired option, then press the Cursor right [▶] key to move to the third level.
4 Use the Cursor up/down [▲/▼] keys to select the desired setting, then press the [ENTER] key to confirm your selection. Some items require additional steps.
5 Press the [SETUP] key or [▶] key to exit the Setup menu.
LANGUAGE
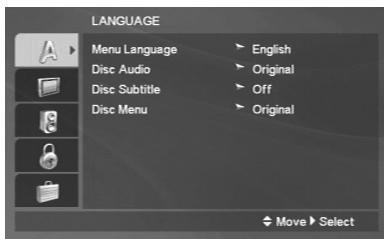
Menu Language
Select a language for the Setup menu and on-screen display.
Disc Audio/ Disc Subtitle/ Disc Menu DVD
Select the language you prefer for the audio Track (disc audio), subtitles, and the disc menu
Original: Refers to the original language in which the disc was recorded.
Other: To select another language, press numeric keys then [ENTER] key to enter the corresponding digit number according to the language code list (See page 21.). If You enter the wrong Language code, press the [CLEAR] key.
DISPLAY
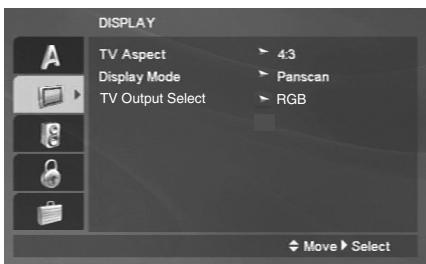
TV Aspect
4:3: Select when a standard 4:3 TV is connected.
16:9: Select when a 16:9 wide TV is connected.
Display Mode
Display Mode setting works only when the TV Aspect mode is set to "4:3".
Letterbox: Displays a wide picture with bands on the upper and lower portions of the screen.
Panscan: Automatically displays the wide Picture on the entire screen and cuts off the portions that do not fit.
TV Output Select (only for Europe)
Set the player's TV Output Select options according to the TV connection type.
RGB: When your TV is connected with the SCART jack.
Y Cb Cr: When your TV is connected with the COMPONENT VIDEO jacks on the DVD player.
Screen saver
The screen saver appears when you leave the DVD player in stop mode for about 5 minutes. If the Screen saver is displayed for 5 minutes, the DVD player automatically turns itself off.
AUDIO
Each DVD disc has a variety of audio output options. Set the player's AUDIO options according to the type of audio system you use.
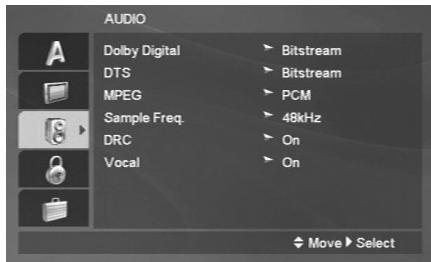
Dolby Digital/ DTS/ MPEG
Bitstream: Select "Bitstream" if you connect the DVD Player's DIGITAL OUT jack to an amplifier or other equipment with a Dolby Digital, DTS or MPEG decoder.
PCM (for Dolby Digital/ MPEG): Select when connected to a two-channel digital stereo amplifier. DVDs encoded in Dolby Digital or MPEG will be automatically down mixed to two-channel PCM audio.
Off (for DTS): If you select "Off", the DTS signal is not output through the DIGITAL OUT jack.
Sample Freq. (Frequency) DVD
If your receiver or amplifier is NOT capable of handling 96 kHz signals, select 48 kHz. When this choice is made, this unit automatically converts any 96 kHz signals to 48 kHz so your system can decode them.
If your receiver or amplifier is capable of handling 96 kHz signals, select 96 kHz. When this choice is made, this unit passes each type of signal through without any further processing.
Check the documentation for your amplifier to verify its capabilities.
When the disc prohibits 96 kHz digital output, the signal always is put out after down-conversion.
DRC (Dynamic Range Control) DVD
With the DVD format, you can hear a program's soundtrack in the most accurate and realistic presentation possible, thanks to digital audio technology. However, you may wish to compress the dynamic range of the audio output (the difference between the loudest sounds and the quietest ones). This allows you to listen to a movie at a lower volume without losing clarity of sound. Set DRC to On for this effect.
This function operates only at the time of playback of DVDs recorded with Dolby Digital.
Vocal DVD
Set to on only when a multi-channel karaoke DVD is playing. The karaoke channels on the disc mix into normal stereo sound.
LOCK (Parental Control)
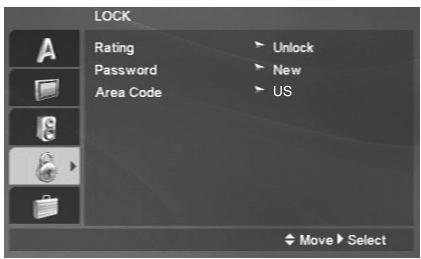
Rating DVD
Some movies contain scenes that may not be suitable for children to view. Many of these discs contain parental control information that applies to the complete disc or to certain scenes on the disc. Movies and scenes are rated from 1 to 8, depending on the country. Some discs offer more suitable scenes as an alternative.
The parental control feature allows you to block access to scenes below the rating you input, thereby preventing your children from being able to view material you believe is unsuitable.
1 Select "Rating" on the LOCK menu then press the Cursor right [▶] key.
2 To access the Rating, Password and Area Code features, you must input the 4-digit password you created. If you have not yet entered a password you are prompted to do so.
Input a 4-digit password and press the [ENTER] key. Enter it again and press the [ENTER] key to verify. If you make a mistake before pressing [ENTER] key, press the [CLEAR] key.
3 Select a rating from 1 to 8 using the Cursor up/down [▲/▼] keys.
Rating 1-8: Rating one (1) has the most restrictions and rating eight (8) is the least restrictive.
Unlock
If you select unlock, parental control is not active and the disc plays in full.
Note:
- When you set "Rating" for the first time, you set an area code first.
- If you set a rating for the player, all disc scenes with the same rating or lower are played. Higher rated scenes are not played unless an alternate scene is available on the disc. The alternative
must have the same rating or a lower one. If no suitable alternative is found, playback stops. You must enter the 4-digit password or change the rating level in order to play the disc.
4 Press the [ENTER] key to confirm your rating selection, then press the [SETUP] key to exit the menu.
Password (Security Code)
You can enter or change password.
1 Select Password on the LOCK menu then press the Cursor right [▶] key.
2 Follow step 2 as shown "Rating" part. "Change" or "New" is highlighted.
3 Enter the new 4-digit code, then press the [ENTER] key. Input it again to verify.
4 Press the [SETUP] key to exit the menu.
If you forget Password
If you forget your password you can clear using the following steps:
1 Press the [SETUP] key to display the Setup menu.
2 Input the 6-digit number "210499" and the password is cleared.
3 Enter a new code as described above.
Area Code DVD
Enter the code of the country/area whose standards were used to rate the DVD video disc, based on the list in the reference chapter.
Ratings are Area-dependent. (See page 21.)
1 Select "Area Code" on the LOCK menu, then press the Cursor right [▶].
2 Follow step 2 as shown "Rating" part.
3 Select the first character using the Cursor up/down [▲/▼] keys.
4 Shift the cursor using the Cursor right [▶] key and select the second character using the Cursor up/down [▲/▼] keys.
5 Press the [ENTER] key to confirm your Area code selection.
OTHERS
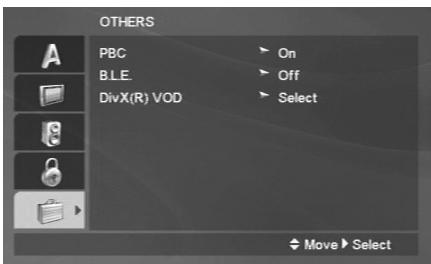
PBC VCD
Set Playback Control (PBC) to On or Off.
On: Video CDs with PBC are played according to the PBC.
Off: PBC is switched off and normal playback is made.
B.L.E. (Black Level Expansion)
To select the black level of playback pictures.
Set your preference and monitor's ability.
On: Expanded grey scale. (0 IRE cut off)
Off: Standard grey scale. (7.5 IRE cut off)
Note:
The B.L.E. function works NTSC system only.
DivX(R) VOD DivX
You can display the DivX DRM (Digital Rights Management) Registration code for your unit only.
The Registration code is used for VOD (Video-On-Demand) service agent. You can purchase or rent an encrypt movie file.
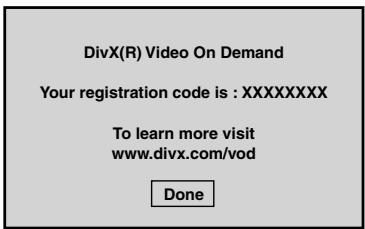
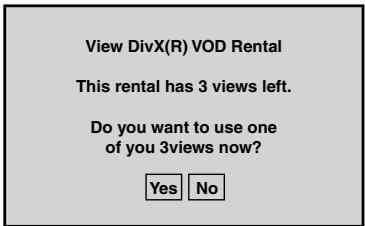
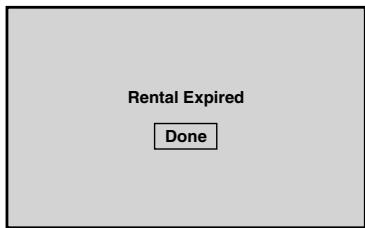
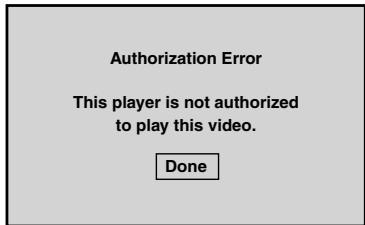
If you rent the DivX VOD file, it has several options of viewing limits as shown below.
Display the number which you can watch the file.
The rental has been expired.
Display the authorization error.
Resolution setting
1 Press the [■] key to stop playback.
2 Press the [RESOLUTION] key once.
- The current resolution setting will be appears in the display window.
![KENWOOD DVF-5500 - Press the [RESOLUTION] key once. - 1](/content/2025/01/83254/images/dcb376f24f659ef54d0a94be2c62168d6e25e95ccd534cc77057a8c6cedd470a.jpg)
3 Press the [RESOLUTION] key repeatedly to change the resolution you want.
The available resolution according to the connections are as shown below.
| Output Connection | Available Resolution | |
| PAL | NTSC | |
| HDMI VIDEO OUT | 1920 x 1080p | 1920 x 1080p |
| 1920 x 1080i | 1920 x 1080i | |
| 1280 x 720p | 1280 x 720p | |
| 720 x 576p | 720 x 480p | |
| 720 x 576i | 720 x 480i | |
| COMPONENTVIDEO OUT | 1920 x 1080p | 1920 x 1080p |
| 1920 x 1080i | 1920 x 1080i | |
| 1280 x 720p | 1280 x 720p | |
| 720 x 576p | 720 x 480 p | |
| 720 x 576i | 720 x 480i | |
| VIDEO OUT | 720 x 576i | 720 x 480i |
| SCART | 720 x 576i | 720 x 480i |
Notes:
- For VIDEO OUT and SCART connections, resolution must be set to 576i (480i) by pressing [RESOLUTION] key.
- If your TV does not accept your resolution setting, abnormal picture appears on the screen. Please read TV's owner's manual then set the resolution that your TV can accept.
- For 720p, 1080i and 1080p resolution on the component video out, only non-copy protected discs can be played back. If the disc is copy protected, it will be displayed at the 576p (480p) resolution.
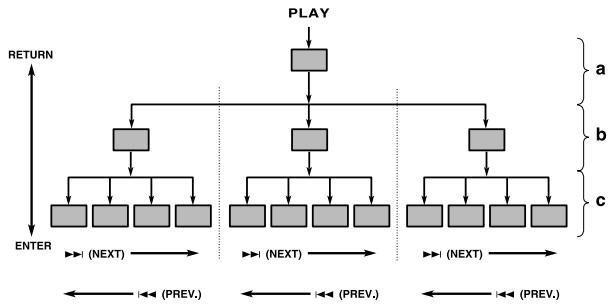
Hierarchical structure of VCD menus (P.B.C. function) VCD
When an item is selected on the menu screen during playback of a P.B.C.-compatible VCD, another menu with more details items may be displayed. When a number of menus are connected in multiple layers in this way, it is said that the menus have a hierarchical structure. In this structure, the desired scene can be reached by repeating item selections on the menu screens.
Example for a hierarchical structure
flowchart
graph TD
    A["PLAY"] --> B["ENTER"]
    B --> C["(NEXT)"]
    A --> D["ENTER"]
    D --> E["(NEXT)"]
    A --> F["ENTER"]
    F --> G["(NEXT)"]
    style A fill:#ccc,stroke:#333
    style B fill:#ccc,stroke:#333
    style C fill:#ccc,stroke:#333
    style D fill:#ccc,stroke:#333
    style E fill:#ccc,stroke:#333
    style F fill:#ccc,stroke:#333
    style G fill:#ccc,stroke:#333
a: First level (menu)
c: Third level (scenes)
Advancing
When an item is selected on the menu screen with the [ENTER] key or the numeric keys, advance is made to the next lower menu level. When the advance destination is the "scene" to be played, the contents will be played.
- When several menus (scenes) can be selected in each level, screen switching is possible with the keys ▶▶▶ I (NEXT) and I◀◀ (PREV.).
Returning
Each time the [RETURN] key is pressed, return is made to the next higher menu.
DVD menu language code list
| Language | Code |
| Abkhazian | 6566 |
| Afar | 6565 |
| Afrikaans | 6570 |
| Albanian | 8381 |
| Ameharic | 6577 |
| Arabic | 6582 |
| Armenian | 7289 |
| Assamese | 6583 |
| Aymara | 6588 |
| Azerbaijani | 6590 |
| Bashkir | 6665 |
| Basque | 6985 |
| Bengali; Bangla | 6678 |
| Bhutani | 6890 |
| Bihari | 6672 |
| Breton | 6682 |
| Bulgarian | 6671 |
| Burmese | 7789 |
| Byelorussian | 6669 |
| Cambodian | 7577 |
| Catalan | 6765 |
| Chinese | 9072 |
| Corsican | 6779 |
| Croatian | 7282 |
| Czech | 6783 |
| Danish | 6865 |
| Dutch | 7876 |
| English | 6978 |
| Esperanto | 6979 |
| Estonian | 6984 |
| Faroese | 7079 |
| Language | Code |
| Fiji | 7074 |
| Finnish | 7073 |
| French | 7082 |
| Frisian | 7089 |
| Galician | 7176 |
| Georgian | 7565 |
| German | 6869 |
| Greek | 6976 |
| Greenlandic | 7576 |
| Guarani | 7178 |
| Gujarati | 7185 |
| Hausa | 7265 |
| Hebrew | 7387 |
| Hindi | 7273 |
| Hungarian | 7285 |
| Icelandic | 7383 |
| Indonesian | 7378 |
| Interlingua | 7365 |
| Irish | 7165 |
| Italian | 7384 |
| Japanese | 7465 |
| Javanese | 7487 |
| Kannada | 7578 |
| Kashmiri | 7583 |
| Kazakh | 7575 |
| Kirghiz | 7589 |
| Korean | 7579 |
| Kurdish | 7585 |
| Laothian | 7679 |
| Latin | 7665 |
| Latvian, Lettish | 7686 |
| Language | Code |
| Lingala | 7678 |
| Lithuanian | 7684 |
| Macedonian | 7775 |
| Malagasy | 7771 |
| Malay | 7783 |
| Malayalam | 7776 |
| Maltese | 7784 |
| Maori | 7773 |
| Marathi | 7782 |
| Moldavian | 7779 |
| Mongolian | 7778 |
| Nauru | 7865 |
| Nepali | 7869 |
| Norweqian | 7879 |
| Oriya | 7982 |
| Panjabi | 8065 |
| Pashto, Pushto | 8083 |
| Persian | 7065 |
| Polish | 8076 |
| Portuguese | 8084 |
| Quechua | 8185 |
| Rhaeto-Romance | 8277 |
| Rumanian | 8279 |
| Russian | 8285 |
| Samoan | 8377 |
| Sanskrit | 8365 |
| Scots Gaelic | 7168 |
| Serbian | 8382 |
| Serbo-Croatian | 8372 |
| Shona | 8378 |
| Sindhi | 8368 |
| Language | Code |
| Singhalese | 8373 |
| Slovak | 8375 |
| Slovenian | 8376 |
| Somali | 8379 |
| Spanish | 6983 |
| Sudanese | 8385 |
| Swahili | 8387 |
| Swedish | 8386 |
| Tagalog | 8476 |
| Tajik | 8471 |
| Tamil | 8465 |
| Tatar | 8484 |
| Telugu | 8469 |
| Thai | 8472 |
| Tibetan | 6679 |
| Tigrinya | 8473 |
| Tonga | 8479 |
| Turkish | 8482 |
| Turkmen | 8475 |
| Twi | 8487 |
| Ukrainian | 8575 |
| Urdu | 8582 |
| Uzbek | 8590 |
| Vietnamese | 8673 |
| Volapük | 8679 |
| Welsh | 6789 |
| Wolof | 8779 |
| Xhosa | 8872 |
| Yiddish | 7473 |
| Yoruba | 8979 |
| Zulu | 9085 |
Area Code code list
| Area | Code |
| Afghanistan | AF |
| Argentina | AR |
| Australia | AU |
| Austria | AT |
| Belgium | BE |
| Bhutan | BT |
| Bolivia | BO |
| Brazil | BR |
| Cambodia | KH |
| Canada | CA |
| Chile | CL |
| China | CN |
| Colombia | CO |
| Congo | CG |
| Costa Rica | CR |
| Croatia | HR |
| Czech Republic | CZ |
| Denmark | DK |
| Ecuador | EC |
| Egypt | EG |
| El Salvador | SV |
| Area | Code |
| Ethiopia | ET |
| Fiji | FJ |
| Finland | FI |
| France | FR |
| Germany | DE |
| Great Britain | GB |
| Greece | GR |
| Greenland | GL |
| Islands | HM |
| Hong Kong | HK |
| Hungary | HU |
| India | IN |
| Indonesia | ID |
| Israel | IL |
| Italy | IT |
| Jamaica | JM |
| Japan | JP |
| Kenya | KE |
| Kuwait | KW |
| Libya | LY |
| Luxembourg | LU |
| Area | Code |
| Malaysia | MY |
| Maldives | MV |
| Mexico | MX |
| Monaco | MC |
| Mongolia | MN |
| Morocco | MA |
| Nepal | NP |
| Netherlands | NL |
| Netherlands Antilles | AN |
| New Zealand | NZ |
| Nigeria | NG |
| Norway | NO |
| Oman | OM |
| Pakistan | PK |
| Panama | PA |
| Paraguay | PY |
| Philippines | PH |
| Poland | PL |
| Portugal | PT |
| Romania | RO |
| Russian Federation | RU |
| Area | Code |
| Saudi Arabia | SA |
| Senegal | SN |
| Singapore | SG |
| Slovak Republic | SK |
| Slovenia | SI |
| South Africa | ZA |
| South Korea | KR |
| Spain | ES |
| Sri Lanka | LK |
| Sweden | SE |
| Switzerland | CH |
| Taiwan | TW |
| Thailand | TH |
| Turkey | TR |
| Uganda | UG |
| Ukraine | UA |
| United States | US |
| Uruguay | UY |
| Uzbekistan | UZ |
| Vietnam | VN |
| Zimbabwe | ZW |
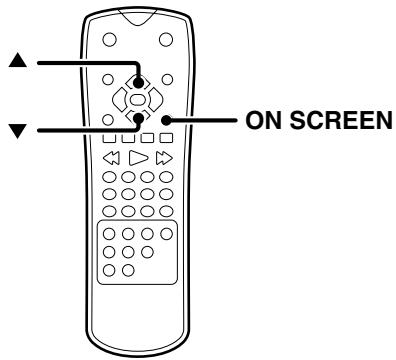
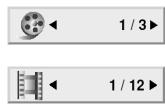
On screen display


The on-screen Banner Display contains many playback features. To see the Banner Display, press the [ON SCREEN] key while a disc is playing. Use the Cursor up/down [▲/▼] keys to move through the different features in the Banner Display. Each feature is illustrated with an icon.
Example:
On-Screen Display during playing DVD video

Title Number

Chapter Number

Time search

Audio language and Digital Audio Output mode

Subtitle language

Angle
On-Screen Display during playing VCD

Track Number (or PBC mode)

Time search

Audio Channel
On-Screen Display during playing DivX

Track Number

Time search

Audio language and Digital Audio Output mode

Subtitle language
Note:
The on screen display is switched off when no operation is performed for a few seconds.
Last Scene Memory


This player memorizes last scene from the last disc that is viewed. The last scene remains in memory even if you remove the disc from the player or switch off the player. If you load a disc that has the scene memorized, the scene is automatically recalled. If you don't want to use the Last Scene Memory, press the [■] key during stop.

natural_image
Front view line drawing of a desktop computer chassis with ports and indicator lights (no text or symbols)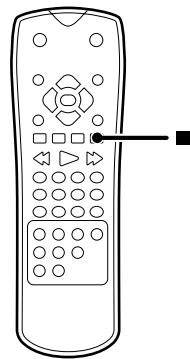
natural_image
Line drawing of a remote control with keypad and control buttons (no text or symbols)Note:
This player does not memorize the scene of a disc if you switch off the player before commencing to play the disc.
Basic play

1 Press the [POWER] key to power on.
2 Press the [▲] key to open the tray.
3 Place a disc.
4 Start playback.
To start playback of DVD video, audio CD or VCD
Press the [▶] key.
Elapsed time of the title, track or file display
- When [▶] key is pressed while a tray is open, the tray closes automatically, and then playback begins.
Note:
When a Disc Menu appears on the screen
In case of interactive DVDs, a Disc Menu appears on the screen. Then press the [ENTER] key to select specific menu you want to play by using Cursor keys.
To start playback of audio CD, DivX, MP3, WMA or JPEG files
It is not possible to play back folders and files that exceed the maximum limitations of the media.
A certain amount of time is required for the player to confirm the media on which DivX/MP3/WMA/JPEG files have been recorded before playback will commence.
Press Cursor up/down [▲/▼] keys to select desired track or file, then press the [▶] key or the [ENTER] key to start playback.
Press the [MENU] key to go to the next page.
Example of MP3 menu
Example of JPEG menu
- When different file types like music, photo, and movie files are mixed on one disc, press the [TOP MENU] key and select the file type (music, photo, movie; see page 8.) to be played back.
Notes:
• After all files of a folder have been played, playback will stop.
- If you are in a file list on the MP3/WMA menu and want to return to the folder list, use Cursor up/down [▲/▼] keys to highlight ⬆ and press the [ENTER] key.
Disc playback features
Notes:
- You won't hear the sound (audio) on the DVD, VCD and DivX when you're using the Skip, Search, Step or Slow motion features.
- Playback features are not available during the opening credits of a movie.
To stop playback

Press the [■] key.
To pause playback

Press the [II] key.
• Each press pauses and plays the disc alternately.
- During DVD, VCD playback, step operation is performed each time this key is pressed. (See page 26.)
Skipping chapters, tracks or files

Press the [◀◀] or [▶▶] key.
- The chapter (or track) in the direction of the key pressed is skipped, and the selected chapter (or track) will be played from the beginning.
- When the [◀◀] key is pressed once during playback, the chapter (or track) being played will be played from the beginning.
- When the [◀◀] key is pressed within 3 seconds after the start of chapter (or track) playback, playback starts from the start of the preceding chapter (or track).
Note:
The Chapter feature won't work if the disc isn't formatted with separate chapters.
Searching CD DVD VCD DivX MP3 WMA
During playback, press the [i◄◄] or [►►i] key for more than 2 seconds to select the searching speed, then release the key.
Each press and hold the [I◄◄] or [►►I] key switches the searching speed.
At the time of DVD video or DivX playback
① ▷ (Normal speed)
② ▷ ▷
③ ▷ ▷ ▷
④ ▷ ▷ ▷ ▷
⑤ ▷▶▶▶▶
At the time of VCD playback
① ▷ (Normal speed)
② ▷ ▷
③ ▷ ▷ ▷
④ ▷ ▷ ▷ ▷
At the time of audio CD, MP3 or WMA playback
① ▷ (Normal speed)
② ▷▷×2
③ ▷▷×4
④ ▷▷×8
- Press the [▶] key at any time to resume normal playback.
• P.B.C. on mode of VCD, the search function does not work.
Repeat play CD DVD VCD DivX MP3 WMA
Desired title, chapter, track or disc can be played back repeatedly.
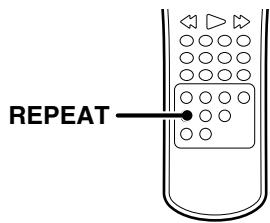
During playback, press the [REPEAT] key.
Repeat icon
![KENWOOD DVF-5500 - During playback, press the [REPEAT] key. - 1](/content/2025/01/83254/images/5d433516a3f326a93b1120ad09f47286c9e601d8002b4ab0560c895923653bad.jpg)
Each press switches the selection.
At the time of DVD video playback
① "Chapter"
② "Title"
③ "Off" (Repeat off)
At the time of audio CD, VCD, DivX, MP3 or WMA playback
① "Track"
② "All"
③ Goes off (Repeat off)
- To cancel repeat playback, press the [REPEAT] key and select "Off".
Notes:
- If you press the [▶▶] once during Repeat Chapter or Repeat Track playback, the repeat playback cancels.
• P.B.C. on mode of VCD, the Repeat play function does not work.
A-B Repeat play


The A-B repeat function lets you mark a segment to repeat between the beginning "A" and the end "B" of the segment you want to replay.
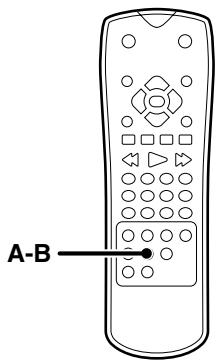
1 Press the [A-B] key when you want to choose a scene (sound) as the beginning point.
Repeat A icon
![KENWOOD DVF-5500 - Press the [A-B] key when you want to choose a scene (sound) as the beginning point. - 1](/content/2025/01/83254/images/835a00a4907444908b2e246363c14d1ef52ee4bd957592f7566d9e9961fd6f78.jpg)
- "A" display appears.
2 Press the [A-B] key again to choose a scene (sound) as the end point.
Repeat A-B icon
![KENWOOD DVF-5500 - Press the [A-B] key again to choose a scene (sound) as the end point. - 1](/content/2025/01/83254/images/c5fc51d56dbc51d6abd90d18fd9a53360f1c3146fd2dddf4e1023860c760d41b.jpg)
- "A-B" display appears and the repeat sequence begins.
• To cancel A-B Repeat playback, press the [A-B] key.
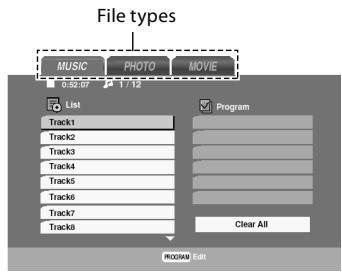
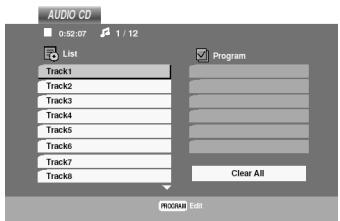
Program play


You can listen to the desired tracks of the current CD, MP3 or WMA in any desired order.
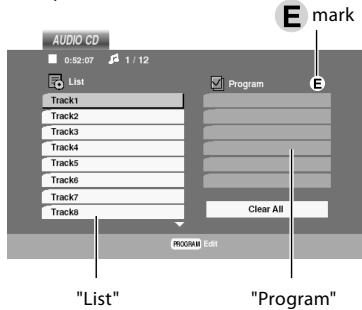
Program Edit
1 Insert a disc and close the tray.
• Audio CD or MUSIC menu appears.
2 Press the [P. MODE] key.
- The E mark will appear to the right of the word "Program" on the right side of the menu screen.
Example of Audio CD menu
• To exit the Program Edit mode, press the [P. MODE] key again.
3 Select a specific track on the "List" by pressing Cursor up/down [▲/▼] keys, then press the [ENTER] key to place the selected track on the "Program" list.
4 You can select maximum 30 values by repeating step 3.
5 Select the track you want to start playing on the Program list by pressing Cursor up/down [▲/▼] keys.
6 Press the [▶] key to start.
- Playback begins in the order in which you programmed tracks. Playback stops after all of the tracks on the Program list have played once.
- The unit stops when the [■] key is pressed. To restart program play, press the [▶] key.
To repeat program play
During program playback, press the [REPEAT] key.
Each press switches the selection.
① "TRACK": repeats the current track or file.
② "ALL": repeats all the tracks (files) on programmed list.
③ Goes off (repeat off)
Note:
If you press the [▶▶] once during Repeat Track playback, the repeat playback cancels.
Delete a track from Program list
1 During stop mode, press the [P. MODE] and the E mark will appear.
2 Press the Cursor [◀/▶/▲/▼] keys to select the track that you wish to delete from the Program list.
3 Press the [CLEAR] key.
Delete the complete Program list
1 During stop mode, press the [P. MODE] and the E mark will appear.
2 Select "Clear All", then press the [ENTER] key.
- The complete program for the disc is deleted.
- The programs are also cleared when the disc is removed.
Movie disc playback
STEP (freeze frame and frame advance) DVD VCD DivX
During playback, press the [II] key.
• Each time you press the key, the picture advances one frame.
- Press the [▶] key to resume normal playback.
Slow motion playback DVD VCD DivX
During playback, press the [SLOW I▶] key.
Each press switches the motion speed. (Slow Reverse is not possible)
① 1/16
② 1/8
③ 1/4
④ 1/2
- Press the [▶] key to resume normal playback.
- Slow motion playback is not available for playing the VR (Video Recording) disc.
Playback from desired title, chapter or track DVD VCD DivX
Because DVD video discs use digital technology, a title can be divided into individual chapters (similar to tracks on a CD).
At the time of DVD video playback
1 Press the [ON SCREEN] key.
2 Press the Cursor up/down [▲/▼] keys to select the title or chapter icon.
Title Number
Chapter Number
3 Press the numeric keys, then press the [▶] key.
To select track No. 23: 2, 3 and ▶
Note:
The Chapter feature won't work if the disc isn't formatted with separate chapters.
At the time of VCD playback
Press the numeric keys, then press the [▶] key.
To select track No. 23: 2, 3 and ▶
Note:
P.B.C. on mode of VCD, the Selecting a Track function may not work. (See page 20.)
Select Audio Language DVD DivX
If the disc was created with different language tracks, you can use the [AUDIO] key to temporarily change the DVD player's Audio setting.
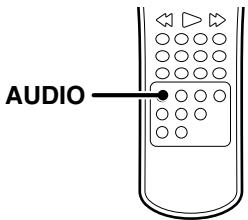
During playback, press the [AUDIO] key.
The language is switched each time the [AUDIO] key is pressed.
![KENWOOD DVF-5500 - During playback, press the [AUDIO] key. - 1](/content/2025/01/83254/images/e9ead6a05587c7e42ea9db2fb76e59f6bc1a2876a3e7fbdfdc65990bde214a05.jpg)
DVD Audio language icon
![KENWOOD DVF-5500 - During playback, press the [AUDIO] key. - 2](/content/2025/01/83254/images/21c4f6f7b89d3685ca32e411aa20f22229e98b0dbe1545a05bf878a0218b042a.jpg)
DivX Audio language icon
Notes:
- The language feature only works if the disc was created with multiple audio tracks.
- When you chose an audio language by the [AUDIO] key, you only override the audio language setting in the DVD Player's main menu (in the Language Preferences menu within Setup menu) temporarily.
Select the Audio channel VCD
You can choose to play back only the right or the left channel of audio recorded on the disc, or you can select stereo playback.
During VCD playback, press the [AUDIO] key.
![KENWOOD DVF-5500 - During VCD playback, press the [AUDIO] key. - 1](/content/2025/01/83254/images/ee5074124ac39f50fd232787148fbe470ec6bd390e5de2675b019fe59ee175e7.jpg)
Audio channel icon
Each press switches the selection.
① LEFT
② RIGHT
③ STEREO
Using Marker DVD VCD DivX
The marker feature lets you mark a point on the disc that you can go to quickly. You can store up to 9 marker points
Create the Marker
When you reach the scene you want to mark, press the [MARKER] key.

1:1/9
Marker icon
- The marker icon appears on the TV screen briefly.
- Repeat to enter up to 9 marker points.
To recall or clear a marked scene
1 During playback, press the [SEARCH] key.
![KENWOOD DVF-5500 - During playback, press the [SEARCH] key. - 1](/content/2025/01/83254/images/1461e491d2984bbf2c5fd8690e8ae1f3fe1dd1aa52dba8c583dc2c1f9f8639f7.jpg)
1 2 3 4 5
Marker search icon
• The marker search menu appears on the screen.
2 Press the Cursor right/left [◀/▶] keys to select a marker number that you want to recall or clear.
3 Press the [ENTER] key to playback from the marked scene or press the [CLEAR] key to clear the selected number.
Notes:
- Depending on the disc, the marker function may not work.
- P.B.C. on mode of VCD, the marker function does not work. (See page 20.)
- The marker points are cleared each time a disc is removed from the player or when the power is turned off.
Select Camera angle DVD
Some disc contains multiple angles particular scene or sequence. If the disc only has one angle, this feature won't work. When you are playing a DVD disc contains scenes recorded different camera angles, the angle indicator will blink on the TV screen.

1 During the angle indicator has blinked, press the [ANGLE] key.
![KENWOOD DVF-5500 - During the angle indicator has blinked, press the [ANGLE] key. - 1](/content/2025/01/83254/images/e97c2aec2d6a49b6385bce982f6e50386626d26966c31bc7ca2a8a780fbf1aac.jpg)
Angle icon
![KENWOOD DVF-5500 - During the angle indicator has blinked, press the [ANGLE] key. - 2](/content/2025/01/83254/images/06ce384efee49e4194a419a8ecb319d913fc3f57e03e9eaeb9ec17681d131ca1.jpg)
natural_image
Illustration of a boat with steam rising, no text or symbols present2 Select the Camera angle with press the [ANGLE] key.
![KENWOOD DVF-5500 - Select the Camera angle with press the [ANGLE] key. - 1](/content/2025/01/83254/images/f59dabbd7dccbeacd20aba3adc222f136158186875cd59a52c3f7ea19aeee94e.jpg)
natural_image
Simple line drawing of a boat with wavy lines indicating speed (no text or symbols)Select Subtitle Language DVD DivX
You can change the Subtitle language while you're watching a disc (but only if the disc was created with subtitles).
During playback, press the [SUBTITLE] key.
The language is switched each time the [SUBTITLE] key is pressed.
![KENWOOD DVF-5500 - During playback, press the [SUBTITLE] key. - 1](/content/2025/01/83254/images/98a13164cdec1a3ecb416c8f5affe7e78fa0d4c304392b46594016c57d30b0c3.jpg)
Subtitle language icon
Notes:
- The subtitle feature only works if the disc was created with multiple subtitle tracks.
- The subtitle menu of the disc appears in some discs.
- The subtitle file of the DivX file is displayed only srt, txt, smi, ssa and sub.
- If there is no information or there is a code that can not read in the DivX file, "1" etc are displayed.
Notice for displaying the DivX subtitle
If the subtitle does not display properly, please follow the steps below.
1 During playback, press and hold [SUBTITLE] key for about 3 seconds. The language code will appear.
2 Press the Cursor right/left [◀/▶] keys to select another language code until the subtitle is displayed properly.
3 Press and hold [SUBTITLE] key for about 3 seconds.
Zoom function DVD VCD DivX
Use zoom to enlarge the video image.
1 During playback, press the [ZOOM] key.
- The square frame appears briefly in the right bottom of the picture.
Each press switches the selection.
① 100 % size (normal size)
② 400 % size
③ 1600 % size
2 Press the Cursor [◀/▶/▲/▼] keys to move through the zoomed picture.
- To resume normal playback, press the [ZOOM] or [CLEAR] key repeatedly.
Note:
Zoom may not work on some DVDs.
To start playing at any chosen time on the disc.
1 During playback, press the [ON SCREEN] key.
2 Press Cursor up/down [▲/▼] keys to select the time clock icon.

00:20:09
Time clock icon
-
"--:--::--" appears.
3 Press Numeric keys to input the required start time in hours, minutes and seconds from left to right. -
If you enter the wrong numbers, press the [CLEAR] to remove the numbers you entered. Then input the correct numbers.
4 Press the [ENTER] key to confirm. - Playback starts from the selected time.
Using the TV screen to start playback CD MP3 WMA
Once you insert an audio CD, MP3 or WMA disc a menu appears on the TV screen.
Audio CD menu
MP3/WMA menu
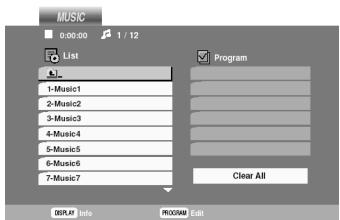
Press the Cursor up/down [▲/▼] keys to select a track then press the [▶] or [ENTER] and playback starts.
Playback from desired track
CD MP3 WMA
Press the numeric keys.
To select track No. 23: 2, 3
To display the ID3 tag MP3 WMA
When playing a file containing information such as track titles, you can see the information by pressing [ON SCREEN] key.
Press the [ON SCREEN] key to display the ID3 tag.
- Title, Artist, Album, Year and Comment display appears on the TV screen.
Each press switches the selection.
① (File name)
② Title
③ Artist
④ Album
⑤ Year
⑥ Comment
- If there is no information, "No ID3 Tag Info" appear on the display.
Random play CD MP3 WMA VCD
The tracks of the disc are played in random order.
During playback, press the [RANDOM] key.
• The Random Play display appears on the TV screen.
• Each time you press the [RANDOM] key, random play would be on and off.
- By pressing [▶▶] key during random playback, the unit selects another track and resumes random playback.
To cancel random play
1 Press the [■] key to stop playback.
2 Press the [RANDOM] key to cancel random play-back.
To repeat random play
During random playback, press the [REPEAT] key.
Each press switches the selection.
① "TRACK"
② "ALL"
③ Goes off (repeat off)
Note:
- After all tracks of a disc have been played in random order, play-back will stop.
• P.B.C. on mode of VCD, the random play function does not work.
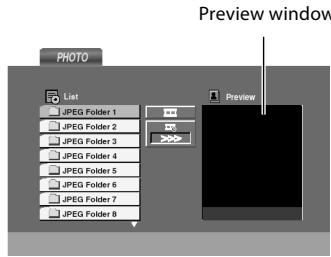
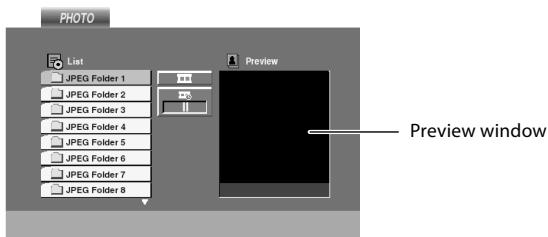
To start playback JPEG
Once you insert an audio JPEG disc a menu appears on the TV screen.
1 Press the Cursor up/down [▲/▼] keys to select a folder then press the [ENTER] key.
2 A list of files in the folder appears. If you are in a file list and want to return to the previous Folder list, use the Cursor up/down [▲/▼] keys to highlight 🔒 and press the [ENTER] key.
3 Select desired file, then press the [▶] or [ENTER] key.
Zoom function JPEG
Use zoom to enlarge the photo image.
1 During playback, press the [ZOOM] key.
- The square frame appears briefly in the right bottom of the picture.
Each press switches the selection.
① 100 % size (normal size)
② 400 % size
③ 1600 % size
2 Press the Cursor [◀/▶/▲/▼] keys to move through the zoomed picture.
- To resume normal playback, press the [ZOOM] or [CLEAR] key repeatedly.
Note:
When the resolution is set to 720p or 1080i, this function is not available.
To rotate picture JPEG
Press the Cursor up/down [▲/▼] keys to rotate the picture clockwise or counter clockwise.
To hide the menu bar JPEG
Press the [RETURN] keys to hide the menu bar.
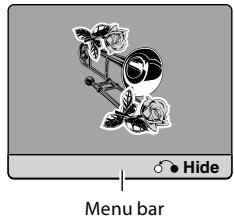
- Switching between display and no display is done each time the [RETURN] key is pressed.
Note:
When the resolution is set to 720p or 1080i, this function is not available.
Slide show JPEG
The Slide show function can be used to switch photo images automatically from one file to the next.
There are 3 Slide speed options.
1 Insert a disc and close the tray.
2 Press Cursor [◀/▶/▲/▼] keys to highlight the
speed icon ( )
- Go to step 4 if the slide speed is not to be changed.
3 Press Cursor left/right [◀/▶] keys to select the option you want to use.
Each press switches the selection.
4 Press Cursor up/down [▲/▼] keys to select the icon and then press the [ENTER] key.
- Playback starts.
Troubles are not always due to malfunction or failure of the system. In case of a trouble, check the following tales before calling for service.
Operation to reset
The microprocessor may fall into malfunction (impossibility to operate erroneous display, etc.) when the power cord is unplugged while power is ON or due to an external factor.
In this case, switch off the power, wait for several seconds, and then switch the power on again.
DVD player unit
| Symptom | Remedy |
| The system cannot be switched ON. | When the power cord is plugged, wait for several seconds, and then switch the power on. |
| Playback does not start when the [▶] key is pressed. | Load a disc and press the [▶] key.There are no signals recorded on the side of the disc being played. Turn the disc over and properly place it on the disc tray. |
| Playback starts but no image/sound is seen heard. | Turn on the TV.Properly reconnect the connection cords. (See pages 11 - 13.) |
| The picture is disrupted when the image is fast forwarded or fast reversed. | The picture is slightly disrupted during fast forward and fast reverse operations. This is not a malfunction. |
| No sound is heard. | Properly connect the audio cords. (See page 12.)Set the sound volume to an appropriate level.The player is in a special playback mode. Press the [▶] key to resume normal play-back mode. |
| No picture is displayed. | Setting to progressive mode has been done for a TV not compatible with progressive mode. Press the [RESOLUTION] key to return to interlaced mode. |
| The picture does not look good or the picture/sound quality is poor. | A nearby device is generating noise. Separate this unit as far as possible from the device you think is generating the noise.Refer to the "Care and storage of disc" section and wipe dirt from the disc. (See page 10.)Refer to the "Be careful against condensation" section and evaporate the condensation. (See page 10.) |
| It takes a while for the disc to start playing. | Time is required for the unit to detect the disc type and size and for the rotation of the motor to stabilize. This is not a malfunction. Approximately 10 to 20 seconds are required for a disc to start playing, although the time differs depending on the disc. |
| The tray opens automatically. | Properly place the disc on the tray. |
| The top and bottom of the screen cannot be seen, or the screen becomes black-and-white. | Refer to the "Video formats" section, and use a disc with the appropriate video format for your TV or a TV with the appropriate video format for the disc. (See page 9.) |
| The subtitle is not displayed. | The subtitle cannot be displayed when the DVD disc being played does not contain the recording of subtitles.Press the [SUBTITLE] key to switch on the subtitle mode. |
| The voice (or subtitle) language cannot be changed. | The voice (or subtitle) language cannot be changed when the DVD disc being played does not contain the recording of more than one voice (or subtitle) language. |
| The viewing angle cannot be changed. | The viewing angle cannot be changed when the DVD disc being played does not contain the recording of more than one angle.More than one viewing angle may be recorded only in limited sections in a disc. |
| Playback will not start even after a title is selected. | Check the viewing restriction level (Rating) setting. (See page 18.) |
| The parental level cannot be changed. | You have forgotten the password. Set the initial setup to the factory setup with the following procedure.1Press the [SETUP] key on the remote to display the Setup menu.2Input the 6-digits number "210499" and the password is cleared.3Enter a new code. (See page 18.) |
| The voice or subtitle language selected in the initial setting is not played. | Use a DVD disc containing the recording of the selected voice or subtitle language.Press the [SUBTITLE] or the [AUDIO] key on the remote and select the language.The DVD specifications provide for selection at the menu screen. Select at the menu screen of the disc. |
| Menu screen messages are not shown in the desired language. | Select disc menu language. (See page 17.) |
| A VCD cannot be played using menus. | Menu playback is available only with VCD discs recorded with P.B.C. |
Remote control unit
| Symptom | Remedy |
| Remote control operation is not possible. | Replace with new batteries. (See page 15.)Operate the unit inside the remote controllable range. (See page 15.) |
Inhibition icon
| Symptom | Remedy |
| The inhibition icon is displayed and remote control is not possible. | • Playback is restricted intentionally by the software producer. Please try another operation. |
[Type]
System......DVD video player
Laser......Semiconductor laser
[Audio Block]
Frequency response
Sampling frequency ; 44.1 kHz ...... 4 Hz \~ 20 kHz
Sampling frequency ; 48 kHz.... 4 Hz \~ 22 kHz
Sampling frequency ; 96 kHz.... 4 Hz \~ 44 kHz
Signal to noise ratio ...... More than 100 dB
Dynamic range......More than 92 dB
Total harmonic distortion .... Less than 0.020 % (1 kHz)
Analog output level/impedance 2 V / 330 Ω
Digital output level/impedance
COAXIAL 0.5 Vp-p / 75 Ω
OPTICAL......-21 dBm \~ -15 dBm (Wave length 660 nm)
[Video Block]
Video output format.... NTSC/PAL
Composite video output level....1 Vp-p (75 Ω)
S-video output level (For Australia)
(Y-signal)....1 Vp-p (75 Ω)
(C-signal)
NTSC....0.286 Vp-p (75 Ω)
PAL 0.300 Vp-p (75 Ω)
Component Video output level
(Y-signal)....1 Vp-p (75 Ω)
(CB-signal) 0.7 Vp-p (75 Ω)
(CR-signal) 0.7 Vp-p (75 Ω)
RGB output level (SCART) (For Europe) 0.7 Vp-p (75 Ω)
Horizontal resolution...... More than 500 lines
Video signal to noise ratio ...... More than 70 dB
HDMI output terminal....Type A (19 PIN)
[General]
Power consumption....9 W
Standby power consumption ....Less than 0.9 W
Dimensions......Width: 440 mm
Height: 41 mm
Depth: 204 mm
Weight (net) 1.5 kg
- Design and specifications are subject to change without notice.
- Full performance is not guaranteed in extremely cold environments (under water-freezing temperatures).
HDMI, the HDMI logo and Hlgh-Definition Multimedia Interface are trademarks or registered trademarks of HDMI licensing LLC.
This product incorporates copyright protection technology that is protected by U.S. patents and other intellectual property rights. Use of this copyright protection technology must be authorized by Macrovision, and is intended for home and other limited viewing uses only unless otherwise authorized by Macrovision. Reverse engineering or disassembly is prohibited.
CONSUMERS SHOULD NOTE THAT NOT ALL HIGH DEFINITION TELEVISION SETS ARE FULLY COMPATIBLE WITH THIS PRODUCT AND MAY CAUSE ARTIFACTS TO BE DISPLAYED IN THE PICTURE. IN CASE OF 525 OR 625 PROGRESSIVE SCAN PICTURE PROBLEMS, IT IS RECOMMENDED THAT THE USER SWITCH THE CONNECTION TO THE "STANDARD DEFINITION" OUTPUT. IF THERE ARE QUESTIONS REGARDING OUR TV SET COMPATIBILITY WITH THIS MODEL 525P AND 625P DVD PLAYER, PLEASE CONTACT OUR CUSTOMER SERVICE CENTER.
Manufactured under license from Dolby Laboratories. Dolby and the double-D symbol are trademarks of Dolby Laboratories.
DVD is a trademark of DVD Format/Logo Licensing Corporation registered in the U.S., Japan and other countries.
Manufactured under license under U.S. Patent #: 5,451,942 & other U.S. and worldwide patents issued & pending. DTS and DTS Digital Out are registered trademarks and the DTS logos and Symbol are trademarks of DTS, Inc. © 1996-2007 DTS, Inc. All Rights Reserved.
DivX, DivX Certified, and associated logos are trademarks of DivX, Inc. and are used under license.
About DivX
DivX is a popular media technology created by DivX, Inc. DivX media Files contain highly compressed video with high visual quality that maintains a relatively small file size. DivX files can also include advanced media features like menus, subtitles, and alternate audio tracks. Many DivX media files are available for download online, and you can create your own using your personal content and easy-to-use tools from DivX.com.
About DivX Certified
DivX Certified products are officially tested by the creators of DivX and guaranteed to play all versions of DivX video, including DivX 6. Certified products qualify for one of several DivX Profiles that designate the type of video the product supports, from compact portable video to high-definition video.
KENWOOD
For your records
Record the serial number, found on the back of the unit, in the spaces designated on the warranty card, and in the space provided below. Refer to the model and serial numbers whenever you call upon your dealer for information or service on this product.
Model
Serial Number
- Caution: Read this page carefully to ensure safe operation.
- Information on Disposal of Old Electrical and Electronic Equipment (applicable for EU countries that have adopted separate waste collection systems)
- Safety precautions
- CAUTION
- The marking of products using lasers
- Notes:
- Accessories
- Special features
- Contents
- Preparation
- Operations
- Knowledge
- Types of playable discs
- Unplayable discs
- Restrictions due to difference between discs
- Region codes in the world
- Region codes of the DVD VIDEO discs that can be played with this player
- Creating media for playing back on this equipment
- Compressing MP3/WMA
- Naming folders and files
- Note:
- Confirming media and files
- When saving files onto media
- Checking the Video Format
- To select TV Type
- Handling of disc
- Handling precautions
- Notes on CD-R/CD-RW discs
- Cautions on discs
- Care and storage
- Care and storage of main unit
- ■ Do not place in the following locations.
- ■ Be careful against condensation
- ■ When a main unit becomes dirty
- Care and storage of disc
- ■ Before storing the disc
- ■ When a disc becomes dirty
- ■ Other cautions
- Caution for transport or movement
- Caution for connection
- Malfunction of microcomputer
- Connecting to a TV with SCART input terminal (For Europe)
- Connecting to a TV with Component input terminal
- Connecting to an Audio component
- Amplifier equipped with 2-channel analog stereo or Dolby Pro Logic II / Pro Logic:
- Amplifier equipped with 2-channel digital stereo (PCM) or a multi-channel decoder (Dolby Digital™ or DTS):
- DTS disclaimer clause
- Connecting to a TV with HDMI input terminal
- About HDMI
- Main unit
- Standby mode
- Display
- Remote control unit
- Loading batteries
- Remove the cover.
- Insert batteries.
- Close the cover.
- Operation
- When you turn on for the first time
- Set up menu
- To display and exit the Menu
- General Operation
- LANGUAGE
- Menu Language
- Disc Audio/ Disc Subtitle/ Disc Menu DVD
- TV Aspect
- Display Mode
- TV Output Select (only for Europe)
- Screen saver
- AUDIO
- Dolby Digital/ DTS/ MPEG
- Sample Freq. (Frequency) DVD
- DRC (Dynamic Range Control) DVD
- Vocal DVD
- LOCK (Parental Control)
- Rating DVD
- Unlock
- Password (Security Code)
- If you forget Password
- Area Code DVD
- OTHERS
- PBC VCD
- B.L.E. (Black Level Expansion)
- DivX(R) VOD DivX
- Resolution setting
- Press the [■] key to stop playback.
- Press the [RESOLUTION] key once.
- Press the [RESOLUTION] key repeatedly to change the resolution you want.
- Hierarchical structure of VCD menus (P.B.C. function) VCD
- Advancing
- Returning
- On screen display
- Example:
- On-Screen Display during playing DVD video
- On-Screen Display during playing VCD
- On-Screen Display during playing DivX
- Last Scene Memory
- Basic play
- To start playback of DVD video, audio CD or VCD
- To start playback of audio CD, DivX, MP3, WMA or JPEG files
- Press the [MENU] key to go to the next page.
- Disc playback features
- To stop playback
- To pause playback
- Press the [II] key.
- Skipping chapters, tracks or files
- Press the [◀◀] or [▶▶] key.
- Searching CD DVD VCD DivX MP3 WMA
- Repeat play CD DVD VCD DivX MP3 WMA
- During playback, press the [REPEAT] key.
- A-B Repeat play
- Press the [A-B] key when you want to choose a scene (sound) as the beginning point.
- Press the [A-B] key again to choose a scene (sound) as the end point.
- Program play
- Program Edit
- Insert a disc and close the tray.
- Press the [P. MODE] key.
- Select a specific track on the "List" by pressing Cursor up/down [▲/▼] keys, then press the [ENTER] key to place the selected track on the "Program" list.
- Select the track you want to start playing on the Program list by pressing Cursor up/down [▲/▼] keys.
- Press the [▶] key to start.
- To repeat program play
- Delete a track from Program list
- Delete the complete Program list
- Movie disc playback
- STEP (freeze frame and frame advance) DVD VCD DivX
- Slow motion playback DVD VCD DivX
- Playback from desired title, chapter or track DVD VCD DivX
- At the time of DVD video playback
- At the time of VCD playback
- Press the numeric keys, then press the [▶] key.
- Select Audio Language DVD DivX
- During playback, press the [AUDIO] key.
- Select the Audio channel VCD
- During VCD playback, press the [AUDIO] key.
- Using Marker DVD VCD DivX
- Create the Marker
- 1:1/9
- To recall or clear a marked scene
- During playback, press the [SEARCH] key.
- Press the Cursor right/left [◀/▶] keys to select a marker number that you want to recall or clear.
- Press the [ENTER] key to playback from the marked scene or press the [CLEAR] key to clear the selected number.
- Select Camera angle DVD
- During the angle indicator has blinked, press the [ANGLE] key.
- Select the Camera angle with press the [ANGLE] key.
- Select Subtitle Language DVD DivX
- During playback, press the [SUBTITLE] key.
- Notice for displaying the DivX subtitle
- Zoom function DVD VCD DivX
- During playback, press the [ZOOM] key.
- Press the Cursor [◀/▶/▲/▼] keys to move through the zoomed picture.
- Using the TV screen to start playback CD MP3 WMA
- Playback from desired track
- To display the ID3 tag MP3 WMA
- Press the [ON SCREEN] key to display the ID3 tag.
- Random play CD MP3 WMA VCD
- During playback, press the [RANDOM] key.
- To cancel random play
- To repeat random play
- During random playback, press the [REPEAT] key.
- To start playback JPEG
- Zoom function JPEG
- To rotate picture JPEG
- To hide the menu bar JPEG
- Slide show JPEG
- Press Cursor left/right [◀/▶] keys to select the option you want to use.
- Press Cursor up/down [▲/▼] keys to select the icon and then press the [ENTER] key.
- Operation to reset
- [Type]
- [Audio Block]
- Frequency response
- Digital output level/impedance
- [Video Block]
- S-video output level (For Australia)
- Component Video output level
- [General]
- About DivX
- About DivX Certified
- KENWOOD
- For your records
Brand : KENWOOD
Model : DVF-5500
Category : DVD player