
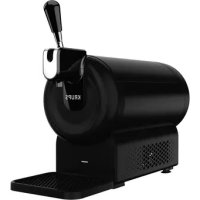
BeerTender C75 - Beer dispenser KRUPS - Free user manual and instructions
Find the device manual for free BeerTender C75 KRUPS in PDF.
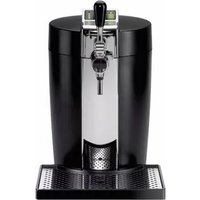


| Type de produit | Beer dispenser (BeerTender) |
| Marque | Krups |
| Modèle | BeerTender C75 |
| Alimentation | 120 V AC (compatible with standard US outlet) |
| Capacité du fût | 5 liters (Heineken Liter DraughtKeg) |
| Température de service | Idéalement réfrigérée; refroidit en 12-18h selon la méthode |
| Indicateur de volume | 4 niveaux, clignote quand il reste environ 2 verres |
| Indicateur de température | Rouge (trop chaud), orange (presque prêt), vert (prêt) |
| Fonction de sécurité enfant | Poignée de tirage amovible |
| Type de fût compatible | Uniquement Heineken® Liter DraughtKeg™ et Heineken Premium Light® Liter DraughtKeg™ |
| Nettoyage du plateau égouttoir | Lave-vaisselle ou lavage à la main avec détergent doux |
| Nettoyage du bec verseur | Lavage à la main à l'eau savonneuse; ne pas mettre au lave-vaisselle |
| Pièces détachées | Bec verseur, plateau et grille égouttoir, tube à bière jetable |
| Puissance | Non spécifiée mais typique pour un refroidisseur (estimation ~100W) |
| Température ambiante recommandée | 54°F à 86°F (12°C à 30°C) |
| Garantie | 1 an contre les défauts de matériau et de fabrication |
| Service client | 1-866-232-0788 (US) ou en ligne sur Krupsusa.com |
Frequently Asked Questions - BeerTender C75 KRUPS
User questions about BeerTender C75 KRUPS
0 question about this device. Answer the ones you know or ask your own.
Ask a new question about this device
Download the instructions for your Beer dispenser in PDF format for free! Find your manual BeerTender C75 - KRUPS and take your electronic device back in hand. On this page are published all the documents necessary for the use of your device. BeerTender C75 by KRUPS.
USER MANUAL BeerTender C75 KRUPS
BeerTender
1 - Important safeguards 2 2 - General Information 4 3 - Product description 5 4 - Before use 6 5 - Using the BeerTender 7 6 - Troubleshooting 11 7 - Disposal 16 8 - Consumer service 16 9 - Limited warranty 17
7
1 - IMPORTANT SAFEGUARDS
When using electrical appliances, basic safety precautions should always be followed to reduce the risk of fire, electric shock, and/or injury to persons including the following:
- Read all instructions.
- To protect against fire, electric shock and injury to persons, do not place cord, plugs or appliance in water or other liquid.
- Close supervision is necessary when any appliance is used near children. Keep appliance out of reach of children. Product not intended for use by children.
- Unplug from outlet when not in use and before cleaning. Allow to cool before putting on or taking off parts, and before cleaning the rest of the appliance.
- Do not operate any appliance with a damaged cord or plug or after the appliance malfunctions, or has been damaged in any manner. Return appliance to your nearest authorized KRUPS Service Center for examination, repair or adjustment (see Limited Warranty).
- The use of an accessory not evaluated for use with this appliance by KRUPS may result in fire electric shock or injury to persons.
- Do not use outdoors.
- Do not let cord hang over edge of table or counter, or touch hot surfaces.
- Do not place on or near a hot gas or electric burner, or in a heated oven.
- To disconnect, turn the control to «off» then remove plug from wall outlet.
- Do not use the appliance for other than its intended use.
- This appliance is for household indoor use only.
- Do not immerse in water.
SAVE THESE INSTRUCTIONS
CAUTION

This appliance is for household use only. Any servicing other than cleaning and user maintenance should be performed by an authorized service representative.
- To reduce the risk of fire or electric shock, do not remove the base. No user serviceable parts inside. Repair should be done by authorized service personnel only.
- Check the voltage to be sure that the voltage indicated on the nameplate is compatible with your voltage.
- Never clean with scouring powders or harsh chemicals.
- Never make technical changes or use the appliance in any manner other than as directed.
SHORT CORD INSTRUCTIONS

A. We do not recommend using an extension cord with this device. B. If an extension cord is absolutely necessary: 1 - the marked electrical rating of the extension cord should be at least as great as the electrical rating of the appliance. 2 - To reduce the risk of injury, do not drape the cord over the counter top or table top where it can be pulled on by children or tripped over unintentionally. 3 - The extension cord should be at least 18 AWG.


2 General information
The BeerTender® is designed to dispense chilled beer in a domestic setting. Only a Heineken® Liter DraughtKeg™ and Heineken Premium Light® Liter DraughtKeg™ can be used with the BeerTender. You should not use any other commercially available beer containers or kegs. Do not introduce any materials other than the DraughtKeg inside the appliance.
BeerTender is designed for use by responsible adults of legal drinking age.
Guidelines for reading these instructions
* The warning triangle indicates instructions that are important for the user's safety. * Please adhere strictly to these directions to ensure proper use and avoid serious injury! * This symbol highlights information that is especially important for making the best use of the machine.
3 - Product description


BeerTender Components
- BeerTender at home draughting system
- Lid
- LED Control panel
- Tap cover
- Press-in panel to open lid of BeerTender
- Dispensing pour spout
- Beer tap handle
- Drip grate
- Drip tray
- ON/OFF switch
- Power cord with plug
DraughtKeg™ Components
- 5 Liter DraughtKeg (not included)
- Draught beer tube (should be changed with each new DraughtKeg)


4 - Before use
Child Safety Lock
* Make sure that children cannot play with the appliance. * Do not leave the materials used to pack the appliance within children's reach. * To prevent children from using the appliance, you can remove the tap handle. To remove the handle, make sure that it is in an upright position and pull upward.
Fire prevention
In the event of a fire, use carbon dioxide (CO2) extinguishers.
Do not use water or powder extinguishers.
Setup and Maintenance
* Install the BeerTender® in an upright position in a safe place. * To ensure that the BeerTender works correctly and efficiently, the following is strongly advised. * Place it on a perfectly level and stable surface; * Choose a clean, well-lit area with an easily accessible electric socket. * Keep the appliance at a minimum distance (4 inches) from the stove as shown in the diagram. * Keep the appliance at a minimum distance (2 ½ inches) from the walls. * Store the DraughtKeg™ at room temperature or in the refrigerator. * Make sure the BeerTender is not exposed to direct sunlight. * Do not use the BeerTender outdoors. * Do not place the BeerTender on very hot surfaces or near open flames, as these may melt or damage the casing. * Your BeerTender uses a technology that delivers ultimate cooling results when the ambient temperature is between 54°F and 86°F. At colder temperatures, the appliance cooling system could be damaged. At warmer temperatures, the cooling system will not be able to reach the temperature you program.
Warning! To avoid overheating, always keep the BeerTender appliance out of direct sunlight. To obtain good cooling performance, never install your machine in a room with an ambient temperature above 86°F.


KRUPS
5 - Using the BeerTender® System
* Always hold the appliance by the bottom edge when lifting. * To obtain draught beer of optimal quality you should keep two basic factors in mind, the temperature of the beer and hygienic conditions. Follow these few simple steps for the ideal use of BeerTender.
A new draught beer tube should be used with each DraughtKeg™. An initial package of draught beer tubes is included with your machine. Additional draught beer tubes can be purchased from Heineken. Go to www.BeerTender.com for more information.
Chilling the DraughtKeg
- Before pouring a draught beer, it is very important that the Heineken and Heineken Premium Light DraughtKeg reach the correct temperature.
- Ensure DraughtKeg is sufficiently chilled before pouring a draught beer. Insufficiently chilled DraughtKegs will produce too much foam. It is ideal to purchase the DraughtKeg pre-chilled or pre-chill overnight before intended use. If the DraughtKeg needs additional chilling, there are 2 recommended options:
a. Inside the BeerTender – Depending on the temperature of the DraughtKeg, it will take up to 18 hours to chill to the ideal serving temperature. b. In a refrigerator – Depending on the temperature of your refrigerator, it will take up to 12 hours to chill to the ideal serving temperature.
Tip: We recommend that you always keep an extra DraughtKeg in your refrigerator to always have a chilled keg available.
Preparing the BeerTender
IMPORTANT: It is important that the BeerTender power switch is turned on before inserting the DraughtKeg. This allows the scale to reset and accurately measure the amount of beer left in the keg. If you remove a partially full DraughtKeg from an operating machine or open the lid while power is on, the scale will need to be reset.


Simply open the lid and lift up the keg for approximately 5-10 seconds before setting back into the machine and closing the lid.
* After setting up the BeerTender and before use, it is vital to clean the detachable pour spout – this is the only part of the appliance that will come into contact with the beer. The spout should be rinsed by hand. After cleaning, screw back into place.
* Before inserting the DraughtKeg into the BeerTender, simply snap the patented disposable draught beer tube (included) onto the DraughtKeg.
* Open the BeerTender cover by pressing in the release panel on the front of the machine.
* Open the tap spout cover by turning counter clockwise.
* Insert DraughtKeg into BeerTender and position the draught beer tube as shown on drawing.
* Close the tap by turning clockwise and snapping into place.
* Carefully close the lid.
* Set the drip tray and grate in place at the front of the appliance. Make sure the drip tray is properly fitted and positioned.


WARNING! The drip tray must be positioned on a level surface and must not jut out from the surface it is resting on.
Control Panel
Your appliance features a large display providing you with important and useful information.

On the left side of the display:
a. Volume indicator
The BeerTender DraughtKeg volume is indicated with 4 levels.
The 4 levels are visible when the DraughtKeg is full.
They disappear progressively while emptying the
DraughtKeg. The last level starts to blink when only two glasses of beer (+ / - one) are left in the DraughtKeg.

On the right side of the display:
b. Temperature indicator
The temperature indicator goes from red, for a beer that is too warm, to orange when cooling of the beer is almost complete, to green when the perfect draught beer temperature has been reached.
Warning: never use your BeerTender with ambient temperature above 86°F. Above that level, the ideal serving temperature cannot be attained.

Pouring a beer from the BeerTender
* Before pouring a beer, rinse a clean glass in cold water which chills the glass and wets the inside to enable a perfectly smooth draught pour. Use of 8 oz glasses is recommended to maintain the ideal serving temperature.

Draught and Drink
* Be aware that the first glass you pour from every new DraughtKeg will contain mostly foam. This is typical of draught beer. Allow the foam to settle and continue to pour. * Tilt and pour: Tilt your glass at a 45 degree angle as you pour and adjust upright as the glass fills. * Ensure you pull the tap handle all the way down. Not opening the handle all the way will result in excessive foam. * For the optimal draught beer drinking experience, serve your beer with a foam head of 2 fingers in height (approximately 1.5").

Proper Care and Cleaning of your BeerTender
* The drip tray and grate should be emptied and cleaned after each use.


* Before cleaning the appliance, it is essential to turn off the ON/OFF switch and then pull the plug out of the socket. * Keep in mind that during use the drip tray will have to be emptied and rinsed regularly. The tray and grate are dishwasher safe or can be washed by hand with a mild detergent. Dry completely. * Always wipe down the interior of the BeerTender after use. Beer is a natural product that can spoil. Therefore, you should always keep the appliance clean to maintain the quality of the beer dispensed and avoid unpleasant odors. * Rinse the pour spout between uses for optimal results. Handwash with warm soapy water. Do not wash in dishwasher. * To remove, unscrew turning counterclockwise from main unit. To re-attach, simply screw back in place turning clockwise. * You should never attempt to access internal parts of the appliance.
IMPORTANT: After cleaning, ensure all parts of your BeerTender® have completely dried before closing the lid.
Storing the BeerTender®
* When the BeerTender is not being used for a long period of time, remove the DraughtKe and turn the control to "off". * Remove the plug from the power outlet. * Store the BeerTender at room temperature in a dry place out of children's reach. * Protect from dust and dirt.
6 - Troubleshooting
| Problem Possible causes Solutions | ||
| The appliance does not turn on. | The appliance is not connected to the main power supply. | Connect the appliance to the power supply. |
| No beer is being dispensed. | The appliance is off. | Switch the appliance on. |
| The DraughtKeg is empty. | Replace the DraughtKeg with a new one. | |
| There is not a DraughtKeg inside the BeerTender appliance. | Install a DraughtKeg inside the BeerTender appliance. | |
| The BeerTender appliance tap handle is not correctly installed/positioned. | Install/position the tap correctly. | |
| The BeerTender produces too much foam when dispensing beer. | The BeerTender DraughtKeg has not reached the right dispensing temperature. | Allow the BeerTender DraughtKeg to cool to the right temperature. |
| The tap handle is being moved too slowly. | Firmly and quickly pull the handle down and forward as far as it will go. | |
| The DraughtKeg has been shaken. | Wait 4 hours before dispensing beer. | |
| The Volume Level indicator is blinking. | The Scale needs to be reset with each new DraughtKeg. | Turn the power on before inserting DraughtKeg. If DraughtKeg is inside, open the BeerTender Cover and lift up the DraughtKeg for 3-5 seconds before replacing into machine. |
| There is a slight buzz or hum coming from my machine. | This is the normal functioning of the cooling element inside the BeerTender. | |
| Beer flows out to slowly. | The tap handle is not open all the way.(position at 45°). | Open the tap completely. |
| Ice forms in the cooling chamber. | The BeerTender has been installed in a humid environment. | Move the BeerTender to a dry place. |
| A fault has occurred in the cooling system. | Have the BeerTender repaired by a Krups authorized service center. | |
| It is normal for a small patch of ice to form on the rear of the cooling chamber (near the screws). | ||
| The BeerTender appliance is dispensing warm beer. | The BeerTender DraughtKeg has not been chilled long enough and is not at the right serving temperature. | Allow the BeerTender DraughtKeg to cool in the refrigerator for about 12 hours or inside the BeerTender for up to 18 hours until ideal serving temperature is reached. |
| The lid of the BeerTender does not close. | The tap cover has not been properly closed. | Close the tap cover properly. |
| The BeerTender DraughtKeg has not been correctly installed. | Install the tap correctly.Ensure the draught tube has been installed completely and is not preventing the lid from closing. | |
| The temperature indicator on the control display never reaches a ready-to-drink level. | The BeerTender® appliance is exposed to a hot temperature or to direct sunlight. | Use the appliance indoors and move to a room where ambient temperature does not exceed 86°F. |
| The control display shows an increasing temperature. | A warm DraughtKeg was installed in a cold appliance. | Allow the BeerTender system to compensate the effect of the temperature change. Displayed temperature should start decreasing after 1 hour maximum. |
7 - Disposal
* To dispose of your BeerTender®, dispose properly according to your local ordinances for disposing small appliances.
8 - Consumer service

If you have additional questions, please call our Consumer Service Department.
It is helpful to have the product available at the time of your call and to know the reference number that can generally be found on the base of the product.
USA:
Online: www.Krupsusa.com
Phone: 1-866-232-0788
Hours*: Monday – Friday from 8:00 a.m. – 6:30 p.m. (EST)
Letters should be addressed to:
Krups
196 Boston Avenue
Medford, MA 02155
Only letters can be accepted. Packages without a return authorization number will be refused.
*Please note hours are subject to change.
9 - LIMITED WARRANTY
This Krups product is warranted for 1 year from the date of purchase against defects in material and
workmanship. During this period, the Krups product that upon inspection by Krups, is proved defective,
will be repaired or replaced, at Krups' option, without
charge to the customer. If a replacement product is sent, it will carry the remaining warranty of the original product.
This warranty does not apply to any
defect arising from a buyer's or user's misuse of the
product, negligence, failure to follow Krups' instructions,
use on current or voltage other than that stamped on the product, wear and tear, alteration or
repair not authorized by Krups, or use for commercial purposes.
THE WARRANTIES SET FORTH HEREIN ARE EXCLUSIVE AND NO OTHER WARRANTIES,
EXPRESS OR IMPLIED, INCLUDING BUT NOT LIMITED TO ANY WARRANTY OF
MERCHANTABILITY OR FITNESS
FOR A PARTICULAR PURPOSE OR USE, ARE MADE
BY KRUPS OR ARE AUTHORIZED TO BE MADE
WITH RESPECT TO THE PRODUCT.
Some states do not allow limitation on how long an implied warranty lasts or do not allow the exclusion of incidental or consequential damages, so the above limitations may not apply to you.
This warranty gives you specific legal rights, and you may also have other rights, which vary from state to state. If you believe your product is defective, bring the product (or send it, postage prepaid) along with proof of purchase to the nearest authorized Krups Service
Center. (To find the nearest authorized Krups Service
Center visit the Krups Website or contact the Krups
Consumer Service indicated below).
If you send the product, please include a letter explaining the nature of the claimed defect.


4 - Before use


- IMPORTANT SAFEGUARDS
- SAVE THESE INSTRUCTIONS
- CAUTION
- SHORT CORD INSTRUCTIONS
- GENERAL INFORMATION
- GUIDELINES FOR READING THESE INSTRUCTIONS
- PRODUCT DESCRIPTION
- BEERTENDER COMPONENTS
- DRAUGHTKEG™ COMPONENTS
- BEFORE USE
- CHILD SAFETY LOCK
- FIRE PREVENTION
- SETUP AND MAINTENANCE
- USING THE BEERTENDER® SYSTEM
- CHILLING THE DRAUGHTKEG
- PREPARING THE BEERTENDER
- CONTROL PANEL
- POURING A BEER FROM THE BEERTENDER
- DRAUGHT AND DRINK
- PROPER CARE AND CLEANING OF YOUR BEERTENDER
- STORING THE BEERTENDER®
- DISPOSAL
- CONSUMER SERVICE
- USA
- KRUPS
- LIMITED WARRANTY
Brand : KRUPS
Model : BeerTender C75
Category : Beer dispenser