London Underground Simulator - Game AEROSOFT - Free user manual and instructions
Find the device manual for free London Underground Simulator AEROSOFT in PDF.


| Product Type | Video Game (Digital Download) |
| Platform | PC (Windows) |
| Genre | Simulation |
| Developer | Aerosoft |
| Publisher | Aerosoft |
| Release Year | 2011 |
| Language Support | English, German |
| File Size | Approximately 2 GB |
| Minimum System Requirements | Windows 7, 2.5 GHz CPU, 4 GB RAM, DirectX 9, 1 GB VRAM |
| Recommended System Requirements | Windows 10, 3.0 GHz CPU, 8 GB RAM, DirectX 11, 2 GB VRAM |
| Game Modes | Single Player |
| Input Devices | Keyboard, Mouse |
| Main Functions | Drive London Underground trains, complete schedules, follow signals, manage doors, report delays |
| Care and Cleaning | Keep gaming system clean and ventilated; avoid overheating |
| Safety Precautions | Take regular breaks, avoid eye strain, maintain proper posture |
| Spare Parts & Repairability | Not applicable; software can be reinstalled or updated via Steam |
| Manual Format | PDF included with download |
| Age Rating | PEGI 3 |
Frequently Asked Questions - London Underground Simulator AEROSOFT
User questions about London Underground Simulator AEROSOFT
0 question about this device. Answer the ones you know or ask your own.
Ask a new question about this device
Download the instructions for your Game in PDF format for free! Find your manual London Underground Simulator - AEROSOFT and take your electronic device back in hand. On this page are published all the documents necessary for the use of your device. London Underground Simulator by AEROSOFT.
USER MANUAL London Underground Simulator AEROSOFT
Airport Paderborn/Lippstadt
D-33142 Bueren, Germany
Tel: +49 (0) 29 55 / 76 03-10
Fax: +49 (0) 29 55 / 76 03-33
natural_image
Abstract black ink brushstroke on white background (no text or symbols)aerosoft™
Volume 3: London Circle Line
Inhalt
Zu Beginn......6
Vorwort 6
Dankeschön....7
Deinstallation....16
Menü....17
Einstellungen 18
Neues Spiel....21
Spiel laden....23
Signale / Signals ......67
Content
Introduction ......38
Preface....38
Credits 39
System Requirements......40
Installation 40
Aerosoft LAUNCHER....42
Removing "World of Subways Vol 3 - London Circle Line" .....46
Menus 47
Settings 48
New game....51
Load game....53
Driving a Train....54
Taking a train into service....54
Appendix 61
Controls 61
Digitised Voice Announcer - DVA 63
Operation with the Raildriver CabController 64
Signale / Signals ......67
Zu Beginn
Vorwort
Community Management / Support:
Carsten Grenkowitz, Timo Lüer, Michaela Vogeler
Videoclip:
Clipcanvas
„World of Subways“ is our series of the most interesting Subway and Underground routes of the world for the PC. After the releases of New York and Berlin we are now proud to introduce Vol 3 - London Underground. This simulation covers the entire Circle Line in its current operational service which includes the new section to Hammersmith. This line offers a length of 27km with 35 stations, many hours of fun and interesting missions.
The Circle Line is an underground service of the London Underground circling the centre of London. It was first described as such in 1949 and already appeared on the 1947 Underground Map. It had not been built as a separate line, but was merged from different sections of the Metropolitan Line and the District Line. Only two short sections of this line are solely used by the Circle line. These sections are the connecting curves between the stations of High Street Kensington and Gloucester Road and between Aldgate and Tower Hill.
Features:
• 3D - Cockpit with rotatable camera
• Original virtual reproductions of 35 stations on the Circle Line
- Free movement in the train and at the stations (accomplished for the first time ever!)
• More realistic AI trains, dynamic passengers on the platforms
• Superb graphics, reflecting headlights, night effects
- Realistic announcements recorded exclusively by the original speaker
The physics have been developed based on real values, such as those used in training simulators. The driving and braking characteristics of the trains are reproduced faithfully and reflect the feeling to actually be in control of a train on the London Underground.
Credits
Many thanks to all the people worked on this project:
Project management: Thomas Langelotz, Michaela Vogeler
Game design / missions design: Thomas Langelotz, Carsten Grenkowitz
Character / animation: Rocketbox Studios, Michaela Vogeler
Sounds: Thomas Langelotz, Christian Helm
Community management / support: Carsten Grenkowitz, Timo Lüer, Michaela Vogeler
Video clip: Clipcanvas Special thanks to Danny Rose, William Lennox and Marc Beindorf.
System Requirements
To fully enjoy “World of Subways Vol 3 - London Circle Line” your PC should meet the following system requirements:
• Dual Core Processor 2,6GHz
• Microsoft Windows 7, Vista or XP (SP3)
• Free hard disk memory: 2GB
- RAM: 2GB
• Video card GeForce 9800 or similar ATI card
- Sound card
- DirectX 9.0c
You will need an internet connection for online registration!
Installation
You have to be logged in with administrator rights before you start the installation of "World of Subways Vol 3 - London Circle Line".
To start the installation of “World of Subways Vol 3 - London Circle Line” simply insert the DVD into your DVD drive or run the file you downloaded from your shop account.
After you have chosen your preferred installation language, the welcome screen appears and you will be presented with some important information and the license agreement. Please read it carefully.
You will be asked to insert your email address and your registration key. Please insert it exactly the way it was written on the label or in the confirmation mail you received from your download shop.
Please keep your registration key on a safe place, You will need it again if a new installation will be necessary.
The installation program will attempt to locate the correct path. If you wish to install to another location, then you will have to enter the correct path for installation manually. In order to do this, click on "Browse" and navigate to the correct path. Before the installation program starts to copy the files onto your hard disc, you will be presented with all the installation details.
The installation program will now copy all of the "World of Subways Vol 3 - London Circle Line" files onto your hard disk.
If you want to make any changes or to install any updates for this program you will need the DVD or the installation file from the download shop and your registration key again.
Important note!
Subsequent to the installation the Aerosoft-Launcher will be started for the online registration.
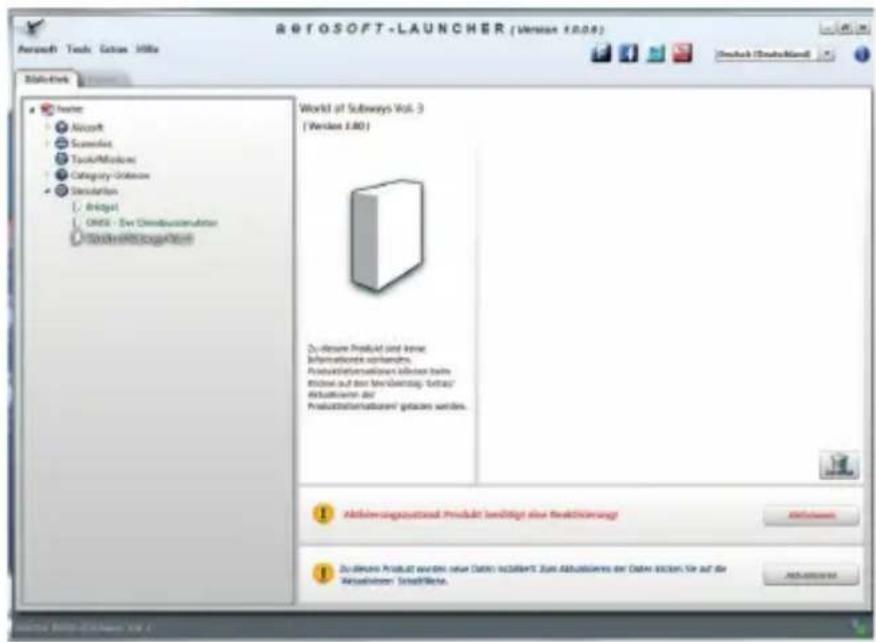
After the activation process is finished successfully exit the Aerosoft-Launcher.
Learn more about the Aerosoft-Launcher in the next chapter of this manual.
To run „World of Subways - Vol 3“ click on the new program icon on your windows desktop.
Aerosoft LAUNCHER
General information about the Aerosoft-Launcher
The Aerosoft-Launcher gives you an overview of all Aerosoft products installed on your computer. You will also have easy access to special features available for the several products.
Should the SOFTWARE PRODUCT require an Online Registration, the Aerosoft LAUNCHER will take you through this process. The Aerosoft-LAUNCHER will be automatically installed with the SOFTWARE PRODUCT and will launch at the end of the install process.
You can run the Aerosoft-Launcher at any time via the Windows START menu to check the activation state of your installed SOFTWARE PRODUCTS. Just follow this link:
START | ALL PROGRAMS | AEROSOFT | Aerosoft Launcher
The Aerosoft-Launcher starts up in the "Library" view by default. Here you can see an overview of all installed Aerosoft SOFTWARE PRODUCTS and their state of activation.
The following categories will be shown.
"Aircraft", "Sceneries", "Tools/Missions", "Category-Unknown" and "Simulation".
The SOFTWARE PRODUCT will be placed in one of these categories accordingly during installation. Older SOFTWARE PRODUCTS which do not need an online activation will be placed in the category "Category-Unknown".
In the "Library" view you will also see an overview of current Aerosoft News.
What is required for an installation?
For an installation and an online-activation you will have to have administrator rights. Please make sure that you have these rights.
You will also need an active internet connection.
How do I activate a SOFTWARE PRODUCT?
If necessary please change to the "Library" view and select the SOFTWARE PRODUCT for activation.
Click on the button "activate".
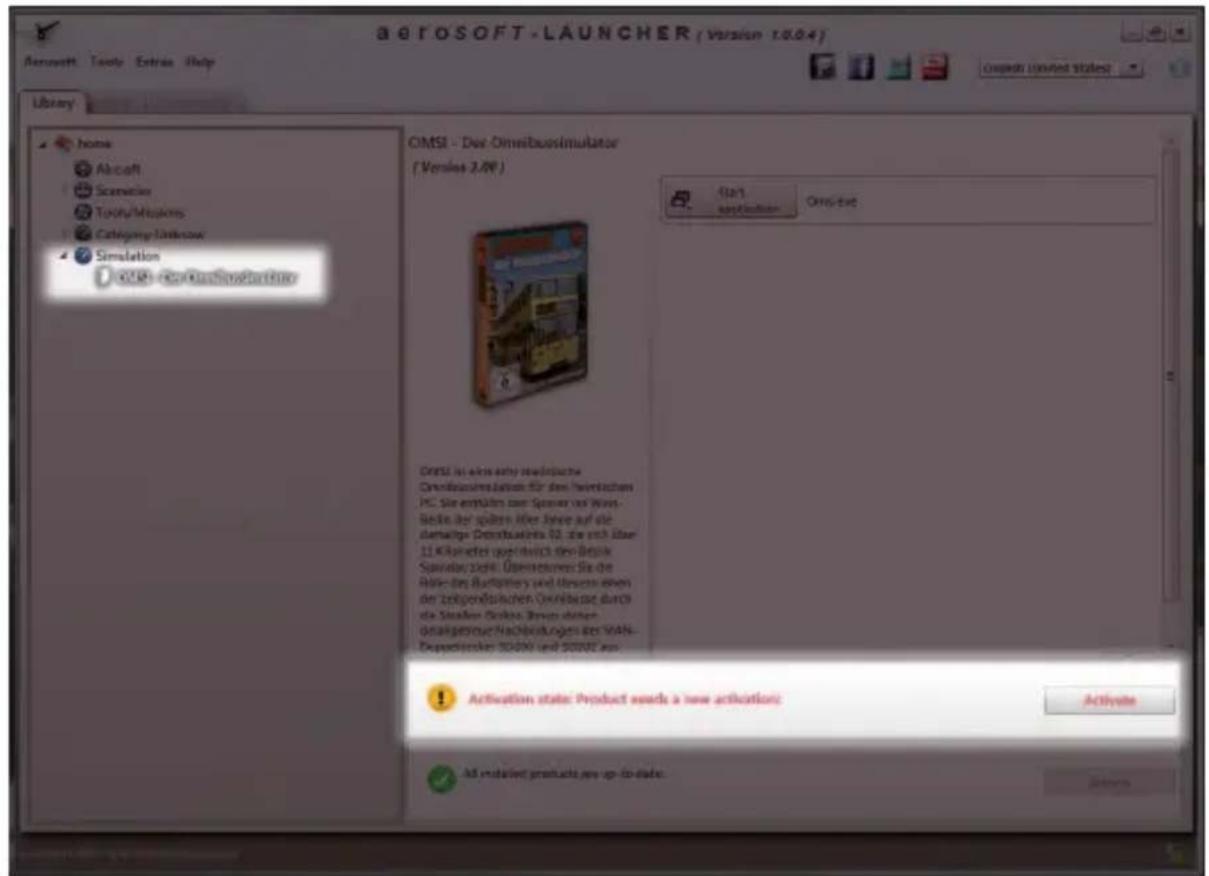
The following screen will appear:
Check your email address and your registration key is correct and click on „Online activation“. Please note you will need an active internet connection for this procedure.
You registration data will transferred to our Aerosoft server now.
Your information will now be transferred to the Aerosoft server. After a successful transfer your system will be activated and used without further limitations.
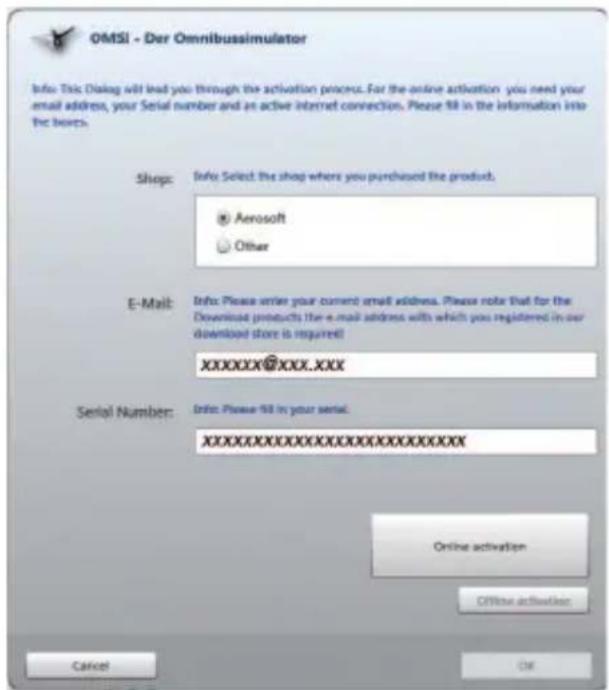
text_image
OMSI - Der Omnibussimulator Info: This Dialog will lead you through the activation process. For the online activation, you need your email address, your Serial number and an active internet connection. Please fill in the information into the boxes. Shop: Info: Select the shop where you purchased the product. Aerosoft Other E-Mail: Info: Please enter your current email address. Please note that for the Download products the e-mail address with which you registered in our download store is required! XXXXXXXXXXXXXXX Serial Number: Info: Please fill in your serial. XXXXXXXXXXXXXXXXXXXXXX Online activation Offline activation Cancel OKPlease note that depending on the safety settings some data of the Aerosoft SOFTWARE PRODUCT need to be personalized.
Information about the activation status
GREY undefined
GREEN active
YELLOW reactivation required
RED activation unsuccessful
I want to install the SOFTWARE PRODUCT again. How do I do this?
The "Library" view will show the activation status of each SOFTWARE PRODUCT.
If it is shown in GREEN, the SOFTWARE PRODUCTS are active. A new activation is not necessary.
If it shows YELLOW the SOFTWARE PRODUCTS have at least been activated once but need a new online activation because of new hardware in your system. Click on the button “activate”.
Please note that all required information has been correctly filled in.
There is an update available for the SOFTWARE PRODUCT. Does it change the activation status?
Normally the activation status will not be changed.
It is possible though that an adoption of the activation status on to the new installed data is necessary.
If this is the case change to the "Library" view and select the appropriate SOFTWARE PRODUCT.
Click on the "refresh" Button to take over the activation status.
I have to reconfigure my PC-System or I have got a new PC. What do I have to bear in mind?
A check of the activation keys commences every time the Aerosoft-LAUNCHER is started. Depending on the activation status, a new activation might be necessary.
Removing "World of Subways Vol 3 - London Circle Line"
In order to fully remove “World of Subways Vol 3 - London Circle Line” run the Aerosoft-Launcher. Change to the “Library” and select “World of Subways Vol 3” in the “Simulation” category. The information about “World of Subways Vol 3 - London Circle Line” will appear.
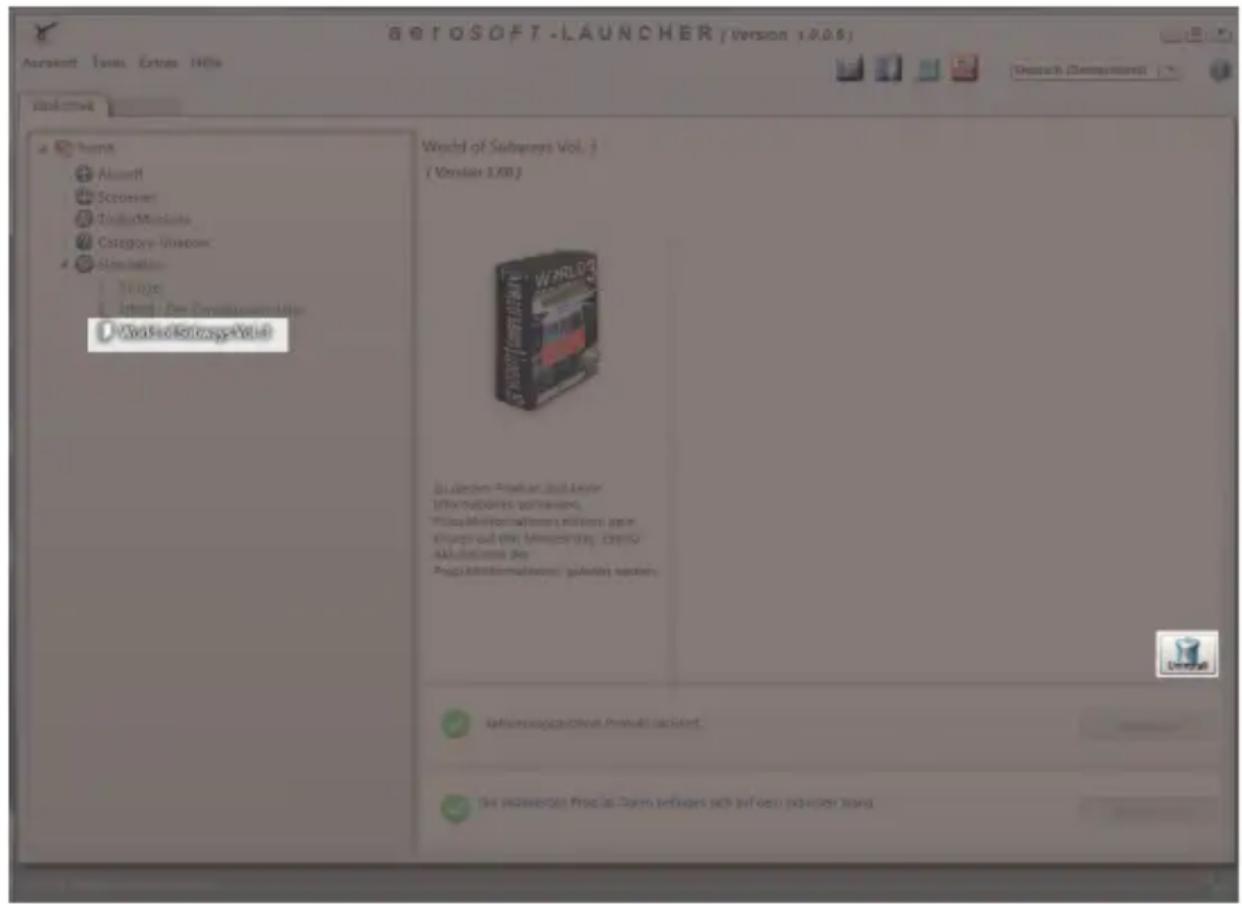
Click on the „Uninstall“ button. The installation program will start to remove the program from your hard disk.
Menus
Double click on the program icon on the windows desktop to run "World of Subways Vol 3 - London Circle Line".
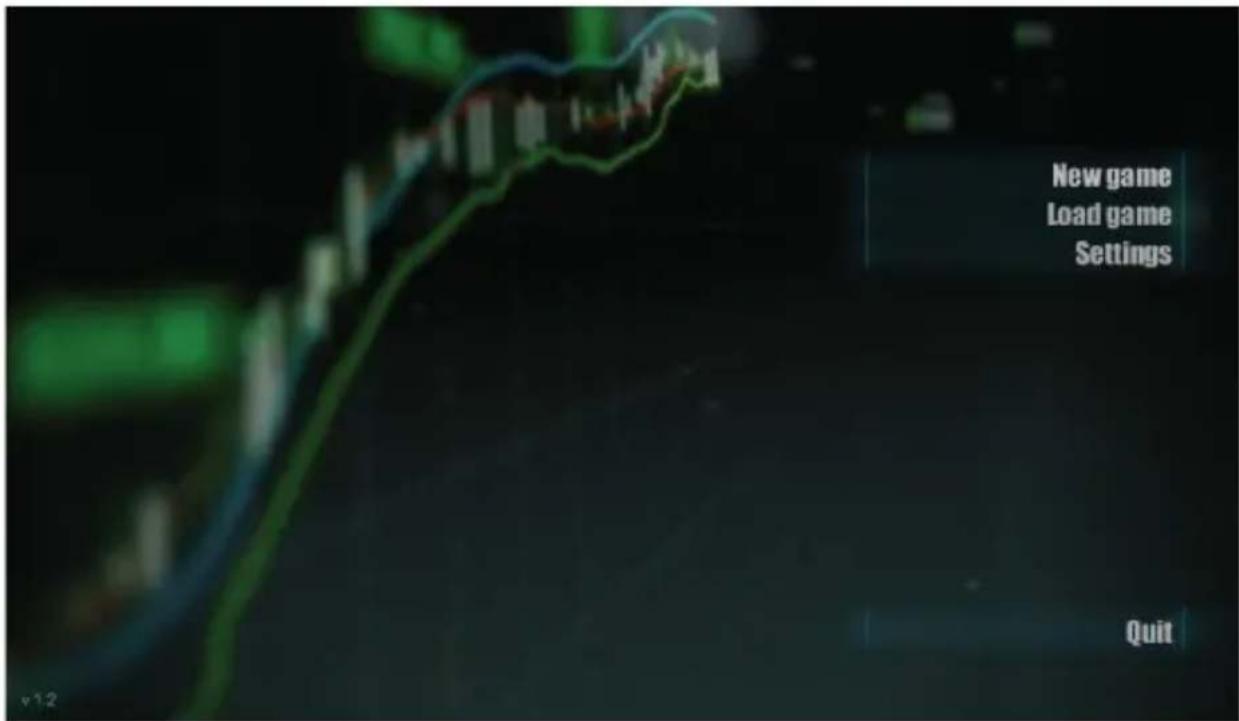
First the main program menu will appear.
text_image
New game Load game Settings QuitFrom the menu "New game" you can start a new run on the route.
From the menu "Load game" you can continue a saved status.
From the menu "Settings" you can set and change various program options.
Settings
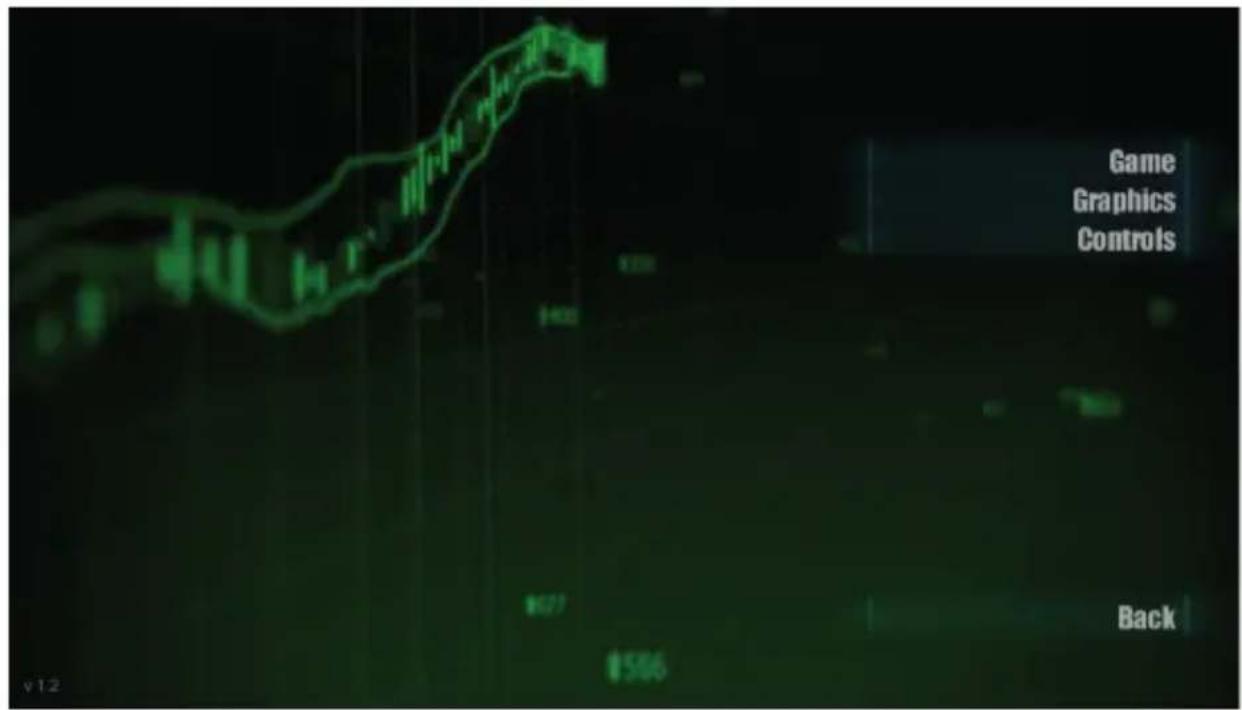
The settings menu has the following submenus:
text_image
Game Graphics Controls Back v12 $627 $586Game
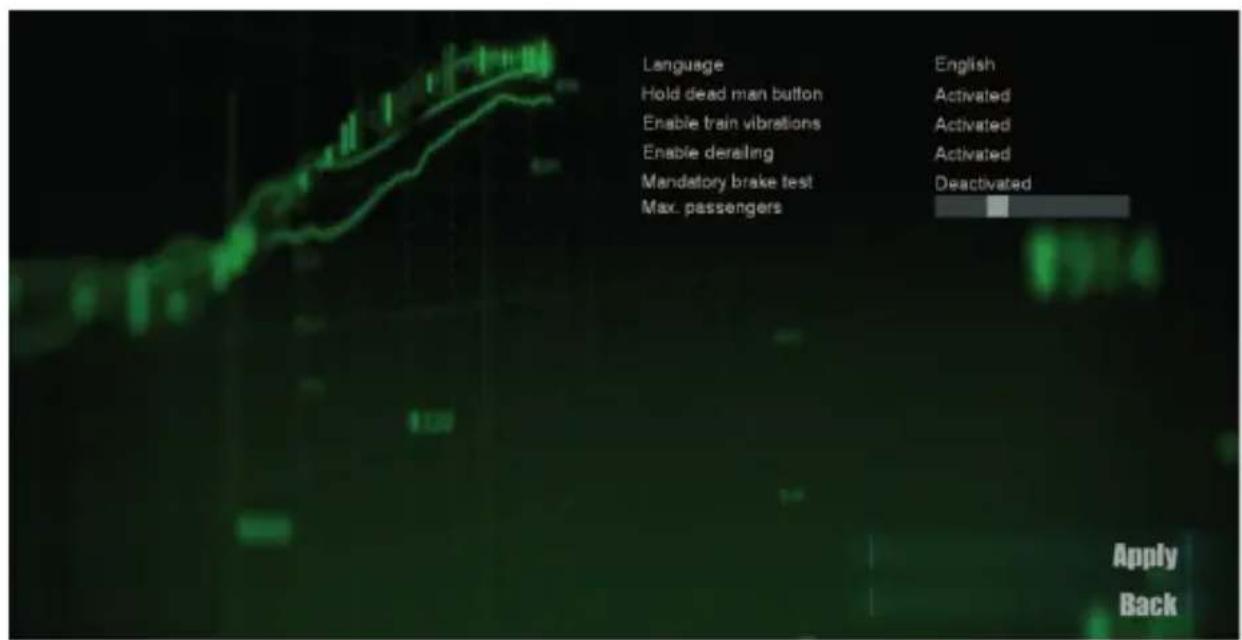
text_image
Language Hold dead man button Enable train vibrations Enable derating Mandatory brake test Max. passengers English Activated Activated Activated Deactivated Apply BackSelect your preferred language and general game options from this menu.
Graphics
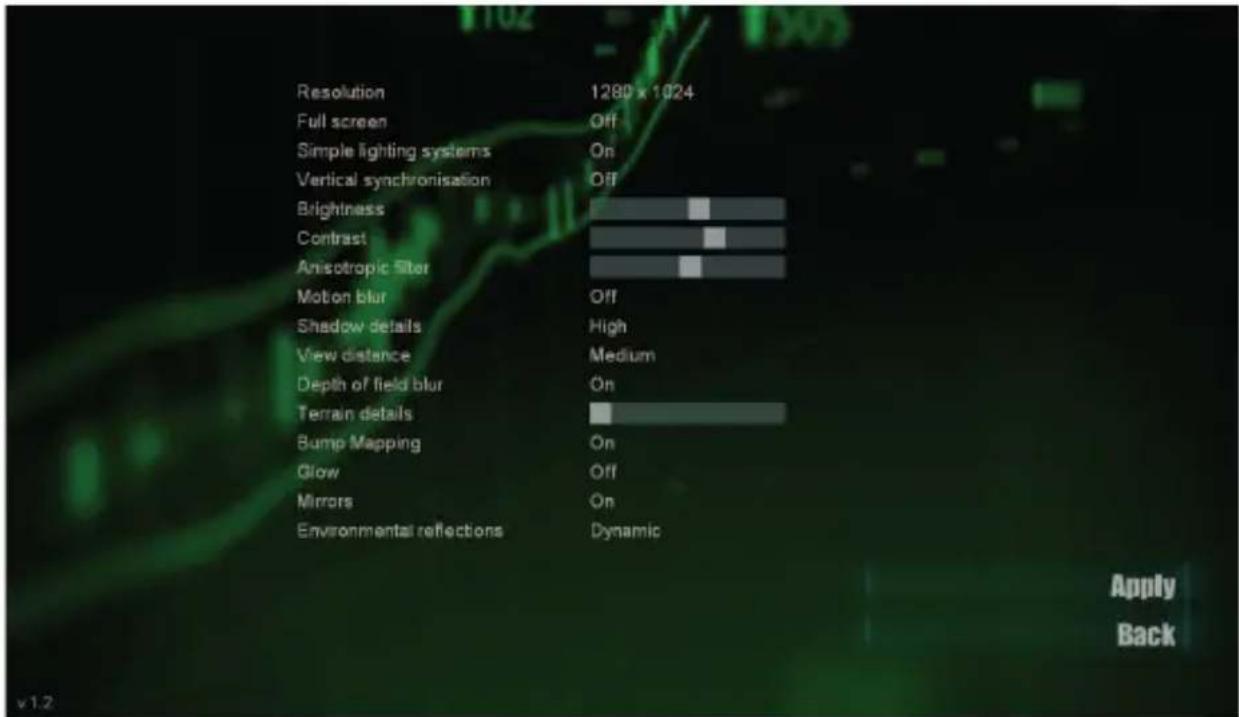
text_image
Resolution 1280 x 1024 Full screen Off Simple lighting systems On Vertical synchronisation Off Brightness Contrast Anisotropic filter Motion blur Off Shadow details High View distance Medium Depth of field blur On Terrain details Bump Mapping On Glow Off Mirrors On Environmental reflections Dynamic Apply BackFrom the graphics settings you can select various options for the display on your monitor. Please not that these settings can have an effect on frame rates. Depending on your system you should experiment with the settings to find the best relation between performance and quality.
Controls
This menu displays the key combinations for the various functions. You can also change the combinations if you wish. To change a combination simply do a left mouse click on the area to the right of the selected function. The previous combination will be deleted. Confirm the selected key/combination you wish to use. The selected key/combination will appear in the highlighted area. Click on “Apply”.
You will be directed to the sub-menu „Interaction“ where you will find functions for the general interaction with the program.
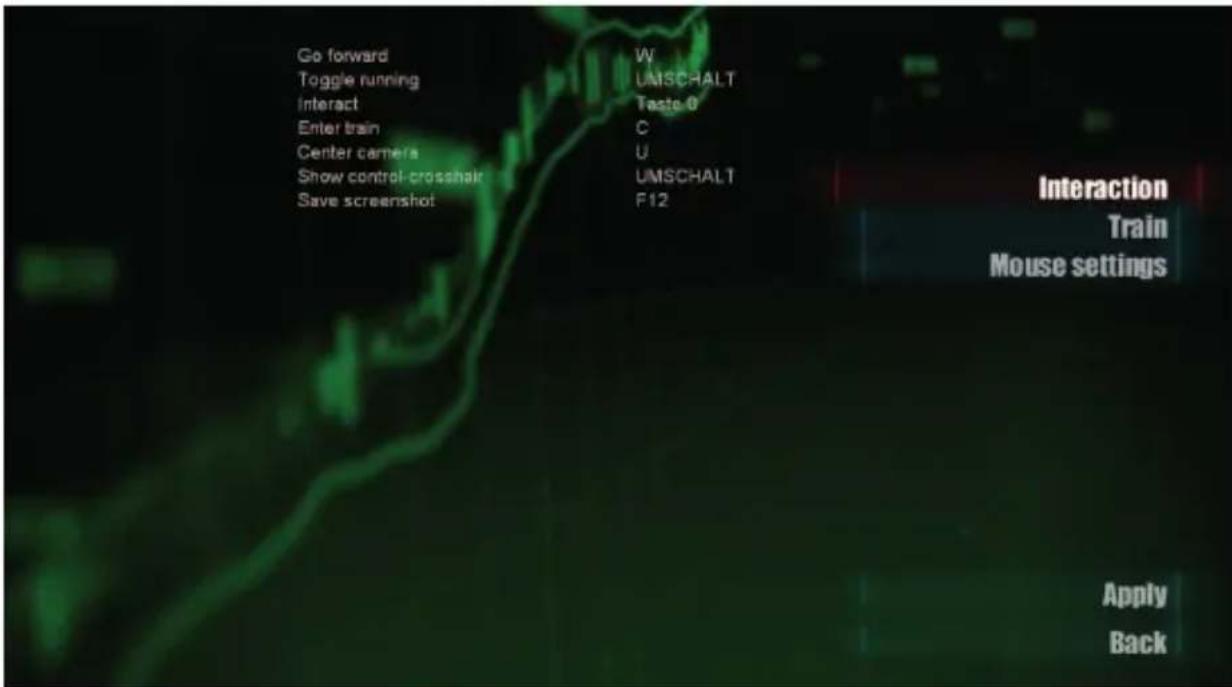
text_image
Go forward Toggle running Interact Enter train Center camera Show control-crosshair Save screenshot W UMSCHALT Taste 0 C U UMSCHALT F12 Interaction Train Mouse settings Apply BackThe sub-menu "Train" gives you all functions necessary to control the train.
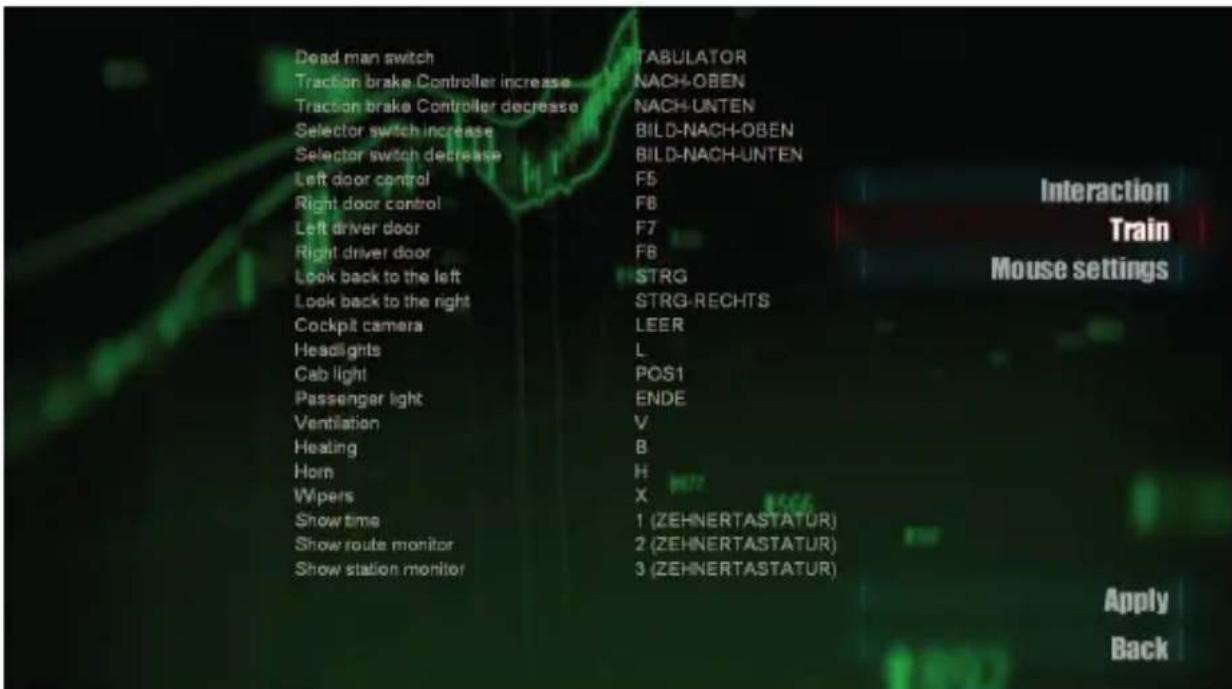
text_image
Dead man switch Traction brake Controller increase Traction brake Controller decrease Selector switch increase Selector switch decrease Left door control Right door control Left driver door Right driver door Look back to the left Look back to the right Cockpit camera Headlights Cab light Passenger light Ventilation Heating Horn Wipers Show time Show route monitor Show station monitor TABULATOR NACH-OBEN NACH-UNTEN BILD-NACH-OBEN BILD-NACH-UNTEN F5 F8 F7 F8 STRG STRG-RECHTS LEER L POS1 ENDE V B H X 1 (ZEHNERTASTATUR) 2 (ZEHNERTASTATUR) 3 (ZEHNERTASTATUR) Interaction Train Mouse settings Apply BackThe sub-menu „Mouse settings“ allows you to change the mouse parameters.
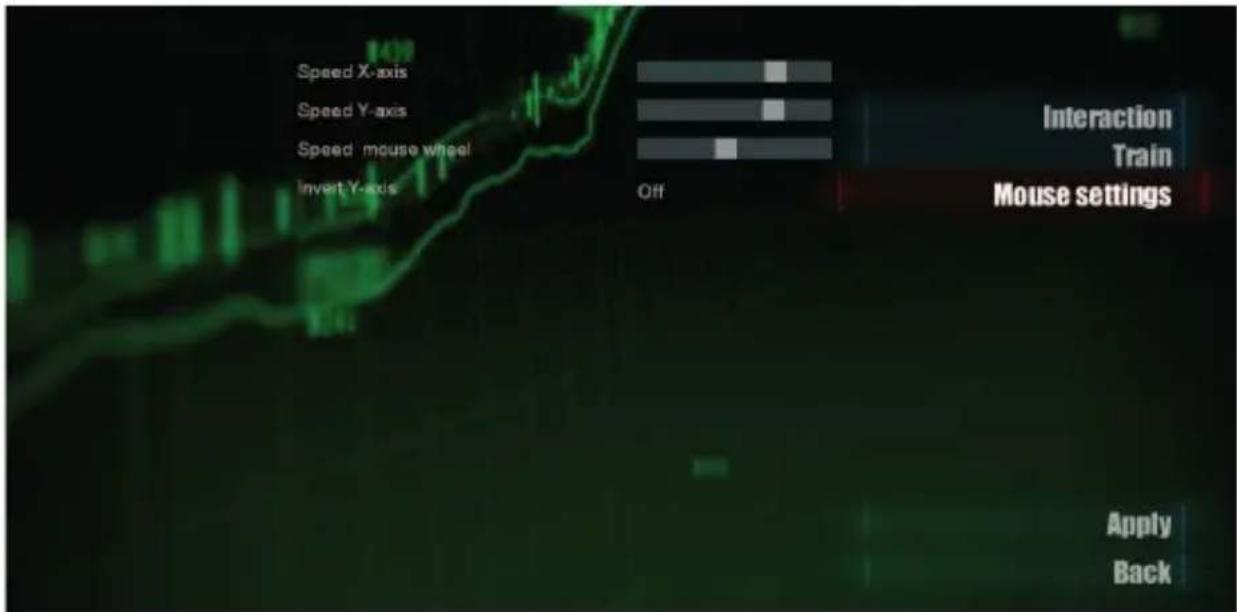
line
| Input Variable | Value | |----------------------|-------| | Speed X-axis | 140 | | Speed Y-axis | 140 | | Speed mouse wheel | 140 | | Invert Y-axis | 140 |New game
You can start off from here.
You can select if you would like to run a mission or a timetable schedule.
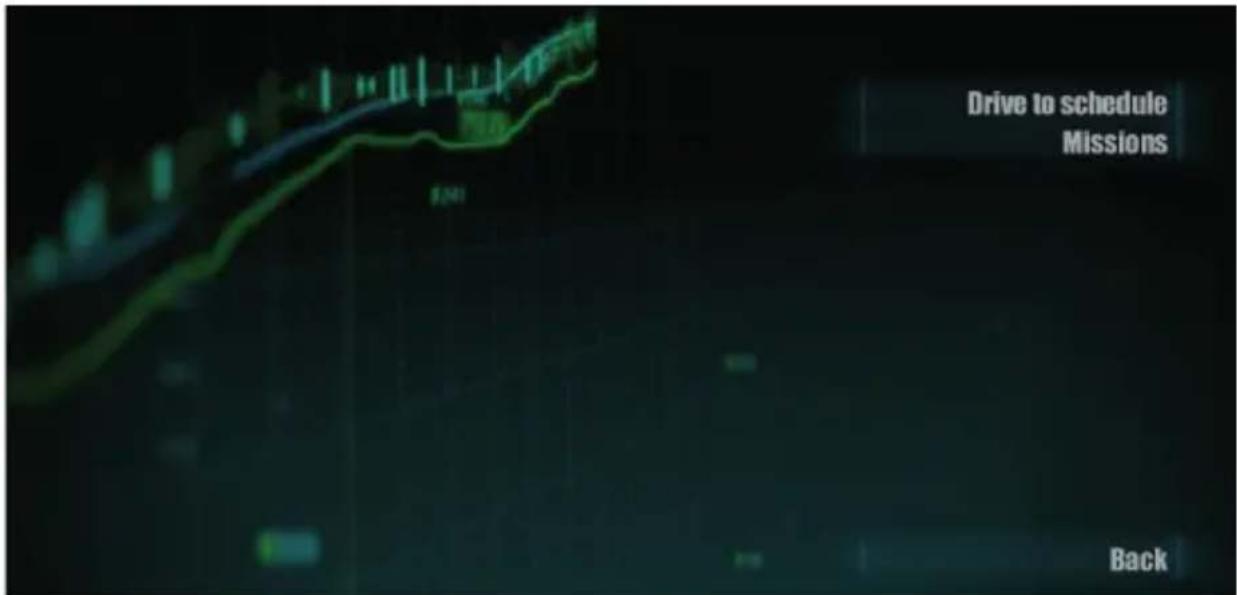
text_image
Drive to schedule Missions BackDrive to schedule
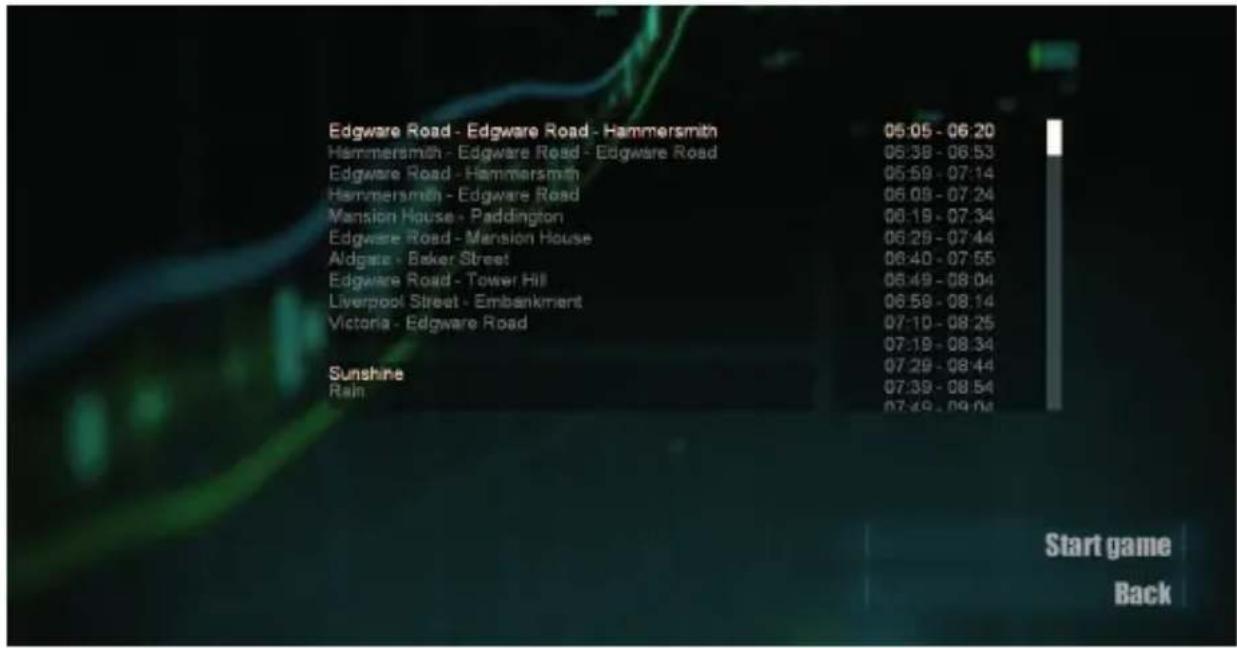
text_image
Edgware Road - Edgware Road - Hammersmith Hammersmith - Edgware Road - Edgware Road Edgware Road - Hammersmith Hammersmith - Edgware Road Mansion House - Paddington Edgware Road - Mansion House Aldgate - Baker Street Edgware Road - Tower Hill Liverpool Street - Embankment Victoria - Edgware Road Sunshine Rain 05:05 - 06:20 06:38 - 06:53 06:59 - 07:14 06:09 - 07:24 06:19 - 07:34 06:29 - 07:44 06:40 - 07:55 06:49 - 08:04 06:59 - 08:14 07:10 - 08:25 07:19 - 08:34 07:29 - 08:44 07:39 - 08:54 07:49 - 09:04 Start game BackSelect the route and time which you want to start from. You can also select if you want to drive by rain or sunshine.
text_image
1. Briefing 2. Stand-by-man 3. Maintenance 4. Collecting 5. Stand-by-man II 6. Support 7. Delay 8. First train 9. Bridge maintenance 10. Support II In the briefing you will learn how to drive a train how to operate at stations. Instructor Danny will explain everything to you. Start game BackYou will find the ten missions here.
Select a mission from the list. You will then see a short description.
In the first mission „Briefing“ you’ll be acquainted with the general operation and handling on a normal service. We strongly recommend to work through this mission before you go to other missions or drive a service to schedule.
Load game
When driving to schedule you have the option to pause and to save the current status. To continue this saved game at a later time open „Load game“.
Select the saved game from the list, then click on "Load" to continue the schedule.
Driving a Train
To become familiar with the operation of a train and with the general procedure at stations we would strongly recommend to work through the mission „Briefing“. Here you will get a step by step instruction on how to operate a train on a short ride. On the return leg you will also be introduced on standard procedures at stations while driving on a service.
Taking a train into service
Preparation of the rear cab
First of all you need to manually switch on the tail lights in the cab of the last carriage.
- Go to the rear of the train and enter the cab. (mouse click on „Door open/close).
- Switch to driver mode (key C) and then to the right console (SHIFT and click on the right console).
- Zoom in on the console (SHIFT + click on „Look at gauges“) to get a better view of the console.
- Switch on tail lights 1 and 2 (SHIFT + mouse click on „Tail Lights“).
- Switch on the destination light (SHIFT + mouse click on Dest.Light).
- Set the rear destination board (SHIFT + mouse click crank handle above the door).
Preparations in the rear cab are now done. End the drive mode (Key C) and get off the train.
Make a visual check from the outside.
Preparation of the drivers cab
Go to the front of the train. Get into the cab and switch to the driver mode (Key C).
Left console:
- Turn the Selector Switch to „Auto“ (Key Page up / down or SHIFT + mouse)
- Turn the Traction Brake Controller (TBC) to „Service Application“ (Arrow up key or SHIFT + mouse)
Switch to the right console
(SHIFT + mouse click on the right console):
- Switch on the cab light (POS1 or switch "Cab Light")
- Switch on the gauge light/dashboard light („Gauge Light“ switch)
- Switch on the destination light („Dest. Light“ switch)
- Switch on the head lights (Key L or „Head Lights“ switch)
- Switch on the ventilation (Key V or „Cab Vent“ switch)
Right wall-console:
- Switch on the passenger light (Key END or „Light Set“ button
- Switch on the saloon heating (Key B or „Saloon Heating“ button)
Perform Brake Test
In reality the driver has to perform at least one brake test before each service. If you have activated the option "Settings" - "Game" - "Mandatory brake test" you need to perform this test before you start your service.
- Build up pressure: On the left console switch the Traction Brake Control (TBC) to „Rheostatic 2. and EP. Application“ (Arrow Up key)
- Perform lamp test: Switch to the right console. On the „Brake Test“-console: click on “Lamp Test” (SHIFT + mouse click).
- Prepare brake test: Set the switch to „Brake Test“ (SHIFT + mouse click) – the yellow control lamps should illuminate.
- Release pressure: On the left console set the Traction Brake Control (TBC) to „Service Application“(Arrow down key). The red control lamps should illuminate (right console – Brake Test Console).
- Build up pressure again: Set the Traction Brake Control (TBC) back to „Rheostatic 2. and EP. Application“. The green control lamps should illuminate after pressure is back again (right console – Brake Test Console).
- Turn off Brake Test: On the right console switch back to „Normal / Reset“.
Set destination board
Turn on the mouse wheel to switch back from the Gauge-Zoom-Mode.
Turn the crank handle above the centre door until the correct destination is displayed (SHIFT + mouse).
Programming the Digitised Voice Announcer - DVA
Set the Traction Brake Control (TBC) to „Service Application“.
Switch to the DVA-console on the left wall (SHIFT + mouse):
- Press the blue "Program" key on the keypad (SHIFT + mouse)
- Press on „2“ or „8“ on the keypad (SHIFT + mouse) to select the correct route.
To hear the correct announcements during the service select the routes on the DVA as follows:
Circle Line Outer Rail: for the service Hammersmith – Edgware Road – Edgware Road (via Wood Lane, Royal Oak, King's Cross St. Pancras, Aldgate, Embankment, High Street Kensington)
Circle Line Inner Rail: for the service Edgware Road – Edgware Road - Hammersmith (via Victoria, Mansion House, Farringdon, Baker Street, Royal Oak, Wood Lane)
For a short service, i.e. Embankment – Liverpool Street, select „Inner Rail“ on the DVA.
- Press the green „Enter“ key to confirm
- Press „2“ or „8“ to select the start station
- Press the green „Enter“ key to confirm
- Press „2“ or „8“ to select the destination
-
Press the green „Enter“ key to confirm
-
Press the blue "Program" key to finalize the programming After finalizing the programming the display on the DVA will show "Automatic Announcer enabled".
Manual announcements can be called up at any station:
Press the according key on the DVA:
- Ready for depart
- Stand clear of the doors
- Train terminates here
- All change please
- Apologize for delay
- Thank you
- Mind the Gap
- No Smoking
- Train held
Note: If the Traction Brake Controller (TBC) is set to „Shut down“ the programming of the announcements has to be done again.
Hint: The DVA can be programmed at any station in case you hear that something is not right. The new announcements will only be made when the doors are being opened.
Procedures at closed stations (Blackfriars):
Shortly before reaching the closed station the announcement „Closed Station“ has to be activated from the DVA. The announcement will follow and inform the passengers that the train will not stop here and continue to the next station. The DVA will then automatically switch to the next station.
Procedure at reaching the final station (as a rule excluding Edgware Road and Hammersmith):
Example Aldgate.
When reaching the final station open the doors as usual. The standard announcement will follow „This is ...“. On the DVA press key 3. The announcement to exit the train will follow. All passengers will now leave the train which can now be set out of service.
Driving
It can be helpful to call up the clock, route monitor and station monitor (Keys 1, 2 and 3 on the NUM pad).
- Turn the Selector Switch to „For“ (Page up / down or mouse).
- Activate the dead man switch (TAB – key).
- Set the Traction Brake Controller (TBC) to „Shunt“, „Series“ or „Parallel“ (Arrow up / down or mouse)
Brake / Stop
The Selector Switch will stay in its „For“ position.
Use the Arrow keys up or down to accelerate / brake.
Detailed description of the Traction Brake Controller:
Accelerate: Set TBC to „Series“ or „Parallel“ (Arrow up key or mouse)
Brake Set Traction Brake Controller (TBC) to a brake setting („Rheostatic 1 and hold to Emergency – Arrow down or mouse)
Stop: the dead man switch will be de-activated when leaving the driver mode (key C). It has to be activated again when returning to driver mode by using the TAB key.
General procedures at stations
Stop the train just in front of the barrier on the platform, never in the middle of the station!
Open the passenger doors (depending on which side F5 or F6)
Use the special announcements on the DVA if necessary (see chapter Programming the Digitize Voice Announcer)
Open the cab door to the platform (mouse or F7 / F8)
Look back and wait until all passengers have boarded or left the train (SHIFT-mouse on option „look back“). To return to the cab use the mouse wheel or press CTRL on the left or CRTL on the right depending on which side you have been looking back.
Close all doors (depending on which side F5 / F6 and F7 / F8) then drive.
Note: The dead man switch will be de-activated when leaving the driver mode (key C). It has to be activated again when returning to driver mode by using the TAB key.
Monitors
HudTime
The actual time is being displayed
The display is called up by using the 1 key on the NUM pad.
Route monitor
The route monitor shows the following data:
• Current and allowed speed
• Status and distance to next signal
• Next station and departure time
- Current time
The route monitor is called up by using the 2 key on the NUM pad.
Station monitor
The station monitor shows the following data:
• Departure station and destination for the selected route
• Display of the departure and arrival time for the selected route
- Current station with set departure time and actual departure time
The station monitor is called up by using the 3 key on the NUM pad.
Appendix
Controls
| walk forward w | |
| run forward SHIFT + w | |
| interact left mouse button | |
| enter Cab:driver mode on/off | c (in the cab only) |
| Zoom in on gauges SHIFT + | click on „look at gauges“ |
| Activate mouse cursor(only possible in driver mode) | SHIFT |
| Centre vehicle camera u | |
| Doors open/close left F5 | |
| Doors open/close right F6 | |
| Open/close cab door left F7 | or mouse click on door |
| Open/close cab door right F8 | or mouse click on door |
| Look back from cab door left CTRL / right CTRL or mouse click on „look back“ | |
| Return to driver mode(cockpit-camera) | SPACE or scroll mouse wheel |
| Activate/de-activate dead man switch | TAB |
| Cab light POS 1 or switch „Cab Light” right console | |
| Gauge lights or switch „Gauge Light” right console | |
| Train destination light | or switch „Destination Light” right console |
| Saloon lights on/off END or | right cab wall „Light Set“ or „Light Trip“ button |
| Head lights L or switch „Head Lights“ right console | |
| Tail lights Right console ri and le „Tail Light“ switch | |
| Heating B or right cab wall | „Saloon Heating“ switch |
| Ventilation V or right console | „Cab Vent“ switch |
| Horn / Whistle H | |
| Wipers X | |
| Display time 1 (NUM pad) | |
| Route monitor 2 (NUM pad) | |
| Station monitor 3 (NUM pad) | |
| Traction Brake Controller set up | Arrow up |
| Traction Brake Controller set back | Arrow down |
| Selector Switch set up Page up | |
| Selector Switch set back Page down | |
| Build up pressure | From setting „Rheostatic 2. and EP. Application“ and above (Selector Switch to Auto or For) |
| Release pressure | From setting „Service Application“ and below (Selector Switch to Auto or For) |
| Screenshot | F12 |
Digitized Voice Announcer - DVA
The keys on the DVA-console on the left cab wall can be operated with a held SHIFT key and the mouse.
| Program – key (blue) | Mouse; to start and finalize the programming |
| Key 2 Mouse; to select departure or destination station | |
| Key 8 Mouse; to select departure or destination station | |
| Enter - key(green) Mouse; to confirm the entry | |
Special announcements (manually):
| Key 1 Ready for departure - (Passenger will run to train) |
| Key 2 Stand clear of the doors - (Passenger will run to train) |
| Key 3 Train terminates here |
| Key 4 All change please |
| Key 5 Apologize for delay |
| Key 6 Thank you |
| Key 7 Mind the Gap |
| Key 8 No Smoking |
| Key 9 Train held |
Operation with the Raildriver CabController
In general you can drive the train using the Raildriver CabController. The Cab Controller will have to be connected to a USB-Port of your PC. An additional activation or calibration is not necessary.
The Rail Driver does not support all functions of World of Subways Vol 3, i.e. the external controls, the calling up of the monitors and the operation and programming of the DVA. These will have to be operated via the keyboard. The assignment is given and can not be changed.
All functions can still be controlled via the keyboard when Rail Driver is connected.
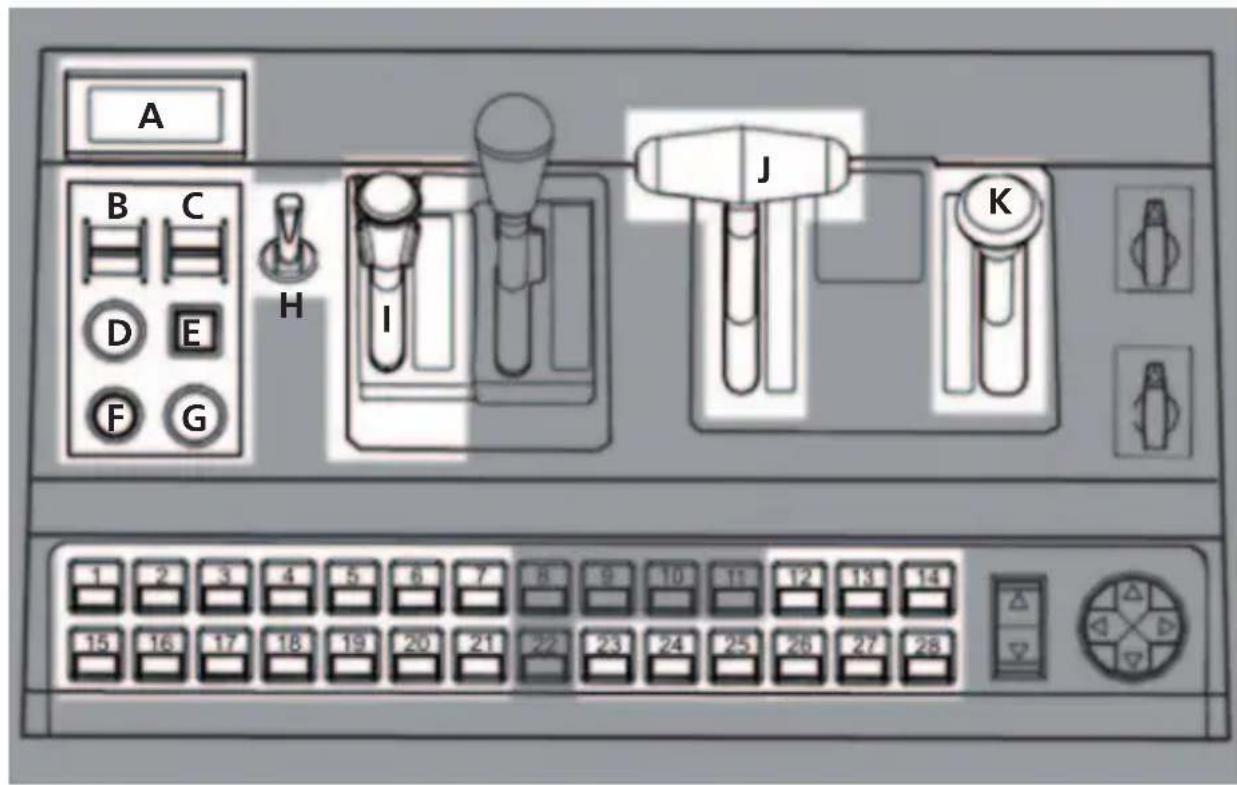
text_image
A B C D E F G H I J K 1 2 3 4 5 6 7 8 9 10 11 12 13 14 15 16 17 18 19 20 21 22 23 24 25 26 27 28Assignments for Raildriver:
A = Speed display
B = Change to driver mode (Key C)
C = Rotating switch brake test
D = Whistle / Horn
E = Brake test lights
F = Wipers
G = Dead man switch
H = Destination display
I = Emergency brake
J = Traction Brake Controller
K = Selector Switch
1 = Cab light 15 = Left cab door open/close
2 = Destination light 16 = Left passenger doors open
3 = Gauge light 17 = Left passenger doors close
4 = Head lights 18 = Look back to the left
5 = Ventilation 19 = Zoom in on left console
6 = Tail light 20 = DVA console
7 = Tail light 21 = Drivers view
8 = Not assigned 22 = Not assigned
9 = Not assigned 23 = Right cab
10 = Not assigned 24 = Right cab wall
11 = Not assigned 25 = Look back to the right
12 = Heating 26 = Right passenger doors close
13 = Passenger lights on 27 = Right passenger doors open
14 = Passenger lights off 28 = Right cab door open/close
Signale / Signals
natural_image
Illustration of a bridge over water with mountainous background and trees (no text or symbols)
natural_image
Illustration of a steam locomotive on a steel truss bridge over a river, surrounded by mountains and trees (no text or symbols visible)
natural_image
Illustration of a large industrial structure with multiple platforms and a water body, no visible text or symbolsBridge! lets you be a structural engineer and a construction manager in one. Master the mystery to bridge with a limited budget and limited numbers of parts to divide and to ensure a smooth operation.
• 30 missions • 15 different component types
• 3 levels of difficulty • 4 technical test
• 7 natural disaster tests • 3 scenarios
- Integrated Mission Editor and much more...
19,99 €