
RETRO-39 - CD Player QFX - Free user manual and instructions
Find the device manual for free RETRO-39 QFX in PDF.


| Product Type | Cassette Recorder with Speaker and USB Port |
| Brand | QFX |
| Model | RETRO-39 |
| Power Supply | AC power adapter 90-240V, or 4 UM-2 (C type) batteries 1.5V each, 6V DC |
| Speaker | 3 inches, 8 ohms |
| Output Power | 850 mW max |
| Cassette Section | Standard cassettes up to C-90; tape speed 4.7 cm/s (1-7/8 ips) |
| Frequency Response | 200 - 6300 Hz |
| Erase System | DC erase |
| Recording Bias | DC bias |
| Main Functions | Cassette Play/Record, fast forward, rewind, stop/eject, pause, USB playback, built-in microphone, Line In jack, Line Out jack |
| Carrying Handle | Integrated side handle |
| Auto Stop | Yes, at end of tape (mechanical) |
| Maintenance and Cleaning | Clean heads and rollers with isopropyl alcohol; use a cleaning cassette after manual cleaning |
| Safety | Erase protection via removable tabs on cassettes; unplug when not in use |
| Repairability | Spare parts not specified in the manual; contact QFX support |
| Dimensions | Approximately 25 x 15 x 8 cm (estimate) |
| Weight | Approximately 1 kg (estimate) |
Frequently Asked Questions - RETRO-39 QFX
User questions about RETRO-39 QFX
0 question about this device. Answer the ones you know or ask your own.
Ask a new question about this device
Download the instructions for your CD Player in PDF format for free! Find your manual RETRO-39 - QFX and take your electronic device back in hand. On this page are published all the documents necessary for the use of your device. RETRO-39 by QFX.
USER MANUAL RETRO-39 QFX
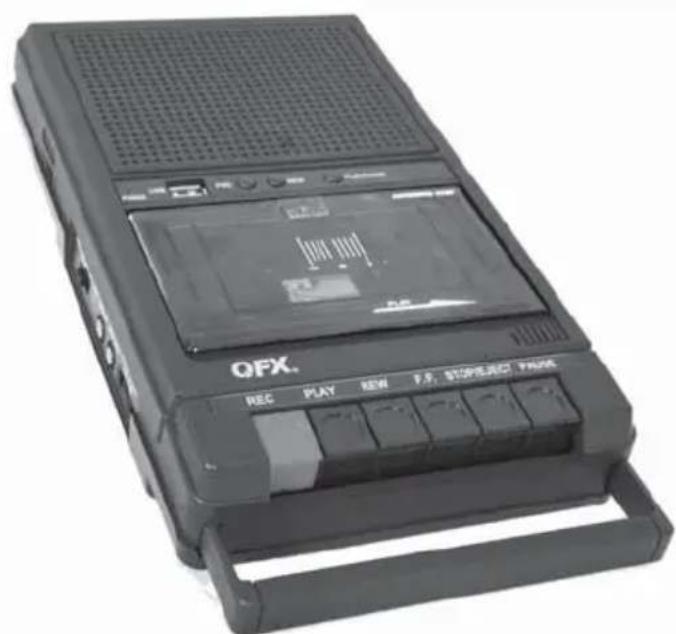
Shoes Box Style Cassette Recorder with USB Port
natural_image
Black QFX portable electronic device with control panel and display screen (no readable text or symbols)
- Attached DC JACK
- Stop/Eject Key
- Speaker (SP Recording)
- Pause Key
- USB Port
- Sideway Handle
- FWD Key (for USB)
- Volume Control
- REW Key (for USB)
- Line Out Jack
- Play/Pause Key (for USB)
- Line In Jack
- Cassette Deck
- USB/Line in/Tape/Off
- Record Key
- Battery Compartment
- Play Key
- Built-in Microphone
- Rewind Key
- Fast-Forward Key
Warning:
Disconnect the recorder by unplugging the plug at the wall socket when not in use.
Operation on Batteries
The recorder operates from 4 x 1.5V DC batteries. If the machine is to be used mostly from batteries supply. Manganese alkaline batteries will usually provide longer battery life.
Slide off the lid of the battery compartment and insert the four batteries over the ribbon, observing polarity marks inside the compartment.
INCORRECT FITTING MAY DAMAGE THE CIRCUIT
Remove weak or exhausted batteries immediately
If the recorder will not be used for long periods of time, remove the batteries and store them in a cool, dry place.
Proper care of your recorder and cassettes
- Keep the recorder in clean condition as described under Maintenance.
- Do not expose the machine to damp conditions or to extreme high temperatures, such as may be reached inside a car on a sunny day.
- Keep the machine and cassettes away from strong magnetic fields, such as close to large transformers, electric motors, television receiver and loudspeakers.
• Always wind your cassettes to one end after use. - Do not make excessive use of the wind and rewind keys in searching for a particular item on a cassette. This may cause “sleeping” or ridges in the layers of the tape and so cause jamming or triggering of the audio stop.
- Do not touch the heads with any metallic or sharp pointed objects.
Loading and removing cassettes
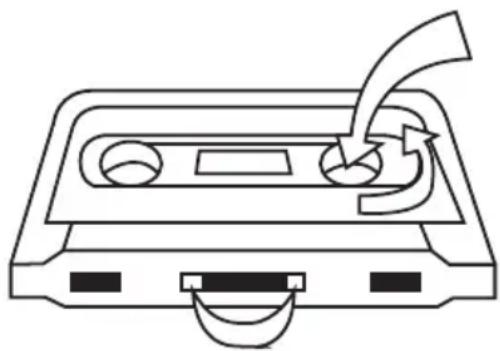
Depress the Stop/Eject Key fully to open the cassette compartment lid. Before inserting a cassette, check the tape tension and make sure that any slack is taken up. This can be done by inserting a pencil into one of the hub-holes and turning to take up the slack. This simple operation will prevent tape-spill and loop-throwing, both of which can physically damage the tape and spoil recordings.
Insert the cassette into the guide on the cassette compartment lid with the exposed tape in the face of the cassette facing the front of the machine. Ensure the cassette is located firmly within the guides on the cassette compartment lid. Close the lid. The cassette is now ready for use.
To remove cassettes, fully depress the Stop/Eject Key. Do not attempt to remove cassettes without first disengaging any function by using the Stop Key.
Do not attempt to load cassettes when the mechanism is engaged. A green surge protector is located on the bottom of the power compartment via the space provided in the back of the shelf.
natural_image
Line drawing of a cassette tape with a scroll wheel and clasp (no text or symbols)Position the microphone about 12ins/30cm from the sound source. The recorder features an Automatic Level Control (ALC) to maintain all recordings at an optimum level. The volume control operated only during replay and therefore does not need adjustment.
Because the microphone built into your machine is in close proximity to mechanical moving parts, it may pick up noise from these if the recorder is operated at greater distance that 12ins/30cm from the sound source.
Recording Using an Line-in jack
Connect a low-impedance microphone to the Line-in jack.
For maximum signal to noise performance position, place the external Line-in jack as close to the audio source as possible. Insertion of a jack plug into the Line-in jack microphone socket automatically disconnects the built-in microphone.
Auto-Stop
The Recorder incorporates a mechanical auto-stop which automatically disengages the playback or record functions at the end of a cassette.
This does not operate in either the fast-forward or rewind modes.
If a cassette triggers the auto-stop before reaching the end of the tape, the tape may have become too tightly wound or has wound ridges, causing too much friction. This can normally be corrected by rapping the cassette face down on a flat surface and then winding the tape through, from end to end, in your machine.
Fast-Forward and Rewind
The Fast-Forward key and the Rewind key allow rapid location of a particular section of tape. Function of either key is canceled by using the Stop key.
Always use the Stop key to halt the tape. Attempting to go from winding to play is likely to damage the tape, and may cause damage to the mechanism. Do not leave the machine winding tape in either direction, since the Auto-Stop will not operate when the tape reaches the end; the mechanism may be damaged if left in this way for any length of time.
Always use the Stop key once the cassette has wound through to one end.
Protecting Recordings
Normally, anything recorded on the tape is automatically erased when a new recording is made.
You can protect your recordings from accidental erasure by removing the erase lock tabs on the rear of the cassette. When the cassette is held with the recorded side up, the protective tab can be found on the left side of the rear edge of the cassette.
All pre-recorded cassettes are protected in this way to prevent accidental erasure of the commercial recording.
"Protected" cassettes may be re-recorded by simply fixing a piece of adhesive tape over the hole where the tap has been removed. This takes the place of the tab and your machine can then be engaged in the record-mode.
A “Protected” cassette will prevent the Record key from being pressed. If at any time you attempt to record and this key will not engage, do not force the mechanism or damage will result. Check that a cassette has been loaded and that the erase-lock tab has not been removed.

natural_image
Line drawing of a cassette tape with three circular slots and a handle (no text or symbols)Erase lock tab for side "i"
Maintenance
Your recorder requires no routine maintenance and under no circumstances should you attempt to lubricate any parts of the machine.
However, parts of the machine, coming into direct contact with the tape, do require periodic cleaning to ensure continuing good performance.
The tape heads (erase and record/play) may be cleaned using a cotton ball moistened with a drop of isopropyl alcohol or proprietary tape head cleaner.
The pinch-roller and capstan shaft may be cleaned in a similar manner.
To gain proper access to these parts, remove any cassette from the compartment and leave the lid raised. Pressing the Play key will engage the mechanics and move all parts into view.
It will be easier to clean the entire surface of the pinch-roller if the power source is connected (batteries or mains), so that the roller and capstan shaft rotate.
It is suggested that a proprietary Cassette Head Cleaning Cassette be used after manually cleaning the Record/Play head in order to restore the polish and remove surface film.

Failure to maintain the tape heads in clean condition will result in muffled reproduction, poor recordings and incomplete erasure.
Failure to maintain the pinch-roller and capstan shaft in clean condition, is likely to cause the tape to entangle and spill out of the cassette.
Do not touch the tape head with any metallic or sharp-pointed object.
Specifications:
Power Supply: AC (-) 90V -240V, DC 6V 4 batteries UM-2 C cell type
Speaker: 3" 8ohm
Output: 850 mW max
Cassette Section:
Tape: Standard Cassette Tape (lengths C-90 or less)
Tape Speed: 1-7/8 in/sec. (4.7 cm/sec)
Frequency Response: 200-6,300 Hz
Erasing System: DC Erase
Recording Bias System: DC Bias
Continuous improvements are always being made to our equipment, both in quality and performance, therefore we reserve the right to alter specifications without notice.
QFX®
Advertencia:
Desconectelagrabadorapordesenchufarelenchufeenelenchufedeparedcuando noesteenuso.
natural_image
Line drawing of a cassette tape with a handle and spout (no text or symbols)Erase lock tab for side "i"
Mantenimiento
natural_image
Black OFX. audio recording device with control buttons and display screen (no readable text or symbols beyond branding)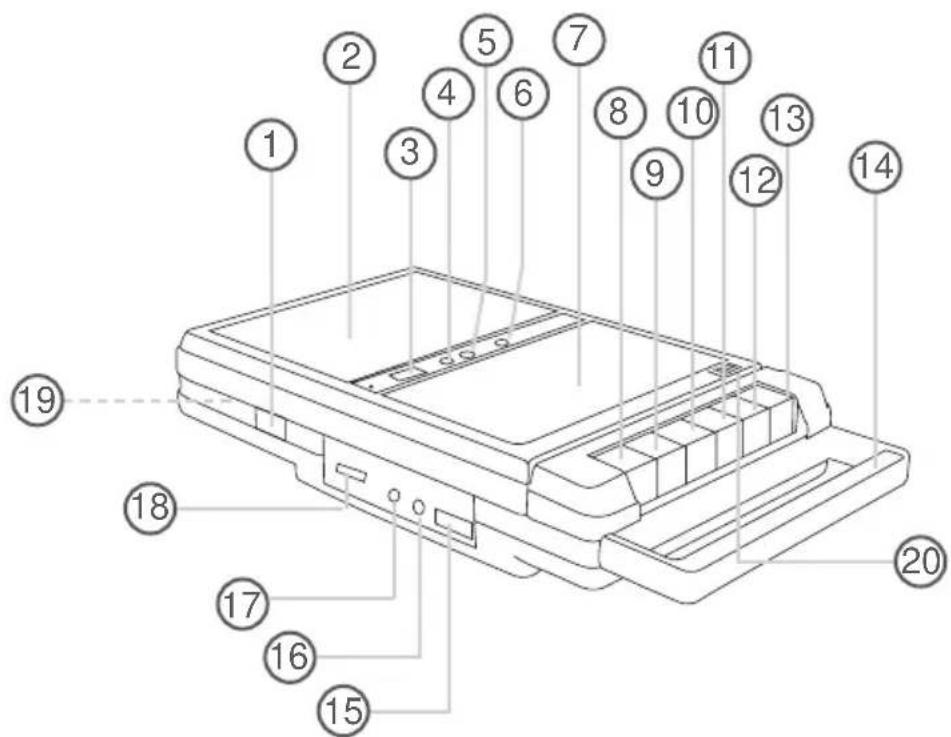
Loading and removing cassettes
Depress the Stop/Eject Key fully to open the cassette compartment lid. Before inserting a cassette, check the tape tension and make sure that any slack is taken up. This can be done by inserting a pencil into one of the hub-holes and turning to take up the slack. This simple operation will prevent tape-spill and loop-throwing, both of which can physically damage the tape and spoil recordings.
Insert the cassette into the guide on the cassette compartment lid with the exposed tape in the face of the cassette facing the front of the machine. Ensure the cassette is located firmly within the guides on the cassette compartment lid. Close the lid. The cassette is now ready for use.
To remove cassettes, fully depress the Stop/Eject Key. Do not attempt to remove cassettes without first disengaging any function by using the Stop Key.
Do not attempt to load cassettes when the mechanism is engaged. A green surge protector is located on the bottom of the power compartment via the space provided in the back of the shelf.

natural_image
Line drawing of a cassette tape with a scroll wheel and arrow indicating motion (no text or symbols)natural_image
Line drawing of a cassette tape (no text or symbols)- Shoes Box Style Cassette Recorder with USB Port
- Warning:
- Operation on Batteries
- INCORRECT FITTING MAY DAMAGE THE CIRCUIT
- Remove weak or exhausted batteries immediately
- Proper care of your recorder and cassettes
- Loading and removing cassettes
- Recording Using an Line-in jack
- Auto-Stop
- Fast-Forward and Rewind
- Protecting Recordings
- Maintenance
- Specifications:
- Cassette Section:
- QFX®
- Advertencia:
- Mantenimiento
Brand : QFX
Model : RETRO-39
Category : CD Player