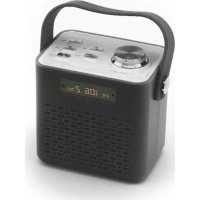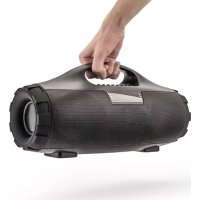
HPG336DAB-DIR - Radio CALIBER - Free user manual and instructions
Find the device manual for free HPG336DAB-DIR CALIBER in PDF.


| Product Type | Portable DAB/DAB+ Radio |
| Model | HPG336DAB-DIR |
| Brand | Caliber |
| Dimensions (W x H x D) | 200 x 130 x 70 mm |
| Weight | 0.6 kg |
| Power Supply | AC 100-240V, 50/60Hz; DC 6V (4 x AA batteries not included) |
| Radio Bands | DAB/DAB+, DAB, FM (87.5-108 MHz) |
| Display | LCD with backlight |
| Speaker Output | 2 x 3W stereo |
| Headphone Jack | 3.5 mm |
| Alarm Function | Dual alarm with snooze |
| Preset Stations | 20 DAB, 20 FM |
| Additional Features | Sleep timer, clock, auto scan, DAB/FM auto switch |
| Remote Control | Included |
| Maintenance | Wipe with dry cloth; avoid liquids |
| Safety | Do not expose to rain or moisture; use only supplied adapter |
| Spare Parts & Repairability | Contact Caliber support for spare parts; not user-serviceable |
| Accessories Included | AC adapter, remote control, user manual |
| Warranty | 1 year |
Frequently Asked Questions - HPG336DAB-DIR CALIBER
User questions about HPG336DAB-DIR CALIBER
0 question about this device. Answer the ones you know or ask your own.
Ask a new question about this device
Download the instructions for your Radio in PDF format for free! Find your manual HPG336DAB-DIR - CALIBER and take your electronic device back in hand. On this page are published all the documents necessary for the use of your device. HPG336DAB-DIR by CALIBER.
USER MANUAL HPG336DAB-DIR CALIBER
text_image
CALIBER CALIBER 4:20 pm Internetradio 10 September, 2019 HPG 3360AB/DIR INTERNET RADIO CABB/IECHPG 336DAB/DIR
Manual
GB
User Manual
Portable Internet Radio
Model:
HPG336DAB/
DIR
Please read this user manual carefully before using the receiver
Contents
Location of controls.... 1
Getting started.... 4
Charging battery 4
Connecting to your Wireless network 4
Overview of features and functions 5
Internet Radio....6
Media Centre....8
DAB+/DAB Radio 9
FM Radio.... 10
Sleep Timer Setting 11
Configuration 12
Add your favourite URL/ Manage favourite by PC 16
Trouble Shooting.... 17
Helpful Tips......
19
Technical Specification 20
Location of controls
1. POWER
Press and hold to power on/off
2. FAV
Press and hold to add station to favourite Press and release to recall the favourite list
3. MENU
Return to main menu
4. LEFT/BW
Navigation / Exit to the previous menu
5. RIGHT/FW
Navigation /Enter edit menu under Favourite list On the radio playing screen, press the [RIGHT/FW] button to view the clock, battery level and radio information
6. NAV/VOL/OK
Tune to navigate / to scroll up and down in different mode.
Increase volume level / Turn clockwise increase the volume level Reduce volume level / Turn anti-clockwise decrease the volume level Press to confirm selection Press to stop playback / resume playback under Internet radio Mute under DAB, and FM
7. Speaker
8 Display
9. Phones Jack
10. USB port for charging internal battery
11. Antenna
Before you start
Please ensure the following is ready:
- You have a broadband internet connection.
- A wireless broadband router is connected to the internet successfully. The radio supports Wireless B, G and N connection (Wireless N router can also be used with the setting on B or G).
- You know the Wired Equivalent Privacy (WEP) or Wi-Fi Protected Access (WPA) data encryption code/password. You need to key in the correct code when the radio is connected to the wireless router for network connection.
If you do not know the code/password, please contact the person /technician who set up the router/network for you.
• The radio can work via Wireless network connection (Wi-Fi connection)
Precautions
- The radio should not be used in a high temperature or high humidity environment over prolonged periods of time as this may damage the unit.
- Keep the radio away from liquids as it may get damaged. Please switch off the radio immediately if water or liquids is spilled into the radio. Consult with the shop you bought this radio for any question.
- Avoid using or storing the unit in dusty or sandy environment.
- Do not open and repair the radio by yourself.
- Use only the specified power input voltage to charge the battery. Connecting a power supply with a different rating will cause permanent damage to the radio and may be hazardous.
- Clean only with dry cloth
Getting started
The radio is powered by the built-in lithium battery. A USB cable is supplied in the product package.
Press and hold the [POWER] button to power on.
To power off the radio, press and hold the same button.
Charging battery
You can see the battery indicator showing on the top row of the display, in alternate with the state of menu.
When battery power is low, the battery indicator will keep blinking as a reminder for battery charging.
To charge the battery, connect the micro USB plug to the port at the right side of the radio, connect the other end to a power source supplied in 5V OUT. The flash aside battery indicator blinking the radio is being charged.
Note: The charging might take much longer to complete if the radio is playing while charging.
Connecting to your Wireless network
Press and hold the [POWER] button to turn on the radio. It will display as follow:
- If this is first time use, Boot up and connect to www.skytune.com to try to check updated software. “Configure Network?” wizard will be displayed. Tune [NAV] button to choose Yes to start configuring network. Press the [NAV] button to highlight Yes and press to confirm.
- Select Add/Remove AP from list (AP is the access point), tune the [NAV] button to scroll and press OK to confirm, then choose Add/Remove AP :
- Choose Add AP (Scan) to start scanning the available Wi-Fi networks around. Scroll to your network and press [NAV] to confirm. If your wifi network has a password protected, it will ask you to enter the passphrase / password.
Here are the steps to enter the password.
Use the [NAV] knob to scroll through the characters. When the correct one is highlighted, press the [NAV] knob to input and move to the next character.
When it comes to the last character of the password and it is highlighted, press & hold [NAV] to input and finish the entry process.
Note: The password is case sensitive. Please consult with the one who set up your network if you don't know the password.
When the Wi-Fi connection is successful, the Association Complete will be shown briefly. It will then display the main menu as follow:
Overview of features and functions
Press [MENU] enter the main menu. Scroll by [NAV] buttons and OK to select:
My Favorite - To show the list of favorite stations which have been assigned to the presets.
There are up to 99 presets available.
Internet Radio - Start exploring the worldwide radio stations and music here.
Media Centre - You can browse and stream music from your network via UPnP or DLNA Compatible devices.
DAB Radio - Pick up DAB+ and DAB radio signal if available in your local area (no internet connection required).
FM Radio - Receive ordinary FM radio stations in your local area (no internet connection required).
Sleep Timer - Enable the timer to turn the radio in standby after the selected time elapsed.
Configuration - More options/settings available to personalize as desired.
Note:
- Always use the [BW] button to exit to the previous menu.
- The radio has a "Status menu" to show the time/date info and battery level indicator. Under the playing screen of Internet radio, DAB and FM, press the [FW] button and the "Status menu" will appear.
Internet Radio
On the main menu, choose Internet Radio and you will find the options below:
Skytune
Select Skytune to start enjoying thousands of radio stations over the world. You can filter your search by Region, Music genre and talks.
Note - You can change the Local Radio area under Configuration> Local radio setup. Please refer to the section "Configuration" for details.
Note - You can change the Local Radio area under Configuration> Local radio setup. Please refer to the section "Configuration" for details.
Note - When you scroll along the list of Globe Most Popular / Local Radio / Globe All / Globe By Genre / Globe By Region and want to quickly reach to a certain point of the long list, press and hold the [NAV] button.
Search (Skytune)
Instead of browsing the radio station list, you can input a few characters of the desired station to filter out / short list the stations.
History
The radio memorizes the stations you have listened up to 99 stations. If you have listened more than 99 stations, it will supersede the first station that you have listened.
Start playing internet radio
When it starts playing a radio station, various information will be displayed.
Under the playing screen, press the [NAV] button, it will display the date and time, as well as the battery level indicator.
Note: Whenever you want to return to the playing screen from other menu, press the or the [RW] repeatedly or wait for the time out.
My Favorite
This is to show the list of your Favorite stations which have been assigned to the presets.
Add to Favourite
When a radio station is playing, press and hold the [NAV] the station is added to the Favorite list.
a notification ↓ will appear "meaning a station has been added to Favourite
You can store up to 99 presets.
The new added station will always appear in the last item on the Favorite list.
Recall a station
Press and release the [FAV] button on the radio unit to recall the favourite list or navigate to My Favourite on the main menu and select it to confirm.
Edit your favorite list
On the Favorite list, choose the radio station you want to edit then press the [FW] button. It will enter the Edit menu with the following options: Move down - To move down the ranking of a station Move up - To move up the ranking of a station Delete - To delete a particular station
Media Centre
The device supports UPnP and is DLNA-compatible.
This provides the opportunity to stream music from your network. However, this requires you to have a compatible device in your network that can function as a server. This can be e.g., a network hard drive or a conventional PC with e.g., Windows 8 via which access to the shared folder or media sharing is permitted. The folders can then be browsed and played on the radio.
Note - Please make sure your computer laptop is on the same Wi-Fi network as the Radio before you start using this function.
Music streaming
- Once the UPnP/DLNA compatible server is configure to share media files with your radio, you can start musicstreaming.
- On the main menu, select Media Centre and choose UPnP.
- It may take a few seconds for the radio to complete the scan for available UPnP servers. If no UPnP servers are found, it will show Empty List.
• After a successful scan is done, select your UPnP server. - The radio will show the media categories available from the UPnP server, e.g. 'Music', 'Playlists' etc.
- Choose the media files that you wish to play.
You can set the mode of playback under Configuration > Playback setup.
My Playlist
You can make your own playlist for the UPnP music files. Choose and highlight the song you want to add to playlist, press and hold the [OK] button. The song will be added to My playlist.
Clear My Playlist
Remove all songs in "My Playlist" to allow a new playlist to be prepared.
Note - If you have DLNA compatible servers available, follow the steps described above to browse the audio files from DLNA compatible device on the radio to play.
DAB Radio (Digital Audio Broadcasting)
If there is Digital Audio Broadcasting (DAB) in your area, the radio can pick up the DAB stations as well (no internet connection is required). The radio supports both DAB and DAB+.
Place the radio close to the window and extend the antenna as far as it can go or move in different direction to get the best reception.
On the main menu, choose DAB Radio and press [NAV] to start.
It will ask whether you want to Scan DAB Station. Press OK to start scanning and it will show the progress on the number of channels received. When it is done, a preset list will be displayed for your action.
You can select the channel and start listening to it. Whenever you want to add to My Favourite, press and hold the ♥[FAV] button on the unit, and it will add to the favourite list, Press and release ♥[FAV] button to recall the favourite list.
Always press the [RW] button to return to the scanned Preset list.
Note - It shows various information such as station name, radio frequency and rolling texts (if available) on the playing screen.
Press the [FW] button to view the Date, time and battery level.
New digital radio stations should be picked up automatically by the radio if they are part of a multiplex you already received. Otherwise you need to do the Preset Scan again.
FM Radio
To receive the ordinary FM stations (no internet connection is required), Place the radio close to the window and extend the antenna as far as it can go or move in different direction to get the best reception.
On the main menu, choose FM Radio and press [OK] to start.
It will ask whether you want to Scan FM Station. Press [OK] to start scanning and it will show the progress on the number of channels are found. When it is done, it will automatically save the found channels on presets and display the list for your action.
You can select the channel and start listening to it. Whenever you want to add to My Favourite, press and hold the [FAV] button on the unit, and it will add to the favourite list. Press and release the [FAV] button to recall the favourite list.
Always press the [RW] button to return to the scanned preset list.
Note - It shows various information such as station name, radio frequency and rolling texts (if available) on the playing screen. Press the [FW] button to view the Date, time and battery level indicator.
Manual Tune
To manual tune the frequency, press and hold the [OK] button, until you see the "Tuning" appeared on the display, at the bottom right corner. Use the [BW / FW] button to tune the frequency. When done, press and hold [OK] button to exit manual tune.
Sleep Timer Setting
You can set the timer to let the radio goes standby after the selected time elapsed in the range of 15 minutes to 180 minutes.
On the main menu, choose Sleep Timer and press [OK]. Choose your desired time period and press [OK] to confirm. You will see the z^z icon appeared on the top row under the status menu (press ▶ button under the playing screen to view the status menu).
To see the time remains for sleep timer, choose Sleep Timer on the main menu and press [OK]. It will show the time left to go standby.
Configuration
Here you will find the complete settings / options available to configure your own tuner. On the main menu, navigate to Configuration setting. Press OK and you will see a list of options available.
Network
Wi-Fi Network
Add / Remove AP
Add AP - It will scan out a list of wireless network around.
Add AP (WPS button) - If WPS button is available on your router, you can choose this option to quickly connect to your wifi network without entering the password. Select this option on the radio and press OK, it will show "Awaiting router info" on the display. Meantime, press the WPS button on your router within one minute. It will time out if no action is taken. It is strongly recommended to place your radio within 2 meters to the router to setup.
Note: In case the connection through WPS is not successful, repeat the steps above and try again.
Remove AP - If you have already added a wireless network and want to remove it, choose this option.
Note: Always place the radio within 2 meters of the Wi-Fi router for setup.
AP: []
If you have added more than one wireless network on the radio and want to switch to another one, select this option to change.
Signal
This is to show the strength of the Wi-Fi Signal of the Wi-Fi router as received by the radio. Usually signal levels lower than -70dBm is at weaker level and if it affects the reception of your radio, you may need to optimize the router location or check any problem of the router itself.
IP
The IP is set Dynamic by default. Select to change Fixed IP according to your network condition.
DNS
The DNS is set Dynamic by default. Select to change
Wi-Fi Channels
Not all of the Wi-Fi channels are available in every country. There may be variation between different countries. Therefore it is necessary to
choose the Wi-Fi channels to ensure the Wi- Fi performs satisfactory. We have already set the channels according to the requirement in different countries. Choose the country you are staying from the list to get the correct channel
Date and Time
The radio will set your local time automatically after the internet connection is completed. If you want to do manual setting, change it by the following options:
Time zone
Auto-set Time Zone: This option is set by default.
Manual-set Time Zone: Choose this option if you want to set the time in another region. Choose and highlight the region/city you prefer and press OK to confirm.
Coupled with NTP (use network time) and DST (Daylight time saving) will be adjusted automatically if you choose to use network time (NTP).
Set Time Format
Choose either 12-hour or 24-hour notation you prefer.
Set Date Format
DST (Day Light Saving)
Enable on/off
NTP (Use network time)
NTP is designed to synchronize a device's clock with a time server. Your radio will synchronize the time server by default every time it powers up and connects to Internet. This ensures a very high degree of accuracy in the radio's clock. You can change to use other time server by inputting the URL address (see below NTP server). You can choose “Do not use network time” if you don't want it to.
If you choose not to use NTP for clock synchronization, highlight the NTP (Network time protocol) and press OK to make the change. You will see the Set Date & Time appeared on the menu. Select it and adjust the date and time as you desire.
NTP Server
NTP is designed to synchronize a device's clock with a time server. Here it shows the server being used for the tuner.
Language
The default language is English, you can choose other languages as preferred. Scroll with the [NAV] buttons to the item with 📋 and press OK.
Scroll to highlight and press OK to select your language of choice. German, English, Spanish, French, Italian, Dutch, Polish, Russian and Simplified Chinese are available.
Local Radio
The radio is set by default to detect the radio stations in your local area automatically through internet connection and these stations can be accessed by selecting Local Radio under Skytune > Local Radio. You can also set Local in another region if you want. Highlight the Local Radio and press OK. Choose Manual-set Local radio to change the region setting.
DAB set up
DAB Preset Scan
You can always carry out a new scanning of DAB channels by selecting this option. All current presets and channels will be erased.
DAB Radio Preset
The scanned DAB stations will be listed here for management. You can move the position or even delete any station. Scroll to the station and press [FW] button. A pop up window will be presented: Move up, Move down and Delete.
FM Setup
FM Area
Choose the Region according to your physical location to define the search range for the radio.
FM Preset Scan
You can always carry out a new scanning of FM channels by selecting this option. All current presets and channels will be erased.
The radio at the lowest frequency of the scanned values will be highlighted. The preset list will be saved unless a new preset scan is carried out.
FM Radio Presets
You can adjust the preset ranking by Move down, Move up or Delete it.
Highlight one of the preset, then press the [FW] button, it will enter into the Edit menu.
Always press the [RW] button to return to the Preset list.
Playback Setup
This is to set the mode of playback under UPnP/DLNA compatible streaming: Repeat All, Repeat Once or Shuffle.
Resume when Power on
This function is ON by default. The radio will resume to the last state of mode when the radio turns on next time, e.g. if it was playing radio station before power off, it will resume playing the last listened station when it turns on next time.
Dimmer
You can set the backlight level for the display as you prefer. There are two settings: Mode and Level
Mode - Normal or Power Saving
Normal - the display will stay with the same level of brightness all the time without dim down. Dim - the display will dim down after 20 seconds if no operation is made on the radio.
Level - Bright and Dim
Bright - This is to adjust the level of brightness in Normal mode. Dim - This is to adjust the level of brightness in Dim mode.
EQ(Equaliser)
Set the equaliser according to your listening preference.
Buffer Time
Sometimes you may experience uneven playback of the internet radio. This can happen if the internet connection is slow or network congestion occurs. To help improving the situation, you can choose longer buffer time to get a few seconds of radio stream before beginning to play.
The default value is 2 seconds. You can choose 5 seconds if you prefer to have a longer buffering time.
Information
View the Network and System Information of your radio.
When you use PC to manage the My favorite stations, you have to use the IP address and you can view this info from here. Then type in the IP address (Configuration > Info > Network > IP) to your PC's browser input window.
Software Update
There may be software release to upgrade features of the radio from time to time. Check the update regularly to keep your radio up to date with the latest software.
Reset to Default
You can do the reset to clear all the settings and return to default settings.
** Please note all the Station presets, Settings and configuration will be erased after you have performed the Reset.
Note: In case the radio has no response or hang up, reset the radio by press and hold the [POWER] and [RW] button at the same time until the radio is powered off.
Add your favourite URL/ Manage favourite byPC
You can add your favorite radio station if you know the published audio stream URL of the radio.
We provide an embedded server for your radio and you can manage your favorite stations anytime to add or edit the list. Follow the steps below to access the embedded server:
- Connect your PC to the same Wi-Fi network as your radio.
- Locate the IP address as follow:
- On the main menu, go to Configuration > Information > Network Information > IP
- Open the web browser (we support Internet Explorer and Chrome) in your PC and type the IP address of the radio (e.g. 192.168.1.11). The screen will pop up as below:
MY FAVOURITE

text_image
Channel Presets ID Channel Name Channel URL 1. France Info ******* Channel URL is maintained by Skytune Info Edit Delete 2. Europe 1 ******* Channel URL is maintained by Skytune Info Edit Delete Move ID To ID Previous Next Current No. 1▼ Page (ID Range: 1-2)
text_image
Add Channel Channel Name Please enter your favourite channel name. Channel URL Please enter channel URL Channel Country Select Genre of Channel Select Save Reset- You can input the name and URL of a new radio station under the Add channel section, then click Save. The new station will sync to the Favorite list of your radio immediately. You can add up to 99 radio stations.
Trouble Shooting
| Problem | Cause | Solutions |
| Cannot connect to Wi-Fi network | Network down | Confirm that a Wi-Fi or Ethernet Wired connected PC can access the internet (i.e. can browse the web) using the same network.Check that a DHCP server is available, or that you have configured a static IP address on the radio.Check that you firewall is not blocking any outgoing ports. As a minimum the radio needs access to UDP and TCP ports 80,443 and 8008, DNS port 53. |
| Router restricts access to listed MAC addresses | Obtain the MAC address from Configuration > Information > Network > Wi-Fi MAC and add to the allowed equipment list on your access point.Note: The radio has separate MAC address for wireless networks. | |
| Insufficient Wi-Fi signal strength | Check distance to router; see if a computer can connect to the network in this locationOptimize the distance of the router's location. Always place the radio close to the router within 2 meters to setup. | |
| Unknown encryption method | Change encryption method on router.The radio supports WEP, WPA, WPA2 | |
| Firewall preventing access | Windows Media Player: varies—non-Microsoft fire walls may require configuration for UPnP.Try other routers and see if the radio can connect, or if hotspot is available on your mobile device, try to see if it connects. | |
| If your radio can connect to the network successfully, but is unable to play particular stations | ·The station is not broadcasting at this time of the day (remember it may be located in a different time zone).·The station has too many people trying to attach to the radio station server and the server capacity is not large enough.·The station has reached the maximum allowed number of simultaneous listeners.·The link on the radio is out of date. The streaming links will be updated regularly or please contact our customer service. | |
| If it shows "Empty list" when "Skytune" is selected. | ·Check if the History or Favourite list can play. If there is no problem, please try again later after 30 minutes. If the stations under those list cannot play, check the Internet connection / cable. | |
| If "Skytune not ready" when Skytune is selected. | ·Try to play the list under History or Favourite. If both cannot play, check your internet connection and if other devices connected to the same network is working. If the Favourite list and History can play, power the radio off and on again to see.If problem persists, please contact us for further assistance. | |
| No DAB/FM reception | ·Please carry out “Factory Reset” on the radio under Configuration in the main menu and extend the antenna. Try different length on the antenna/direction.·Move the radio close to the window. | |
| DAB/FM Radio reception is poor | ·Please adjust the length / direction of the antenna to reach a better reception.·Check that you do not have other electrical equipment too close to your radio, causing interference. | |
| No sound | ·Adjust the volume level.·Check if the internet radio playback is stopped. Press the OK button to play.Under DAB and FM mode, check if it is muted, press the OK button to unmute. |
Helpful Tips :
If the Internet Radio keeps re-buffering radio station:
The Internet Radio is streaming the data from the radio station via your broadband connection, if there is a high error rate on your broadband connection, or the connection is intermittent, then it will cause the Internet Radio to pause until the connection is re-established and it has received enough data to start playing again.
If your Internet Radio keeps stopping, please check the DSL modem to ensure that the Broadband line is not suffering a high error rate or disconnections. If you are experiencing these problems, you will need to contact your broadband supplier.
What is Buffering?
When playing a stream, the Internet Radio/Media player, downloads a small amount of the stream before it starts playing. This is used to fill in any gaps in the stream that may occur if the internet or the wireless network is busy. The Internet Radio streams music data from the PC while you are listening. If a stream gets blocked or experiences Internet congestion while transferring it may stop/interfere with the quality of play. If this happens, check your internet connection speed- it must be faster than the speed of the streams.
My radio is working but some stations cannot be played.
The problem may be due to one or more of the followings:
a. The radio station is no longer broadcasting.
b. The radio station has reached the maximum allowed number of simultaneous listeners.
c. The radio station has changed the stream arrangement and the link is no longer valid.
d. The radio station is not broadcasting at the time of the day (not all stations are broadcasting 24 hours throughout the day).
e. The Internet connection between your radio and the radio station server is too slow or unstable to support the data rate of the broadcast.
Technical Specification
Model:
HPG336DAB-DIR
Power input: 5V 1A
Power voltage: 100-240V\~50/60Hz
Wireless Network: IEEE802.11b/g/n
Wireless network frequency: 2412 - 2484 MHz
Wireless transmission power: Typical transmission power 14 dBm (72.2 Mbps); 20 dBm (11b mode)
Security Protocol: WEP/WPA/WPA2
DAB frequency range: 174.928MHz (5A) - 239.200MHz (13F)
Support DAB and DAB+
FM frequency range: 87.5-108MHz
Built-in Lithium-ion battery: 2000mAh
Audio output: Stereo earphone jack 3.5 mm
Telescopic antenna
Unit Dimension: 162 x 46 x 102 mm
Remark: Specification may vary without notice
What's included in the box
* Internet Radio
* USB charging cable
* User manual
WEEE and Recycling
The European laws do not allow any more the disposal of old or defective electric or electronic devices with the household waste. Return your product to a municipal collection point for recycling to dispose of it. This system is financed by the industry and ensures environmentally responsible disposal and the recycling of valuable raw materials.
GB Caliber hereby declares that the item HPG336DAB/DIR is in compliance with the essential requirements and other relevant provisions of Directive 2014/53/EU (RED) and 2011/65/EU (RoHS).
FR Par la présente Caliber déclare que l'appareil HPG336DAB/DIR est conforme aux exigences essentielles et aux autres dispositions pertinentes de la directive 2014/53/EU (RED) et 2011/65/EU (RoHS).
DE Hiermit erklärt Caliber, dass sich das Gerät HPG336DAB/DIR in Übereinstimmung mit den grundlegenden Anforderung und übrigen einschlägigen Bestimmungen der Richtlinie 2014/53/EU (RED) und 2011/65/EU (RoHS) befindet.
IT Con la presente Caliber dichiara che questo HPG336DAB/DIR è conforme ai requisiti essenziali ed alle alte disposizioni pertinenti stabilite dalla directiva 2014/53/EU (RED) e 2011/65/EU (RoHS).
ES Por medio de la presente Caliber declara que el HPG336DAB/DIR cumple con los requisitos esenciales y otra disposiciones aplicables o exigibles de la Directiva 2014/53/EU (RED) y 2011/65/EU (RoHS).
PT Caliber declara que este HPG336DAB/DIR está conforme com os requisitos essenciais e outras disposições da Directiva 2014/53/EU (RED) e 2011/65/EU (RoHS).
S Härmed intygar Caliber att denna HPG336DAB/DIR Pro står i överensstämmelse med de väsentliga egenskapskrav och övriga relevanta bestämmelser som framgår av direktiv 2014/53/EU (RED) och 2011/65/EU (RoHS).
PL Niniejszym Caliber oświadcza, że HPG336DAB/DIR jest zgodne z zasadniczymi wymaganiami oraz innymi stosownymi postanowieniami Dyrektywy 2014/53/EU (RED) i 2011/65/EU (RoHS).
DK Undertegnede Caliber erklærer hermed, at følgende udstyr HPG336DAB/DIR overholder de væsentlige krav og øvrige relevante krav i direktiv 2014/53/EU (RED) og 2011/65/EU (RoHS).
EE Käesolevaga kinnitab Caliber seadme HPG336DAB/DIR vastavust direktiivi 2014/53/EU (RED) ja 2011/65/EU (RoHS) pöhinõuetele ja nimetatud direktiivist tulenevatelle teistele asjakohastele sätetele.
LT Šiuo Caliber deklaruoja, kad šis HPG336DAB/DIR atitinka esminius reikalavimus ir kitas 2014/53/EU (RED) ir 2011/65/EU (RoHS) Direktyvos nuostatas.
FI Caliber vakuuttaa täten että HPG336DAB/DIR tyyppinen laite on direktiivin 2014/53/EU (RED) ja 2011/65/EU (RoHS) oleellisten vaatimusten ja sitä koskevien direktiivin muiden ehtojen mukainen.
IS Hér með lýsi Caliber yfir þvi að HPG336DAB/DIR erí samræmi við grunnkröfur og aðrar kröfur, sem gerðar eru í tilskipun 2014/53/EU (RED) og 2011/65/EU (RoHS).
NO Caliber erklærer herved at utstyret HPG336DAB/DIR er i samsvar med de grunn-leggende krav og øvrige relevante krav i drektiv 2014/53/EU (RED) og 2011/65/EU (RoHS).
NL Hierbij verklaart Caliber dat het toestel HPG336DAB/DIR in overeenstemming is met de essentiële eisen en de andere relevante bepalingen van richtlijn 2014/53/EU (RED) en 2011/65/EU (RoHS).
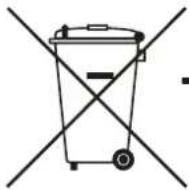
GB Old appliances and/or batteries must not be disposed with garbage!
If the device/battery can not be used anymore, every user is legally obliged to dispose of old appliances and/or batteries separated from the garbage, e.g. at a collection point of his municipality/district.