
G 3640 - Guillotine OLYMPIA - Free user manual and instructions
Find the device manual for free G 3640 OLYMPIA in PDF.


| Product Type | Guillotine Paper Cutter |
| Brand | Olympia |
| Model | G 3640 |
| Cutting Length | 360 mm (approx.) |
| Cutting Capacity | Up to 15 sheets of 80 g/m² paper |
| Dimensions (W x D x H) | 500 x 300 x 150 mm (approx.) |
| Weight | 5 kg (approx.) |
| Power Supply | Manual operation (no power required) |
| Main Functions | Trimming paper, cutting photos, crafting |
| Safety Features | Blade lock, safety guard, automatic blade return |
| Material | Metal base with plastic components |
| Maintenance | Wipe blade with dry cloth after use; occasional lubrication |
| Spare Parts Available | Replacement blades, cutting stick |
| Repairability | User-serviceable blade replacement; professional repair for other issues |
| Included Accessories | Cutting mat, blade guard |
| Intended Use | Office, school, home crafting |
| Certifications | CE (assumed) |
Frequently Asked Questions - G 3640 OLYMPIA
User questions about G 3640 OLYMPIA
0 question about this device. Answer the ones you know or ask your own.
Ask a new question about this device
Download the instructions for your Guillotine in PDF format for free! Find your manual G 3640 - OLYMPIA and take your electronic device back in hand. On this page are published all the documents necessary for the use of your device. G 3640 by OLYMPIA.
USER MANUAL G 3640 OLYMPIA
natural_image
3D rendering of a black-and-white manual cutting machine with open blade and grid pattern (no text or symbols visible)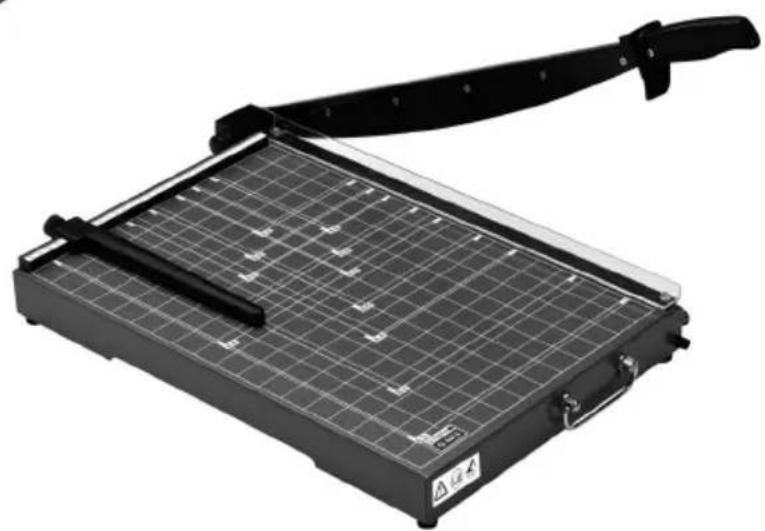
natural_image
Black and white photo of a flatbed cutting machine with metal blades and grid pattern (no text or symbols visible)Hebelschneider G 3120 / G 4420 / G 3640 / G 4640 / G 3115 / G 4415
Guillotine G 3120 / G 4420 / G 3640 / G 4640 / G 3115 / G 4415

natural_image
Technical line drawing of a mechanical device with labeled parts (no text or symbols present)natural_image
Technical line drawing of a mechanical assembly with two views (one showing a pin inserted, the other showing a handle inserted), no text or symbols present.Service-Center Hattingen
Zum Kraftwerk 1
45527 Hattingen
Please read the following information thoroughly and observe the instructions and information contained when operating the device.
- Keep this operating manual in a safe place for future reference.
- Before starting to use the device, set it down on a level, stable working base.
- Never take hold of the blades when carrying the device or putting it away.
- Always use both hands to operate the device.
- Keep loose clothing, ties, jewellery, long hair and other loose objects away from the device.
- Remove any staples and/or paper clips from the document before starting to cut it.
- The cutting blade must be neither greased nor ground.
- Do not use the device if the pressing rail is not firmly in place.
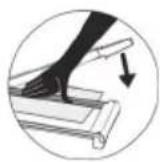
- The device must not be used if the blade is damaged.
- Keep the device out of the reach of small children.
- The device is not intended to cut fingernails or toenails.
- Intended Use
This guillotine may only be used to cut paper, photo paper and lamination foil.
Unauthorised modification or reconstruction is not permitted.
●Unintended Use
Only cut materials complying with the specifications in Section Technical Data. Any use other than that described in Section Intended Use is considered unintended use.
●Overview of Operating Elements
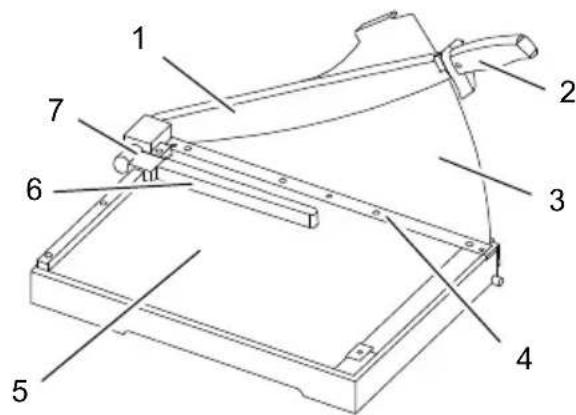
- Guillotine arm (blade)
- Handle of guillotine arm
- Perspex blade protection
- Pressing rail with finger protection
- Positioning lines and measuring systems
- Paper guide
- Lock for paper guide
●Assembling the Blade Protection
Note: The following descriptions applies to the models G 4420, G 3120, G 3640 and G 4640.
natural_image
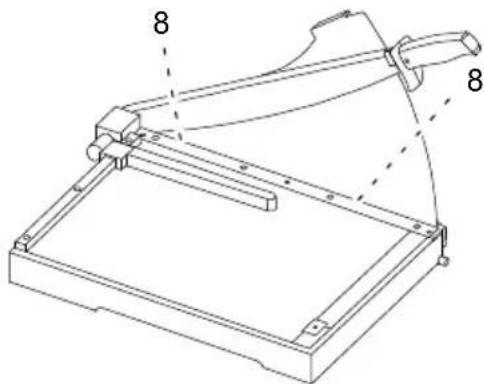
Technical line drawing of a mechanical device with labeled parts (no text or symbols present)Before starting to use the guillotine, assemble the perspex blade protection to protect the user from the sharp guillotine blade.
- Remove the device carefully from the packaging.
- Remove the screws (8) from the pressing rail (4).
- Remove the protective card from the per-spex blade protection (3).
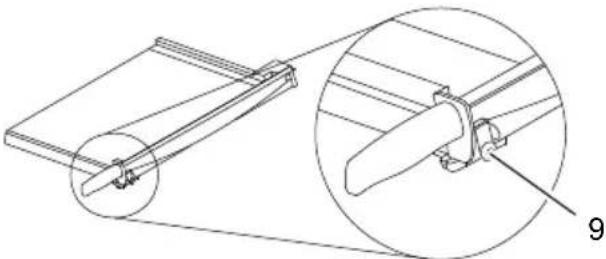
- Unlock the guillotine arm (1) by turning the lock (9) clockwise.
- Pull the guillotine arm (1) upwards a little. Install the perspex blade protection (3) carefully, from the rear, so that the protection is against the blade.
Note: The handle (2) is provided with a small projection which must be on the left-hand side of the perspex blade protection (3). Move the cover so that the screw holes are in line with the respective thread.

Attention: Property damage! The per-spex blade protection (3) could be damaged. Do not tighten the screws too tight.
- Fix the perspex blade protection (3) in place on the pressing rail (4) with the screws (8).
●Guillotine
- Remove the device carefully from the packaging.

Attention: Risk of injury! The guillotine blade is very sharp! Never reach in towards or take hold of the guillotine blade.
- Before starting to use the device, set it down on a level, stable working base.
Note: The guillotine arm (1) is locked on the underside of the cutting unit.
- Unlock the guillotine arm (1) by turning the lock (9) clockwise.
natural_image
Technical line drawing of a mechanical assembly with an inset showing a pin inserted into a bracket (no text or symbols present)-
Use the handle (2) to move the guillotine arm (1) upwards.
-
Place the material to be cut in the required position under the pressing rail (4) and press the pressing rail down.
-
Cut the material by moving the guillotine arm (1) down using the handle (2).

Attention: Risk of injury! The guillotine blade is very sharp! Never reach in towards or take hold of the guillotine blade.
Note: After completing the cutting task, the guillotine arm (1) must be locked to the underside of the cutting unit.
- Use the handle (2) to move the guillotine arm (1) down as far as possible. Lock the guillotine arm by turning the lock (9) anticlockwise.
●Paper Guide
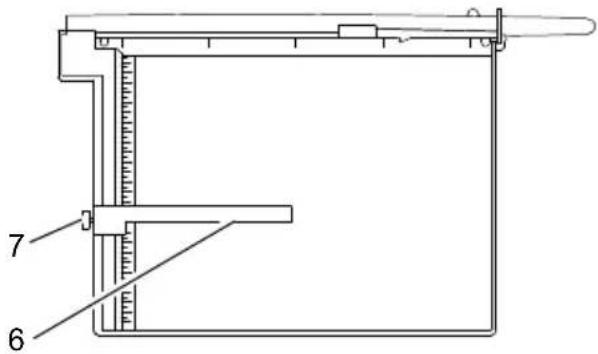
- Release the lock (7) for the paper guide (6).
- Slide the paper guide (6) carefully on the rail.
Note: Do not slide the paper guide (6) if the lock (7) has not been released.
- Position the paper guide (6) with the aid of the measuring units and systems (5).
Note: The paper guide (6) can be adjusted continually in the rail.
- Lock the paper guide (6). The paper guide serves as a stopper for the material to be cut.
●Technical Data
Cutting length (mm)
| G 3640 | 360 |
| G 4640 460 | |
| G 3120 310 | |
| G 4420 448 | |
| G 4415 448 | |
| G 3115 310 |
●Adjusting the Guillotine Arm
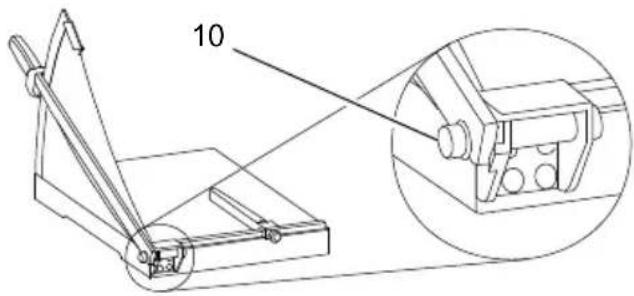
After a period of time in use, the guillotine arm (1) becomes too loose and no longer remains in position of its own accord. The guillotine arm (1) must then be readjusted.
- Tighten the screw (10) slowly, using an appropriate tool.
Note: Check whether the guillotine arm remains in position, taking the safety information into account. If the guillotine arm is too difficult to move, loosen the screw (10) slowly, using an appropriate tool.
Cutting capacity Sheets (80 g / m²)
| G 3640 | 40 |
| G 4640 40 | |
| G 3120 20 | |
| G 4420 20 | |
| G 4415 15 | |
| G 3115 15 |
Dimensions (L x W x H) (mm)
| G 3640 | 294 x 630 x 360 |
| G 4640 394 x 730 x 370 | |
| G 3120 385 x 405 x 300 | |
| G 4420 360 x 535 x 445 | |
| G 4415 360 x 535 x 70 | |
| G 3115 385 x 410 x 70 | |
Weight (kg)
| G 3640 | 4.9 |
| G 4640 8.2 | |
| G 3120 2.7 | |
| G 4420 4.9 | |
| G 4415 4.6 | |
| G 3115 2,5 |
●Cleaning the Device

Attention: Risk of injury! The guillotine blade is very sharp! Take the utmost caution when cleaning the guillotine blade!
Clean the outer surfaces of the device with a slightly damp cloth. Clean the blade carefully with a soft brush.
Do not use any aggressive cleaning agents or chemicals to clean the device.
we are pleased that you have chosen this equipment.
In the case of a defect, please return the device together with the receipt and original packing material to the point-of-sale.

Brand : OLYMPIA
Model : G 3640
Category : Guillotine