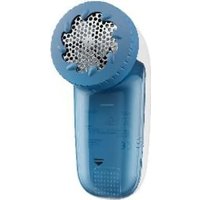
AFR 3 C2 - Nettoyage du visage AQUAPUR - Free user manual and instructions
Find the device manual for free AFR 3 C2 AQUAPUR in PDF.


| Product Type | Lint remover (fabric shaver) |
| Brand | AquaPur |
| Model | AFR 3 C2 |
| Power Supply | 2 x 1.5V AA batteries (LR6/Mignon) |
| Voltage | 3 V |
| Speed Levels | 2 (level 1 and 2) |
| Adjustable Spacer | Yes, for thick and thin fabrics; removable for very fine lint |
| Safety Cut-out | Yes, blades stop under excessive pressure |
| Fluff Collector | Yes, removable and emptyable |
| Included Accessories | Cleaning brush, protective cap, spacer, 2 x AA batteries, operating instructions |
| Intended Use | Removing lint and fluff from clothing in domestic environments |
| Material | Plastic housing, stainless steel blades |
| Cleaning Method | Empty fluff collector; clean housing, spacer, and cap with damp cloth; clean blades with brush |
| Dimensions (approx) | 10 x 5 x 5 cm (height x width x depth) |
| Weight (approx) | 200 g (including batteries) |
| Warranty | 3 years from date of purchase |
| Disposal | Compliant with WEEE Directive 2012/19/EU; do not dispose in household waste |
| Battery Disposal | Dispose of discharged batteries at collection points |
Frequently Asked Questions - AFR 3 C2 AQUAPUR
User questions about AFR 3 C2 AQUAPUR
0 question about this device. Answer the ones you know or ask your own.
Ask a new question about this device
Download the instructions for your Nettoyage du visage in PDF format for free! Find your manual AFR 3 C2 - AQUAPUR and take your electronic device back in hand. On this page are published all the documents necessary for the use of your device. AFR 3 C2 by AQUAPUR.
USER MANUAL AFR 3 C2 AQUAPUR
Operating instructions
IAN 276994
ES IT PT
text_image
iES
Before reading, unfold the page containing the illustrations and familiarise yourself with all functions of the device.
DE AT CH
GB/MT Operating instructions Page 43
text_image
Technical diagram showing a mechanical component with labeled parts and directional arrows indicating motion or movement.natural_image
Simple line drawing of a trash bin with crossed lines indicating no waste or restriction (no text or symbols)KOMPERNASS HANDELS GMBH
BURGSTRASSE 21
44867 BOCHUM
GERMANY
www.kompernass.com
Indice
Introduzione 16
text_image
Technical diagram showing a mechanical component with labeled parts and directional arrows indicating motion or movement.natural_image
Simple line drawing of a trash bin with two crossed lines indicating no waste or restriction (no text or symbols)KOMPERNASS HANDELS GMBH
BURGSTRASSE 21
44867 BOCHUM
GERMANY
www.kompernass.com
Índice
Introdução 30
Colocar as pilhas 33
Utilização 34
text_image
Technical diagram showing a mechanical component with labeled parts and directional arrows indicating motion or movement.natural_image
Symbol of a trash bin crossed with two diagonal lines, representing no waste or discharge (no text or labels)KOMPERNASS HANDELS GMBH
BURGSTRASSE 21
44867 BOCHUM
GERMANY
www.kompernass.com
Contents
Introduction 44
Intended use 44
Safety instructions 44
Package contents 46
Technical data 47
Appliance description 47
Inserting batteries 47
Usage 48
Removing / replacing the spacer ..... 50
Cleaning and care ....51
Emptying the fl uff collector .... 51
Cleaning the housing and cutting head ..... 51
Disposal 52
Read these operating instructions carefully before using the appliance for the first time, and retain them for future reference. Please pass these operating instructions on to any future owner(s).
Introduction
Congratulations on the purchase of your new appliance.
You have selected a high-quality product. The operating instructions are part of this product. They contain important information on safety, usage and disposal.
Before using the product, familiarise yourself with all handling and safety guidelines. Use the product only as described and for the range of applications specified.
Please also pass these operating instructions on to any future owner(s).
Intended use
This lint remover is intended exclusively for the removal of lint and fl uff from clothing in domestic environments.
Do not use it in commercial or industrial environments.
Safety instructions
■ This appliance may be used by children aged 8 years and above and by persons with limited physical, sensory or mental capabilities or lack of experience and knowledge, provided that they are under supervision or have been told how to use the appliance safely and are aware of the potential risks.
Children must not use the appliance as a plaything. Cleaning and user maintenance tasks may not be carried out by children unless they are supervised.
■ To avoid damage, do not allow liquids to penetrate the appliance and do not submerge it in water.
■ Ensure that no foreign objects penetrate the appliance.
■ Never open the housing, except the battery compartment to replace the batteries, there are no user-serviceable parts inside.
■ In the event of malfunctions or obvious damage, please contact our Customer Service department.
If you do not intend to use the appliance for an extended period, remove the batteries – batteries can discharge themselves and then leak.
■ Should the batteries leak: Put on protective gloves and clean the battery compartment with a dry cloth.
■ Use ONLY the type of battery detailed in the Technical Data as replacements for discharged batteries.
■ Do not throw the batteries into the fire. Do not short-circuit the batteries. Do not attempt to recharge the batteries. There is a risk of explosion!
- Keep batteries away from small children. Infants can put batteries into their mouths and swallow them. If a battery is swallowed, seek medical assistance IMMEDIATELY. There is a risk of fatal injury!
Package contents
Before using the appliance for the first time, check the package content to ensure that it is complete and free of visible damage.
◆ Lint remover
◆ Cleaning brush, protective cap, spacer
◆ 2 x batteries
◆ Operating instructions
Technical data
Power supply: 2 x 1.5 V, type AA/LR6/Mignon
Voltage: 3 V
Appliance description
③ Fluff collector
④ Shaver foil
⑤ Adjustable spacer
6 Protective cap
⑦ Cleaning brush
① On/Off switch/Speed switch
② Battery compartment cover
Inserting batteries
1) Pull off the battery compartment cover ②.
2) Insert the batteries as shown in the polarity diagram in the battery compartment.
3) Slide the battery compartment cover ② back on so that it clicks into place.
Usage
NOTE
This lint remover can damage structured fabrics or very soft materials such as angora. Therefore, always test the lint remover on an inconspicuous part of the garment and turn the transparent part of the spacer ⑤ first to the level "Thick" and then push the On/Off switch/Speed switch ① to speed level 1. The appliance now runs at speed level 1. In this way you can gently test whether the setting is sufficient for the garment without damaging it.
This appliance should not be brought into contact with moisture. Therefore, do not use the lint remover on moist fabrics.
1) Lay the garment on a flat surface, such as an ironing board. Ensure that the surface to be processed has no wrinkles. Otherwise, the garment could be damaged.
2) Turn the spacer ⑤ to the desired position or remove it completely (see Chapter "Removing/ replacing the spacer"):
- "Thick" for large bobbles and coarse textiles (large distance to the cutter knives)
- "Thin" for small lint/bobbles and fine textiles (small distance to the cutter knives)
- Remove the spacer ⑤, only for very fine lint (virtually no spacing to the cutter knives).
3) Push the On/Off switch/Speed switch ① to the required speed level.
We recommend that you start working at speed level 1. If the results are satisfactory and you feel comfortable handling the appliance then you can switch up to speed level 2.
4) Guide the shaver foil ④ lightly and without pressure over the material. The fluff and bobbles will be shaved off and collected in the fluff collector ③.
5) When you want to stop, push the On/Off switch/Speed switch ① back to speed level 0.
NOTE - SAFETY CUT-OUT
This appliance is equipped with a safety cut-out. If you apply excessive pressure, the blades under the shaver foil ④ will stop. As soon as the pressure is reduced, the blades will resume moving.
NOTE
Empty the fl uff collector ③ regularly. If the fl uff collector ③ is overfi lled, the cutting blades will work more slowly even though the batteries are not yet weak.
Removing / replacing the spacer
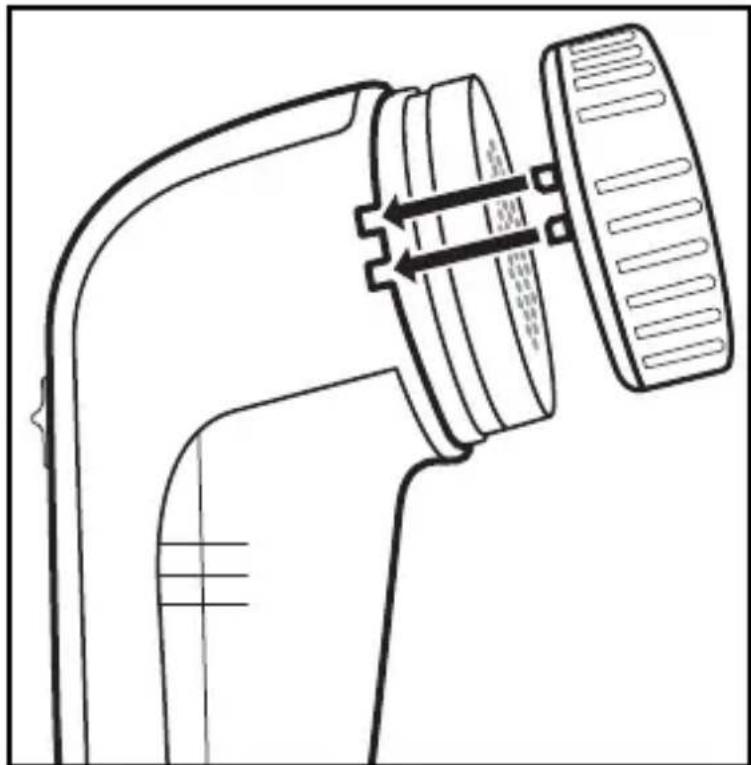
To attach the spacer ⑤, place it on the cutting head and press it firmly. Ensure that the two small tabs on the spacer ⑤ grip into the two recesses on the appliance:
natural_image
Technical line drawing of a mechanical component with directional arrows indicating motion or assembly (no text or symbols)◆ To remove it, pull the spacer ⑤ forwards and off.
To protect the shaver foil ④, you should remove the spacer ⑤ when not using the appliance and place the protective cap ⑥ on the shaver foil ④.
Cleaning and care
Emptying the fl uff collector
1) First pull the fl uff collector ③ a little way down and lift it off.
2) Empty out the textile fl uff.
3) Replace the fl uff collector ③ so that it is firmly in place.
Cleaning the housing and cutting head
ATTENTION! MATERIAL DAMAGE!
Do not use abrasive, aggressive or chemical cleaning agents. These could damage the surface of the appliance!
- Clean the housing, the removed spacer ⑤ and the protective cap ⑥ with a moist cloth.
◆ Unscrew the shaver foil ④ from the appliance. Clean the shaver foil ④ with a slightly damp cloth.
WARNING! RISK OF INJURY!
Be careful when handling the blades under the shaver foil ④. These are very sharp and can easily be damaged.
◆ Brush fl uff and lint remnants from the cutter knives with the cleaning brush ⑦.
When all parts are well dried, screw the shaver foil 4 back on.
◆ Replace the spacer ⑤ so that it is seated firmly.
Disposal
text_image
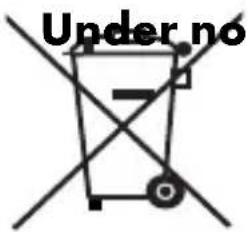
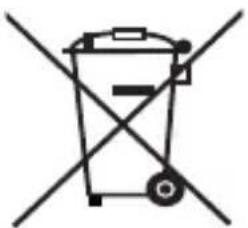
Under nocircumstances should the appliance be disposed of in standard domestic waste. This product is subject to the provisions of European Directive 2012/19/EU.
Dispose of the appliance via an approved waste disposal company or your municipal waste disposal facility. Please observe applicable regulations. Please contact your waste disposal facility if you are in any doubt.
Disposal of (rechargeable) batteries
natural_image
Symbol of a trash bin crossed with diagonal lines, representing waste or discharge (no text or labels)Used (rechargeable) batteries
be disposed of in the domestic waste. Consumers are legally obliged to dispose of (rechargeable) batteries at a collection point in their community/ city district or at a retail store.
The purpose of this obligation is to ensure that (rechargeable) batteries are disposed of in an environmentally congruent manner. Only dispose of (rechargeable) batteries when they are fully discharged.

The packaging is made of environmentally friendly materials which you can dispose of at your local recycling centre.
This appliance has a 3-year warranty valid from the date of purchase. If this product has any faults, you, the buyer, have certain statutory rights. Your statutory rights are not restricted in any way by the warranty described below.
Warranty conditions
The validity period of the warranty starts from the date of purchase. Please keep your original receipt in a safe place. This document will be required as proof of purchase.
If any material or production fault occurs within three years of the date of purchase of the product, we will either repair or replace the product for you at our discretion. This warranty service is dependent on you presenting the defective appliance and the proof of purchase (receipt) and a short written description of the fault and its time of occurrence.
If the defect is covered by the warranty, your product will either be repaired or replaced by us. The repair or replacement of a product does not signify the beginning of a new warranty period.
Warranty period and statutory claims for defects
The warranty period is not prolonged by repairs eff ected under the warranty. This also applies to replaced and repaired components. Any damage and defects present at the time of purchase must be reported immediately after unpacking. Repairs carried out after expiry of the warranty period shall be subject to a fee.
Scope of the warranty
This appliance has been manufactured in accordance with strict quality guidelines and inspected meticulously prior to delivery.
The warranty covers material faults or production faults. The warranty does not extend to product parts subject to normal wear and tear or fragile parts such as switches, batteries, baking moulds or parts made of glass.
The warranty does not apply if the product has been damaged, improperly used or improperly maintained. The directions in the operating instructions for the product regarding proper use of the product are to be strictly followed. Uses and actions that are discouraged in the operating instructions or which are warned against must be avoided.
This product is intended solely for private use and not for commercial purposes. The warranty shall be deemed void in cases of misuse or improper handling, use of force and modifications / repairs which have not been carried out by one of our authorised Service centres.
Warranty claim procedure
To ensure quick processing of your case, please observe the following instructions:
■ Please have the till receipt and the item number (e.g. IAN 12345) available as proof of purchase.
■ You will find the item number on the type plate, an engraving on the front page of the instructions (bottom left), or as a sticker on the rear or bottom of the appliance.
If functional or other defects occur, please contact the service department listed either by telephone or by e-mail.
■ You can return a defective product to us free of charge to the service address that will be provided to you. Ensure that you enclose the proof of purchase (till receipt) and information about what the defect is and when it occurred.
You can download these instructions along with many other manuals, product videos and software on www.lidl-service.com.
Service
Service Great Britain
Tel.: 0871 5000 720 (£ 0.10/Min.)
E-Mail: kompernass@lidl.co.uk

Service Malta
Tel.: 80062230
E-Mail: kompernass@lidl.com.mt
IAN 276994
Importer
Please note that the following address is not the service address. Please use the service address provided in the operating instructions.
KOMPERNASS HANDELS GMBH
BURGSTRASSE 21
44867 BOCHUM
GERMANY
www.kompernass.com
Inhaltsverzeichnis
Einleitung 58
text_image
Technical diagram of a device with Chinese annotations indicating directional arrows and component labelsnatural_image
Symbol of a trash bin crossed with diagonal lines, representing waste or discharge (no text or labels)KOMPERNASS HANDELS GMBH
BURGSTRASSE 21
44867 BOCHUM
GERMANY
www.kompernass.com
KOMPERNASS HANDELS GMBH
BURGSTRASSE 21
44867 BOCHUM
DEUTSCHLAND / GERMANY
www.kompernass.com