
CFD-V25 - Hi-Fi System SONY - Free user manual and instructions
Find the device manual for free CFD-V25 SONY in PDF.


| Product Type | CD Radio Cassette-Corder (Hi-Fi System) |
| Dimensions (W x H x D) | Approx. 425 x 160 x 246 mm (16 3/4 x 6 3/8 x 9 3/4 inches) |
| Weight | Approx. 4.2 kg (9 lb 4 oz) including batteries |
| Power Source | AC 110-120 / 220-240 V selectable (CFD-V25/V34/V37) or 230 V (CFD-V34L/V37L/930L), 50/60 Hz; DC 9 V (6 R20 size D batteries) |
| Power Consumption | AC 20 W |
| CD Player Type | Compact Disc digital audio system, Class 1 laser product |
| CD Frequency Response | 20 - 20,000 Hz +1/-2 dB |
| Radio Bands | FM, AM/MW/LW (varies by model) |
| Cassette Deck | 4-track 2-channel stereo, TYPE I (normal) tape only |
| Speaker Configuration | Full range 10 cm dia., 3.2 ohms cone type (2 speakers) |
| Maximum Power Output | 2.5 W + 2.5 W |
| Headphones Jack | Stereo minijack for 16 - 64 ohms headphones |
| Remote Control | Infrared remote with 2 R6 (AA) batteries |
| Supplied Accessories | AC power cord, remote controller (1 each) |
| Playback Features | Repeat Play, Shuffle Play, Program Play, Loop function |
| Sound Adjustment | MEGA BASS (bass boost), TONE (high/low tone) |
| Recording | CD-to-tape and radio-to-tape recording |
| Cleaning and Maintenance | Clean lens with blower; clean tape heads, pinch roller, capstan with alcohol; demagnetize heads after 20-30 hours |
| Safety Precautions | Do not expose to moisture, avoid confined spaces, use only specified voltage and batteries |
| Model Variations | CFD-V25, CFD-V34, CFD-V34L, CFD-V37, CFD-V37L, CFD-930L (differences in power switch name and radio bands) |
Frequently Asked Questions - CFD-V25 SONY
User questions about CFD-V25 SONY
0 question about this device. Answer the ones you know or ask your own.
Ask a new question about this device
Download the instructions for your Hi-Fi System in PDF format for free! Find your manual CFD-V25 - SONY and take your electronic device back in hand. On this page are published all the documents necessary for the use of your device. CFD-V25 by SONY.
USER MANUAL CFD-V25 SONY
CD Radio Cassette-Corder
Operating Instructions page 2 ^EN
To prevent fire or shock hazard, do not expose the player to rain or moisture.
To avoid electrical shock, do not open the cabinet. Refer servicing to qualified personnel only.
Information
For customers in Europe
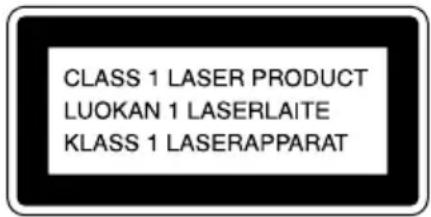
This Compact Disc player is classified as a CLASS 1 LASER product.
The CLASS 1 LASER PRODUCT label is located on the bottom exterior.
WARNING
Do not install the appliance in a confined space, such as a bookcase or built-in cabinet.
About this manual
The instructions in this manual are for the CFD-V25, CFD-V34, CFD-V34L, CFD-V37, CFD-V37L and CFD-930L. Before you start reading, check your model number. The CFD-V34L is the model used for illustration purpose.
Note
The name of the switch to turn on/off this player is indicated as below:
"OPERATE": CFD-V34L/V37L/930L
"POWER": CFD-V25/V34/V37
Notice for customers in the United Kingdom
A moulded plug complying with BS 1363 is fitted to this equipment for your safety and convenience.
Should the fuse in the plug supplied need to be replaced, same rating fuse approved by ASTA or BSI to BS 1362, (i.e. marked with
or (mark) must be used.
If the plug supplied with this equipment has a detachable fuse cover, be sure to attach the fuse cover after you change the fuse. Never use the plug without the fuse cover. If you should lose the fuse cover, please contact your nearest Sony service station.
Table of contents
Basic Operations
4 Playing a CD
6 Listening to the radio
8 Playing a tape
10 Recording on a tape
The CD Player
12 Using the display
13 Locating a specific track
14 Playing tracks repeatedly (Repeat Play)
15 Playing tracks in random order (Shuffle Play)
16 Creating your own program (Program Play)
Setting Up
18 Choosing the power sources
20 Adjusting the sound emphasis (TONE/MEGA BASS)
Additional Information
21 Precautions
23 Troubleshooting
25 Maintenance
26 Specifications
28 Index
Playing a CD
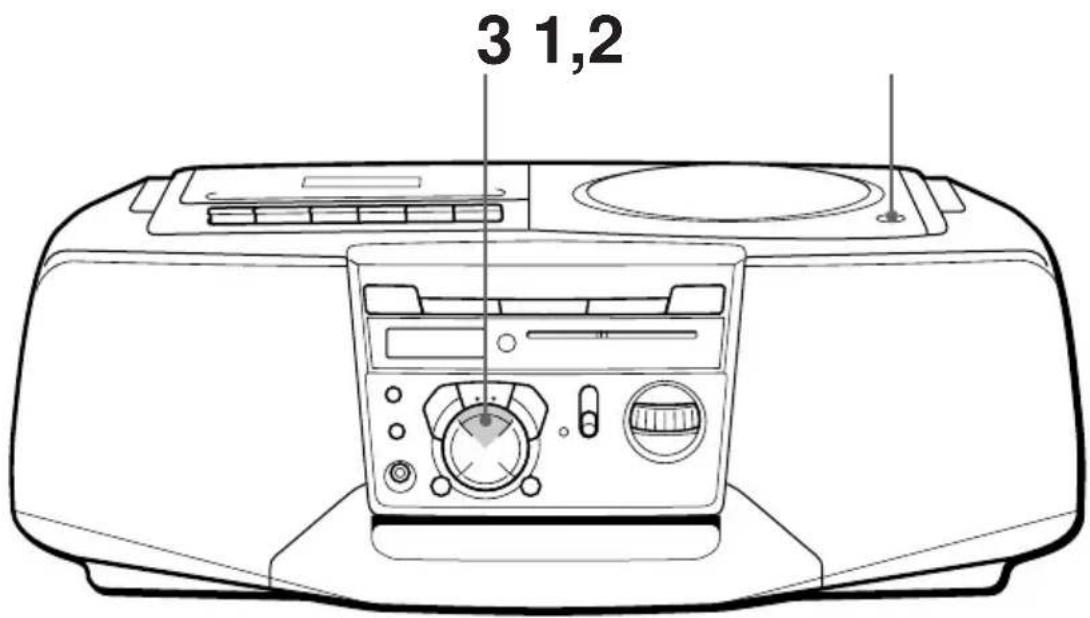
Connect the supplied AC power cord (see page 18).
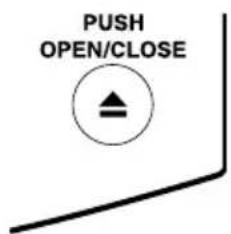
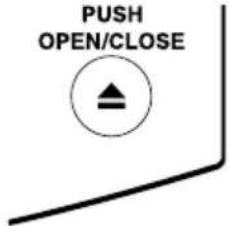
1 Press ▲ PUSH OPEN/CLOSE
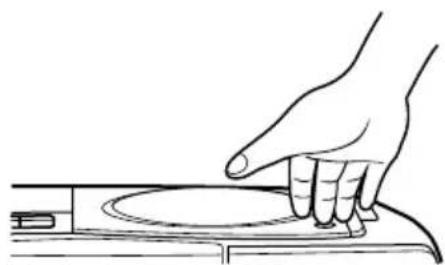
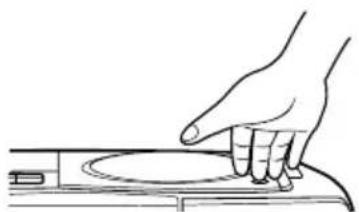
down to open the CD compartment and place a CD on the CD compartment.
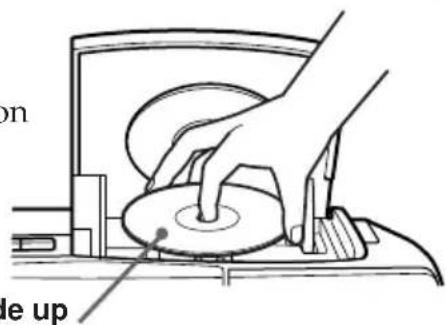
With the label side up
2 Close the CD compartment.
natural_image
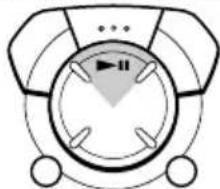
Line drawing of a hand pressing down on a device (no text or symbols)3 Press ▶II (direct power-on).
natural_image
Pure diagram of a circular mechanical or electrical component with no text, numbers, or symbolsThe player plays all the tracks once.
Tip
Next time you want to listen to a CD, just press ▶II. The player turns on automatically and starts playing the CD.
Use these buttons for additional operations
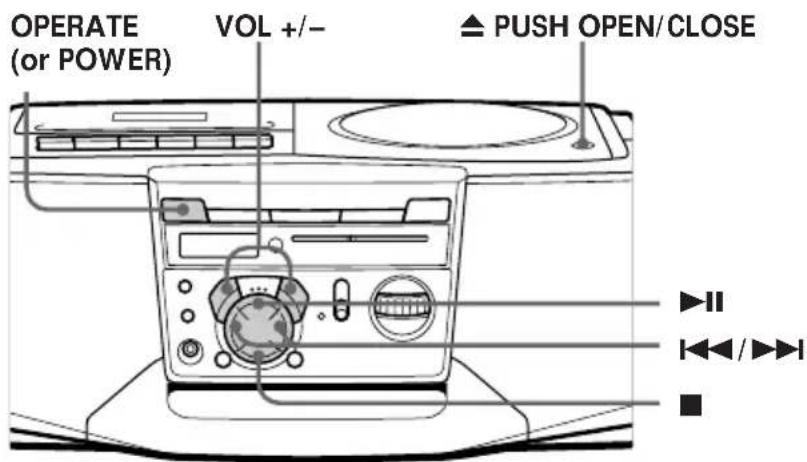
To Press
| Adjust the volume VOL +/- | |
| Stop playback ■ | |
| Pause playback ▶II | Press again to resume play after pause. |
| Go to the next track ▶▶I | |
| Go back to the previous track ◀◀◀ | |
| Remove the CD ▲ PUSH OPEN/CLOSE | |
| Turn on/off the player OPERATE (or POWER, see page 2) | |
Listening to the radio
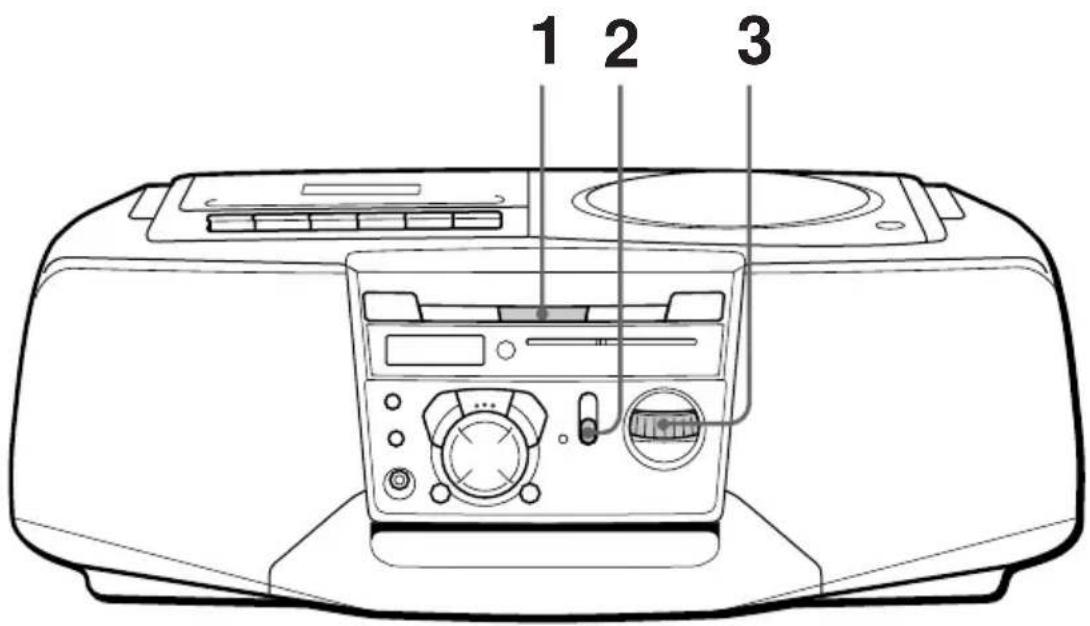
Connect the supplied AC power cord (see page 18).
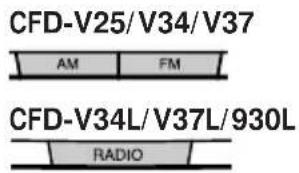
1 CFD-V25/V34/V37: Press FM or
CFD-V25/V34/V37
| AM | FM |
AM (direct power-on).
CFD-V34L/V37L/930L: Press
RADIO (direct power-on).
CFD-V34L/V37L/930L
| RADIO |
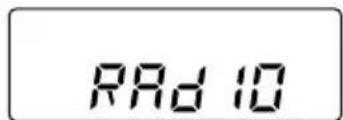
Display
Rad 10
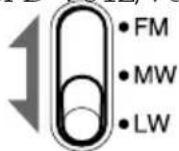
2 CFD-V34L/V37L/930L only: Select
3 Turn TUNING to tune in a radio
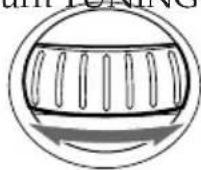
TUNING
station.
If the received FM stereo is too weak, the reception becomes monaural.
Tip
CFD-V34L/V37L/930L only:
To receive an FM stereo program
Set the FM MODE selector at the rear to STEREO. If the FM broadcast is noisy, set the selector to MONO and the radio will play in monaural.
Use these buttons for additional operations
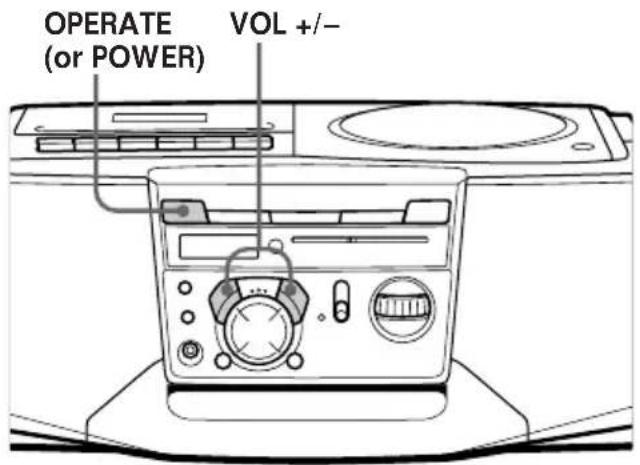
To Press
Adjust the volume VOL +/-
Turn on/off the radio OPERATE (or POWER, see page 2)
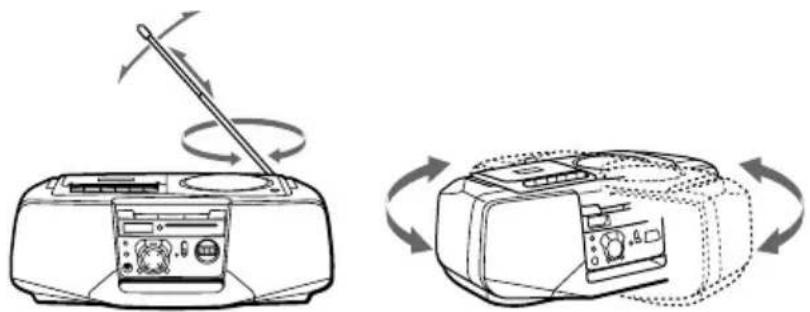
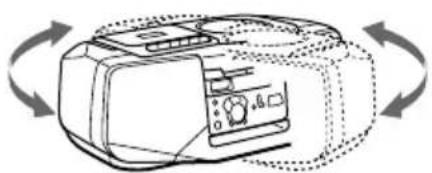
To improve broadcast reception
Reorient the antenna for FM. Reorient the player itself for AM or MW/LW.
natural_image
Diagram showing two views of a portable radio device with a lever and fan, illustrating the mechanism of rotation (no text or symbols present)For FM For AM/MW/LW
Playing a tape
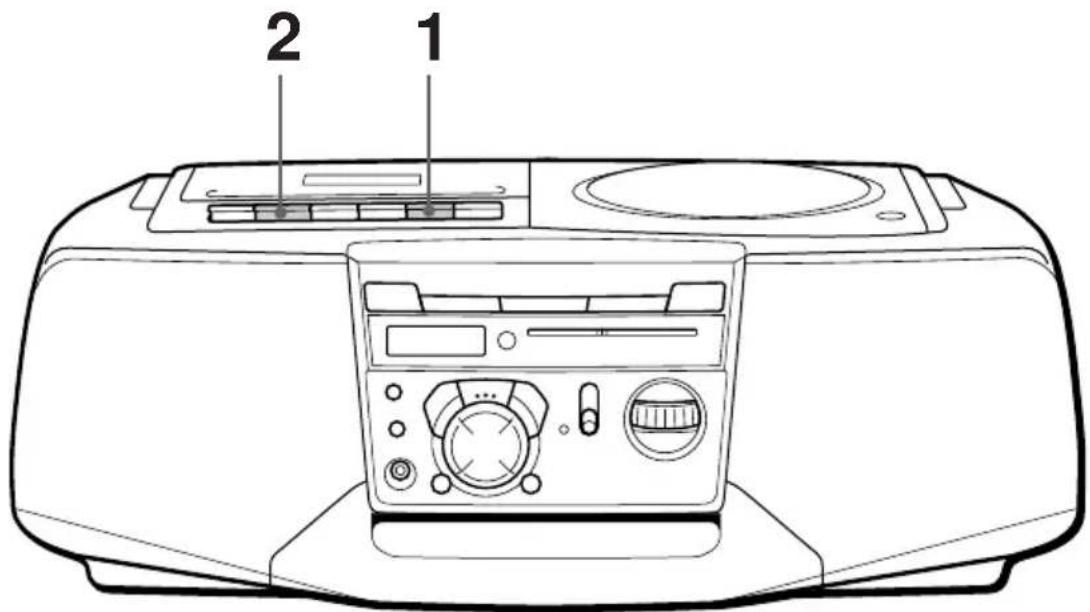
Connect the supplied AC power cord (see page 18).
1
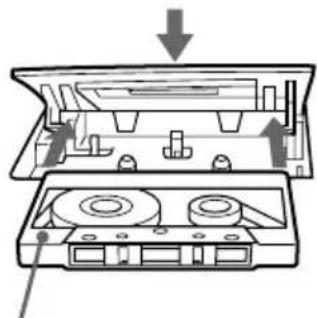
Press ■▲ to open the tape STOP/EJECT
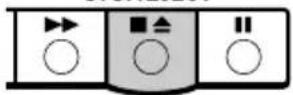
compartment and insert a recorded tape. Use TYPE I (normal) tape only. Close the compartment.
natural_image
Diagram of a cassette tape assembly showing internal components and sound wave effects (no text or labels)With the side you want to play facing upward
2
Press PLAY
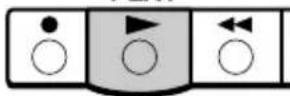
The player turns on (direct power-on) and starts playing.
Display
TAPE
Tip
Next time you want to listen to a tape, just press ▶. The player turns on automatically and starts playing the tape.
Use these buttons for additional operations
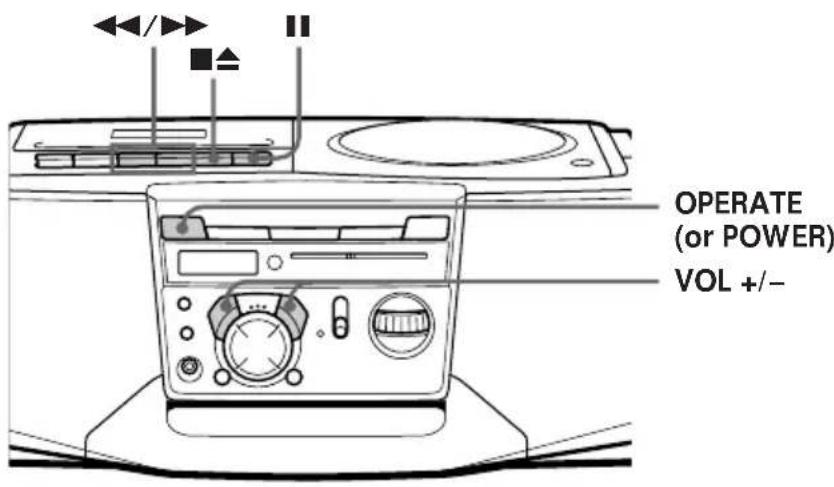
To Press
Adjust the volume VOL +/-
Stop playback ■
Fast-forward or rewind the tape ▶▶ or ◀◀
Pause playback
Press the button again to resume play after pause.
Eject the cassette ■
Turn on/off the player OPERATE (or POWER, see page 2)
Recording on a tape
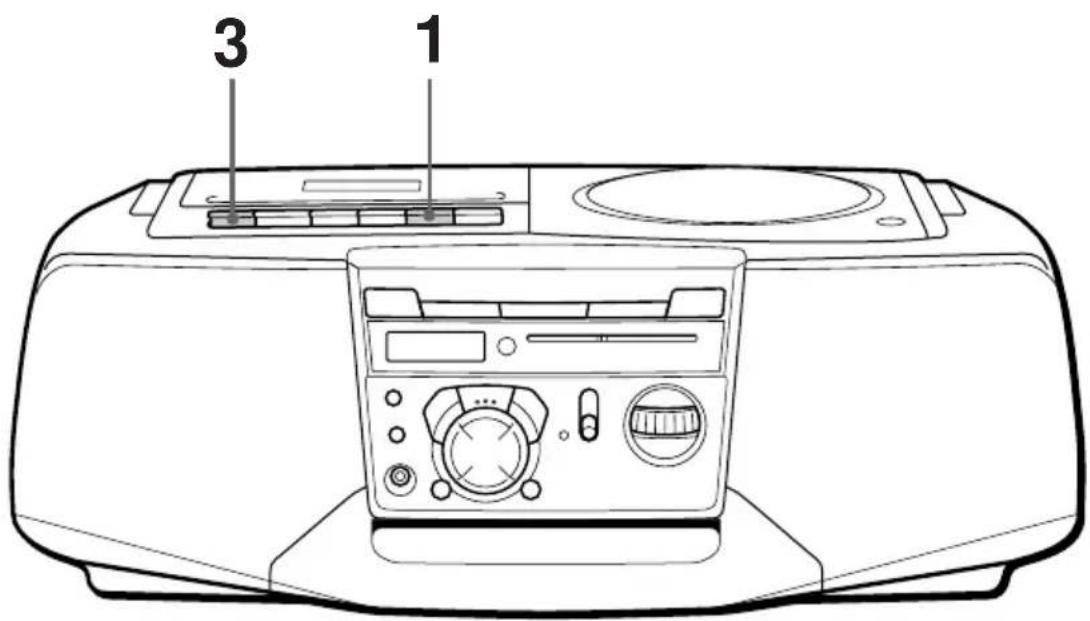
Connect the supplied AC power cord (see page 18).
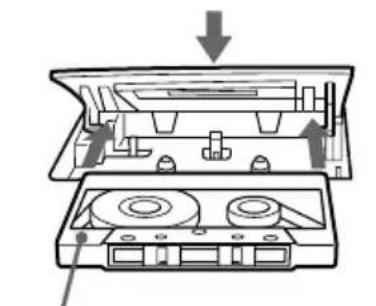
1 Press ■▲ to open the tape
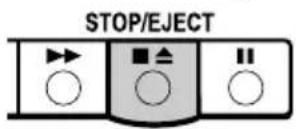
compartment and insert a blank tape. Use TYPE I (normal) tape only.
natural_image
Diagram of a CD drive assembly showing top and front views with no text or symbolsWith the side you want to record on facing upward
2 Select the program source you want to record.
To record from the CD player, press CD and insert a CD (see page 4).
Display
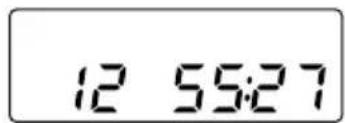
To record from the radio, press FM or AM (CFD-V25/V34/V37) or RADIO (CFD-V34L/V37L/930L) and tune in the station you want (see page 6).
3
Press ● to start recording. (▶ is
REC
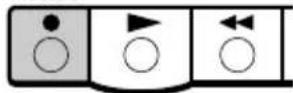
depressed automatically).
Tips
- Adjusting the volume or the audio emphasis (page 20) will not affect the recording level.
- CFD-V34L/V37L/930L only: If the MW/LW program makes a whistling sound after you've pressed ● in step 3, press PLAY MODE/ISS (Interference Suppress Switch) repeatedly until the noise is at a minimum.
- For the best results, use the AC power as a power source for recording.
• To erase a recording, proceed as follows:
1 Press TAPE until "TAPE" appears in the display. Insert the tape whose recording you want to erase into the tape compartment.
2 Press ●.
Use these buttons for additional operations
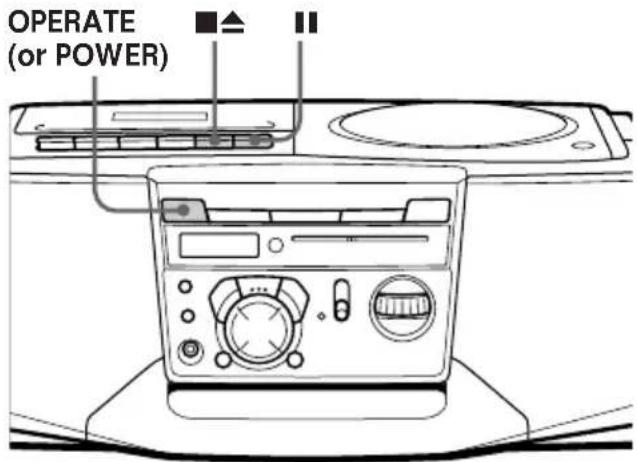
To Press
Stop recording ■
Pause recording II
Press the button again to resume recording.
Turn on/off the power OPERATE (or POWER, see page 2)
Using the display
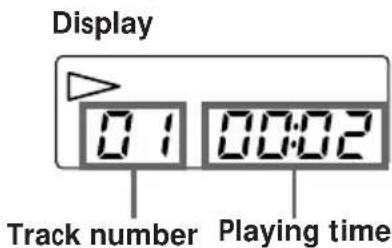
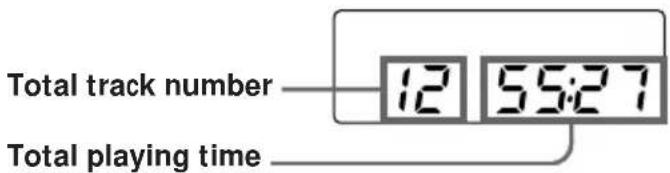
You can check information about the CD using the display.
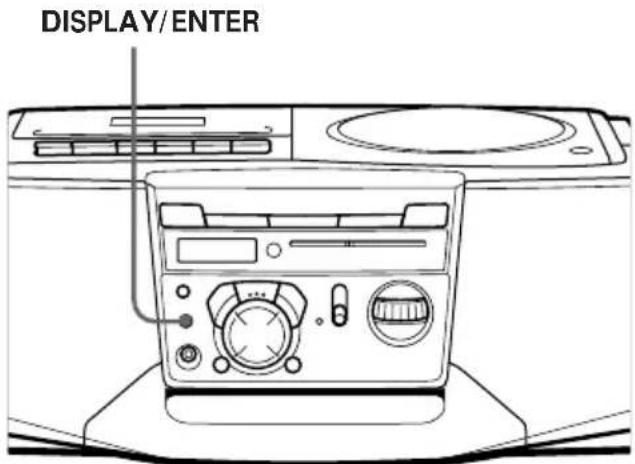
Checking the total track number and playing time
Check the display in stop mode.
Checking the remaining time
Press DISPLAY/ENTER while playing a CD.
To display Press DISPLAY/ENTER
| Remaining time on the Once current track* |
| Remaining time on the CD Twice and the number of tracks left |
| Playing time and the current Three times track number |
* For a track whose number is more than 20, the remaining time appears as “- -:-” in the display.
Locating a specific track
You can quickly locate any track using the number buttons. You can also find a specific point in a track while playing a CD.
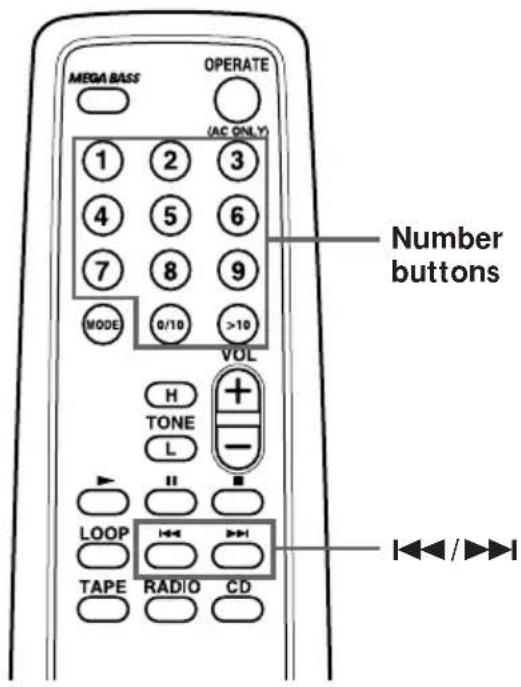
Note
You cannot locate a specific track if "SHUF" or "PGM" is lit in the display. Turn off the indication by pressing ■.
Tip
When you locate a track numbered over 10, press >10 first, then the corresponding number buttons. Example: To play track number 23, press >10 first, then 2 and 3.
To locate Press
| a specific track directly a number button of the track. |
| a point while listening to ▶▶▶ (forward) or ◀◀◀the sound (backward) while playingand hold down until you find the point. |
| a point while observing ▶▶▶ (forward) or ◀◀◀the display (backward) in pause andhold down until you find the point. |
Playing tracks repeatedly
(Repeat Play)
You can play tracks repeatedly in normal, shuffle or program play modes (see page 16).
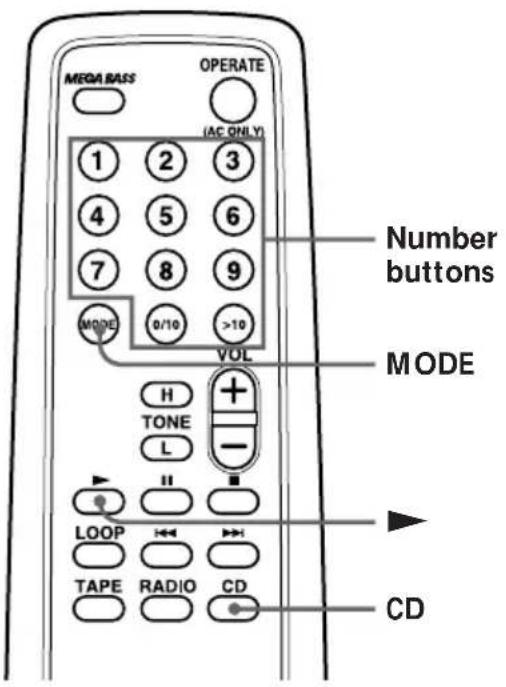
Tip
To enjoy a short repeat play, use LOOP. As soon as you press and hold LOOP during play, the player starts a loop play of the part between the point where you pressed LOOP and a point about a second behind. When you release LOOP, the player returns to normal play.
1 Press CD.
2 Press MODE (PLAY MODE on the player) repeatedly until the repeat mode you want appears in the display.
To repeat Select
| a single track "REP 1" |
| all tracks "REP ALL" |
| tracks in random order "SHUF" "REP" |
| programed tracks "PGM" "REP" |
3 Do either of the following to start repeat play:
- When you've selected "REP 1", select the track by pressing the number button (pressing ◀◀◀ or ▶▶◀ then ▶▶◀ on the player).
- When you've selected "REP ALL" and "SHUF" "REP", press ▶ (▶II on the player).
- When you've selected "PGM" "REP", program tracks (see step 3 on page 16), then press ▶ (▶) on the player).
To cancel Repeat Play
Press MODE until "REP" disappears from the display.
Playing tracks in random order
(Shuffle Play)
You can play tracks in random order.
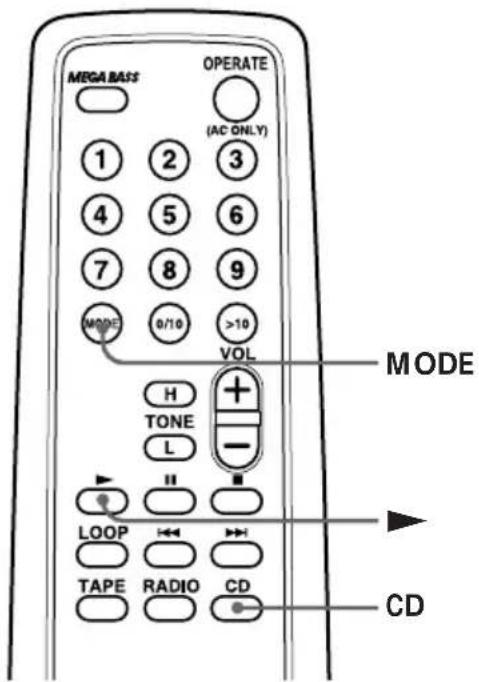
On the player
1 Press CD.
2 Press PLAY MODE repeatedly until "SHUF" appears in the display.
3 Press ▶II.
1 Press CD.
2 Press MODE repeatedly until "SHUF" appears in the display.
3 Press ▶ to start shuffle play.
To cancel Shuffle Play
Press MODE until "SHUF" disappears from the display.
Creating your own program
(Program Play)
You can arrange the playing order of up to 20 tracks on a CD.
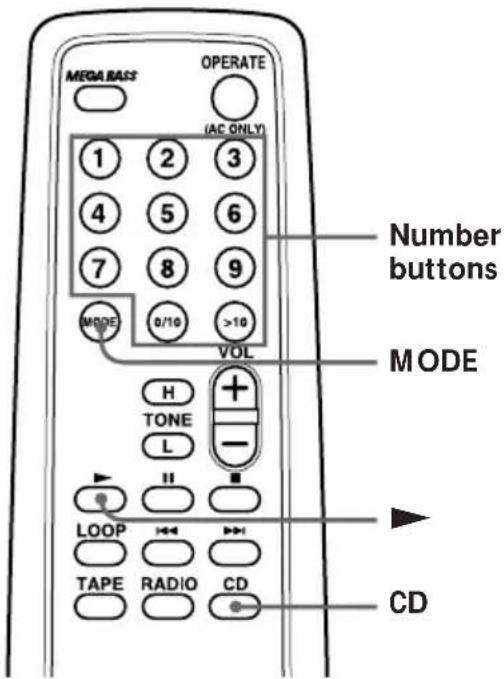
On the player
1 Press CD. 2 Press PLAY MODE until "PGM" appears in the display.
3 Press the ◀◀◀ or ▶▶◀ then press DISPLAY/ENTER for the tracks you want to program in the order you want.
4 Press ▶II.
1 Press CD. 2 Press MODE until "PGM" appears in the display. 3 Press the number buttons on the remote for the tracks you want to program in the order you want. You can program up to 20 tracks.
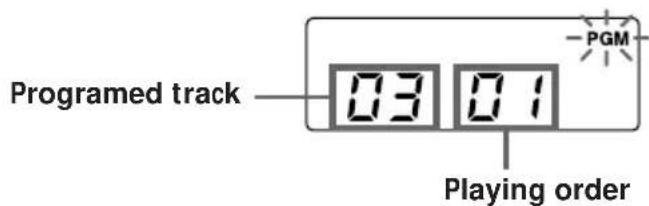
4 Press ▶ to start program play.
Tips
- You can play the same program again, since the program is saved until you turn off the power or open the CD compartment.
- The current program will be erased if you open the CD compartment.
- You can record your own program. After you've created the program, insert a blank tape and press ● to start recording.
To cancel Program Play
Press MODE until "PGM" disappears from the display.
To check the order of tracks before play
Press DISPLAY/ENTER.
Every time you press the button, the track number appears in the programmed order.
To change the current program
Press ■ once if the CD is stopped and twice if the CD is playing. The current program will be erased. Then create a new program following the programing procedure.
Choosing the power sources
You can use the AC power or batteries as a power source.
Use the AC power source whenever you record since recording consumes much power.
Tip
Only for the customers supplied with an AC plug adaptor:
Use the supplied AC plug adaptor if the plug of the AC power cord does not match your outlet.
Note
When you operate the player with the batteries, you cannot turn on the player using the remote.
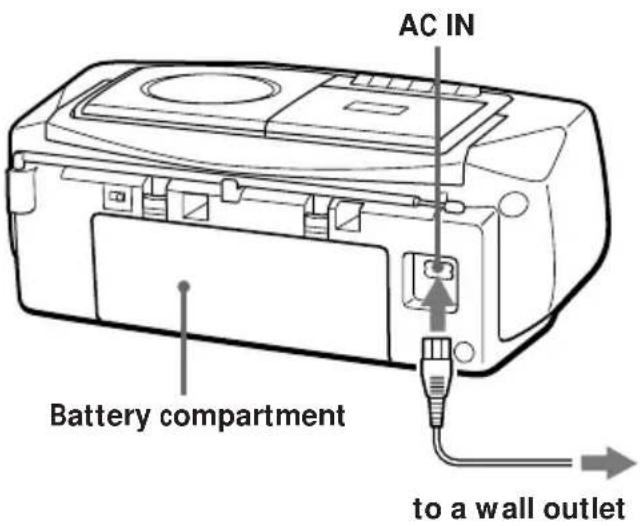
Connecting the AC power cord
Insert one end of the supplied AC power cord to the AC IN socket located at the rear of the player, and the other end to the wall outlet.
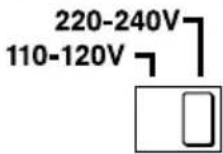
Adjusting the voltage (CFD-V25/V34/V37 only)
Be sure to set the VOLTAGE SELECTOR (at the bottom) to your local power supply.
VOLTAGE SELECTOR
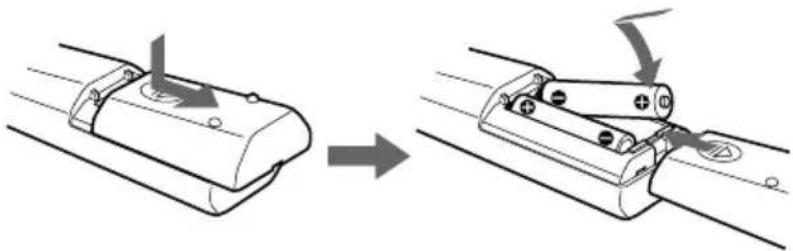
Inserting batteries into the remote
natural_image
Diagram showing a mechanical assembly before and after disassembly, with no visible text or symbolsInsert two R6 (size AA) batteries (not supplied)
Replacing batteries
With normal use, the batteries should last for about six months. When the remote no longer operates the player, replace all the batteries with new ones.
Tip
Replace the batteries when the OPR/BATT indicator dims or when the player stops operating. Replace all the batteries with new ones. Before you replace the batteries, be sure to take out the CD from the player.
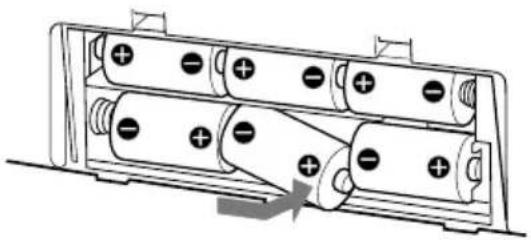
Using the player on batteries
Insert six R20 (size D) batteries (not supplied) into the battery compartment.
To use the player on batteries, disconnect the AC power cord from the player.
natural_image
Diagram of a battery pack with multiple batteries and one moving inside (no text or symbols)Adjusting the sound emphasis
(TONE/MEGA BASS)
You can adjust the audio emphasis of the sound you are listening to.
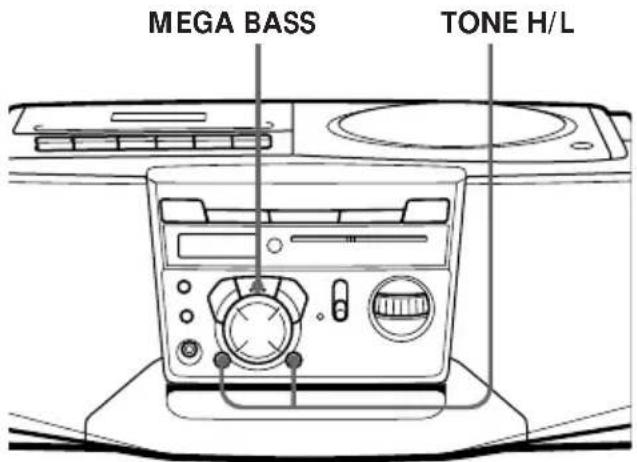
Adjusting the tone
Press TONE H or L.
Press TONE H to enhance the high tone and TONE L to enhance the low tone.
Reinforcing the bass sound
Press MEGA BASS.
To return to normal sound, press the button again.
Precautions
On safety
- As the laser beam used in the CD player section is harmful to the eyes, do not attempt to disassemble the casing. Refer servicing to qualified personnel only.
- Should any solid object or liquid fall into the player, unplug the player, and have it checked by qualified personnel before operating it any further.
On power sources
- For AC operation, check that the player's operating voltage is identical with your local power supply (see "Specifications") and use the supplied AC power cord; do not use any other type. The voltage selector is located at the bottom of the player (CFD-V25/V34/V37 only).
- The player is not disconnected from the AC power source (mains) as long as it is connected to the wall outlet, even if the player itself has been turned off.
- For battery operation, use six R20 (size D) batteries.
- When the batteries are not to be used, remove them to avoid damage that can be caused by battery leakage or corrosion.
- The nameplate indicating operating voltage, power consumption, etc. is located at the bottom.
On placement
- Do not leave the player in a location near heat sources, or in a place subject to direct sunlight, excessive dust or mechanical shock.
- Do not place the player on an inclined or unstable place.
- Do not place anything within 10 mm of the side of the cabinet. The ventilation holes must be unobstructed for the player to operate properly and prolong the life of its components.
- If the player is left in a car parked in the sun, be sure to choose a location in the car where the player will not be subjected to the direct rays of the sun.
- Since a strong magnet is used for the speakers, keep personal credit cards using magnetic coding or spring-wound watches away from the player to prevent possible damage from the magnet.
On operation
- If the player is brought directly from a cold to a warm location, or is placed in a very damp room, moisture may condense on the lenses inside the CD player section. Should this occur, the player will not operate properly. In this case, remove the CD and wait about an hour for the moisture to evaporate.
- If the player has not been used for a long time, set it in the playback mode to warm it up for a few minutes before inserting a cassette.
If you have any questions or problems concerning your player, please consult your nearest Sony dealer.
continued
Precautions (continued)
Notes on CDs
- Before playing, clean the CD with a cleaning cloth. Wipe the CD from the center out.
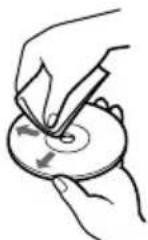
- Do not use solvents such as benzine, thinner, commercially available cleaners or anti-static spray intended for vinyl LPs.
- Do not expose the CD to direct sunlight or heat sources such as hot air ducts, nor leave it in a car parked in direct sunlight as there can be a considerable rise in temperature inside the car.
- Do not stick paper or sticker on the CD, nor scratch the surface of the CD.
• After playing, store the CD in its case.
If there is a scratch, dirt or fingerprints on the CD, it may cause tracking error.
Notes on cassettes
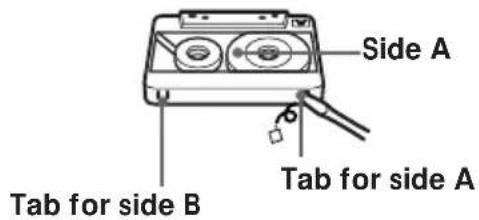
- Break off the cassette tab from side A or B to prevent accidental recording. If you want to reuse the tape for recording, cover the broken tab with adhesive tape.
- The use of a cassette with more than 90 minutes of play time is not recommended except for long, continuous recording or playback.
Troubleshooting
| Symptom | Remedy | |
| GeneralCD Player | The power is not on. | Connect the AC power cord to a wall outlet securely.Make sure the batteries are inserted correctly.Replace all the batteries with new ones if they are weak.You cannot turn on the player with the remote when you operate the player on batteries. |
| There is no audio. | Make sure the function you want to use appears in the display window.Adjust the volume.Unplug the headphones when listening through speakers. | |
| The CD does not play/“no disc” lights in the display even when a CD is in place. | Make sure that the CD compartment is closed.Place the CD with the label surface up.Clean the CD.Take out the CD and leave the CD compartment open for about an hour to dry moisture condensation.Make sure “Cd” appears in the display. | |
| The sound drops out. | Reduce the volume.Clean the CD, or replace it if the CD is badly damagedPlace the player in a location free from vibration. | |
| Radio | The audio is weak or has poor quality. | Replace all the batteries with new ones if they are weak.Move the player away from the TV.If you are using the remote while listening to AM or MW/LW radio, noise may be heard.This is unavoidable. |
| The picture of your TV becomes unstable. | If you are listening to an FM program near the TV with an indoor antenna, move the player away from the TV. |
continued
Troubleshooting (continued)
| Symptom | Remedy | |
| Tape Player | The tape does not move when you press an operation button. | ·Close the cassette compartment securely. |
| The REC ● button does not function/The tape does not play. | ·Make sure the safety tab on the cassette is in place.·Make sure “TAPE” appears in the display. | |
| The tape does not erase completely. | ·Clean the erasing head (see page 25).·Replace all the batteries with new ones if they are weak. | |
| The tape does not record. | ·Make sure the tape is inserted properly.·Make sure the safety tab of the cassette is in place. | |
| The audio is weak/The audio quality is poor. | ·Clean the heads, pinch roller and capstan (see page 25).·Demagnetize the heads using a demagnetizer (see page 25). | |
| The sound is distorted. | ·The TYPE II (high position) or TYPE IV (metal) tape is being used. Use TYPE I (normal) tape only. | |
| Remote | The remote does not function. | ·Replace all the batteries in the remote with new ones if they are weak.·Make sure that you are pointing the remote at the remote sensor on the player.·Remove any obstacles in the path of the remote and the player.·Make sure the remote sensor is not exposed to strong light such as direct sunlight or fluorescent lamp light.·Move closer to the player when using the remote. |
After trying the above remedies, if you still have problems, unplug the AC power cord and remove all the batteries. After all the indications in the display disappear, plug the power cord and insert the batteries again. If the problem persists, please consult your nearest Sony dealer.
Maintenance
Cleaning the lens
If the lens becomes dirty, it may cause a skipping of sound during CD operation. Clean with a commercially available blower.
Cleaning the tape heads and tape path
Wipe the heads, the pinch roller and the capstan with a cleaning swab slightly moistened with cleaning fluid or alcohol after every 10 hours of operation for optimum playback and recording quality. To make the best possible recording, however, we recommend that you clean all surfaces over which tape travels before each recording.
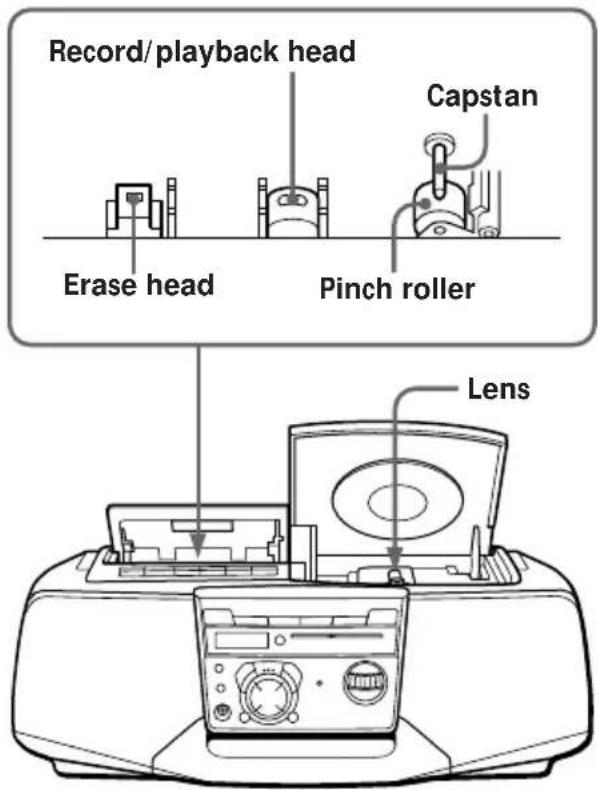
After cleaning, insert a tape when the areas cleaned are completely dry.
Demagnetizing the tape heads
After 20 to 30 hours of use, enough residual magnetism will have built up on the tape heads to begin to cause loss of high frequency sound and hiss. At this time, you should demagnetize the heads and all metal parts in the tape path with a commercially available tape head demagnetizer.
Cleaning the cabinet
Clean the cabinet, panel and controls with a soft cloth slightly moistened with a mild detergent solution. Do not use any type of abrasive pad, scouring powder, or solvent, such as alcohol or benzine.
Specifications
CD player section
System
Compact disc digital audio system
Laser diode properties
Material: GaAlAs
Wave length: 780 nm
Emission duration: Continuous
Laser output: Less than 44.6 μW
(This output is the value measured at a distance of
about 200 mm from the objective lens surface on
the optical pick-up block with 7 mm aperture.)
Spindle speed
200 r/min (rpm) to 500 r/min (rpm) (CLV)
Number of channels
2
Frequency response
20 - 20,000 Hz +1/-2 dB
Wow and flutter
Below measurable limit
Radio section
Frequency range
CFD-V34L/V37L/930L
| FM Italy 87.5 - 108 MHz |
| Central and 65 - 108 MHz |
| Eastern Europe |
| Other countries 87.6 - 107 MHz |
MW Italy 526.5 - 1606.5 kHz
Other countries 531 - 1,602 kHz
LW Italy 148.5 - 283.5 kHz
Other countries 153 - 279 kHz
CFD-V25/V34/V37
| FM Saudi Arabia 87.6 - 107 MHz |
| Tourist model 76 - 108 MHz |
| Other models 87.6 - 108 MHz |
AM Tourist model 530 - 1,629 kHz
Other models 530 - 1,605 kHz
IF
FM: 10.7 MHz
AM/MW/LW: 455kHz
Aerials
FM: Telescopic aerial
AM/MW/LW: Built-in ferrite bar aerial
Cassette-corder section
Recording system
4-track 2 channel stereo
Fast winding time
Approx. 120 s (sec.) with Sony cassette C-60
Frequency response
TYPE I (normal): 70 - 10,000 Hz
General
Speaker
Full range: 10 cm dia., 3.2 ohms, cone type (2)
Outputs
Headphones jack (stereo minijack)
For 16 - 64 ohms impedance headphones
Maximum power output
2.5 W + 2.5 W
Power requirements
For CD radio cassette-corder:
CFD-V34L/V37L/930L
| 230 V AC, 50 Hz |
CFD-V25/V34/V37
| 110 - 120, 220 - 240 V AC selectable, 50/60 Hz |
9 V DC, 6 R20 (size D) batteries
For remote controller :
3 V DC, 2 R6 (size AA) batteries
Power consumption
AC 20 W
Battery life
For CD radio cassette-corder:
FM recording
| Sony R20P: approx. 13.5 h |
| Sony alkaline LR20: approx. 19 h |
Tape playback
| Sony R20P: approx. 7.5 h |
| Sony alkaline LR20: approx. 15 h |
CD playback
| Sony R20P: approx. 2.5 h |
| Sony alkaline LR20: approx. 6 h |
Dimensions
Approx. 425 · 160 · 246 mm (w/h/d)
(16 3/4· 6 3/8 9 3/4inches)(incl. projecting parts)
Mass
Approx. 4.2 kg (9 lb. 4 oz) (incl. batteries)
Supplied accessory
AC power cord (1)
Remote controller (1)
Design and specifications are subject to change without notice.
Optional accessories
Sony MDR headphone series
Index
A
Adjusting sound emphasis 20 tone 20
B
Batteries for player 19 for remote 18
C
CD player 12 Choosing power sources 18
Cleaning cabinet 25 lens 25 tape heads and tape path 25
Creating your own program 16
D, E, F, G, H
Demagnetizing the tape heads 25 Display 12
I, J, K
Improving broadcast reception 7
L
Listening to the radio 6 Locating a specific track 13 Loop 14
M, N, O
MEGA BASS 20
P, Q
Playing a CD 4 a tape 8 tracks repeatedly 14 Power sources 18 Program Play 16
R
Recording on a tape 10 Repeat Play 14
S
Selecting tracks 5 Setting up 18 Sound emphasis 20
T
TONE 20 Troubleshooting 23
U
Using the display 12
V, W, X, Y, Z
Voltage selector 18
ADVERTENCIA
natural_image
Line drawing of a hand pressing down on a computer monitor (no text or symbols)del disco.
natural_image
Line drawing of a hand pressing down on a device (no text or symbols)3
natural_image
Top-down schematic of a mechanical or electrical component with no visible text or symbolsnatural_image
Diagram of a portable radio with a brush and fan, showing motion arrows (no text or symbols)Para FM
natural_image
Line drawing of a portable kitchen appliance with circular arrows indicating rotation or cycle (no text or symbols)Para AM/MW/LW
natural_image
Diagram of a CD-ROM drive showing top and front views with arrows indicating assembly (no text or symbols)natural_image
Diagram of a battery pack with multiple batteries and one partially inserted, showing no text or symbols.natural_image
Line drawing of a vintage air conditioner unit with control panel and fan (no text or symbols)Ajuste del tono
Presione TONE H o L.
- CD Radio Cassette-Corder
- Information
- WARNING
- About this manual
- Note
- Notice for customers in the United Kingdom
- Table of contents
- Basic Operations
- The CD Player
- Setting Up
- Additional Information
- Playing a CD
- Press ▲ PUSH OPEN/CLOSE
- Close the CD compartment.
- Press ▶II (direct power-on).
- Tip
- Listening to the radio
- Use these buttons for additional operations
- To Press
- To improve broadcast reception
- Playing a tape
- 1
- 2
- Display
- Recording on a tape
- Press ■▲ to open the tape
- Select the program source you want to record.
- 3
- Tips
- Using the display
- Checking the total track number and playing time
- Checking the remaining time
- Locating a specific track
- Playing tracks repeatedly
- To cancel Repeat Play
- Playing tracks in random order
- On the player
- To cancel Shuffle Play
- Creating your own program
- To cancel Program Play
- To check the order of tracks before play
- To change the current program
- Choosing the power sources
- Connecting the AC power cord
- Adjusting the voltage (CFD-V25/V34/V37 only)
- Inserting batteries into the remote
- Replacing batteries
- Using the player on batteries
- Adjusting the sound emphasis
- Adjusting the tone
- Reinforcing the bass sound
- Precautions
- On safety
- On power sources
- On placement
- On operation
- Precautions (continued)
- Notes on CDs
- Notes on cassettes
- Troubleshooting
- Troubleshooting (continued)
- Maintenance
- Cleaning the lens
- Cleaning the tape heads and tape path
- Demagnetizing the tape heads
- Cleaning the cabinet
- Specifications
- CD player section
- Radio section
- Cassette-corder section
- General
- Optional accessories
- Index
- A
- B
- C
- D, E, F, G, H
- I, J, K
- L
- M, N, O
- P, Q
- R
- S
- T
- U
- V, W, X, Y, Z
- ADVERTENCIA
- Ajuste del tono
Brand : SONY
Model : CFD-V25
Category : Hi-Fi System