
DN-16046 - Security Camera Digitus - Free user manual and instructions
Find the device manual for free DN-16046 Digitus in PDF.


| Product Type | Security Camera |
| Model | DN-16046 |
| Brand | Digitus |
| Resolution | Full HD 1080p (1920 x 1080) |
| Field of View | 90° (diagonal) |
| Night Vision | Up to 10m with infrared LEDs |
| Connectivity | Ethernet (RJ-45) |
| Power Supply | 12V DC or PoE (Power over Ethernet) |
| Power Consumption | Max 6W |
| Dimensions (W x H x D) | 70 x 180 x 70 mm |
| Weight | 350g |
| Housing Material | Metal (aluminum alloy) |
| Ingress Protection | IP66 (weatherproof) |
| Operating Temperature | -20°C to 50°C |
| Main Functions | Motion detection, night vision, remote monitoring via app, two-way audio |
| Cleaning and Maintenance | Wipe with soft dry cloth; avoid harsh chemicals |
| Safety Features | Overcurrent protection, surge protection |
| Spare Parts | Available from manufacturer: mounting bracket, screws, power adapter |
| Repairability | Modular design; user-replaceable lens module, IR board |
| General Information | Compatible with ONVIF; supports microSD up to 128GB (not included) |
Frequently Asked Questions - DN-16046 Digitus
User questions about DN-16046 Digitus
0 question about this device. Answer the ones you know or ask your own.
Ask a new question about this device
Download the instructions for your Security Camera in PDF format for free! Find your manual DN-16046 - Digitus and take your electronic device back in hand. On this page are published all the documents necessary for the use of your device. DN-16046 by Digitus.
USER MANUAL DN-16046 Digitus
The Plug&View IP camera series by DIGITUS ® offers P2P cloud services in order to avoid the complicated network configuration for the camera installation. Everything you need is "Plug&View" and a few installation steps.
2 Supplied with:
- 1 X IP camera
- 1 X AC adapter
- 1 X Ethernet cable
- 1 X Installation CD
- 1 X Mounting accessories
- * DN-16038/DN-16039/DN-16040/DN-16043/DN-16044 also include a built in 2GB memory for storage.
3 Installation procedure:
3.1 Connect
Please follow the instructions of the Quick Start Guide to connect your Plug&View camera and to start using it from your user account. Then log in to your user account in http://plug-view.com. After a successful login you will see an overview of the images of your registered cameras.
4 Description of the toolbar
The toolbar can be found to the right side above the image of each IP camera. Here you can quickly see the operational readiness and make various settings.
4.1 LED display symbols
■ Green light
When the green light is ON, your IP camera is online und sending. The video image is successfully displayed on the screen.
■ Yellow light
When the yellow light is ON, the IP camera is online, but not yet sending. No video image is displayed on the screen.
■ Red light
When the red light ● is ON, the IP camera is offline and nothing is displayed on the screen.
4.2 Full Screen
The 'Full Screen' button opens a new screen for better viewing of the video image, which is then displayed across the entire screen.
4.3 Live image and PTZ
The button "Live View" will display the live-stream or images from the selected IP camera in real-time. If you have multiple Plug&View cameras installed, you can switch between the different cameras using the display on the left-hand side of the screen. Use the arrow buttons and to select other IP cameras from the list.
In the event of connection problems, e.g. because of a slow Internet connection, you can click on to reload the live-stream or real-time images. By clicking on 📄, on the right side at the bottom of the screen, one can access the configuration controls for the selected camera.

If the selected IP camera supports PTZ functions, the PTZ control panel, with which you can control the camera, can be selected. Otherwise the field will be grayed out to indicate that it has no function. Each motion adjustment requires a click.
4.4 Playback
The "Playback" function is only supported when an SDcard for media recording has been inserted into the IP camera. By using the blue tags on the time axis, all recorded events can be retrieved. All recorded events have been stored and tagged with a blue mark on the time axis. You can select to view them for different time periods, by clicking on the left side of the time axis, on hour (hour), day (day) or week (week).

When hovering over a blue tag with the mouse, the color changes to orange and the details of the recorded clips are displayed. Select a specific clip to check this.

During playback of the selected media clip, you can stop or pause it, or switch to the next clip, using the media control buttons. You can also drag the marker of the video search control to the desired position in the playback.
Settings
The settings button opens up a special web user interface for the configuration of the IP camera. Please log in with "admin" as the username and password.
Muting
With the button, you can switch the sound of the camera on or off.
Refreshing
With the refresh button you can refresh or reload the video image on you IP camera.
Deleting
With the delete button, you can delete specific IP camera medium from the overview page.
Screenshot
With the photo button you can take a still shot of the current video image and save it directly to your PC.
Click on the top right of the screen to exit the full-screen mode or click on the bottom right side to return to the matrix display page.
In the camera matrix, click on "Settings" in order to see the list of cameras.
In this list you can see the details of your camera(s) and by clicking on change the name of the camera, with you can remove a specific camera from your account and with the hook button underneath "Device Matrix" select if she should be displayed with a live image in the overview.
By clicking on the "Plus" symbol on the left, above the list, an additional camera can be registered to your account.

Google Drive Backup
To the right your Google Drive Account for the cloud-backup is set up. You must have a microSD memory card installed in your camera in order to be able to use Google backup.
Please click on the button "Google authentication" and then accept the request in the following window to use "Google Drive" as cloud storage, by clicking on "OK".

You will be redirected to the Google Drive registration page. Please enter your Google Mail address and password, if you already have an account.
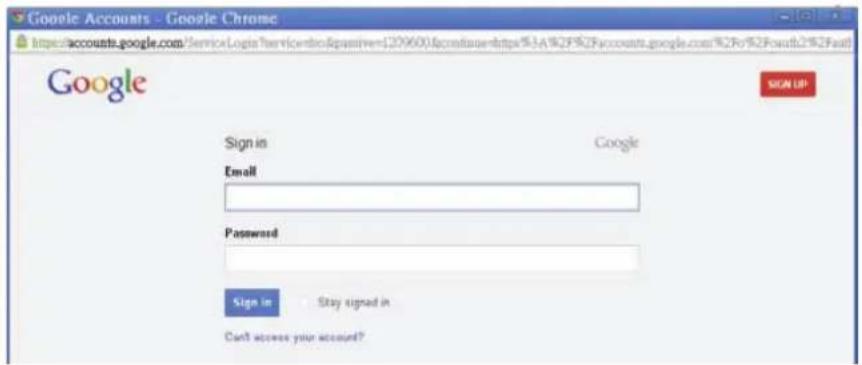
After entering your Google account information, please accept the access rights to allow for the video-backup from the camera to the Google Drive. The window will then close automatically.
DIGITUS Plug&View is requesting permission to:
▶ View basic information about your account
▶ View and manage any of your documents and files in Google Drive
- View and manage any of your documents and files in Google Drive
▶ View your email address
▶ View and manage Google Drive files that you have opened or created with this app
▶ View and manage your spreadsheets in Google Drive
- Perform these operations when I'm not using the application
Allow access
No thanks
Through the storage function of Google Cloud, a copy of your video files from the microSD-card is loaded onto Google Drive. This means, that the videos, triggered by movement or timer, can be played from the cloud storage, online, using your browser. Please log in to your Google Drive and select the recorded video (RTV) files in the directory "SAT_Recordings" to watch the videos online.

5 Camera User Interface
The camera user interface has 5 menu items (Home, Replay, Parameters, System and Wireless). In order to be able to use the multimedia and control functions, the OCX component must be installed in Internet Explorer and the VLC Mediaplayer in Firefox and Chrome. A download link will be displayed in the user interface if necessary.
5.1 Home
This page shows the live image from the camera.
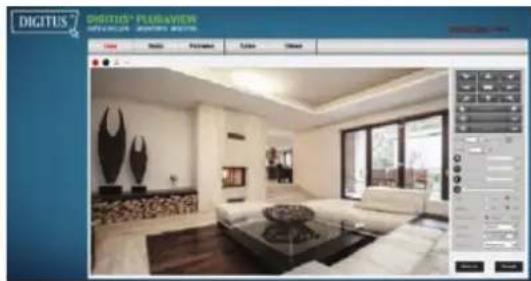
Under "Home" you can also pan and tilt (Plug&View OptiArc or similar PTZ cameras), as well as control the video settings such as brightness, contrast and saturation.


5.2 Replay
The Replay records all events such as motion detection or alarm. Select a date and then press the search button (magnifying glass) to list all events on this date. To view the recorded video, double-click on the entry or press "Play".

5.3 Parameters
This is where you configure Video Parameter, Network Parameter and Event Settings.
5.3.1 Video
Under Video Parameter you can configure the resolution, the quality and the frame rate for the video stream.

Quality supports 5 levels in the image quality settings: from very high to very low.
Three streams are supported by the camera, the ‘main stream’ for local viewing and recording, the ‘sub stream’ for remote viewing when there is limited capacity of Internet connection and the ‘mobile stream’ for mobile viewing.
5.3.2 Audio
Under Audio you can enable or disable the audio for the main and sub stream.

5.3.3 OSD
You can enable or disable the time stamp and camera name in the video picture of the camera. You can also modify the camera name.

5.3.4 PTZ
Enable or disable the flip and mirror of the cameras image, depending on the mounting of the camera. Set the speed of the pan and tilt, adjust the stay time between 2 and 60 seconds and choose the patrols between 2 and 10 times. If the default position is enabled, the camera will automatically move back to the set position after the end of the set time.

5.3.5 Network IP Settings

Here you assign a fixed IP address to the camera, according to the configuration of your LAN or WLAN, or select DHCP if you are using a DHCP-server, such as your router, for the assigning of IP-addresses. The ports for HTTP, RTSP and ONVIF can be modified here, if port forwarding settings are required on your router.
5.3.6 DDNS

If you want to have additional access to the user interface via a DynDNS provider, activate Dynamic DNS by selecting "on" and enter your domain and access data.
5.3.7 E-Mail

You can configure your E-Mail Settings here. You can choose if you want to use the default pre configured e-mail server, or want to use your own server. If you want to use your own server, start with the SMTP server you are using. Enter the IP address or host name of the SMTP server. If you don't know the SMTP server settings, please refer to the settings you are using in your e-mail software or ask your network administrator or ISP.
Enter the SMTP server port your SMTP server is using and enable SSL if necessary. If your SMTP server is using authentication, please active this as well by authenticating with your username and password.
Please enter the mail addresses where the e-mails should be send to. You can enter up to 3 different e-mail addresses.
From as is used as sender e-mail address. Some mail servers reject e-mails from unknown senders. In this case, please enter your own e-mail address here.
5.3.8 FTP
You can configure your FTP server settings here.
Enter the IP address or host name and the used port of the FTP server. Enter then the username and password of the user which have access to the FTP server.
With Test you can test if the configured settings are correct.

5.3.9 Motion Detect

Enable the motion detection with a click on "Enable". The colored area within the video image is the motion detection area, i.e. the area in which a movement triggers a picture or a video recording. In the original delivery condition, almost the entire screen is covered with red boxes. In order to exclude certain areas from the motion detection, click in the red boxes to delete the colored marker. Select the sensibility of the motion detection. You have four levels you can select: 'Very High', 'High', 'Normal' and 'Low'.
As action you can choose E-Mail and/or Output.
Send E-Mail will send an e-mail to the "send to addresses" which are configured under e-mail setup. "Alarm with Snapshot" will send a snapshot via e-mail or FTP. "Alarm with record" will upload the records via FTP. Trigger alarm output* will trigger the alarm output (digital output).
With the schedule you can configure the time schedule for the motion detection. You can set up a week mode, work mode or with all times day a continuos recording. Please save your configuration by clicking "Apply".
*Camera must have digital In and Output (Alarm In/Out)
5.3.10 Alarm In Out

If your camera has "Alarm In and Out", you can configure the settings here. You can use a sensor to trigger the alarm in. Please configure, if the used device will trigger the input with a high or a low signal.
Actions are similar to the motion detection actions. For setting up, please refer to motion detection. Alarm out will trigger a relay. Please configure, if the alarm out will be open or grounded. Please configure also the dwell time of the signal.
5.3.11 Snapshot
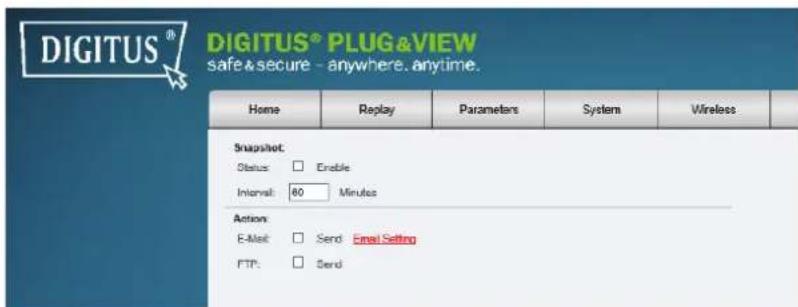
In Snapshot you can configure to take a snapshot in a specified interval. Please enable the status and configure the interval the snapshot should be taken. Choose as action if the snapshot should be send by e-mail or upload via FTP.
5.3.12 Record
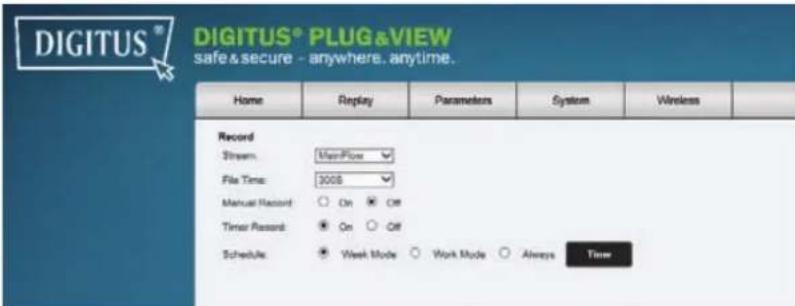
You can record the cameras stream to the installed SDcard. Please choose which stream you would like to record (MainFlow or MinorFlow) and configure the file size by using the file time. You can configure the file time from 30 seconds up to 600 seconds. Please choose if you want to do a manual record or if you want to do time recording. For time recording, you can configure the schedule for week mode, work mode or all time day.
5.3.13 Privacy Mask

"Privacy Mask" marks any specific area within the video image which is blacked out during a recording. Activate up to 4 regions. By clicking on "Region 1", a black color box will appear, which represents the covered area. Then click with the mouse inside the color box and drag the box to the area which should be covered. Using the mouse, you can change the format of the box. Activate "Region 2" to select another area and repeat the process. Once you have selected up to 4 areas, finish the process by clicking on "OK".
5.4 System
5.4.1 User
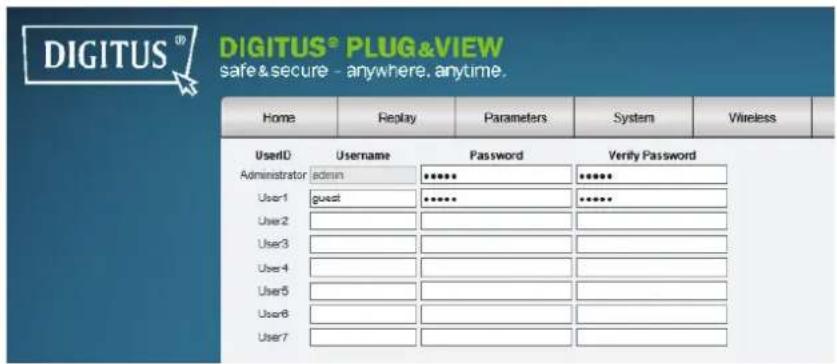
In the delivery state, you logged into the camera as administrator. As admin you can create and delete users, who have access to the camera user interface. Normal users do not have permission to add or delete users.
5.4.2 Time Setting

Manual setting, Sync with computer time, Sync with NTP and Time zone are optional. Select the method you want to use. Select the method you want to use.
Keep current: Keep the current time, which is shown in Date&Time
Manual setting: Enter time and date manually.
Sync with computer time: The time of the IP camera is automatically synchronized with your PC.
Sync with NTP: Enter the URL or IP address of the NTP server.
Time Zone: Select the Time Zone according to your location.
5.4.3 Initialize

Reboot: performs a reboot of the camera
Factory default: set the camera back to factory defaults
Backup Data: Save the configuration of the camera
Restore: Load backuped data to the camera
Upgrade: Load a new firmware to the camera
5.4.4 Device Info
Shows camera name, serial number, hardware version, software version, start time and network information of the camera.
5.4.5 Local Storage

Status information of your storage (SDcard). You can format, remove or refresh.
You can browse to the recorded files of the SDCard and download them to your PC.
5.4.6 System Log
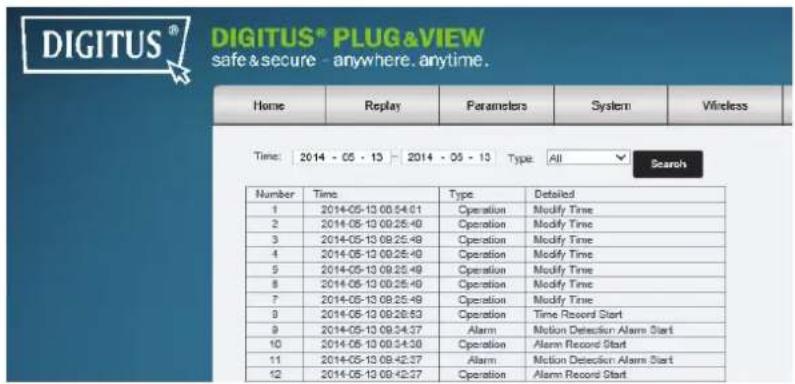
In the system log you will find log information regarding normal operation or alarm.
You can choose all, to see all log entries or you can separate operation or alarm messages.
5.4.7 Wireless
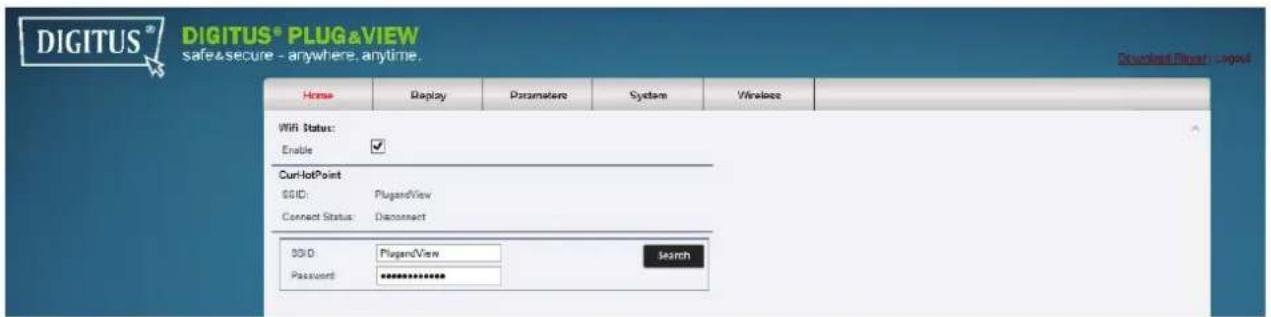
If you want to bind the camera to your local WiFi network, please click on "Wireless", to configure the wireless settings.
A search window appears, in which the available wireless networks in your environment will be displayed. Please select the identifier (SSID) of your network and confirm with "OK".
![SSID TestPMM 88% [WPA-PSK-TKIP][WPA2-PSK-CCMP][WPS][ESS] PlugandView 86% [WPA-PSK-TKIP][ESS]](/content/2026/05/805089/images/9502bff187d4ad7b8d3e9106bfce1bbb3ca79b610955ae7a090edd9fb6bb84d2.jpg)
In the next window enter the WLAN key (key) and confirm with "OK".

Please ensure that your router is functioning as a DHCP-server. This is the factory setting of almost all routers. This will establish the connection to your Wireless LAN.
You can now remove the network cable from the camera and close the browser window.
DEFAULT CAMERA PARAMETER
Username: admin
Password: admin
IP address: DHCP
Trademarks
DIGITUS is a registered trademark ASSMANN Electronic GmbH.
Android, Google, Google play are registered trademarks of Google Inc.
Note:
All other trademarks not listed here, are the property of their respective owners.
Trademarks or trade names mentioned in this manual are used to describe the operating steps and do not imply that they are freely available. In any case they are the property of the respective holder of the rights.
The ASSMANN Electronic GmbH hereby declares that the IP cameras, type Plug&View, are in accordance with the requirements and provisions of the Directive 1999/5/EC.
The full Declaration of Conformity can be found under http://www.digitus.info.
1 Einleitung:

5.2 Wiedergabe


- 2 SUPPLIED WITH
- 3 INSTALLATION PROCEDURE
- 3.1 CONNECT
- 4 DESCRIPTION OF THE TOOLBAR
- 4.1 LED DISPLAY SYMBOLS
- GREEN LIGHT
- YELLOW LIGHT
- RED LIGHT
- 4.2 FULL SCREEN
- 4.3 LIVE IMAGE AND PTZ
- 4.4 PLAYBACK
- SETTINGS
- MUTING
- REFRESHING
- DELETING
- SCREENSHOT
- GOOGLE DRIVE BACKUP
- DIGITUS PLUG&VIEW IS REQUESTING PERMISSION TO
- 5 CAMERA USER INTERFACE
- 5.1 HOME
- 5.2 REPLAY
- 5.3 PARAMETERS
- 5.3.1 VIDEO
- 5.3.2 AUDIO
- 5.3.3 OSD
- 5.3.4 PTZ
- 5.3.5 NETWORK IP SETTINGS
- 5.3.6 DDNS
- 5.3.7 E-MAIL
- 5.3.8 FTP
- 5.3.9 MOTION DETECT
- 5.3.10 ALARM IN OUT
- 5.3.11 SNAPSHOT
- 5.3.12 RECORD
- 5.3.13 PRIVACY MASK
- 5.4 SYSTEM
- 5.4.1 USER
- 5.4.2 TIME SETTING
- 5.4.3 INITIALIZE
- 5.4.4 DEVICE INFO
- 5.4.5 LOCAL STORAGE
- 5.4.6 SYSTEM LOG
- 5.4.7 WIRELESS
- DEFAULT CAMERA PARAMETER
- TRADEMARKS
- NOTE
- 1 EINLEITUNG
- 5.2 WIEDERGABE
Brand : Digitus
Model : DN-16046
Category : Security Camera