W318 - Camera EASYPIX - Free user manual and instructions
Find the device manual for free W318 EASYPIX in PDF.


User questions about W318 EASYPIX
0 question about this device. Answer the ones you know or ask your own.
Ask a new question about this device
Download the instructions for your Camera in PDF format for free! Find your manual W318 - EASYPIX and take your electronic device back in hand. On this page are published all the documents necessary for the use of your device. W318 by EASYPIX.
USER MANUAL W318 EASYPIX
natural_image
Technical line drawing of a device casing with mounting holes and a central circular component (no text or symbols)easypix®
Table of Content
Introduction
Thanks for purchasing this Digital Camera. You can not only take good quality digital photos, but also can use it as a removable disk. For more quality and function setting, please read this manual carefully before using
Key Features
Digital Image Resolution- 5M by the interpolation (2592x1944), 3M (2048x1536), 2M (1920x1080 HD), VGA (640x480)
SDRAM 4MB, support Micro SD memory card (not included) up to 8GB.
1.8 inch TFT Color LCD
PhoTags Express software for managing and enhancing your photos, add captions, send E-mail, printing and much more.
What your camera includes
Digital Camera
PhoTags Express software Installation CD
User's manual
Strap
Computer System Requirements for Windows 2000/XP
To be able to download photos to your PC, you will need the following minimum configuration:
Pentium process or above with windows 2000, XP
64 MB RAM, more than 250MB free disk space
Available USB interface
CD-ROM Drive
➢ Recommended screen resolution 24 bit or higher
256 color or higher display adaptor
Computer System Requirements for Windows Vista/Win7
To be able to download photos to your PC your will need the following minimum configuration:
Windows Vista/Win7
800MHz processor and 512 MB of system memory
20GB hard driver with at least 15GB of available space
Support for Super VGA graphics
Available USB Interface
CD-ROM drive
Computer System Requirements for Macintosh
Power Macintosh G3 500 MHz or higher
Mac OS X version 10.2.6 or later
128 MB or more available system RAM (256 MB recommended), 150 MB free disk space
800 x 600 or higher-resolution monitor displaying millions of colors
Note: This hardware is plug and play compatible when used on a Mac, however, the included software can be used on Windows operating systems only.
Waterproof Notice
Please read this manual carefully before using the camera, and pay attention to the following notice.

Warning
This symbol indicates that violating this item can cause the serious personal Injury, or material loss.

Caution
ymbol indicates that violating this item can cause the minor or medium
personal injury, or material loss.
Operation:

Warning
- Please don't attempt to take apart the camera. The high voltage parts are present within the camera. If you take apart the camera, there will be dangerous electric shocks.
- If the internal camera parts are exposed as a result of being dropped, please don't touch Any exposed portion by hands. Otherwise, there is a danger of receiving and electric shock.
- Please don't expose the camera under the sunshine or the places of high temperature. It may cause any damage on the internal parts or battery, even result in the explosion.
- Keep the memory card out of the reach of children in order to avoid any risk of it being swallowed by the mistake.
- If there is smoke or strange sounds emitting from the camera, please stop using it, and also remove the battery immediately. Please send back the camera to the retailer for repair.
- Please don't place your camera at high temperature and humidity environment.

Caution
- Before using the camera underwater, please install the battery and memory card first, and make sure all covers are securely locked. Please also test this camera in water in advance, and make sure there is no water getting inside.
- If you find the water gets inside the camera, please turn off the power, and go away the water immediately.
- If the moisture appears on the lens during the use, it may be leaking. Please remove the battery and memory card, and then send back this camera to the retailer for repair immediately.
- Please don't open the battery door when using underwater. This is to avoid the water getting inside the camera, and an electric shock occurring.
- If it becomes hot during the use, please turn off the power and remove the battery immediately.
- This camera is waterproof and dustproof. Please don't take apart this camera by yourself. This action may cause any damage on the camera. If this damage is caused, the user needs to take the responsibility for repair.
- Please don't use the camera at the environment of higher or lower temperature for a long time.
- Should the LCD panel be damaged, please don't use it underwater. To avoid any personal injury, please send back this camera to the retailer for repair immediately.
- This camera is 3 meters waterproof, and please do not use this camera over the depth.
•After using this camera underwater, please clean it with fresh water, and wipe it with clean cloth.
Then, you can open the battery cover to remove the battery or memory card, and have the camera body dry automatically. - If you don't use the camera, please remove the memory card and battery.
Waterproof and Dustproof
- Be sure to attach the strap and slip it over your wrist when using the camera.
- Please don't subject this camera to a strong shock or pressure. It can cause a loss in waterproof and dustproof performance.
- Before using the camera underwater, please be sure to close battery door completely.
- When using the camera underwater, please don't open the battery door. It will cause leaking.
- When replacing the battery or memory card, please wipe off any dirt or sand, and rinse the camera with fresh water, or leave it in a bowl of fresh water for 2 or 3 minutes. Then, wipe the camera with a clear cloth. Please make sure the camera is clear and dry. This is to avoid any substance or water getting inside the camera when you replace the battery or memory card.
*** Please don't open the battery door at the beach or by the sea, and also avoid replacing the battery or memory card where the camera is likely to get wet or dirty, and make sure your hands are dry.
•After using the camera underwater, please make sure it is power off, and the battery and USB covers are firmly closed. Please wipe off any dirty or sand, and rinse the camera with fresh water, or leave it in a bowl of fresh water for 2 or 3 minutes. Then, wipe the camera with a clear cloth. After cleaning this camera, please remove the battery and memory card. Afterward, please leave the camera in a bowl of fresh water for 30 minutes again. Finally, please dry this camera with a clean cloth, and store it in a safe place.
- Avoiding using any soap water, mild detergents, or alcohol to clear the camera, it may affect the waterproof and dustproof performance
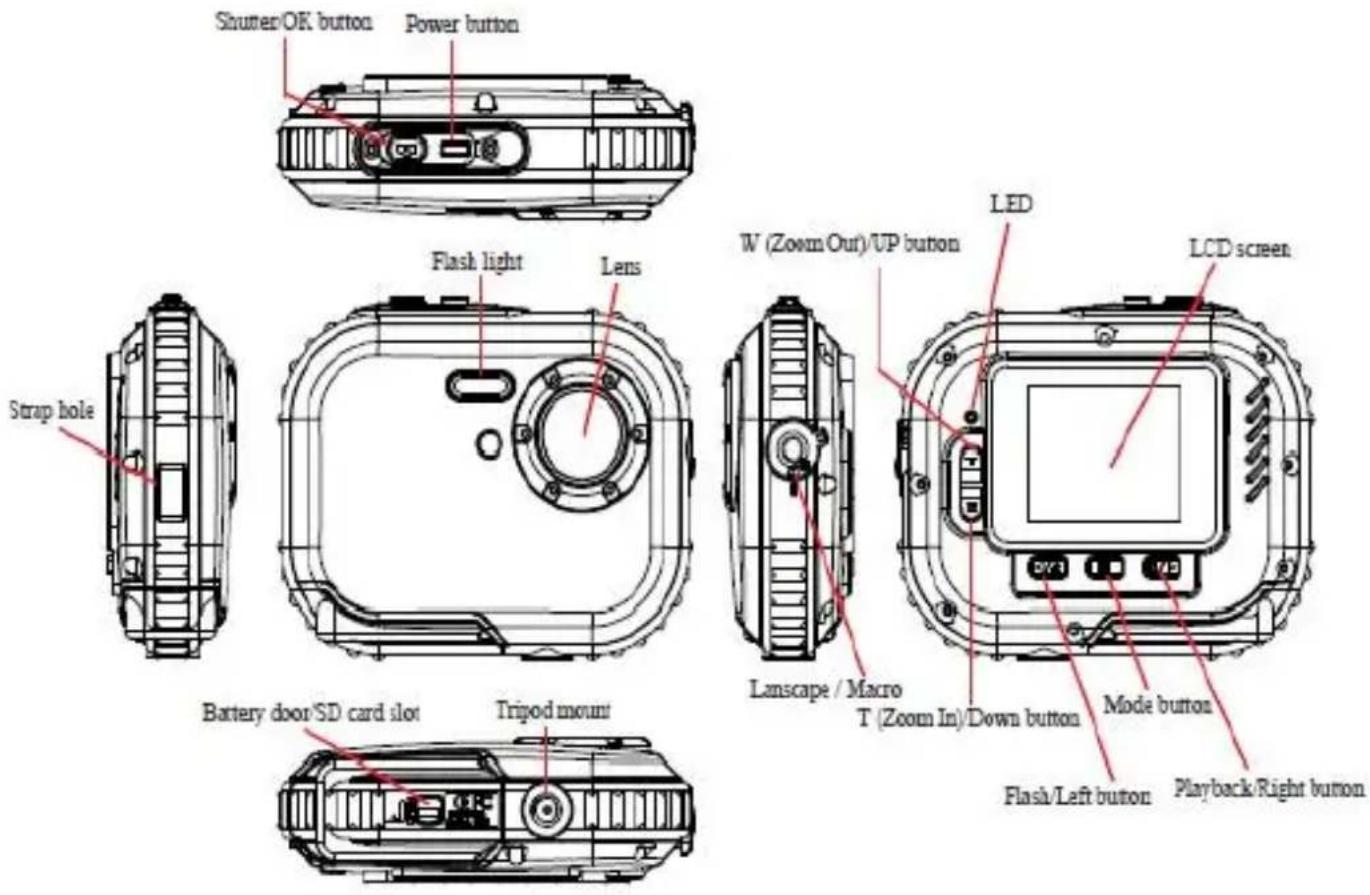
A Quick Look at Your Camera
text_image
Shunter/OK button Power button Flash light Lens Strap hole Battery door/SD card slot Tripod mount LED W (Zoom Out)/UP button LCD screen Landscape / Macro T (Zoom In)/Down button Mode button Flash/Left button Playback/Right buttonBattery Installation
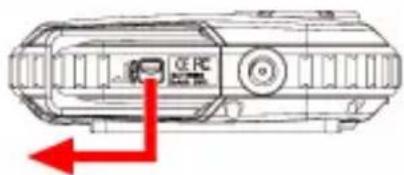
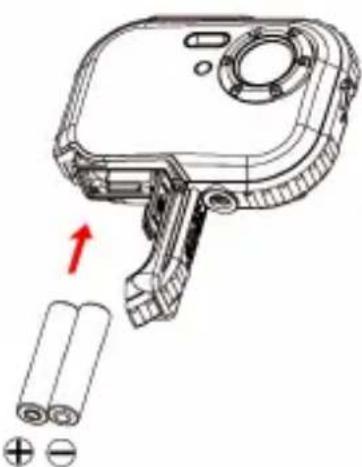
Your camera requires 2 AAA batteries. Insert the battery into the camera as following description:
the Lock and slide the cover
- pull inside battery cover
text_image
CER METER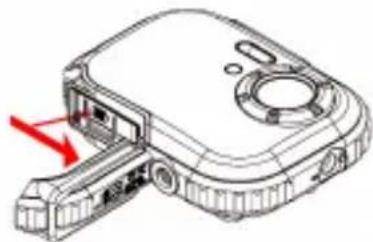
natural_image
Technical line drawing of a device with a red arrow indicating a component or connection (no text or symbols present)1.Open
natural_image
Technical line drawing of a handheld device with battery pack and indicator lights (no text or symbols)- Install batteries according to the indication
Note: 1. if you don't intend to use your camera for an extended period, please remove the batteries to avoid battery leakage and corrosion.
-
Please don't remove the battery away or power off your camera at will, otherwise the test photo in your Digital Camera will be lost if without SD memory card, so please download your test photo to PC as soon as possible.
-
Do not mix old and new batteries.
-
Do not mix alkaline, standard (carbon-zinc), or rechargeable (nickel-cadmium metal hydride) batteries.
Installing Memory Card
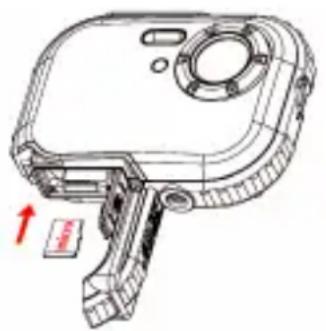
Your camera has a memory card slot that enables you to insert any “Micro SD” compatible memory card. Adding a memory card will allow you to increase the capacity of your camera before you have to transfer photos to PC. Installing the SD memory card as below:
- Locate the Memory Card slot.
- Insert the Memory card into the slot as correct direction. (look on the photos as below)
natural_image
Technical line drawing of a device casing with a red arrow indicating a component (no text or symbols present)-
Push the card in until you feel it "click" into position. The top of the card should be flushed with the surface of the camera. An icon SD will appear on the LCD screen after you power on your camera.
-
Once an external memory card is inserted in the camera, all the images taken will be stored on the external memory card.
Note:
- Limited internal memory is provided for testing. The image will be lost when the power is off. Please download the image before power off.
- An external memory card is required for normal use; your camera supports any compatible Micro SD memory card.
- "Card inserted, change to SD card" will be shown on the screen when you insert the card, indicating that photos will be stored in the memory card.
- When you take out the memory card, "Card removed, change to Internal RAM" will be appeared on the LCD screen, now you can only take 1 photo.
Starting Your Camera
Press and hold the Power button to turn on your camera, the LCD screen will be light up; this will confirm that your camera is on and ready for use.
Press and hold the Power button about 3 seconds to power off your camera.
There are JPG (Camera Mode), AVI (Video Mode), and Play back to select.
JPG(Camera Mode):
Taking photos
Power on your camera, the default mode is JPG(camera mode).
Hold the camera steady and compose your object with LCD screen. Press Shutter button, a moment later, one photo is taken.
Note: When the internal memory is full, the LCD screen will display "Memory Full – Insert a SD card to transfer and take more photos!". So, please insert a SD when you use the camera.
Flash
Your camera has a flash function enables you to take photos when the light condition is not good.
Press Left button, until the icon ⚡A will appear on the LCD, the auto flash is turned on, press Left button until the icon Ⓞ will show on the LCD, the red eye reduction function is on. Press Left button until you see icon ⚡ appear on the LCD screen the flash is forced on. Press Left button until the icon n display on the LCD, it means the flash function is turned off.
Note: “Low Power” will show on the LCD, if you change flash function when the battery power is insufficient. Now please reinstall new batteries for flash function.
Digital Zoom function
You can magnify your subject using the digital zoom. Use the T and W buttons to adjust the zoom up to 8X. Press the T button to zoom in on your subject. Push the W button to zoom back out.
Change Image Resolution
The built-in memory allows you to take one 3.1 Mega-Pixel testing photo without SD memory card, inserted a SD memory card to get more image size selections.
- Press the Menu button.
- Press the Right button to select the Resolution option.
-
Press the T/W button to select the following.
(5M) 2592x1944 pixels; (3M) 2048x1536 pixels;
(2M) 1920x1080 HD pixels; (VGA) 640x480 pixels -
Press the Menu button to confirm your selection.
Note:
Different image resolutions will affect the photo quality. High resolution photos will be of better picture quality and therefore will take up more camera memory capacity than lower resolution photos.
Anti-Shake
- Press the Menu button.
- Press the Right button twice to select the Anti-Shake.
- Press the T/W button to select "on or off".
- Press the Menu button to confirm.
Face Detect
- Press the Menu button.
- Press the Right button three times to select the Face Detect.
- Press the T/W button to select "on or off".
- Press the Menu button to confirm.
AVI(Video Mode):
You can shoot movies in this mode. Before shooting, you need to insert a SD card to expand camera capacity for shooting movies, and Press Menu button to select AVI to select. A 🎨 icon will show on the left corner of the LCD.
Resolution
- Press the Right button to select the Resolution.
- Press the T/W button to select VAG & QVGA.
- Press Menu button to confirm.
Playback:
Delete
- Press the Right button once to select Delete.
- Press T/W to select "This Image/All/Cancel" you request.
- Press the Menu to confirm.
Pictbridge
- Press the Right button twice to select Pictbridge.
- Press T/W to select "Pictbridge/Cancel"
- Press the Menu to confirm.
Setup:
Please press four times to select "Set Up" to change the default you request.
Self-Timer
- Press T/W to select the Self-Timer and press Menu to confirm.
-
Press T/W button to select the following.
Off/2 Seconds/5 Seconds/ 10 Seconds -
Press the Menu button again to confirm.
Image Quality
- Press T/W button to select the Image Quality and press Menu to confirm.
- Press T/W button to select the following.
Super Fine/Fine/Normal
- Press the Menu button again to confirm.
Auto Power Off
- Press T/W button to select the Auto Power Off and press Menu to confirm.
- Press the T/W button to select the following.
Off/1 Minute/2 Minutes/3 Minutes
- Press Menu button again to confirm.
Language
- Press T/W button to select the Language and press the Menu to confirm.
- Press the T/W button to select the following.
English, Español, Português, Français, Deutsch,
Italiano, Nederlands, Pyccknn, Turkce, Polski
- Press the Menu button again to confirm.
Frequency
- Press T/W button to select the Frequency and press the Menu to confirm.
- Press the T/W button to select "50Hz/60Hz".
- Press the Menu button again to confirm.
Sound Effect
- Press T/W button to select the Sound Effect and press the Menu to confirm.
- Press the T/W button to select "Off/On".
- Press the Menu button again to confirm.
Format
- Press T/W button to select the Format and press the Menu to confirm.
- Press the T/W button to select "OK/Cancel".
- Press the Menu button again to confirm.
Default Setting
- Press T/W button to select the Default Setting and press the Menu to confirm.
- Press the T/W button to select "OK/Cancel".
- Press the Menu button again to confirm.
Cancel
Select "Cancel" would stop all setting.
Installing PhoTags Express Software
NOTE: Make sure that your camera is not connected to the computer.
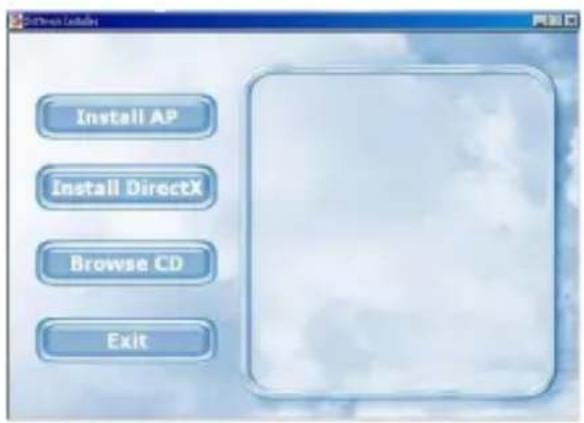
Insert software CD to your computer. After a few seconds, it will show an installing main window on the screen.
text_image
Install AP Install DirectX Browse CD Exit1. Install PhoTags Express
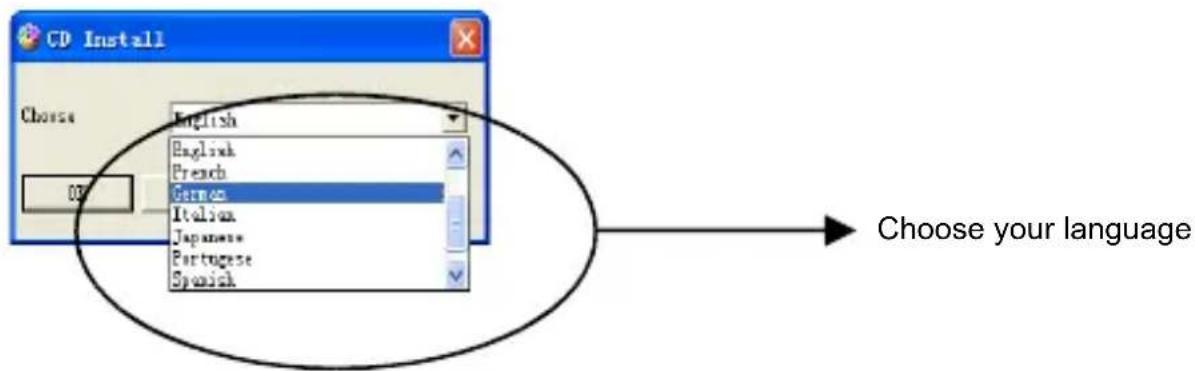
Click on the "Install AP" to start installing process. The language window will be shown on the screen and you can choose the language you want to use.
text_image
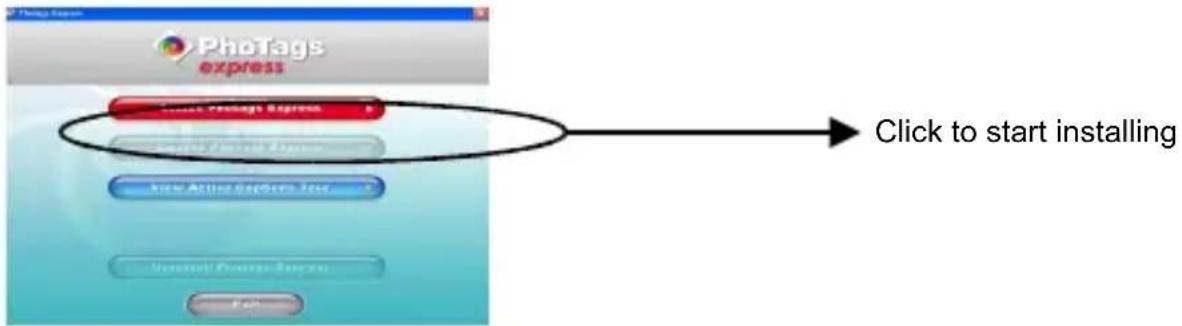
CD Install Choose English English French German Italian Japanese Portuguese Spanish Choose your languageAnd then, the installer window will be shown as below.
text_image
Photo Express Photo Express Click to start installing New Active Express Jour... Install/Press Express OKAfter you click "Install PhoTags Express" button, there will be showing some windows that help you to finish the installing. You are only required to follow the description and click the buttons that it's defaulted by the software.
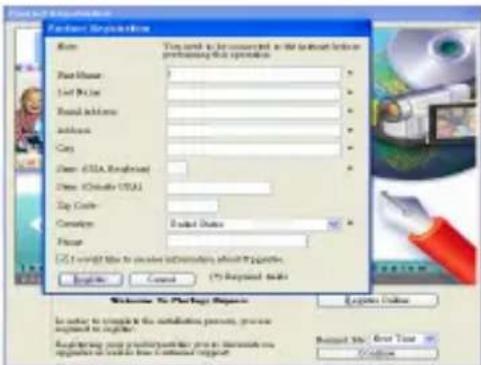
Register online
Click "Register online" button to have a registration. Or you can directly click "Continue" for registration next time.
text_image
Frequent Applications Name: Test card to be converted in the network between pretraining this operation Pass Name: 1st Place Retail Address: Address: Cap: Date: USA Email Date: Chinese USA Zip Code: Campaign: Received Status: Finish: I will't like to create information about it pages. Login Cancel (*) Required details Welcome To Purchase Options Login Details In order to complete the installation process, you will request to register. Register your product page you can access us register your website how to continue or support. Recent 100% Print DownloadAfter this step, the main window will appear on the screen.
text_image
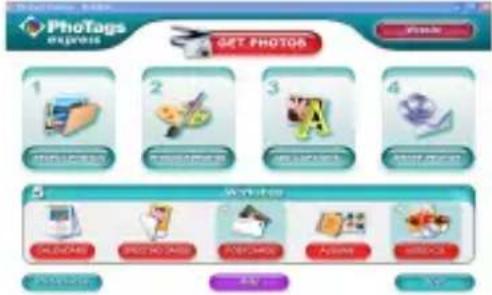
PhotoTags Express SET PHOTOS 1 2 3 4 PrintGPS TextGPS Collection Audio Watches CLOTHING POSTO AND COPYING APPY IMPORTS AVOCATI AVOCATIEverything you need to get the most from your photos
Select photos
Select the photos that you download from your camera. And edit it in the software.
2. Edit photos
Click the "Enhance photos", "Add captions" from the main window to edit your ideal photos.
3. Share photos
Share your photos via "E-mail", "Printing", and "Create HTML web" to uploading online.
4. Workshop
Create “Calendars”, two sides “Greeting cards” and “Postcards” on standard photo paper. You can purchase “Album” and “Video CD”. Two additional workshop project online at any time and create Photo Album and slide shows on CD that can be viewed on your PC and VCD for viewing on your TV using your DVD player.
How to purchase additional "Workshop" projects
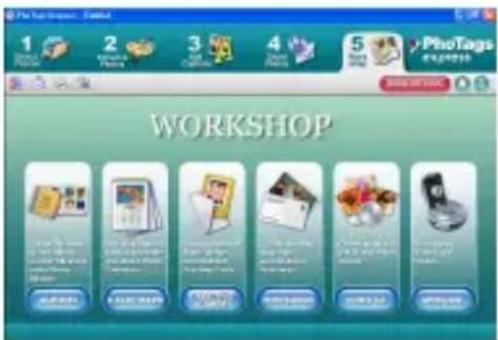
In addition to the free Calendars, two-sided Greeting Cards and Postcards Workshop projects you have the ability to purchase two additional Workshop projects: "Albums" and "Video CD" online, at anytime.
- To purchase the "Workshop Project" simply click the one you wish to purchase and you will be referred to an online website where you can purchase them.
text_image
Workshop 1 2 3 4 5 6 7 8 9 10 11 12 13 14 15 16 17 18 19 20 21 22 23 24 25 26 27 28 29 30 31 32 33 34 35 36 37 38 39 40 41 42 43 44 45 46 47 48 49 50- Once you purchase the "Workshop projects" they will be automatically activated in the software.
Transferring photos to your PC
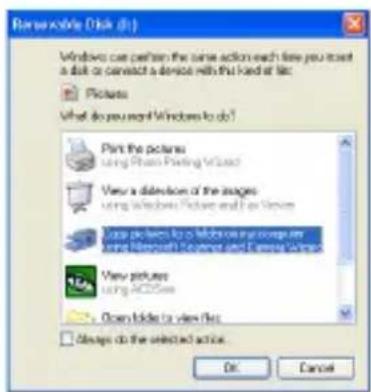
Turn on your camera, Change your camera mode to Playback and connect your camera to the computer correctly with USB cable, the screen will be shown a window (Removable Disk H:) as below:
text_image
Renewable Disk (R) Windows can pattern the same action each file you want a disk or connect a device with this hard at file: Pictures What do you want Windows to do? Print the pictures using Phase-Painting Wizard View a deletion of the images using Windows Pictures and For Services View pictures to a folder on your computer using Microsoft Internet and Google Windows View pictures using AOSSee Open files to view files Always do the selected active. OK CancelNOTE: Now you can download the photos to your computer via two methods as below:
1. Download photos directly from windows
Choose “copy pictures to a folder on my computer” on the Removable Disk (H:) window. After you click “OK”, there will be shown some windows on the screen step by step, you are only required to follow the description and click the buttons that are defaulted by the system to finish transferring. Or you can:
- Click on the START button in Windows.
- Click on the MY COMPUTER Icon on the desktop.
- Your memory card will appear as a REMOVABLE STORAGE DEVICE.
- Click on the REMOVABLE STORAGE DEVICE to view the images. The mages are stored in the subfolder called DCM100.
- You can now copy and paste the images to any directory you choose.
2. Download photos by using PhoTags Express
Double click the PhoTags Express icon on the desktop to launch the application.
Click the "Get Photos" button on the main window.
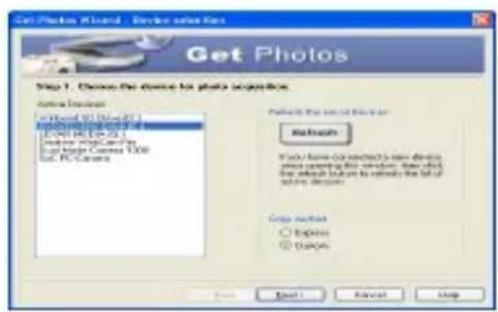
The "Get Photos" wizard mode will appear on the screen, you can select
"Custom copy" to download photos with your individuation.
Or you can select "Express" option to download all photos to the computer without the option of selecting photos. In this mode you will not see a preview of the photos transferred.
text_image
Get Photos Step 1: Choose the choice for photo recognition. Active Search Forward to Image 2013 E:\CONTROLS\SPG1 Import PhotoCam PS Dual Media Camera 100 Ed. PC Camera Default for all other items Refresh What home connected to new devices please opening this window, then click the switch button to rewrite the list of active devices. Crop method Express CropsCustom copy
This mode is used to manually select the photos you wish to copy to your computer.
The “Device selection” mode will appear. Both your camera and the memory card will each appear in the “Active Devices” list. Select “Custom copy” click “Next” to continue.
Note: At this moment, you can select "Express" option to copy all photos to your computer in one time without any prompt.
text_image
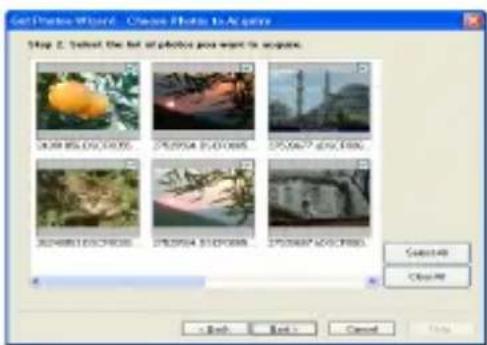
Get Photos Wizard - Choose Photos to Acquire Step 2. Select the list of photos you want to acquire. 100 MB/500 GB/500 250004 GB/500 GB 370007 GB/500 GB 320001 GB/500 GB 350004 GB/500 GB 370007 GB/500 GB 648149 Close < Back Back > CancelSelect your photos click "Next" to continue.
text_image
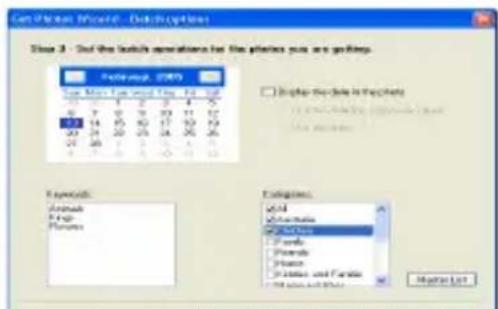
Get Phone Wizard - Download Step 3: Get the telephone operations for the phones you are getting. Telephone: (2007) Date: May 1st July 1st Aug 1st Aug Time: 12:00-15:00 Time: 16:00-18:00 Time: 19:00-21:00 Time: 22:00-24:00 Time: 25:00-27:00 Time: 28:00-30:00 Time: 31:00-33:00 Time: 34:00-36:00 Time: 37:00-39:00 Time: 40:00-42:00 Time: 44:00-46:00 Time: 48:00-50:00 Time: 51:00-53:00 Time: 54:00-56:00 Time: 57:00-59:00 Time: 60:00-62:00 Time: 63:00-65:00 Time: 66:00-68:00 Time: 69:00-71:00 Time: 72:00-74:00 Time: 75:00-77:00 Time: 78:00-80:00 Time: 81:00-83:00 Time: 84:00-86:00 Time: 87:00-89:00 Time: 90:00-92:00 Time: 93:00-95:00 Time: 96:00-98:00 Time: 99:00-101:00 Time: 1.2.3.4.5.6.7.8.9.10.11.12.13.14.15.16.17.18.19.20.21.22.23.24.25.26.27.28.29.30.31.32.33.34.35.36.37.38.39.40.41.42.43.44.45.46.47.48.49.50.51.52.53.54.55.56.57.58.59.60.61.62.63.64.65.66.67.68.69.70.71.72.73.74.75.76.77.78.79.80.81.82.83.84.85.86.87.88.89.90.91.92.93.94.95.96.97.98.99.10Add active captions to the picture. With this feature you can add a date, keywords and categories. Click "Next" to continue.
text_image
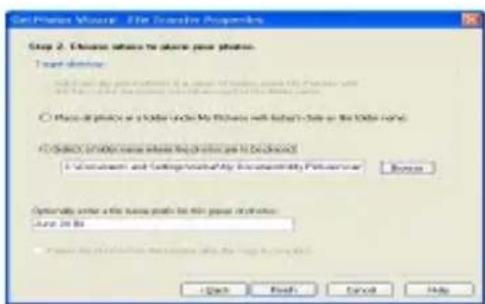
Get Photos Wizard: The Transfer Properties Step 2. Choose values to place new photos. I want to access: • I have all photos as a folder under My thickness with the title or the folder name. • I currently use a file path to access to it. Please click I switch and click any other information. Please click Options to enter a file path to the image directory. Auto 20 No. Next Step 1: Get Images to the image file.Choose a position where you want to place the photos.
Click "Finish" to copy the photos to the location you selected.
Note:
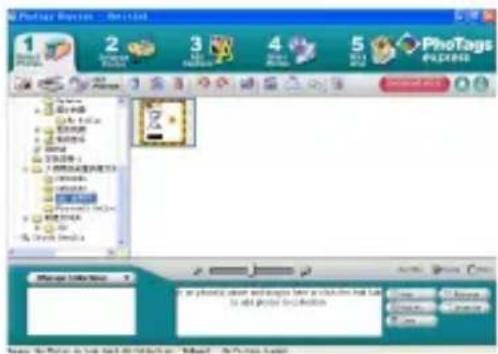
All of the picture you imported will appear in the "Select Photos" main window. And now, you can edit your photos per your idea, and then download it to your computer. For how to edit the photos, you can refer to the Quick Start guide in the PhoTags Express.
text_image
Package Options - Version1 1 2 3 4 5 PhoTags express Manage Settings or any printing error and design how to reduce the next page to add printing settingsPhoTags Express software owner manual
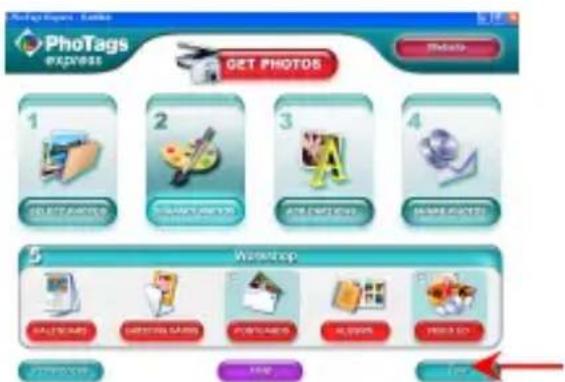
You can edit, printing, sharing photos with PhoTags Express. You can operate it as following step to know how to use PhoTags Express:
- Launch the PhoTags Express.
- Click "tour" button on the main window to view how to use the PhoTags Express in detail.
text_image
Photo/Export Table Photo PhoTags EXPRESS GET PHOTOS 1 2 3 4 5 Washup GA/LAWG CARTSIA GARS POSTLANDS MUSGS IMPORTS COOL ExportClick here
Attention :
If PhoTags Express can not promote the DirectX automatically, you can manually install the
DirectX in the CD before using the
Camera, otherwise ,if the edition of DirectX in the windows operation is less than 8.1,then the
AVI file can not be played.
Appendix : Specifications
| Sensor 3MP CMOS sensor | |
| Image resolution 5M(by interpolation), 3M, 2M, VGA | |
| Lens f=7.23mm, F2.8 | |
| Internal memory SDRAM 4MB | |
| External memory Support Micro SD card up to 8GB | |
| Flash Auto/force on/red eye reduction/off | |
| Quality Normal/fine/super fine | |
| Anti-shake Yes | |
| Face detect Yes | |
| Self-timer Off/2s/5s/10s | |
| Auto Power off Off/1min/2mins/3mins | |
| Battery 2*AAA batteries | |
| Working temperature | 0~40°C |
| Computer system Window 2000/XP/ Vista/Win7/M | Mac OS X (10.2.6 or higher) |