
VCX1PT2000 - Vacuum Cleaner Profilo - Free user manual and instructions
Find the device manual for free VCX1PT2000 Profilo in PDF.


| Brand | Profilo |
| Model | VCX1PT2000 |
| Product Type | Bagless Canister Vacuum Cleaner |
| Suction Control | Electronic, adjustable on/off button |
| Power Cord Length | Approximately 6 m (fully extend for long use) |
| Filter System | Motor protection filter, foam filter, fluff filter, washable exhaust filter |
| Dust Container Capacity | Approximately 1.5 L (maximum level mark) |
| Weight | Approximately 5 kg |
| Power Consumption | 1600 W (based on 16 A fuse recommendation) |
| Accessories Included | Adjustable floor tool, hard-floor brush, telescopic tube, pet hair upholstery nozzle, crevice nozzle, upholstery nozzle |
| Special Features | Parking aid, carrying handle, automatic cord rewinder, storage aid |
| Maintenance | Empty dust container after each use; clean foam/fluff filter and motor protection filter regularly; rinse exhaust filter every 6 months |
| Safety | Do not vacuum people, animals, hot or sharp objects, liquids; unplug before cleaning; use only approved spare parts |
| Spare Parts | Particle filter (642879), foam filter (608113), fluff filter (608110), exhaust filter (642881) |
| Intended Use | Domestic household vacuuming only, not for commercial use |
Frequently Asked Questions - VCX1PT2000 Profilo
User questions about VCX1PT2000 Profilo
0 question about this device. Answer the ones you know or ask your own.
Ask a new question about this device
Download the instructions for your Vacuum Cleaner in PDF format for free! Find your manual VCX1PT2000 - Profilo and take your electronic device back in hand. On this page are published all the documents necessary for the use of your device. VCX1PT2000 by Profilo.
USER MANUAL VCX1PT2000 Profilo
natural_image
Line drawing of a vacuum cleaner device with mesh grille and handle (no text or symbols)VCX1....PT
tr
Your vacuum cleaner .23
Setting up 24
Vacuuming 26
When the work is done .....29
Emptying the dust container and cleaning the particle filter . . . . . . . . . . . . . . . . . . 30
Cleaning the cylinder and joint . . . . . . . . . . . . . . . . . . . . . . . . . . . . . . . . . . . . . . . . . . . . . . . . . . . . . . . 34
Care 35
Optional accessories / Replacement parts . . . . . . . . . . . . . . . . . . . . . . . . . . . . . . . . . . . . . . . . . . . 36
Frequently asked questions .37
Troubleshooting small problems 37
de
natural_image
Mechanical component diagram showing a threaded fastener inserted into a housing (no text or symbols visible)natural_image
Diagram showing two cylindrical objects with an arrow indicating a process or transformation (no text or symbols)natural_image
Illustration of a vacuum cleaner with a tool inserted, showing the handle and tip (no text or symbols)natural_image
Diagram showing two cylindrical objects with an arrow indicating a process or transformation (no text or symbols)natural_image
Illustration of a hand holding a pen or tool with directional arrows indicating movement or force (no text or symbols)natural_image
Technical illustration of a mechanical device with internal components and a directional arrow (no text or symbols)natural_image
Diagram of a sewing machine needle insertion into the jaw (no text or symbols)natural_image
Mechanical diagram showing a rotating bearing and gear mechanism (no text or symbols)natural_image
Diagram showing two hands operating a tool with downward arrows indicating action, alongside icons representing components (no text or symbols)natural_image
Diagram showing two tool tips labeled a and b, with arrows indicating process flow (no text or symbols beyond labels)natural_image
Diagram showing a hairbrush being inserted into a cleaning tool, with no text or symbols present.Sert zemin aπz∂
natural_image
Technical illustration of a vacuum cleaner's internal structure with a black arrow indicating a component (no text or symbols present)natural_image
Illustration of a hand holding a vacuum cleaner with mesh filter (no text or symbols)natural_image
Diagram showing a hand adjusting a bag with arrows indicating movement or adjustment (no text or symbols present)Fişi çekin.
natural_image
Mechanical assembly diagram showing threaded components and a connector (no text or symbols)natural_image
Illustration of a hand holding a pen or tool with arrows indicating movement or adjustment (no text or symbols present)natural_image
Technical illustration of a car interior showing dashboard and steering wheel (no text or symbols)natural_image
Mechanical assembly diagram showing a motor and gear assembly with an upward arrow (no text or symbols)natural_image
Technical line drawing of a mechanical device with internal components and a close-up inset showing a component detail (no text or symbols)natural_image
Three-panel technical illustration showing a car interior with structural components and directional arrows (no text or symbols)natural_image
Two views of a mechanical component with arrows indicating direction, no text or symbols presentnatural_image
Diagram of a device with two panels, one open and one closed, showing internal components and directional arrows (no text or symbols)natural_image
Cross-sectional diagram of a vehicle showing internal components and directional arrows (no text or symbols)natural_image
Diagram showing a computer monitor with grid layout and an open screen, illustrating the process of device rotation (no text or symbols present)natural_image
Mechanical assembly diagram showing two views of a motor or gear mechanism with no visible text or symbolsnatural_image
Mechanical assembly diagram showing a motor and gear mechanism with no visible text or symbolsnatural_image
Mechanical assembly diagram showing a cylindrical component being inserted into a car wheel, with an inset close-up highlighting internal components (no text or symbols present)natural_image
3D rendering of a mechanical component with a curved handle and rectangular body (no text or symbols)Silme ağızı VZ103WD\*
natural_image
Illustration of a Y-shaped vacuum cleaner with textured handle and base (no text or symbols)Sert zemin-ağzı VZ122HD\*
natural_image
Simple hand-drawn rectangular outline on white background (no text or symbols)
natural_image
3D rendering of a rectangular block with no visible text or symbols on its surface
natural_image
Exterior view of a four-panel window frame structure (no text or symbols)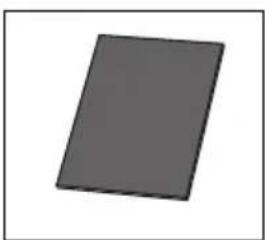
natural_image
Simple gray rectangular shape with no text or symbolsPlease keep this instruction manual. When passing the vacuum cleaner on to a third party, please also pass on this instruction manual.
Intended use
This vacuum cleaner is intended for domestic use and not for commercial use.
Only use this vacuum cleaner in accordance with the instructions in this instruction manual.
The manufacturer will not accept any responsibility for damage caused by improper use or incorrect operation.
Therefore, please note the following points.
The vacuum cleaner must only be operated with:
■ manufacturer's replacement parts, accessories and optional accessories
The vacuum cleaner is not to be used for:
■ vacuuming persons or animals
■ vacuuming up:
- insects or spiders.
– hazardous, sharp-edged, hot or burning substances. - damp or liquid substances.
– highly flammable or explosive substances and gases. - Ash, soot from tiled stoves and central heating systems
Safety information
This vacuum cleaner complies with the recognised rules of technology and the relevant safety regulations. We confirm that it complies with the following European directives: 89/336/EEC (amended by Directives 91/263/EEC, 92/31/EEC and 93/68/EEC). 73/23/EEC (amended by Directive 93/68/EEC).
■ Always observe the information on the rating plate when using the vacuum cleaner and connecting to the power supply.
■ Never vacuum without the dust container and the particle filter with foam filter and fluff filter => This can damage the vacuum cleaner.
■ Only allow children to use the vacuum cleaner under supervision.
- Keep the vacuum cleaner away from the face when using nozzles and tubes.
=> There is a risk of injury.
■ Never carry the vacuum cleaner by the power cord or flexible hose.
■ Fully extend the power cord when using the vacuum cleaner continuously for several hours.
■ When disconnecting the appliance from the mains, pull the plug, not the power cord.
■ Do not pull the power cord around sharp corners or allow it to become trapped.
■ Unplug the vacuum cleaner from the mains before carrying out any work on it.
■ Do not use the vacuum cleaner if it is damaged. Unplug the power cord from the mains if a fault is detected.
■ For safety reasons, only authorised after-sales service personnel are permitted to carry out repairs and fit replacement parts to the vacuum cleaner.
■ Protect the vacuum cleaner from moisture and sources of heat.
■ The vacuum cleaner is not suitable for use on building sites.
=>Vacuuming up building rubble could damage the vacuum cleaner.
■ Switch off the vacuum cleaner when it is not in use.
■ At the end of its life, the vacuum cleaner should be disposed of in an appropriate manner.
Disposal information
■ Packaging
The packaging is designed to protect the vacuum cleaner from being damaged during transport. It is made of environment-friendly materials and can be recycled. Dispose of packaging that is no longer required at an appropriate recycling point.
■ Used vacuum cleaners
Used vacuum cleaners still contain many recyclable materials. Therefore, please take used vacuum cleaners to your retailer or recycling centre so that they can be recycled. For current disposal methods, please enquire at your appliance dealership or local council.
Please note
- Only connect the appliance to a socket that is protected by at least a 16 amp fuse. If a fuse is tripped when you switch on the vacuum cleaner, this may be because other electrical appliances which have a high current draw are connected to the same power circuit. To prevent the fuse from tripping, select the lowest power setting before switching the vacuum cleaner on, and increase the power only once it is running.

1 Adjustable floor tool*
2 Hard-floor brush*
3 Telescopic tube*
4 Sliding button*
5 Pet hair upholstery nozzle*
6 Fixed tube*
7 Handle*
8 Flexible hose
9 Multi-purpose nozzle *
10 On/off button with electronic suction regulator
11 Parking aid
12 Power cord
13 Carrying handle
14 Cylinder release button
15 Exhaust filter*
16 Dust container
17 Emptying button
18 Maximum level mark
19 Dust container flap
20 Motor protection filter
21 Storage aid
22 Filter cartridge with foam filter and fluff filter
23 Dust separator twist-lock cover
24 Cylinder
*Dependent on model purchased

Before using for the first time
Push the handle onto the flexible hose until it engages.
*Dependent on model purchased

natural_image
Mechanical component diagram showing a threaded fastener inserted into a housing (no text or symbols visible)Push the flexible hose into the opening at the front of the vacuum cleaner.

natural_image
Diagram showing two cylindrical objects with an arrow indicating a process or transformation (no text or symbols)Push the handle into the fixed/telescopic tube. To remove it, turn the handle slightly and pull it out of the tube.
*Dependent on model purchased

natural_image
Illustration of a vacuum cleaner with a tool inserted, showing the tip and handle (no text or symbols)Insert the fixed/telescopic tube into the floor tool. To remove it, turn the tube slightly and pull it out of the floor tool.
*Dependent on model purchased
Setting up en

natural_image
Diagram showing two cylindrical objects with an arrow indicating a process or transformation (no text or symbols)Connect the fixed tubes together
*Dependent on model purchased

natural_image
Illustration of a hand holding a pen or tool with directional arrows indicating movement or force (no text or symbols present)Unlock the telescopic tube to adjust its length by moving the sliding button in the direction of the arrow.
*Dependent on model purchased

natural_image
Technical illustration of a mechanical device with internal components and a directional arrow (no text or symbols)Holding the power cord by the plug, pull out the required length and plug the plug into the mains socket.

natural_image
Diagram of a device's internal structure with a downward arrow indicating a component (no text or symbols present)Press the on/off button in the direction of the arrow to switch your vacuum cleaner on/off.
Setting up en

natural_image
Mechanical diagram showing a rotating bearing and gear mechanism (no text or symbols)Adjust the suction by turning the on/off button in the direction of the arrow.
Set the power setting to maximum for the best results when vacuuming.
Vacuuming en

natural_image
Diagram showing two hands operating a tool with downward arrows indicating movement, alongside icons representing components (no text or symbols)Adjust the adjustable floor tool:
■ Rugs and carpets =>

■ Hard floors/parquet =>


natural_image
Diagram showing two tool tips labeled a and b, with arrows indicating process flow (no text or symbols beyond labels)Vacuuming with accessories
Attach the nozzles to the tube or handle as required:
a) Crevice nozzle for vacuuming crevices and corners, etc.
b) Upholstery nozzle for vacuuming upholstered furniture, curtains, etc.
*Dependent on model purchased
Vacuuming en

natural_image
Diagram showing a hairbrush being inserted into a cleaning tool, with no text or symbols present.Hard-floor brush*
For vacuuming hard floors (parquet flooring, laminate flooring, wooden floorboards, stone floors, etc.)
*Dependent on model purchased

Pet hair upholstery nozzle
■ For easy and thorough removal of pet hair (attach to handle or suction pipe as required).
■ To clean the pet hair upholstery nozzle, simply vacuum using the handle.
■ If it is very dirty, the pet hair upholstery nozzle can also be opened.
To do this, turn the two screws on the sides of the nozzle (e.g. using a coin) and remove the inner part from the nozzle.
■ After cleaning, replace the inner part (make sure it is correctly seated) and screw to the housing.
*Dependent on model purchased

natural_image
Technical illustration of a vacuum cleaner with a downward arrow indicating motion (no text or symbols present)You can use the parking aid on the back of the vacuum cleaner if you wish to stop vacuuming for a short time.
Once you have switched off the vacuum cleaner, slide the catch on the floor tool into the groove at the rear of the appliance.

To store or transport the vacuum cleaner, use the storage aid on the underside of the vacuum cleaner. Stand the vacuum cleaner up on its end. Slide the catch on the floor tool into the groove on the underside of the appliance.
! CAUTION: Do not operate in an upright/vertical position.

natural_image
Illustration of a hand holding a vacuum cleaner with mesh filter (no text or symbols)The appliance can also be carried using the carrying handle when vacuuming steps, for example.

natural_image
Diagram showing a hand adjusting a car seatbelt with arrows indicating movement or adjustment (no text or symbols present)Unplug the vacuum cleaner.
Tug the power cord briefly and let go. The cable then rewinds automatically.

natural_image
Mechanical assembly diagram showing threaded components and a close-up of a mechanical component (no text or symbols visible)To remove the flexible hose, turn to release the catch and pull the hose out.

natural_image
Illustration of a hand holding a pen or tool with arrows indicating movement or adjustment (no text or symbols present)Unlock the telescopic tube by moving the sliding button in the direction of the arrow and slide one tube into the other.
Emptying the dust container and cleaning the particle filter en

natural_image
Technical illustration of a car interior showing dashboard and steering wheel (no text or symbols)To achieve optimum vacuuming results, the dust container should be emptied and all the filters should be cleaned after every vacuuming job and, at the latest, when the maximum fill level is reached.
Emptying the dust container
Use the release button to unlock the cylinder. The cylinder releases upwards.

natural_image
Technical illustration of a mechanical assembly with an upward arrow indicating motion (no text or symbols present)Remove the dust container from the vacuum cleaner using the handle.

natural_image
Technical line drawing of a mechanical device with internal components and a close-up inset showing a circular component (no text or symbols)Press the button (PRESS) to release the dust container flap and empty the container into the rubbish bin.

Close the dust container flap and click it into place at all 3 catches.
Emptying the dust container and cleaning the particle filter en

natural_image
Three-panel technical illustration showing a car interior with structural components and directional arrows (no text or symbols)Cleaning the foam filter and fluff filter
■ Open the filter cartridge and take out the filter frame with the fluff filter and foam filter.

natural_image
Two views of a mechanical component with arrows indicating direction, no text or symbols present■ Remove the fluff filter and foam filter from the filter frame and clean them by tapping out the dirt. If the filters are very dirty, they should both be rinsed out.

Emptying the dust container and cleaning the particle filter en

natural_image
Diagram of a mechanical device with two open compartments and directional arrows indicating movement or force (no text or symbols present)■ Insert the foam filter into the fluff filter and clip into the filter frame.

■ Insert the filter frame into the filter cartridge and click into place, in the direction of the arrow.

natural_image
Cross-sectional diagram of a vehicle showing internal components and airflow direction (no text or symbols)Cleaning the motor protection filter
■ Open the motor protection filter flap. Remove the micro filter and shake it clean. If the micro filter is very dirty, it should be rinsed out. A replacement micro filter may be ordered via the After Sales service. Replacement part number: 642879

! CAUTION: The vacuum cleaner must only be operated with the motor protection filter, foam filter and fluff filter fitted. The filters must be completely dry before they are refitted in order to ensure that they function correctly and to prevent the formation of odours or bacteria (wait about 24 hours)
Emptying the dust container and cleaning the particle filter en

■ Fit the dust container into the vacuum cleaner (make sure it is fitted correctly).
■ Push the cylinder back into position, closing the vaccum cleaner (you will hear a positive click).
! CAUTION: The cylinder can only be engaged if the dust container is fitted correctly.

natural_image
Diagram showing a computer monitor with grid layout and an open screen, illustrating the process of device placement or assembly (no text or symbols present)Cleaning the washable exhaust filter (made by Schwarzvlies)
■ Open the exhaust filter cover.
■ Remove the exhaust filter.
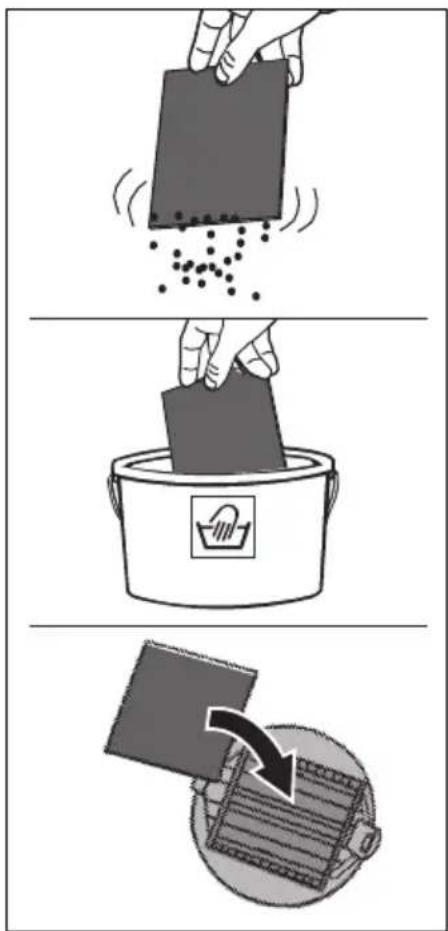
■ Clean the exhaust filter by knocking out the dirt.
■ If the exhaust filter is very dirty, it should be rinsed out (or washed in the washing machine at 40^ C).
■ Fit the exhaust filter.
■ Close the exhaust filter cover.
! CAUTION: The filter must be completely dry • before it is refitted in order to ensure that it functions correctly and to prevent the formation of odours or bacteria (wait about 24 hours).
The exhaust filter may be ordered via our After Sales Service.
Replacement part number: 642881
Cleaning the cylinder and joint en

natural_image
Mechanical assembly diagram showing two views of a motor or gear mechanism with no visible text or symbols■ Use the release button to unlatch the cylinder. The cylinder folds forward.
■ Turn the dust separator twist-lock cover anticlockwise and remove it from the dust separator.
■ Clean the cylinder and cylinder cover as required.

natural_image
Mechanical assembly diagram showing a rotary switch mechanism with no visible text or symbols■ Replace the dust separator twist-lock cover and lock into position by turning in a clockwise direction.
■ Push the cylinder back into position, closing the vacuum cleaner (you will hear a positive click).

natural_image
Mechanical assembly diagram showing a cylindrical component being inserted into a car, with an inset close-up highlighting internal components (no text or symbols present)■ The cylinder can also be removed from the vacuum cleaner to clean the joint in the event of malfunctions caused by large objects being vacuumed up.
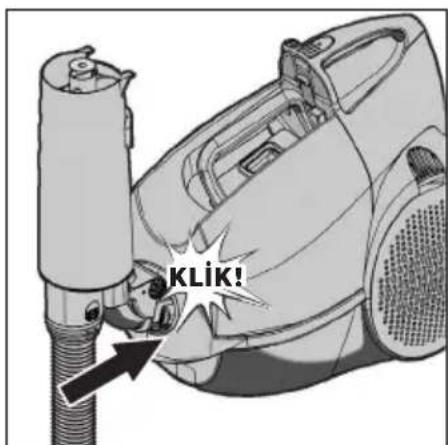
■ When replacing the joint, you must hear it engage.
! CAUTION: The inside of the separator may become scratched with use and start to look opaque. This does not, however, affect the performance of the vacuum cleaner in any way, i.e. it will continue to function as normal.
Care en
■ Always switch the vacuum cleaner off and disconnect the power cord from the mains before cleaning the vacuum cleaner.
■ The vacuum cleaner and plastic accessories can be cleaned with a commercial plasticcleaner.
Do not use abrasive, glass or all-purpose cleaners. Never immerse the vacuum cleaner in water.
■ The dust compartment can, if necessary, be cleaned with a second vacuum cleaner or simply wiped with a dry cloth or dusting brush.
Subject to technical changes.
natural_image
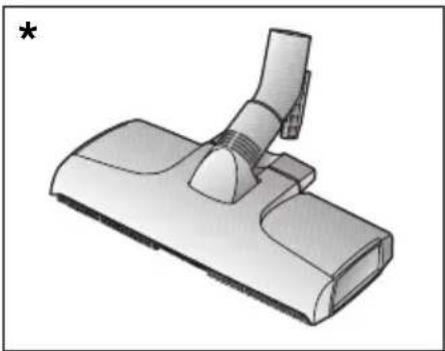
3D rendering of a mechanical component with a curved handle and rectangular body (no text or symbols)Parquet and wet tool VZ103WD\*
Suitable for use on parquet, laminate, stone, floor-boards, tiles, lino etc. (test the floor wipes on an inconspicuous area before using on a sensitive hard floor finish or a hard floor with specific care requirements). Vacuums and wet wipes the floor at the same time. Uses standard floor wipes. Includes pack of 15 floor wipes.

natural_image
3D rendering of a showerhead with handle and textured base (no text or symbols)Hard floor brush VZ122HD\*
For vacuuming hard floors (parquet flooring, laminate flooring, wooden floorboards, stone floors, etc.)
*Depending on the model, special accessories are available in our After Sales Service.
Replacement parts en
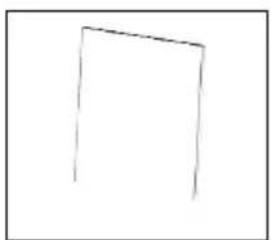
Particle filter (1), product code 642879
Foam filter (2), product code 608113
Fluff filter (3) product code 608110
Schwarzvlies (4) product code 642881
natural_image
Simple hand-drawn rectangular outline on white background (no text or symbols)
natural_image
Simple 3D gray rectangular block with no text or symbols on its surface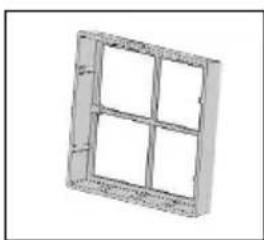
natural_image
Simple 3D wireframe diagram of a window frame with four panes (no text or symbols)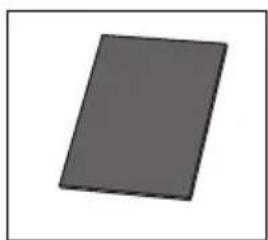
natural_image
Simple gray rectangular shape with no text or symbolsFrequently asked questions en
What kind of dirt can be vacuumed using the vacuum cleaner?
All kinds of household dirt can be vacuumed using the VCX1. When vacuuming fine particles, note that the motor protection filter, foam filter and fluff filter must be cleaned at regular intervals to guarantee the optimum function of the vacuum cleaner.
Should the dust container be emptied after each use of the vacuum cleaner?
The dust container should be emptied after each use for hygiene reasons, or at the latest when the maximum level (see the mark) is reached.
How often should filter cartridges and motor protection filters be cleaned/rinsed out?
Ideally, the filters should be cleaned after each use, especially after vacuuming fine particles, either by tapping or rinsing, depending on the
level of dirt.
The motor protection filter, foam filter and fluff filter must be cleaned at the latest when the maximum level (see max. marking on dust container) has been reached.
How often should the washable exhaust filter be cleaned/rinsed?
The washable exhaust filter should be cleaned regularly for hygiene reasons by tapping the dust out and must be rinsed through at least once every 6 months (or washed in the washing machine at 40^ C).
What is the best way to transport my vacuum cleaner?
The VCX1 can be transported easily using the ergonomic carrying handle, e.g. for vacuuming the stairs. It is best to hold/carry the tube with the floor tool in the other hand.
Troubleshooting small problems en
| Problem | Cause | Solution |
| Suction power becomes noticeably weaker | The filter cartridge / motor protection filter is heavily soiled. | Clean the motor protection filter, fluff filter and foam filter by tapping out the dust or rinsing.Caution: After rinsing, replace the motor protection filter, foam filter and fluff filter only once they are completely dry (after approximately 24 hours). |
| The nozzle is blocked | Vacuum the nozzle, e.g. using the crevice nozzle | |
| The hose / telescopic tube is blocked. | Slide the telescopic tube together and separate the suction pipe sections.Loosen and remove the blockage. | |
| The hose / handle is blocked | Separate the hose from the vacuum cleaner and handle Loosen and remove the blockage. | |
| The dust separator is blocked | Remove the twist-lock cover from the dust separator, loosen and remove the blockage. Clean the dust separator with a damp or dry cloth if necessary.Replace the twist-lock cover. | |
| The dust separator joint is blocked | Detach the dust separator from the vacuum cleaner, remove the blockage and click the joint back into the vacuum cleaner. | |
| Bottom flap of the dust container does not close | The bottom flap is soiled | Clean the bottom flap, e.g. with a damp or dry cloth.When closing the flap, ensure that it is fitted correctly. |
natural_image
Mechanical component diagram showing a disassembled part with a threaded end (no text or symbols visible)natural_image
Diagram showing two cylindrical objects with an arrow indicating a process or transformation (no text or symbols)natural_image
Illustration of a vacuum cleaner with a tool, showing the tip and handle (no text or symbols)natural_image
Diagram showing two cylindrical objects with an arrow indicating a process or transformation (no text or symbols)natural_image
Illustration of a hand holding a pen or tool with directional arrows indicating movement or force (no text or symbols)natural_image
Technical illustration of a mechanical device with internal components and a directional arrow (no text or symbols)natural_image
Diagram of a sewing machine needle insertion into a socket (no text or symbols)natural_image
Mechanical diagram showing a rotating bearing and gear mechanism (no text or symbols)natural_image
Diagram showing two hands operating a tool with downward arrows indicating movement, alongside icons representing components (no text or symbols)natural_image
Diagram showing two tool tips labeled a and b, with arrows indicating direction of movement (no text or symbols beyond labels)natural_image
Diagram showing a hairbrush being inserted into a cleaning tool, with no text or symbols present.Hartbodendüse
Tierhaar-Polsterdüse
natural_image
Technical illustration of a vacuum cleaner with a downward arrow indicating motion (no text or symbols present)natural_image
Illustration of a hand holding a vacuum cleaner with mesh grille (no text or symbols)natural_image
Diagram showing a hand adjusting a bag with arrows indicating movement or adjustment (no text or symbols present)Netzstecker ziehen.
natural_image
Mechanical assembly diagram showing threaded components and a connector (no text or symbols)natural_image
Illustration of a hand holding a pen or tool with arrows indicating movement or adjustment (no text or symbols present)natural_image
Technical illustration of a car interior showing dashboard and steering wheel (no text or symbols)natural_image
Technical illustration of a car interior showing engine compartment and intake manifold (no text or symbols)natural_image
Technical illustration of a mechanical device with internal components and a close-up view of a component (no text or symbols)natural_image
Three-panel technical illustration showing a car interior with structural components and directional arrows (no text or symbols)natural_image
Two views of a door panel showing internal structure and movement, with arrows indicating direction (no text or symbols)natural_image
Diagram of a device with two panels, one open and one closed, showing internal components and directional arrows (no text or symbols)natural_image
Cross-sectional diagram of a spacecraft or spacecraft interior showing internal components and directional arrows (no text or symbols)natural_image
Diagram showing a computer monitor with grid layout and an open screen, illustrating the process of device placement or assembly (no text or symbols present)natural_image
Mechanical assembly diagram showing two views of a motor or gear mechanism with no visible text or symbolsnatural_image
Mechanical assembly diagram showing a motor and gear mechanism with directional arrows (no text or symbols)natural_image
Mechanical assembly diagram showing a cylindrical component being inserted into a car's wheel, with an inset close-up highlighting internal components (no text or symbols present)natural_image
3D rendering of a mechanical component with a curved handle and rectangular body (no text or symbols)Wischdüse VZ103WD\*
natural_image
3D rendering of a vacuum cleaner blade with handle and textured base (no text or symbols)Hartboden-Düse VZ122HD\*
natural_image
Simple hand-drawn rectangular outline on white background (no text or symbols)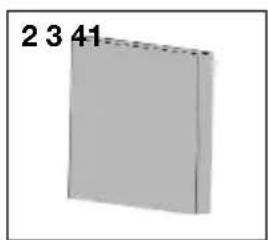
natural_image
Simple 3D gray rectangular block with no text or symbols on its surface
natural_image
Exterior view of a four-panel window frame (no text or symbols visible)
natural_image
Simple gray rectangular shape with no text or symbolsnatural_image
Symbol of a trash bin crossed with two crossed lines, no text or numbers presenttr
This appliance is labelled in accordance with European Directive 2002/96/EG concerning used electrical and electronic appliances (waste electrical and electronic equipment - WEEE). The guideline determines the framework for the return and recycling of used appliances as applicable throughout the EU
de


- tr
- de
- Silme ağızı VZ103WD\*
- Sert zemin-ağzı VZ122HD\*
- Intended use
- Safety information
- Disposal information
- ■ Packaging
- ■ Used vacuum cleaners
- Please note
- Before using for the first time
- Setting up en
- Vacuuming en
- Vacuuming with accessories
- Emptying the dust container and cleaning the particle filter en
- Emptying the dust container
- Cleaning the foam filter and fluff filter
- Cleaning the motor protection filter
- Cleaning the washable exhaust filter (made by Schwarzvlies)
- Cleaning the cylinder and joint en
- Care en
- Do not use abrasive, glass or all-purpose cleaners. Never immerse the vacuum cleaner in water.
- Parquet and wet tool VZ103WD\*
- Hard floor brush VZ122HD\*
- Replacement parts en
- Frequently asked questions en
- What kind of dirt can be vacuumed using the vacuum cleaner?
- Should the dust container be emptied after each use of the vacuum cleaner?
- How often should filter cartridges and motor protection filters be cleaned/rinsed out?
- How often should the washable exhaust filter be cleaned/rinsed?
- What is the best way to transport my vacuum cleaner?
- Wischdüse VZ103WD\*
- Hartboden-Düse VZ122HD\*
Brand : Profilo
Model : VCX1PT2000
Category : Vacuum Cleaner