XTP101 - Lawn mower Espina - Free user manual and instructions
Find the device manual for free XTP101 Espina in PDF.


User questions about XTP101 Espina
0 question about this device. Answer the ones you know or ask your own.
Ask a new question about this device
Download the instructions for your Lawn mower in PDF format for free! Find your manual XTP101 - Espina and take your electronic device back in hand. On this page are published all the documents necessary for the use of your device. XTP101 by Espina.
USER MANUAL XTP101 Espina
LAWNMOWER Instruction manual
Original instructions
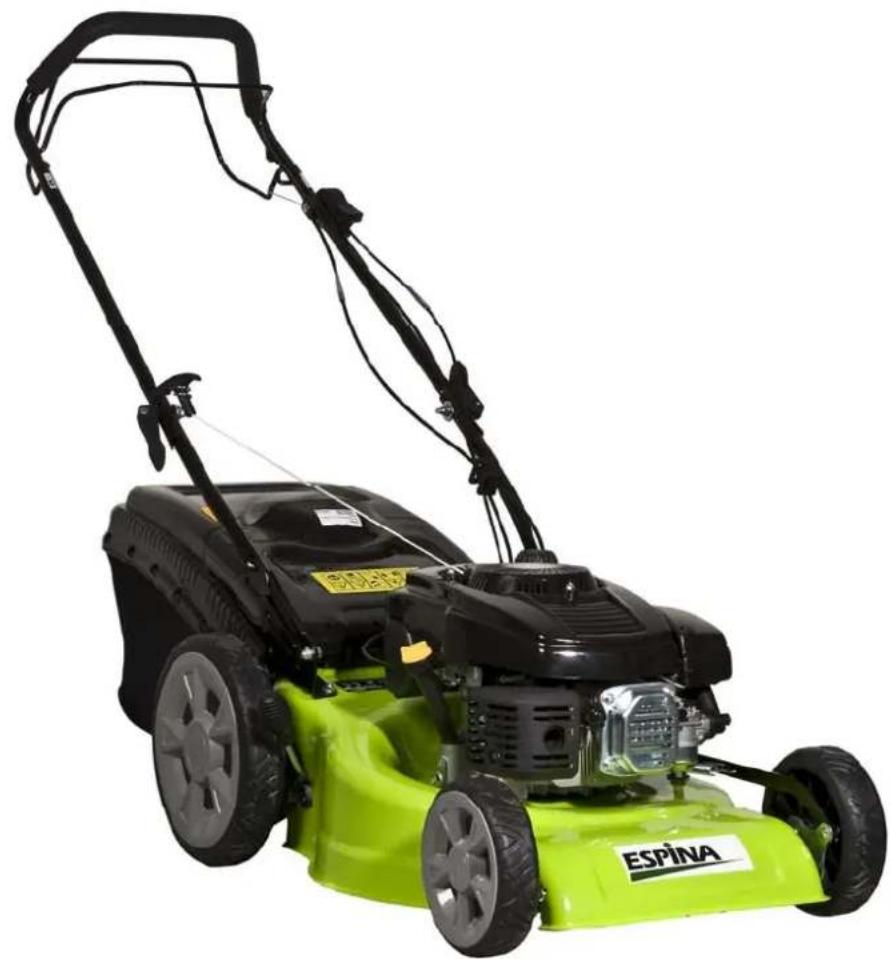
natural_image
Exterior view of a green ESPÍNA lawn mower with black and white body (no signage or text on the motor itself)natural_image
Collage of four black-and-white photos showing a toy car, hands holding wires, and cable clamps (no visible text or symbols)natural_image
Close-up of a mechanical component with internal structural lines and directional arrows (no text or symbols)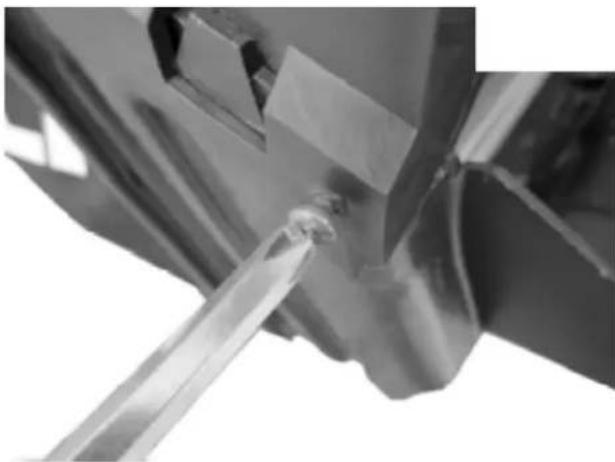
natural_image
Close-up of a metallic mechanical component with a tool inserted, no visible text or symbols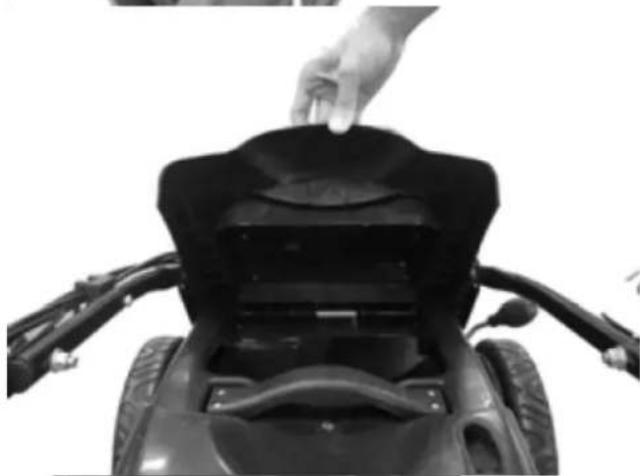
natural_image
Close-up of a person pressing down on a motorcycle seat cover (no text or symbols visible)natural_image
Close-up of hands installing or adjusting a mechanical component with wires (no visible text or symbols)natural_image
Line drawing of hands using a wrench to adjust or install a mechanical component (no text or symbols present)
text_image
MAX ← MINnatural_image
Hand holding a tool interacting with a mechanical component (no visible text or symbols)natural_image
Line drawing of a person using a tool to adjust or install a curved mechanical component, with directional arrows indicating movement (no text or symbols)natural_image
Diagram of a bicycle steering wheel with a lever and directional arrows indicating motion (no text or symbols)natural_image
Hand holding a tool with an arrow indicating rotation (no text or symbols present)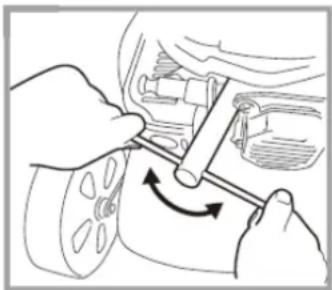
natural_image
Illustration of hands using a tool to adjust or install a vehicle wheel (no text or symbols visible)natural_image
Close-up of a hand holding a metallic mechanical component, no visible text or symbolsnatural_image
Close-up of a mechanical component with internal structural lines and directional arrows (no text or symbols)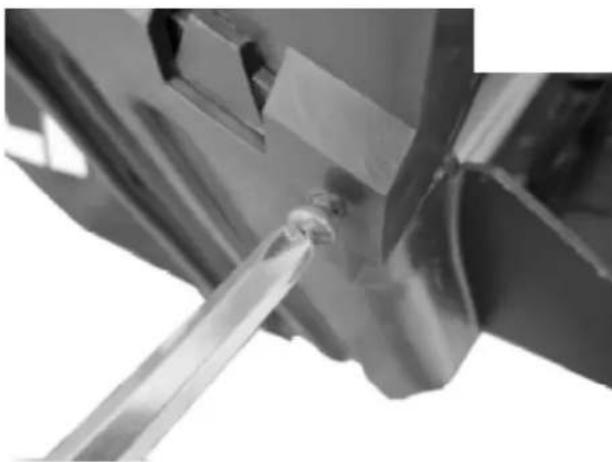
natural_image
Close-up of a metallic tool interacting with a mechanical component (no visible text or symbols)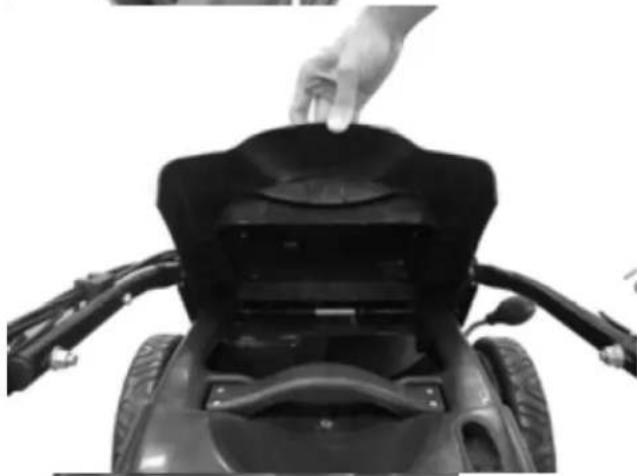
natural_image
Close-up of a person adjusting a black mechanical component on a motorcycle chassis (no visible text or symbols)natural_image
Close-up of hands installing or adjusting a car tire with a tool (no visible text or symbols)natural_image
Line drawing of a hand using a tool to adjust or install a mechanical component (no text or symbols visible)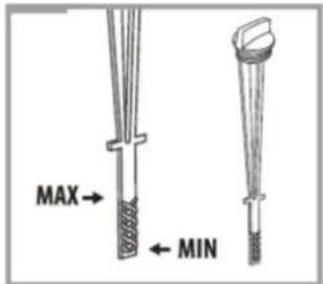
text_image
MAX MINnatural_image
Line drawing of a hand inserting a component into a fan or fan device (no text or symbols visible)natural_image
Illustration of a hand holding a tool with directional arrows indicating movement or force (no text or symbols present)natural_image
Diagram of a bicycle steering wheel with a hand operating it, showing motion arrows (no text or symbols)natural_image
Hand holding a connector with an arrow indicating rotation (no text or symbols present)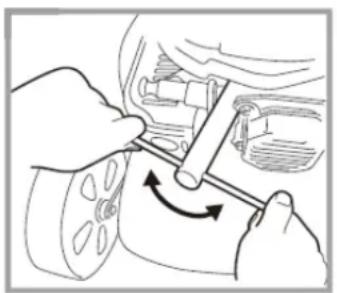
natural_image
Illustration of hands using a tool to adjust or install a car wheel (no text or symbols visible)natural_image
Close-up of a hand holding a metallic mechanical component, no visible text or symbolsCongratulations for choosing this high-quality ESPINA product! We hope it will be of great help to you. Remember to read the instruction manual before using the appliance for the first time in order to ensure safe usage. If you have any doubt or problems, please contact your dealer or the importer. We wish you safe and pleasant work with this appliance!
SAFETY INSTRUCTIONS
READ THESE INSTRUCTIONS CAREFULLY AND NOTE THE SAFETY INSTRUCTIONS AND WARNINGS. USE THE APPLIANCE CORRECTLY AND WITH CARE FOR THE PURPOSE FOR WHICH IT IS INTENDED. FAILURE TO DO SO MAY CAUSE DAMAGE TO PROPERTY AND/OR SERIOUS PERSONAL INJURY. KEEP THIS INSTRUCTION MANUAL SAFE FOR FUTURE USE.
- This appliance can be used by children aged from 8 years and above and persons with reduced physical, sensory or mental capabilities or lack of experience and knowledge if they have been given supervision or instruction concerning use of the appliance in a safe way and understand the hazards involved. Children shall not play with the appliance. Cleaning and user maintenance shall not be made by children without supervision.
- Become familiar with the machine and how it works.
- Read and understand the operator's manual and labels affixed to the machine. Learn its application and limitations as well as the specific potential hazards peculiar to it.
- Understand completely the function of all the controls and their proper operation. Know how to stop the machine and disengage the controls quickly.
- Do not attempt to operate the machine until you fully understand how to properly operate and maintain the engine and how to avoid accidental injuries and/or property damage.
- Never operate the machine without good visibility or light.
- Never start or run the engine in an enclosed room. The exhaust fumes are dangerous, containing carbon monoxide, an odorless and deadly gas. Operate this unit only in a well-ventilated outdoor area.
- Do not operate the machine while under the influence of drugs, alcohol, or any medication that could affect your ability to use it properly.
- Dress properly. Wear heavy long pants, boots and gloves. Do not wear loose clothing, short pants, and jewelry of any kind. Secure long hair so it is above shoulder level. Keep your hair, clothing and gloves away from moving parts. Keep your hair, clothing and gloves away from moving parts.
- Check your machine before starting it. Keep guards in place and in working order. Make sure all bolts and nuts are properly tightened.
- Never operate the machine when it is in need of repair or is in poor mechanical condition. Replace damaged, missing or failed parts before using it. Check for fuel leaks. Keep the machine in safe working condition.
- Do not use the machine if it does not turn on/off appropriately. Any gasoline powered machine that cannot be controlled with the engine switch is dangerous and must be replaced.
-
Form a habit of checking to see that keys and adjusting wrenches are removed from machine area before starting it. A wrench or a key that is left attached to a rotating part of the machine may result in personal injury.
-
Stay alert, watch what you are doing and use common sense when operating the machine.
- Do not overreach. Do not operate the machine while barefoot or when wearing sandals or similar lightweight footwear. Wear protective footwear that will protect your feet and improve your footing on slippery surfaces. Keep proper footing and balance at all times. This enables better control of the machine in unexpected situations.
- Reduce the risk of unintentional starting. Make sure that the engine switch is off before transporting the machine or performing any maintenance or service on the unit. Transporting or performing maintenance or service on a machine with its switch on invites accidents.
- Fuel is highly flammable, and its vapors can explode if ignited. Take precautions when using to reduce the risk of serious personal injury.
- When refilling or draining the fuel tank, use an approved fuel storage container while in a clean, well-ventilated outdoor. Do not smoke, or allow sparks, open flames or other sources of ignition near the area while adding fuel or operating the unit. Never fuel the machine indoors.
- Keep grounded conductive objects, such as tools, away from exposed, live electrical parts and connections to avoid sparking or arcing. These events could ignite fumes or vapors.
- Always stop the engine and allow it to cool before filling the fuel tank. Never remove the cap of the fuel tank or add fuel while the engine is running or when the engine is hot. Do not operate the machine with known leaks in the fuel system.
- Loosen the fuel tank cap slowly to relieve any pressure in the tank.
- Never overfill fuel tank (there should be no fuel above the upper limit mark).
- Replace all fuel tank and container caps securely and wipe up spilled fuel. Never operate the unit without the fuel cap securely in place.
- Avoid creating a source of ignition for spilled fuel. If fuel is spilled, do not attempt to start the engine but move the machine away from the area of spillage and avoid creating any source of ignition until fuel vapors have dissipated.
- Store fuel in containers specifically designed and approved for this purpose.
- Store fuel in a cool, well-ventilated area, safely away from sparks, open flames or other sources of ignition.
- Never store fuel or machine with fuel in the tank inside a building where fumes may reach a spark, open flame, or other sources of ignition, such as a water heater, furnace, clothes dryer and the like. Allow the engine to cool before storing in any enclosure.
SYMBOLS
 | Before using your appliance, please read the instructions carefully. |
 | Thrown object hazard |
 | Keep safe distance. Keep unauthorized people, children or pets away from work area. |
 | Keep your hands and feet away from the moving parts when the engine starts and is running. |
 | Turn off the engine and disconnect the spark plug cap before cleaning, transporting, making adjustments, servicing or when the machine is left unattended. |
 | Exercise caution when handling gasoline and oil. |
 | Wear eye and ear protection while using the machine. |
TECHNICAL DATA
| Engine | Sanli 5,5HP 3100-3200rpm |
| Engine type | 4-stroke overhead valve engine (OHV) |
| Cylinder displacement | 163cm^3 |
| Fuel | unleaded gasoline (95 octane or higher) |
| Fuel tank volume | 1L |
| Oil type | SAE30 (e.g. Viima small engine oil WK4T) |
| Oil tank volume | 650ml |
| Drive system | rear wheel drive |
| Max speed | 3,7m/s |
| Cutting method | collection/mulching |
| Cutting width | 51cm |
| Cutting height | 30 - 80mm |
| Cutting heights | 10 |
| Cutting height adjustment | centralized with a lever |
| Collector capacity | 60L |
| Deck material | steel |
| Drive | self-propelled |
| Wheel size front/rear | 200/300mm |
| Starting method | recoil start |
| Weight | 41kg |
PARTS
text_image
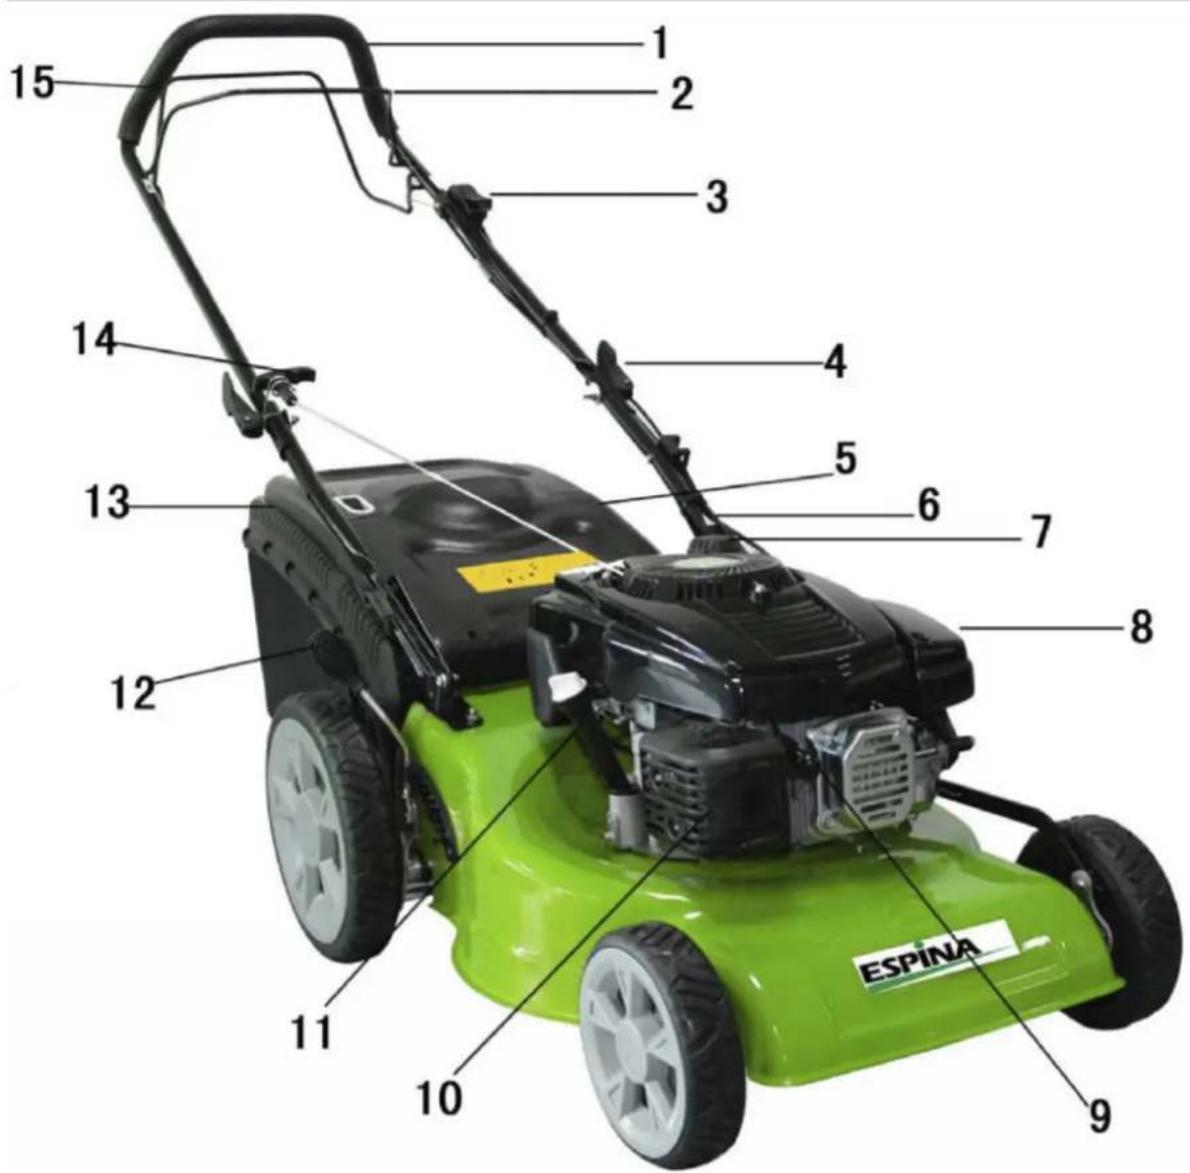
1 2 3 4 5 6 7 8 9 10 11 12 13 14 15 ESPINA| 1 | Handle | 9 | Spark plug |
| 2 | Safety lever | 10 | Muffler |
| 3 | Throttle control lever | 11 | Oil filler cap and dipstick |
| 4 | Quick-release clamp | 12 | Height adjustment lever |
| 5 | Rear cover | 13 | Grass collection bag |
| 6 | Transmission cable | 14 | Starter rope |
| 7 | Fuel tank | 15 | Drive lever |
| 8 | Air filter |
PRIOR TO USE
Unpack the appliance and check that all parts are included. If any part is missing or damaged, contact your dealer immediately. Dispose all packing material according to local regulations.
Assembly
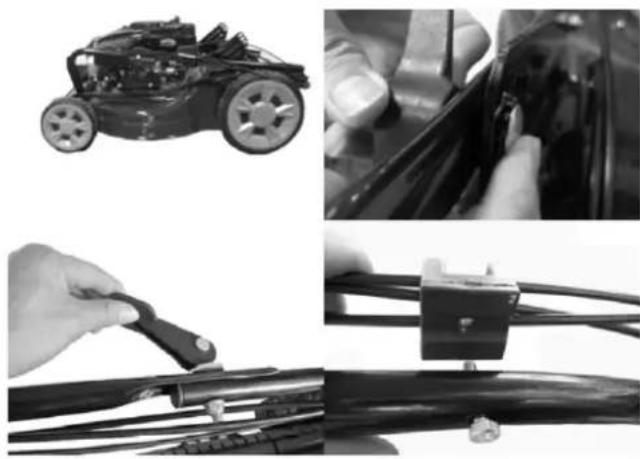
Your machine is not completely assembled due to packing reasons. It is delivered as shown in the below picture. Assemble the appliance according to the instructions below.
natural_image
Collage of four black-and-white photos showing a toy car, hands holding wires, and cable clamps (no text or symbols visible)- Fit the lower handle with wing nuts, bolts, washers and screws.
- Lock the handle in position using quick-release clamps.
- Fit the cable clamp from outside to inside with a bolt.
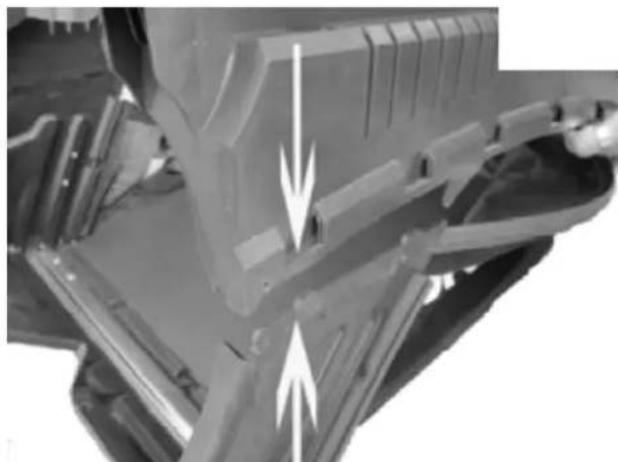
natural_image
Close-up of a mechanical component with internal structural lines and arrows indicating flow or movement (no text or symbols)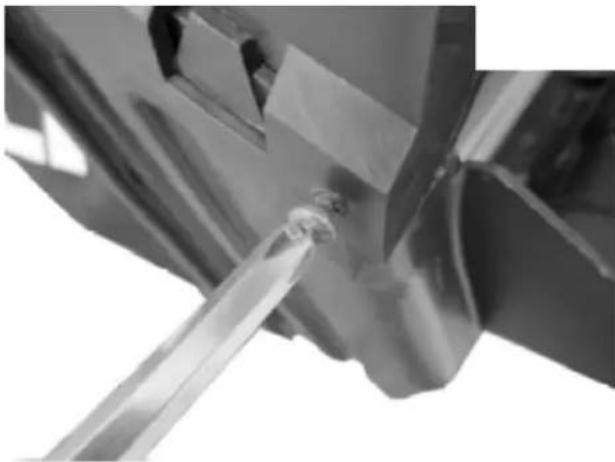
natural_image
Close-up of a metallic mechanical component with a tool inserted, no visible text or symbols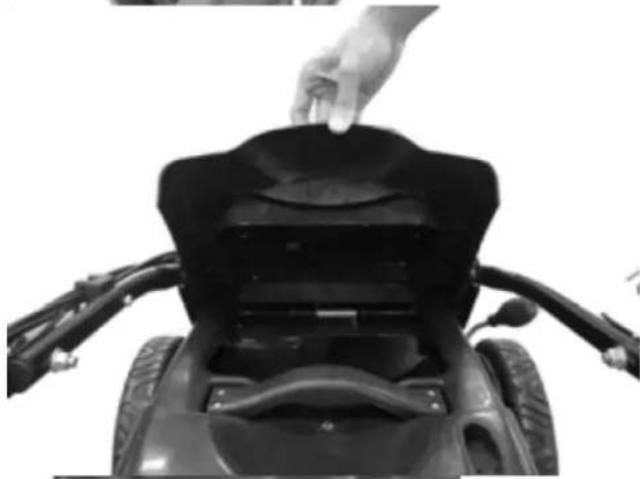
natural_image
Close-up of a hand pressing down on a black motorcycle seat cover (no text or symbols visible)- Assemble the grass collection bag as shown in the pictures.
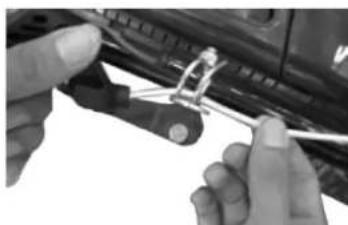
natural_image
Close-up of hands installing or adjusting a cable or wire component on a car (no visible text or symbols)- Fasten the starter cord to the machine.
Engine oil

NO OIL INSIDE!
Add engine oil (SAE 30 or SAE 10W-30) before use, otherwise the motor will be permanently damaged and the warranty will be voided.
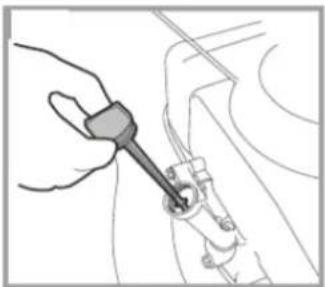
- Make sure the mower is on level surface. Remove the dipstick and slowly pour 650 ml of recommended oil into the tank. Do not overfill. Replace the dipstick and tighten.
- Check the oil level before each use and if necessary top up with engine oil. The oil level must be between the min and max marks on the dipstick.
natural_image
Line drawing of a hand using a wrench to adjust or install a mechanical component (no text or symbols present)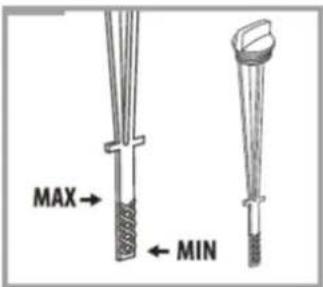
text_image
MAX ← MINAdding fuel
natural_image
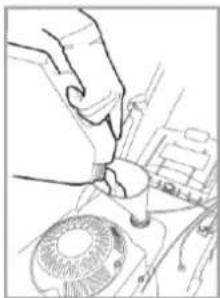
Line drawing of a hand inserting a component into a fan (no text or symbols)Fill fuel tank with unleaded, fresh and clean gasoline using a clean funnel. Do not overfill. Instead leave at least 15 mm from the bottom of the filler neck to allow expansion. Tighten securely the fuel cap after filling.
ATTENTION! Exercise extreme caution when handling gasoline and follow the warnings given in this manual.
GENERAL PRECAUTIONS FOR USE
- Never lift or carry a machine while the engine is running. Fuel tank should be emptied before transporting.
- Do not force the machine. Use the correct machine that suits the work. The correct machine will do the job better and safer at the rate for which it was designed.
- Do not change the engine governor settings or over-speed the engine. The governor controls the maximum safe operating speed of the engine.
- Do not put your hands or feet near rotating parts.
- Avoid contact with hot fuel, oil, exhaust fumes and hot surfaces. Do not touch the engine or muffler. These parts get extremely hot from operation. They remain hot for a short time after you turn off the unit. Allow the engine to cool before service, making adjustments or fuelling.
- If the machine should start to make an unusual noise or vibration, immediately shut off the engine, disconnect the spark plug wire, and check for the cause. Unusual noise or vibration is generally warning of trouble.
- Use only attachments and accessories approved by the manufacturer. Failure to comply with these instructions may result in personal injury.
- Maintain the machine. Check for misalignment or binding of moving parts, breakage of parts and any other condition that may affect the machine's operation. If damaged, have
the machine repaired before use. Many accidents are caused by poorly maintained equipment.
- Keep the engine and muffler free of grass, leaves, excessive grease or carbon build up to reduce the chance of a fire hazard.
- Never douse or squirt the unit with water or any other liquid. Keep handles dry, clean and free from debris. Clean them after each use.
- Observe proper disposal laws and regulations for oil to protect the environment.
- Store idle machine out of the reach of children. Do not allow persons unfamiliar with the machine or these instructions to operate it.
- Before cleaning, repairing, inspecting or adjusting shut off the engine and make sure all moving parts have stopped. Always make sure the engine switch is in its "OFF" position. Disconnect the spark plug cap, and keep the wire away from the plug to prevent accidental starting.
- To inspect the underside of your mower, only tilt the mower to your right or back when standing behind it otherwise oil may leak into inappropriate parts of the engine. Never tilt the mower when the engine is running.
- Have your machine serviced by qualified repair personnel using only identical replacement parts. This will ensure that the safety of the machine maintained.
- Always operate the machine from behind, never pass or stand in front of the machine when the engine is running. Never pull the machine towards you. Instead always push it and walk behind it.
- If the unit strikes a foreign object, stop the engine, disconnect the spark plug cap, thoroughly inspect the machine for any damage, and repair the damage before restarting and operating the machine.
- Never leave the operating position and leave the machine unattended when the engine is running.
- Always stop the engine when work is delayed or when walking from one location to another.
- Stay away from the edge of ditches and avoid actions that may cause the machine to topple over.
- Mow carefully on slopes and across the face of slopes (never up and down). Do not use in steep hills (inclination max 20°).
- Do not use the machine after rainfall or nightfall or in poor light conditions.
- Clear the area to be mowed of any stones, sticks and other objects before beginning. Ensure that you mow safe distance away (min. 14 metres) from people, children and animals.
- To reduce exposure to vibration, limit the hours of operation and take periodic breaks to minimize repetition and rest your hands.
On/Off
-
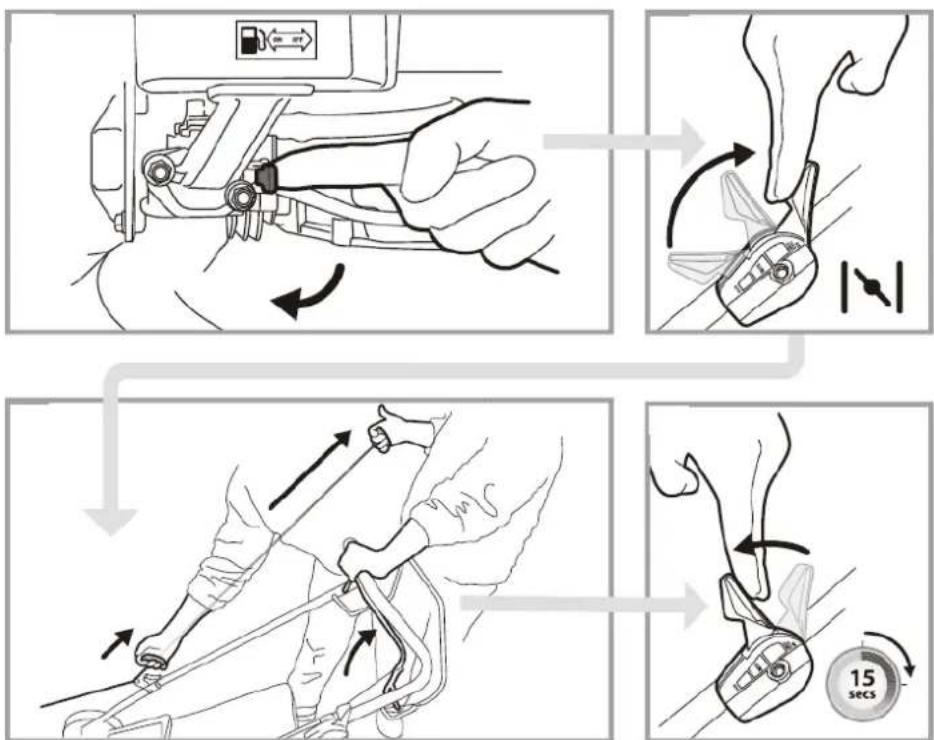
Make sure that your mower is on a hard and flat area away from fuel or fuelling area.
-
Slide the gasoline tap lever to ON position.
-
Move the throttle control lever to the cold start position.
-
Firmly hold the top handle with one hand and then with your other hand pull the cord slowly until you feel resistance. Then pull the starter strongly. Do not release the cord. Instead guide it carefully back to its original position.
-
When the engine has been running for at least 15 seconds (or longer on cold days), adjust the throttle control lever to the RUN position.
-
To re-start a hot engine, move the throttle control lever to the RUN position and then refer to point 4 above.
-
Turn off the mower by releasing the safety lever and pushing the throttle control lever to STOP position. After the engine has stopped, slide the fuel tap to OFF position.
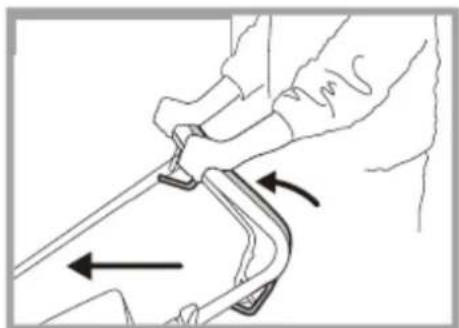
Drive lever
natural_image
Line drawing of a hand holding a tool with directional arrows indicating movement or force (no text or symbols)To activate the transmission press the drive lever against the handle. This enables the self-propelled function.
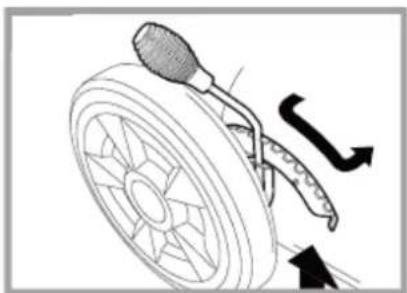
Cutting height adjustment
natural_image
Diagram of a bicycle steering wheel with a cam and directional arrows indicating motion (no text or symbols)Adjust the cutting height of your mower to suit the mowing conditions. Do not try to remove too much grass in one pass, mow rather the same area a few times. Adjustment of the cutting height is made centrally. Turn off the machine and take the weight of the machine of the mower by lifting. Move the lever outwards and move it towards the front of the machine to increase the cutting height or towards the rear to reduce the cutting height. Return the lever to the appropriate notch to set the desired cutting height. Make sure the lever fits snugly and securely.
CLEANING AND STORAGE
- Cut grass is damp. Regular cleaning after each use will reduce the risk of corrosion or seizure.
- Before you start cleaning, turn off the engine and allow it to cool.
- Remove accumulated grass clippings from and around with a soft brush.
- Clean the grass collection bag annually with a brush or gentle spray of water. Let the bag dry.
- Clean underneath regularly. Disconnect the spark plug cap and tilt the mower to your right or back when standing behind it. Remove cut grass from the cutting system with a scraper and a brush.
- Do not use a pressure washer or hot water to clean the mower. Dry off the machine before storing by leaving it running for a few minutes on a flat, clear surface to prevent corrosion or seizure.
- Store your mower in a dry, well-ventilated area away from flames, sparks or heat sources. Disconnect the spark plug cap before storing. Avoid storing beneath a tarpaulin or similar cover as it may cause condensation resulting in corrosion.
- Winter storage: Thoroughly clean the mower. Run the engine outdoors until fuel tank is empty or empty fuel using a fuel suction pump. Dispose of discarded fuel according to the local regulation. Turn fuel tap to OFF. Remove the spark plug from the engine. Pour a tablespoon of engine oil into the cylinder. Gently pull the starter rope several times to distribute the oil to protect the cylinder over winter. Replace and tighten the spark plug.
- Transporting your mower: Make sure that the fuel tank is empty. Allow the engine to cool and turn fuel tap to OFF position.
Maintenance schedule
| Parts\Frequency | Before each use | After 5 operating hours | Every 25 hours or once a year before winter storage |
| Cutting system | Check its condition | Sharpen and balance blade.Replace worn or damaged blade. | |
| Spark plug | Check | Clean and check the clearance of the electrodes.Replace if necessary. | |
| Air filter | Check | Clean the air filter.Replace if necessary. | |
| Oil | Check the oil level. | Drain and renew. | Drain and renew. |
Cutting system
Before and after each mowing session, check that the blade, its attachment bolts and drive shaft are not damaged or excessively worn. Never try to straighten a bent blade. Replace a damaged, worn or bent blade as soon as possible. Use only original spare parts.
WARNING: Vibration from a bent or damaged blade can cause permanent damage to the mower. Working with an excessively worn blade wastes fuel and can lead to injury if the blade becomes detached from the machine. Excessive vibration when mowing is a good indication of a problem with the cutting system.
Sharpening the blade
For best mowing results, have the edges sharpened and the blade balanced at least once a year by a specialist service center.
Removing the blade
Wear appropriate protective gloves to prevent possible injury when handling the blade. Disconnect the spark plug cap and tilt the mower to your right when standing behind it. Holding the blade firmly in one hand, use a spanner or socket to loosen the blade screw.
Mounting the blade
Wear appropriate protective gloves to prevent possible injury when handling the blade. Disconnect the spark plug cap and tilt the mower to your right when standing behind it. Check that all components (the blade, key, blade holder, screws and washers) are present, clean and in good condition.
Position the blade on its support and check the correct alignment and matching of pads with the blade. The blade must be positioned precisely on its stand. Tighten the screws connecting all the components. Make a final visual check that all parts are present and aligned before tightening the fixing bolt very firmly with a wrench while holding the blade firmly in one hand (wear suitable gloves).
Spark plug
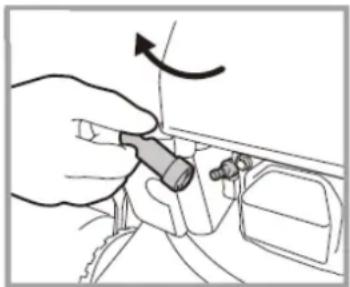
Check the spark plug initially after the first five hours of use. Thereafter, maintenance of the spark plug should take place every 25 hours. Remove the spark plug cap using a rotary motion and then remove the spark plug with the wrench provided. Clean off any carbon deposits using a copper brush and check the electrode gap with a feeler gauge (the gap should be 0.7 mm). Replace and re-tighten the serviced spark plug and replace the cap.
If the spark plug is worn or damaged, replace with a new spark plug of the same or suitable type for the engine. If in doubt, contact your local dealer.
natural_image
Hand holding a small mechanical component with an arrow indicating rotation (no text or symbols present)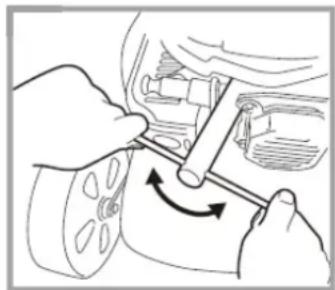
natural_image
Illustration of hands using a tool to adjust or install a car wheel (no text or symbols visible)Cleaning the air filter
An air filter in poor condition will reduce the performance and life of the engine while making it harder to start. Regular checks are therefore essential, especially when using the mower in dusty conditions. Check and clean the air filter at least every 25 hours of use.
Remove the air box lid and carefully remove the foam filter cartridge. Clean the cartridge in a small bowl of warm water containing a few drops of washing-up liquid until it is perfectly clean and free from all traces of grease and dust. Rinse the filter cartridge in clean water and then squeeze gently to remove most of the water. Let it air dry until it is completely dry.
Clean the cover and inside of the air box with a clean, lint-free cloth. Apply a uniform layer of oil to the outside of the cartridge filter with a brush (you can use clean engine oil for this). Insert the filter cartridge into its housing and replace the filter lid ensuring that each component is in place and properly installed. If the filter cartridge is damaged or very dirty, replace it using an original spare part.
Changing the engine oil
After 5 operating hours, the oil must be changed for the first time, then every 25 operating hours or at least once a year.
- Leave the engine running outdoors for several minutes to warm the oil and make it more fluid. Do not to touch the hot parts!
- Remove the spark plug cap and unscrew the oil level dipstick.
- Place a suitable container beneath the mower's oil filler pipe and tilt the mower to your right when standing behind it. Allow the oil to drain completely into the container.
- Return the mower onto its four wheels and fill the engine with fresh oil.
ATTENTION! Dispose of waste oil according to the local regulations. It is not allowed to drain waste oil onto the ground or mix it with other waste material.
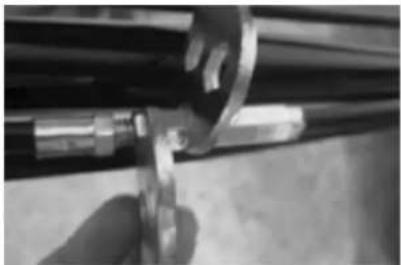
Transmission cable adjustment
natural_image
Close-up of a hand adjusting a mechanical component with a metallic ring (no visible text or symbols)In its transmission-engaged position, the mower's power drive lever is pushed fully towards the handle. An incorrectly adjusted transmission cable can cause premature wear to the mower's drive system. If the transmission cable is too tight, it will be difficult to move the drive lever towards the handle bar. Conversely, if the transmission cable is not tight enough, the transmission will function poorly and lack drive. To adjust the tension of the cable transmission, increase or reduce the length of the adjustment device using the wrench. Check the effectiveness of the transmission and the resistance of the lever. Once proper adjustment has been reached, secure the adjustment device by tightening the lock nuts.
TROUBLE SHOOTING
| Problem | Possible cause | Solution |
| Engine fails to start | Incorrect throttle positionEmpty fuel tankDefective spark plugDirty spark plugSpark plug not connectedFlooded engineOld gasoline in the tankWater in the fuel tank | Select the correct settingFill the tankReplace the spark plug.Clean the spark plug.Check that the spark plug is properly attached.Turn fuel OFF and pull the starter until the mower starts. Turn the fuel ON.Drain stale fuel and replace with fresh fuel.Contact your dealer. |
| Engine stops often. | Blocked fuel supplyFuel cap is not venting.Wrong fuel type | Ensure the fuel line is not pinched or blocked.Loosen the fuel cap.Drain fuel tank and fill with fresh gasoline. |
| Engine loses power. | Air filter is dirty.Incorrect height adjustmentBlocked fuel cap vent holes | Clean or replaceRaise the mower's cutting height.Ensure the holes in the cap are clear. |
| The machine vibrates heavily. | Loose cutting bladeBent or broken bladeLoose screws or boltsExcessive grass/dirt build-up | Check and tighten bolts and screws.Replace the blade.Clean and ensure that the under-side of the mower is also clean |
| Poor cutting catching | Collection bag is not fitted correctly.Incorrect cutting heightBlocked grass catcher vents | Reattach the collection bag and check for damage.Adjust the cutting height.Clean the vents and check that the collection bag is not damaged. |
EU Declaration of Conformity (Translation of the original EU Declaration of Conformity)
We
declare under our sole responsibility that the following product
Equipment: Lawn mower
Brand name: Espina
Model/type: XTP101 (LSP510S9A)
is in conformity with the
Machinery Directive (MD) 2006/42/EC, Electromagnetic Compatibility Directive (EMC) 2004/108/EC, Noise Emission Directive 2005/88/EC and Emission Directive 2004/26/EC
and the following harmonized standards and technical specifications have been applied:
EN ISO 14982:2009, EN ISO 5395-1:2013, EN ISO 5395-2:2013
Kauhajoki 2.12.2014
Manufacturer: Isojoen Konehalli Oy
Harri Altis, Purchase Manager (authorized to compile the Technical File)