Ocean W6 - Faucet WimTec - Free user manual and instructions
Find the device manual for free Ocean W6 WimTec in PDF.


User questions about Ocean W6 WimTec
0 question about this device. Answer the ones you know or ask your own.
Ask a new question about this device
Download the instructions for your Faucet in PDF format for free! Find your manual Ocean W6 - WimTec and take your electronic device back in hand. On this page are published all the documents necessary for the use of your device. Ocean W6 by WimTec.
USER MANUAL Ocean W6 WimTec
natural_image
Modern wall-mounted digital shower unit with a blue circular indicator light and a metallic handle (no text or symbols visible)text_image
12 V= WW KWWimTec OCEAN W6 - TD:
text_image
WimTec RANKING / ASSENDENT 1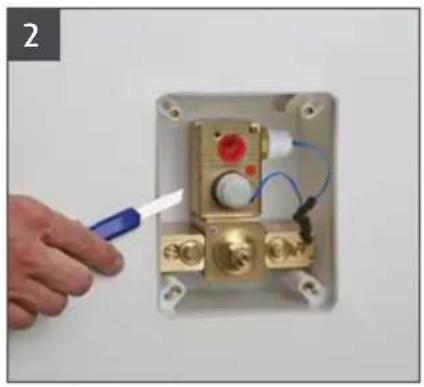
natural_image
Hand holding a blue tool installing or adjusting a brass electrical control box (no text or symbols visible)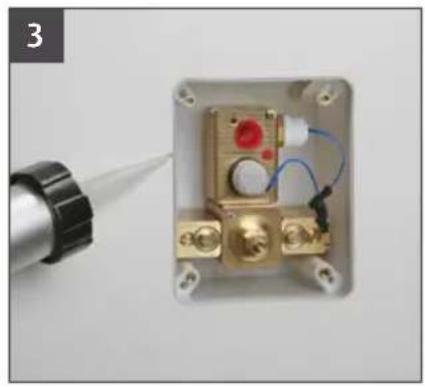
natural_image
Close-up of a brass electronic device with a red and white component, mounted on a metal frame with a black tool nearby (no visible text or symbols)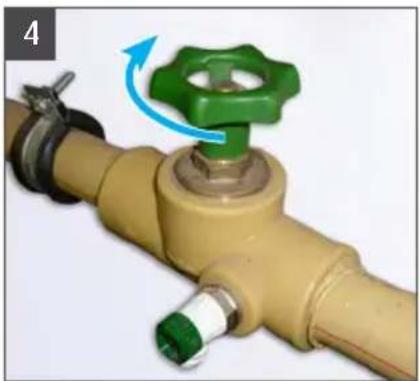
natural_image
Close-up of a yellow pipe valve with green valve and blue arrow indicating rotation (no text or symbols)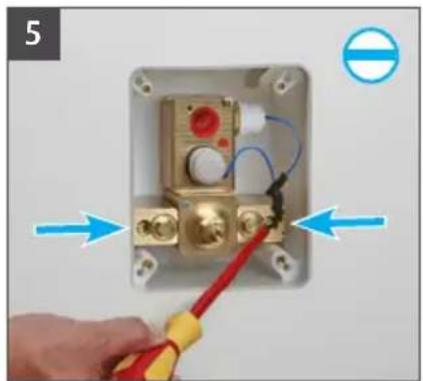
natural_image
Hand using a red tool to adjust or install a wall-mounted electrical component, with blue arrows indicating direction (no text or symbols visible)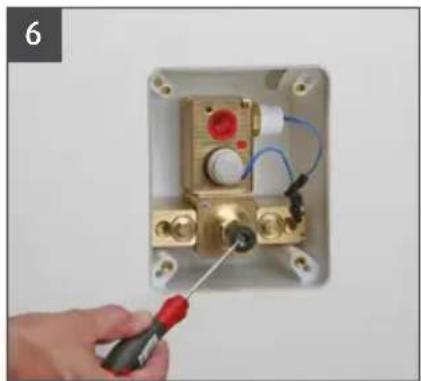
natural_image
Hand using a screwdriver to switch an electrical component on a wall (no text or symbols visible)!
natural_image
Close-up of a hand adjusting an electrical component with wires and a magnified inset showing internal wiring (no text or symbols visible)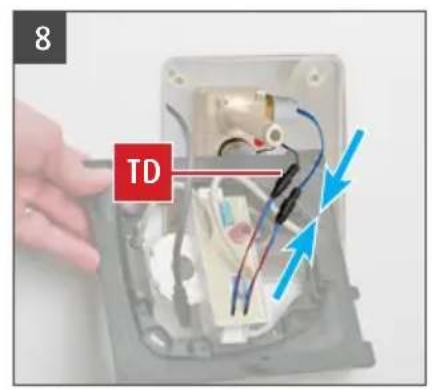
text_image
8 TD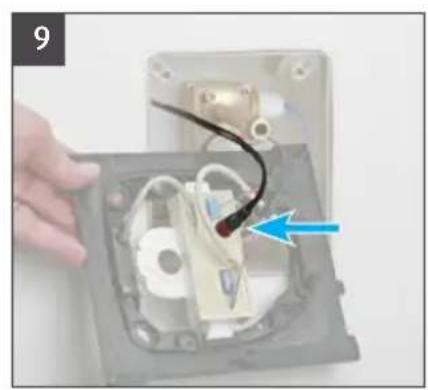
natural_image
Close-up of a hand holding an electronic device with a black cable and blue arrow pointing to a component (no text or symbols visible)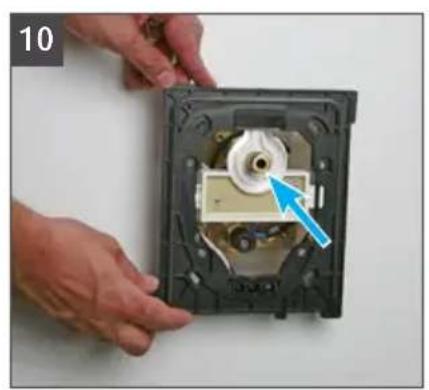
natural_image
Close-up of hands installing or adjusting a CD-ROM drive into a black case, with a blue arrow pointing to the component (no text or symbols visible)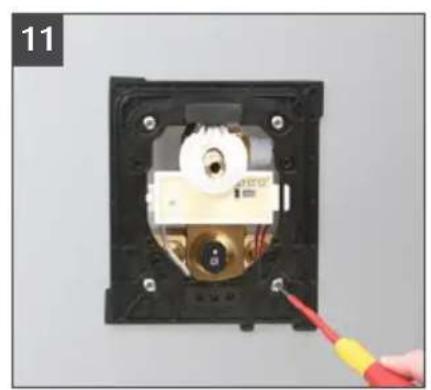
natural_image
Close-up of a mechanical device with a red-handled tool inserted, showing internal components and mounting holes (no text or symbols visible)natural_image
Close-up of a mechanical device with a central component and a red tool, no visible text or symbols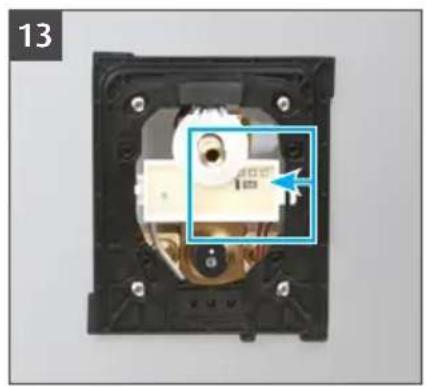
natural_image
Close-up of a mechanical component with a highlighted section and arrow annotation (no readable text or symbols)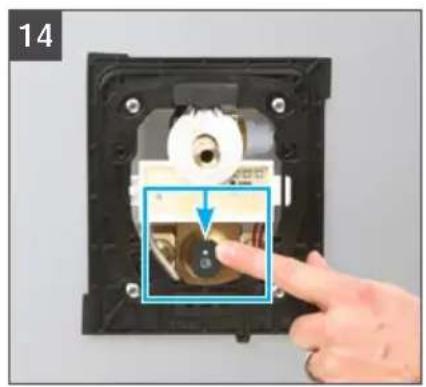
natural_image
Hand inserting a component into a black plastic case, showing a magnified view of the internal object (no text or symbols visible)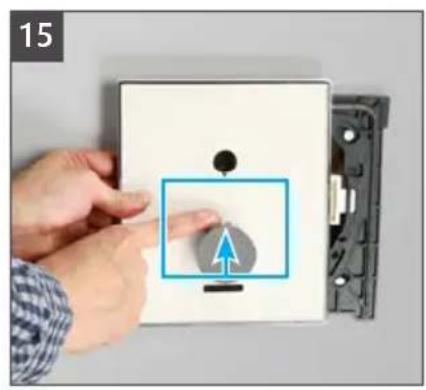
text_image
15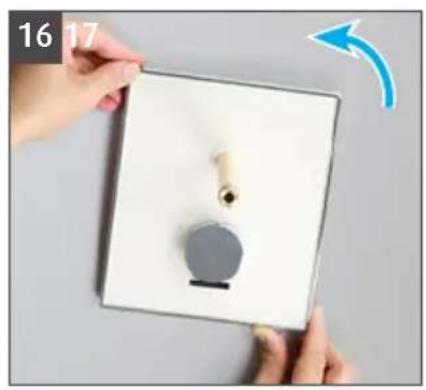
natural_image
Close-up of hands holding a white square appliance with a circular button and a small hole, no visible text or symbols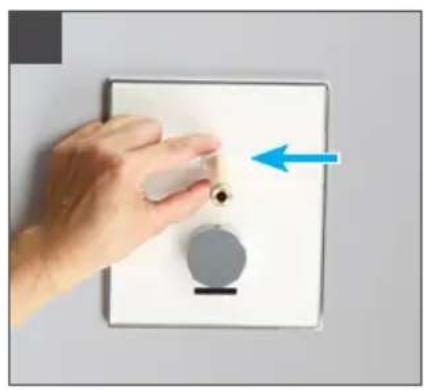
natural_image
Hand holding a small metallic object on a white wall-mounted electrical outlet, with a blue arrow pointing to the component (no text or symbols visible)!
ACHTUNG!
natural_image
Hand holding a wall-mounted electrical outlet with a bulb and wires, no visible text or symbols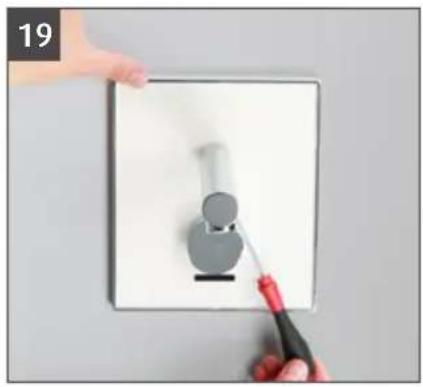
natural_image
Hand using a screwdriver to install a wall-mounted device (no text or symbols visible)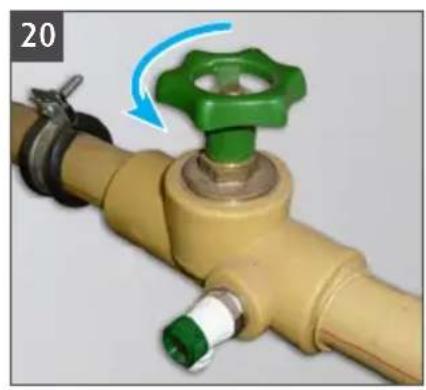
natural_image
Close-up of a yellow pipe valve with green valve and blue arrow indicating rotation (no text or symbols)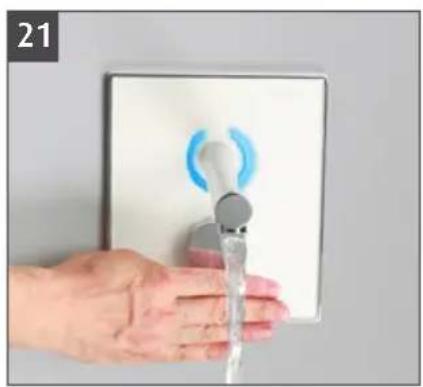
natural_image
Hand washing a wall-mounted device with a blue circular icon (no text or symbols visible)DIP Schalter 1=ON, 2=ON
Einschalten
natural_image
Silhouette of a person placing an object into a box with a hand near it (no text or symbols)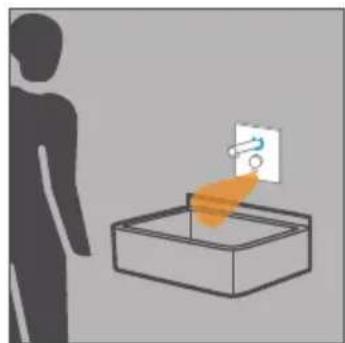
natural_image
Silhouette of a person standing next to a box containing an orange object with a white symbol (no text or labels)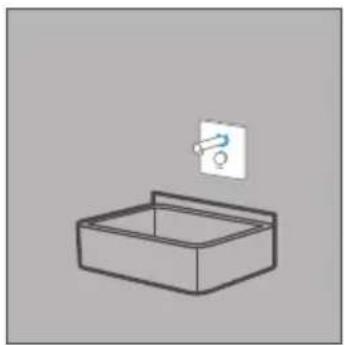
natural_image
Simple line drawing of a rectangular sink with a hanging wall symbol (no text or labels)natural_image
Illustration of a hand placing a small electrical component into a rectangular box (no text or symbols)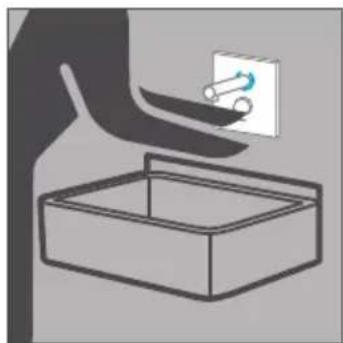
natural_image
Illustration of a hand placing a small object into a rectangular box with a directional arrow (no text or symbols)Reinigungsstopp:
DIP Schalter 3
natural_image
Simple line drawing of a container with an orange arrow pointing to a white square (no text or symbols)!
natural_image
Illustration of a hand holding a small object above a rectangular box, with no visible text or symbols.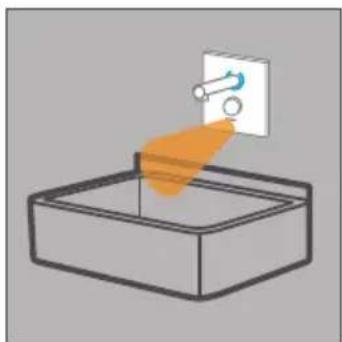
natural_image
Simple line drawing of a hand holding a wall-mounted device, no text or symbols presentnatural_image
Simple line drawing of a rectangular box with a small question mark above it, labeled '3 - 48 h 10 s' at the bottom (no other text or symbols)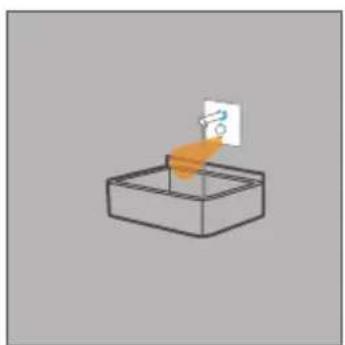
natural_image
Simple 3D diagram of a box with an orange arrow pointing to a small white square (no text or symbols)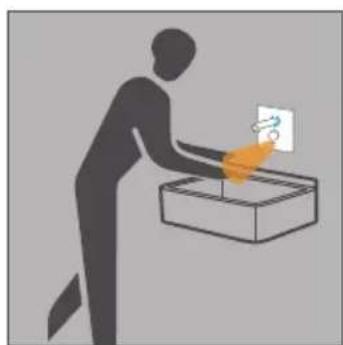
natural_image
Silhouette of a person handling a box with a hand near it (no text or symbols)Ersatzteile
BezeichnungArt.Nr.:
natural_image
Diagram of a device casing with internal components and a central display (no text or symbols)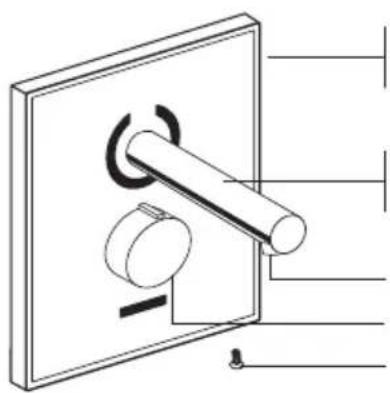
natural_image
Technical line drawing of a mechanical switch or lever assembly (no text or symbols)120 875 Elektronikplatte Standard
natural_image
Technical line drawing of a mechanical enclosure or housing with multiple circular components and mounting holes (no text or symbols)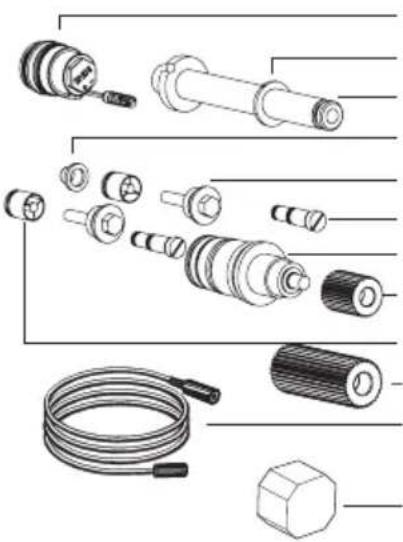
natural_image
Exploded view diagram of mechanical components including shafts, bolts, and hoses (no text or labels)231 205 Magnetventil (1 Stk.)
Congratulations on purchasing WimTec OCEAN W6.
In order to ensure that you will be able to enjoy this high-quality product for many years, please take note of the following cleaning and maintenance recommendations:
■ Use mild cleaning agents containing soap
■ Do not use abrasive, scrubbing, nano sealing or acidic cleaning agents or disinfectants
■ Clean the fitting with a soft sponge or cloth only
■ Do not use steam cleaners
Lime deposits on the glass front panel combined with wetness can impair the touch-tronic function. To ensure proper operation, we recommend regular cleaning of the glass panel using a power cleaner.
This manual is valid for the following products:
WimTec OCEAN W6 wall fitting
Art.No. 112 382, 114 638, 118 803, 118 810
WimTec OCEAN W6 wall fitting with thermal disinfection
Art.No. 112 405, 114 645, 118 827, 118 834
Delivery scope:
Safety glass front plate with chorme frame and mixing lever, electronics module and outlet.
Important installation notes:
Provide for a flush-mount box for an optional power supply outside of the protected zone. Mounting and installation may only be performed by a qualified service provider in accordance with DIN 1988, ÖVE/ÖNORM E8001 and VDE 0100 Part 701. When planning and installing sanitary facilities, all relevant local, national and international standards and provisions must be observed!
According to the Austrian ÖNORM B 5019, thermal disinfection requires a minimum temperature of 60 °C for at least 10 min at the relevant system locations. The operator must ensure that all parts of the installation (e.g., piping) can withstand the temperatures applied during thermal disinfection.
The "General installation terms and conditions" provided at www.wimtec.com apply.
!
Specifications
Operating voltage: via power supply 230 V 50 Hz / 12 V=
Art.No. 117 899 - power supply for one control unit
Art.No. 113 792 - power supply for up to 5 control units
Power consumption: max. 3.5 W
Active range: from 15 cm - 30 cm (30 cm factory setting)
Close-Active range: 4 - 5 cm
Flushing: as long as user is in active range
Flushing stop: from 10 s - 10 min (in manual program from 10 s - 60 s)
Stagnation rinse: activatable, after 3 h - 48 h of none-use for 10 s
Continuous flow: activatable, for 10 s - 10 min
Cleaning stopp: activatable, for 3 min
Flow rate: 0,05 - 0,6 MPa (0,5 - 6 bar)
Static pressure: max. 0,8 MPa (8 bar)
Water temperature: max. 70 °C (max. 80 °C for max. 10 min)
Flow rate: 6 l/min (independent of pressure)
Water inlet: R 1/2" IT
Front plate: Safety glass (ESG)
Dimensions (BxHxT):
Frontplate: 182,5 x 210,5 x 11 mm
In wall box: 169 x 140 x 124 mm
Assembly

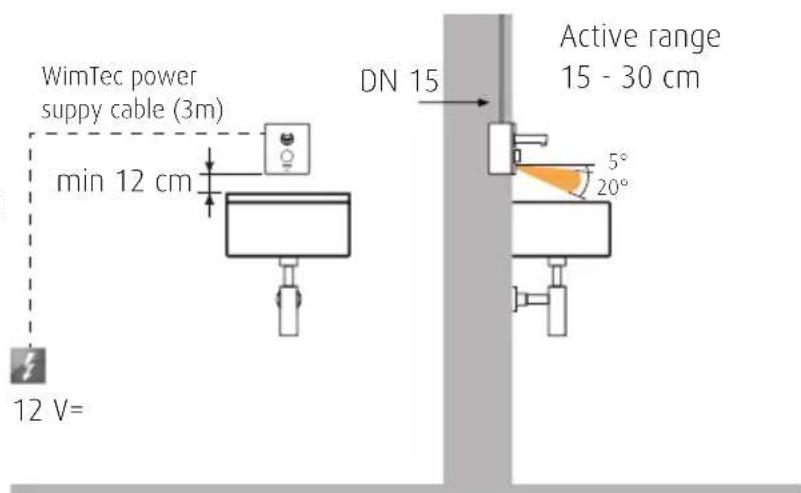
Power supply 3 m cable
Use art.no. 113 167
From joint box:
2 x 0,5 mm2 max. 100 m total cable length
3 x 0,5 mm ^2 for thermal disinfection

Do not mount power
supply in the fl ush-mount set or protected zones.
text_image
WimTec power supply cable (3m) min 12 cm 12 V= DN 15 Active range 15 - 30 cm 5° 20°WimTec OCEAN W6
Legend
Mounting frame with integrated electronicsFront plate:
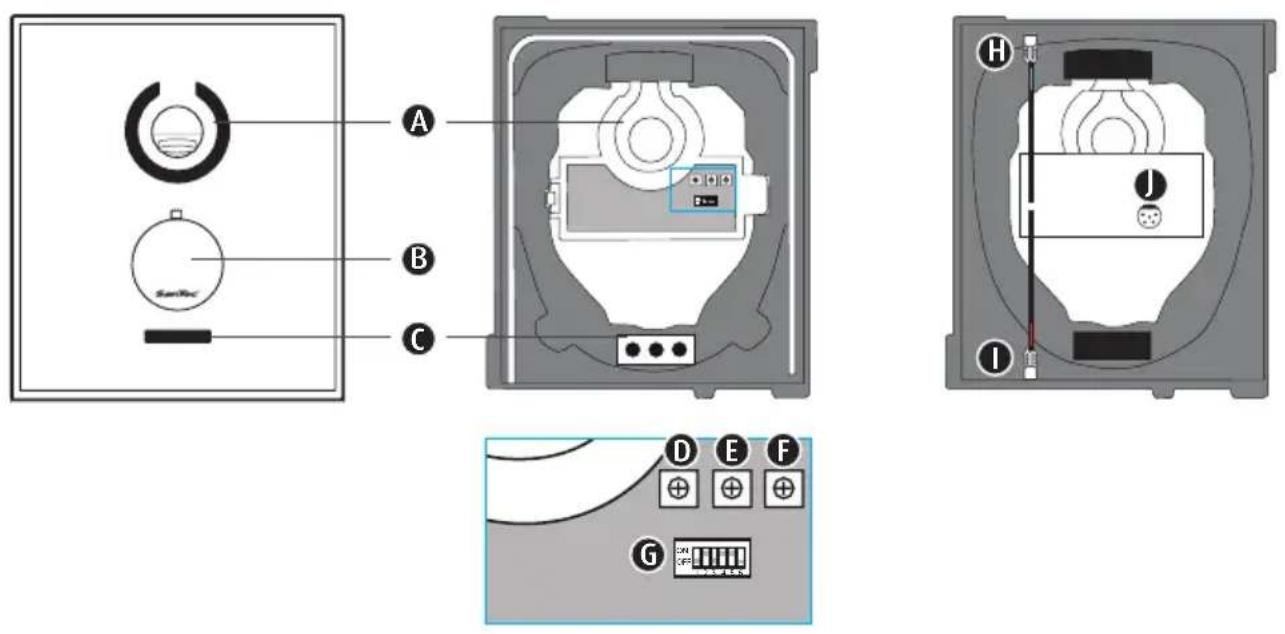
A Touch-Tronic-Icon
B Thermostat knob to adjust the temperature, including a button for bypassing the 38 °C safety lock.
C Infrared sensor to detect user interaction with the fitting (sensor range).
D Range control
E Time control
F Interval control
G DIP switches for configuring the functions
H Connection, magnetic valve
1 Connection, bypass magnetic valve f. therm. disinfection
Connection terminal for 12-V power supply
Configuring the programs & functions
Regulator controls:
D.
Range control
User detection range preset to 30 cm (configurable from 15–30 cm).
Sets the infrared sensor range.
E.
Time control
for safety flow arrest preset to 1 min (configurable from 10 s to 10 min). Manual program: configurable from 10 s to 60 s. After the configured maximum flow time has elapsed, the water stops automatically.
F.
Interval control
for stagnation rinse (setting range 3 h - 48 h).
If the wall fitting has not been used for the set period, the device will automatically perform a 10-s rinse.
Note on range setting:
Most operating modes (depending on the DIP switch configuration) will stop the water flow as soon as you remove your hands from the sensor area. In particular as regards shallow, large ceramic basins, the basin itself can cause the sensor to trigger continuously. This is evidenced by the water flow continuing for a long time or the fitting triggering on its own. In extreme cases, the fitting will trigger by itself, water will flow until the water arrest time has been reached, and then the device will no longer trigger. If this happens, you need to reduce the sensor range. If the range is too low, the infrared sensor may no longer be able to properly detect your hands. In most operating modes, this will make it impossible to activate the fitting. To remedy this situation, increase the sensor range.
In general, the following applies:
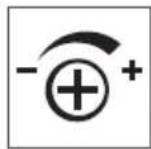
Move counterclockwise to decrease the setting. Move clockwise to increase the setting.

Dip-Schalter:
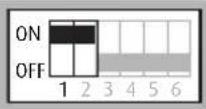
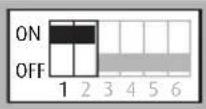
Program activation - DIP switches 1 and 2:
| Program DIP switch 1 DIP switch 2 Description | |||
| Fully automatic mode 1) | ON ON | Page 26 | |
| Manual program | OFF OFF | Page 27 | |
1) Program or functions already configured ex factory.
WimTec OCEAN W6
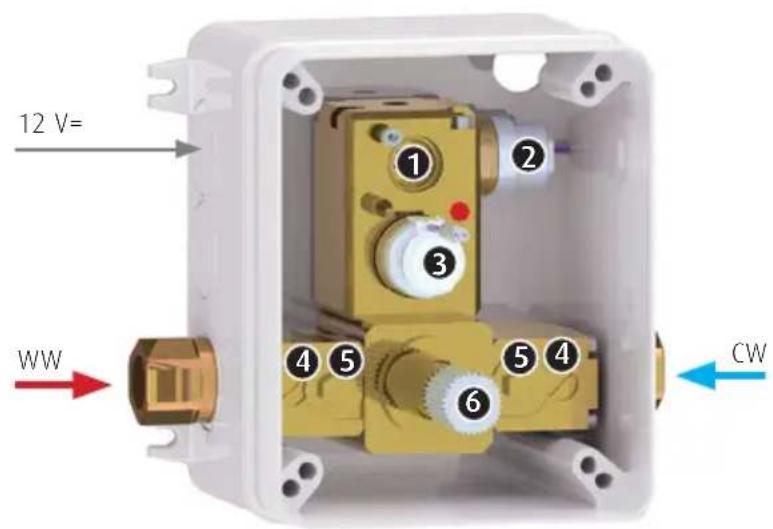
Flush-mount set
text_image
12 V= WW CW① Wall outlet
② Magnetic valve for wall outlet
③ Magnetic valve for thermal disinfection (only for art. no. 119 978)
4 Cut-off valve (closed upon delivery)
⑤ Dirt filter and return flow valve
6 Thermostat
Wiring diagram for thermal disinfection
WimTec OCEAN W6 - TD:
Art.No. 112 108, 114 621

Power supply:
2 x 0.5 mm ^2 total cable length max. 100 m
Power supply, 1-connect. art. no. 117 899
Power supply, 5-connect. art. no. 113 792

Use WimTec power cable 3 m
(part of delivery scope)

Power supply not mountable in basic kit or in any protective areas.
Control line only for thermal disinfection
2 x 0.5 mm² total cable length max. 100 m
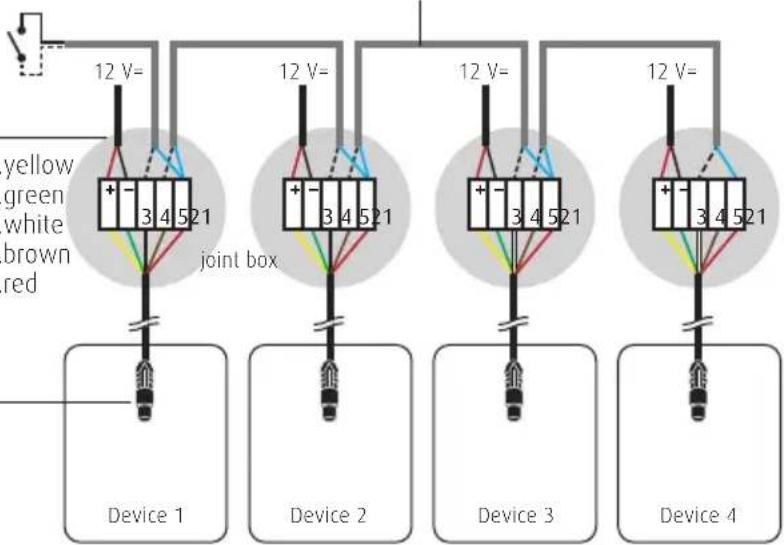
text_image
yellow green white brown red 12 V= 3 4 5 21 joint box 12 V= 3 4 5 21 12 V= 3 4 5 21 12 V= 3 4 5 21 Device 1 Device 2 Device 3 Device 4EN
WimTec® OCEAN W6
Assembly
text_image
1 WimTec MANAGEMENT / ATTENUATION 1 2 3 4 5 6 7 8 9 10 11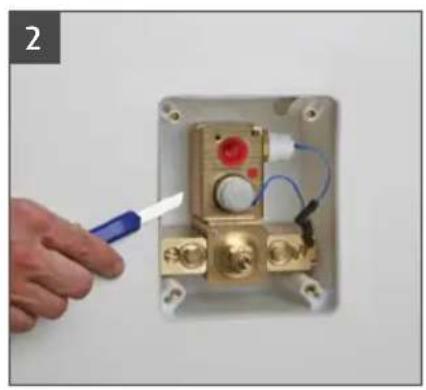
natural_image
Hand holding a tool installing or adjusting a brass electrical outlet with wires (no visible text or symbols)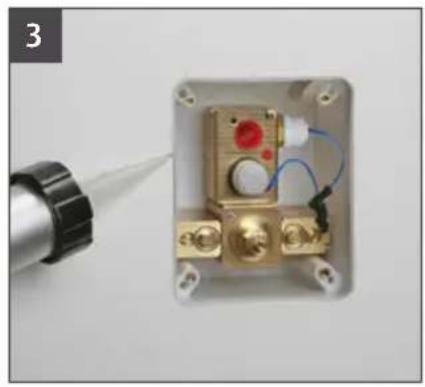
natural_image
Close-up of a brass electrical enclosure with wiring and a tool tip, no visible text or symbols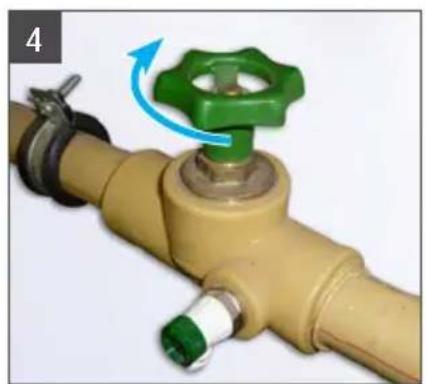
natural_image
Close-up of a yellow pipe valve with green valve and blue arrow indicating rotation (no text or symbols)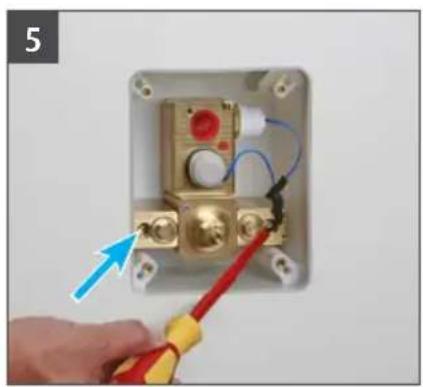
natural_image
Hand using a red and yellow power tool to switch an electrical outlet (no text or symbols visible)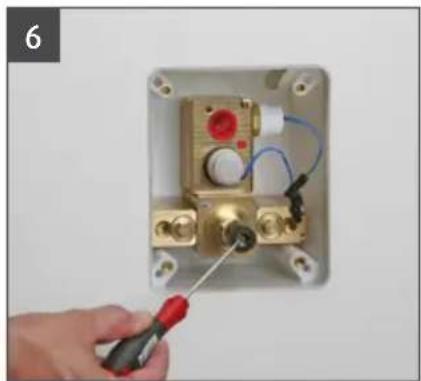
natural_image
Hand using a screwdriver to switch an electrical socket mounted on a wall socket (no text or symbols visible)!
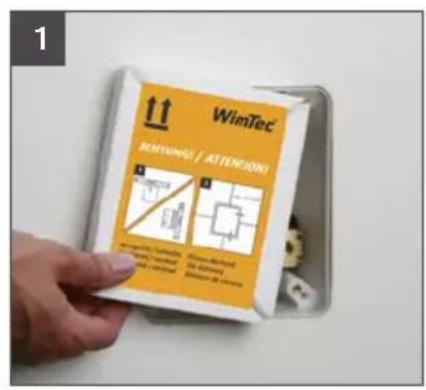
ATTENTION! Perform the following steps in the order indicated!
- Remove the flush-mount protective cover.
- Cut off protruding parts from the flush-mount box so it aligns with the tiles.
- Where necessary, seal off space between wall and flush-mount set with silicone.
- Close the main water valve.
- Open both integrated stop valves using a screwdriver.
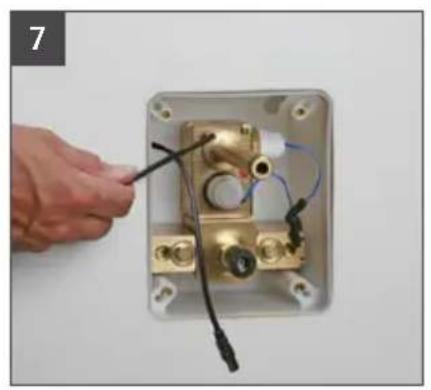
- Mount adapter for thermostat using a 2.5 Allen key.
WimTec OCEAN W6
Assembly
natural_image
Hand holding a small electronic component with wires and connectors, mounted on a white base (no visible text or symbols)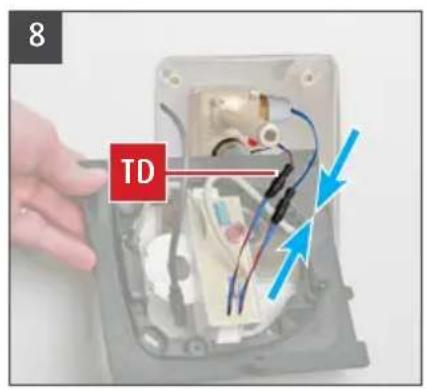
text_image
8 TD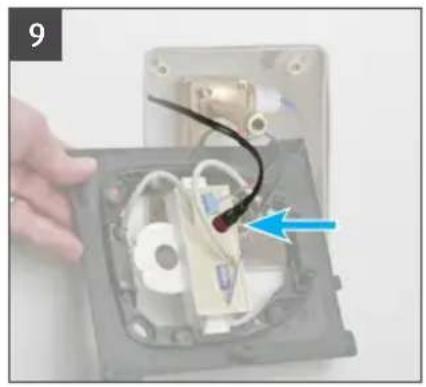
natural_image
Close-up of a hand holding an open electronic device with visible wiring and components (no text or symbols)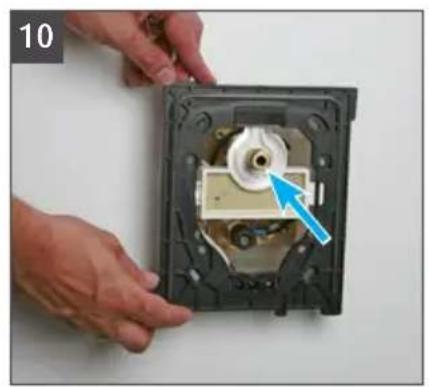
natural_image
Close-up of hands installing or adjusting a mechanical component inside a device casing (no visible text or symbols)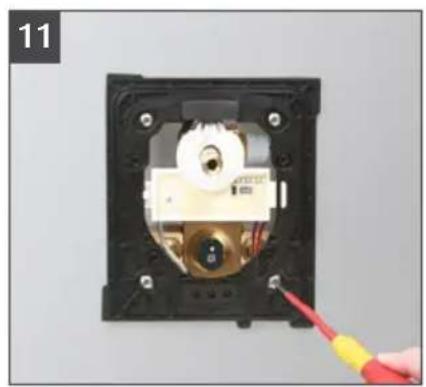
natural_image
Close-up of a mechanical component with a red-handled tool inserted, showing internal wiring and mounting holes (no text or symbols visible)-
Screw out screw M5 and remove the plastic film. Afterwards install spacer for outlet pipe and fix it with screw M5.
-
Connect the magnetic valve to the electronics module. For models with thermal disinfection: Connect the lower magnetic valve (red dot) to the electronics module (cable with red marking).
-
Feed the WimTec power cable 3m (Art.No. 113 167) with the electronics module and connect it to the power supply (Art.No. 117 899, 113 792). Then turn on the power supply. (This will cause the safety locking mechanism of the magnetic valve to activate.) Attention: The power supply must not be installed in the flush-mount set!
-
Fix the mounting frame above outlet pipe.
-
Attach the mounting frame using the 4 screws supplied. Make sure that the cable connections remain intact and the cables are not crimped. When tightening the screws, ensure that the mounting frame does not get warped.
EN
WimTec® OCEAN W6
Assembly
natural_image
Close-up of a mechanical device with a central component and a red tool, no visible text or symbols.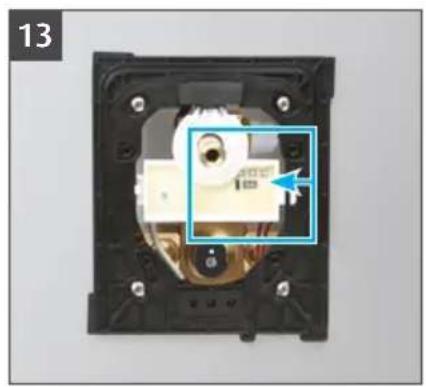
natural_image
Close-up of a mechanical component with a highlighted section and arrow, no visible text or symbols
natural_image
Hand inserting a component into a black plastic device with a blue arrow indicating the component (no text or symbols visible)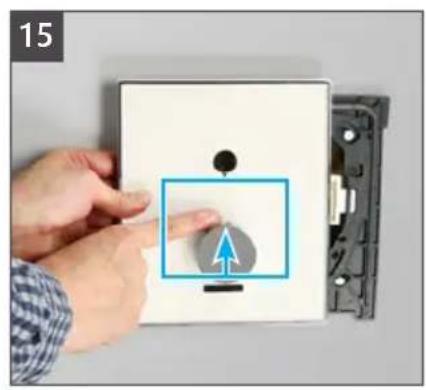
text_image
15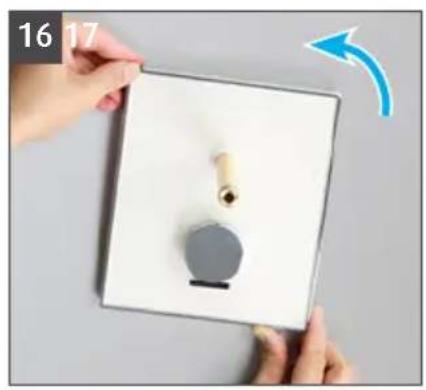
natural_image
Close-up of hands holding a white square device with a circular button and a cylindrical object, no visible text or symbols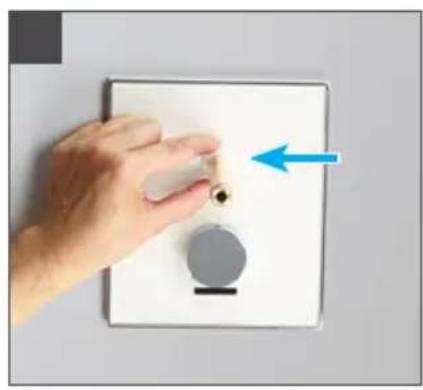
natural_image
Hand holding a small component on a white electrical outlet with a blue arrow pointing to it (no text or symbols visible)!
ATTENTION! Perform the following steps in the order indicated!
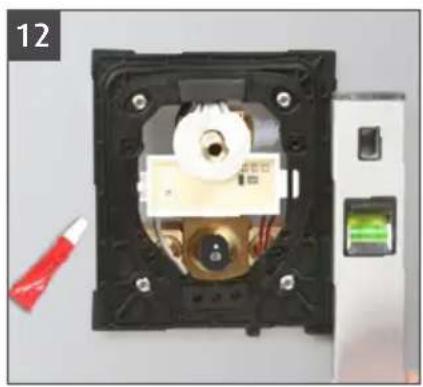
- Correctly align the mounting frame. Apply the included special grease to the front of the valve.
- Configure the desired functions at the electronics module (see page 20).
- Check the thermostat position – the arrow should be pointing upwards.
- Check the position of the thermostat knob – the locking knob should be pointing directly upwards.
- Insert outlet pipe carefully through the glass plate and apply some pressure while turning it until it is aligned horizontally.
- Place the plastic spacer ring over the outlet pipe towards the front plate.
WimTec OCEAN W6
Assembly
natural_image
Hand holding a small white electrical outlet with a bulb and a small black component, next to a red wire (no text or symbols visible)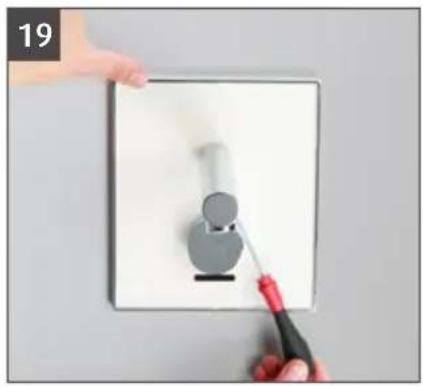
natural_image
Hand using a screwdriver to clean a wall-mounted electrical outlet (no text or symbols visible)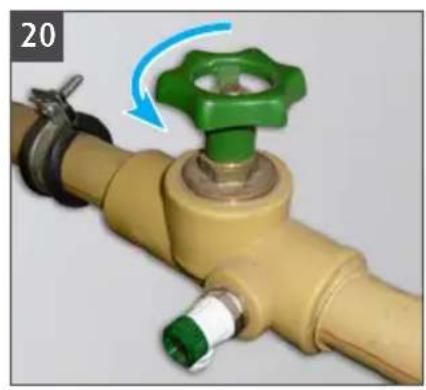
natural_image
Close-up of a yellow pipe valve with green valve and blue arrow indicating rotation (no text or symbols)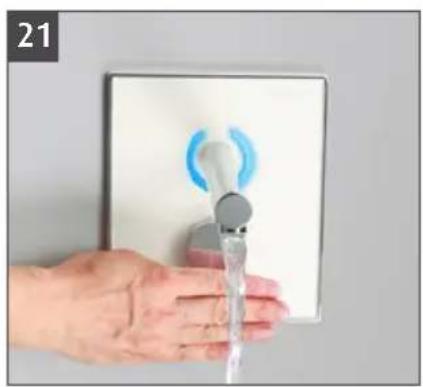
natural_image
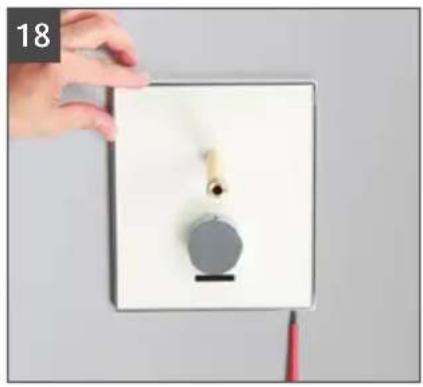
Hand washing a wall-mounted water tap with a blue circular icon (no text or symbols visible)- Fasten front plate with lock screw right below.
- Place the design spout over the outlet pipe, and arrest it at the bottom using the Allen screw.
- Open the main water valve.
- Perform a system test.
Fully automatic program mode (default setting): DIP switch 1=ON, 2=ON
Switch on
As soon as you enter the sensor range, the water flow will start automatically.
Switch off
Once you clear the sensor range or after the configured shut-off delay time has elapsed, the water will stop.
Safety flow arrest
After the configured water arrest time has elapsed, the water flow will automatically stop to prevent unintentional continuous activation.

natural_image
Silhouette of a person placing an orange object into a box with a question mark (no text or symbols)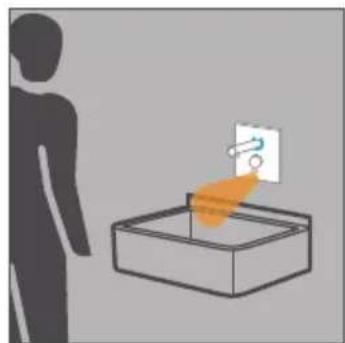
natural_image
Silhouette of a person standing next to a box with an orange arrow pointing to a card (no text or symbols visible)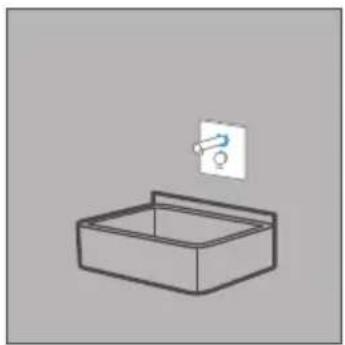
natural_image
Simple line drawing of a rectangular basin with a hanging wall symbol (no text or labels)If your hands frequently leave the sensor range while washing your hands, for example, causing the water flow to stop prematurely, you can extend the shut-off delay to 5 s. When using an instantaneous water heater, the configured shut-off delay helps to minimise the number of ignition processes.
DIP switch 6 ON = Extended shut-off delay - 5 s.
DIP switch 6 OFF = Standard shut-off delay - 2 s (default setting).
WimTec OCEAN W6
Program description
Manual program: DIP switch 1=OFF, 2=OFF

Switch on
Approach the infrared sensor (below the thermostat knob) with your hand to start the water flow.
Switch off
The water will automatically stop flowing after the set water arrest time has elapsed. To stop the water flow prematurely, hold your hand in front of the infrared sensor until the water stops.
(time control configurable from 10 s to 60 s)
natural_image
Illustration of a hand placing a small electronic component into a rectangular box (no text or symbols)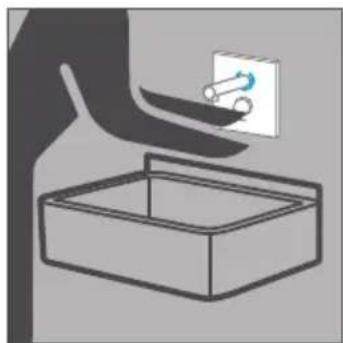
natural_image
Illustration of a hand placing a small electronic component into a rectangular box (no text or symbols)Cleaning stop:
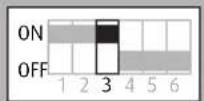
DIP switch 3
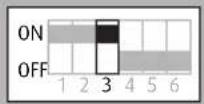
Serves to disable automatic activation prior to cleaning.
DIP switch 3 ON = Cleaning stop function enabled (default setting).
DIP switch 3 OFF = Cleaning stop function disabled.
Enable cleaning stop
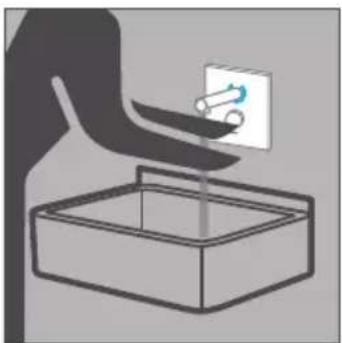
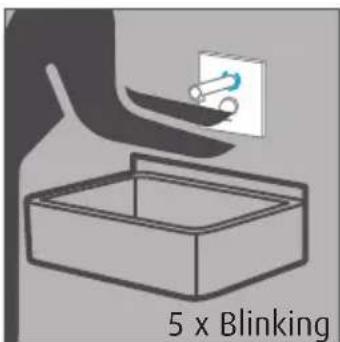
Position your hand in front of the infrared sensor (below the spout). The illuminating icon begins to pulse and water flow starts.
After blinking 5 times the water flow stops and cleaning stop function is enabled.
Disable cleaning stop
The fitting will resume normal operation 3 min after the sensor has remained un-triggered.
To instantly end the cleaning stop, perform the same steps used to enable the function.
While the cleaning stop function is enabled, the illuminating icon will light up every 3 s.
text_image
5 x Blinking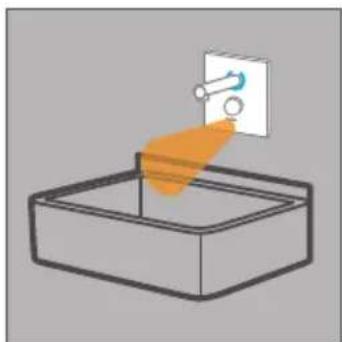
natural_image
Simple line drawing of a box with an orange arrow pointing to a white square (no text or symbols)If the manual program is enabled (DIP switch 2 OFF), you can only enable the cleaning stop within the first 3 s after triggering the water flow.
WimTec OCEAN W6
Program description
Continuous flow:
DIP switch 4
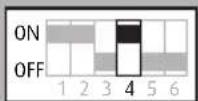
Enable the continuous flow function to fill the washbasin or a container.
DIP switch 4 ON = Continuous flow function enabled.
DIP switch 4 OFF = Continuous flow function disabled (default setting).
Enable continuous flow
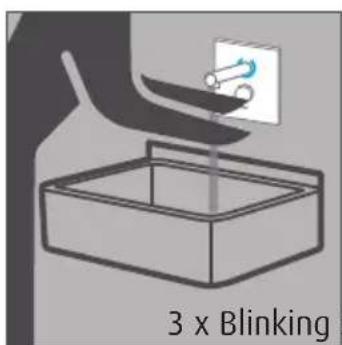
Place your hand in front of the infrared sensor (below the thermostat knob) and wait unit the icon begins to pulse.
After blinking 3 times continuous flow is enabled for the time set at the time control.
The illuminating icon lights up continuously.
Enable continuous flow if cleaning stop is enable
Place your hand in front of the infrared sensor (below the thermostat knob).
Water flow starts und the icon begins to pulse. After blinking 5 times cleaning stop is enabled and water flow stops.
Stay until 3 blink impulses signal that continuous flow is enabled.
Disable continuous flow
The function automatically ends after the time set at the time control has elapsed. You can manually disable the function following the same procedure used to enable it.
The fitting will resume normal operation after you leave the sensor range.
text_image
3 x Blinking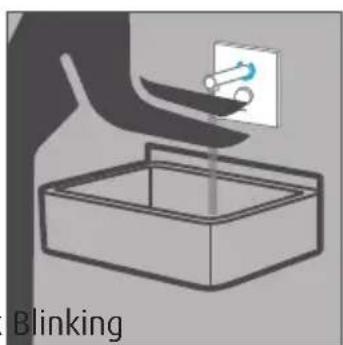
natural_image
Illustration of a hand pressing a component into a box, with a small icon above (no text or symbols on the diagram itself)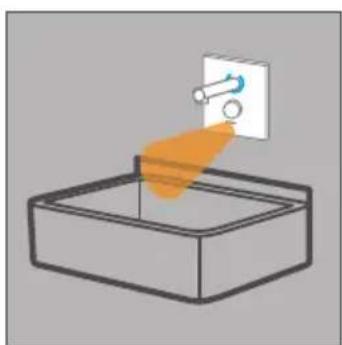
natural_image
Simple line drawing of a box with an orange pointer and a white wall, no text or symbols present.Stagnation rinse:
DIP switch 5
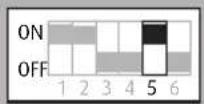
Serves to rinse water supply lines in order to remove stagnant water that accumulates during longer periods of disuse.
DIP switch 5 ON = Stagnation rinse function enabled.
DIP switch 5 OFF = Stagnation rinse function disabled (default setting).
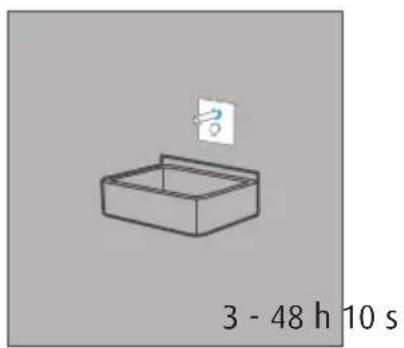
Time interval
Can be set from 3–48 h at the interval control (see p. 20).
Automatic stagnation rinse
If the fitting has not been used for the set period, the stagnation rinse operation is automatically executed for 10 s.
The illuminating icon lights up continuously during stagnation rinse.
Safety
If the cleaning stop function is enabled, the stagnation rinse function will only start 2 min after the cleaning stop function has ended.
5 s before and after the stagnation rinse, the ON/OFF icon will flash rapidly.
natural_image
Simple line drawing of a rectangular box with a small question mark above it, labeled '3 - 48 h 10 s' at the bottom (no other text or symbols)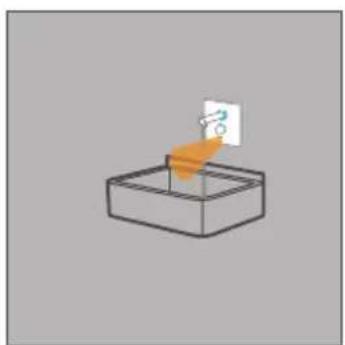
natural_image
Simple 3D diagram of a box with an orange arrow pointing to a small white square (no text or symbols)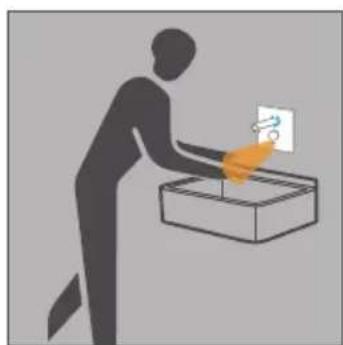
natural_image
Silhouette of a person placing an object into a box with a magnifying glass (no text or symbols)WimTec OCEAN W6
Replacement parts
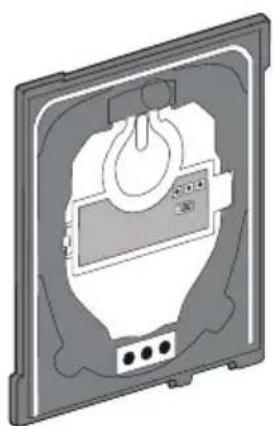
DesignationArt. no.:
natural_image
3D diagram of a device casing with internal components and mounting holes (no text or symbols)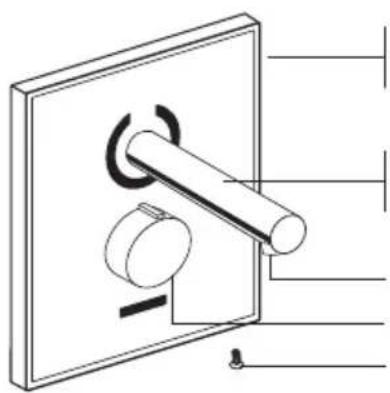
natural_image
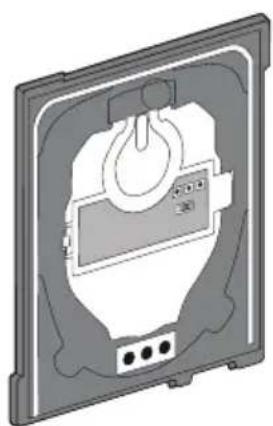
Technical line drawing of a mechanical switch or lever assembly (no text or symbols)120 875 Electronics plate standard
120 868 Electronics plate for thermal disinfection
113 211 Front plate white/chrome
114 485 Front plate black/chrome
113 259 Short spout, 185 mm
119 756 Long spout, 240 mm
108 637 Flow regulator incl. ring
115 536 Thermost knob
113 877 Security screw
natural_image
Technical line drawing of a mechanical enclosure with mounting holes and internal components (no text or symbols)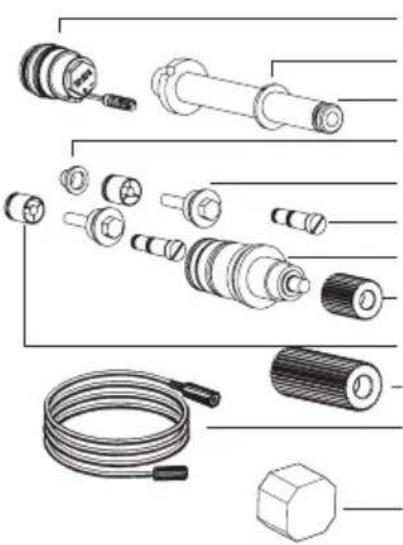
natural_image
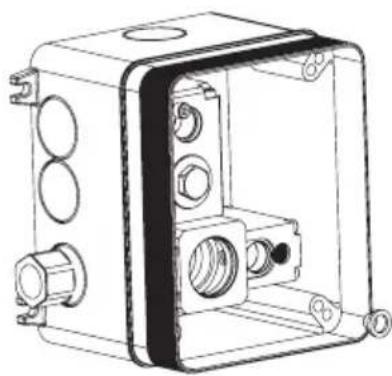
Exploded view diagram of mechanical components including bolts, shafts, and hoses (no text or labels)231 205 Magnetic valve (1 pc.)
113 273 W6 plastic spacer ring
113 266 W6 inner outlet pipe
119 770 Dirt filter (1 pc.)
119 794 Filter cover (1 pc.)
119 763 Blocking pin (1 pc.)
120 530 Complete thermostat
120 547 Adapter for thermostat
119 787 Return flow valve (1 pc.)
120 790 Extension set for thermostat-
113 167 Power cable 3 m (only for WimTec OCEAN W6)
117 899 Power supply (1-connect.)
113 792 Power supply (5-connect.)
www.wimtec.com

CE