Sky - Faucet WimTec - Free user manual and instructions
Find the device manual for free Sky WimTec in PDF.


User questions about Sky WimTec
0 question about this device. Answer the ones you know or ask your own.
Ask a new question about this device
Download the instructions for your Faucet in PDF format for free! Find your manual Sky - WimTec and take your electronic device back in hand. On this page are published all the documents necessary for the use of your device. Sky by WimTec.
USER MANUAL Sky WimTec
natural_image
Modern stainless steel water dispenser with a black handle and metallic shaft (no text or symbols visible)natural_image
Close-up of a metallic ring component with concentric circular features (no text or symbols visible)Position des Touch-Sensors
natural_image
Silhouette of a person using a candle to press or write on a tray (no text or symbols visible)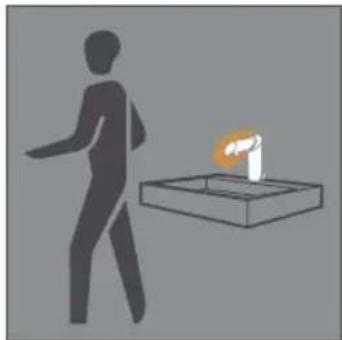
natural_image
Silhouette of a person walking toward a lit candle on a tray (no text or symbols visible)Montage
!
ACHTUNG!
natural_image
Line drawing of a kitchen sink with a hand pump and faucet (no text or symbols)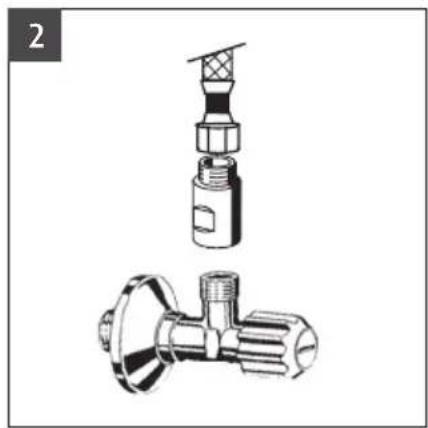
natural_image
Technical illustration of a mechanical valve assembly (no text or symbols)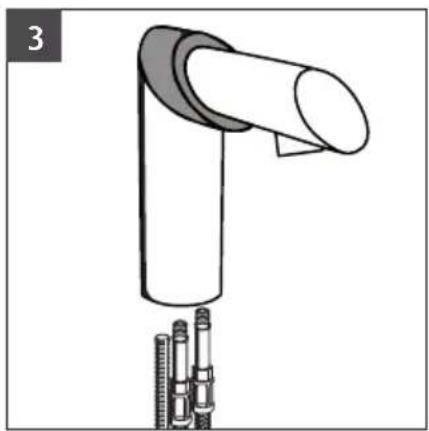
natural_image
Mechanical assembly diagram showing a cylindrical component with attached parts, no text or symbols present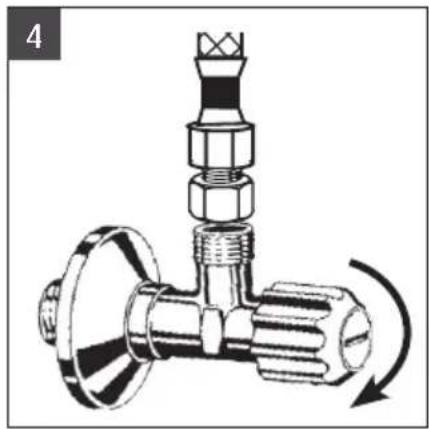
natural_image
Mechanical valve assembly diagram showing a rotating shaft and flange (no text or symbols)natural_image
Line drawing of a bathroom sink with faucet and toilet (no text or symbols)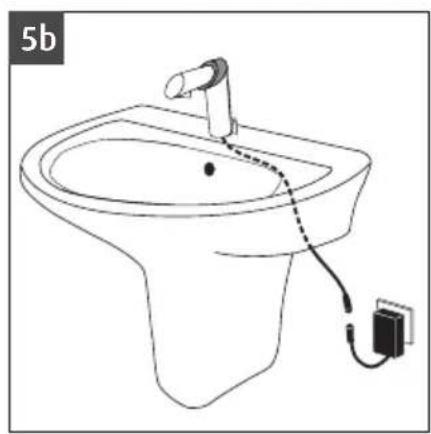
natural_image
Line drawing of a standard bathroom sink with faucet and electrical outlet (no text or symbols)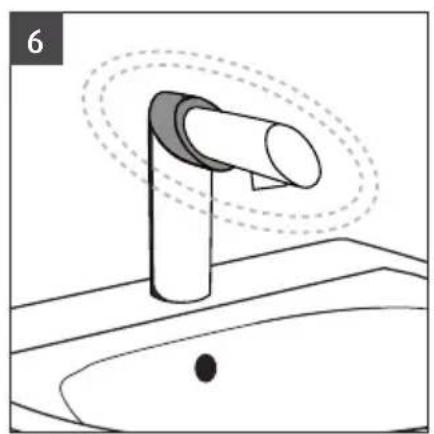
natural_image
Diagram of a faucet with a drain, showing water level and spray pattern (no text or symbols)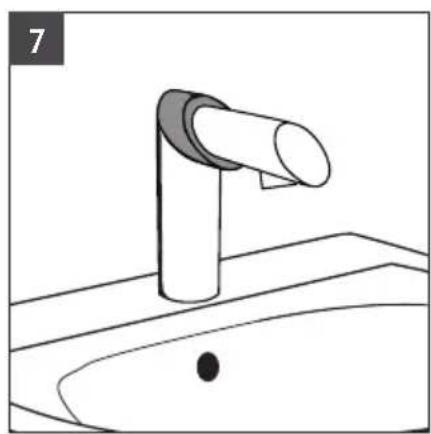
natural_image
Line drawing of a faucet on a sink (no text or symbols)natural_image
Silhouette of a person using a device to clean or wash a tray (no text or symbols)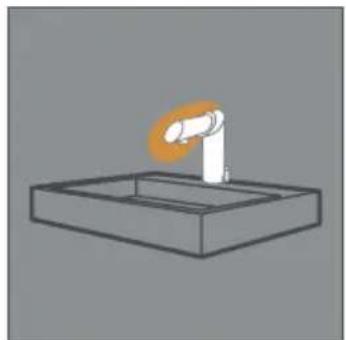
natural_image
Simple line drawing of a robotic arm interacting with a rectangular base (no text or symbols)natural_image
Silhouette of a person using a handheld device to clean or wash a tray (no text or symbols visible)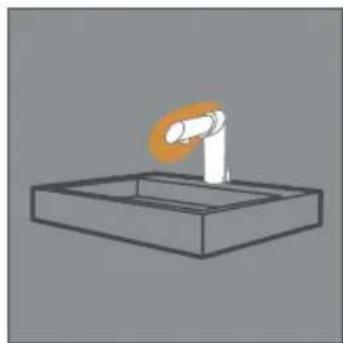
natural_image
Simple line drawing of a robotic arm positioned above a rectangular base (no text or symbols)natural_image
Simple 3D diagram of a robotic arm mounted on a rectangular base, with a clock icon and time label '3/24 h' (no text or symbols on the diagram itself)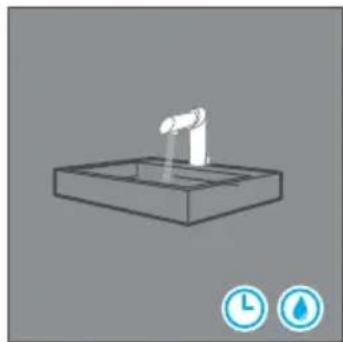
natural_image
Simple line drawing of a robotic arm above a rectangular base, with two circular icons below (no text or symbols)text_image
Exploded diagram of a hair dryer with numbered parts for identificationCongratulations on purchasing the WimTec SMART fitting.
In order to ensure that you will be able to enjoy this high-quality product for many years, please take note of the following cleaning and maintenance recommendations:
■ Use mild cleaning agents containing soap
■ Do not use abrasive, scrubbing, sealing or acidic cleaning agents or disinfectants
■ Clean the fitting with a soft sponge or cloth only
■ Do not use steam cleaners
This manual is valid for the following products
WimTec SKY washbasin fitting
6 V without mixer Art.No. 104 448 6 V with mixer Art.No. 104 424
230 V without mixer Art.No. 104 431 230 V with mixer Art.No. 104 417
Delivery scope
Tap housing with electronic module and 9 V battery or 230 V power unit, magnetic valve, connection hoses, dirt-filter attachment for corner valve, mounting material and reflux preventers at variant with premixed water model.
Important installation notes:
Mounting and installation may only be performed by a qualified service provider in accordance with DIN 1988, ÖVE/ÖNORM E8001 and VDE 0100 Part 701. When planning and installing sanitary facilities, all relevant local, national and inter-national standards and provisions must be observed! Provide for 230 V/12 V power unit outside of the protected zone.
The "General installation terms and conditions" provided at www.wimtec.com apply.
Specifications
WimTec SKY - 6 V:
Battery: 6 V Lithium CR-P2 (in scope of supply)
Battery life: approx. 100.000 flushings (max. 1,5 y.)
WimTec SKY - 230 V:
Operating voltage: 230 V 50 Hz Power consumption: approx 0.2 VA
Further technical specifications:
Magnetic valve: cartridge 6 V
Active range: automatic
Flushing: as long as user is in active range
Flushing stop: from 30 s - 10 min
Stagnation rinse: activatable, after 3 h or 24 h of none-usage for 10 s
Continuous flow: activatable, for 3 min
Cleaning stopp: 3 min (switchable)
Flow rate: 0,15 - 0,6 MPa (1,5 - 6 bar)
Static pressure: max. 0,8 MPa (8 bar)
Water temperature: max. 70 °C (max. 80 °C for max. 10 min)
Flow rate high pressure: 6 l/min (independent of pressure)
Water connection: G 3/8" IT
Connection hoses: approved by DVGW W 270 and DVGW W 543
Not suitable with: Corner valve thermostat, UC-mixer, UC-tank, boiler
Dimensions in mm
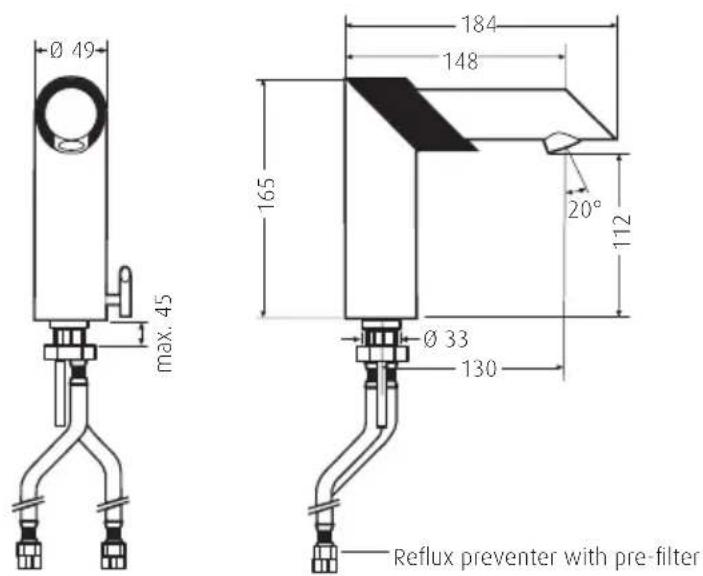
Reflux preventer with pre-filter
Configuring the functions
text_image
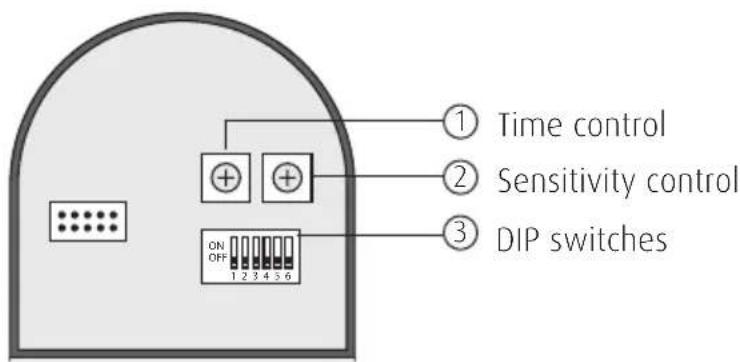
① Time control ② Sensitivity control ③ DIP switches ON OFF 1 2 3 4 5 6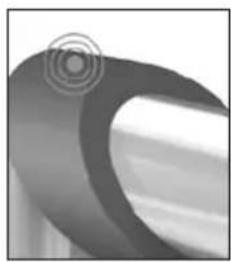
natural_image
Close-up of a metallic ring component with concentric circular patterns (no text or symbols visible)Position of the touch sensor
Rule applies to all controls:
!
Move counterclockwise to decrease the setting. Move clockwise to increase the setting.

Einstellregler:
1. Time control
for water arrest, default setting 1 min (setting range 30 s to 10 min).
2. Sensitivity control
regulates the shut-off sensitivity of the fitting (1 = sensitiv, 20 = insensitiv)
3. DIP switches:
Function activation - DIP switch 1-6:
| DIP switch Function Factory setting Description | |||
| 1 | Flushing mode ON Page 19 | ||
| 2 | Cleaning stop OFF Page 19 | ||
| 3 | Continuous flow OFF Page 20 | ||
| 4 | Stagnation rinse OFF Page 21 | ||
| 5 | Stagnation rinse time OFF Page 21 | ||
| 6 | Shut-off delay (ON = 5 s, OFF = 3 s) OFF Page 22 | ||
EN
WimTec SKY
Functions
Water flow starts
As soon as the user steps into the active range and is recognized by the sensor.
Water flow stops
When the user leaves the active range or after the set flush-stop time.

natural_image
Silhouette of a person pushing a candle on a tray (no text or symbols)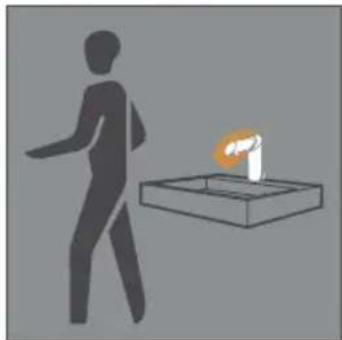
natural_image
Silhouette of a person walking toward a lit candle on a tray (no text or symbols visible)Assembly
!
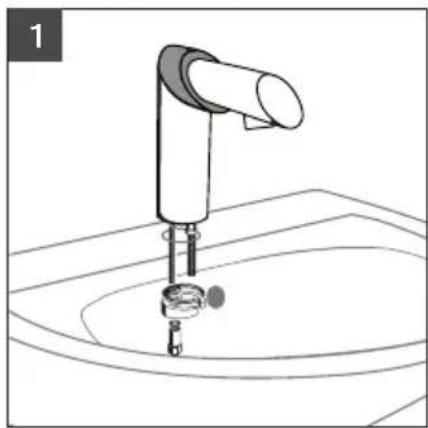
ATTENTION! Perform the following steps in the order indicated!
natural_image
Line drawing of a kitchen sink with a hand pump and water dispenser (no text or symbols)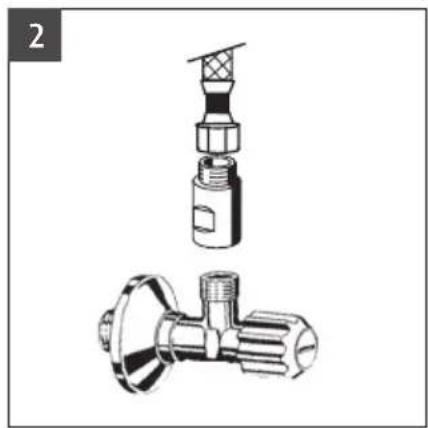
natural_image
Technical illustration of a mechanical valve assembly (no text or symbols)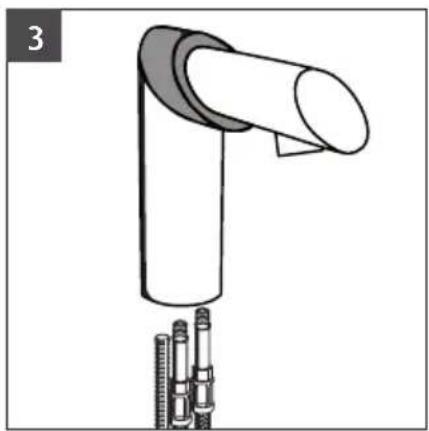
natural_image
Mechanical assembly diagram showing a cylindrical component with attached parts, no text or symbols present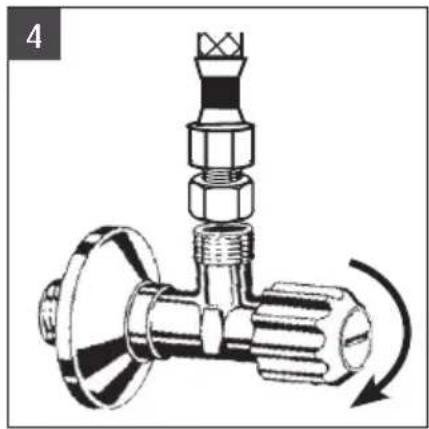
natural_image
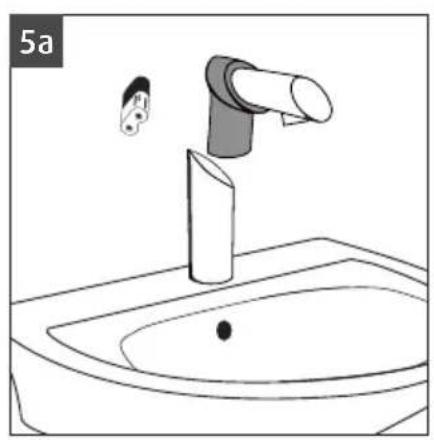
Mechanical valve assembly diagram showing a rotating shaft and flange (no text or symbols)- Fasten the fitting to the washbasin.
Not applicable with corner valve thermostat, UC-mixer, UC-tank or boiler.
-
For premixed water model: Use reflux preventers with prefilter or corner valve with prefilter.
-
Attention! Don't re-tighten the hoses on the body of the fitting.
-
Battery version: Before battery inserting or changing turn off corner valve.
EN
WimTec SKY
Assembly
natural_image
Line drawing of a bathroom sink with faucet and toilet (no text or symbols)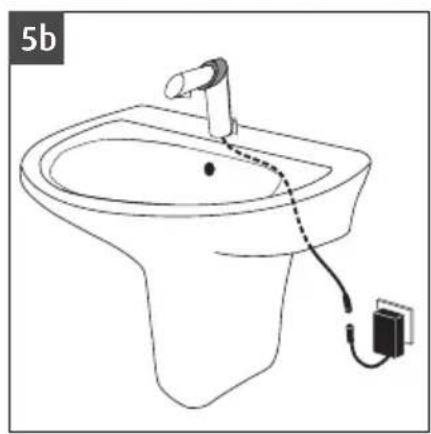
natural_image
Line drawing of a standard bathroom sink with faucet and electrical outlet (no text or symbols)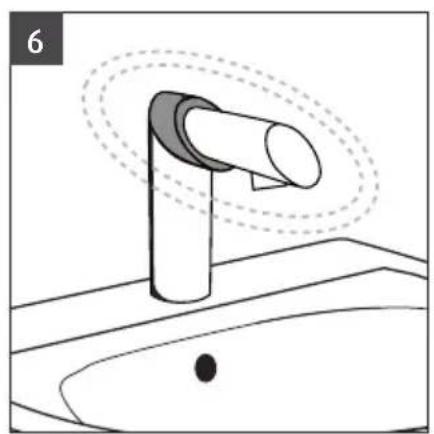
natural_image
Diagram of a faucet with a handle and sink, showing water level indicator (no text or symbols)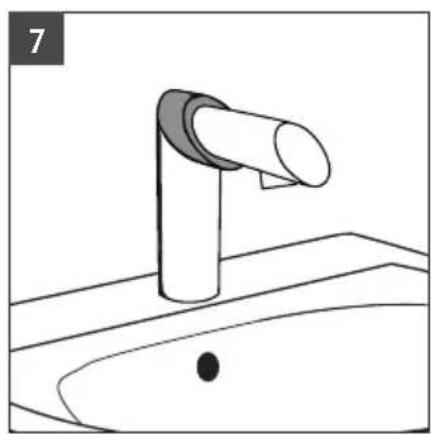
natural_image
Line drawing of a faucet on a sink (no text or symbols)- a) Battery version: Place the battery into the battery module and connect the battery to the fitting – open the water valve.
- b) Wall outlet version: Connect the power supply to the fitting - open the water valve.
- Automatic range adjustment. Do not touch the fitting (inkl. water valve and mounting houses) for 15 s.
- The fitting is now ready for operation.

ATTENTION!
Perform the following steps
in the order indicated!
Configuring the functions
Flushing mode:
DIP switch 1
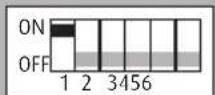
'ON' position: Automatic program enabled.
'OFF' position: Manual program enabled.
Cleaning stop:
DIP switch 2
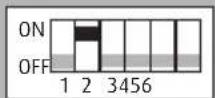
Serves to disable the fitting prior to cleaning.
'ON' position: Cleaning stop function enabled.
'OFF' position: Cleaning stop function disabled (default setting).
Enable cleaning stop
Touch the metal outlet before water flows starts and tip on the sensor ring until the water flow stops. (approx. 5 x in 2 s). The water flow stops and the cleaning stop is enabled.
Disable cleaning stop
3 min. after leaving the active range the fitting switches into normal mode.

natural_image
Silhouette of a person using a handheld device to clean or wash a tray (no text or symbols)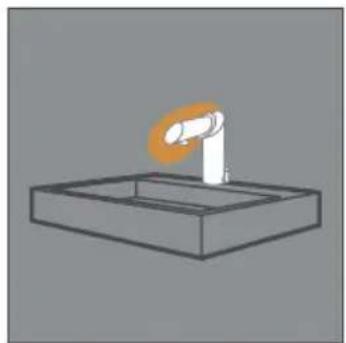
natural_image
Simple line drawing of a robotic arm interacting with a rectangular base (no text or symbols)Configuring the functions
Continuous flow:
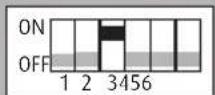
DIP switch 3
Enable the continuous flow function to fill the washbasin or a container.
'ON' position: Continuous flow function is enabled.
'OFF' position: Continuous flow function is disabled (default setting).
Enable continuous flow
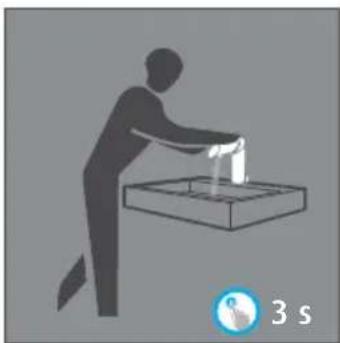
Approach the active range with your hand. After starting the water flow tip for 3 s on the sensor ring.
Disable continuous flow
The function automatically ends after the water arrest time set at time control has elapsed.
To instantly end continuous flow, perform the same steps as used for 'Enable continuous flow'.
natural_image
Silhouette of a person using a handheld device to clean or wash a substance, with a time indicator showing 3 seconds (no text or symbols on the diagram itself)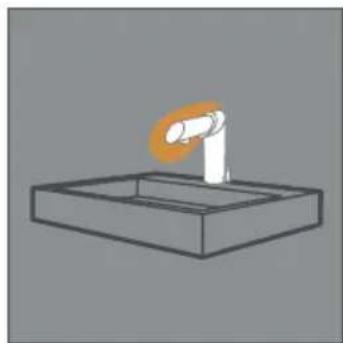
natural_image
Simple line drawing of a robotic arm positioned above a rectangular base (no text or symbols)Configuring the functions
Stagnation rinse:
DIP switch 4
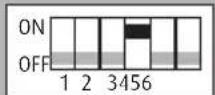
Serves to rinse water supply lines in order to remove stagnant water that accumulates during longer periods of disuse.
'ON' position: Stagnation rinse is enabled.
'OFF' position: Stagnation rinse function is disabled (default setting).
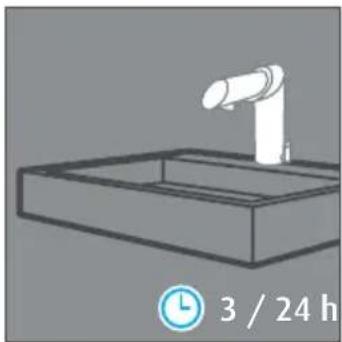
Time interval
Can be set at 3 or 24 h at the interval control.
Automatic stagnation rinse
If the fitting has not been used for the set period, a stagnation rinse operation is performed for the duration configured.
natural_image
3D rendering of a robotic arm mounted on a rectangular base, with no visible text or symbols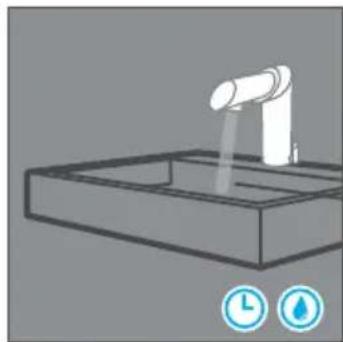
natural_image
Illustration of a faucet pouring liquid into a tray, with two time icons below (no text or symbols)Stagnation rinse interval:
DIP switch 5
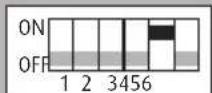
You can select one of two predefined intervals (3 h or 24 h).
'ON' position: Stagnation rinse interval is set to 3 h.
'OFF' position: Stagnation rinse interval is set to 24 h.
Configuring the functions
Shut-off delay:
DIP switch 6
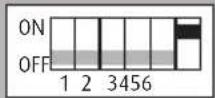
You can select one of two predefined shut-off delay times (3 s or 5 s).
'ON' position: Shut-off delay is 5 s.
'OFF' position: Shut-off delay is 3 s (default setting).
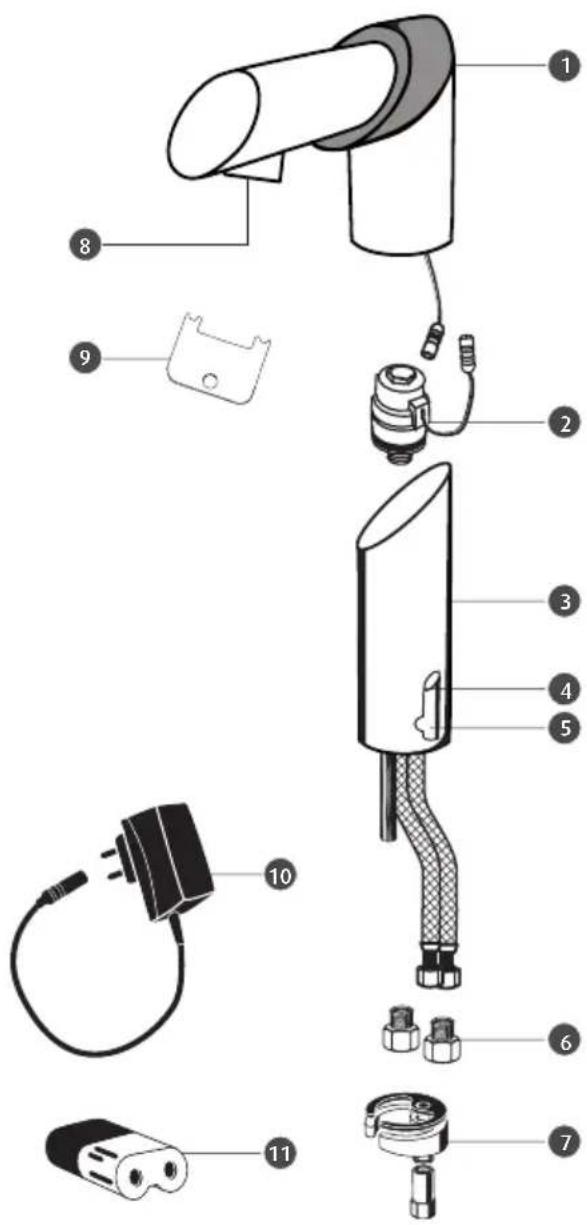
Replacement parts
text_image
Exploded view diagram of a hair dryer with numbered parts for identificationNo. Designation Art. no.:
1 Outlet
with electronics module 230 V 106 251
with electronics module 6 V 106 244
2 Magnetic valve 6 V 231 205
3 Fitting bottom part inc connecting hoses premixed water 104 745 cold water 104 752
4 Mixer handle 107 111
5 Mixer shaft 107 098
6 Reflux preventer 230 314
7 Mounting set 105 131
8 Flow regulator 105 155
9 Service key for flow regulator 109 276
10 Power supply 230 V 101 065
11 Lithium battery 6 V 230 741
www.wimtec.com

CE