Table Top RR500 - Enceinte musicale Ricatech - Free user manual and instructions
Find the device manual for free Table Top RR500 Ricatech in PDF.


| Product Type | Tabletop Stereo System with CD Player and FM/AM Radio |
| Brand | Ricatech |
| Model | Table Top RR500 |
| Power Source | AC 120V ~ 60Hz (USA/Canada) or similar; detachable power cord |
| Power Consumption | Approx. 20W (estimated) |
| Dimensions (W x H x D) | Approx. 30 cm x 15 cm x 20 cm |
| Weight | Approx. 2 kg |
| Functions | CD player, AM/FM radio, AUX input, light modes (neon/bulb/LED), repeat/program play |
| CD Player Features | Play, stop, skip forward/backward, repeat (track/all), program up to 20 tracks |
| Radio Bands | AM (530-1600 kHz approx.) and FM (88-108 MHz approx.) |
| Radio Tuning | Analog tuning knob |
| FM Antenna | External wire antenna (included) |
| AUX Input | 3.5mm stereo jack or RCA (model dependent); with ON/OFF switch |
| Lighting | Neon, bulb, or LED lights (version dependent); with mode selector for static or changing colors |
| Controls | Volume knob (with power on/off), function selector, tuning knob, light button, CD door, playback buttons |
| Placement | Flat, even surface; avoid extreme temperatures, humidity, dust, and poor ventilation |
| Safety Features | Class 1 laser product; do not open cover; unplug when not in use |
| Warranty | 2 years (against factory defects); excludes physical damage, water, drops, unauthorized service |
| Reset | Press reset button (if equipped) to resolve minor issues |
| Included Accessories | FM antenna wire, detachable rack (for AUX), user manual |
Frequently Asked Questions - Table Top RR500 Ricatech
1. Ensure the VOLUME knob is not at minimum.
2. Verify the FUNCTION selector is set to the correct mode (CD, AM, FM, or AUX).
3. If using AUX, make sure the ON/OFF switch near the AUX jack is set to ON.
4. Press the reset button (if available) to restore normal operation.
User questions about Table Top RR500 Ricatech
0 question about this device. Answer the ones you know or ask your own.
Ask a new question about this device
Download the instructions for your Enceinte musicale in PDF format for free! Find your manual Table Top RR500 - Ricatech and take your electronic device back in hand. On this page are published all the documents necessary for the use of your device. Table Top RR500 by Ricatech.
USER MANUAL Table Top RR500 Ricatech
natural_image
Black and white photo of a vintage juicer with ornate silver frame, control panel, and display (no visible text or symbols)USER MANUAL
WWW.RICATECH.COM
text_image
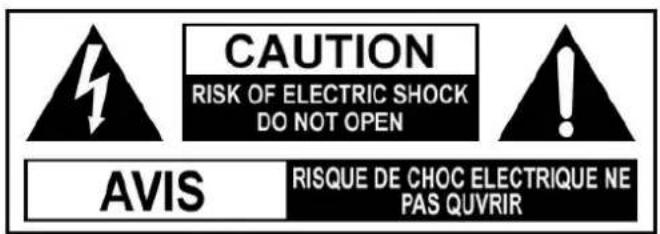
CAUTION RISK OF ELECTRIC SHOCK DO NOT OPEN AVIS RISQUE DE CHOC ELECTRIQUE NE PAS QUVRIR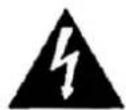
The Lighting flash with an arrowhead symbol, within the equilateral triangle, is intended to alert the user to the presence of uninsulated "dangerous voltage" within the product's enclosure that may be of sufficient magnitude to cause an electric shock.
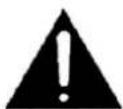
The exclamation point within the equilateral triangle is intended to alert the user to the presence of important operating and maintenance (servicing) instructions in this owner manual.
WARNING: TO REDUCE THE RISK OF ELECTRIC SHOCK, DO NOT REMOVE COVER (OR BACK). NO USER-SERVICEABLE PARTS INSIDE. REFER SERVICING TO QUALIFIED SERVICE PERSONNEL.
WARNING: TO PREVENT FIRE OR SHOCK HAZARD, DO NOT EXPOSE THIS APPLIANCE TO RAIN OR MOISTURE.
CAUTION: TO PREVENT ELECTRIC SHOCK, MATCH WIDE BLADE OF PLUG TO WIDE SLOT, FULLY INSERT. (USA AND CANADA ONLY)
On Placement
- Do not use the unit in places which are extremely hot, cold, dusty, or humid.
- Place the unit on a flat and even surface.
- Do not restrict the air flow of the unit by placing it in a place with poor air flow, by covering it with a cloth.
FCC Information (USA VERSION ONLY)
This device complies with Part 15 of FCC Rules.
Operation is subject to the following two conditions:
(1) Device may not cause harmful interference, and
(2) This device must accept any interference received, including interference that may cause undesirable operation.
On Safety
- When connecting or disconnecting the AC cord, grip the plug and not the cord itself. Pulling the cord may damage it and create a hazard.
- When you are not going to use the unit for a long period of time, disconnect the AC power cord.
On Condensation
- When left in a heated room where it is warm and damp, water droplets or condensation may form inside the unit. When there is condensation inside the unit, the unit may not function normally. Let the unit stand for 1 to 2 hours before turning the power on, or gradually heat the room up and dry the unit before use.
ATTENTION SHOULD BE DRAWN TO THE ENVIRONMENTAL ASPECTS OF BATTERY DISPOSAL
WARNING:
• Should any trouble occur, disconnect the AC power cord and refer servicing to a qualified technician.
• Do not place anything directly on the top of the unit. Damage to the unit can result.
LASER SAFETY
THIS UNIT EMPLOYS A LASER.
ONLY A QUALIFIED SERVICE PERSONNEL SHOULD OPEN COVER IN ATTEMPT TO SERVICE THIS DEVICE DUE TO POSSIBLE EYE INJURY.
CAUTION: USE OF ANY CONTROLS, ADJUSTMENTS, OR PROCEDURES OTHER THAN THOSE SPECIFIED HEREIN MAY RESULT IN HAZARDOUS RADIATION EXPOSURE.
This section describes the compact disc controls in the order in which you would normally use them.
Follow the instruction in a step-by-step sequence and in a very short time you will master complete operation of the unit.
CD OPERATION
- Rotate the VOLUME knob from OFF position towards the Max position to turn on the unit.
- Push the CD DOOR once to open the CD DOOR to insert a disc into the DISC TRAY then push the CD DOOR again to close the CD DOOR.
**Make sure the CD DOOR is closed properly** - Press PLAY button.
- Adjust the listening level by rotating the VOLUME knob.
NOTES
- If the disc is seriously scratched, or too dirty, disc play may not start.
- If an improperly centered disc is played, noise can be heard in the mechanism. The use of such disc should be avoided.
- Do not tilt the unit with discs loaded. Doing so may cause malfunction.
TO STOP DISC PLAY
Press the STOP button. Disc play will stop; the TRACK display will show the total number of tracks.
TO LISTEN TO THE DESIRED TRACK
- Press the F.F button, the CD player will skip ahead to the next track each time when the F.F button.
- Press the F.W button, the CD player will skip back to the previous track.
- Press the PLAY button, play will start.
REPEAT DISC PLAY (IF EQUIPPED)
- Press REP button once to repeat disc play of one track.
- Press REP button twice to repeat disc play all the track.
- Pressing once more turns off repeat mode.
PROGRAMMED DISC PLAY (IF EQUIPPED)
- Press the STOP button.
- Press the PGM button.
- Select a track number then press PGM button again.
- Repeat step 3 until all the desired tracks are programmed (Up to total 20 tracks).
RADIO
- Rotate the VOLUME knob from OFF position towards MAX position to turn on the unit.
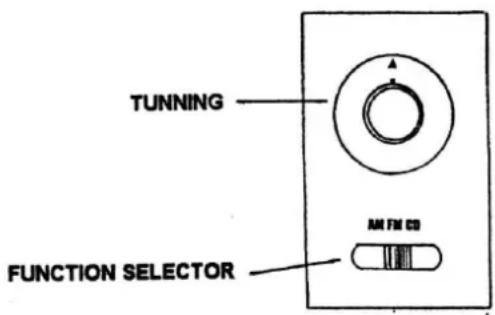
- Select AM or FM by sliding the FUNCTION selector.
- Select radio station by rotating the TUNING knob.
- To turn off the unit, rotate VOLUME knob to OFF position.
text_image
TUNNING AM FM CD FUNCTION SELECTORFM ANTENNA JACK (IF EQUIPPED)
For better FM reception, connect FM antenna wire (included) to the FM ANTENNA jacks (located at the back cover)
- Rotate the LIGHT button to turn on all the light.
- To turn off the light, rotate the LIGHT button again.
REMARK: (FOR NEON LIGHTS VERSION ONLY)
When MODE selector is switched to AM, the neon lights will be automatically turned off.
LIGHT MODE (IF EQUIPPED BULB LIGHTS VERSION ONLY)
Switch the MODE selector at back cover to change the light mode.
LIGHT MODE (IF EQUIPPED LED LIGHTS VERSION ONLY)
The colours of the lights change over time, switch to HOLD at back cover to remain static to your favourite colour. Switch to PLAY position to resume
\*IMPORTANT NOTE: (LED LIGHTS VERSION ONLY)
The changing colors sequences of lights are controlled by IC, the lights maybe turned off when the light mode in HOLD position is normal.
AUXILIARY CONNECTION "AUX IN" (IF EQUIPPED)
-
Connect your own device (i.e. MP3 player or IPOD) to the “AUX IN connection” (located at the back of cabinet) with stereo plug and detachable rack (packed separately). OR IF YOUR UNIT EQUIPPED WITH “AUX IN socket” (located at the right side of cabinet) with RCA cord (packed separately), the two ends of the cord should be connected to the holes of the jack in accordance with the colors.
-
Adjust the ON / OFF switch next to the jack to the 'ON' position.
-
Rotate the mode selector to "CD-AUX".
-
Adjust the sound with the VOLUME knob or the volume control of the device.
-
When change to another mode, the device will continue to play with no sound until the ON / OFF switch is adjusted to 'OFF' position and switch off the device.
IMPORTANT NOTE:
- Adjust the ON / OFF switch to the 'OFF' position when not in use.
- The CD function will resume to normal only after the ON / OFF switch is adjusted to 'OFF' position.
TROUBLESHOOTING GUIDE
The following checks will assist in the correction of most problems which you may encounter will your set. Before going through the check list below first check the following points.
**The power cord must be connected firmly.
Should any problem persist after you have made these check consult your nearest friendly dealer.
| Symptom | Possible Causes (and Remedies) |
| Radio Reception | |
| No radio | The function switch is not in the correct position.Adjust the VOLUME knob.Rotate the TUNING knob to find a radio station.Switch the AUX IN jack to “OFF” |
| CD Player Operation | |
| Disc play does not start. | Reload the disc with the label side up.Clean the disc. |
| Sound skips | Change the installation location.Press reset button. |
| General | |
| Unit not working | The AC power cord is not connected to an outlet.Check that the power cord is connecting firmly.Turn the power button from the “OFF” position to “ON” position. |
| No sound output | Turn VOLUME clockwise.Press reset button.Switch the AUX IN jack to “OFF” & remote RCA cord. |
| Severe hum or noise | The TV or VTR is too close to the stereo system.Separate from the TV or VTR. |
SPECIFICATION
Ricatech BV covers all products (Excl. accessories) with a 2 year warranty applying to all faults caused by a factory-error. External physical damage will not be covered by our warranty
| Warranty: | All hardware errors occurring within 2 years after purchase unless caused by points mentioned below. |
| No Warranty : | Faults caused by:*Dismountal by any other service center then ours.*Water and moisture damage*Drop and bump damage*Usage with non approved Ricatech accessories.*Short-circuit or over-voltage*Physical damage, loss or damage to accessories |
| Out of warranty repairs | Please be so kind to contact us for out-of-warranty repairs. We will provide you with a quotation with the expected costs.Goods out of warranty cannot be returned to your reseller. |