
21T10(A) - TV MATSUI - Free user manual and instructions
Find the device manual for free 21T10(A) MATSUI in PDF.


| Product Type | CRT Television |
| Brand | Matsui |
| Model | 21T10(A) |
| Screen Size | 21 inches (53 cm) diagonal |
| Display Type | CRT (Cathode Ray Tube) |
| Aspect Ratio | 4:3 |
| Dimensions (with stand) | Approximately 500 mm x 450 mm x 480 mm (W x H x D) |
| Weight | Approximately 18 kg |
| Power Supply | AC 220-240V, 50Hz |
| Power Consumption | Approximately 75 W |
| Input/Output Ports | SCART (1x), Antenna (RF), RCA Audio/Video (optional) |
| Remote Control | Standard IR remote (batteries not included) |
| Built-in Features | Sleep timer, auto-search tuning, fine tuning |
| Speaker | 1x mono speaker, 2x3W output |
| Teletext | FLOF (FASTEXT) teletext, more than 100 pages |
| Screen Type | Flat screen (optional) or curved |
| Safety | II class insulation, unplug during thunderstorms or when not in use |
| Cleaning Instructions | Wipe with a soft, dry cloth. Do not use liquid or aerosol cleaners |
| Parts and Reparability | Contact authorized service center. Do not open the casing |
Frequently Asked Questions - 21T10(A) MATSUI
User questions about 21T10(A) MATSUI
0 question about this device. Answer the ones you know or ask your own.
Ask a new question about this device
Download the instructions for your TV in PDF format for free! Find your manual 21T10(A) - MATSUI and take your electronic device back in hand. On this page are published all the documents necessary for the use of your device. 21T10(A) by MATSUI.
USER MANUAL 21T10(A) MATSUI
natural_image
Front view of a vintage CRT television displaying a blank screen with no visible text or symbols on the screen.21T10(A)
Damage
Never use your TV if it is damaged in any way. Always place your TV on a flat level surface avoiding anywhere which may be subject to strong vibration.
Weather
It is advisable to unplug the aerial during an electrical storm.
Moisture
Do not allow your TV to be exposed to rain, moisture, dust. If any liquid is spilt into your TV it can cause serious damage. If you spill any liquid into your TV switch it off at the mains immediately. Contact your store.
Interference
Do not place your TV on or near appliances which may cause electromagnetic interference (TV or Hi-Fi speakers). If you do, it may adversely affect the working of the unit, and cause a distorted picture or sound.
Temperature
Avoid extremes of temperature, either hot or cold, place your TV well away from heat sources such as radiators or gas/electric fires.
Ventilation
The TV must be well ventilated. Do not cover your TV or position in a small confined space. It is recommended that you leave a 10cm gap all around your TV.
Batteries
Batteries are easily swallowed by young children. Do not allow young children to play with the remote control unit.
Covers
Do not remove any fixed covers as this may expose dangerous voltages.
Standby
Do not leave your TV in standby for long periods of time e.g. overnight or while on holiday.
Basic TV features
Basic TV functions....Page 2
Adjusting the sound . . . . . . . . . . . . . . . . . . . . . . . . . . . . . . . . . . . . . . . . . . . . . . . . . . . . . . . . . . . . . . . . . . . . . . . . . . . . Page 3
Adjusting the picture . . . . . . . . . . . . . . . . . . . page 4
Sleep function ......Page 5
Adjusting the picture defaults .....Page 6
Adjusting the picture format ....Page 6
Manual tuning
Manual tuning ....Page 7
Child lock
Using the child lock....Page 8
Teletext features
Teletext features . . . . . . . . . . . . . . . . . . . . . . . . . . . . . . . . . . . . . . . . . . . . . . . . . . . . . . . . . . . . . . . . . . . . . . . . . Page 9-11
Fault finding guide
Fault finding guide ....Page 12
Information and specification
Scart socket information....Page 13
Specification Page 13

text_image
Partmaster Direct0870 9090 444
calls charged at National Rate
Partmaster, our accessories and spares service can provide accessories, spares and replacement instruction books for this and virtually any other domestic electrical item you may have – with most items being dispatched within 24 hours!
Basic TV functions

Make sure that your TV is properly installed.
The next two pages detail how to use your TVs basic features; standby, changing channel, and adjusting the volume.
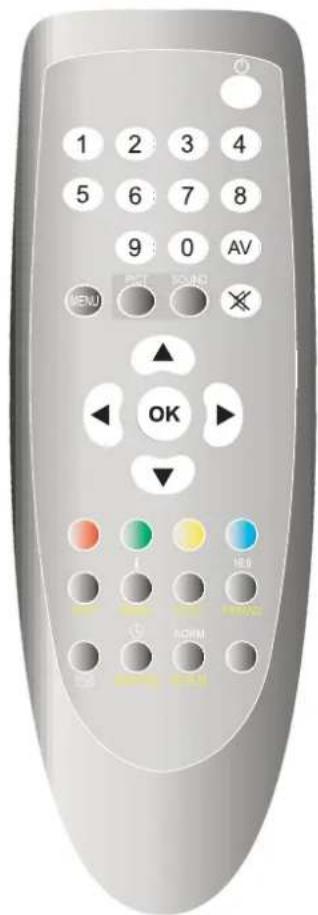
The standby button on the remote control doesn't switch the set off completely it only switches it to standby mode. To turn your television off completely, switch off power and unplug the television at the wall socket.
text_image
1 2 3 4 5 6 7 8 9 0 AV MENU PICK ROUND ✗ OK ▶ ▼ H.E.D. SORM1 Switching on
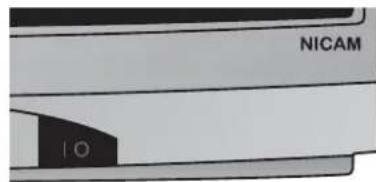
Press the POWER button on the front panel, the red indicator will light.
Switch on your television by pressing the red STANDBY ()button on the remote control (the green indicator will light), press STANDBY again to switch the TV back into standby. The red standby indicator will appear.
text_image
NICAM 102 Select a channel
Press the NUMBER buttons to select channels. When selecting channels with numbers greater than 9 – for example, for channel 25 – press 2 then quickly press 5.
Press ▲ to select channels in sequence; e.g. 1, 2, 3, 4 etc. Press OK to switch between the last two channels viewed.
You may find that you are unable to select channel number 8 through to 80. This is because during automatic tuning your television didn't find enough channels of suitable sound and picture quality to place in these numbered positions. This is quite normal, it doesn't mean that there is anything wrong with your television.
text_image
PI - BBC 1 STEREO3 Viewing the AV channels
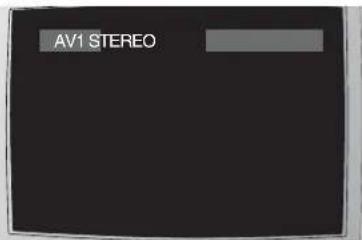
If you have a TV, Satellite/Cable box or Games Console you may connect them to your TV with a SCART lead (not supplied). To view equipment connected to your TV with a scart lead press AV until AV1 or AV2 appears on your screen. To view TV channels again press AV until a numbered TV channel appears.
text_image
AV1 STEREO4Adjusting the Volume
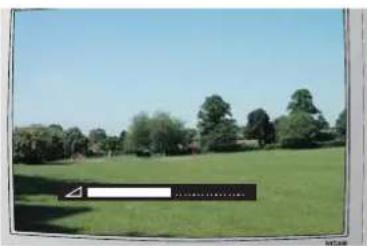
Press 🔍 ▶ on the remote control to adjust the sound level.
Press MUTE to temporarily switch off sound. When sound is switched off the mute symbol will appear on screen.
Press MUTE a second time or press ↗ no switch sound back on.
natural_image
Landscape photo of a grassy field with trees and clear sky (no visible text or symbols)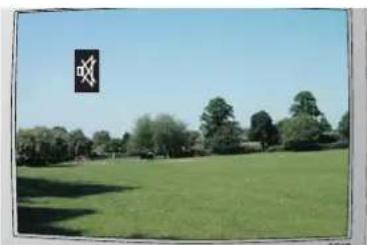
natural_image
Landscape photo of a grassy field with trees and clear blue sky (no text or symbols visible)Adjusting the sound
1 Select the sound menu
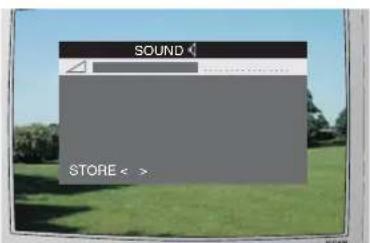
Press the SOUND button on your remote control. The SOUND on screen display will appear.
Press ↕ to set the volume higher or lower.
text_image
SOUND STORE < >You can adjust the default sound setting in the sound menu. Your TV will then turn on at the volume that you have set.
2 Store your selection
Press ▲ to▼ highlight STORE.
Press ▶ to confirm, STORE will briefly flash red. Press TV to remove the SOUND menu on screen display.

text_image
SOUND 4 STORE < >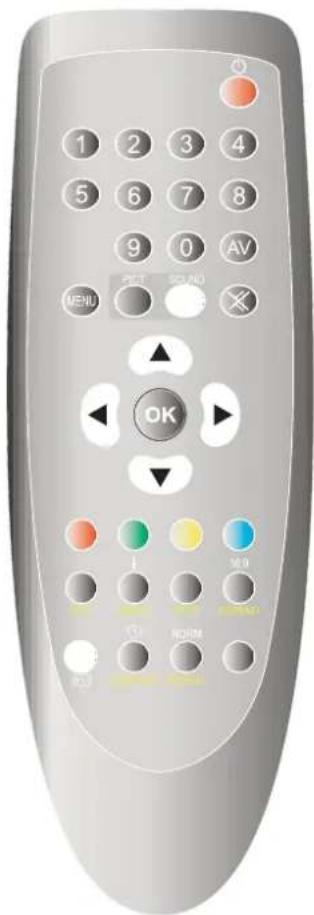
natural_image
Front view of a silver remote control with numeric keypad and function buttons (no text or symbols visible)Adjusting the picture
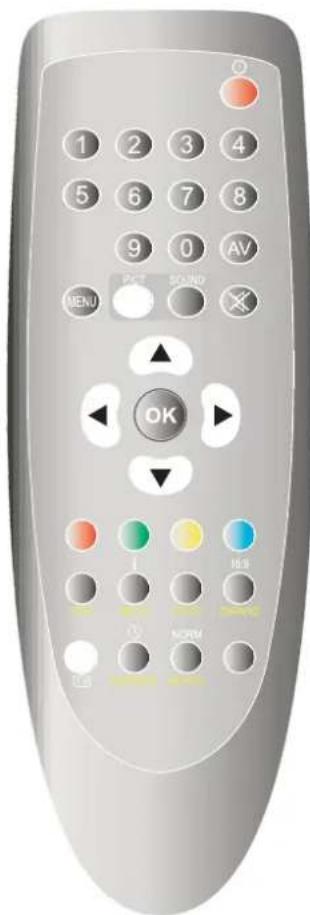
The picture settings have been adjusted by the factory under optimum signal reception conditions, however conditions may not be the same in your area. After turning on your television, allow it to warm up for a few minutes before making any adjustments. Should you wish to reset picture controls back to factory settings press NORMAL.
natural_image
Front view of a silver remote control with numeric keypad, function buttons, and a central 'OK' button (no text or symbols beyond basic controls)1 Select the picture menu Press the PICT button. The picture menu will appear.
text_image
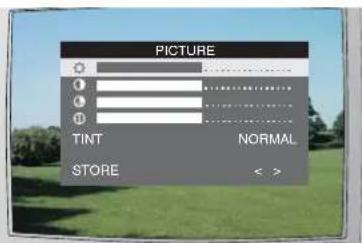
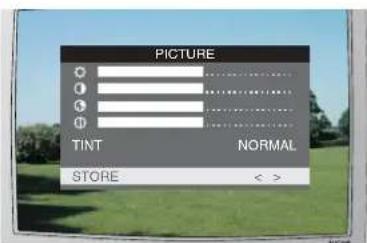
PICTURE TINT NORMAL STORE < >2 Select the picture control Press ▲ repeatedly to switch between BRIGHTNESS, CONTRAST, COLOUR and SHARPNESS.
text_image
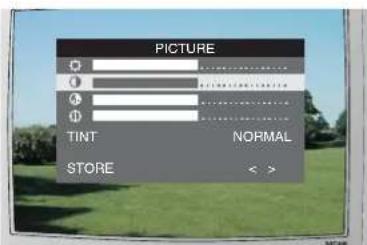
PICTURE TINT NORMAL STORE < >3Adjust the levels
Press /to-adjust the levels. Pictures appear sharpest during daylight hours by increasing the contrast. In the evening (when surroundings are darker) the sharpest picture can be obtained by reducing the contrast (see page 6).
text_image
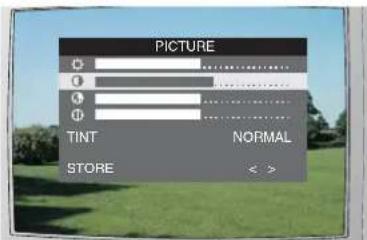
PICTURE TINT NORMAL STORE < >4 Store your selection
Press ▲ to Highlight STORE. Press ▲ to confirm, STORE will briefly flash red. Press TV to remove the PICTURE on screen display.
text_image
PICTURE ○ ○ ○ TINT NORMAL STORE < >5 Display channel info.
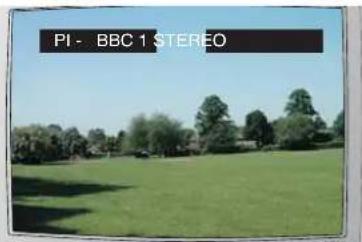
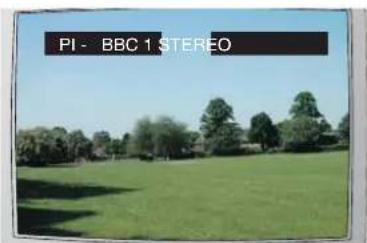
Press the TV button; the TV screen will display the current channel and whether NICAM stereo is available. The on-screen displays will clear after 5 seconds.
natural_image
Landscape photo of a grassy field with trees and distant buildings under a clear sky (no text or symbols visible)Sleep function
1 Finding the sleep function
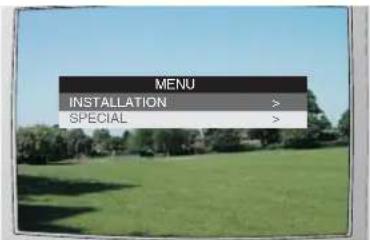
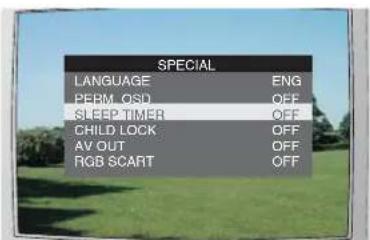
To set the sleep timer press the MENU button. Press ▲ to▼ select SPECIAL.
Press ◀to confirm.
text_image
MENU INSTALLATION > SPECIAL >2 Select sleep timer
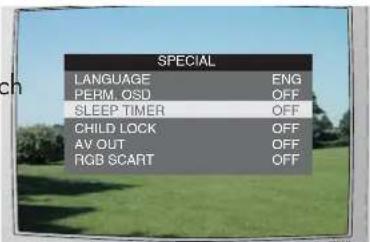
Press ▲/▼ to select is currently set to OFF.
SLEEP TIMER which
text_image
SPECIAL LANGUAGE ENG PERM OSD OFF SLEEP TIMER OFF CHILD LOCK OFF AV OUT OFF RGB SCART OFF3 Select a sleep time
Repeated presses of ⚠ will increase or decrease the sleep timer in 15 minute intervals from 15 minutes to 120 minutes. The timer will start immediately
1st press 15 minutes
2nd press 30 minutes
...etc. ...45,60,75 etc.

text_image
SPECIAL LANGUAGE ENG PERM OSD OFF SLEEP TIMER 15 CHILD LOCK OFF AV OUT OFF RGB SCARTPress TV to remove the menu.
When you have set the sleep timer your TV will return to a normal picture and automatically switch off after the preset sleep time.
4 Cancel sleep timer
To cancel the sleep timer, follow the instructions above to access the SLEEP TIMER function and set the sleep timer to OFF.
Press standby on the remote control to switch your TV on after sleep timer has switched it off.
text_image
SPECIAL LANGUAGE ENG PERM OSD OFF SLEEP TIMER OFF CHILD LOCK OFF AV OUT OFF RGB SCART OFFThe sleep function allows you to automatically switch your television into standby after a preset amount of time (up to 120 minutes).
text_image
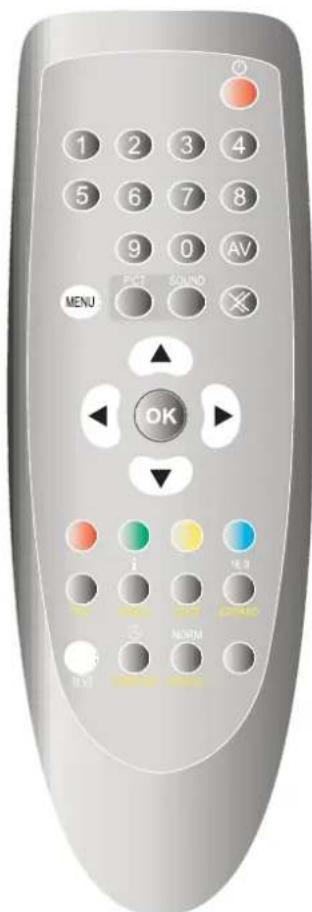
1 2 3 4 5 6 7 8 9 0 AV MENU RIGHT SOUND ✕ OK TIME TIME TIMEAdjusting the picture defaults
Your TV display has 3 different default settings:
Normal Day viewing Night viewing
Please note:
If you intend to use a games console or VCD player with your TV, you many have to set RGB SCART to OFF in the SPECIAL menu.
natural_image
Front view of a silver remote control with keypad, function buttons, and navigation icons (no text or symbols on the device itself)1 Restore factory settings
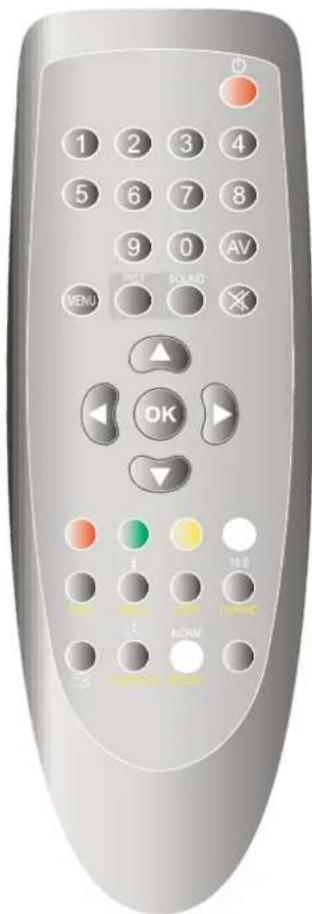
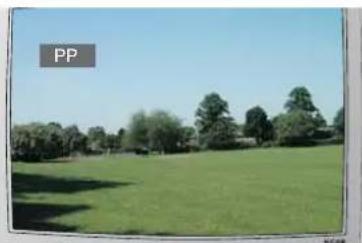
Press the NORM button; the TV screen display will return to its factory settings. PP will be displayed on-screen for 7 seconds.
The settings effected are VOLUME, BRIGHTNESS, CONTRAST, COLOUR and SHARPNESS.
natural_image
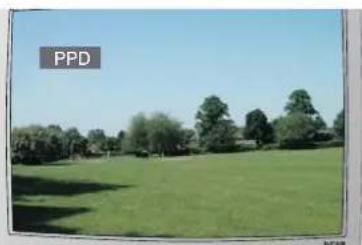
Landscape photo of a grassy field with trees and clear sky (no text or symbols visible)Press the NORM button for a second time; the TV screen display will lighten noticeably. PPD will be displayed on-screen for 7 seconds.
natural_image
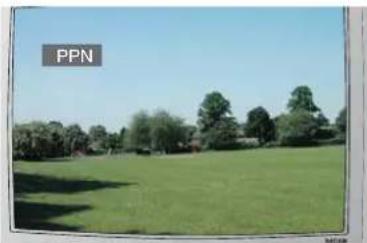
Landscape photo of a grassy field with trees and clear sky (no text or symbols visible)Press the NORM button for a third time; the TV screen display will darken noticeably. PPN will be displayed on-screen for 7 seconds.
natural_image
Landscape photo of a grassy field with trees and clear blue sky (no text or symbols visible)4 Return to factory settings
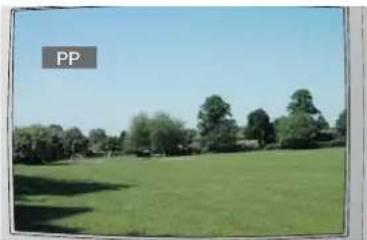
Press the NORM button for a fourth time; the TV screen display will return to its factory settings. PP will be displayed on-screen for 7 seconds.
natural_image
Landscape photo of a grassy field with trees and clear sky (no text or symbols visible)Adjusting the picture format
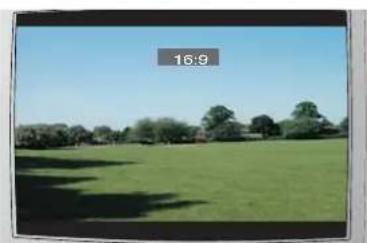
Many TV programs are broadcast in widescreen (16:9 screen ratio). When this function is activated a black line is present at the top and bottom of the screen to mimic widescreen viewing
1 Selecting widescreen
Press the 16:9 button to view the screen in widescreen. To return the aspect ratio to normal; press the 16:9 button for a second time.
natural_image
Landscape photo of a grassy field with trees and clear sky, no visible text or symbolsManual tuning
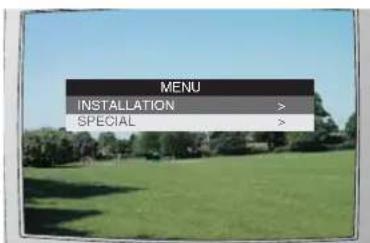
1 Select the main menu
Select your TV channel to re-tune.
Press the MENU button. The main menu will appear.
text_image
MENU INSTALLATION > SPECIAL >2 Select the installation menu
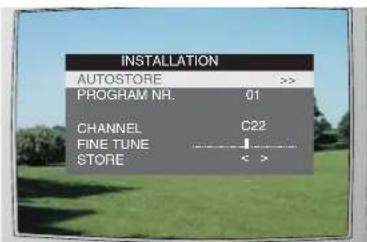
Press the ↗ buttons to highlight INSTALLATION (indicated by a yellow strip). Press ↕ to confirm.
The INSTALLATION on screen display will appear.
text_image
INSTALLATION AUTOSTORE >> PROGRAM NH. 01 CHANNEL C22 FINE TUNE STORE < >3 Select manual tuning
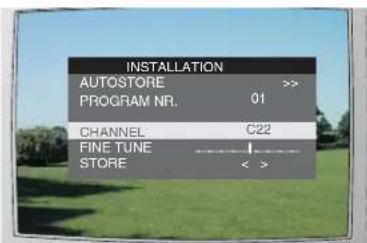
Press the ▲ button to select CHANNEL.
To change the current channel select PROGRAM NR. first.
text_image
INSTALLATION AUTOSTORE >> PROGRAM NR. 01 CHANNEL C22 FINE TUNE STORE < >4 Start searching
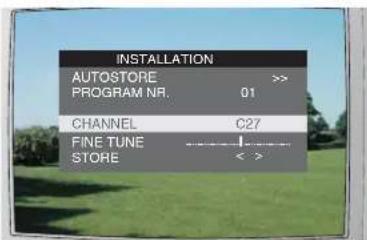
Press to search up the waveband or to search down the waveband.
text_image
INSTALLATION AUTOSTORE >> PROGRAM NR. 01 CHANNEL C27 FINE TUNE STORE < >5 Fine Tuning
Press ▲ / ▼ to select FINE TUNE.
Press to search up the waveband or to search down the waveband.
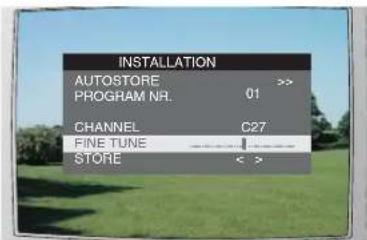
text_image
INSTALLATION AUTOSTORE >> PROGRAM NR. 01 CHANNEL C27 FINE TUNE STORE < >6 Store the channel
Press ▲/▼ to select STORE. Press / to confirm your selection.
Repeat stages 4 – 5 for tuning other channels. Press TV to remove the TUNING on screen display.
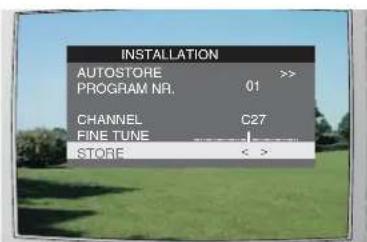
text_image
INSTALLATION AUTOSTORE PROGRAM NR. 01 CHANNEL C27 FINE TUNE STORE < >In certain areas of the country with poor reception the Automatic Tuning System may not tune your television to the strongest broadcast signal. If you are not satisfied with the automatic tuning you may manually tune your television to obtain the best possible picture and sound.
text_image
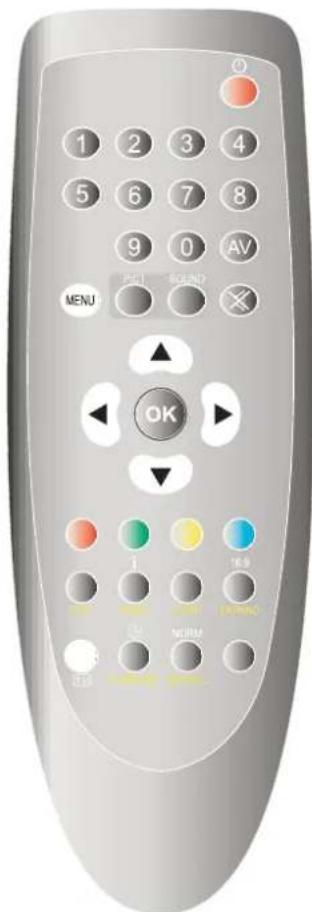
1 2 3 4 5 6 7 8 9 0 AV MENU PUL SOUND OK TIME TIME TIMEUsing the child lock
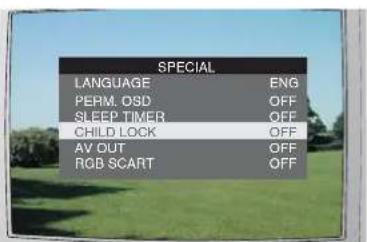
With this function you can lock certain programmes in order to prevent children from changing channel. If the child lock function is on, pressing any key on the remote control will cause the TV to be locked.
1 Select the main menu Select your TV channel to lock.
Press the MENU button. The main menu will appear.
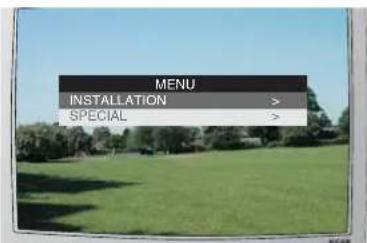
text_image
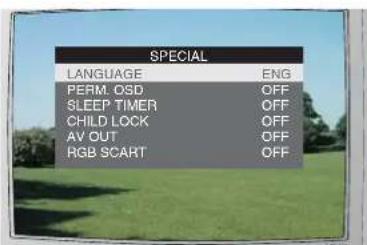
MENU INSTALLATION > SPECIAL >2 Select the special menu Press the ▲ buttons to highlight SPECIAL (indicated by a yellow band) Press ◀/▶ to confirm.
The SPECIAL on-screen display will appear.
text_image
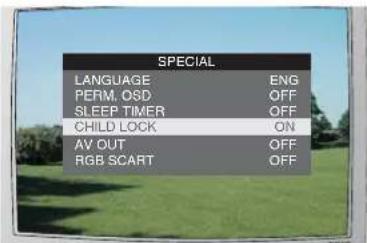
SPECIAL LANGUAGE ENG PERM. OSD OFF SLEEP TIMER OFF CHILD LOCK OFF AV OUT OFF RGB SCART OFF3 Select child lock Press the ▲ buttons to highlight CHILD LOCK.
Press ↕to turn the child lock ON.
text_image
SPECIAL LANGUAGE ENG PERM, OSD OFF SLEEP TIMER OFF CHILD LOCK ON AV OUT OFF RGB SCART OFF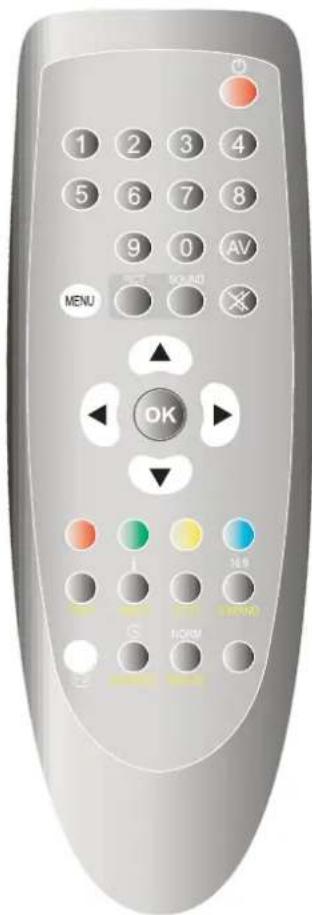
natural_image
Front view of a silver remote control with numeric keypad, function buttons, and navigation icons (no text or symbols on the device itself)4 Continue viewing
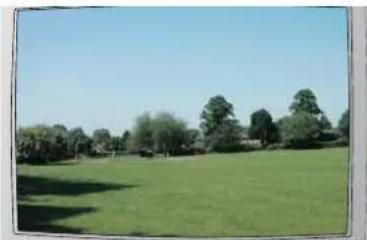
Press TV on the remote control to continue viewing as normal. When any key is pressed on the remote control (except for the menu key) the picture will become distorted and cannot be returned to normal, until the menu key is selected and the child lock is turned off.
natural_image
Landscape view of a grassy field with trees under a clear blue sky (no text or symbols visible)5 Turning the child lock off Repeat stages 1 to 3 above but select child lock OFF.
text_image
SPECIAL LANGUAGE ENG PERM. OSD OFF SLEEP TIMER OFF CHILD LOCK OFF AV OUT OFF RGB SCART OFFTeletext features
1 Select text
To view Teletext press TEXT
1st press .....Text only.
2nd press ....Text and TV picture.
3rd press ....TV picture only.
P100 TELETEXT 100 JAN 1 12:00:00
TEXT
TEXT
TEXT
TEXT
TV GUIDE SPORT NEWS WEATHER
2 Enter a page number
All Teletext pages are three digit numbers e.g. to select page 100, press 1, then 0, then 0.
If you accidentally press a wrong button, complete the sequence with any three numbers, then re-enter the correct number.
Press ▲ to ▼ advance pages sequentially up or down.
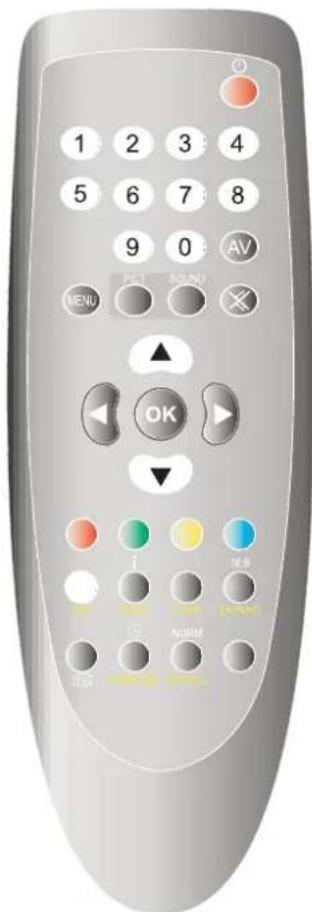
Using the four coloured Fast text buttons you may move around Teletext services with greater ease and speed.
P100 TELETEXT

3 Select TV
To switch from one Teletext service to another press TEXT until the TV picture is displayed.
Select another TV channel.
Press TEXT to revert to Teletext.
natural_image
Landscape view of a grassy field with trees and clear blue sky (no text or symbols visible)Teletext is the name given to the
magazine services operated by
television companies.
A variety of information is available including News, Weather, Financial and Travel information. Teletext is normally transmitted
whenever a station is on air. In addition to
Teletext your television also incorporates Fast
text. Using the four coloured Fast text
keys you may move around Teletext
services with greater ease and speed.
text_image
1 2 3 4 5 6 7 8 9 0 AV MENU PET SOUND ✗ OK ▼ 16.9 ON/OFF ON/OFF ON/OFFTeletext features

Some Teletext pages contain too much information to be displayed on a single page, when this occurs sub-pages are transmitted. Sub-pages are identified by an additional numbering sequence, e.g. 1/3, where the first number indicates the sub-page number and the second indicates the number of available sub-pages.
natural_image
Illustration of a remote control with numeric keypad, function buttons, and color-coded buttons (no text or symbols)1 Freeze the page
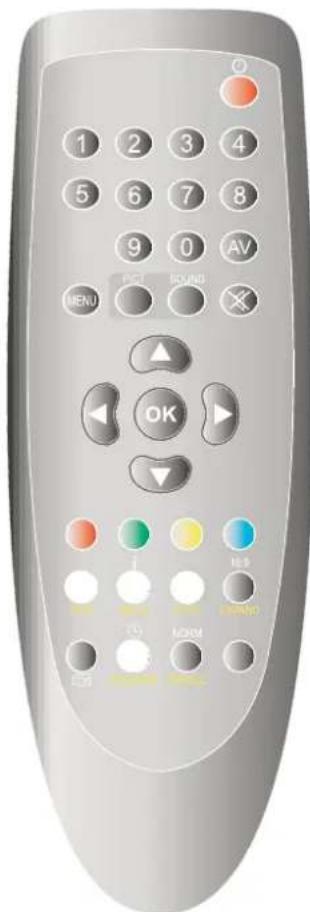
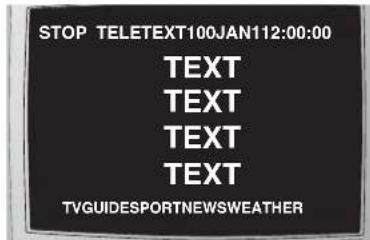
Press STOP to freeze a page. STOP will appear in the top left corner of the screen. Press STOP a second time to release the page. Pages and sub-pages are transmitted in sequence with an adequate pause for reading each page. You may freeze a page which is of particular interest and hold it on screen. Information cannot be updated when page/sub-page is held using STOP.
text_image
STOP TELETEXT100JAN112:00:00 TEXT TEXT TEXT TEXT TVGUIDESPORTNEWSWEATHER2 Select a sub page
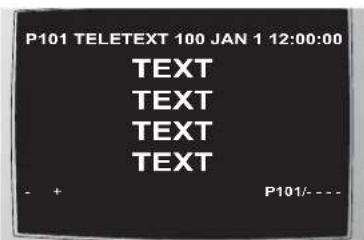
Press SUB PAGE to view a sub-page. Select the desired sub-page number, e.g. sub page number 2 press 0 0 0 2 by pressing the direct channel entry buttons.
Whilst using subpages it is essential to enter four numbers. Using sub page you may view and hold a page or sub-page; as information is received from the transmitter the screen will be updated, e.g. a page of share prices.
Press INDEX to return to the INDEX page.
text_image
P101 TELETEXT 100 JAN 1 12:00:00 TEXT TEXT TEXT TEXT - + P101/- - - -3 View the clock
When viewing in normal TV mode, press SUB PAGE to display the current time (via teletext).
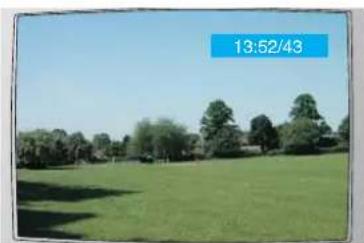
natural_image
Landscape photo of a grassy field with trees and clear sky, no visible text or symbolsTeletext features
1 Make the screen bigger
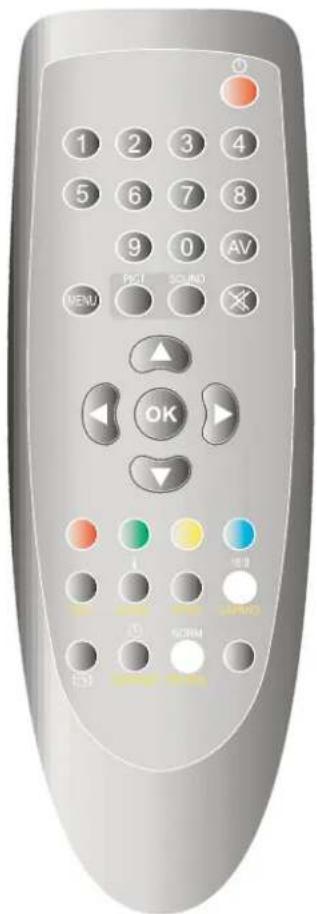
Press EXPAND to increase the size of the characters on screen.
1st press .....View the top of the page.
2nd press ....View the bottom of the page.
3rd press .....Return to full view of full page (text normal size).
2 Reveal an answer
Press REVEAL to display hidden text.
Some pages contain hidden text, e.g. a quiz page with concealed answers.
P100 TELETEXT 100 JAN 1 12:00:00
TEXT TEXT
P100 TELETEXT 100 JAN 1 12:00:00
QUESTION ???????
TV GUIDE SPORT NEWS WEATHER
P100 TELETEXT 100 JAN 1 12:00:00
ANSWER ! ! ! ! !
TV GUIDE SPORT NEWS WEATHER
In order to use Teletext the control codes must be transmitted by the broadcasting authorities - it's operation is, therefore dependent on these codes being transmitted.
text_image
1 2 3 4 5 6 7 8 9 0 AV MENU PIGL SOUND ✗ OK SAYA SCRMFault finding guide
| SymptomCauseSolution | ||
| No standby light. | Is your TV plugged in? Plug your TV into damaged? | main socket outlet. |
| Is the mains power for your TV off? Press main power switch. | ||
| Has the fuse in the mains plug blown? Replace fuse in mains plug. | ||
| No picture, no sound. | Is your TV plugged in? Plug your TV into mains socket outlet. | |
| Is the aerial connection lead broken or damaged? | Check all aerial connections for damaged wires. If necessary replace with new cables. | |
| Possible station trouble? Move the aerial away from areas of possible interference. If you live in a known poor reception area, try using an aerial booster to improve the quality of the broadcast. | ||
| Is the mains power switch for your TV turned off. | Press main power switch. | |
| Have you pressed the mute button? Have you set the volume to minimum? | Press the mute button again or increase the volume using volume control. | |
| Unable to select channel numbers 8 through to 80. | During automatic tuning your signal didn't find enough channels to place them in numbered positions? | If a television station has been missed try repeating the automatic tuning procedure described in the Quick Start Guide. |
| Poor or no colour. Aerial or connection cable is not connected or is damaged. | Check all aerial connections for broken or damaged wires. If necessary replace with new cables. Try using aerial booster to improve the quality of the signal. | |
| No Teletext or strange characters or letters on screen. | Colour control is not adjusted. | Adjust the colour. |
| Aerial connection is poor or possible station trouble. | Adjust the colour. Check aerial connections for broken wires or try another station. | |
| Remote control does not work or operates iratically. | Weak or exhausted batteries. | Replace the batteries. |
| Batteries placed in the wrong way. | Check that you have put the batteries in the remote control the right way around. | |
| Unable to playback video tapes. | During automatic tuning your TV was not switched on. | Before starting the automatic tuning make sure that your TV is switched on and that a tape is playing. |
| Unable to watch satellite stations. | During automatic tuning your Satellite/Cable box was not switched on. | Before starting the automatic tuning make sure that your Satellite/Cable box is switched on and that a channel has been selected; for example BBC News 24. |
Scart socket information
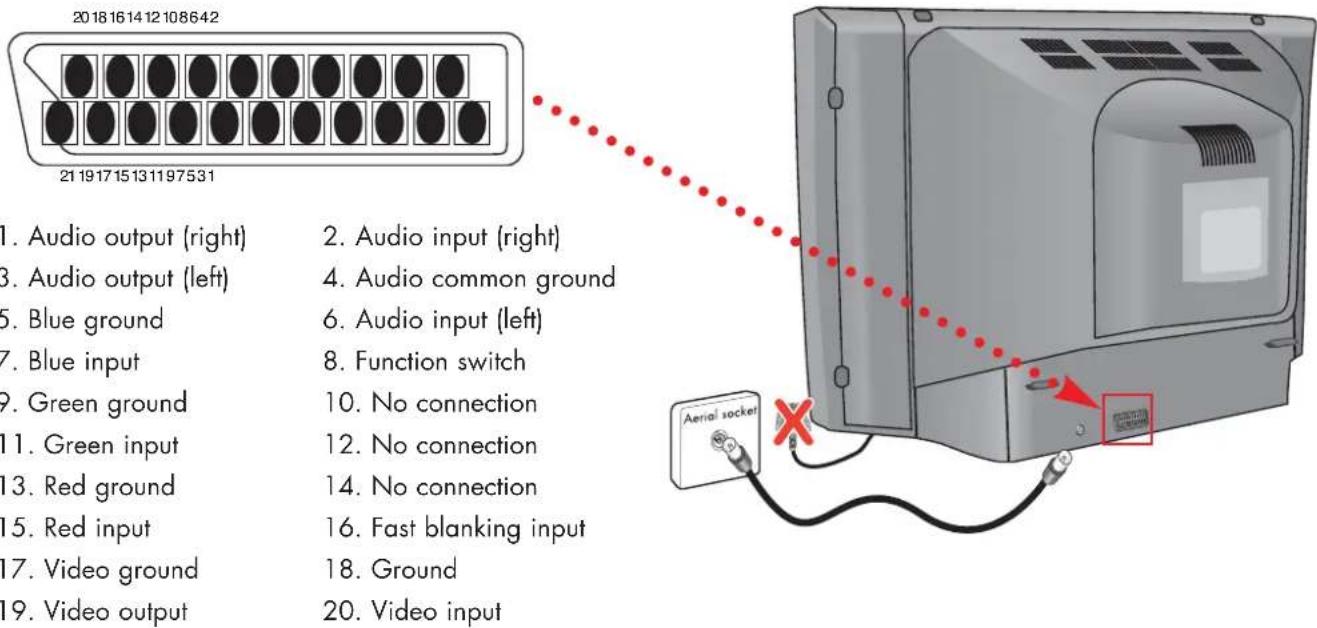
By using a SCART lead you can improve the quality of playback and sound. Remember you must still have the aerial lead (not supplied) connected. If you are using a SCART lead(not supplied) you should not have to tune your TV to your video, instead select the AV channel by pressing the AV button on the remote control.
text_image
2018161412108642 21 191715131197531 1. Audio output (right) 2. Audio input (right) 3. Audio output (left) 4. Audio common ground 5. Blue ground 6. Audio input (left) 7. Blue input 8. Function switch 9. Green ground 10. No connection 11. Green input 12. No connection 13. Red ground 14. No connection 15. Red input 16. Fast blanking input 17. Video ground 18. Ground 19. Video output 20. Video inputSpecification
Television
Picture tube . . . . . . . . . . . . . . . . . . . . . . . . . . . . . . . . . . . . . . . . . . . . . . . 51cm visible screen measured diagonally
Colour system ....PAL I
External aerial .....75 Ohm DIN type
Scart socket . . . . . . . . . . . . . . . . . . . . . . . . . . . . . . . . . . . . . . . . . . . . 21 Pin
General
Mains supply ....AC 180V-240V \~ 50Hz
Power consumption ....Standby: max.9W, Normal operation: 55W
Dimensions 490mm (W) × 450mm (D) × 440mm (H)
Weight 21kg net
Accessories .... Remote control .... Remote control batteries (2 x AA)
Weight and Dimensions are approximate. Because we continually strive to improve our products we may change specifications and designs without prior notice.
No part of this publication may be reproduced, stored in a retrieval system or transmitted, in any form or by any means, without the prior permission in writing of Dixons Stores Group, nor be otherwise circulated in any form of binding or cover other than that in which is published and without a similar condition including this condition being imposed on the subsequent purchaser.