RFF466NFNMIXA - Fridge NORDMENDE - Free user manual and instructions
Find the device manual for free RFF466NFNMIXA NORDMENDE in PDF.


User questions about RFF466NFNMIXA NORDMENDE
0 question about this device. Answer the ones you know or ask your own.
Ask a new question about this device
Download the instructions for your Fridge in PDF format for free! Find your manual RFF466NFNMIXA - NORDMENDE and take your electronic device back in hand. On this page are published all the documents necessary for the use of your device. RFF466NFNMIXA by NORDMENDE.
USER MANUAL RFF466NFNMIXA NORDMENDE
Information on No-Frost technology 2
Safety Information 3
Security warnings 4
Installation and Operation of your Refrigerator 5
Before Starting to Operate Your Refrigerator 5
USAGE INFORMATION ......6
Operating your Fridge 7
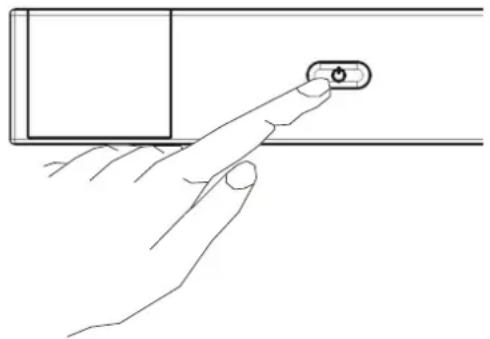
On / Off button 7
Thermostat Setting 7
Super Freeze Mode 8
Friendly Lighting 8
Freezer Temperature Settings 9
Warnings about Temperature Adjustments.... 9
Accessories 10
Ice Box 10
Freezer Box.... 10
Odour Filter 10
Roller Storage Box 11
Fresh Dial 11
Water dispenser 12
Mounting of the water tank group 12
Cleaning the Water Tank 13
FOOD PLACEMENT ....14
Cooling Compartment 14
Deep Freeze Compartment.... 14
CLEANING AND MAINTENANCE 19
Defrosting 19
Replacing The Light Bulb 20
SHIPMENT AND REPOSITIONING 21
Repositioning the Door 21
BEFORE CALLING THE SERVICE 21
Tips For Saving Energy 24
THE PARTS OF THE APPLIANCE AND THE COMPARTMENTS ...... 25
Parts of the water dispenser 26
PART-1. BEFORE USING YOUR REFRIGERATOR
Information on No-Frost technology
No-frost refrigerators differ from other static refrigerators in their operating principle.
In normal fridges, the humidity entering the fridge due to door openings and the humidity inherent in the food causes freezing in the freezer department. To defrost the frost and ice in the freezer compartment, you are periodically required to turn off the fridge, place the food that needs to be kept frozen in a separately cooled container, and remove the ice gathered in the freezer department.
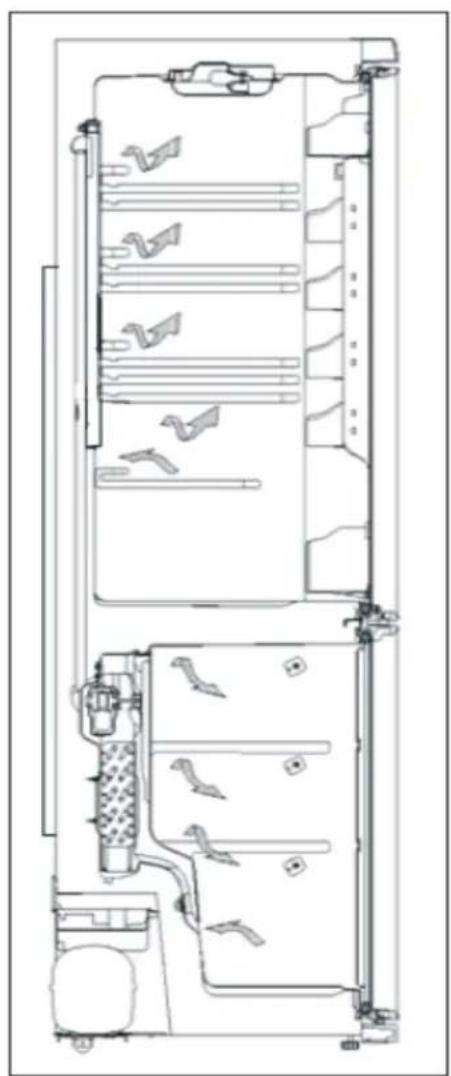
The situation is completely different in no-frost fridges. Dry and cold air is blown into the fridge and freezer compartments homogeneously and evenly from several points via a blower fan. Cold air dispersed homogeneously and evenly between the shelves cools all of your food equally and uniformly, thus preventing humidity and freezing.
Therefore your no-frost fridge allows you ease of use, in addition to its huge capacity and stylish appearance.
natural_image
Technical line drawing of a mechanical or electrical enclosure with internal components and no visible text or symbolsSafety Information
- While carrying and positioning the fridge, do not give damage to the cooler gas circuit.
- If your old fridge has a lock, break or remove the lock before discarding it, because children may get trapped inside it and may cause an accident.
- Old fridges and freezers contain isolation material and refrigerant with CFC. Therefore, take care not to harm environment when you are discarding your old fridges.
IMPORTANT NOTES:
- If your appliance uses R600 as a refrigerant – you can learn this information from the label on the cooler- you should be careful during shipment and mounting to prevent your appliance's cooler elements from being damaged. Although R600a is a environmental friendly and natural gas, as it is explosive, in case of a leakage to be occurred due to a damage in the cooler elements move your fridge from open flame or heat sources and ventilate the room where the appliance is located for a few minutes.
- Please read the instruction manual carefully before installing and using your appliance. Our company is not responsible of the damage occurred due to misuse.
- Follow all instructions on your appliance and instruction manual, and keep this manual in a safe place to resolve the problems that may occur in the future.
- This appliance is produced to be used at houses and it can only be used in house and for the specified purposes. It is not suitable for commercial or common use. Such use will cause the guarantee of the appliance to be cancelled and our company will not be responsible for the losses to be occurred.
- This appliance is produced to be used in houses and it is only suitable for cooling / storing foods. It is not suitable for commercial or common use and/or for storing substances except for food. Our company is not responsible for the losses to be occurred in the contrary case.
natural_image
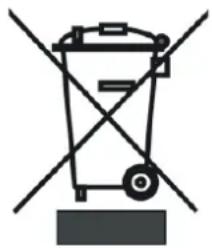
Symbol of a trash bin crossed with no text or labels, representing waste sorting or disposal (no text present)Please ask your municipal authority about the disposal of the WEEE for the reuse, recycle and recovery purposes.
Conformity Information
- Tropical Class is defined for the environment temperatures between 16^ and 43^ in accordance with the TS EN ISO 15502 Standards.
- The appliance is designed in compliance with the EN15502, IEC60335-1 / IEC60335-2-24, 2004/108/EC standards.
Security warnings
Warning: Do not use mechanical devices or other means to accelerate the defrosting process, other than those recommended by the manufacturer. Do not use electrical appliances inside the food storage compartments of the appliance, unless they are of the type recommended by the manufacturer. Keep ventilation openings, in the appliance enclosure or in the built-in structure, clear of obstruction. Do not damage the refrigerant circuit.
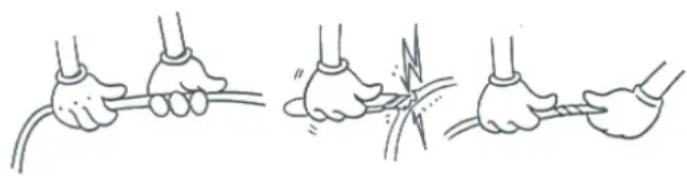
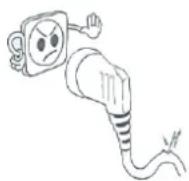
- Please do not use a multi-way socket or an extension cable.
- Please do not insert a plug whose cable is damaged, torn or worn-out into the socket.
- Please never pull, bend or damage the cable.
natural_image
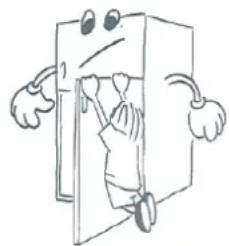
Illustration of three hands performing a cable or wire manipulation technique (no text or symbols present)- This product has been designed for utilization by adults; please do not let children play with the device and dangle their body by hanging on the door.
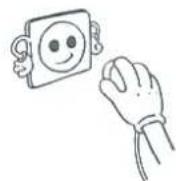
- Never ever take out the plug from the socket with wet hands in order not to cause any electrical shock!
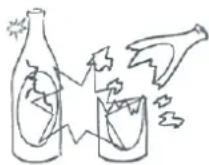
- Please do not ever place acidic drinks in glass bottles and cans in the deep-freeze compartment of your refrigerator. Bottles and cans may burst out.
- For your safety, please do not place any explosive and flammable materials in the refrigerator. Place the drinks with high alcohol content into the cooling compartment of the device with their lids tightly closed and in a vertical position.
- Avoid any manual contact as you take out the ice made in the deep freeze compartment; the ice may cause burns and/or cuts.
- Never ever touch the frozen food with bare hands! Do not eat the ice cream and ice cubes immediately after you taken them out of the deep freeze compartment!
- Please do not refreeze the frozen food once they are thawed. It may pose a danger for your health since it might cause problems such as food poisoning.
- Please do not cover the body and/or top of the refrigerator with cloth, table cover etc. This will negatively affect the performance of the refrigerator.
- Secure the accessories inside the appliance in order to prevent them get damaged while moving.
- The appliance is not intended for use by people (including children) with reduced physical, sensory or mental capabilities, or lack of experience and knowledge, unless they have been given supervision or instruction concerning use of the appliance by a person responsible for their safety. Children should be supervised to ensure that they don't play with the appliance.
- If the supply cord is damaged it must be replaced by the manufacturer or service agent or similar qualified people in order to avoid a hazard.
natural_image
Cartoon illustration of a person peeking out of a door, with arms and legs raised (no text or symbols)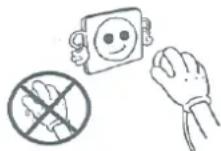

Installation and Operation of your Refrigerator
- The operation voltage of your refrigerator is 220-240 V and 50 Hz.
- A specially grounded plug has been connected to the power cable of your refrigerator. This plug should be used with a specially grounded socket of 16 amperes. If there is no such socket in your house, please have it installed by an authorized electrician.
- Our company shall not be held responsible for damages that may arise due to utilization with no grounding installation.
- Place your refrigerator in a suitable spot that it will not be exposed to direct sunlight.
- It should be at least 50 cm away from heat sources such as cookers, ovens, wing radiators and stoves and at least 5 cm away from electrical ovens.
- Your refrigerator should not be used in the open air and should not remain under the rain.
- If your refrigerator is juxtaposed with a deep freeze, it is necessary to leave a space of at least 2 cm between them in order to prevent condensation on the outer surfaces.
- Please do not place any heavy objects on your refrigerator and place your refrigerator in a suitable spot in such a way that there will be a free space of minimum 15 cm on the top.
- If your are going to place the refrigerator beside your kitchen cabinets then you should keep a clearance of at least 2 cm's between them.
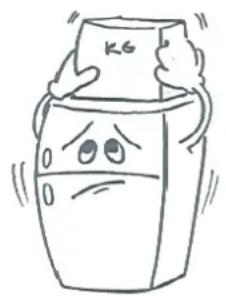
- To prevent the condenser (the black backside component with fins) from touching the wall, put on the plastic distance guide in its place rotating 90^ .
- To ensure smooth and vibration-free operation of your refrigerator, the adjustable front feet must be set at the suitable height and mutually balanced. You can ensure this by turning the adjustable feet clockwise (or counter-clockwise). This process should be performed before the food is placed in the refrigerator.
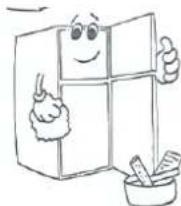
- Before using your refrigerator, wipe all its parts with warm water in which you shall add one teaspoon of food soda, then rinse it with clean water and dry it. After the cleaning process is completed, place all the parts back.
natural_image
Cartoon illustration of a distressed container with arms and legs, showing a sad face (no text or symbols)
natural_image
Cartoon illustration of a smiling refrigerator with thumbs up and a bowl of food (no text or symbols)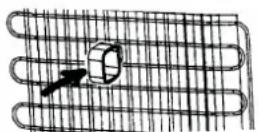
Before Starting to Operate Your Refrigerator
- During the first operation or to ensure the efficient operation of the device following the relocation processes, allow your refrigerator to remain idle for 3 hours (in a vertical position), then insert the plug to the socket. Otherwise, you may damage the compressor.
- The first time you operate your refrigerator, an odour might be smelt. This odour shall disappear once your refrigerator starts cooling.
PART-2. USAGE INFORMATION
Display and Control panel

text_image
super freeze -22 -20 -18 -16 On / Off button Freezer set button SR led Alarm led lv led !sr alarm #lvOn / Off button
It cuts the power of appliance by pushing on-off switch.
Freezer Set Button
It is freezer set button. The set values of freezer compartment can be changed by this button. SF mode can be active by pushing this button too.
SR
SR will light red and audible alarm will be released when any problem occurs in the fridge.
Alarm
Alarm will light as red when the doors are opened. After 2 minutes, the buzzer will sound too.
lv
In case the mains voltage is low, this symbol will be lighted. Red warning lights will go off when mains voltage raises the appropriate level.
Operating your Fridge
On / Off button
natural_image
Line drawing of a hand pressing a button on a screen (no text or symbols)It cuts the power of appliance by pushing on-off switch.
When the appliance is plug on, it controls the system for 25 seconds at first. Please do your adjustments after these 25 seconds.
Thermostat Setting
text_image
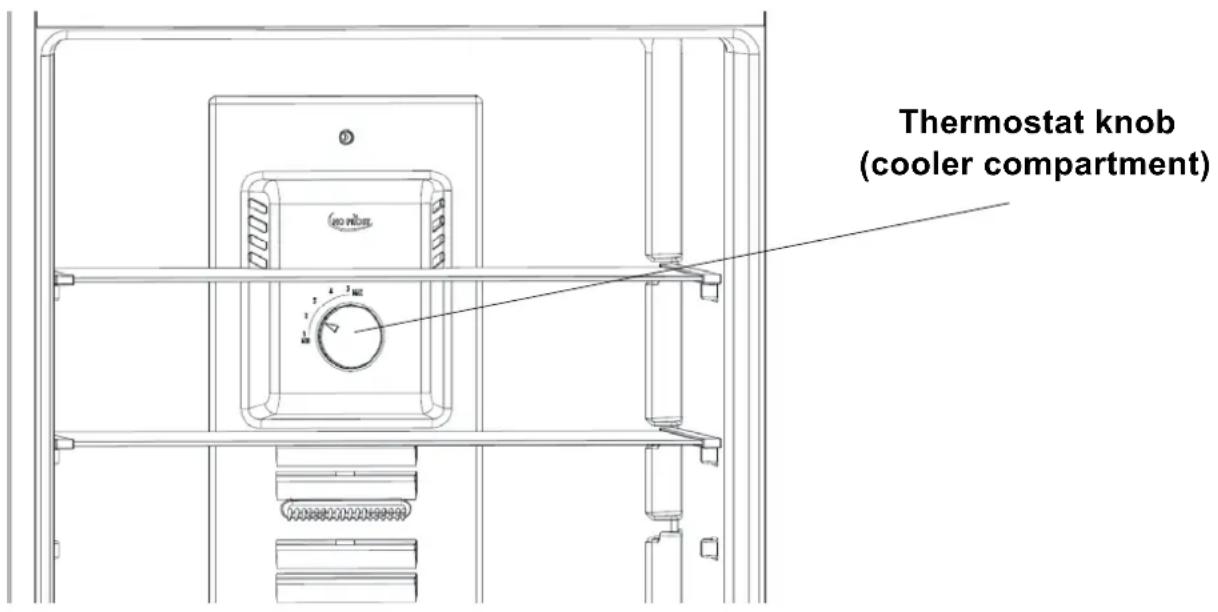
Thermostat knob (cooler compartment)Refrigerator thermostat automatically regulates the inside temperature of the compartments. By rotating the knob from position 1 to 5, colder temperatures can be obtained. In cold seasons, you can set lower positions in order to decrease the energy consumption.
Refrigerator Thermostat Setting;
1 - 2 : For less coldly conditions.
3 - 4 : For normal conditions.
5 : For colder conditions.
Note that; the ambient temperature, temperature of the freshly stored food and how often the door is opened, affects the temperature in the appliance. If required, change the temperature setting.
Super Freeze Mode
When would it be used?
- For freezing a large amount of food (too large to be fitted in the Super freezer).
- To freeze fast food.
• To freeze food quickly. - To store seasonal food for a long time.
How would it be used?
- Press freezer set button until superfreeze lights up.
- If pressed on no button in 3 second, when "Superfreeze" is seen it will be set. Led will blink 5 times and sound beep beep.
- Superfreeze symbol will be displayed during this mode.
- Maximum amount of fresh food (in kg) that can be frozen in 24 hours is indicated on the appliance label.
- For optimum appliance performance to reach maximum freezing capacity, set active SF mode 3 hours before placing fresh food in the freezer.
- Freezing process will be completed 24 hours after placing fresh foods in the freezer.
During this mode:
- If pushed freezer set button, super freeze led blinks, if pressed on no button for 3 seconds, mode is cancelled and previous set value is set.
Note: "Super Freeze" mode will be automatically cancelled after 24 hours or freezer sensor temperature is lower than -32 °C.
Friendly Lighting
- If you want to operate the illumination system of appliance according to ambient brightness, you can select this mode.
- If you want to select this mode, please press Freezer set button during 3 seconds. For cancelling, you can press Freezer set button during 3 seconds again. When this mode is selected and ambient light is enough, the lighting of inside of appliance will not be active.
Freezer Temperature Settings
- Initial temperature value for Freezer Setting Indicator is -18^ .
- Press freezer set button once.
- When you first push this button, the last set value will blink on screen.
- Whenever you press on this button, lower temperature will be set. (-16°C, -18°C, -20°C, superfreeze)
- When you push the freezer set button until superfreeze symbol appears on the Freezer Setting Indicator, and if you do not push any button in 3 seconds Super Freeze will flash.
- If you continue to press, it will restart from -16^ .
Warnings about Temperature Adjustments
- Your temperature adjustments will not be deleted when an energy breakdown occurs.
- It is not recommended that you operate your fridge in environments colder than 10^ in terms of its efficiency.
- Temperature adjustments should be made according to the frequency of door openings and the quantity of food kept inside the fridge.
- Do not pass to another adjustment before completing an adjustment.
- Your fridge should be operated up to 24 hours according to the ambient temperature without interruption after being plugged in to be completely cooled. Do not open doors of your fridge frequently and do not place much food inside it in this period.
- A 5 minute delaying function is applied to prevent damage to the compressor of your fridge, when you take the plug off and then plug it on again to operate it or when an energy breakdown occurs. Your fridge will start to operate normally after 5 minutes.
- Your fridge is designed to operate in the ambient temperature intervals stated in the standards, according to the climate class stated in the information label. We do not recommend operating your fridge out of stated temperatures value limits in terms of cooling effectiveness.
| Climate Class | Ambient |
| T | 16 to 43 °C |
| ST | 16 to 38 °C |
| N | 16 to 32 °C |
| SN | 10 to 32 °C |
Note: If ambient temperature less than 25^ C, refrigerator setting should be adjusted "between 1 and 3 position"
- If ambient temperature more than 25^ , refrigerator setting should be increased until temperature will reach to sufficient cooling.
- For optimum adjustment, freezer setting must be as -18^ or -20^ .
- In summer, if refrigerator is used where the ambient temperature is too high, you should adjust freezer termostat as -24^ .
Accessories
Ice Box
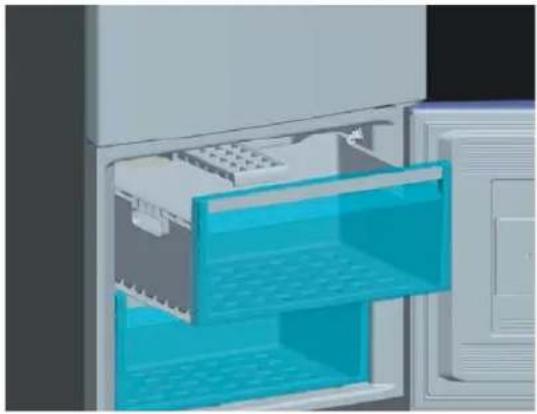
• To remove ice box; pull the upper freezer box out as far as possible and then pull the ice box out.
- Fill 3/4 full of water and place the ice box in freezer.
Note: While placing the ice box in the freezer, place in a horizontal position. Otherwise the water in the ice box can spill.
natural_image
3D illustration of a refrigerator interior showing blue liquid-filled doors and a keyboard (no text or symbols)Freezer Box
The freezer box allows foods are maintained more regularly.
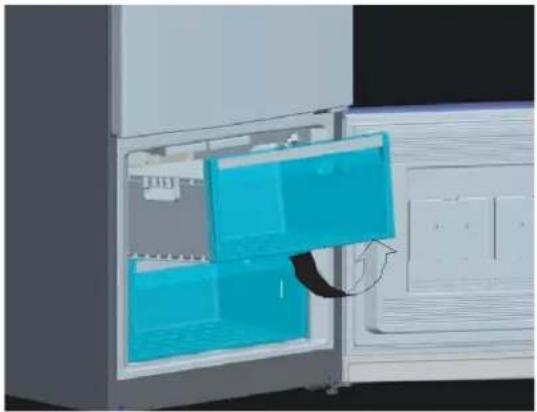
Removing The freezer box;
- Pull the box out as far as possible
- Pull the front of box up and out.
! Make the inverse of the same operation for the resetting the sliding compartment.
Note: Always Keep the handle of box while removing the box.
natural_image
3D rendering of a refrigerator interior showing blue insulation material being placed inside (no text or symbols visible)Odour Filter
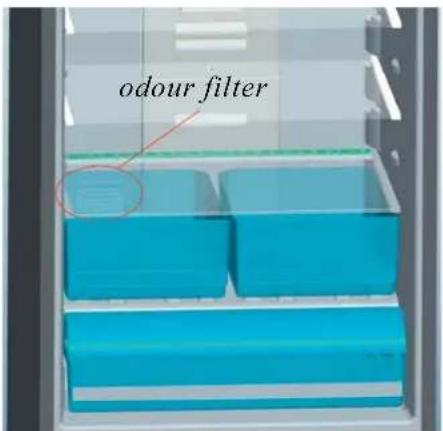
The filter in this area, blocks the bad smell in the cooler compartment.
text_image
odour filterRoller Storage Box
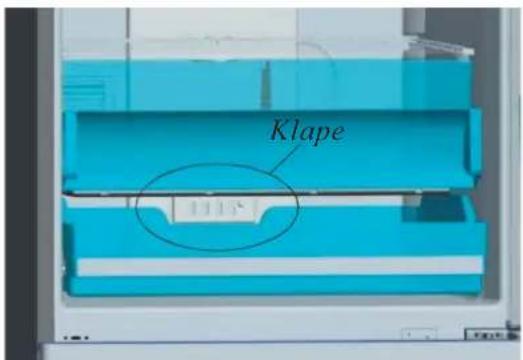
You can adjust and use this department as 2 different functional department.
1- To use for 0 °C Department: If you want to use this compartment as 0 °C box, you must take the sliding part (cover, which is indicated in picture) from closed position to open position.
2- To use for Crisper Department: If you want to use this compartment as crisper, you must take the sliding part (cover, which is indicated in picture) from open position to closed position.
text_image
Klape- While this department is used as 0 °C Department, Keeping food in the Chiller compartment instead of the freezer or refrigerator compartment allows food retain freshness and flavour longer, while preserving its fresh appearance. When chiller tray becomes dirty, remove it and wash it with water. (Water freezes at 0°C, but foods containing salt or sugar freeze at temperature lower than that) Normally people use the chiller compartment for raw fish, lightly pickled, rice, etc...
• Pull the chiller shelf out toward you. the cover will open automatically
! Do not put foods you want to freeze or ice trays into this part.
natural_image
Close-up of a blue refrigerator with open door and side window (no visible text or symbols)
natural_image
Close-up of a blue plastic shelf with internal compartments, no visible text or symbols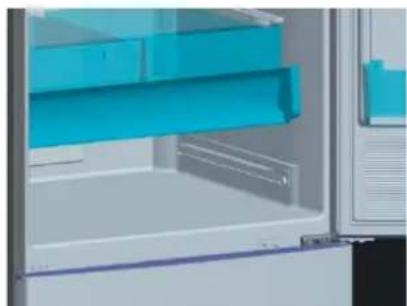
natural_image
Interior view of a refrigerator with blue shelves and glass doors (no visible text or symbols)Picture. 1 Picture. 2 Picture. 3
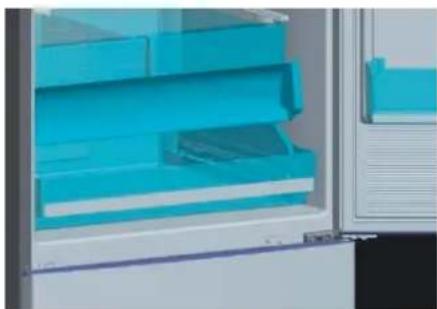
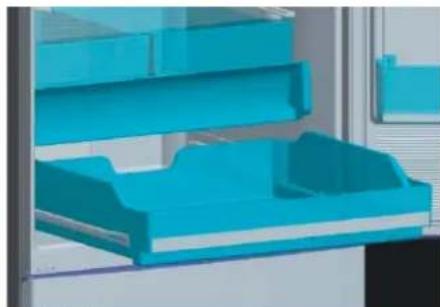
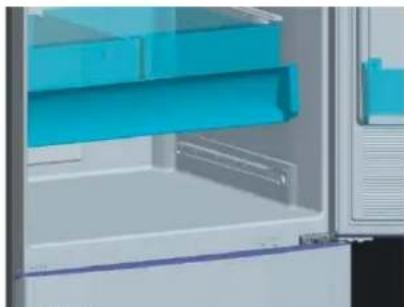
Removing The chiller shelf;
- Open the cover fully. (Picture-1)
• Pull the chiller shelf out toward you. (Picture-2) - Pull the wheels of chiller shelf up from rail to remove. (Picture-3)
Fresh Dial
natural_image
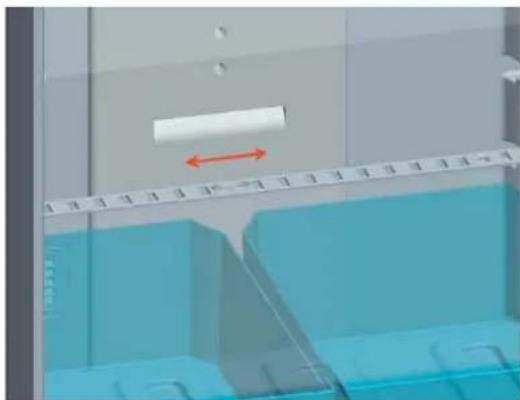
3D mechanical assembly diagram showing a component with a red directional arrow and blue base blocks (no text or symbols)In case of the crisper is totally full, the fresh dial is located in front of crisper, should be opened. By means of this the air in the crisper and humidity rate will be controlled and endurance life will be increased.
If you see any condensation on glass shelf, you must open this klape which is on behind of shelf.
Water dispenser (If available)
Mounting of the water tank group
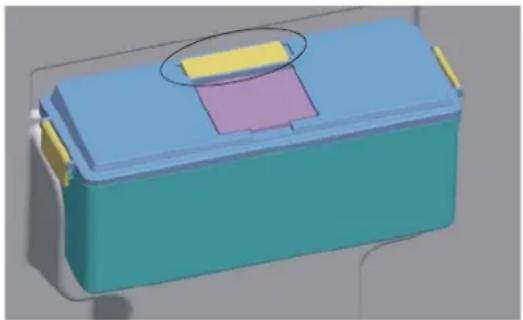
Place the water tank in the details of the door plastic pitched in the direction of the arrow.
After inclined to mount the water tank, push it down to place to the details of door plastics properly.
Add your drinks with the help of water tank top cover.
Uphold the side locking covers to detach the water tank cover.
To serve your drink press valve lever slightly.

Filing the Water Tank
- Remove the top cover of the water tank.
- Fill up the tank with water.
- Mount back the top cover of the water tank
Attention
- Do not use the water dispenser anything except water.
- If you leave water in the tank for a long time it could cause odour. In this case clean the tank and keep using it.
- Clean up the water tank before using it for the first time.
Cleaning the Water Tank
- Lift the water tank.
- Remove the tank cover with upholding the side locking covers
- Clean up the tank with warm water and reassamble the pieces you removed.
Stowing the Water Tank
• Install the water tank as shown.
- Be careful about the tap and the hole match each other while installing.
- Water flow can appear unwillingly if the tank haven't taken its place properly. Also check the gaskets are assembled properly.
Drip Tray
- During the usage of dispenser the water splashes around the glass piles up in the drip tray. In order to clean it remove the tray. After the cleaning you can mount it on.
Filter detail.
There is a filter cover with a filter in it at the back of top cover .Don't use
this related cover.
Please apply to authorized service about exchanging of related detail.
Please apply to authorized service center about opening of related cover and exchanging of filter
natural_image
3D rendering of a rectangular electronic component with a highlighted yellow and pink section (no text or symbols)ATTENTION:
PLEASE HOLD THE GLASS FOR ONE SECOND LONGER AFTER DISTRIBUTION TO AVOID DRIPS.
PART-3. FOOD PLACEMENT
Cooling Compartment
- To set the refrigerator compartment to 2-3 graphic bar will be enough for normal conditions.
- To reduce humidity and consequence increase of frost never place liquids in unsealed containers in the refrigerator.
- Never place warm food in the refrigerator. Warm food should be allowed to cool at room compartment.
- Arrange the meat and cleaned fish (wrapped in packages or sheets of plastic) which you will use in 1-2 days.
- You can put the fruits and vegetables into crisper without packing.
| Food Storing time | Where to place in the fridge department | |
| Vegetables and fruits 1 week | In the Crisper (without being wrapped) | |
| Meat and fish 2 to 3 days | Covered with plastic folio and bags Or in a meat box (on the glass shelf) | |
| Fresh cheese 3 to 4 days In the special door shelf | ||
| Butter and Margarine 1 week In the special door shelf | ||
| Bottled product, Milk and Yoghurt | Until the expiry date recommended by the producer | In the special door shelf |
| Eggs | 1 month In the egg shelf | |
| Cooked food | All shelves | |
NOTE: Potatoes, onions and garlic should not be stored in the refrigerator.
Deep Freeze Compartment
- Please use the deep freeze compartment of your refrigerator for storing the frozen food for a long time and for producing ice.
- If you are going to use the refrigerator with maximum freezing capacity:
Use the “Quick Freeze” mode after moving the frozen food that is in the top basket to the other baskets. After 24 hours elapsed, your refrigerator will exit the “Quick Freeze” mode automatically.
* Place the foods that you want to freeze to the top basket of the freezer department without exceeding the freezing capacity of your refrigerator.
* While you use Quick Freeze Mode, you mustn't storage an exist foozen food near the fresh foods that you want to freeze.
Then enable the “Quick Freeze” mode again. You may place your food next to the other frozen food after they are frozen (for at least 24 hours after the 2 ^nd activation of the “Quick Freeze” mode).
- Please do not place the food you shall newly freeze nearby the already frozen food.
- You should freeze the food to be frozen (meat, minced meat, fish, etc.) by dividing them into portions in such a way that they can be consumed once.
- Please do not refreeze the frozen food once they are thawed. It may pose a danger for your health since it might cause problems such as food poisoning.
- Do not place the hot meals in your deep freeze before they become cold. You would cause the other food frozen beforehand in the deep freeze to become putrefied.
- When you buy frozen food, makes sure that they were frozen under appropriate conditions and the package is not torn.
- While storing the frozen food, the storage conditions on the package should certainly be observed. If there is not any explanation, the food must be consumed within the shortest time possible.
- Frozen foods must be carried without corrupting them and placed on the quick freezing shelf as soon as possible. Do not use door shelves for freezing purpose.
- If there had been humidification in the frozen food package and it has a foul smell, the food might have been stored under unsuitable conditions previously and gone rotten. Do not purchase this type of foods!
- The storage durations of frozen food change depending on the ambient temperature, the frequent opening and closing of the doors, thermostat settings, food type and the time elapsed from the purchase time of the food to the time it is placed into the freezer. Always abide by the instructions on the package and never exceed the indicated storage duration.
- If you keep open freezer door for a long time or forget open, there will be a frost on sub-grade of freezer. Therefore that can cause to prevent of air curcilation. For overcame this situation, first plug out and wait for thawing. After this frost will thaw, you must clean freezer.
• To increase storage volume of freezer, you can remove baskets, cover..etc - The declared volume on label is equal which the appliances is used without baskets,covers....etc.
ICE PACK
* If a power failure or malfunction occurs, that ice pack can be used to slow down the thawing process. The longest storage time is obtained by placing the ice pack directly on the food in the top compartment.
* To save space, the ice pack can be stored in the door compartment.
* The ice pack can also be used to cool food temporarily, for example in a cold bag.
- Some recommendations have been specified on pages 16, 17 and 18 for the placement and storage of your food in the deep freeze compartment.
| Meat and fish Preparing | Storing time (months) | In room temperature Defrost time -hour- | |
| Steak Wrapping in a foil 6-10 1-2 | |||
| Lamb meat Wrapping in a foil 6-8 1-2 | |||
| Veal roast Wrapping in a foil 6-10 1-2 | |||
| Veal cubes In small pieces 6-10 1-2 | |||
| Lamb cubes In pieces 4-8 2-3 | |||
| Minced meat | In packages without using spices | 1-3 | 2-3 |
| Giblets (pieces) | In pieces | 1-3 | 1-2 |
| Bologna sausage/salami | Should be packaged even if it has membrane | Until it is defrosted | |
| Chicken and turkey | Wrapping in a foil | 7-8 | 10-12 |
| Goose and Duck | Wrapping in a foil | 4-8 | 10 |
| Deer, Rabbit, Wild Boar | In 2.5 kg portions and as fillets | 9-12 | 10-12 |
| Freshwater fishes (Salmon, Carp, Crane, Siluroidea) | After cleaning the bowels and scales of the fish, wash and dry it; and if necessary, cut the tail and head. | 2 | Until it is thawed completely |
| Lean fish; bass, turbot, flounder | 4-8 | Until it is thawed completely | |
| Fatty fishes (Tunny, Mackarel, bluefish, anchovy) | 2-4 | Until it is thawed completely | |
| Shellfish | Cleaned and in bags | 4-6 | Until it is thawed completely |
| Caviar | In its package, aluminum or plastic container | 2-3 | Until it is thawed completely |
| Snail | In salty water, aluminum or plastic container | 3 | Until it is thawed completely |
Note: Frozen foods, when thawed, should be cooked just like fresh foods. If they are not cooked after being thawed they must NEVER be re-frozen.
| Vegetables and Fruits | Preparing | Storing time (months) | In room temperature Defrost time -hour- | ||
| Cauliflower | Take the leaves apart, cut the heart into pieces, and leave it in water with a little lemon juice for a w h | 10 - 12 It can be used as frozen | |||
| String beans and beans | Wash and cut to small pieces | 10 - 13 It can be used as frozen | |||
| Beans | Hull and wash | 12 | It can be used as frozen | ||
| Mushroom and asparagus | Wash and cut to small pieces | 6 - 9 It can be used as frozen | |||
| Cabbage Cleaned 6 | -8 2 | ||||
| Eggplant | Cut to pieces of 2cm after washing | 10 - 12 Separate them from one another | |||
| Corn | Clean and pack with its stem or as sweetcorn | 12 It can be used as frozen | |||
| Carrot | Clean and cut to slices | 12 | It can be used as frozen | ||
| Pepper | Cut the stem, cut into two pieces and remove the core | 8 - 10 | It can be used as frozen | ||
| Spinach | Washed 6 - 9 2 | ||||
| Apple and pear | Peel and slice | 8 - 10 | (In Fridge) 5 | ||
| Apricot and Peach | Cut into two pieces and remove the stone | 4 - 6 | (In Fridge) 4 | ||
| Strawberry and Blackberry | Wash and hull | 8 - 12 | 2 | ||
| Cooked fruits | Adding 10 % of sugar in the container | 12 | 4 | ||
| Plum, cherry, sourberry | Wash and hull the stems | 8 - 12 | 5 - 7 | ||
| Dairy Products Pastry | Preparing | Storing time (months) | Storing Conditions | ||
| Packet (Homogenize) Milk | In its own packet 2 - 3 | Pure Milk – In its own packet | |||
| Cheese-excluding white cheese | In slices 6 - 8 | It can be left in its original package for storing for a short time. For long term storage It should be stored in a plastic | |||
| Butter, margarine | In its package 6 | ||||
| * Eggs | Albumen | 10 - 12 | 30 gr of it is equal to a yolk. | In closed container | |
| Egg mixture (Albumen – yolk) | Some salt or sugar is added for preventing it from becoming dense. | 10 | 50 gr of it is equal to a yolk. | ||
| Yolk | Some salt or sugar is added for preventing it from becoming dense. | 8 - 10 | 20 gr of it is equal to a yolk. | ||
* It should not be frozen with its shells. The white and yolk of the egg should be frozen separately or as having been well mixed.
| Storing time (months) | Thawing time in room temperature (hours) | Thawing time in owen (min.) | |
| Bread | 4 - 6 | 2 - 3 | 4-5 (220-225 °C) |
| Biscuits | 3 - 6 | 1 - 1,5 | 5-8 (190-200 °C) |
| Pastry | 1 - 3 | 2 - 3 | 5-10 (200-225 °C) |
| Pie | 1 - 1,5 | 3 - 4 | 5-8 (190-200 °C) |
| Phyllo dough | 2 - 3 | 1 - 1,5 | 5-8 (190-200 °C) |
| Pizza | 2 - 3 | 2 - 4 | 15-20 (200 °C) |
The taste of some spices found in cooked dishes (anise, basilica, watercress, vinegar, assorted spices, ginger, garlic, onion, mustard, thyme, marjoram, black pepper, etc.) changes and they assume a strong taste when they are stored for a long period. Therefore, the frozen food should be added little amount of spices or the desired spice should be added after the food has been thawed.
The storage period of food is dependent on the oil used. The suitable oils are margarine, calf fat, olive oil and butter and the unsuitable oils are peanut oil and pig fat.
The food in liquid form should be frozen in plastic cups and the other food should be frozen in plastic folios or bags.
PART-4. CLEANING AND MAINTENANCE
- Make sure you have disconnected the plug from the socket before starting the cleaning.
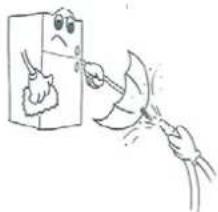
- Please do not clean the refrigerator by pouring water in it.
- You may wipe the inner and outer parts of your device by using warm and soapy water with a soft cloth or sponge.
- Please remove the parts one by one and clean them with soapy water. Do not wash them in a dishwasher.
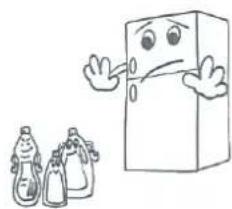
- Never ever use flammable, combustible or melting materials such as thinner, gasoline or acid for cleaning purposes.
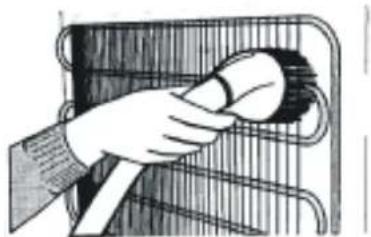
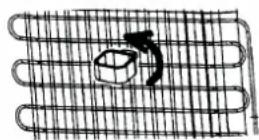
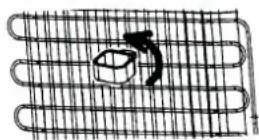
- You should clean the condenser (back of the appliance) with broom ones a year in order to provide energy saving and increase the productivity.
natural_image
Simple line drawing of a hand holding a device with a cartoon face, no text or symbols present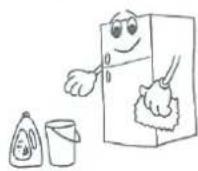
natural_image
Cartoon illustration of a distressed refrigerator with two smaller bottles beside it (no text or symbols)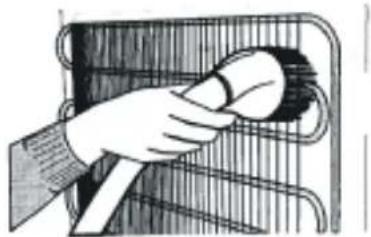
natural_image
Illustration of a hand holding a small object inside a rack (no text or symbols visible)Make sure that the appliance is unplugged.
Defrosting
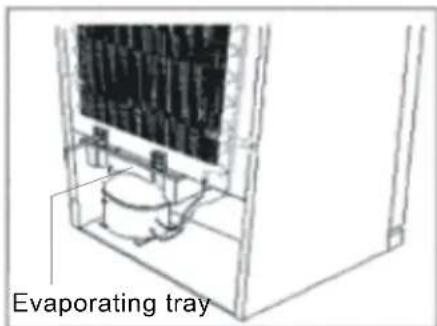
- Your refrigerator makes fully automatic defrosting. The water formed as a result of defrosting passes through the water collection spout, flows into the vaporization container behind your refrigerator and evaporates by itself in there.
text_image
Evaporating trayReplacing The Light Bulb
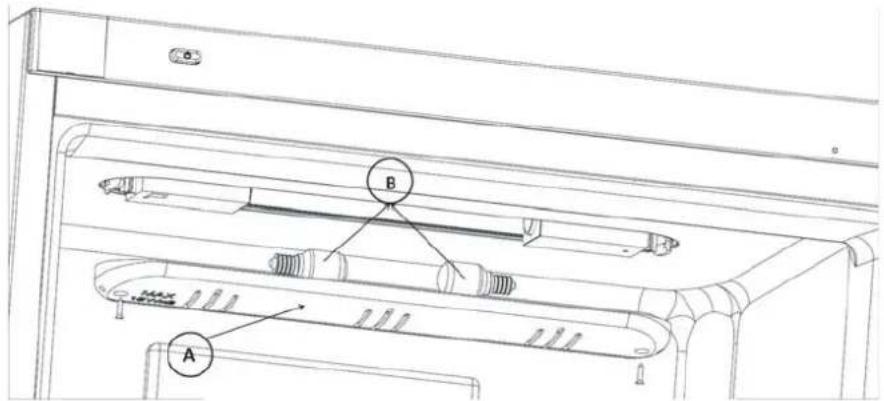
Replacing the Refrigerator Light Bulb (If the illumination is occurred via lamp)
- Unplug the unit from the power supply,
- Remove the screws on each side of the refrigerator lamp cover(A).
- Change the light bulb (B) with a new one (not more than 15 Watt)
- Place the light cover in its place and plug the unit.
text_image
Technical diagram of a device with labeled components A and B, showing internal structure and mounting points.Replacing The Light Led
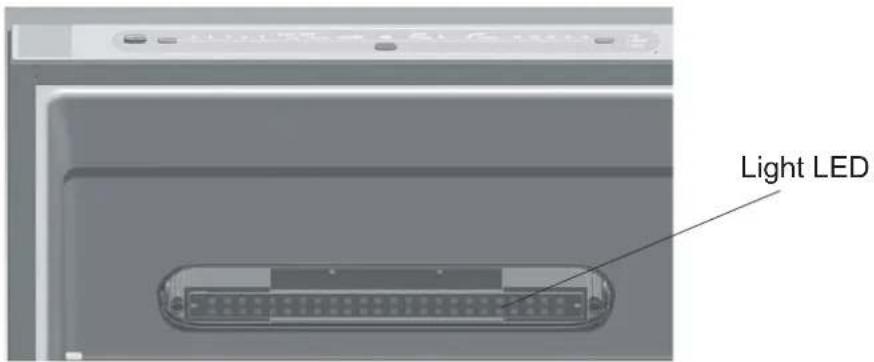
(If the illumination is occurred via LED strip)
Please call the service man.
text_image
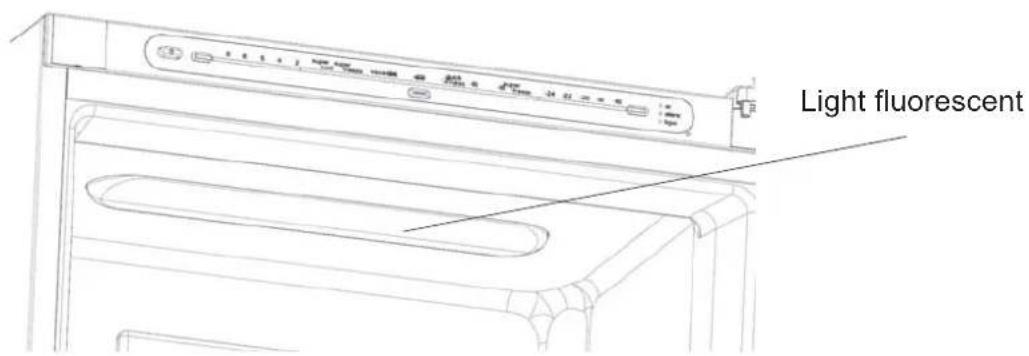
Light LEDReplacing The Refrigerator Light Fluorescent Lamp (If the illumination is occurred via Fluorescent Lamp)
Please call the service man.
text_image
Light fluorescentPART-5. SHIPMENT AND REPOSITIONING
- Original package and foam may be kept for re-transportation (optionally).
- You should fasten your fridge with thick package, bands or strong cords and follow the instructions for transportation on the package for re-transportation.
- Remove movable parts (shelves, accessories, vegetable bins etc.) or fix them into the fridge against shocks using bands during re-positioning and transportation.
- Carry your fridge in the upright positio.

natural_image
Simple line drawing of two children holding blank rectangular signs (no text or symbols)Repositioning the Door (For some models)
You can reposition the doors of your fridge. Contact nearest authorized service for this.
PART-6. BEFORE CALLING THE SERVICE
Check Warnings;
Your fridge warns you if the temperatures for cooler and freezer are in improper levels or when a problem occurs in the appliance. Warning codes are displayed in the Freezer and Cooler Indicators.
| Error Code | MEANING | CAUSE | ACTIONS TO BE TAKEN |
| SR | Fault warnings | It appears when one or several parts of the fridge fail or a problem occurs on the cooling system. | Contact the nearest authorized technical service as soon as possible. |
| LV | Low voltage | Fridge switches to stand-by condition when the voltage supply is lower than 170 Volts. | This feature prevents damage to the compressor due to low voltage. Fridge will start operating automatically when the supply voltage reaches the desired level. |
If your refrigerator does not operate;
• Is there a power failure?
- Is the plug connected to the socket correctly?
- Is the fuse of the socket to which the plug is connected or the main fuse blown?
- Is there any failure at the socket? To check this, plug your refrigerator to a socket this is surely operating.
Control warnings;
If the temperatures of the cooling and freezer compartments are not in the suitable levels or there is a problem in the appliance, your refrigerator will warn you. Warning codes appear in the Freezer and Cooling Compartment Setting Displays.
If your refrigerator is operating noisily; Normal Noises
Crackling (Ice Cracking) Noise:
- It is heard during the automatic defrosting process.
- Once the device has been cooled or heated (expansions in the device material).
Short Cracking Noise
- It is heard when the thermostat turns on and off the compressor.
Compressor Noise
- It is the normal engine noise. This noise indicates that the compressor is operating normally. As the compressor is being introduced, it might operate a little bit more noisily for a short period of time.
Bubbling and burbling sound:
- This noise is emitted as the coolant fluid flows through the pipes within the system.
Water flowing sound:
- This is the normal sound of water flowing into the evaporation container during the defrosting process. This sound may be heard during the defrosting process performed in the device.
Water blowing sound:
- It is the normal fan sound. This sound may be heard due to air circulation in No Frost refrigerators as the system is operating normally.
If the edges of the refrigerator cabin contacted by the door seal are hot;
- Especially in summer months (in hot weathers), there might be heating on the surfaces contacted by the seal on the refrigerator when the compressor is operating and this is quite normal.
If there is humidification in the inner parts of your refrigerator;
- Has the food been properly packaged? Have the cups been well dried before they were put into the refrigerator?
- Are the doors of the refrigerator opened very frequently? When the door is opened, the humidity found in the air in the room enters the refrigerator. Especially if the humidity rate in the room is too high, the more frequently the door is opened the faster will be the humidification.
- It is normal to have water drops formed on the back wall following the automatic defrosting process. (In Static Models)
If the doors are not being properly opened and closed:
- Are the food packages preventing the doors from being closed?
- Have the door compartments, shelves and drawers been properly placed?
- Have the door seals been defective or torn?
• Is your refrigerator standing on an even ground?
About the water dispenser;
If the water flow is abnormal;
Check that;
- The tank is well installed.
- The tank gaskets are well assembled.
If dripping occurs;
Check that;
• The tap is well assembled.
- The tap gaskets are well assembled.
IMPORTANT NOTES:
- Compressor protection function will be activated after sudden power breakdowns or after unplugging the appliance, because the gas in the cooling system is not stabilized yet. Your fridge will start after 5 minutes, there is nothing to worry about.
- If you will not use your fridge for a long time (e.g. in summer holidays) unplug it. Clean your fridge according to Part 4 and leave the door open to prevent humidity and smell
- If the problem persists after you have followed all the instructions above, please consult to the nearest authorized service.
- The appliance you bought is designed for home type use and can be used only at home and for the stated purposes. It is not suitable for commercial or common use. If the consumer use the appliance in a way that does not comply with these features, we emphasize that the producer and the dealer shall not be responsible for any repair and failure within the guarantee period.
- The lifetime of your appliance stated and declared by the Department of the Industry is 10 years (the period for retaining parts required for the proper functioning of the appliance).
Tips For Saving Energy
1- Install the appliance in a cold, well ventilated room, but not in direct sunlight and not near heat source (radiator, cooker.. etc). Otherwise use an insulating plate.
2- Allow ward food and drinks to cool down outside the appliance.
3- When thawing frozen food, place it in the refrigerator compartment. The low temperature of the frozen food will help to cool the refrigerator compartment when it is thawing. So it causes energy saving. If the frozen food is put out, it causes wastage of energy.
4- When placing, drinks and slops they must be covered. Otherwise humidity increases at the appliance. Therefore the working time gets longer. Also covering drinks and slops helps to save smell and taste.
5- When placing food and drinks, open the appliance door as briefly as possible.
6- Keep close the covers of any different temrepature compartment in the appliance (crisper, chiller ...etc).
7- Door gasket must be clean and pliable. Replace gaskets if worn.
THE PARTS OF THE APPLIANCE AND THE COMPARTMENTS
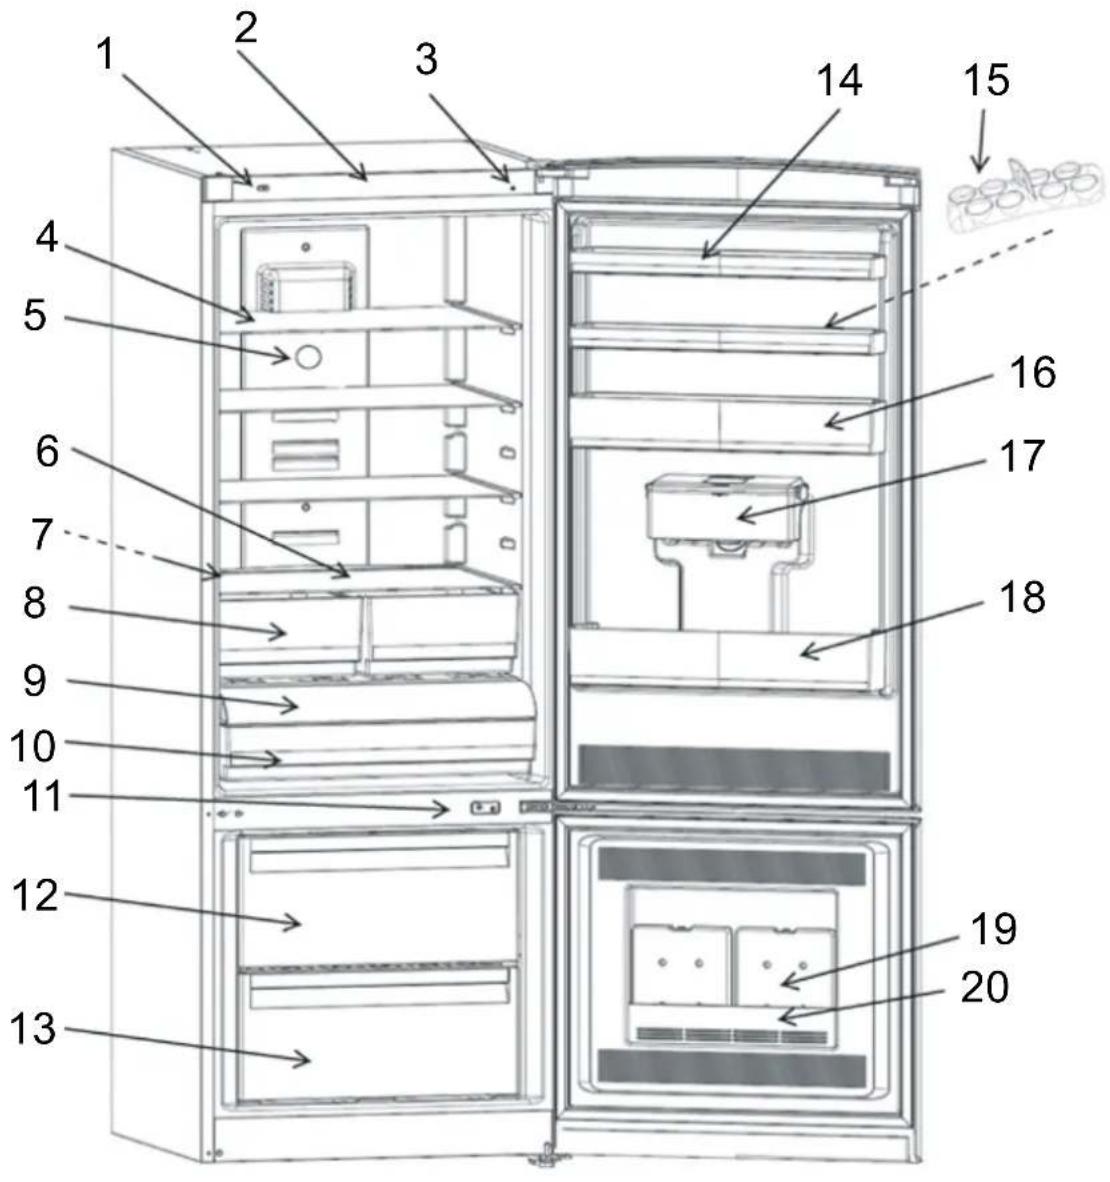
text_image
1 2 3 4 5 6 7 8 9 10 11 12 13 14 15 esides 16 17 18 19 20This figure has been drawn for information purposes about parts and accessories of the appliance. Parts may vary according to the model of the appliance.
1) On/Off Button
2) Panel Board
3) Light Sensor
4) Cooler Glass Shelf
5) Thermostat knob
6) Crisper Cover
7) Odour Filter
8) Crisper
9) Roller Storage Box Cover
10) Roller Storage Box
11) Lamb Switch
15) Egg Holder
16) Middle Shelf
17) Water Tank (If available)
12) Freezer Upper Basket B) Bottle Shelf
13) Freezer Bottom Basket9) Cooling Battery
14) Upper Shelf
20) Battery Cover
Parts of the water dispenser (If available)
(A) FRONT TANK GROUP
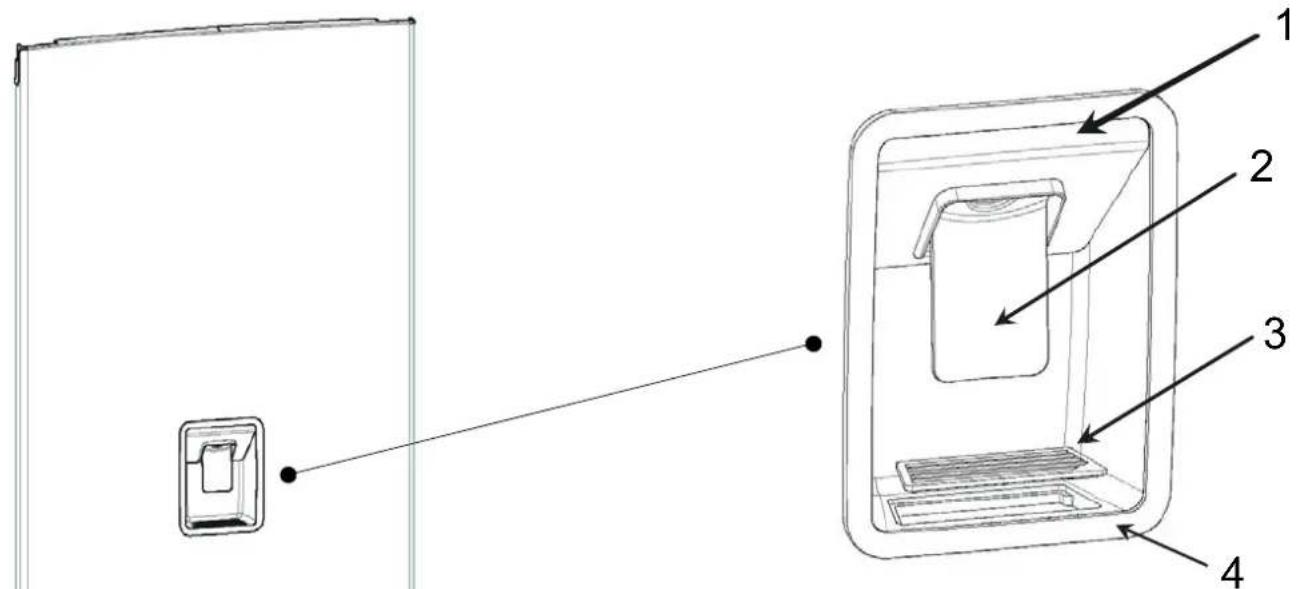
text_image
Technical diagram showing a device with labeled components: front panel, internal storage unit, and side view.1) Top cover of the water dispenser
2) Valve lever
3) Drip tray
4) Water dispenser casing
(B) WATER TANK GROUP
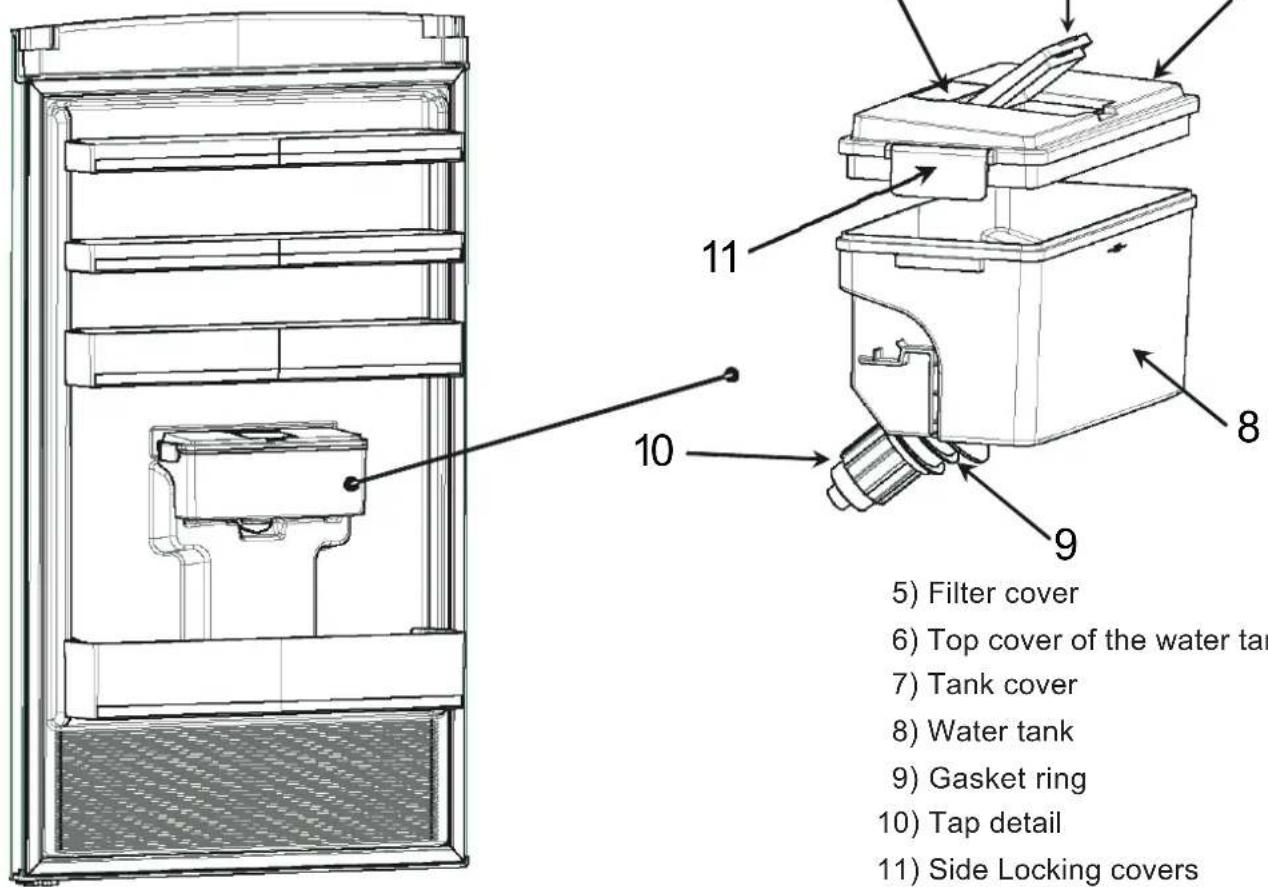
text_image
5) Filter cover 6) Top cover of the water tan 7) Tank cover 8) Water tank 9) Gasket ring 10) Tap detail 11) Side Locking coversPART - 8. ELECTRICAL CONNECTION (UK ONLY)
For your safety please read the following information
Warning: This appliance must be earthed.
This appliance operates from 220-240 volts and should be protected by a 13 amp fuse in the plug.
The appliance is supplied with a standard 13 amp 3-pin mains plug fitted with a 13-amp fuse. Should the fuse require replacement, it must be replaced with a fuse rated at 13 amp and approved to BS1362.
If the mains plug which is fitted is unsuitable for the socket outlet in your home or is removed for any other reason, please follow the instructions below on how to wire a 13 amp 3 pin plug..
How to wire a 13 amp plug.
Important
The wires in the mains lead on this appliance are coloured in accordance with the following code:
Green and Yellow - Earth
Blue - Neutral
Brown – Live

text_image
GREEN/YELLOW Earth BROWN Live BLUE Neutral FUSE 13 Amps Cord ClampAs the colours may not correspond with the markings identifying the terminals in your plug proceed as follows.
The green and yellow wire must be connected to the terminal in the plug which is marked with the letter E or with the earth symbol 1= or coloured green and yellow.
The blue wire must be connected to the terminal marked N.
The brown wire must be connected to the terminal marked L.
You must make sure the lead is firmly secured under the cord clamp.
Inhalt
natural_image
Technical line drawing of a mechanical or electrical enclosure with internal components and no visible text or symbolsnatural_image
Illustration of three hands performing a cable or wire manipulation technique (no text or symbols present)natural_image
Illustration of three cartoon figures: a door with arms, a close-up photo of a smiling face, and a bottle pouring liquid (no text or symbols)
natural_image
Cartoon illustration of a distressed container with arms and legs, showing a sad face (no text or symbols)
natural_image
Cartoon illustration of a smiling refrigerator with thumbs up and a bowl of food (no text or symbols)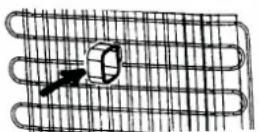
natural_image
Line drawing of a hand pressing a button on a rectangular panel (no text or symbols)natural_image
3D illustration of a refrigerator interior showing blue insulation material inside the door (no text or symbols)Gefrierfach
natural_image
3D rendering of a refrigerator interior showing blue and black compartments with a magnified inset (no text or symbols visible)Geruchsfilter
natural_image
Close-up of a modern refrigerator with blue doors and silver casing (no visible text or symbols)Bild. 1
natural_image
3D rendered image of a blue plastic shelf or rack unit with no visible text or symbolsBild. 2
natural_image
Interior view of a refrigerator with blue shelves and open door (no visible text or symbols)Bild. 3
natural_image
3D rendered mechanical component with blue housing and a red directional arrow indicating motion (no text or symbols)natural_image
3D rendering of a rectangular electronic component with a highlighted yellow and pink section (no text or symbols)ACHTUNG:
natural_image
Illustration of a family cleaning refrigerator with different hand gestures and food items (no text or symbols)