OFZ10011A1 - Fridge OK - Free user manual and instructions
Find the device manual for free OFZ10011A1 OK in PDF.

| Brand | OK |
| Model | OFZ10011A1 |
| Product Type | Upright Freezer |
| Energy Efficiency Class | A+ |
| Annual Energy Consumption | 149 kWh/year |
| Total Storage Volume | 32 L |
| Freezing Capacity | 2 kg/24h |
| Star Rating | 4 stars (****) |
| Temperature Rise Time | 10 hours |
| Climate Class | ST (16°C to 38°C) |
| Noise Emission | 42 dB(A) re 1 pW |
| Dimensions (W x D x H) | 474 x 496 x 921 mm |
| Net Weight | 16 kg |
| Electrical Connection | 220-240 V ~ 50 Hz |
| Rated Power | 0.55 A |
| Defrost Type | Manual |
| Refrigerant | Isobutane (R600a) |
| Temperature Control | Thermostat knob (positions 1-7, Off) |
| Door Reversible | Yes |
| Adjustable Feet | Yes (front) |
| Construction | Freestanding |
| Warranty | 2 years |
Frequently Asked Questions - OFZ10011A1 OK
User questions about OFZ10011A1 OK
0 question about this device. Answer the ones you know or ask your own.
Ask a new question about this device
Download the instructions for your Fridge in PDF format for free! Find your manual OFZ10011A1 - OK and take your electronic device back in hand. On this page are published all the documents necessary for the use of your device. OFZ10011A1 by OK.
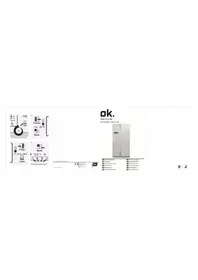
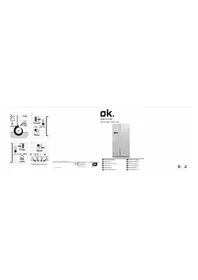
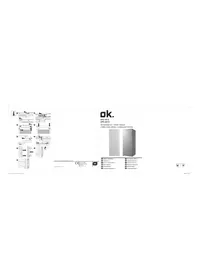
USER MANUAL OFZ10011A1 OK
DE
4.2 Nivellieren
natural_image
Illustration showing a cartoon notebook character with motion lines and an inset diagram of a hand pulling a rope (no text or symbols)5 Geräteausstattung
6 Betrieb
DE
natural_image
Technical diagram of a rectangular enclosure with internal structure and labeled components (no text or symbols)Please read thoroughly this instruction manual.
Please read this user manual thoroughly before first time operation. It contains important safety instructions and information with regard to installation, operation and maintenance of the appliance. A correct handling contributes to the efficient use of and minimizes energy consumption while operating.
Improper use may cause hazardous situations, especially for children.
Keep this manual for future reference. Pass it on to any future owner of this product. In case of any doubt regarding questions or topics which are not extensively described in this manual, please contact your distributor, an authorized technician or our customer service. For a new manual contact the customer service Germany +49 (2944) 9716 791 or look at our homepage www.OK-ggv.de
The manufacturer is constantly working on the development of all types and models. All types and models are subject to change in design, features and equipment without prior notice.
Table of content
1 Disposal 4
2 Safety instructions....5
2.1 Safety instructions....5
2.2 General safety instructions....5
2.3 Special safety instructions....6
2.4 Refrigerant....6
3 Intended use 7
4 Prior to initial operation....7
4.1 Installation....8
4.2 Levelling 9
5 Description of the appliance ....10
6 Operating instructions ....11
6.1 Switching on the appliance ....11
6.2 Setting temperature 11
7 Storing food....12
7.1 In Use 13
8 Defrosting....13
9 Switching off the appliance....14
10 Cleaning and care....15
11 Energy savings tips....17
12 Reversing the door....17
13 Operating noise....18
14 Trouble shooting 19
15 Technical specification....19
16 CE-Conformity....20
17 EU Productfiche 21
1 Disposal
Disposal of used appliances
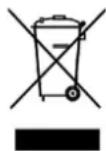
This product is marked in accordance with the European Waste Directive 2012 / 19 / EU
It regulates the proper disposal of the product. Environmentally sound disposal will prevent possible negative consequences to health caused by improper disposal.
This symbol on the product or its packaging indicates that this product must not be disposed of with the regular household waste. The user has to return the product to a collection point for the recycling of electric and electronic equipment.
The disposal must comply with the local regulations in place.
For further information please contact your local authorities or waste collection service.
Disable waste equipment prior to disposal:
- Disconnect the mains plug from the wall socket.
- Disconnect the plug from the power supply cord.
- Remove or disable any existing spring, snap or latch locks.
- Remove the seal from the door
This will prevent children from locking themselves in (danger of SUFFOCATION!) or from getting into other perilous situations. Children might not understand the risks that arise from handling household appliances.
Therefore, observe children and make sure they do not play with the device.
2 Safety instructions
2.1 Safety instructions
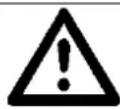
All safety instructions in this manual are marked with a warning symbol. They indicate potential hazards at an early stage. It is imperative to read and follow this information.
Explanation of safety instructions

WARNING
Indicates a / Refers to a dangerous situation, which can result in death or serious injury!
CAUTION
Refers to a dangerous situation, which may result in minor or moderate injury.
IMPORTANT
Describes a situation which may cause substantial damage to property or to the environment.
2.2 General safety instructions
- Avoid injury and damage by transporting the appliance packed only.
- Mount and connect the appliance according to the instructions of this manual only.
- The plug must be accessible after installation.
- In case of emergency, unplug the device immediately.

WARNING
Do not touch the plug and the power supply cord with wet or moist hands when connecting or disconnecting.
Danger to life of ELECTROCUTION!
- Hold the plug when disconnecting the power supply cord. Do not pull the power supply cord.
-
Disconnect the plug before any cleaning or maintenance operation.
-
A damaged power supply cord must be replaced immediately by the supplier, dealer or customer service. If the power supply cord or plug is damaged, you may no longer use the appliance.
- Except for cleaning and maintenance operations specified in this instruction manual no other modification may be executed.
2.3 Special safety instructions
Safety rules of children and persons with limited abilities

WARNING
Packaging materials (such as plastic bag and film, polystyrene) is dangerous for children. Danger of SUFFOCATION!
Keep the packaging material off children.

WARNING
This appliance can be used by children aged from 8 years and above and persons with reduced physical, sensory or mental capabilities, or lack of experience and knowledge, if they have been given supervision or instruction concerning use of the appliance in a safe way and understand the hazards involved.
Never allow children to play with the appliance
Cleaning and user maintenance shall not be made by children without supervision.
A person responsible for safety must supervise or instruct children and vulnerable people who are using the appliance.
2.4 Refrigerant

CAUTION
Do not damage the refrigerant circuit.
The refrigerant circuit of this appliance contains the refrigerant Isobutane (R600a), a natural gas that is inflammable and of high environmental compatibility. During transport and installation of the appliance, make sure no parts of the refrigerant circuit get damaged.
Procedure for damaged refrigerant circuit:
- Imperatively avoid open flames and sources of ignition
- Ventilate well the room in which the appliance stands.
3 Intended use
This appliance is intended to be used in household. It is suitable for cooling food and beverages only.
The manufacturer is not reliable for any damage resulting from commercial or any other use then cooling food/beverages.
For safety reasons alterations and modifications are not allowed for this appliance.
This appliance is not designed for built-in nor built-under!
| WARNINGDo not use electrical appliances inside the food storage compartments of the appliance, unless they are of the type recommended by the manufacturer. |
| CAUTIONPlastic parts in contact for longer periods or frequently with oil/acids (animal or plant), age faster and may tear or break. |
| CAUTIONThe appliance is not suitable for the storage and cooling of medicine, blood plasma, laboratory preparations, or similar products according to Medical Device Directive 2007/47/EC. |
4 Prior to initial operation
The packaging must be intact. Check the appliance for any transport damage. Do not install a damaged appliance. In case of damage, please contact your supplier.
Remove transport protection
The appliance and parts of the interior are protected for transportation. Remove all adhesive tapes from the right and left side of the door and the expanded polystyrene parts from the rear (grid / depending on the model). You may remove any adhesive residue with a cleaning solvent. Also remove any adhesive tapes and packing material from inside of the appliance.

WARNING
Do not cut adhesive strips with a sharp object, e.g. a carpet knife, the door gasket may be damaged.
After transportation allow the appliance to stand for 12 hours so that the cooling agent can be collected in the compressor. Non-observance could damage the compressor and hence result in failure of the device. This would void your warranty claim.
Packaging material
Ensure the environmentally sound disposal of packaging materials, see chapter 1.
4.1 Installation
Location
The ambient temperature affects the power consumption and the proper functioning of the appliance. Therefore, install the appliance in a well-ventilated, dry room should. Its ambient temperature should correspond with the climate class, for which the device is designed for.
Do not install the appliance outdoors (e.g. balcony, terrace, garden house, etc.).
Regarding location of the appliance see also chapter 12 'tips for saving energy'.
For information on the climate class, please refer to the ‘product data sheet’ or the rating plate, which is located on the rear or inside the appliance behind the vegetable drawer. After installation the plug must be accessible.
Climate class and ambient temperature are as follows:
SN 10 to 32°C
N 16 to 32°C
ST 16 to 38°C
T 16 to 43°C
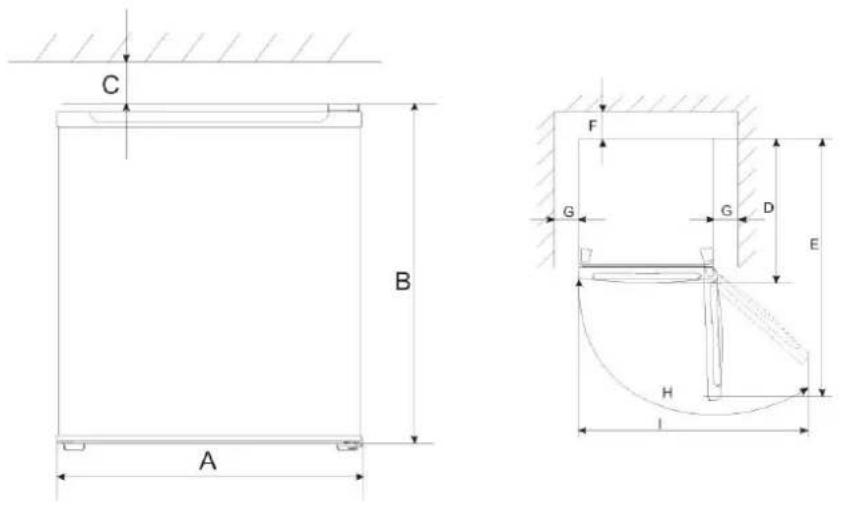
The airflow on the rear and top affects energy consumption and cooling/freezing capacity (depending on the model). Therefore the ventilation cross-section minimum for the ventilation of the appliance must be observed. Please refer to the below listed tables and drawings.
EN
Dimensions in mm and degree
| A | B | C | D | E | F | G | H | I* |
| 474 | 496 | 100 | 447 | 921 | 100 | 100 | 160° | 948 |
| with handle | / | |||||||
Fig. 1 Fig. 2
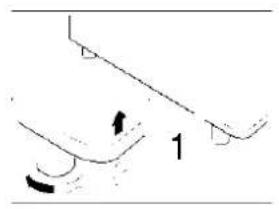
4.2 Levelling
A slightly uneven surface can be levelled by turning height-adjustable front feet.
Turn the feet until the appliance stands steady and horizontally on the floor, without shaking.
natural_image
Simple line drawing of a curved surface with two protrusions and a numbered label '1' (no text or symbols beyond the number)
EN
5 Description of the appliance
Designation
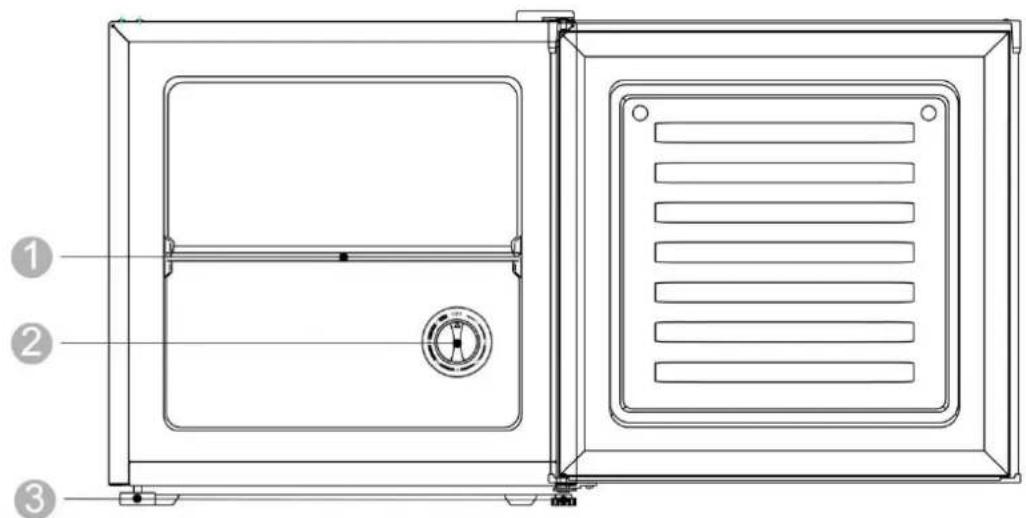
| No | Description |
| 1 | Shelf |
| 2 | Thermostat Knob |
| 3 | Adjustable Foot |
6 Operating instructions
Clean appliance prior to initial operation
The appliance and the parts of the interior have to be cleaned thoroughly before first use. See also chapter, Cleaning and care'.
6.1 Switching on the appliance
DO NOT SWITCH ON UNTIL FOUR HOURS AFTER MOVING THE FRIDGE.
Operating tips
■ After the appliance has been switched on, it may take several hours until the set temperature has been reached. Do not put any food in the appliance beforehand.
■ The sides of the housing are sometimes heated slightly. This prevents condensation in the area of the door seal.
■ If the freezer compartment door cannot be immediately re-opened after it has been closed, wait until the resulting low pressure has equalised.
■ The coolant fluid needs time to settle. If the appliance is switched off at any time, wait 30 minutes before switching back on to allow the coolant fluid to settle.
6.2 Setting temperature
Testing
- Clean the freezer with lukewarm water and detergent, and wipe dry. Note: Electrical components should be cleaned with a dry cloth.
- Remark: turn the thermostat knob to the "4" position, and plug the freezer into the wall outlet. The compressor will begin to run.
- Check, after 30 minutes of operation, to ensure that the freezer is cold.
Temperature Control
- The temperature control (thermostat knob, turned by coin) is located near the top of the unit.
- Turning the thermostat knob adjusts the temperature of the freezer.
- The marks on the knob represent different settings. Setting "1" is the warmest and setting "7" is the coolest, setting "off" is off.
- The factory recommended setting is "4" for normal operating conditions.

7 Storing food
Use the freezer compartment
To store deep-frozen food.
To make ice cubes.
To freeze food. Note Ensure that the freezer compartment door has been closed properly. If the door is open, the frozen food will thaw. The freezer compartment will become covered in thick ice. Also: waste of energy due to high power consumption!
Purchasing frozen food
■ Packaging must not be damaged.
■ Use by the "use by" date.
■ Temperature in the supermarket freezer must be -18 °C or lower.
■ If possible, transport deep-frozen food in a cool bag and place quickly in the freezer compartment
Freezing fresh food
Freeze fresh and undamaged food only. To retain the best possible nutritional value, flavour and colour, vegetables should be blanched before freezing.
Aubergines, peppers, zucchini and asparagus do not require blanching.
Literature on freezing and blanching can be found in bookshops.
Note
Keep food which is to be frozen away from food which is already frozen.
■ The following foods are suitable for freezing:
Cakes and pastries, fish and seafood, meat, game, poultry, vegetables, fruit, herbs, eggs without shells, dairy products such as cheese, butter and quark, ready meals and leftovers such as soups, stews, cooked meat and fish, potato dishes, soufflés and desserts.
■ The following foods are not suitable for freezing: Types of vegetables, which are usually consumed raw, such as lettuce or radishes, eggs in shells, grapes, whole apples, pears and peaches, hard-boiled eggs, yoghurt, soured milk, sour cream, crème fraîche and mayonnaise.
Packing frozen food
To prevent food from losing its flavour or drying out, place in airtight containers.
- Place food in packaging.
- Remove air.
- Seal the wrapping.
- Label packaging with contents and date of freezing.
Suitable packaging:
Plastic film, tubular film made of polyethylene, aluminium foil, freezer containers.
These products are available from specialist outlets.
Unsuitable packaging:
Wrapping paper, greaseproof paper, cellophane, bin liners and used shopping bags.
Items suitable for sealing packaged food:
Rubber bands, plastic clips, string, cold resistant adhesive tape, etc.
Bags and tubular film made of polyethylene can be sealed with a film heat sealer.
7.1 In Use
- Food should be wrapped in aluminium foil, or some other type of airtight packing.
- Do not allow frozen food in freezer to touch foods just placed into freezer. It can damage the food.
- Frozen foods from the store should be placed in the freezer promptly, so they do not thaw.
- Never place fresh vegetables and fruits into the freezer as they can get freezer burn
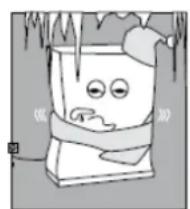
8 Defrosting
natural_image
Cartoon illustration of a sad, anthropomorphic object with icicles above (no text or symbols)- When the freezer operates for a long period of time, the surface of the evaporator and the drawers may become covered with a layer of white frost.
- This frost will reduce the energy efficiency of the unit, and make the freezer less effective. When this frost forms, it should be promptly removed.
EN
- When defrosting, unplug the freezer, and remove all terms from the freezer.
- Either allow the frost to melt naturally from the warm air in the room, or carefully use a plastic scraper. Finally, wipe away any remaining ice and water, plug the freezer in, and return the food to the freezer.
Caution
Do not scrape off hoarfrost or ice with a knife or pointed object. You could damage the refrigerant tubes. Leaking refrigerant may ignite or cause eye injuries.
Proceed as follows:
Note
Switch on the Super function approx.4 hours before defrosting. As a result, the food will drop to a very low temperature and can therefore be stored for longer at room temperature.
- Remove the frozen food and place temporarily in a cool location. Place ice pack (if available) on the frozen food.
- Switch off the appliance.
- Pull out the mains plug or remove the fuse.
- To accelerate the defrosting process, place a pan of hot water on a trivet in the freezer compartment.
- Wait until the layer of frost has thawed.
- Wipe up condensation with a cloth or sponge.
- Wipe dry the freezer compartment.
- Switch the appliance on again.
- Put the frozen food back in the freezer compartment.
9 Switching off the appliance
If you are going away on holiday or for any other reason, wish to leave the freezer idle for any period of time, proceed as follows:
- Disconnect the freezer from the electric power supply by removing the plug from the wall socket.
- Remove all food.
- Clean and dry the inside as instructed in the direction given above for cleaning.
- Leave the doors open to prevent any unpleasant smells from building up while the freezer is not used.
10 Cleaning and care
- Do not use abrasive, chloride or acidic cleaning agents or solvents.
- Do not use scouring or abrasive sponges. The metallic surfaces could corrode.
- Never clean the shelves or containers in the dishwasher. The parts may become deformed!

WARNING
When cleaning the refrigerator the electric plug must be removed from the power supply.
- Before cleaning: Switch off the appliance.
- Pull out the mains plug or switch off the fuse!
Proceed as follows:
- Take out the food and store in a cool location. Place ice pack (if available) on the food.
- Wait until the layer of frost has thawed.
- Wipe the door seal with clear water only and then wipe dry thoroughly.
- After cleaning reconnect and switch the appliance back on.
- Put the food back into the appliance.
Interior fittings
All variable parts of the appliance can be taken out for cleaning.
• Take out glass shelves
- To do this, pull out shelf, lift at the front and take out.
• Taking out the extendable glass shelf
- Hold down levers on the underside on both sides, pull glass shelf forwards, lift and swivel out to the side.
- Condensation channel
- Regularly clean the condensation channel and drainage hole with a cotton bud or similar implement to ensure that the condensation can drain.
• Take out shelves in the door
- Clean the appliance with a soft cloth, lukewarm water and a little pH neutral washing-up liquid. The rinsing water must not run into the light or through the drainage hole into the evaporation area.
IMPORTANT
Never clean the shelves or containers in the dishwasher. The parts may become deformed!
11 Energy savings tips
Install the appliance in a dry, well ventilated room! The appliance should not be installed in direct sunlight or near a heat source (e.g. radiator, cooker). If required, use an insulating plate.
- Allow warm food and drinks to cool down before placing in the appliance.
- Thaw frozen food in the refrigerator compartment and use the low temperature of the frozen food to cool refrigerated food.
- Open the appliance as briefly as possible.
- Regularly defrost the freezer compartment to remove the layer of frost!
- A layer of hoarfrost will impair refrigeration of the frozen food and increase power consumption.
- Ensure that the freezer compartment door has been closed properly.
- To avoid increased power consumption, occasionally clean the back of the appliance.
- The arrangement of the fittings does not affect the energy rating of the appliance.
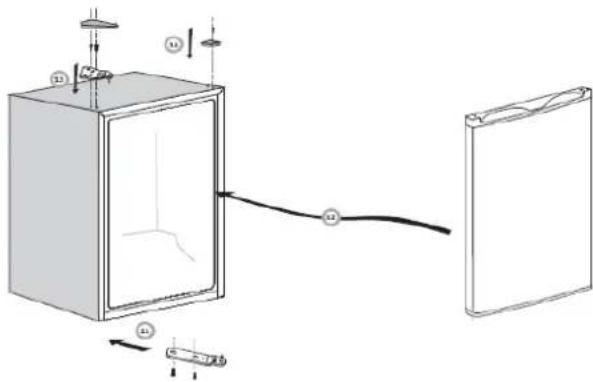
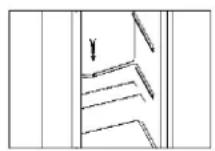
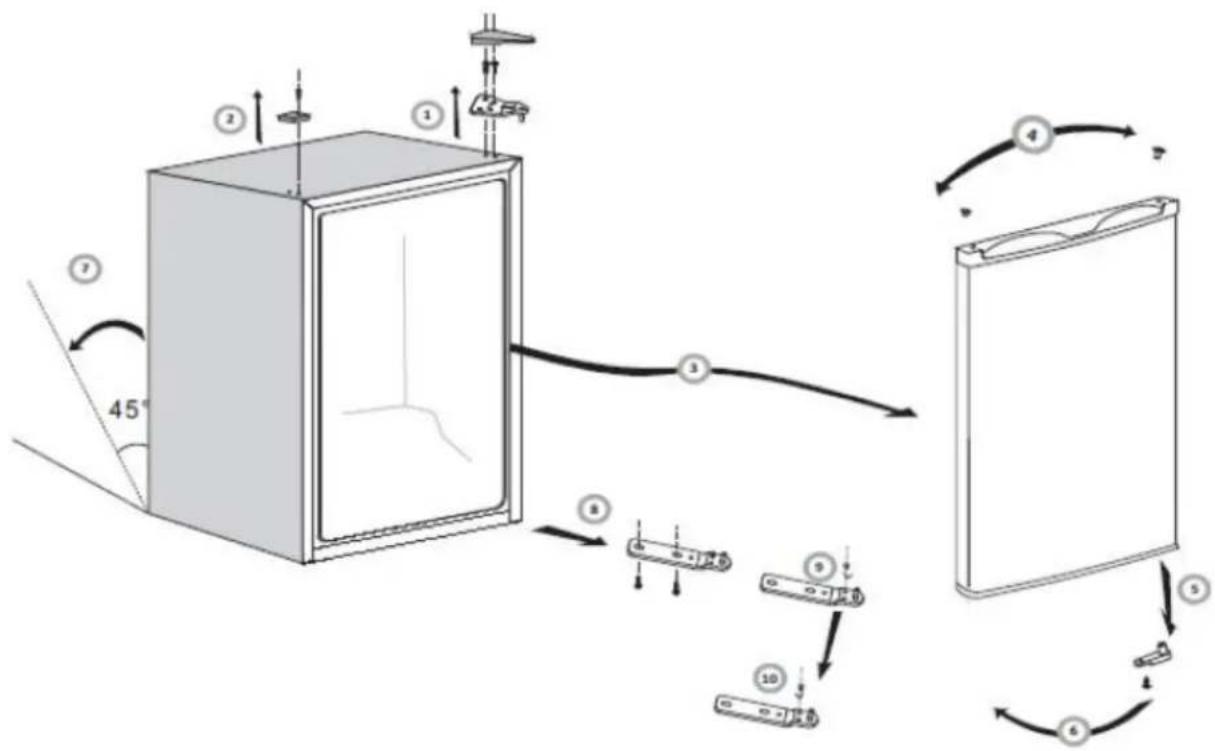
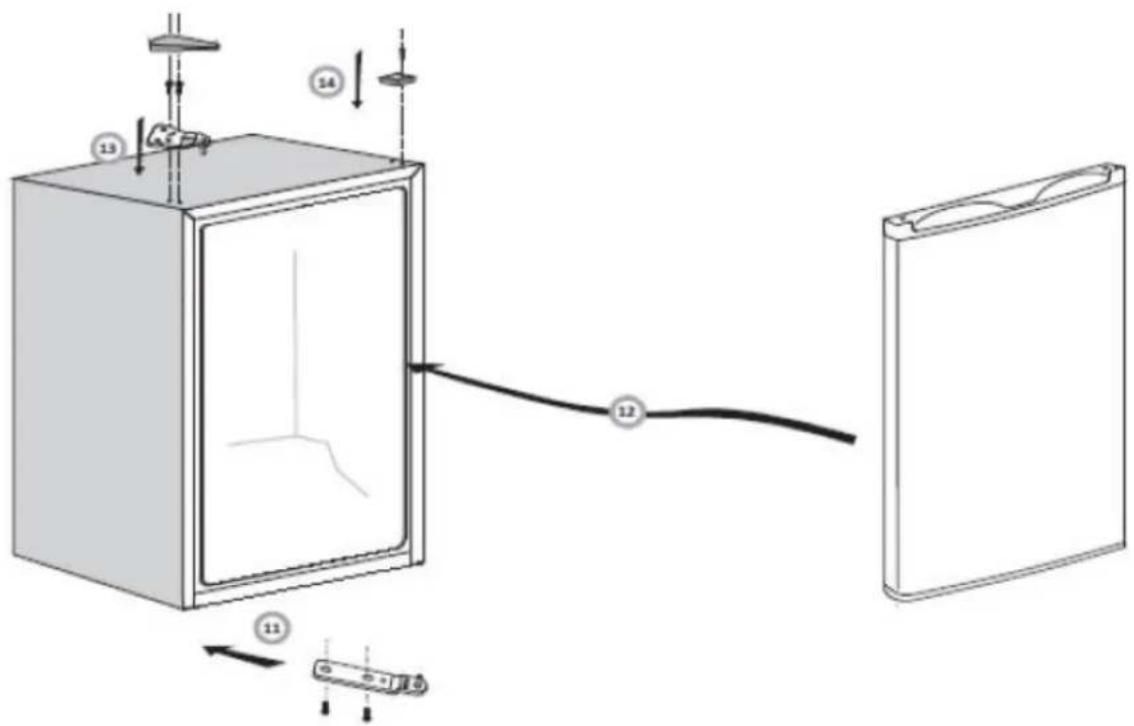
12 Reversing the door
flowchart
graph TD
    A["Top View"] --> B["Measurement Point"]
    B --> C["Measurement Step 1"]
    C --> D["Measurement Step 2"]
    D --> E["Measurement Step 3"]
    E --> F["Measurement Step 4"]
    F --> G["Measurement Step 5"]
    G --> H["Measurement Step 6"]
    H --> I["Measurement Step 7"]
    I --> J["Measurement Step 8"]
    J --> K["Measurement Step 9"]
    K --> L["Measurement Step 10"]
    L --> M["Measurement Step 11"]
    M --> N["Measurement Step 12"]
    N --> O["Measurement Step 13"]
    O --> P["Measurement Step 14"]
    P --> Q["Measurement Step 15"]
    Q --> R["Measurement Step 16"]
    R --> S["Measurement Step 17"]
    S --> T["Measurement Step 18"]
    T --> U["Measurement Step 19"]
    U --> V["Measurement Step 20"]
    V --> W["Measurement Step 21"]
    W --> X["Measurement Step 22"]
    X --> Y["Measurement Step 23"]
    Y --> Z["Measurement Step 24"]
    Z --> AA["Measurement Step 25"]
    AA --> AB["Measurement Step 26"]
    AB --> AC["Measurement Step 27"]
    AC --> AD["Measurement Step 28"]
    AD --> AE["Measurement Step 29"]
    AE --> AF["Measurement Step 30"]
EN
13 Operating noise
| Sounds / Noise | Kind of noise | Reason / Measure |
| Normal sounds | Murmuring | Caused by the compressor when operating. |
Liquid sounds | Caused by the circulation of the refrigerant. | |
Clicking sounds | The temperature control switches the compressor on or off. | |
| Noise | Vibration of the grid or tubes | Check whether grid and tubes are securely attached. |
| Bottle sounds | Keep safety distance between bottles and other containers. |
14 Trouble shooting
| Defect | Possible causes | Measures |
| 1. Interior lights are not working, but compressor is running. | The light bulb is defective. | Replace light bulb (see chapter 11). |
| 2. There is water in the appliance. | The water drainage channel is blocked. | Clean the water drainage channel and the drain pipe. |
| 3. The cooling group starts too often and too long. | - You have opended the door too often.- The air circulation around the appliance is obstructed. | - Don’t open the door unnecessarily.- Keep free the surroundings of the appliance. |
| 4. The appliance does not cool. | - The appliance is off or not supplied with power.-Temperature control is regulated on “0”- Ambient temperature is too low. | - Check, whether power supply works, fuses are intact, mains plug is correctly plugged into the socket.- Adjust the temperature control.- See chapter 6.2 |

WARNING
Repairs to electrical appliances may be carried out only by a qualified technician. Repairs that are wrong or not correctly performed can cause hazard to the user and lead to a loss of warranty.
15 Technical specification
| Model | OFZ 10011 A1 |
| Type (Number of temperature control) | 1 |
| Defrost Cooling | Manual |
| Electrical connection [V/Hz] | 220-240 / 50 |
| Rated power [A] | 0.55 |
| Net weight [kg] | 16 |
| EAN no. [white] | 4049011123403 |
| Dimensions and required space, see chapter ,Installation““ | |
*subject to change without prior notice*.
16 CE-Conformity
At the moment of its market introduction this product complies with the requirements laid down in the Directive on the unification of the laws of the Member States relating to the electromagnetic compatibility 2014/30/EU of electrical equipment within certain voltage limits (2014/35/EU).
This product is identified with the CE mark and comes with a declaration of conformity to inspection by market surveillance authority.
*subject to change without prior notice*.
17 EU Productfiche
Regulation (EU) 1060/2010
| Trade mark | Exquisit | |
| Model | OFZ 10011 A1 | |
| Category 1) | 8 | |
| Energy efficiency class 2) | A+ | |
| Annual energy consumption 3) | kWh/annum | 149 |
| Total storage volume | I | 32 |
| Storage volume cooling | I | - |
| Storage volume freezing | I | 32 |
| Star rating 4) | 4 * | |
| Frost-free | No | |
| Temperature rise time | h | 10 |
| Freezing capacity | kg/24h | 2 |
| Climatic class 5) | ST | |
| Airborne acoustical noise emission | dB(A) re1pW | 42 |
| Construction | Freestanding |
1) 1 = Refrigerator with one or more fresh-food storage compartments,
2 = Refrigerator-cellar, Cellar and Wine storage appliances,
3 = Refrigerator-chiller and Refrigerator with a 0-star compartment,
4 = Refrigerator with a one-star compartment, 5 = Refrigerator with a two-star compartment,
6 = Refrigerator with a three-star compartment, 7 = Refrigerator-freezer,
8 = Upright freezer, 9 = Chest freezer, 10 = Multi-use and other refrigerating appliances
^2) A+++ (most efficient) to D (least efficient)
3) Annual energy consumption (AE C) in kWh per year, based on standard test results for 24 hours. Actual energy consumption will depend on how the appliance is used and where it is located.
4) 1 ☒ One-star compartment with nominal temperature of -6°C
2 ** Two-star compartment with nominal temperature of -12°C
3 *** Three-star compartment with nominal temperature of -18°C
4 * *** Food freezer compartment (four-star compartment) with nominal temperature of -18°C
5) Climate class: This appliance is intended to be used at an ambient temperature between lowest air highest temperature: SN = 10°C-32°C, N = 16°C-32°C, ST = 16°C-38°C, T = 16°C-43°C
OFZ10011A1
Vertrieben durch:
Markeninhaber: