
Mini VAC100 - Vacuum Sealer Rommelsbacher - Free user manual and instructions
Find the device manual for free Mini VAC100 Rommelsbacher in PDF.


User questions about Mini VAC100 Rommelsbacher
0 question about this device. Answer the ones you know or ask your own.
Ask a new question about this device
Download the instructions for your Vacuum Sealer in PDF format for free! Find your manual Mini VAC100 - Rommelsbacher and take your electronic device back in hand. On this page are published all the documents necessary for the use of your device. Mini VAC100 by Rommelsbacher.
USER MANUAL Mini VAC100 Rommelsbacher
natural_image
Abstract geometric pattern with interlocking vertical lines inside a circle (no text or symbols)ROMMELSBACHER
natural_image
Assorted packaged food items including fruits, snacks, and capsules (no visible text or labels)natural_image
Black-and-white photo of assorted food items including a microwave, jars of vegetables, and cherry tomatoes (no text or symbols visible)natural_image
Black-and-white photo of various glass jars and containers with scattered food items, no visible text or symbols.We are very pleased that you have chosen this high-quality Vacuum Sealing System and thank you for your confidence. We are sure that you will be pleased with its convenient operation and diversity. To ensure that you will be able to enjoy using your appliance for a long time, please read and observe the following notes carefully.
Contents
• THE APPLIANCE · THE FUNCTIONS page 19
• SAFETY IN USE page 20
• OPERATION page 20
Vacuum sealing with plastic bags and rolls page 20
Vacuum sealing with „Executive“ containers and universal lids page 21
Vacuum sealing with „Family“ containers page 22
Vacuum sealing of jars with metal caps (Leifheit-type) page 22
Vacuum sealing with bottle caps page 22
Manual sealing page 22
- CLEANING page 23
• TECHNICAL DATA page 23
• TROUBLESHOOTING page 23
• VACUUM SEALING - GENERAL INFORMATION page 24
Advantages of vacuum sealing page 24
Storage times page 25
What is vacuum sealing? page 26
Using MAGIC VAC ^® bags page 27
Using MAGIC VAC ^® containers page 28
Important notes page 29
- MAGIC VAC® ACCESSORIES page 30
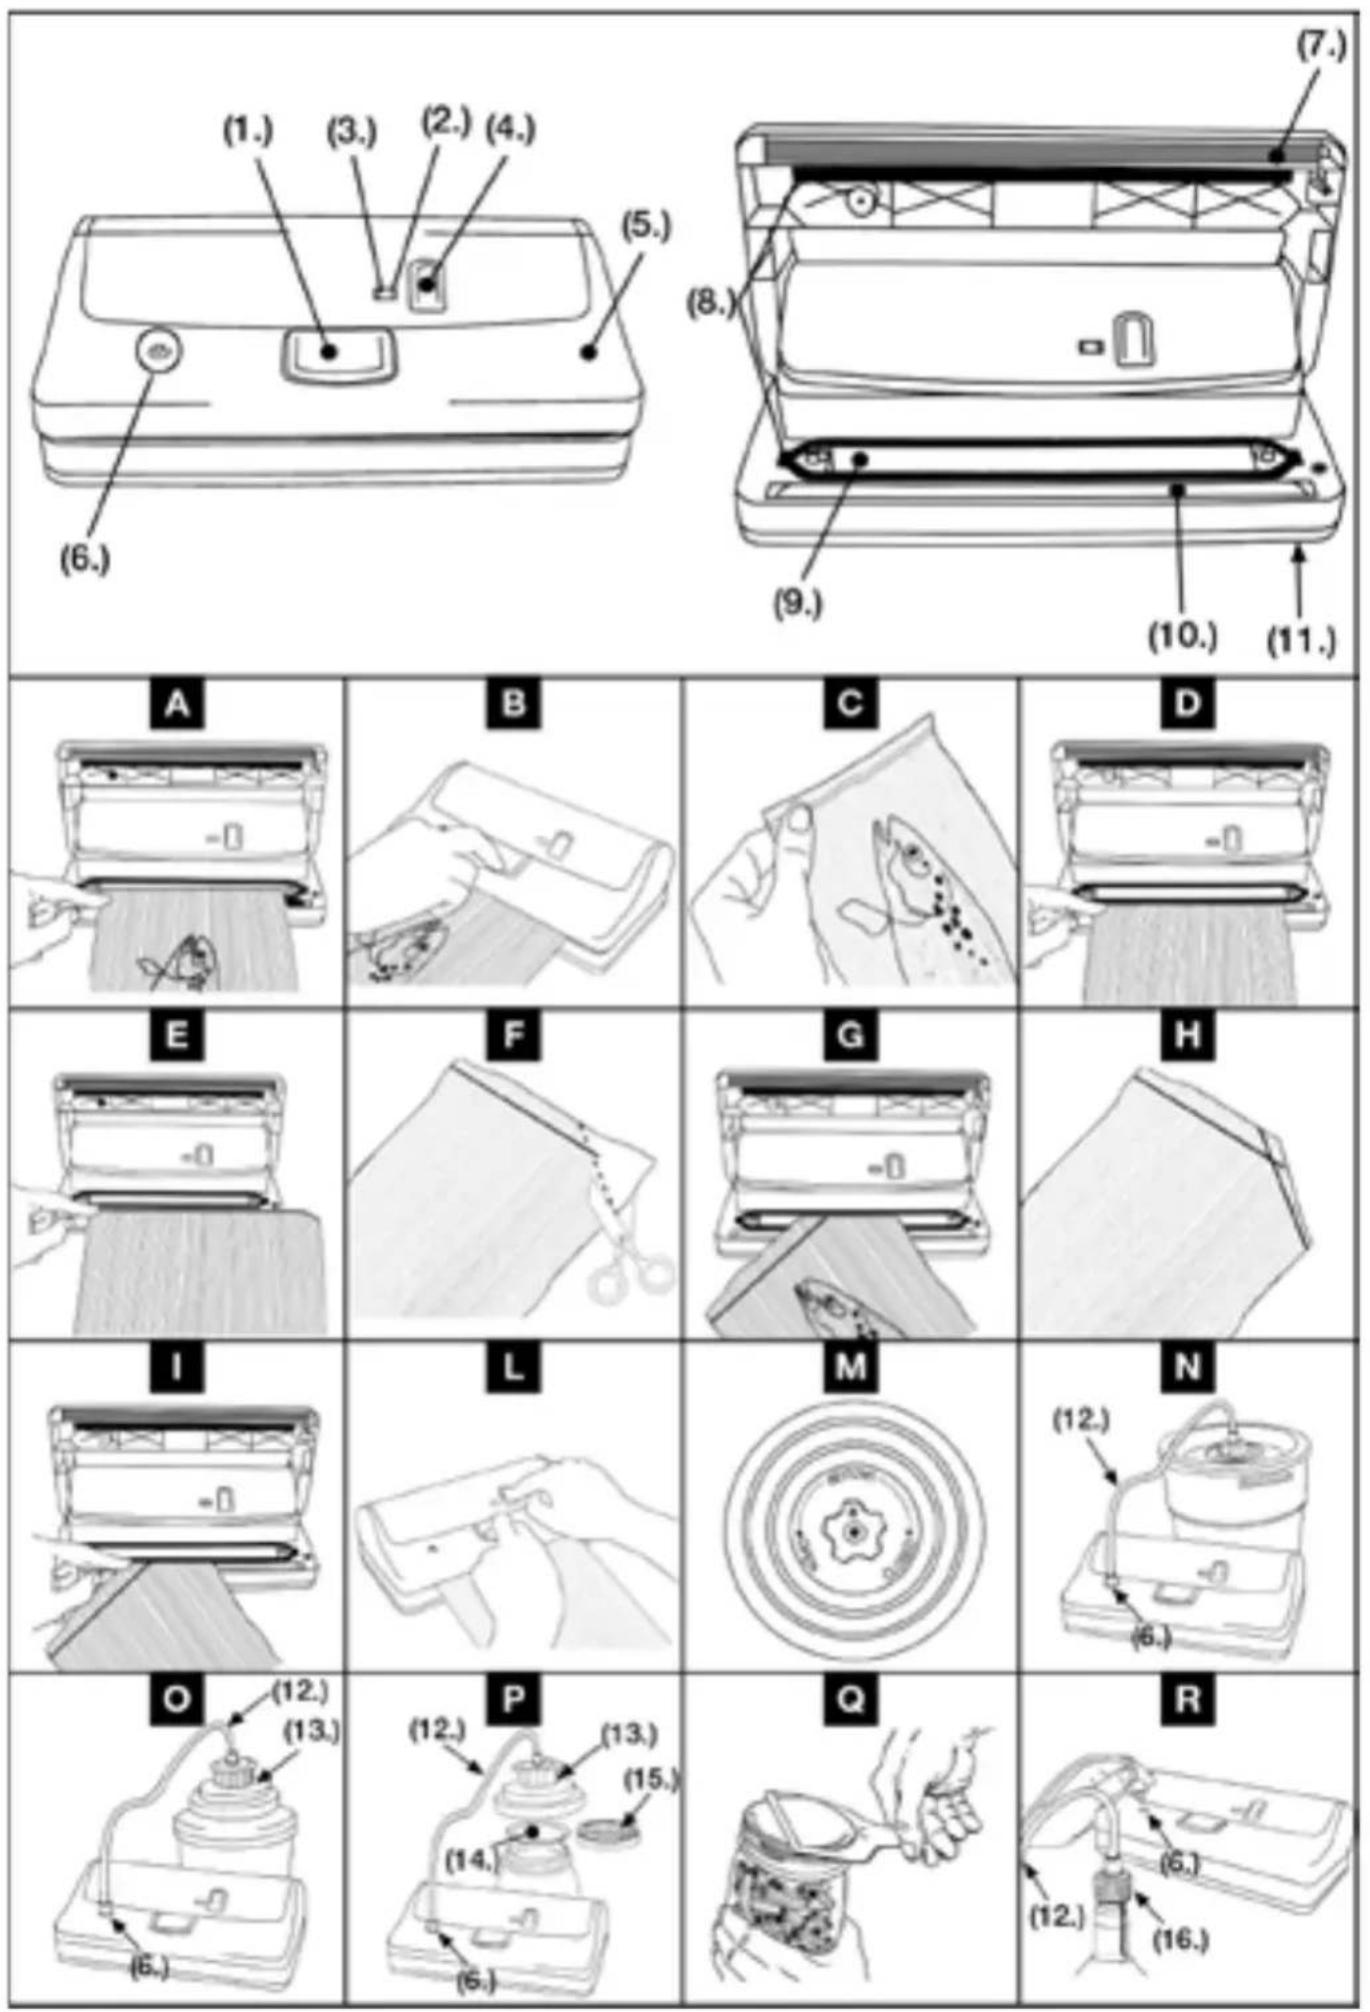
(1) ON button - keep this button pressed until the vacuum/sealing process is finished (with your other hand, additionally press down on the area marked PUSH)
(2) Vacuum indicator - changes from yellow to green while vacuum is generated
(3) Sealing indicator - lamp is glowing during sealing process
(4) MAN SEAL button - for immediate sealing irrespective of the vacuuming force reached
(5) Cover - by pressing the ON button and pressing down on the cover at the area marked PUSH the vacuuming pump becomes activated
(6) Hose port - for joining the connection hose to jars, containers, universal lids, bottle caps etc.
(7) Sealing gasket - place the plastic bag on the sealing bar
(8) Airtight gaskets - ensure maintenance of the vacuum inside the chamber and vacuum sealing of plastic bags and containers
(9) Vacuum chamber - for vacuum sealing, place the open side of the plastic bag in the vacuum chamber for air extraction and absorption of any liquids that might escape
(10) Sealing bar - contains a heating wire, covered with Teflon, preventing sticking of plastic bags during the vacuum sealing process
(11) Skid-proof feet - ensure stability and prevent skidding of the appliance
SAFETY IN USE
- Make sure the details on the rating label are in conformity with your mains voltage. Only connect unit to alternating current.
- Children and persons with handicaps of physical, sensorial or mental nature must not operate this appliance without an adequate supervision and/or corresponding expert advice and safety instructions.
• Children should be supervised in order to ensure that they do not play with this appliance. - Do not at all operate this unit with an external timer or a separate telecontrol system.
- Unplug the appliance for ensuring switch-off.
- The appliance is not suitable for continuous operation. Allow the appliance to cool down for about 2 minutes after every vacuum sealing process.
- Do not operate the appliance on or in the vicinity of hot surfaces.
- Prevent suction of liquids into the vacuum chamber. In the event liquids enter the vacuum chamber, please remove them with a towel.
- Never immerse the appliance in water and do not allow steam or water to infiltrate.
The appliance must not be cleaned with a steam jet cleaning device. - Caution: The sealing bar becomes hot in use - Mind the hazard of burns!
- Our electrical appliances comply with the relevant safety regulations. In case of signs of damage to the appliance or the power cord, unplug the appliance immediately. Repairs must be conducted by authorised specialist shops only. Improper repairs may pose considerable dangers to the user.
- This appliance is intended for normal household use only and not for commercial use.
- Improper use and non-observance of the instruction manual will void warranty.
Operating the MINI at altitudes (over 1500 m)
The vacuum indicator is an instrument functioning pursuant to the principle of differentiation, i.e. it measures the difference between the external air pressure (environment) and the internal vacuum value. Therefore, when operating the MINI at altitudes, the indication might not become entirely green, albeit the maximum vacuum was accomplished. In such event, interrupt the vacuum sealing process by opting for the MAN SEAL button (4) for manual sealing.
OPERATION
Prior to each use, make sure the appliance and all accessory parts to come in contact with food (containers, lids, jars etc.) have been cleaned thoroughly.
Vacuum sealing with plastic bags and rolls
Always place the appliance on a dry, stable and level base. Please provide for sufficient space in front of the appliance to place the bags with the food to be vacuum-sealed.
Connect the mains plug to a socket corresponding to the voltage the appliance is designed for (see technical data).
The bags are available in two widths: 20 cm and 30 cm. Opt for the bag size suitable to accommodate your food to be preserved. Make sure that the bag is at least 8 cm longer than the food to be vacuum-sealed.
a) Vacuum sealing with bags of 20 cm width
Open the cover (5) until it locks in place. Put the food into the bag, however without creating wrinkles or straining the surface of the bag. Remove any liquids and particles from the area of the bag's inner surface where the sealing seam is meant to be. Put the bag with its contents in front of the appliance and place the bag's open edge into the vacuum chamber (9) (fig. A).
Shut the cover (5). Press the ON button (1) while simultaneously pressing down on the area marked PUSH to complete the vacuum sealing process (fig. B). Wait until the sealing indicator light (3) starts glowing and goes off again. Open the cover (5) and remove the bag.
Check whether the sealing seam is even, i.e. a uniform and flat seam without edges or wrinkles, no design of the lower layer to be seen any more (fig. C).
You can stop the process at any time by releasing the ON button.
b) Vacuum sealing with rolls of 20 cm width
Cut-off the required length of foil. Now seal one of the open edges as follows:
Open the cover (5) until it locks in place.
Put one of the foil's open edges on the sealing bar (10) with the plain side up (fig. D).
ATTENTION: The bag must not reach into the vacuum chamber (9) or overlie the gaskets (8).
Shut the cover (5).
Press the ON button (1) while simultaneously pressing down on the area marked PUSH
to complete the vacuum sealing process (fig. B). Wait until the sealing indicator light (3) starts to glow and goes off again.
Open the cover (5) and remove the bag.
Check the sealing seam. Now proceed with the vacuum sealing process as under point a).
c) Vacuum sealing with bags of 30 cm width
Open the cover (5) and put food into the bag.
Place the bag's open edge onto the sealing bar (10) (fig. E) and seal just a part of the bag's open edge. For this keep the ON button pressed until the indicator lamp goes off (3).
Cut off slantwise one corner of the bag's still open edge (fig. F).
Put the open side of the bag into the vacuum chamber (fig. G).
Now proceed with the vacuum sealing process according to point a).
Finally check the sealing seam; the second one should cross the first one by creating an “X” shape (fig. H).
d) Vacuum sealing with rolls of 30 cm width
Cut-off the required length of foil from the roll. Now seal one of the open edges as follows:
Open the cover (5).
Put one of the foil's open edges on the sealing bar (10) (fig. E) and seal only a part of the bag's open edge. For this press the ON button and keep it pressed until the sealing indicator light (3) goes off.
Check the sealing seam.
Take scissors and cut off slantwise one corner of the bag's left open edge (fig. F).
Now seal the remaining part of the bag (fig. I) and check if the second sealing seam lies crosswise on the first one so that an “X” shape was created (fig. H).
Now proceed with the vacuum sealing process as under point c).
Vacuum sealing with “Executive” containers and universal lids
The smoke-coloured containers and the universal lids with star-shaped knob (see fig. M) make vacuum sealing easier as they allow to insert the hose directly into the middle hole of the knob (fig. N).
You can use the universal lids (available with a diameter of 100 mm and 125 mm) in combination with temperature-resistant preserving jars and pots/bowls.
ATTENTION: Vacuum generated in containers made of too thin plastic or glass material can lead to implosion and thus cause injuries. This is why they are not suitable for vacuum sealing with universal lids.
Fill the container, leave at least 3 cm of space to the top edge and then put the lid on the container's rim. Turn the knob to "VACCUM" position (fig. M).
Put one end of the connection hose (12) into the hose port of the appliance (6) and the other end into the knob of the lid (fig. N).
Press the ON button (1) and keep it pressed until the vacuum indicator (2) glows green.
Remove the connection hose from the knob at the lid and the appliance as well.
Turn the knob to "CLOSED" position.
To open the container turn the knob to "OPEN". You will hear the sound of air rushing back.
This sound shows that the contents have been stored in a vacuum.
Vacuum sealing with "Family" containers
Convenient multi-purpose containers, perfect for storage in pantries and refrigerators. They are perfect for frequent use, e.g. for storing dry food, such as biscuits, flour, coffee or rice. Fill the container, leave at least 3 cm of space to the top edge and then put the lid on the container's rim. Put one end of the connection hose (12) into the hose port of the appliance (6) and the other end into the lid of the “Family” container (fig. N).
Press the ON button (1) and keep it pressed until the vacuum indicator (2) glows green.
Remove the connection hose from the lid and from the appliance as well.
For opening the container press the "PUSH" button.
Vacuum sealing of jars with metal lids (Leifheit-type)
Select a vacuuming cap fitting to the size of the jar.
Fill the jar and leave at least 3 cm of space to the top edge.
Put one end of the connection hose (12) into the hose port of the appliance (6) and the other end into the vacuuming cap (13). Put the vacuuming cap directly on the jar with the lid (14).
Then vertically press down the cap in order to ensure the cap's correct fitting on the lid (fig. P).
Press the ON button (1) and keep it pressed until the vacuum indicator (2) glows green.
Keep the button pressed in order to achieve a tight fitting. Remove the connection hose from the cap and from the appliance as well. Undo the vacuuming cap from the jar.
Put the ring - which came with the jar - on and screw it tight (15) (fig. P).
For opening a vacuum-sealed jar with metal lid you should use the specific lid opener (observe that the inscriptions show to the top).
Place the lid opener as shown in fig. Q. Use the lid opener carefully until the vacuum got released completely. Then remove the metal lid. This provides that the lid can be used again.
Vacuum sealing with bottle caps
With the bottle cap you can reclose any open wine or beverage bottle with non-carbonated contents. Vacuum sealing provides for a slowed down oxidation of the beverage and this is why its quality and taste get preserved longer.
Put one end of the connection hose (12) into the hose port of the appliance (6) and the other end into the bottle cap (16) (fig. R). Press the bottle cap firmly into the bottle.
Press the ON button (1) and keep it pressed until the vacuum indicator (2) glows green.
At once remove the connection hose from the bottle's lid.
For opening a vacuum-sealed bottle just slowly pull out the cap from the bottle.
You will hear the sound of air rushing back into the bottle.
Manual sealing - MAN SEAL button (4)
When you press this button and the lamp of the vacuum indicator (3) is glowing the sealing process is done at once. This renders possible to shorten the vacuum sealing process when sealing sensitive food, such as sponge cake, biscuits, etc. (fig. L).
CLEANING
ATTENTION: Always pull the mains plug first before cleaning!
Prior to cleaning of appliance or equipment please carefully wash you hands.
Prior and after each use clean the appliance's surface with a moist cloth and mild detergent (no abrasive cleaners or solvents). Should any liquid get into the appliance, under no circumstances connect the appliance to the mains plug, but contact your service point.
Clean thoroughly all equipment (containers, lids, jars, etc.) and let it dry completely.
For cleaning the equipment in your dishwasher use the top rack only.
TECHNICAL DATA
Suction system with safety liquid-collecting tray, equipped with a lubrication-free piston-driven rotary depressor. Casing made of antistatic ABS synthetic resin of first quality.
automatic suction
automatic and manual sealing voltage/wattage:
pump air flow rate: 10 l/min (approx.)
pump vacuum level: 60 cm/Hg / - 0.8 bar (approx.)
230 V\~ 50 Hz · 320 W
dimensions : L x D x H: 29 cm x 14 cm x 9 cm
weight: 2 kg
TROUBLESHOOTING
Appliance not working
- Check the correct fitting of the wall plug. Check the socket by plugging in another appliance.
- To start the vacuum sealing process press the ON button while additionally pressing down on the area marked PUSH at the cover to generate sufficient pressure.
- In case of overheating the appliance switches-off automatically. In this case let it cool down for 15 minutes.
- Check whether cable or plug show damage. If yes - do not operate the appliance!
Vacuum sealer does not seal the first edge of the cut-off plastic bag
- Check whether the cut side of the bag was positioned correctly (according to paragraph „Vacuum sealing with plastic bags and rolls“).
Appliance does not create a complete vacuum inside the plastic bag
- For a correct sealing process the open end of the bag must completely extend into the vacuum chamber (9).
- Check the sealing bar (10) as well as the gaskets (7) + (8) for dirt on them. Clean them and put them in correct position again.
- Check the plastic bag for holes.
Appliance does not seal correctly
- In case the sealing bar (10) gets too hot and the bag melts, open the cover (5) and let the bar cool down for some minutes.
- This appliance is produced in compliance with current safety standards. In the event of overheating, the appliance gets switched-off automatically. Leave it to cool down for 15 minutes before starting the vacuum sealing cycle again.
Appliance does not create a complete vacuum inside the container
- Reposition the connection hose (12), one side into the hose port (6), the other side into the lid.
- Do not fill the container completely but leave a space of at least 3 cm.
- Make sure the arrow at the container's lid points to "VACUUM".
- Use a vacuuming cap of the correct size.
- Check if vacuuming cap is worn out or damaged.
- When putting the vacuuming cap onto the container's lid twist it to get a firmer, better fit.
- Let liquids cool down before vacuum sealing.
Bag is loosing its vacuum after sealing
- Wrinkles, crumbs, grease or humidity can cause leaky spots at the sealing seam.
Reopen the bag, clean its upper part inside as well as the sealing bar (10). Then seal again. - Check the bag for damages or holes. It is recommended to pad out sharp edges of the contents by using some kitchen paper.
Containers „Executive“ or the Universal Lids are loosing their vacuum
- Check whether the arrow on the knobs of container lid and universal lid got turned to „CLOSED“ position after the vacuum sealing process.
- Check whether the rim of the container/jar and the seal of the universal lid are undamaged and clean. Clean them with a moist cloth and start vacuum sealing anew.
- Check the right fitting and intactness of all seals in the container's lids and the universal lids.
- Look after the ring below the knob of the container's lid/the universal lid is fitting accurately.
- From time to time lids of preserving jars must be replaced. Dispose of unusable lids.
„Family“ lose their vacuum
- Check whether the rim of the container in the wear area is damaged.
- Check the right fitting and intactness of the seals in the container's lid.
- Look whether fit of the seal below the “PUSH” knob of the container’s lid is fitting well.
- Lids and preserving jars must not show fissures and also their rubber seals must be without cracks or fissures. From time to time the lids of preserving jars must be replaced.
VACUUM SEALING - GENERAL INFORMATION
Advantages of vacuum sealing
Vacuum sealing will revolutionise the way in which you buy and keep food. By keeping food under vacuum (i.e. without air), the shelf-life of foods is greatly extended, whether it is kept in the pantry, fridge or freezer. Air can make food rancid and stale, it can cause it to ferment, dry out, and it may even cause freezer burns. Vacuum sealing keeps your food fresher and more flavourful for longer.
Now you can pack fresh food bought from the market, or food picked from your vegetable garden, in handy portions for future use, even in large quantities. Food bought already vacuum-sealed, like cheese and meat, will retain its flavour and freshness once opened, without problems of moisture and mould, if it is vacuum-sealed after use in MAGIC VAC ^® bags and containers. Meat, fish and vegetables can be frozen without the risk of frost burns and will keep their freshness and quality. Foodstuffs like coffee, rice, flour and dried fruit will last much longer if they are vacuum-sealed with your vacuum sealer. Fresh or perishable foods must in any case be frozen or kept in the fridge.
The original quality of the food must be of the very highest order, in terms of freshness and environmental hygiene, when you decide to vacuum-seal it. There are in fact no preservation methods which will transform a poor product into a good one.
Always keep your vacuum sealer, bags and containers handy and you will quickly appreciate the many advantages and ease of use when it comes to preserving the quality of food. Consult the „storage times“ chart to see how vacuum sealing can extend the life of any food without in any way altering or impairing its taste, smell, appearance, hygiene and nutritional value.
Storage Times Storage time under Storage time when
atmospheric pressure vacuum-sealed
Cooled food (5 ± 2 °C)
| red meat 3-4 days 8-9 days | ||
| white meat 2-3 days 6-9 days | ||
| fish, whole 1-3 days 4-5 days | ||
| game 2-3 days 5-7 days | ||
| sausages | 7-15 days | 25-40 days |
| sliced sausage | 4-6 days 20-25 days | |
| soft cheese 5-7 days 14-20 days | ||
| hard and semi-hard cheese | 15-20 days | 25-60 days |
| vegetables | 1-3 days 7-10 days | |
| fruit | 5-7 days 14-20 days | |
Cooked and cooled food (5 ± 2 °C)
| vegetable puree or soup | 2-3 days | 8-10 days |
| pasta and risotto | 2-3 days 6-8 days | |
| cooked and roast meats | 3-5 days | 10-15 days |
| filled cakes | ||
| (with cream and fruit) | 2-3 days | 6-8 days |
| deep-frying oil | 10-15 days | 25-40 days |
Frozen food (-18 ± 2 °C)
| meat | 4-6 months | 15-20 months |
| fish | 3-4 months | 10-12 months |
| vegetables | 8-10 months | 18-24 months |
Food at room temperature (25 ± 2 °C)
| bread | 1-2 | days | 6-8 | days |
| packed biscuits | 4-6 | months | 12 | months |
| pasta | 5-6 | months | 12 | months |
| rice | 5-6 | months | 12 | months |
| flour | 4-5 | months | 12 | months |
| dried fruit | 3-4 | months | 12 | months |
| ground coffee | 2-3 | months | 12 | months |
| powdered tea | 5-6 | months | 12 | months |
| freeze-dried products | 1-2 | months | 12 | months |
| powder milk | 1-2 | months | 12 | months |
These are indicative values which depend on the quality of the packaging and the original quality of the food.
IMPORTANT: Keep perishable foods in the freezer or fridge.
Vacuum sealing extends the life of food, but does not turn it into a „preserve“, i.e. a product stable at room temperature.
What is vacuum sealing?
The deterioration of food is caused by chemical reactions that occur in food which is exposed to the air, temperature, moisture, the action of enzymes, the growth of micro-organisms or contamination by insects. Vacuum sealing reduces the absolute pressure of the air inside the package or container, by removing the oxygen and eliminating volatile compounds. The oxygen in the air causes food to deteriorate, firstly through a process of oxidation, causing the loss of nutritional values, flavour and all the food's qualities. Air also promotes the growth of most micro-organisms and causes the frost burns which occur on frozen food.
Vacuum sealing extends the shelf life of many fresh foods, by reducing oxidation and preventing the proliferation of microbes (bacteria and mould). However, many fresh foods contain sufficient moisture to encourage the growth of micro-organisms that can grow with or without air.
To prevent the deterioration of such foods, they must be preserved at low temperatures.
Micro-organisms like mould, yeast and bacteria are present everywhere, but they can cause problems only in certain conditions. For example, mould will not grow in environments with a low oxygen content, or in the absence of moisture or humidity. To grow, yeast requires moisture, sugar and a moderate temperature, but it can grow in the presence or absence of air.
Refrigeration slows the growth of yeast and freezing blocks it completely. Bacteria can multiply with or without air, depending on their type.
Clostridium Botulinum is a very dangerous type of bacteria which can develop in environments which do not contain acids, are without oxygen and are exposed to temperatures in excess of 4 °C for long periods of time.
Foodstuffs vulnerable to attack by Clostridium Botulinum are those with low acidity (like red meat, poultry, fish, seafood, olives in brine, eggs, mushrooms and vegetables) and medium acidity foods like virtually all vegetables and many fruits (ripe tomatoes, onions, red pepper, figs and cucumbers). To prevent contamination by this bacterium, it is essential to observe the basic rules of hygiene and, to prevent its harmful proliferation in preserved foods, they must be refrigerated for short periods and/or frozen for long-life preservation. However, such foods must be eaten immediately after heating.
IMPORTANT: You must consume immediately any food which has been heated while still sealed in MAGIC VAC® bags. Leaving the food to cool slowly at room temperature in the sealed vacuum bag may cause several harmful micro-organisms to multiply, in just a few hours, to values that are health-threatening.
Several enzymes found in foods cause increasingly noticeable changes in colour, structure and flavour; such changes depend on the preservation time, temperature and, above all, the presence of air. To halt the action of enzymes, vegetables must be blanched briefly using steam or a microwave oven. Food which contains a high percentage of acidity, like most fruits, do not require blanching. The absence of air created by the vacuum will in any case slow down or prevent the action of these enzymes.
Insect larvae are frequently found in many low water content or dried foods which have not been vacuum-sealed or frozen, and they can develop during preservation and thus contaminate the food. Some products like flour and grain might contain larvae, but using vacuum sealing will stop them developing into insects.
Using MAGIC VAC® bags
Vacuum sealing for the freezer
First of all, use the freshest possible food. Your vacuum sealer will allow you to retain all the freshness of the food if it is properly preserved. Some foods have a soft consistency which could be damaged by vacuum sealing the product when fresh. To prepare delicate foods like meat, fish, berries, bread, etc., it is advisable to pre-freeze them first. In the first twenty-four hours there is no risk of freezer burns, so you can vacuum-seal the products frozen the previous day in MAGIC VAC ^® bags, and then keep them in the freezer for long periods so as to preserve all the nutritional values and flavour of the product you have packed. When vacuum sealing soups, stews or other liquid food, pre-freeze it in a pan or high-strength dish. When the food becomes solid, vacuum-seal it, add a label and replace in your freezer.
To vacuum-seal vegetables, peel them and then blanch them briefly in boiling water or a microwave oven until they are warm but still firm. Then vacuum-seal them in convenient portions. If the food is not pre-frozen, leave an extra 5 cm in the length of the bag to allow for expansion due to freezing. With regard to meat and fish, it is advisable to place the food on a paper towel and vacuum-seal it with the towel in the bag. This will absorb any moisture in the food.
To preserve food like focaccia, crêpes and small hamburgers, stack them on top of each other, placing greaseproof paper or film between each piece. This will make it easier to remove some of the food, repackage the rest and replace it immediately in the freezer.
Vacuum sealing for the fridge
Appropriate portions of food can be prepared in advance, then vacuum-sealed and kept in the fridge for use at different times, ready to be heated as and when necessary.
Vacuum sealing for the pantry
Even foods that can keep at room temperature (like, for example, coffee, flour, pasta, sugar, etc.) can benefit from vacuum sealing. If these products are to remain unused for several days, such as when you go away on holiday, it is advisable to protect all foods by vacuum sealing. They will keep better and moisture, mould and insects will not attack and ruin them.
Defrosting food in bags
To defrost vacuum-sealed food such as meat, fish, fruit, vegetables or other delicate foodstuffs, place it on the lowest shelf in the fridge to defrost slowly. Bread and focaccia should be left at room temperature, while soups or other liquid foods should be immersed in hot water still in the vacuum bags until they reach the right temperature. When you leave food at room temperature or heat it in a bain-marie, make sure you cut one corner of the bag to let the steam escape. When the food has been defrosted, it must be consumed immediately. Do not re-freeze it.
Repackaging pre-packed food
Many foodstuffs, like cheese and meat, are sold pre-packed in factory-prepared vacuum bags. To retain the flavour and freshness of these foods, repackage them in MAGIC VAC ^® bags after the factory package has been opened.
Pre-packed foods must always be consumed by the use-by date shown on the original package. They must also be handled with the greatest care and hygiene when repackaging.
Useful tips...
- For food with tapered ends or sharp edges, like bones and spaghetti, pad the edges with paper towels to prevent perforating the bag.
- Fragile and delicate foodstuffs like strawberries, crackers or biscuits should be preserved in the containers to prevent them from suffering damage.
- There are many non-food products which can be vacuum-sealed, such as camping equipment including matches, first aid kits and clean, dry clothes. You can even preserve the emergency triangle in the car. Also, you can extend the storage time of pipe tobacco. Silverware and collections can also be vacuum-sealed to protect the items against oxidation, etc.
Using MAGIC VAC ^® containers
WARNING: Do not use plastic or glass containers that are not suitable since they could implode under the vacuum pressure of MAGIC VAC ^® and cause injury.
Freezing food in containers
To freeze food in plastic containers use only MAGIC VAC ^® containers or, in the case of glass receptacles, use tempered glass suitable for freezer temperatures.
Preparing food for vacuum sealing in containers
Vacuum sealing in containers is ideal for products that you use frequently. Dried foodstuffs like pasta, rice, flour, sugar, crisps, savouries or biscuits, and pet food, will maintain all their shape and freshness.
Salad foods, vegetables and herbs can be cleaned for the whole week and kept in a MAGIC VAC ^® container. They will remain firm and fresh. To absorb excess moisture, fold a paper towel and place it on the bottom of the container.
WARNING: Liquids must be cooled before vacuum sealing. Hot liquids will expand and leak from the container during depressurising.
Food in powder or granule form can be covered with a paper towel before vacuum sealing. This will prevent the powder or granules from getting into the vacuum paths or being deposited in the Vacuum Cap seal.
Oil used once for frying can be filtered, cooled, vacuum-sealed in a MAGIC VAC ^® container and kept in the fridge. This will enable you to use the oil again at least once, since it has been preserved in an airless and cold environment, thereby retaining its characteristics.
Pantry items like flour, rice and cake mixes stay fresh for longer if they are vacuum-sealed. Nuts and condiments retain their flavour and will not become rancid.
Marinating food in containers
To marinade meat, poultry or fish, pierce the surface of the food and place it in a MAGIC VAC ^® container, covered with the marinade of your choice. Vacuum-seal the MAGIC VAC ^® container and cool in the fridge for at least 20 minutes. The food will be as tasty as if it had been left to marinade overnight!
Tips for preserving food in jars
To preserve food in jars, use lids which have been checked and are free from defects. To create and maintain a good vacuum, the seals of the lids must be in perfect condition. To keep the lids in good condition, immerse them in boiling water for three minutes and then rub the dry seal with a drop of oil. This will restore the necessary elasticity to the seals of the lids.
Important notes
In order to optimise the preservation of foods and ensure perfect hygiene, a number of important rules must be followed:
- Make sure you wash your hands thoroughly and clean all the implements and surfaces you will be using to cut and vacuum-seal the food.
- If possible, wear gloves when handling the food.
- Once perishable food has been packed, place it in the fridge or freeze it immediately, maintaining a constant fridge or freezer temperature. Do not leave the food for a long time at room temperature.
- Place the packs of vacuum-sealed food carefully in the fridge or freezer so that the food will cool rapidly to a low temperature.
- After opening tinned food or food that has been factory vacuum-sealed, it can be vacuum-sealed again. Follow the instructions for repacking pre-packed food and for freezing the food as described.
- Pre-packed foods must in any case be consumed by the use-by date shown on the original package.
- Once you have warmed up or defrosted perishable food, it must be eaten. Do not eat perishable food if it has been left at room temperature for many hours. This is especially important if the food has been prepared with a dense sauce, in a vacuum-seal or in other lowoxygen content environments.
- Do not defrost food in boiling water or using other heat sources, unless the food in question is liquid (soups, juices, etc.).
- Vacuum sealing extends the life of dried food. Food which has a high fat content becomes rancid due to oxygen and heat. Vacuum sealing extends the life of food like nuts, coconut flakes, or cereal products. Store in a cool, dark place.
• Vacuum sealing will not extend the life of fruit and vegetables such as bananas, apples, potatoes and several vegetables, unless it has been peeled prior to vacuum sealing.
- Soft foods and food with a delicate structure (like fish, berries, etc.) must be pre-frozen for one night before they can be vacuum-sealed and placed in the freezer.
- Vegetables like broccoli, cauliflower and cabbage give off gas when they are vacuum-sealed fresh for storage in the fridge. To prepare these foods for vacuum sealing, blanch and freeze them.
- To ensure correct and safe vacuum sealing, use only original MAGIC VAC® bags, containers and accessories.
MAGIC VAC® ACCESSORIES
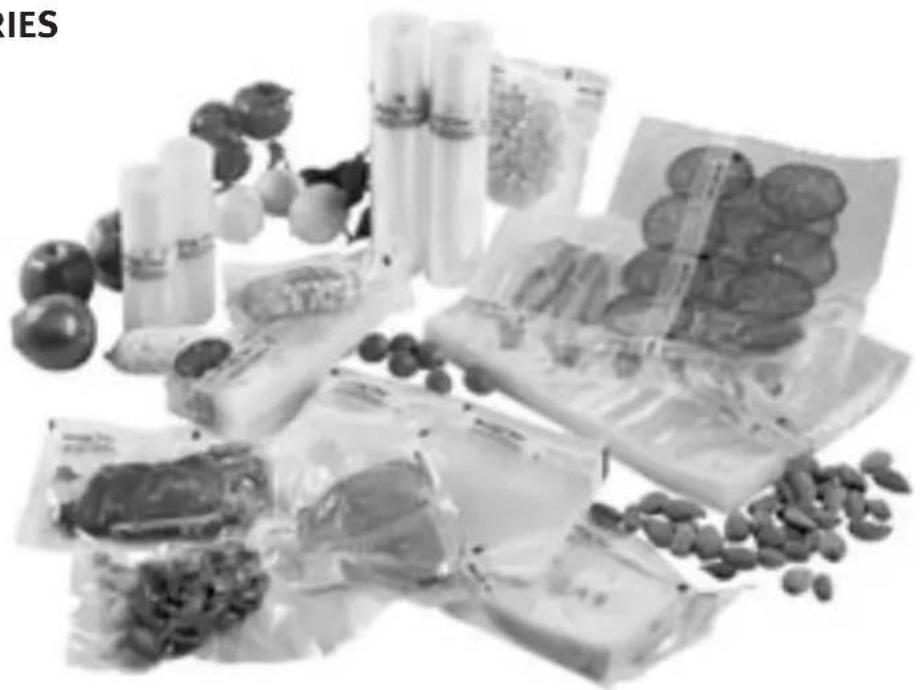
high-quality bags and rolls, reusable
natural_image
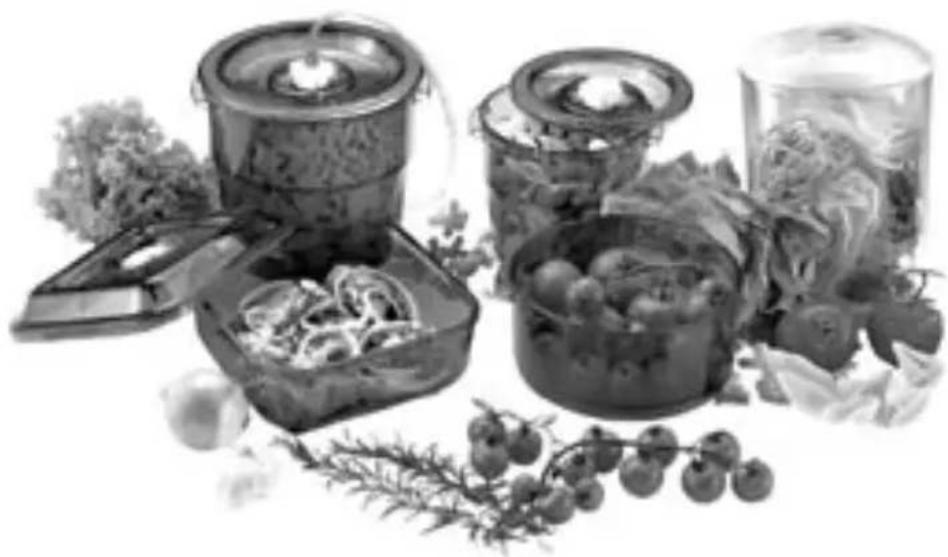
Black-and-white photo of packaged food items including fruits, snacks, and capsules (no visible text or labels)containers for microwave, refrigerator and freezer
natural_image
Black-and-white photo of assorted food items including a microwave, jars of vegetables, and cherry tomatoes (no text or symbols visible)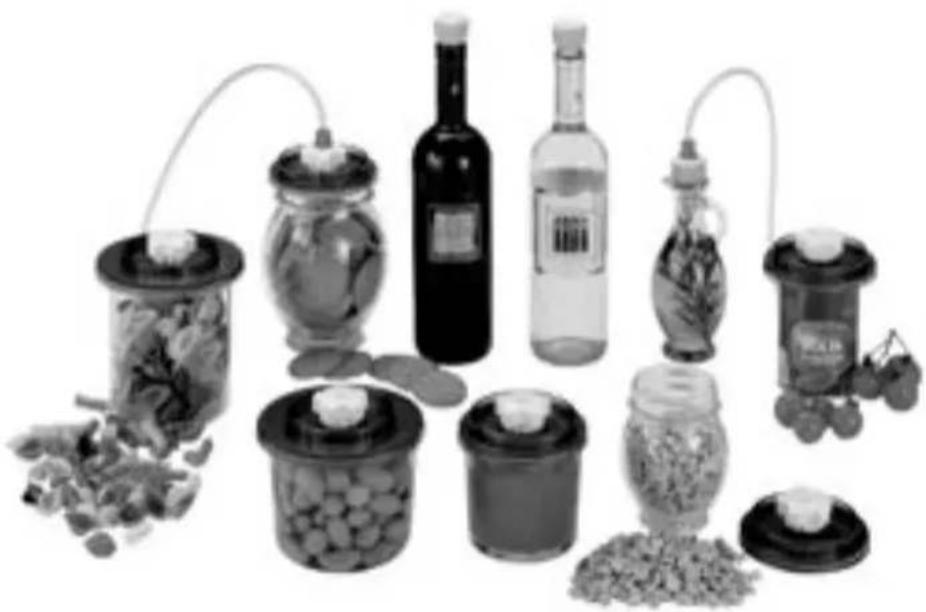
natural_image
Black-and-white photo of various glass jars and containers with scattered food items, no visible text or symbols.universal lids and bottle caps