
Memo 77 - Dictaphone OLYMPIA - Free user manual and instructions
Find the device manual for free Memo 77 OLYMPIA in PDF.


| Product Type | Dictaphone / Voice Recorder |
| Brand | Olympia |
| Model | Memo 77 |
| Dimensions (approx.) | 10.0 x 5.0 x 2.0 cm |
| Weight (with batteries) | 80 g |
| Power Supply | 2 x AA batteries (not included) |
| Recording Medium | Internal memory / MicroSD card (optional) |
| Recording Format | MP3 / WAV |
| Maximum Recording Time | Up to 8 hours (depending on quality and memory) |
| Microphone | Built-in omnidirectional |
| Speaker | Built-in 0.5W |
| Playback Controls | Play, Pause, Stop, Fast Forward, Rewind |
| Connectivity | USB 2.0 for file transfer |
| Headphone Jack | 3.5 mm stereo |
| Voice Activation (VOX) | Yes |
| Key Lock Function | Yes (prevents accidental recording) |
| Display | LCD with backlight |
| Battery Indicator | Yes |
| Cleaning | Wipe with a soft, dry cloth. Do not use solvents. |
| Safety Precautions | Do not expose to moisture or extreme temperatures. Remove batteries if unused for long periods. |
| Spare Parts / Repairability | Contact Olympia customer service. Batteries and USB cable are user-replaceable. |
Frequently Asked Questions - Memo 77 OLYMPIA
User questions about Memo 77 OLYMPIA
0 question about this device. Answer the ones you know or ask your own.
Ask a new question about this device
Download the instructions for your Dictaphone in PDF format for free! Find your manual Memo 77 - OLYMPIA and take your electronic device back in hand. On this page are published all the documents necessary for the use of your device. Memo 77 by OLYMPIA.
USER MANUAL Memo 77 OLYMPIA
MP (Medium Play) Gute 447 Min.
D
Bedienung
Bedienung
Wiederholen abbrechen
Bedienung
Nachrichten suchen
Nachricht löschen
Use in extreme conditions 22
Batteries 22
Rechargeable battery pack 22
Medical equipment 22
Disposal 23
8 Display Indicators 24
9 Operating Elements 25
10 Power Supply 26
Inserting the batteries 26
11 Operation 27
Setting the date and time 27
Switching on (Standby mode) 28
Switching on (TIME mode) 28
Operating modes 28
Recording quality 29
Managing messages 30
Recording sensitivity 30
Hold function (key lock) 30
Recording 31
Voice-activated recording (VOX) 32
Playing messages 33
Microphone 34
Headset 34
Repeating a message 34
Repeat all messages 35
Stopping repeat playback 35
Interrupting repeat playback 35
Searching for a message 36
Erasing messages 36
Erasing all messages 37
12 Technical Data 38
Technical data 38
GB
Safety Information
7 Safety Information
Please read this operating instruction manual thoroughly.
Intended use
This digital voice recorder is designed to record all kinds of vocal communication.
Any other use is considered unintended use. Please note that dubbing recorded messages without authorisation is prohibited except for private purposes. Do not use the device while driving a vehicle, motorcycle etc. to prevent the increased risk of an accident through being distracted. Unauthorised modification or reconstruction is not permitted. Under no circumstances open the device or complete any repair work yourself.
Use in extreme conditions
Prevent excessive exposure to smoke, dust, vibration, chemicals, moisture, heat and direct sunlight.
Batteries

ion: The device can only be operated using batteries. Any other form of power supply is forbidden.
Rechargeable battery pack

Attention when using batteries: Never throw batteries into a fire. Only use batteries of the same type! Pay attention to correct polarity. Incorrect polarity of the batteries represents a risk of explosion during charging.
Medical equipment

Caution: Never use the voice recorder in the vicinity of medical equipment. Effects on such equipment cannot be fully ruled out.
Disposal
In order to dispose of your device, bring it to a collection point provided by your local public waste authorities (e.g. recycling centre).
The adjacent symbol indicates that the device must not be disposed of in normal domestic waste! According to laws on the disposal of electronic and electrical devices, owners are obliged to dispose of old electronic and electrical devices in a separate waste container.

Packaging materials must be disposed of according to local regulations.
Batteries must not be disposed of in domestic waste. Special collection containers are provided at certain sites (supermarkets, electric shops).
8 Display Indicators
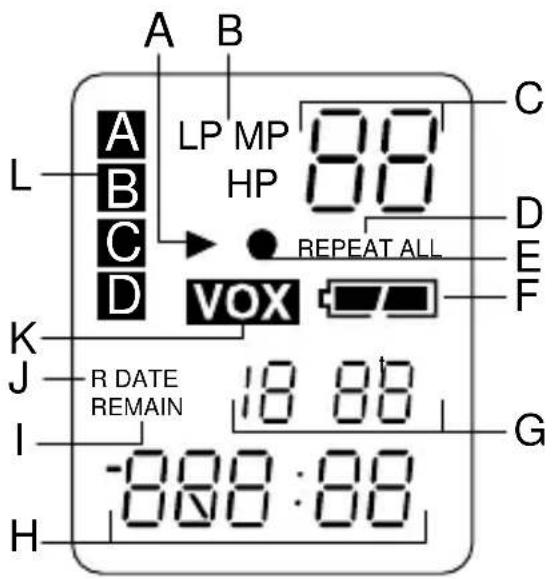
A Play G Date
B Recording quality H Minutes/Seconds (timer)
C Messages/Year I Remain
D Repeat (all) J R (recording active), Date
E Record K VOX (voice activity detector)
F Battery capacity L Memory locations
9 Operating Elements
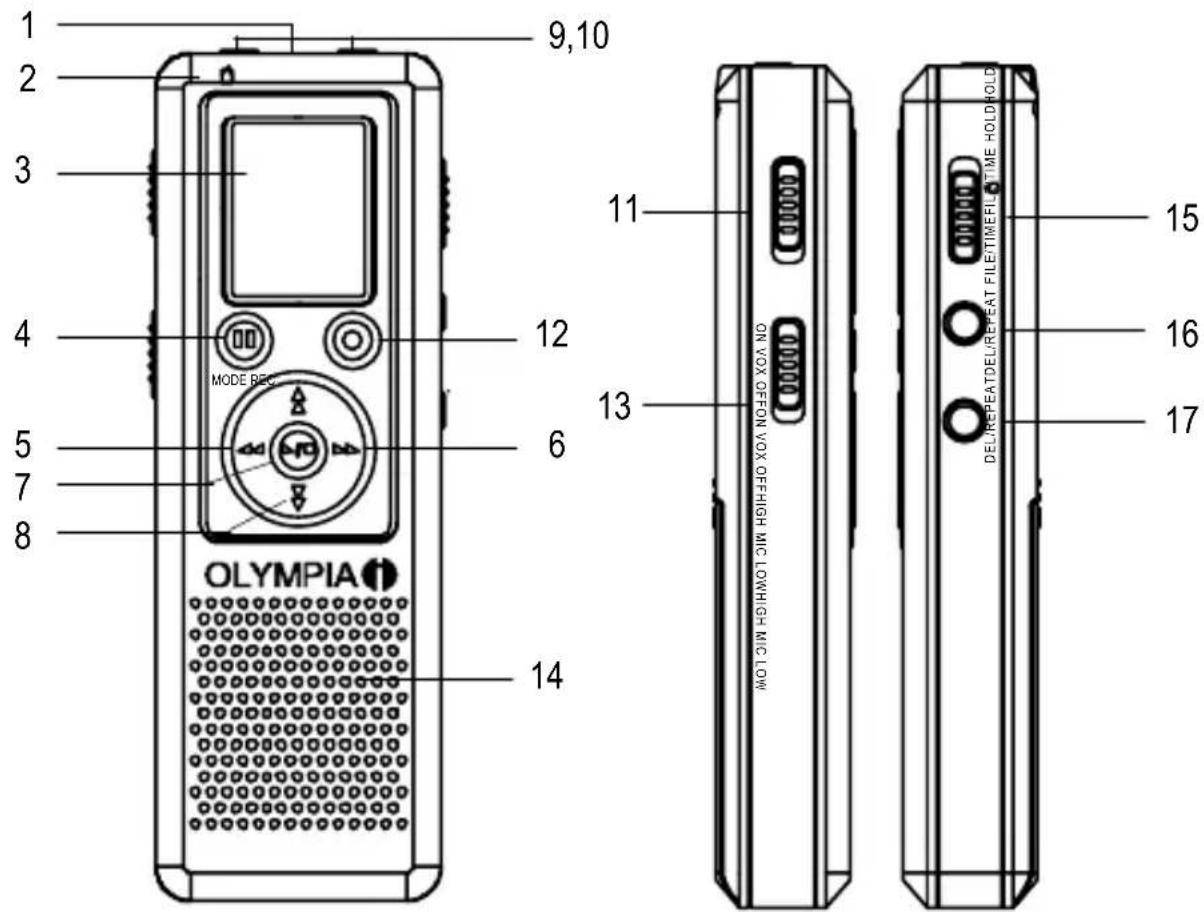
1 Built-in microphone
2 Recording active
3 Display
4 Mode/Pause
5 Reverse
6 Forward
7 Play/Stop
8 Volume control
9 MIC (microphone) jack
10 EAR (earphones/headset) jack
11 Microphone sensitivity
12 Record/Stop
13 VOX on/off
14 Loudspeaker
15 HOLD on/off
16 File/Time
17 Delete/Repeat
GB
Power Supply
10 Power Supply
Inserting the batteries
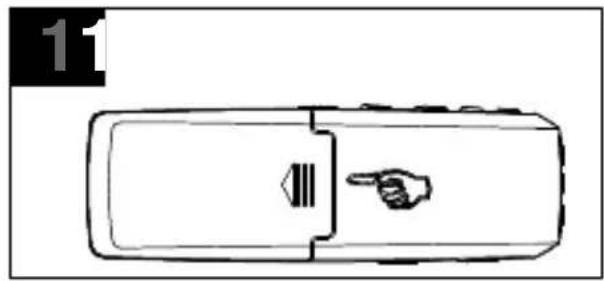
Open the battery compartment by sliding the cover out and opening it.
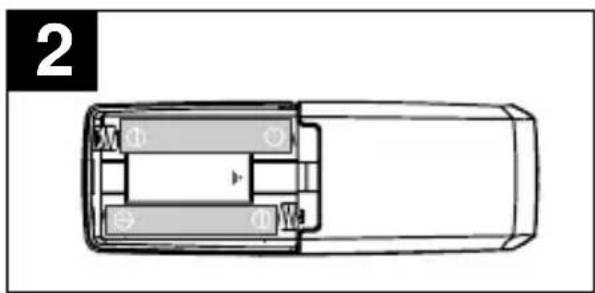
Insert 2 AAA batteries (not supplied). Pay attention to correct polarity.
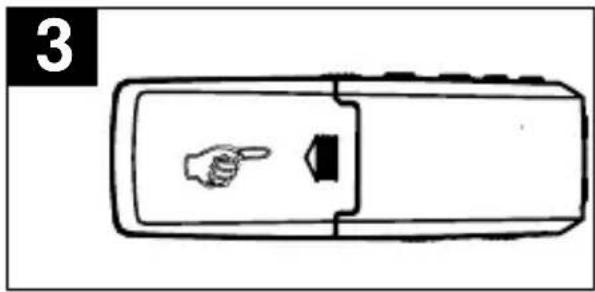
Close the battery compartment again.
The batteries are fully charged.

The batteries are empty.

The charge status of the batteries is indicated in the display.
GB
Note: When changing the batteries, the messages recorded are retained but the time must be set again.
11 Operation
Setting the date and time
When the batteries have been inserted properly, the machine is in Standby mode. 1_M 01_D (month, day) and 0:00 (hour, min.) appear in the display. Set the date and time as follows:
While the date and time appear in the display, press the FILE/TIME button ① to select between the 12 or 24-hour clock. Press and hold the MODE/PAUSE button ② for 3 seconds then release it.
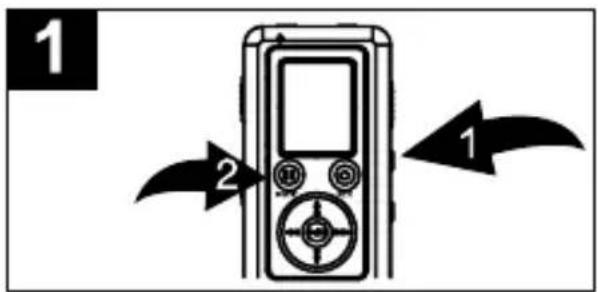
"SET" appears in the display. Press and hold the MODE/PAUSE button ② a second time in order to display the date and time settings.
Press the PLAY/STOP button ③ to confirm the setting, the year indicator flashes. Define the year by pressing the REV ⑤ or FWD ④ buttons. Press the PLAY/STOP button to confirm the setting.
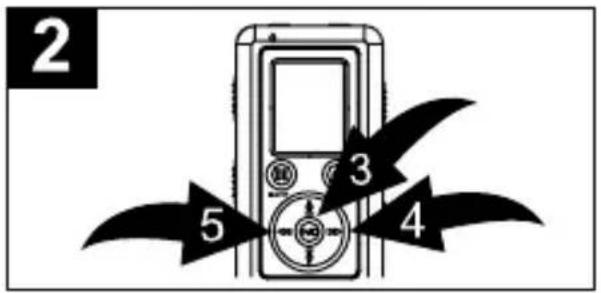
Press the REV ⑤ or FWD ④ button to select the month and then press the PLAY/STOP button ③ to confirm it. Repeat the steps to set the day, hour and minute.
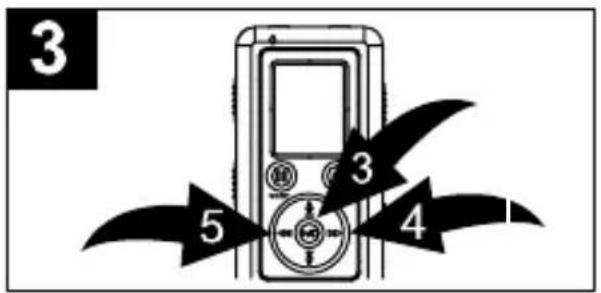
Note: While the date and time appear in the display (TIME mode), press the FILE/TIME button ① to select between the 12 or 24-hour clock.
Operation
Switching on (Standby mode)
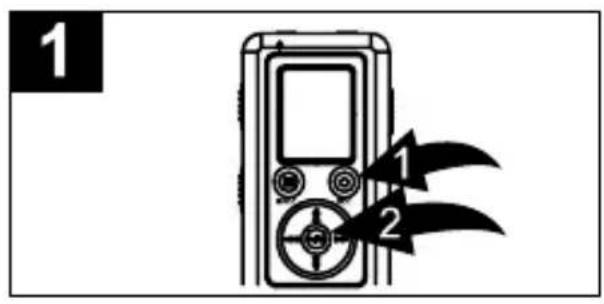
To activate Standby mode, press the REC/STOP button ① or the PLAY/STOP button ② when TIME mode is active.
Switching on (TIME mode)
To activate TIME mode immediately, press the MODE/PAUSE button ③ when Standby mode is active.
Note: If you do not press a button for a period of 30 seconds, the device automatically switches to the time display (TIME mode).
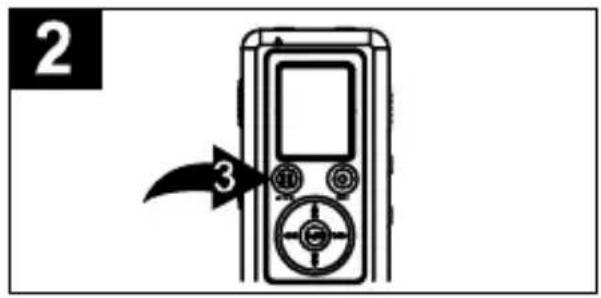
Operating modes
The operating modes differ in the display as follows:
Standby mode TIME mode
- Number of messages
- Recording quality
- Battery capacity
- Memory location
-
Length of the current message
-
Battery capacity
- Month/Day
- Time
GB
Recording quality
There are three different recording qualities available for selection to record the voice messages.
Recording mode Recording quality Max. recording time
HP (High Play) Best possible 225 min.
MP (Medium Play) Good 447 min.
LP (Long Play) For long recording 872 min.
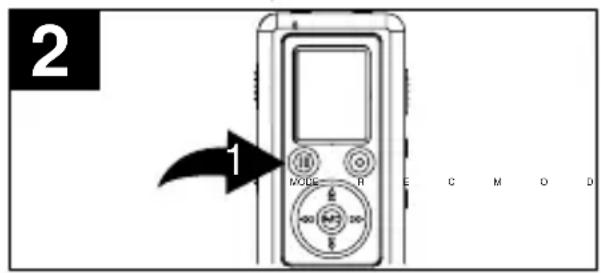
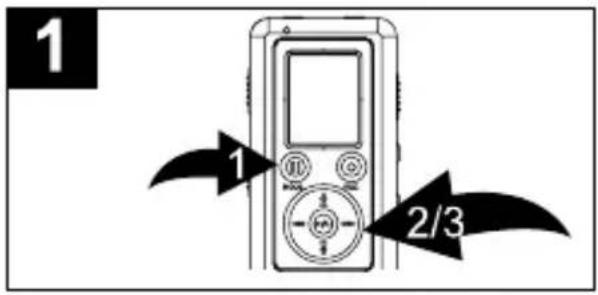
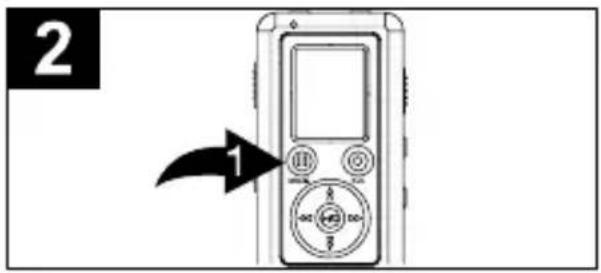
Press and hold the MODE/PAUSE button ① for 3 seconds. "SET" appears in the display and the recording quality currently set flashes (HP, MP or LP). Press the REV ② or FWD ③ button to select the recording quality required.
When the required recording quality appears, press the MODE/PAUSE button ① twice to confirm it and switch to TIME mode or do not press any buttons for a period of 30 seconds to switch to TIME mode.
GB
Operation
Managing messages
The device has 4 files, named A, B, C and D, in which to store the messages. You can store a total of 396 messages or 872 minutes in LP mode using all the files (refer to “Recording quality”, Page 29). A max. of 99 messages can be recorded in one file. Proceed as follows to select a file:
Press the REC/STOP ① or PLAY/STOP ② button to activate Standby mode. Press the FILE/TIME button (side of recorder) to select the required file/memory location (A, B, C, D). The number in the top right corner of the display indicates the total number of messages recorded. The time at the bottom of the display indicates the total recording time of the message selected.
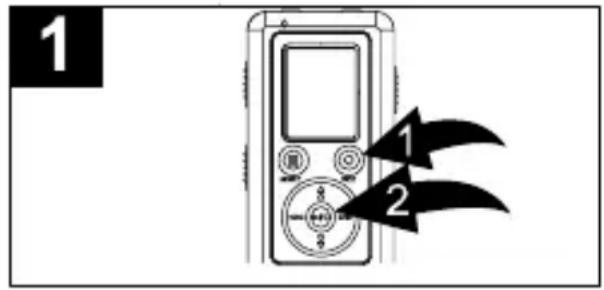
Note: Each time a message is recorded, the device generates a consecutive number, starting with 1 for the last message, which appears in the display. If no more memory space is available, "FULL" appears in the display. Refer to Page 36 to learn how to erase messages.
Recording sensitivity
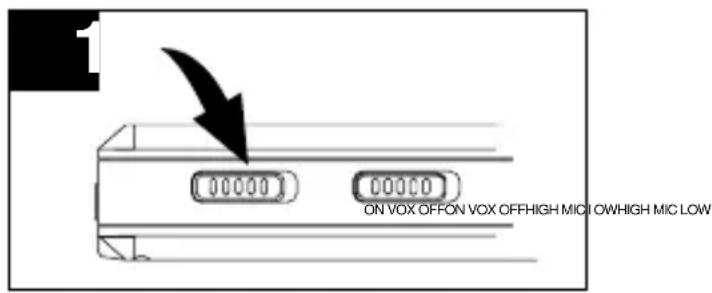
Slide the MIC control to LOW to record noises which are very close to the microphone. Slide the control to HIGH to make recordings further away from the microphone.
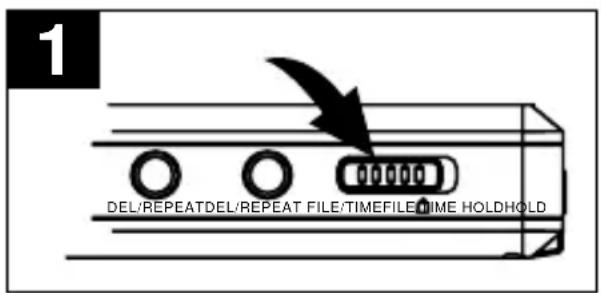
Hold function (key lock)
Slide the HOLD control to the lock to deactivate all the buttons. "HOLD" appears in the display. Slide the HOLD control to the left to activate all the buttons again.
Recording
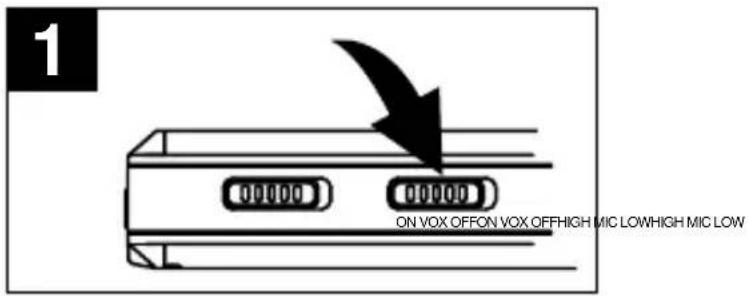
The device is equipped with an automatic voice activity detector (VOX) (refer to Page 32 "Voice activity detector (VOX)"). If VOX is deactivated, you can record in the normal way.
Ensure that the VOX control on the rear side is set to OFF. Switch the device on and select the required recording quality (refer to Page 29 "Recording quality").
Select a file/memory location by pressing the FILE/TIME button ① (refer to Page 30 "Managing messages").
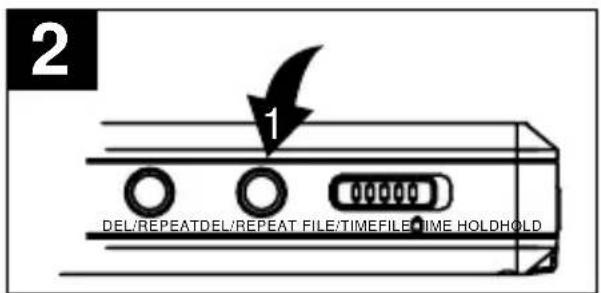
Press the REC/STOP button ② when the device is in Standby mode, REC lights up in the display and the recording time appears. Speak into the microphone or connect a microphone to the MIC jack and speak at a normal volume. Press the REC/STOP button ② again to end recording.
Press the PLAY/STOP button ④ to display the time remaining for recording. Press the MODE/PAUSE button ③ to interrupt recording, PAUSE flashes in the display. To resume recording, press the MODE/PAUSE button ③ again.
Operation
Voice-activated recording (VOX)
When the VOX function is active, the device only records when you speak; if you pause, the device interrupts recording and resumes when you continue to speak.
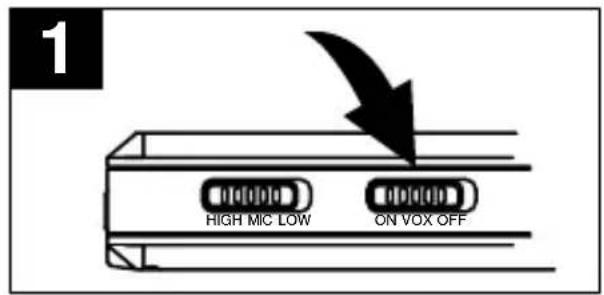
Slide the VOX control to ON. VOX is active. Switch the device on and select the required recording quality (refer to Page 29 "Recording quality").
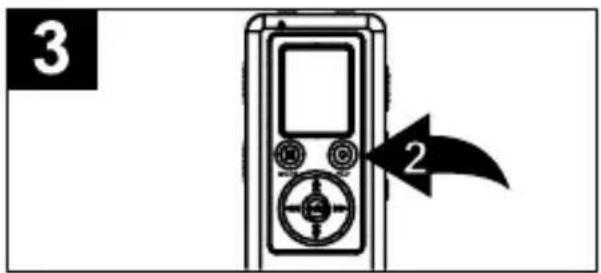
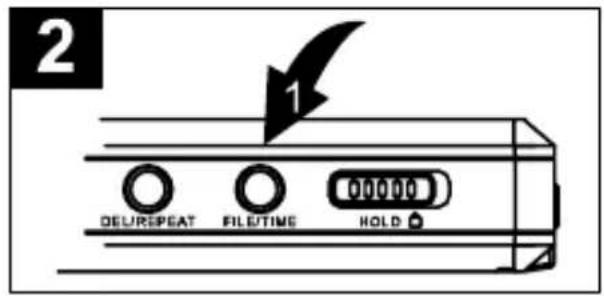
When the device is in Standby mode, press the FILE/TIME button
① to select a file (A, B, C, D) in which the message should be stored.
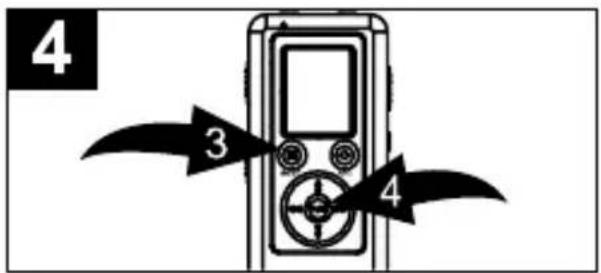
Press the REC/STOP button ②, REC lights up in the display and the time indicator for the current recording appears. Speak into the microphone integrated or connect an external microphone to the MIC
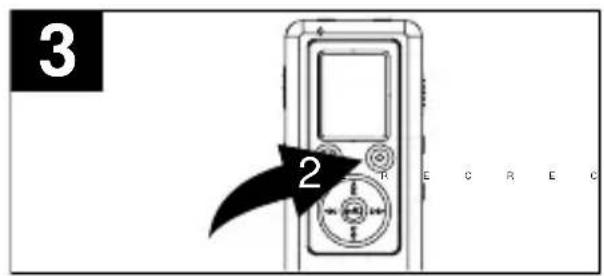
jack. The device begins to record the moment you start to speak. If the device interrupts recording, REC and PAUSE flash in the display until you resume recording.
Press the REC/STOP button ② to end recording.
Note:
- The first noise activates the recorder and it is possible it will not be recorded.
•A change in a voice volume does not cause the device to interrupt recording; 2 seconds silence suffices to interrupt recording. - For information on continuous recording, refer to Page 31.
• To interrupt recording immediately, press the MODE/PAUSE button. - The integrated audio level automatically sets the recording volume.
•A distance of approx. 20 cm from the device is considered reasonable for recording at a normal volume (speaking).
Playing messages
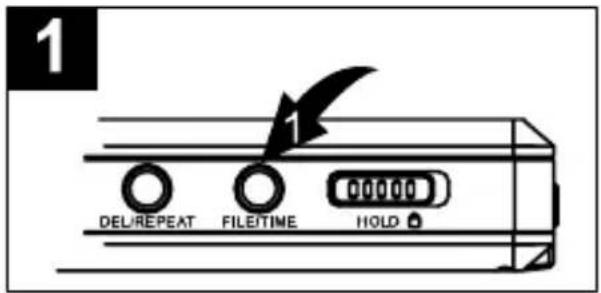
Switch the device on, press the FILE/TIME button ① and select a file (A, B, C, D).
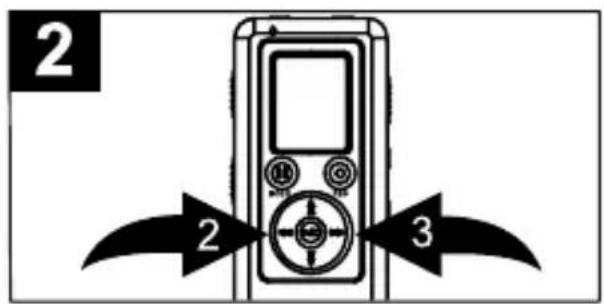
Press the REV ② or FWD ③ button to select the message required. The message number and message length appear in the display.
GB
Operation
Activate Standby mode and press the PLAY/STOP button ⑤ to play the current message. ▶ appears during playback as well as the message timer. Press the REC/STOP button ④ to check the time and date of the message. To recall the current time display, press no button for 3 seconds - the device automatically changes back.
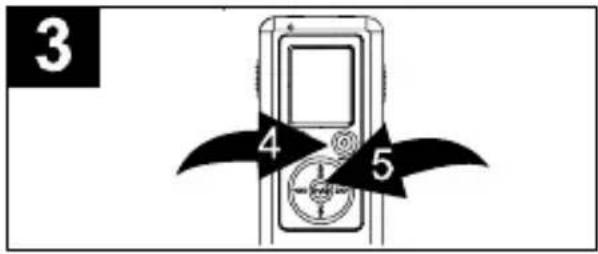
- To interrupt playback immediately, press the MODE/PAUSE button. PAUSE flashes in the display. To resume playback, press the MODE/PAUSE button again.
• To move back/forward in the current playback, press and hold the REV or FWD button. Release the respective button when you have reached the required passage.
- Press the REV or FWD button to interrupt playback and select another messages.
Microphone
You can connect a microphone to the MIC jack on the device. As soon as the microphone is connected, the integrated microphone is deactivated.
Headset
Earphones/headset can be connected the EAR jack on the device. As soon as the headset/earphone is connected, the loudspeaker is automatically deactivated.
Repeating a message
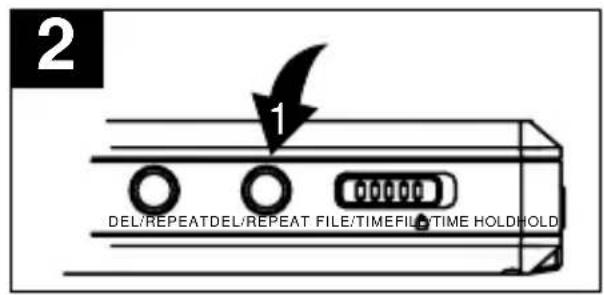
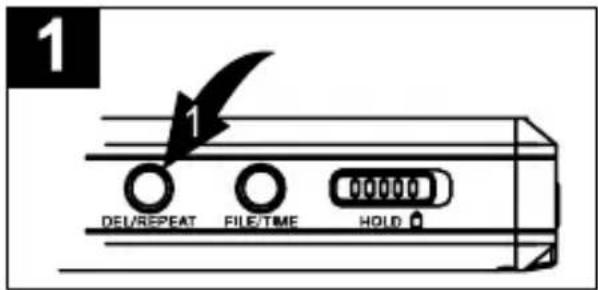
If you want to play a message again, press the DEL/REPEAT button ① during playback; REPEAT appears in the display and the message is repeatedly played until you press the PLAY/STOP button ②.
Repeat all messages
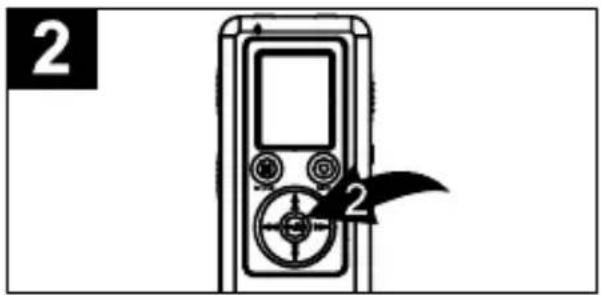
If you want to play all the messages in a file (A, B, C, D), press the DEL/REPEAT button ① during playback until REPEAT ALL appears in the display. All the messages in the file selected (A, B, C, D) are repeatedly played until you press the PLAY/STOP button ②.
Stopping repeat playback
Press the DEL/REPEAT button once or twice while a message is being played until REPEAT or REPEAT ALL disappears from the display.
Interrupting repeat playback
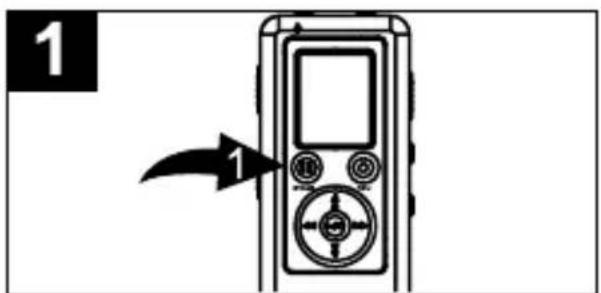
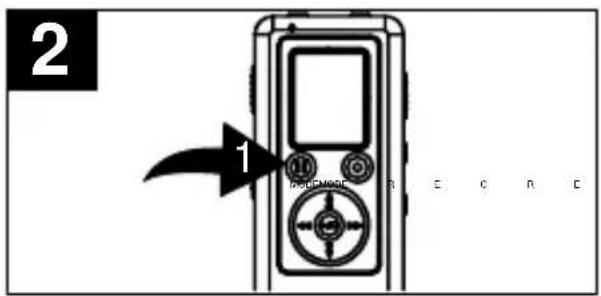
To interrupt recording or playback, press the MODE/PAUSE button ①. PAUSE flashes in the display.
Press the MODE/PAUSE button ① again to resume recording or playback.
GB
Operation
Searching for a message
The device plays the first five seconds of each recording.
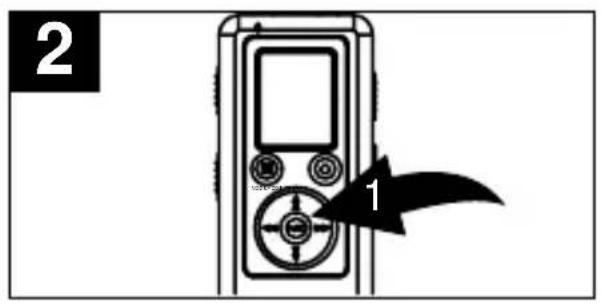
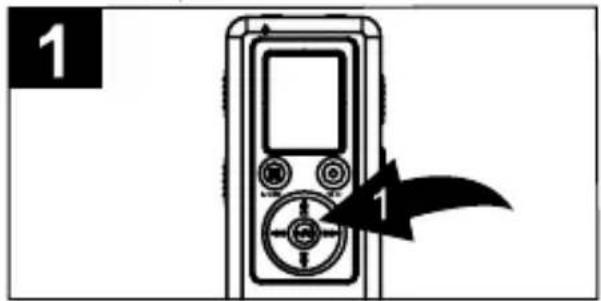
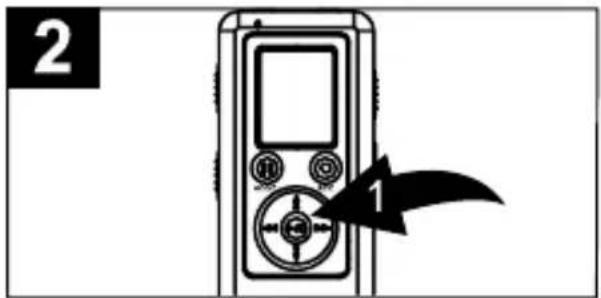
Press the FILE/TIME button when Standby mode is active to select a file (A, B, C, D). Press and hold the PLAY/STOP button ① for 2 seconds. SCAN appears in the display. The device plays the first 5 seconds of each message located in the file selected (A, B, C, D).
The device ends the search automatically if no message is selected. To play a message during the search, press the PLAY/STOP button ①. To end the search, press the PLAY/STOP button ① twice.
Erasing messages
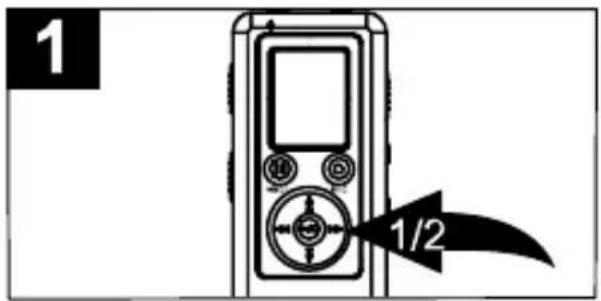
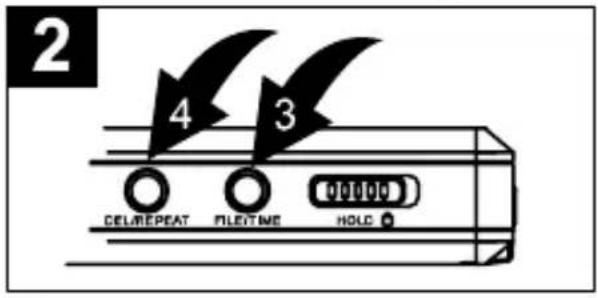
Activate Standby mode and select the file required by pressing the FILE/TIME button ③ and the required message by pressing the REV ① or FWD ② button. The message number and length appear in the display.
GB
Press the DEL/REPEAT button ④, ERASE appears in the display and the first 5 seconds of the message are played. Press the DEL/REPEAT button ④ within these 5 seconds to erase the message. The message is erased and the remaining messages are renumbered.
Note: If no messages should be erased, do not press the DEL/RE-PEAT button ④ when it is being played back.
Erasing all messages
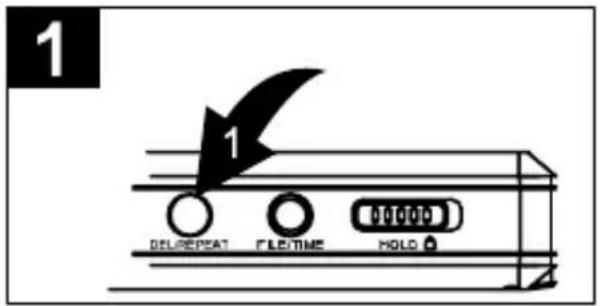
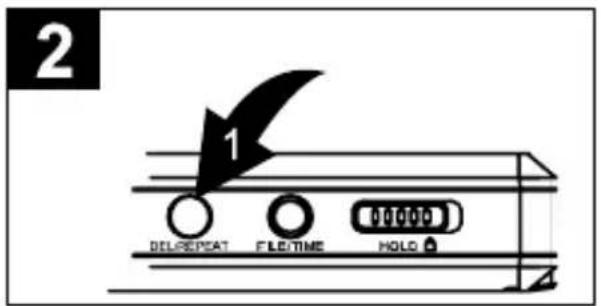
Activate Standby mode, press the DEL/REPEAT button ①, and simultaneous press and hold the REC/STOP button until ALL and ERASE appear in the display.
Then press the DEL/REPEAT button ① for 5 seconds. All the messages are erased.
GB
Technical Data
12 Technical Data
Technical data
| Type of memory Built-in flash memory | |
| Max. recording time 872 min. in LP mode | |
| Loudspeaker 0.2 W (8 Ohm) | |
| Output power 80 mW | |
| Power source 3 V, 2 x AAA batteries | |
| Operating time 18 hours for recording | 20 hours for playback at volume level 9 |
| Dimensions 109 (H) x 37 (W) x 18 (H) | mm |
| Weight (without batteries) 50 g | |

- Bedienung
- Wiederholen abbrechen
- Nachrichten suchen
- Nachricht löschen
- Display Indicators 24
- Operating Elements 25
- Power Supply 26
- Operation 27
- Technical Data 38
- Safety Information
- Safety Information
- Intended use
- Use in extreme conditions
- Batteries
- Rechargeable battery pack
- Medical equipment
- Disposal
- Display Indicators
- Power Supply
- Power Supply
- Inserting the batteries
- GB
- Operation
- Setting the date and time
- Operation
- Switching on (Standby mode)
- Switching on (TIME mode)
- Operating modes
- Standby mode TIME mode
- Recording quality
- Recording mode Recording quality Max. recording time
- Managing messages
- Recording sensitivity
- Hold function (key lock)
- Recording
- Voice-activated recording (VOX)
- Note:
- Playing messages
- Microphone
- Headset
- Repeating a message
- Repeat all messages
- Stopping repeat playback
- Interrupting repeat playback
- Searching for a message
- Erasing messages
- Erasing all messages
- Technical Data
- Technical Data
Brand : OLYMPIA
Model : Memo 77
Category : Dictaphone