
KCH 4890 B - Range hood Kernau - Free user manual and instructions
Find the device manual for free KCH 4890 B Kernau in PDF.


| Product Type | Range Hood |
| Brand | Kernau |
| Model | KCH 4890 B |
| Width | 90 cm |
| Depth | 50 cm |
| Height (Chimney Min/Max) | 50-100 cm |
| Weight | Approx. 15 kg |
| Power Supply | 220-240 V, 50 Hz |
| Rated Power | 250 W |
| Maximum Extraction Capacity | 650 m³/h |
| Noise Level (Max Speed) | 65 dB |
| Number of Speeds | 3 |
| Control Type | Touch Controls |
| Lighting | LED, 2 x 3 W |
| Grease Filter | Aluminum mesh, washable |
| Carbon Filter (Optional) | For recirculation mode |
| Duct Diameter | 150 mm |
| Installation Type | Wall-mounted, chimney |
| Energy Class | A |
| Annual Energy Consumption | 80 kWh/a |
| Fluid Dynamic Efficiency | A |
| Grease Filter Efficiency | B |
| Noise Level (Low Speed) | 45 dB |
Frequently Asked Questions - KCH 4890 B Kernau
User questions about KCH 4890 B Kernau
0 question about this device. Answer the ones you know or ask your own.
Ask a new question about this device
Download the instructions for your Range hood in PDF format for free! Find your manual KCH 4890 B - Kernau and take your electronic device back in hand. On this page are published all the documents necessary for the use of your device. KCH 4890 B by Kernau.
USER MANUAL KCH 4890 B Kernau
INSTRUKCJA MONTAŻU I OBSŁUGI OKAPU
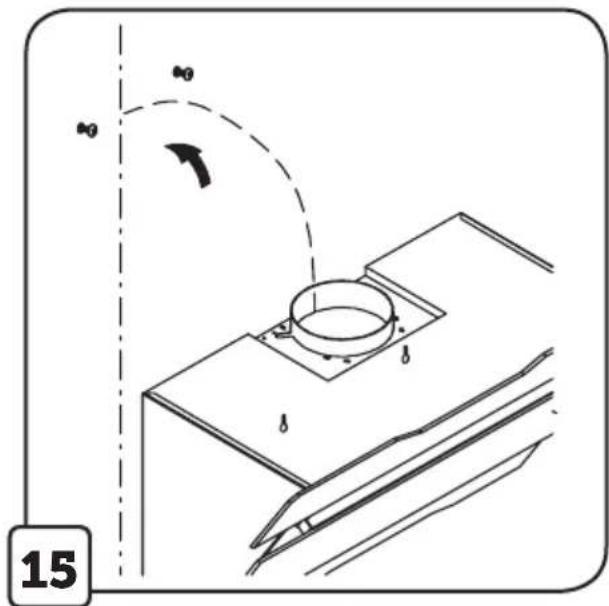
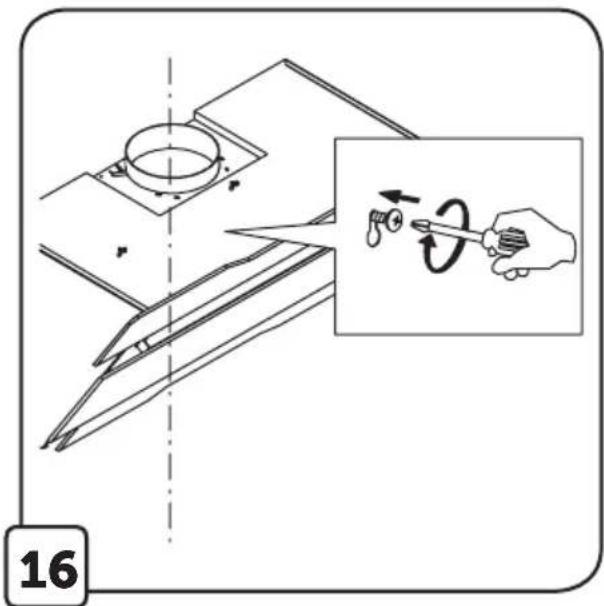
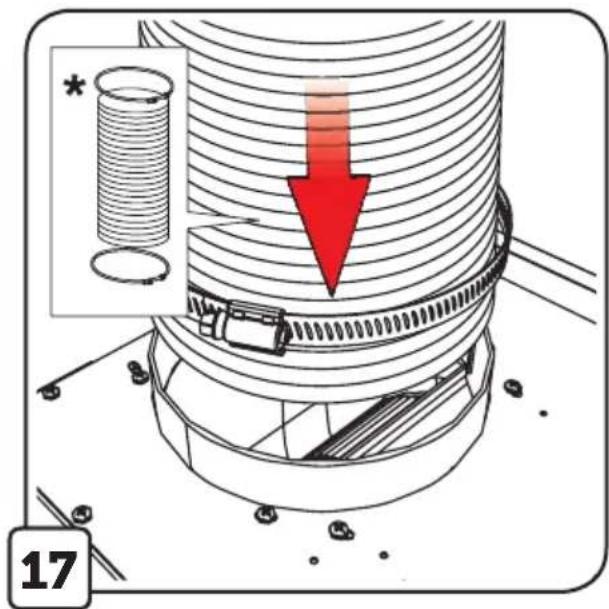
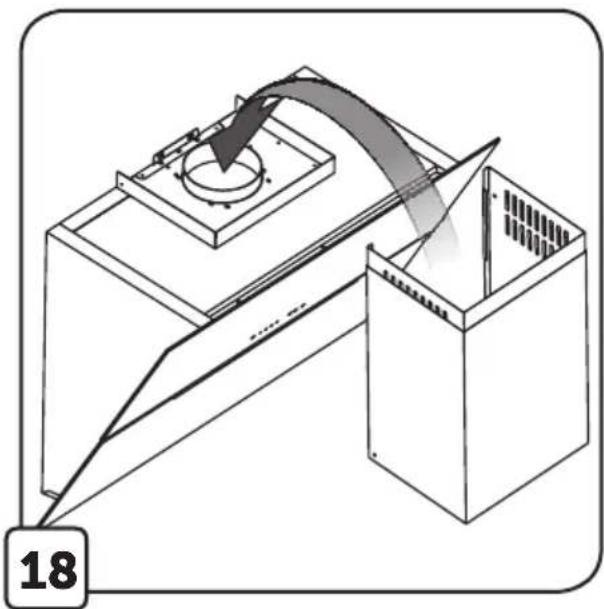
natural_image
Diagram of a mechanical device with a curved arrow and labeled part '18' (no text or symbols on the diagram itself)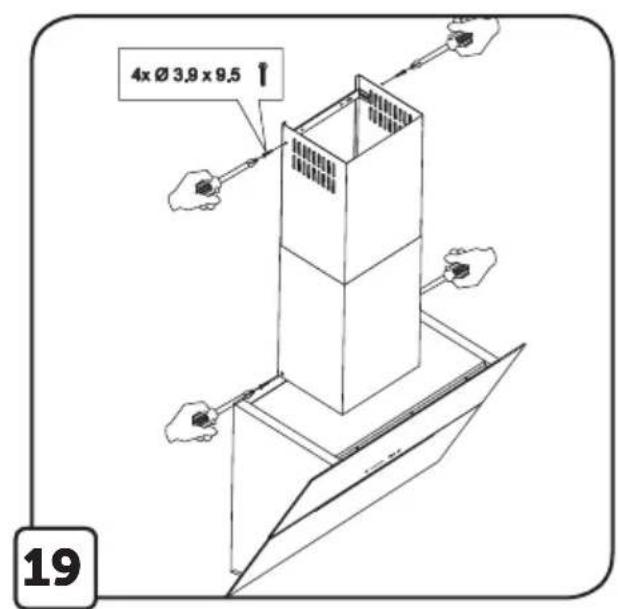
natural_image
Technical diagram of a mechanical assembly with directional arrows indicating motion or force (no text or symbols present)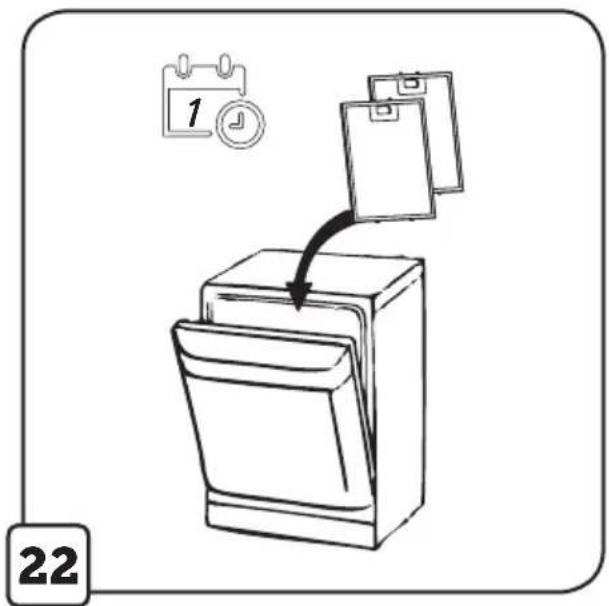
Below you can find explanations regarding the symbols occurring in this manual:
Important information concerning the user's safety and its correct use.
Information concerning the environmental protection.
Ducted cooker hood.
Recirculating cooker hood.
You should start using the cooker hood only after reading this manual.
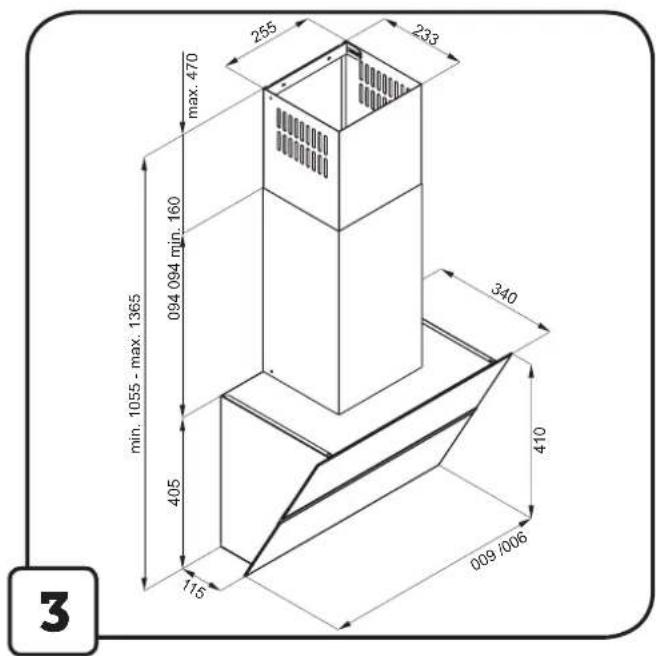
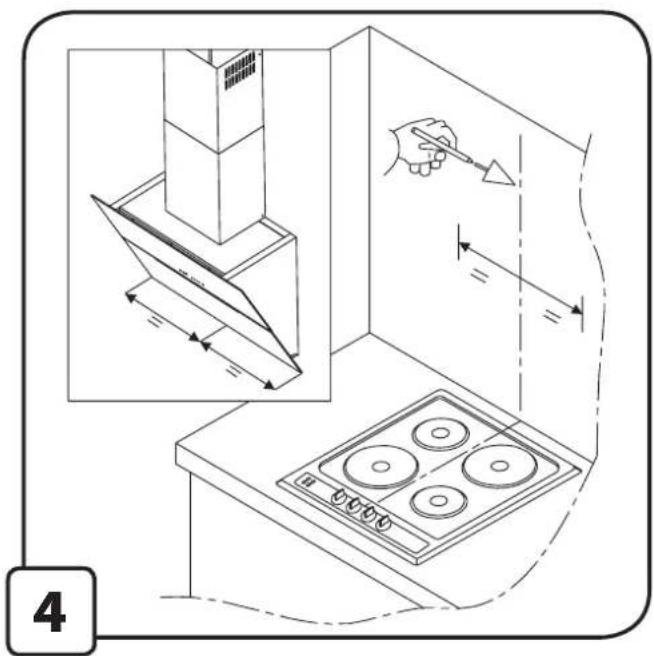
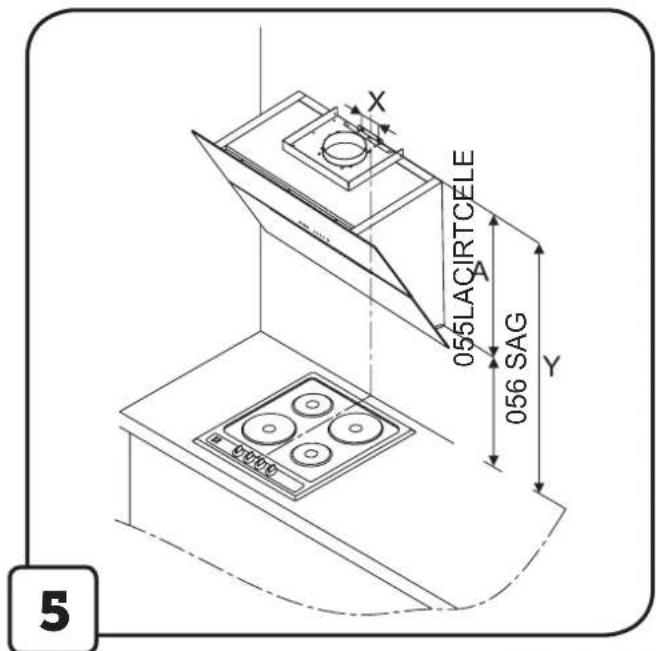
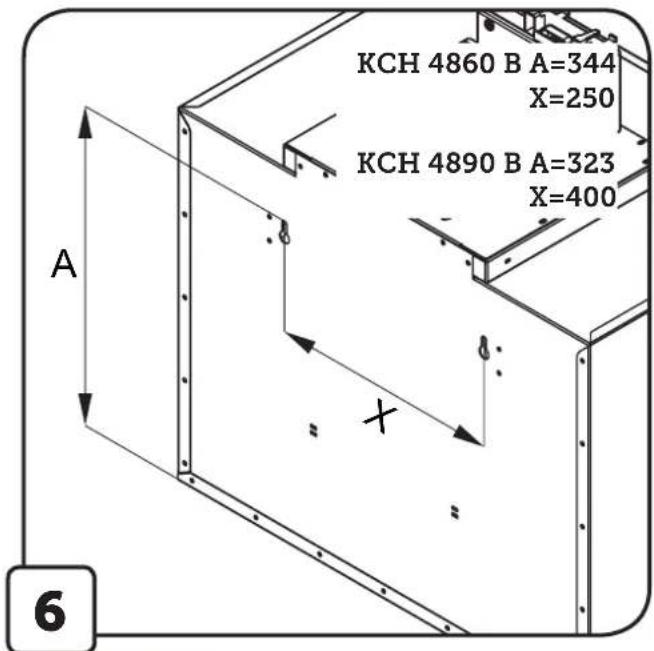
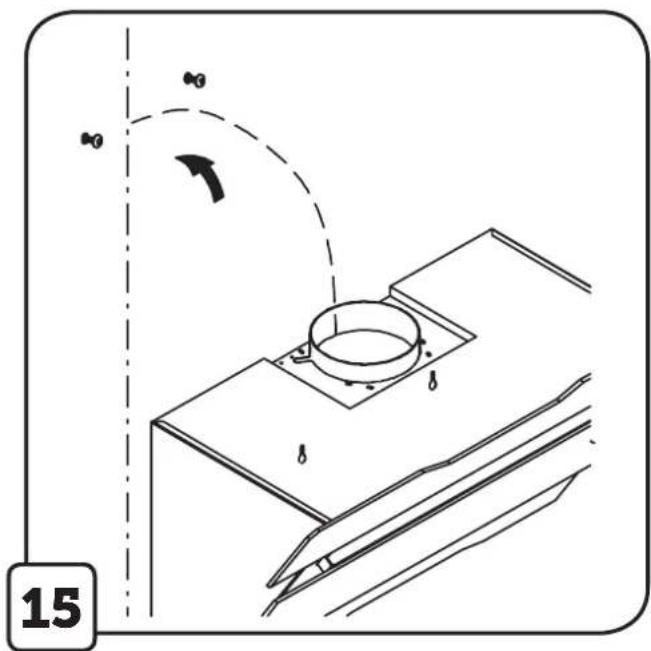
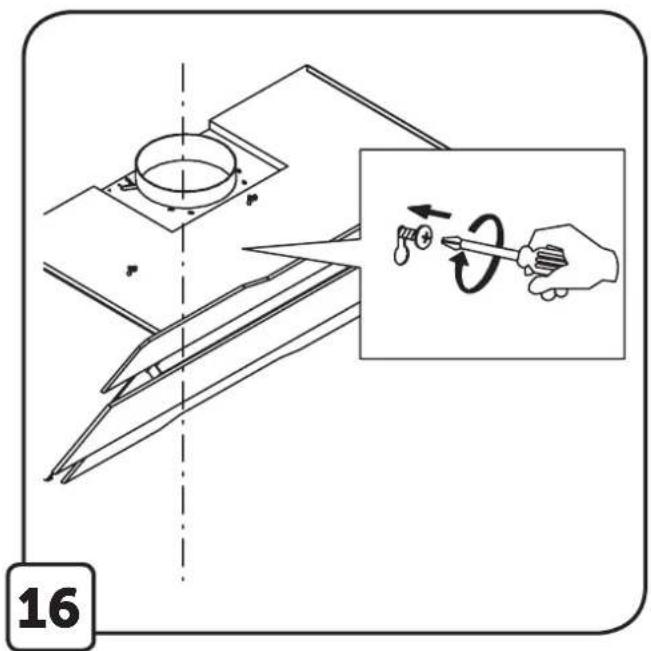
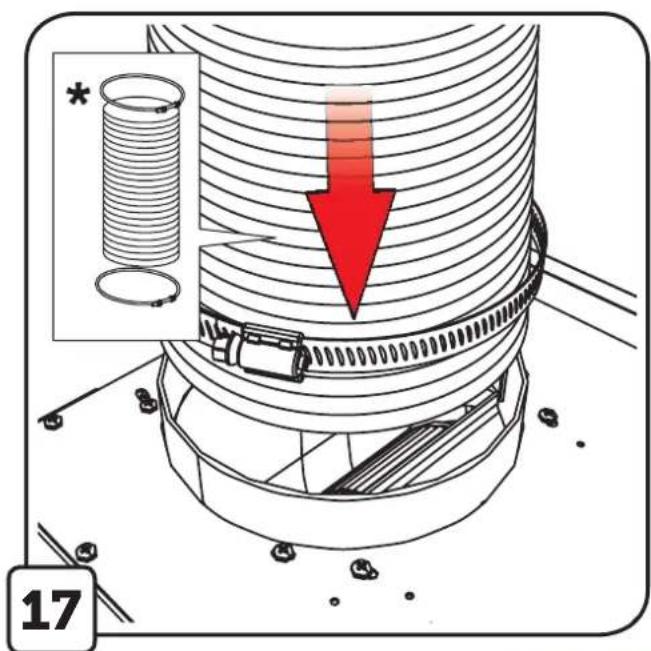
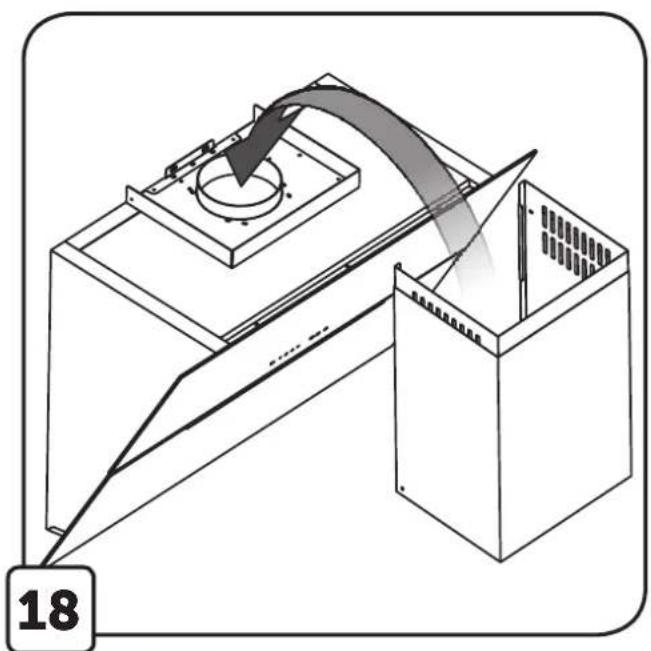
natural_image
Isometric diagram of a mechanical assembly with a curved arrow indicating motion, no text or symbols present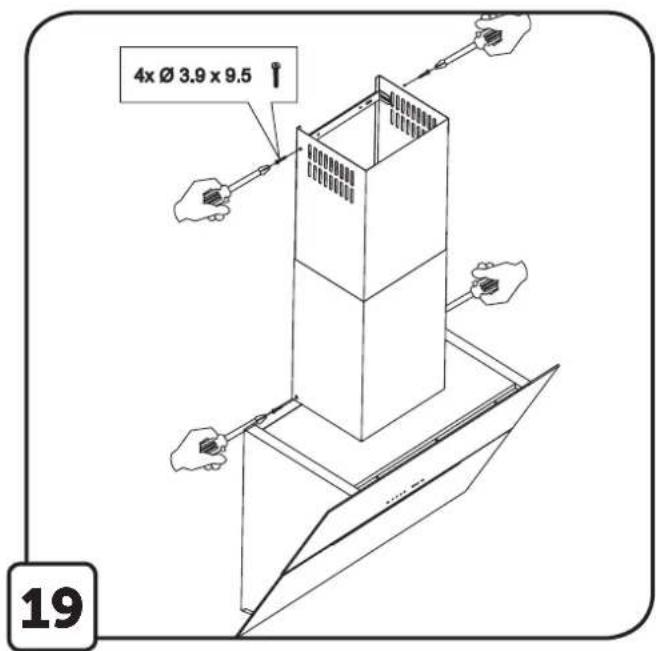
natural_image
Diagram of a mechanical device with red arrows indicating motion or flow, no readable text or symbols present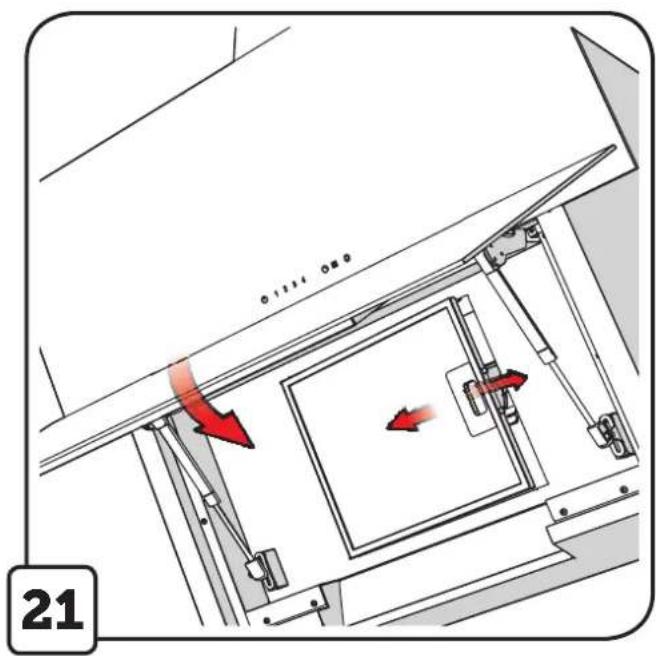
natural_image
Diagram of a mechanical assembly with directional arrows indicating motion or force, no readable text or symbols present.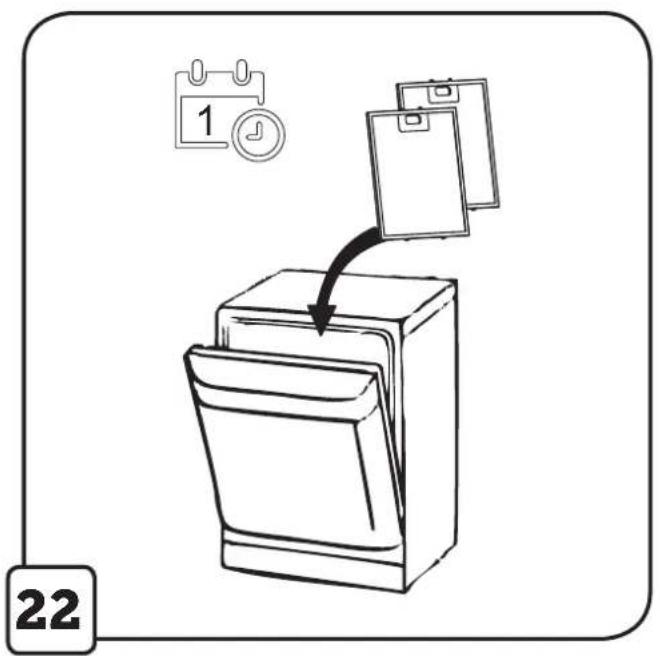
During installation of the device, it's necessary to follow the instructions contained in this manual. The manufacturer declines all responsibility for damages resulting from the installation carried out inconsistently with the information provided in this manual.
This cooker hood has been designed exclusively for domestic use. In terms of appearance, the cooker hood may differ from the cooker hood presented in the figures of this manual, however the instructions for its use, maintenance and assembly remain unchanged.
! It’s necessary to keep this user manual in a safe place, in order to be able to use it at any time. If the device is sold or moved, please make sure that this user manual is included along with it.
! Carefully read the user manual, which provides precise information concerning the installation, use and taking care of the device.
! Do not make any electrical or mechanical changes to the device or to the drainage ducts.
Note: Elements marked with the symbol „(*)” are included only in the set of selected models, while in other cases they should be purchased separately.

Warning Note!
- Do not connect the device to the mains prior to completion of the assembly.
- Before carrying out any cleaning or maintenance activity, it’s necessary to disconnect the cooker hood from the power supply by removing the plug from the socket or by turning off the main power switch.
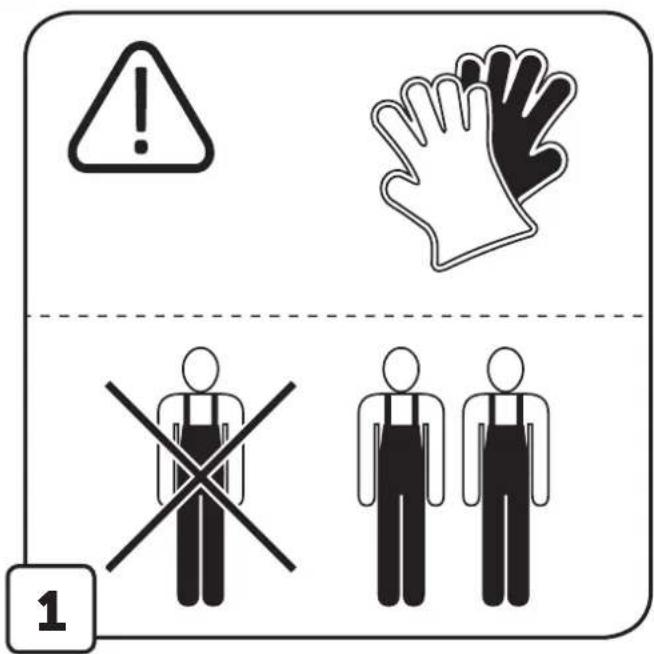
- All assembly and maintenance activities must be carried out in protective gloves.
- This equipment may be used by children of at least 8 years of age and by persons with reduced physical and mental abilities, as well as by persons with no experience and knowledge of the equipment, if supervision or instructions concerning the use of this equipment in a safe manner are provided, so that the associated hazards are clear.
• Children should not play with the equipment.
- Children without supervision should not carry out the cleaning and maintenance of the equipment.
- You should never use the cooker hood without properly installed filters!
- This cooker hood should NEVER be used as a support surface, unless this option has been clearly indicated. A room, in which the cooker hood is used together with other devices that burn gas or other fuel, should be equipped with adequate ventilation.
- Sucked-in air should not be discharged into the duct used to discharge exhaust fumes, which are generated by gas devices or devices powered by other fuel. It’s strictly prohibited to prepare meals with the use of open flame (flambe) under this cooker hood.
- The use of an open fire is dangerous for filters and creates a risk of fire, therefore it’s not allowed under any circumstances. When frying, it’s necessary to remain cautious, in order to avoid overheating the oil so that it does not ignite spontaneously. The available parts can become very heated, if they will be used together with the devices intended for cooking.
- In the scope of necessary technical and safety measures concerning the discharge of exhaust fumes, the regulations issued by the competent local authorities must be strictly observed.
- The cooker hood must be often cleaned, both inside and outside (AT LEAST ONCE A MONTH, while observing the maintenance instructions provided in this manual).
- Failure to observe the rules concerning the cleaning of cooker hood, as well as replacement and cleaning of filters, results in a fire hazard.
- In order to avoid electric shock, do not use or leave the cooker hood without properly installed light bulbs. The manufacturer is not responsible for any damages or fires caused by the device and resulting from non-compliance with the instructions contained in this manual.
- This device is marked in accordance with the Directive 2012/19/EU of the European Parliament and of the Council on waste electrical and electronic equipment (WEEE).
- By ensuring the appropriate disposal of this device, you will contribute to reducing the risk of the product having an adverse effect on the environment and human health, which could otherwise occur in the case of incorrect disposal of this device.
This symbol on the device or packaging means that this product cannot be treated as other municipal waste. It must be handed over to the appropriate collection and recycling centre for electrical and electronic equipment. The correct disposal and scrapping helps in the scope of elimination of the negative impact of scrapped devices on the environment and health. In order to obtain detailed information regarding the recycling possibilities of this device, please contact your local city hall, city cleaning services or the store, in which you purchased this product.
Application
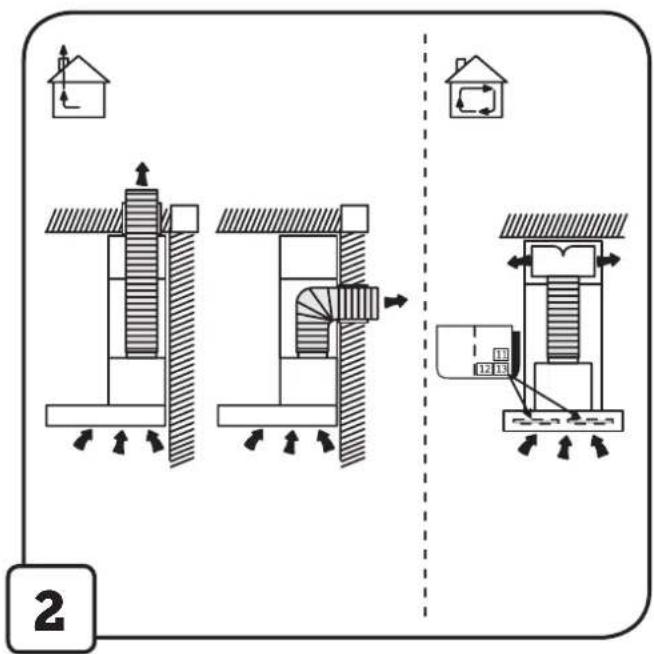
This device can be used as a ducted cooker hood (discharge of fumes to the outside) or as a recirculating cooker hood (fumes are filtered and discharged back into the room). The models of cooker hoods that are not equipped with a discharge fan function only as an extractor and must be connected to an extraction device (not included in the set). Guidelines regarding the connection are supplied with the external extraction device.

ed cooker hoodg
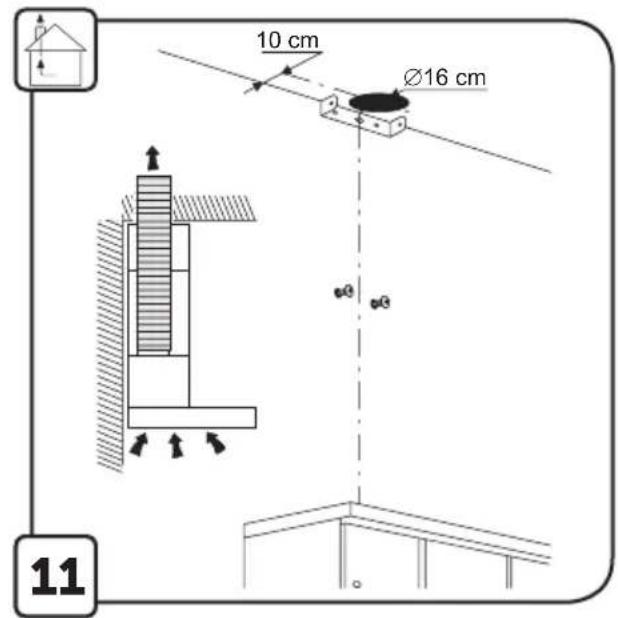
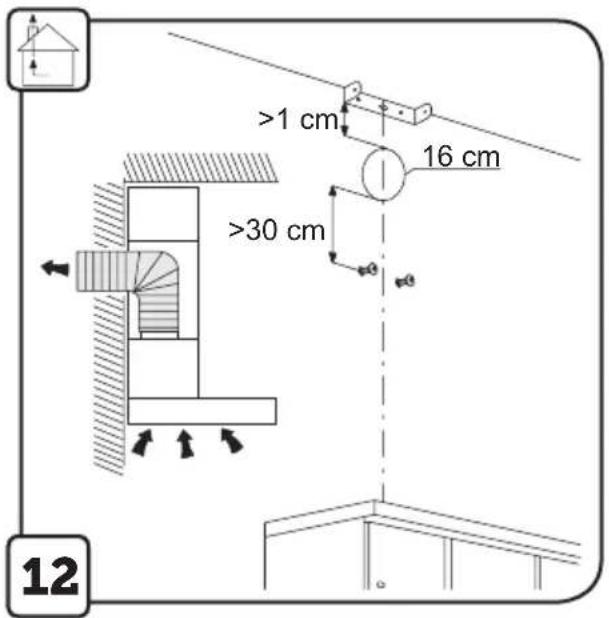
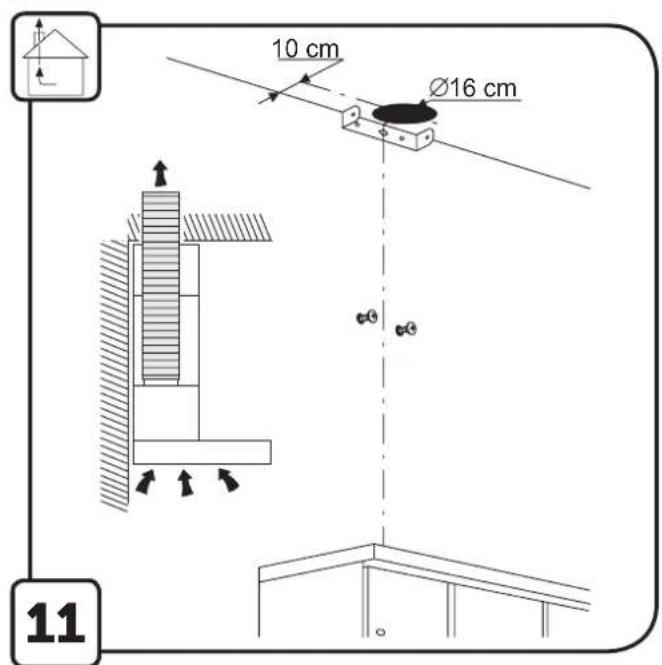
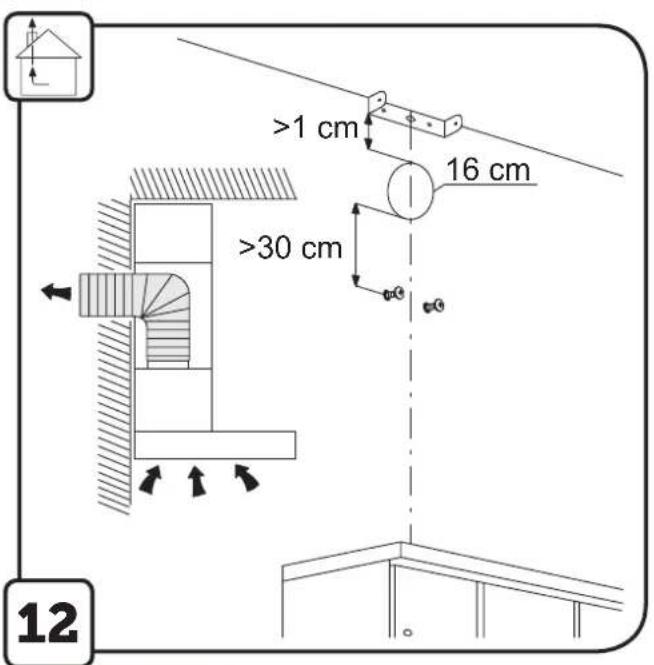
The fumes are removed to the outside with the use of a discharge pipe, which is mounted to the connection flange. Diameter of the discharge pipe must be equal to diameter of the connection flange.
Note! The discharge pipe is not supplied in a set with the device and must be purchased separately. In the horizontal part, the pipe must have a slight inclination upwards (approx. 10°), in order to facilitate the air flow to the outside. If the cooker hood is equipped with carbon filters, then they must be removed. Connect the cooker hood to the ventilation duct using a discharge pipe with a diameter corresponding to the size of the cooker hood's outlet (connecting flange). The use of ducts with a smaller cross-section reduces the suction capabilities and drastically increases noisiness of the cooker hood. Therefore, the manufacturer is not responsible for this condition.
! Use the shortest possible duct.
! Use a duct with the lowest number of bends (maximum bending angle: 90^ ).
! Avoid radical changes in the duct's cross-section.
! Use a duct with the smoothest inner surface.
! The duct material must be compliant with the applicable standards.
Recirculating cooker hood
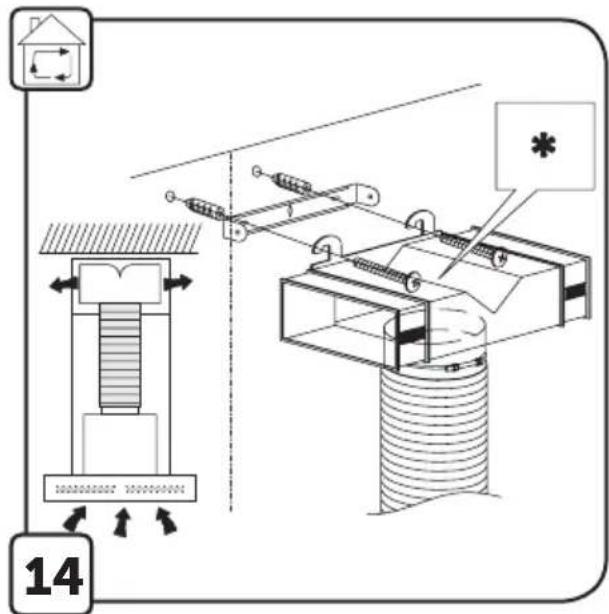
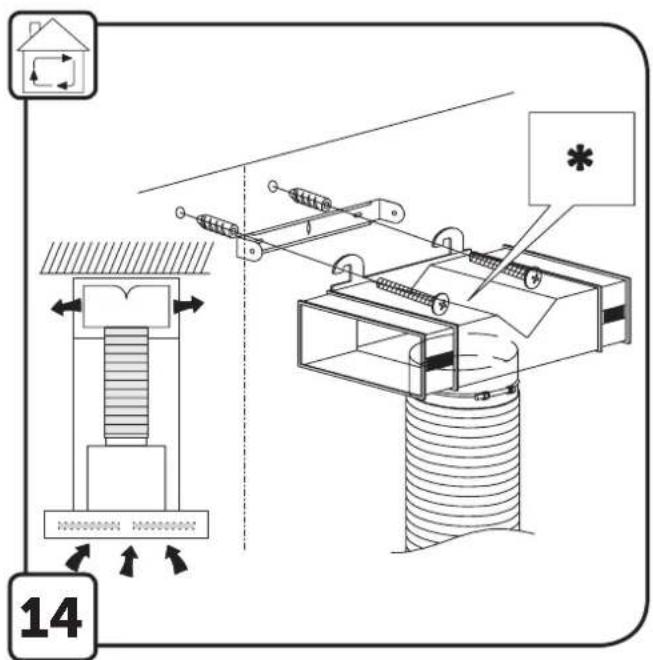
In order to use the cooker hood in this version, it's necessary to install the carbon filter. It can be purchased from the seller. Suckedin air is cleaned of grease and odours, before it is returned to the room through the grilles in the chimney's top cover.
Installation of the cooker hood
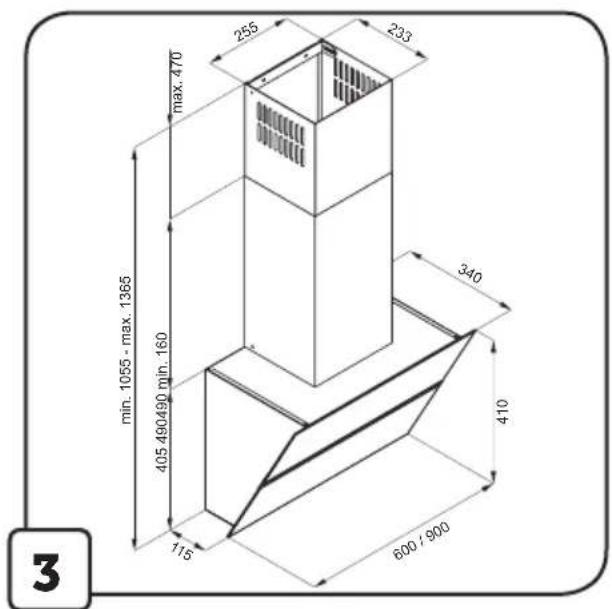
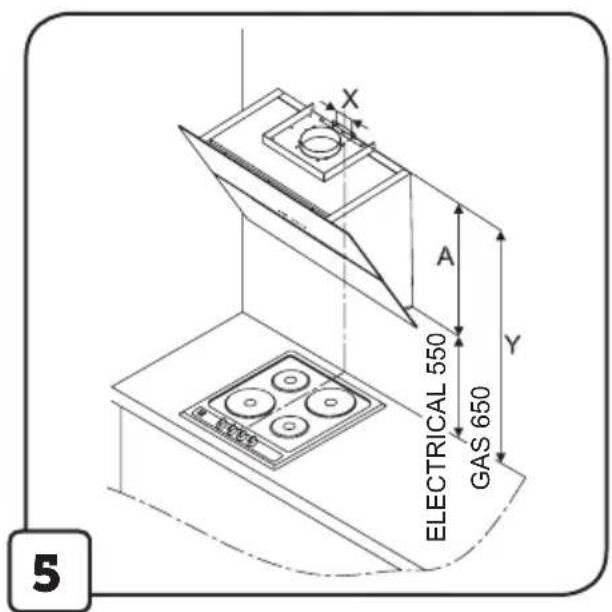
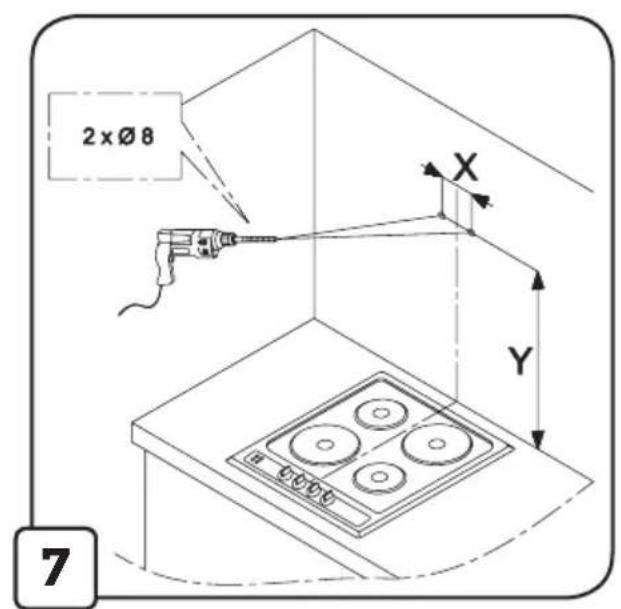
The minimum distance between the surface on which the dishes are located on the heating device and the lowest part of the cooker hood should amount to no less than 55 cm - in case of electric cookers, and no less than 65 cm - in case of gas cookers or mixed type. If a larger distance is indicated in the installation manual of the gas kitchen, then you must comply with such indications.

Electrical connectione
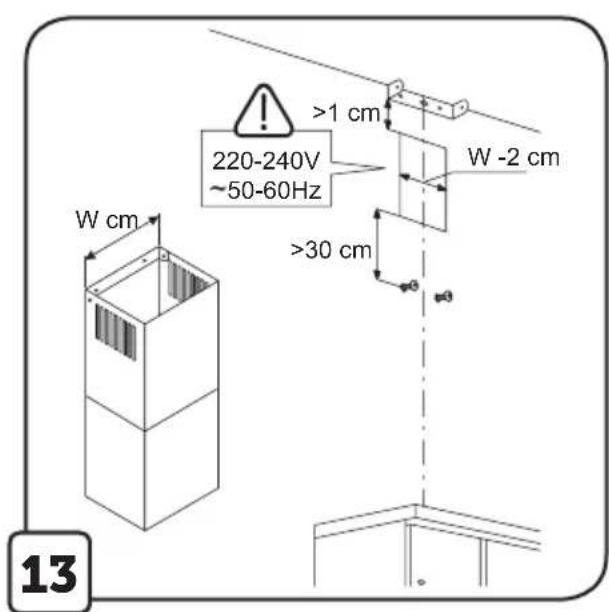
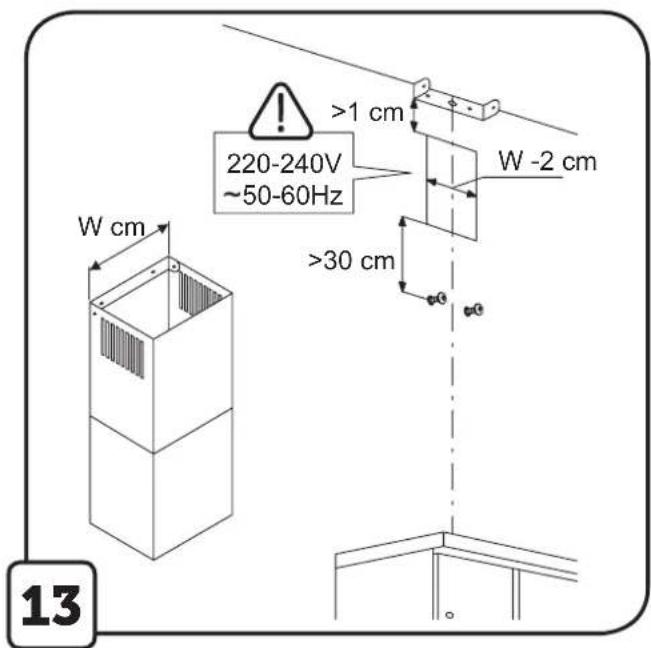
The mains voltage must correspond to the voltage indicated on the plate, which is located in the inner part of the cooker hood. This cooker hood is equipped with a plug, which must be connected to a socket in accordance with the applicable standards, and placed in an easily accessible place, also after the completed installation.
Note! Prior to the reconnection of the hood circuit to the power supply and checking its proper operation, you always have to make sure that the power cord is correctly mounted. The cooker hood is equipped with a special power cord. In case of damage to this cord, it should be purchased from the manufacturer or supplier of the cooker hood..
Installation of the cooker hood
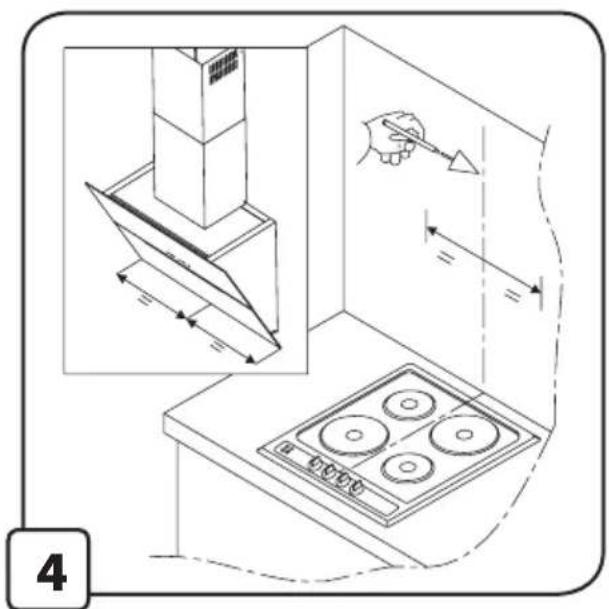
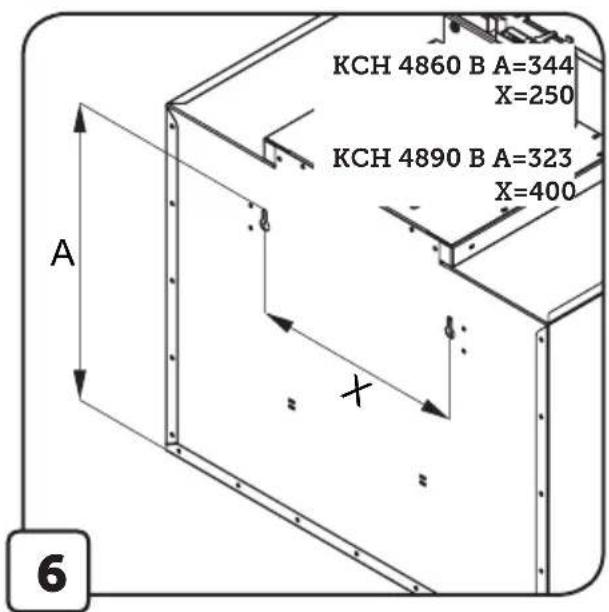
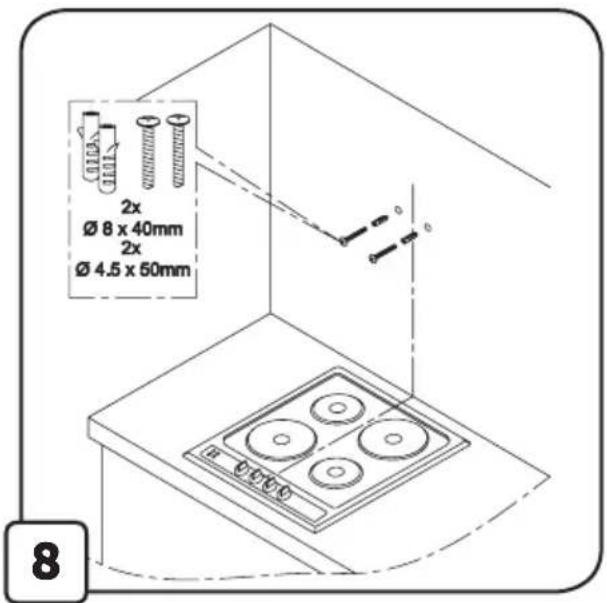
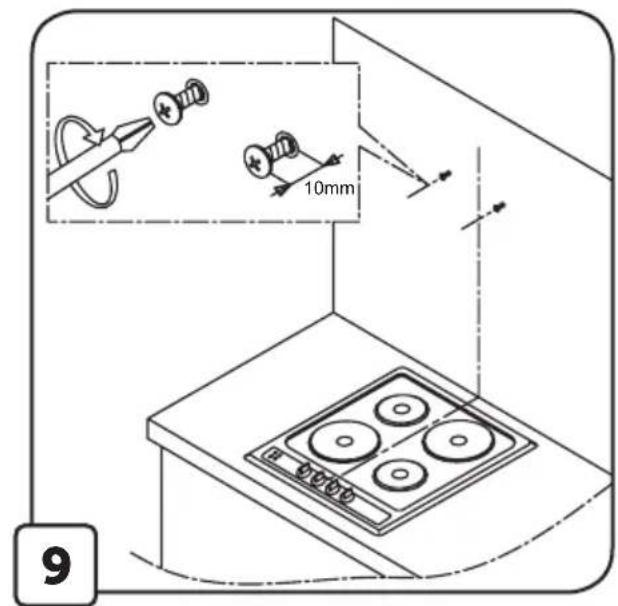
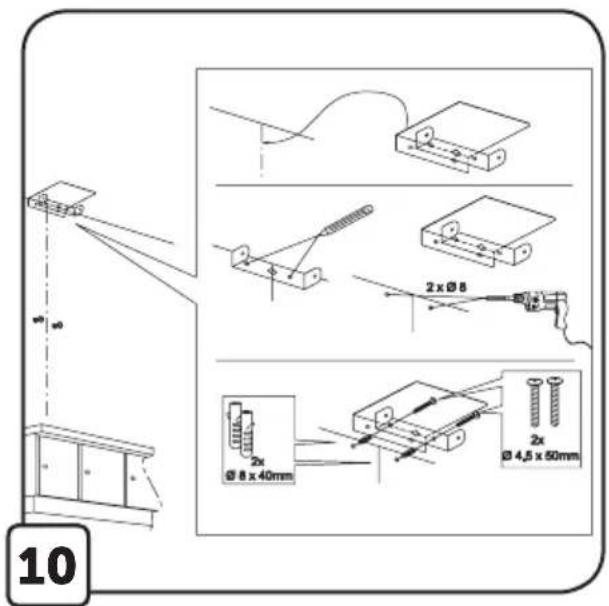
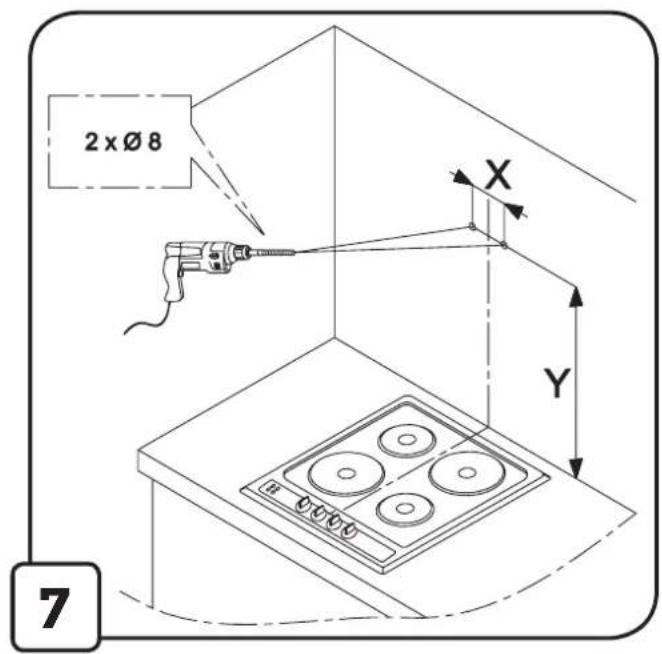
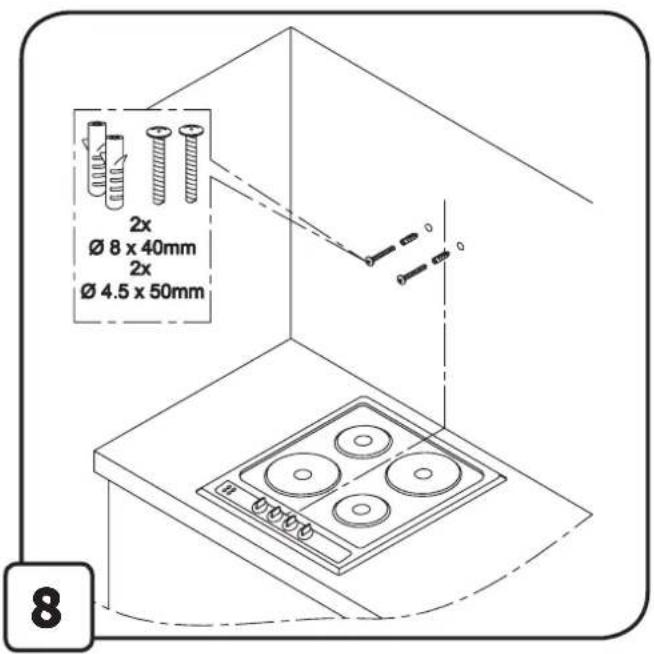
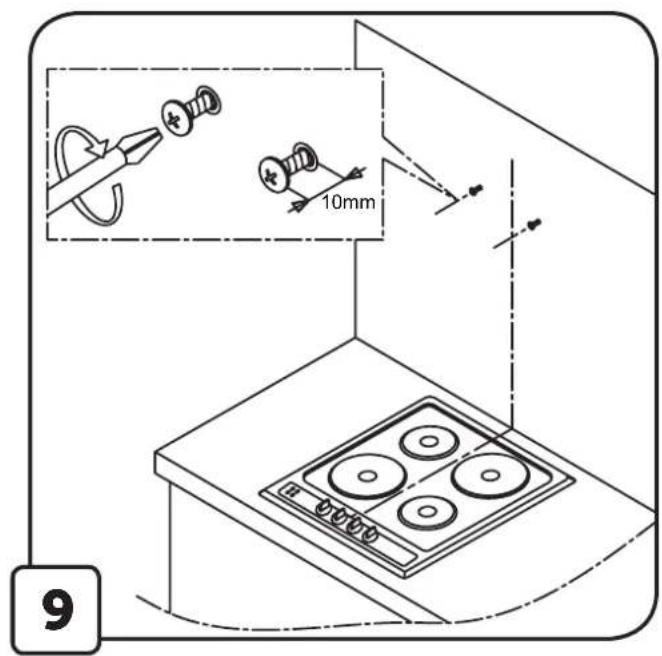
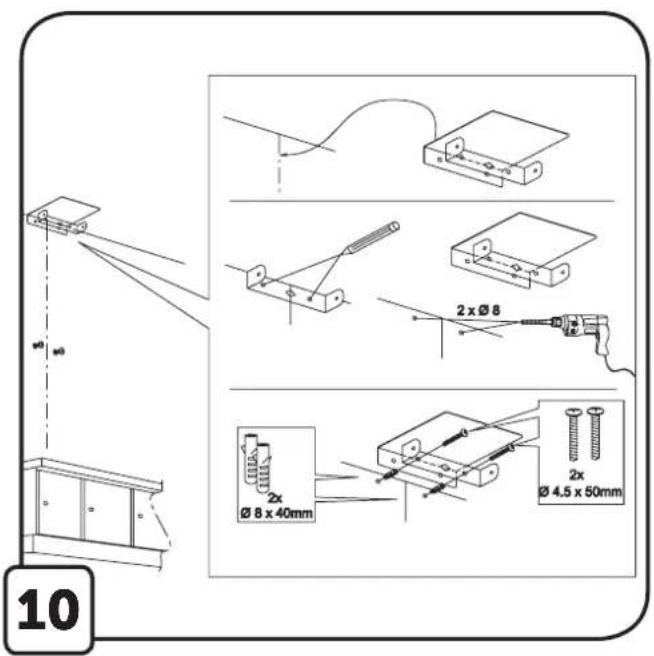
The cooker hood is equipped with fixing pegs, which are suitable for most walls and ceilings. Nevertheless, it’s necessary to seek the advice of a qualified technician, in order to ensure that the materials are suitable, depending on the type of wall or ceiling. The wall or ceiling must be adequately strong to support the cooker hood’s weight.
Operation of the cooker hood
In this case, when the air in the kitchen is particularly contaminated, you should use the cooker hood set at the highest speed. It's recommended to turn on the cooker hood 5 minutes before starting to cook any meals, and leaving it turned on for approx. 15 minutes after completion of cooking.
In order to select the cooker hood functions, you have to lightly touch the controls.
1 2 3 4 5

1. Turning off the device / decreasing the speed
This button is intended for decreasing the motor speed. In order to turn off the motor, press and hold it.
2. Turning on the device / increasing the speed
When the device is in off mode, press this button in order to start the motor. When the device is operating, press this button to increase the speed by one gear higher (4 is the maximum gear). The current gear is presented on the LCD. A digit on the display corresponds to the current motor speed.
3. LCD
Presents the current functions / operating mode of the cooker hood.
4. Timer
It enables the programming of automatic shutdown of the cooker hood.
5. Turning the lighting on / off
Timer
There's a possibility to program an automatic shutdown of the cooker hood fan at any time, selected in the scope between 10 and 90 minutes, in 10-minute intervals. In order to activate the programming function, switch on the cooker hood motor to the desired gear with the use of button 4, and then press the button of programming the hood shutdown time. A pulsing LED will appear on the display, informing that the controller has entered the time programming mode. Select the time of automatic motor shutdown with the use of button ,'1,2,3'', while remembering that the digit indicated by the display and multiplied by 10-minute time interval, corresponds to the time of delayed hood motor shutdown (e.g. digit 1=10 min, digit 2=20 min, digit 3=30 min, etc.). While having set the value of delayed shutdown, confirm it again with the button of programming the hood shutdown, then the display will stop blinking and it will indicate the previously set gear, while the pulsating dot by the gear will signal the measuring of time for the hood motor shutdown.
If you want to cancel the function of automatic hood motor shutdown, then press the button of programming the hood shutdown again during measuring of the time.
Note: Turning on the automatic shutdown function (Timer) must be carried out within 20 seconds, otherwise when no activity is performed, the cooker hood will automatically switch to normal operating mode.
Maintenance
Note! Before carrying out any cleaning or maintenance activity, it's necessary to disconnect the cooker hood from the power supply by removing the plug from the socket or by turning off the main power switch.
Cleaning of the cooker hood
The cooker hood must be often cleaned, both inside and outside (at least with the same frequency as in the case of grease filter cleaning), with the use of a cloth moistened with mild agents. It’s prohibited to use any abrasives.
IT'S PROHIBITED TO USE ALCOHOL!
Note: Failure to comply with the regulations on cleaning of the device and replacement of the filters results in a fire hazard. Therefore, it's recommended to comply with the indicated guidelines. The manufacturer is not responsible in any way for possible motor damage or fire resulting from failure to comply with the maintenance rules and the above-mentioned instructions.
Grease filter
It stops the grease particles originating from cooking. It must be cleaned at least once a month (or when the filter contamination indicator - if your model of cooker hood is equipped with such indicator - informs about the need to replace it), with the use of a non-aggressive cleaning agent, manually or in a dishwasher at low temperature and in a short washing cycle. In case of washing in a dishwasher, the metal grease filter may become discoloured, however its specific filtering characteristics will not change. In order to remove the grease filter, it's necessary to pull the spring handle.
Carbon filter
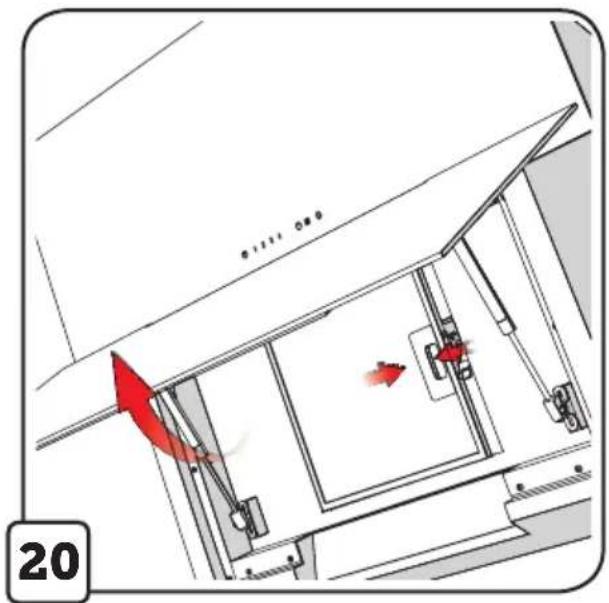
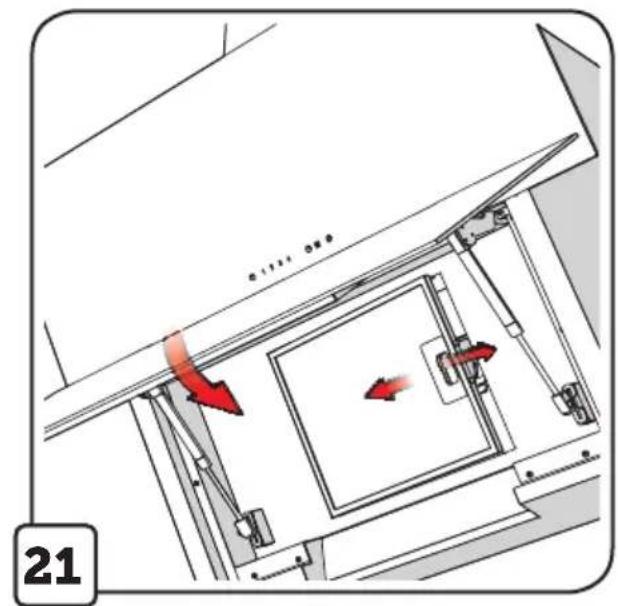
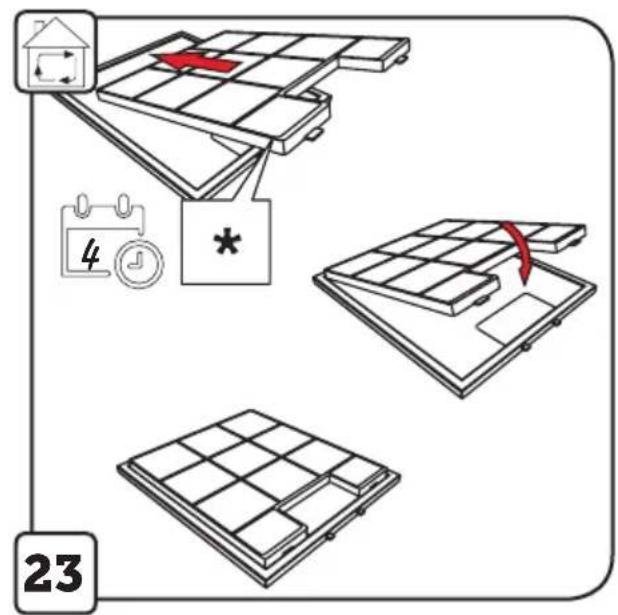
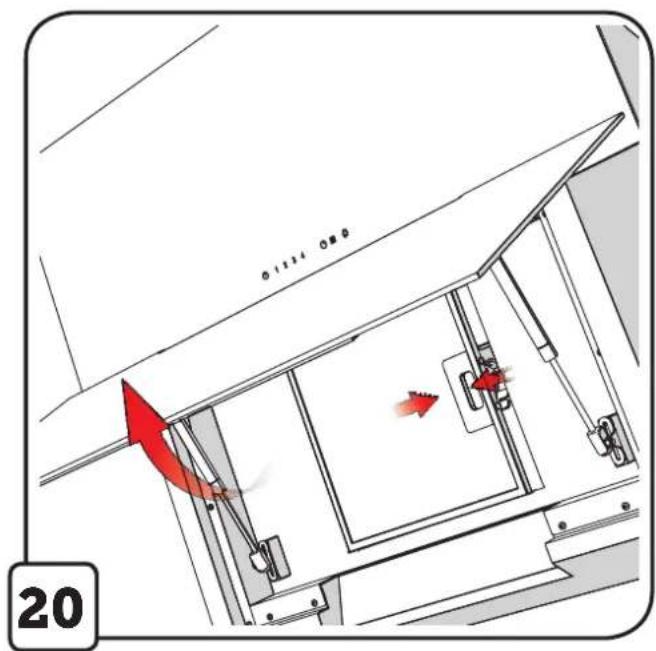
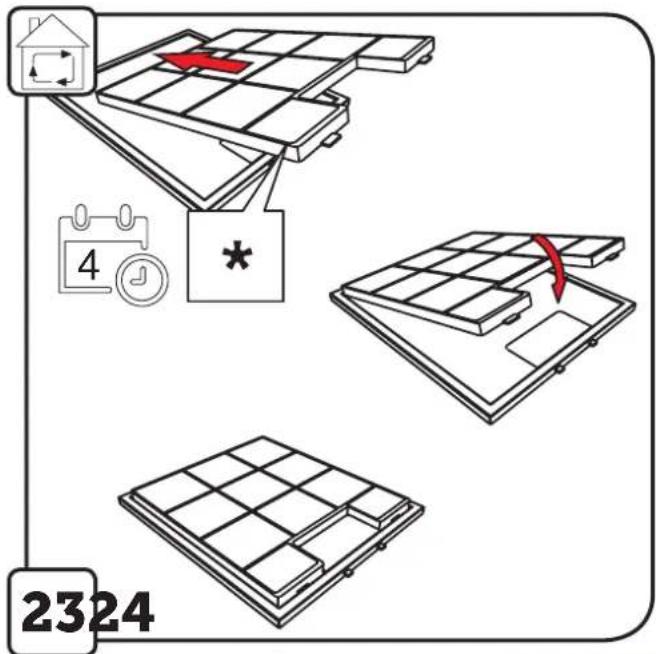
The carbon filter is used only when the cooker hood is not connected to the ventilation duct. The filter with activated carbon has the ability to absorb odours until it is saturated. It is not suitable for cleaning or regeneration and it should be replaced at least every 4 months or more often in the case of exceptionally intensive use. The carbon filter replacement is presented in fig. 20, 21, 23.
Replacement of lighting
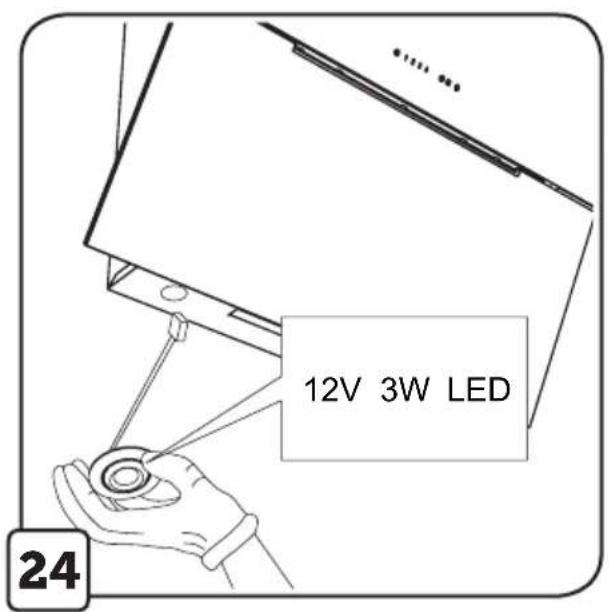
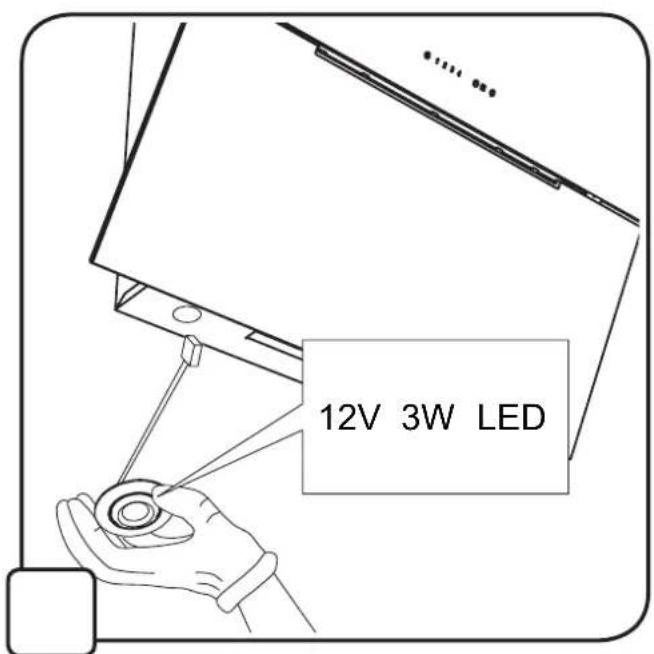
The lighting installation consists of two halogens, each with a power amounting to 3 W. The replacement of lighting is presented in fig. 24. In case, when the lighting does not work, first check whether the lamps have been properly installed. If after such control, the lighting still does not work, please contact the support service.
NOTE: Remember not to touch the dismantled halogen directly with your bare hands.
KERNAU

- INSTRUKCJA MONTAŻU I OBSŁUGI OKAPU
- Warning Note!
- Application
- ed cooker hoodg
- Recirculating cooker hood
- Installation of the cooker hood
- Electrical connectione
- Operation of the cooker hood
- Turning off the device / decreasing the speed
- Turning on the device / increasing the speed
- LCD
- Timer
- Turning the lighting on / off
- Timer
- Maintenance
- Cleaning of the cooker hood
- IT'S PROHIBITED TO USE ALCOHOL!
- Grease filter
- Carbon filter
- Replacement of lighting
Brand : Kernau
Model : KCH 4890 B
Category : Range hood