
TT-7521IP - Monitor Newline - Free user manual and instructions
Find the device manual for free TT-7521IP Newline in PDF.


| Product Type | Interactive Flat Panel Display (Monitor) |
| Brand | Newline |
| Model | TT-7521IP |
| Screen Size (Diagonal) | 75 inches |
| Backlight Type | LED |
| Aspect Ratio | 16:9 |
| Viewing Angle | 178° horizontal/vertical |
| Physical Resolution | 3840 × 2160 pixels (4K UHD) |
| Display Color Depth | 10-bit (1.07 billion colors) |
| Contrast Ratio (Typical) | 4000:1 |
| Touch Technology | Capacitive (20 touch points) |
| Touch Screen Material | Tempered glass |
| Audio Output Power | 15W (internal speakers) |
| Connectivity | HDMI, VGA, USB, RS-232, OPS slot, Composite, YPbPr |
| Power Supply | 100-240V, 50/60Hz |
| Power Consumption (Rated) | 300W (max) |
| Standby Power | ≤ 0.5W |
| Net Weight | 49 kg |
| Gross Weight | 62 kg |
| Package Dimensions (W x D x H) | 1859 x 247 x 1136 mm |
| Working Temperature/Humidity | -10°C ~ 45°C, 20% ~ 93% RH (non-condensing) |
| Storage Temperature/Humidity | -20°C ~ 60°C, 20% ~ 93% RH (non-condensing) |
| Installation Options | Wall-mounted (VESA 600x400) or mobile stand |
| Optional Internal PC Slot | OPS (Open Pluggable Specification) compatible |
| Energy Saving Modes | Standard and Energy Saving (ECO) modes available |
Frequently Asked Questions - TT-7521IP Newline
User questions about TT-7521IP Newline
0 question about this device. Answer the ones you know or ask your own.
Ask a new question about this device
Download the instructions for your Monitor in PDF format for free! Find your manual TT-7521IP - Newline and take your electronic device back in hand. On this page are published all the documents necessary for the use of your device. TT-7521IP by Newline.
USER MANUAL TT-7521IP Newline
Please properly keep the manual for further reference.
Welcome:
Thanks for purchasing this product. Please read the instructions carefully before using this product.
This device complies with part 15 of the FCC Rules. Operation is subject to the following two conditions: (1) This device may not cause harmful interference, and (2) this device must accept any interference received, including interference that may cause undesired operation.
NOTE 1: This equipment has been tested and found to comply with the limits for a Class B digital device, pursuant to part 15 of the FCC Rules. These limits are designed to provide reasonable protection against harmful interference in a residential installation. This equipment generates, uses, and can radiate radio frequency energy and, if not installed and used in accordance with the instructions, may cause harmful interference to radio communications. However, there is no guarantee that interference will not occur in a particular installation. If this equipment does cause harmful interference to radio or television reception, which can be determined by turning the equipment off and on, the user is encouraged to try to correct the interference by one or more of the following measures:
- Reorient or relocate the receiving antenna.
- Increase the separation between the equipment and receiver.
- Connect the equipment into an outlet on a circuit different from that to which the receiver is connected.
- Consult the dealer or an experienced radio/TV technician for help.
NOTE 2: Any changes or modifications to this unit not expressly approved by the party responsible for compliance could void the user's authority to operate the equipment.
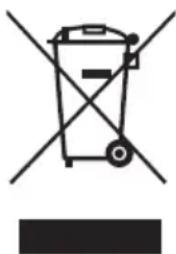
The symbol of the crossed out wheeled bin indicates this product should not be placed in municipal waste. Instead, dispose of waste equipment by taking it to a designated collection point for electrical and electronic equipment recycling.
natural_image
Symbol of a trash bin with crossed lines indicating no waste or restriction, plus a solid black rectangle below (no text or labels)Contents
About This Document 01
Safety Instruction 02
1. Parts and Functions 05
1.1 Parts 05
1.2 Ports 06
1.3 Remote Controller 07
2.Installation Guide 09
2.1 Safety Precautions 09
2.2 Installation Precautions 10
2.3 Installation 12
2.4 Installing the Internal PC (Optional) 13
3.Turning On/Off 14
3.1 Power On 14
3.2 Power Off 14
4.Menu 15
4.1 Select Signal Source 15
4.2 Picture Setting 15
4.3 Sound Setting 16
4.4 Option Setting 16
4.5 Audio Only Function 18
5.Multi-Media 19
5.1 Multi-media File Type 19
5.2 Select USB Flash 19
5.3 Enter USB Flash 20
6.ECO Mode 21
7.Serial Port Control 22
8. Specifications of PC Mode (VGA Input) 25
9. Formats Supported by Multi-media 26
10.FAQ & Troubleshooting 27
11.Maintenance Tips 29
12.Technical Parameters 30
13.More Information 31
About This Document
This document describes multiple functions, instructions, and notes about the product.
Symbols are used in this document to indicate operations that need particular attention. The symbols are defined as follows:
 NOTE NOTE | Provides additional information to supplement operation in the main text. |
 TIP TIP | Provides tips for operation. |
 CAUTION CAUTION | Indicates a potentially hazardous situation that, if not avoided, could result in equipment damage, data loss, performance deterioration, or unanticipated results. |
 WARNING WARNING | Indicates a hazard with risk that, if not avoided, could result in death or injury. |
Safety Instruction
For your safety, please read the following instruction before you use the product. Serious injury or property damage may be caused by improper operations. Do not try to repair the product by your own.
| WARNING | |
 | Disconnect the product from the power supply immediately if major failures occur.Major failures include the following:Smoke, peculiar smell or abnormal sound is discharged from the product.No image or sound is displayed, or the image error occurs.Where the mains plug or an appliance coupler is used as the disconnect device the disconnect device shall remain readily operable.In the preceding scenarios, do not continue to use the product. Disconnect power supply immediately and contact professional staff for troubleshooting. |
 | Do not drop any liquids, metal, or anything combustible into the product.If any liquids or metal are dropped onto or into the product, power off the product and disconnect the power supply. Then contact professional staff for solutions.Pay attention to children when they are close to the product. |
| Put the product on a stable surface.An unstable surface includes and does not limited to an inclined plane, a shaky stand, desk or platform, which might cause turnover and damage. | |
 | Do not open the panel or change the product on your own.High voltage components are installed in the product. When you open the cover, high voltage, electric shock, or other dangerous situations may occur.If inspection, adjustment, or maintenance is required, contact the local distributor for help. |
 | Use the specified power supply.To prevent the product from being damaged, do not use any types of power cables other than the one provided with the product.Use a three-wire socket and ensure that it is properly grounded.Pull out the power plug from the socket if the product is not used for a long period. |
| Clean the dust and metal on the power plug regularly.Continued use of this product may cause fire or electric shock if the plug is not clean for a long time.Pull out the power plug before cleaning it with a dried cloth. | |
 | Do not put items on the top of the product.Do not put items, such as a container for liquid (a vase, flowerpot, cosmetics or liquid medicine) on the top of the product.If any water or liquid is spilled on the product, a short circuit may occur and cause fire or electric shock.Do not walk on or hang any items on the product. |
 | Do not install the product in an improper place.Do not install the product in humid places, such as the bathroom, the shower room, near windows, or outdoor environments that experience rain, snow or other harsh weather. Avoid installation near hot spring vapor. The preceding environments may cause faults in the product or electric shock under extreme conditions.Do not put exposed fire source, such as an ignited candle, on the product. |
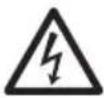 | Pull out the power supply during thunderstorms.Do not touch the product during a lighting storm to avoid electric shock.Install or place components that supply high enough voltage to cause personal injury out of the reach of children. |
 | Do not touch the power cable with wet hands. |
 CAUTION CAUTION | |
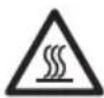 | Do not install the product in high temperature environments.Do not install the product near a heat source, such as a radiator, a heat reservoir, a stove or other heating products.Do not expose the product to direct sunlight, which may cause high temperatures and subsequent faults in the product. |
 | For transport:Pack the product for transport or maintenance by using the cartons and cushioning material provided with the product.Vertically move the product during transport. The screen or other components are easily broken if the product is moved by an improper way.Before you move the product, disconnect all external connections and separate all toppling preventing products. Move the product carefully to prevent it from being hit or squeezed, especially the screen, which may cause injury if broken. |
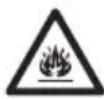 | Do not cover or block up any vents on the product.Any overheated components may cause fire, damage the product, and shorten the service life.Do not lay the product down in a way where the venting surface will be covered.Do not install the product on carpet or cloth.Do not use a cloth such as table cloth to cover the product. |
| CAUTION | |
 | Keep the product away from the radio.The product complies with the international EMI standard to prevent radio interference. However, interference may still exists and causes noise in the radio.If noise occurs in the radio, try the following solutions.Adjust the direction of the radio antenna to avoid the interference from the product.Keep the radio away from the product. |
| Use the battery correctly.Galvanic corrosion, electric leakage, and even fire may be caused by improper battery usage.It is recommended to use the designated type of battery and install the battery by the correct electrodes (positive and negative).Do not install and use a new battery with a used one.Take out the battery if the remote control is not used for a long period.Do not expose the battery to overheated environments, such as sunlight or heat sources.Dispose of the used battery based on your local regulations. | |
| Do not damage the power cable.Do not damage, change, twist, bend, or forcibly drag the power cable.Do not put weights (such as the product itself) on the power cable.Do not forcibly drag the cable when you pull out the power plug. If the power cable is damaged, please contact the local distributor to repair or replace it.The power cable in the accessory box is for this product only. Do not use it on other products. | |
| Additional advice:Use the product in an environment with comfortable lighting. It is harmful to your eyes to watch in a too bright or too dark environment.Relax your eyes watching for a period of time.Keep sufficient distance from the product to protect your eyes and prevent eyestrain.Adjust the volume to an appropriate level, especially at night.Use amplifier equipment as the audio input source with caution. If you must use amplifier equipment, the input power should not exceed the maximum of speaker power. Otherwise, the speaker can become overpowered and damaged. | |
1
Parts and Functions
1.1 Parts
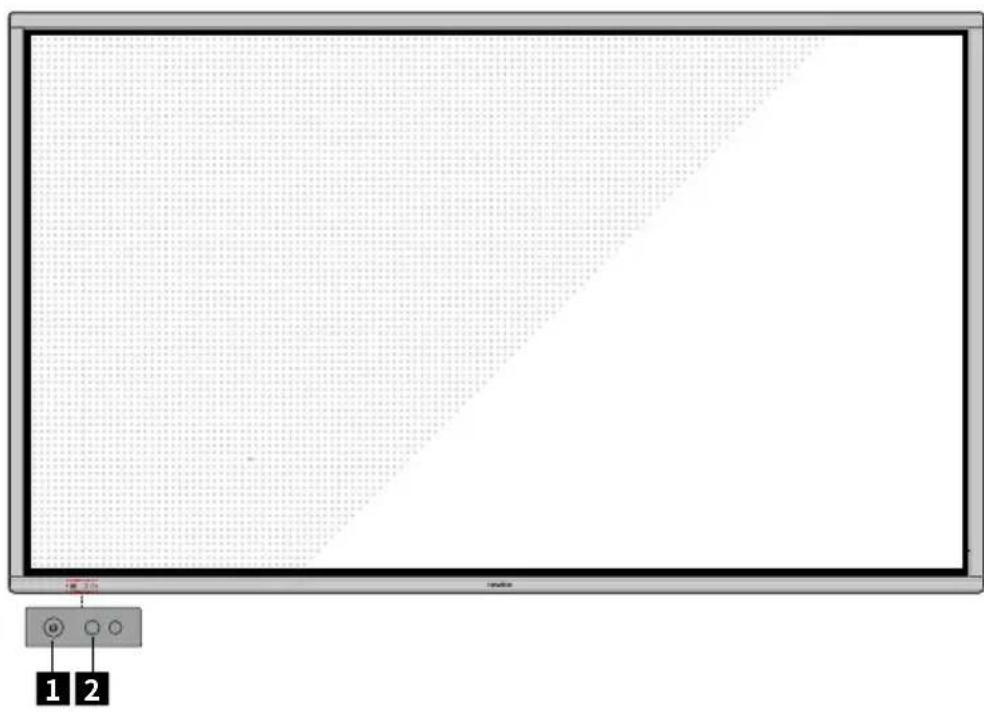
- Front View
- Rear View

| 1 | Power Button Power Switch | 5 | |
| 2 | IR Receiver Rear Ports | 6 | |
| 3 | Speaker Internal PC Port (OPS) | 7 | |
| 4 | Power Supply Plug |
1.2 Ports
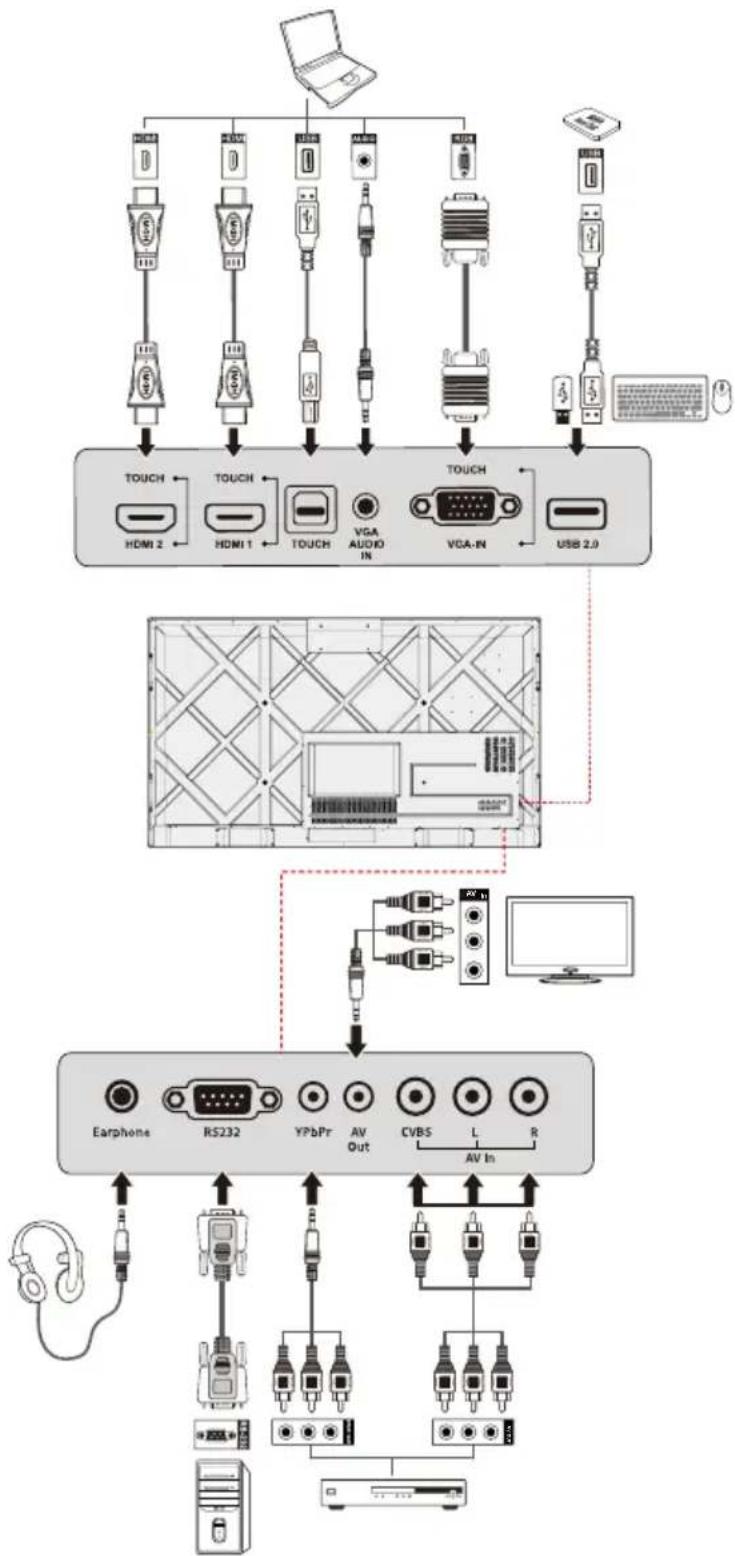
flowchart
graph TD
    A["User"] --> B["Device 1"]
    A --> C["Device 2"]
    A --> D["Device 3"]
    A --> E["Device 4"]
    A --> F["Device 5"]
    A --> G["Device 6"]
    A --> H["Device 7"]
    A --> I["Device 8"]
    A --> J["Device 9"]
    A --> K["Device 10"]
    A --> L["Device 11"]
    A --> M["Device 12"]
    A --> N["Device 13"]
    A --> O["Device 14"]
    A --> P["Device 15"]
    A --> Q["Device 16"]
    A --> R["Device 17"]
    A --> S["Device 18"]
    A --> T["Device 19"]
    A --> U["Device 20"]
    A --> V["Device 21"]
    A --> W["Device 22"]
    A --> X["Device 23"]
    A --> Y["Device 24"]
    A --> Z["Device 25"]
    A --> AA["Device 26"]
    A --> AB["Device 27"]
    A --> AC["Device 28"]
    A --> AD["Device 29"]
    A --> AE["Device 30"]
    A --> AF["Device 31"]
    A --> AG["Device 32"]
    A --> AH["Device 33"]
    A --> AI["Device 34"]
    A --> AJ["Device 35"]
    A --> AK["Device 36"]
    A --> AL["Device 37"]
    A --> AM["Device 38"]
    A --> AN["Device 39"]
    A --> AO["Device 40"]
    A --> AP["Device 41"]
    A --> AQ["Device 42"]
    A --> AR["Device 43"]
    A --> AS["Device 44"]
    A --> AT["Device 45"]
    A --> AU["Device 46"]
    A --> AV["Device 47"]
    A --> AW["Device 48"]
    A --> AX["Device 49"]
    A --> AY["Device 50"]
    A --> AZ["Device 51"]
    A --> BA["Device 52"]
    A --> BB["Device 53"]
    A --> BC["Device 54"]
    A --> BD["Device 55"]
    A --> BE["Device 56"]
    A --> BF["Device 57"]
    A --> BG["Device 58"]
    A --> BH["Device 59"]
    A --> BI["Device 60"]
    A --> BJ["Device 61"]
    A --> BK["Device 62"]
    A --> BL["Device 63"]
    A --> BM["Device 64"]
    A --> BN["Device 65"]
    A --> BO["Device 66"]
    A --> BP["Device 67"]
    A --> BQ["Device 68"]
    A --> BR["Device 69"]
    A --> BS["Device 70"]
    A --> BT["Device 71"]
    A --> BU["Device 72"]
    A --> BV["Device 73"]
    A --> BW["Device 74"]
    A --> BX["Device 75"]
    A --> BY["Device 76"]
    A --> BZ["Device 77"]
    A --> CA["Device 78"]
    A --> CB["Device 79"]
    A --> CC["Device 80"]
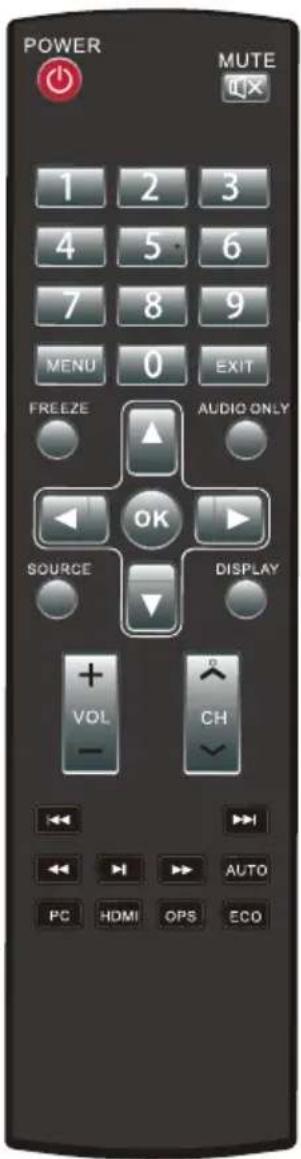
1.3 Remote Controller

WARNING
To avoid probable faults, please read the following instructions and use the remote controller properly.
- Do not drop or beat the remote controller.
- Do not spill water or other liquid on the remote controller.
- Do not put the remote controller on wet items.
- Do not expose the remote controller under sunlight or put it near overheated source.
 | Power on/standby |
 | Mute/Unmute |
| 0-9 | Enter number |
 | Enter the function menu |
 | Quit |
  | Freeze |
AUDIO ONLY | Enable Audio Only mode |
| SOURCE[D5Y] | Enter or exit signal source menu |
DISPLAY | Show current signal status or information |
 | Confirm selected item |
 | Up direction button |
 | Down direction button |
 | Left direction button |
 | Right direction button |
| [###] | Adjust volume |
| [###] | Reserve button |
 | Previous media file |
 | Next media file |
 | Rewind |
 | Fast forward |
| Play or pause | |
| AUTO | Auto adjust displaying (only available for VGA signal source) |
| PC | Switch to VGA signal source |
| HDMI | Switch to HDMI 1/2/3 signal source |
| OPS | Switch to Internal PC signal source |
| ECO | Switch to display mode(Standard – Energy saving) |
2.1 Safety Precautions
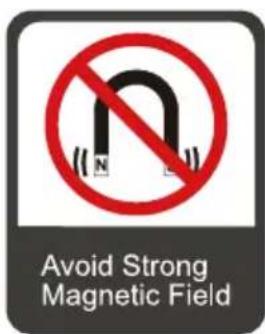
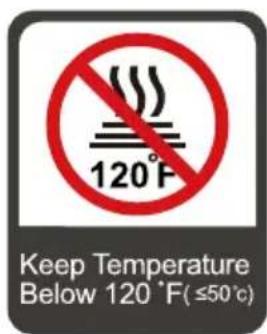
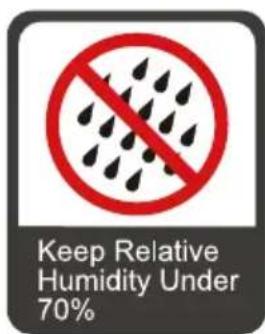
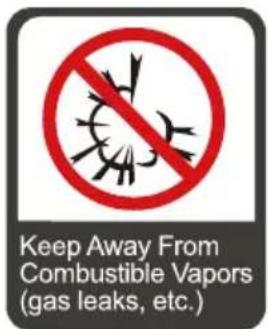
- Installation Environment
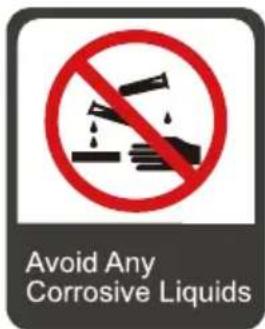
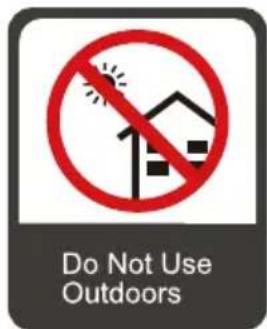

- Installation Direction
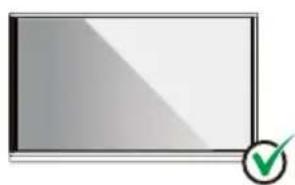
natural_image
Simple icon of a blank rectangular board with a green checkmark in the bottom-right corner (no text or symbols)Hang the Product Horizontally
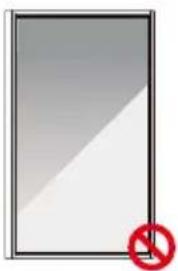
No Vertical Installation
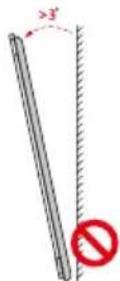
Do Not Install Tilted
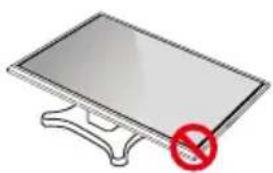
natural_image
Illustration of a flat-screen monitor with a red prohibition symbol on the stand (no text or labels)Do Not Lay Flat
2.2 Installation Precautions
- Weight Loading
- When using a mobile stand, ensure that the weight of the product is less than the loading capacity of the mobile stand.
- When using the wall-mount bracket, ensure that the wall can support the weight of the product. We recommend that the wall surface be reinforced and have a loading capacity 4 times of the weight of the product. Consult a professional installer for wall-mount installation.
Note
- The company does not undertake relevant legal responsibility for any problems caused by improper operation, if the third party mobile stand, or wall-mount bracket is beyond the scope of the product.
- Do not install the product where it might be hit by a door.
♦ Vertical installation
When installing, try to keep the product vertical. The vertical tilt range allowed for wall-mount installation is ±3 degrees. Excessive tilt angle may cause the screen glass to fall off or the product to collapse.
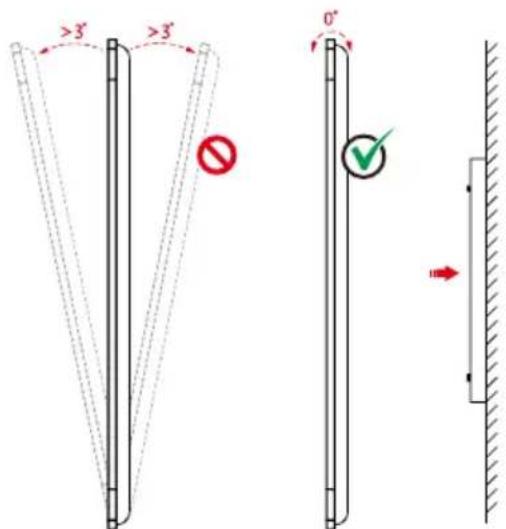
Note
For any problem, please contact our support desk. Our company is not responsible for any damage or losses incurred by users if the users fails to follow the instructions.
♦ Ventilation
Ensure adequate ventilation and/or air conditioning environment. We recommend keeping certain distances from the side of the product to the wall or panels. Ventilation requirements are shown in following figure.
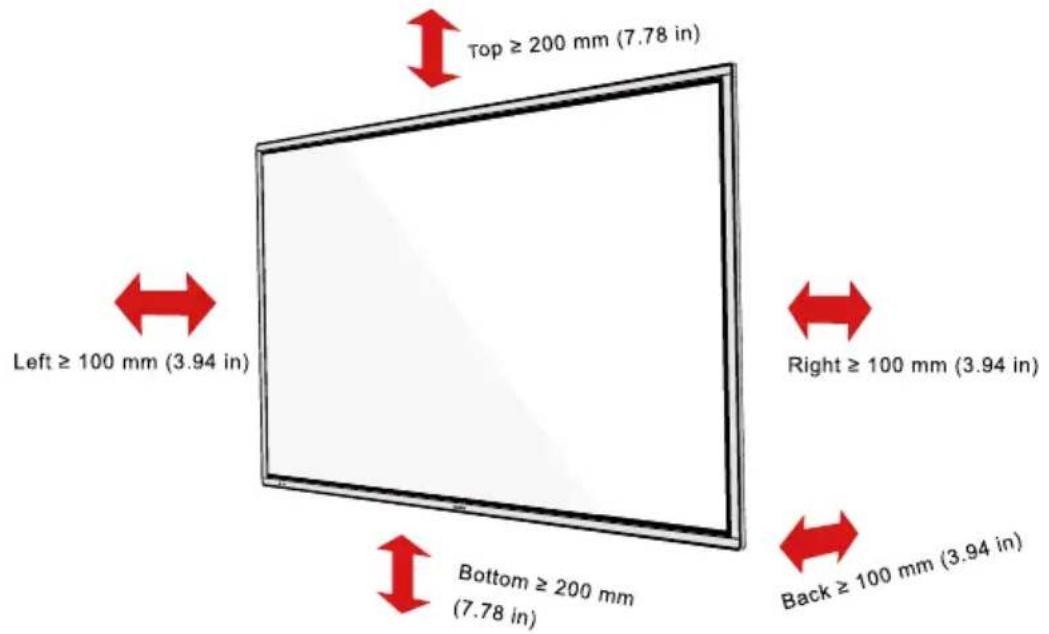
2.3 Installation
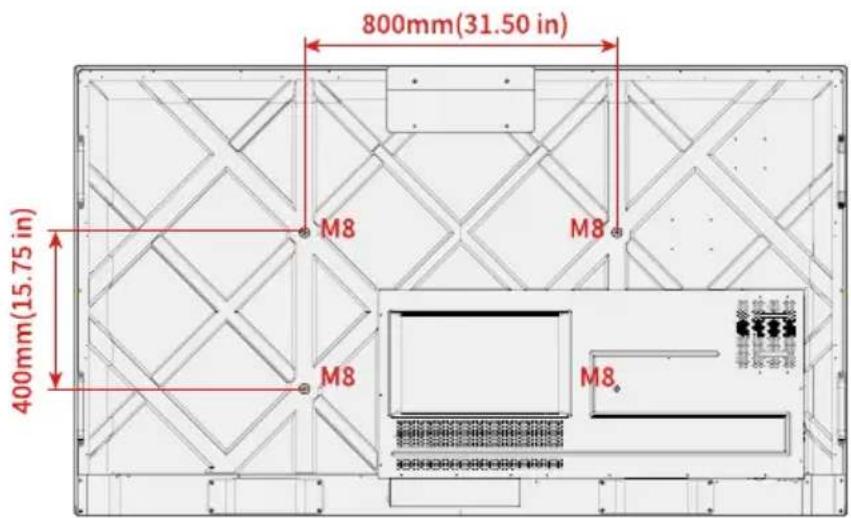
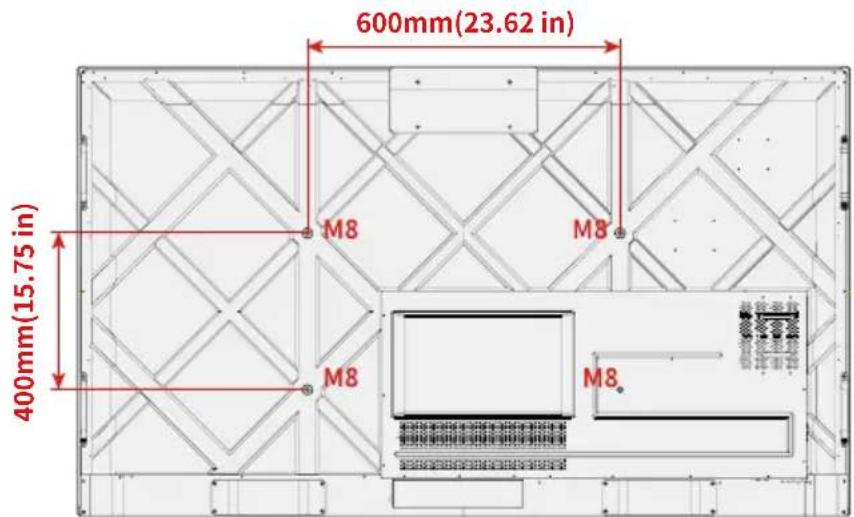
The dimensions of the four bracket mounting holes on the back panel are VESA MIS-Fcompliant (75",86": 800 x 400 mm/31.50 x 15.75 in; 65": 600x400mm/23.63 x15.75in). Use metric M8 screws with length of 10 mm to 15 mm (0.40 to 0.59 in) to secure the touch screen with the mounting system. Dimensions of the mounting holes on the back panel are shown on the following figure.
Note
Consult a professional installer to install the product.
- 75" / 86"
• 65"
2.4 Installing the Internal PC (Optional)

CAUTION
The internal PC does not support hot plugging. Therefore, you must insert or remove it when the screen is powered is off. Otherwise, the screen or internal PC may be damaged.
You will need to purchase the internal PC separately. Perform the following steps to install the internal PC.
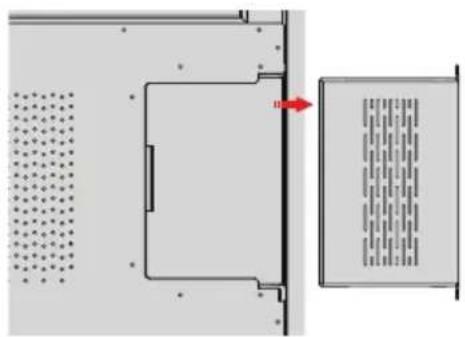
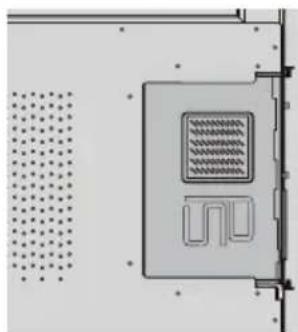
Step 1: Unscrew the M3 screws by hand to remove the internal PC shielding cover.
natural_image
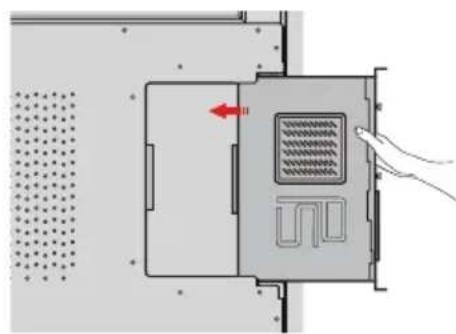
Diagram showing a room with ventilation grilles and a door, no text or symbols presentStep 2: Push the internal into the internal PC port at the rear of the screen from right to left.
natural_image
Diagram of a device interior with a hand pressing a button, showing no text or symbols.Step 3: Secure the internal PC to the display by using the M3 screws.

Step 4: Ensure the installation is correct before turning the power on again.
natural_image
Pure electrical circuit lines without any symbols3.1 Power On
Step 1: Plug the power supply into the power outlet fully and plug the power connector into the side of the product. Ensure the power supply is in the range of 100V to 240V with frequency at 50 Hz/60 Hz ± 5%. The power current must be grounded.
Note
The power outlet should be installed near the equipment and should be easily accessible.
Step 2: Flip the power switch located on the side of the product to "On".
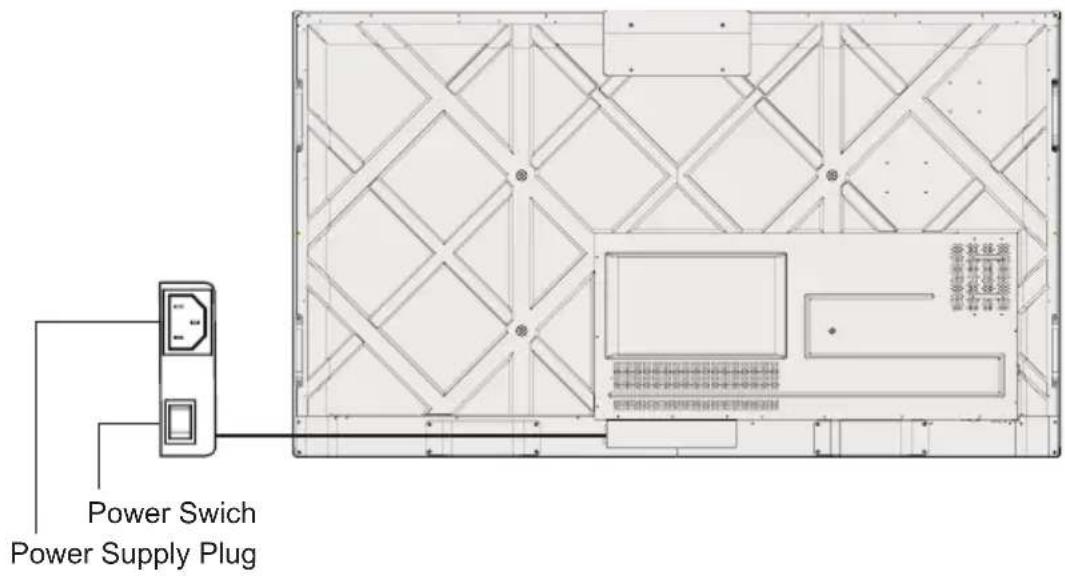
Step 3: Press the power button ⏻ on the front control panel or ⏻ on the remote control.
3.2 Power Off
Step 1: Press the power button ⏻ on the front panel or the power button ⏻ on the remote control again. the power indicator will turn to red.
Step 2: If you are not going to use the product for an extended period of time, we recommend you to switch the power switch to "Off".
Note
- If an internal PC is equipped, the internal PC and the screen are powered off simultaneously when you power off the system.
- Do not forcibly disconnect the power supply of the screen when the internal PC is on.
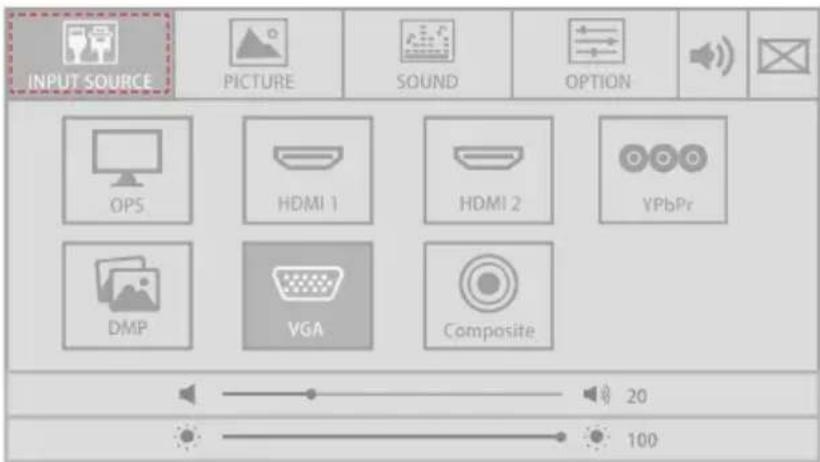
After the product is powered on, press MENU on the remote controller or using one finger to swipe up from the bottom of the screen to enter the user menu setting interface. The menu items include INPUT SOURCE, PICTURE, SOUND, and OPTION. By default, the PICTURE interface appears.
Use your finger to perform screen touch operation or press ◀/▶/▲/▼ on the remote controller to select a menu item and press OK to complete the menu switching and option setting in the menu.
- Drag the sliders on the right sides of ▶ and ● to adjust the volume and brightness respectively.
- Click in the upper right corner of the interface to mute the device. After the mute setting, a mute icon will appear in the upper right corner of the screen.
Note
- Click anywhere on the screen outside the interface to exit the setting menu.
- Press Exit on the remote controller to exit the setting menu.
4.1 Select Signal Source
Press SOURCE to enter the signal source selection menu.
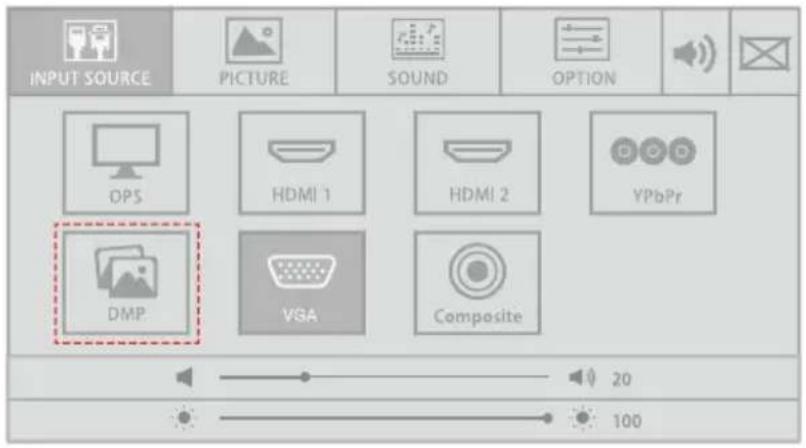
In the INPUT SOURCE interface, you can select the OPS, HDMI, DMP, VGA, Composite and YPbPr source via the remote controller or by touch operation.
4.2 Picture Setting
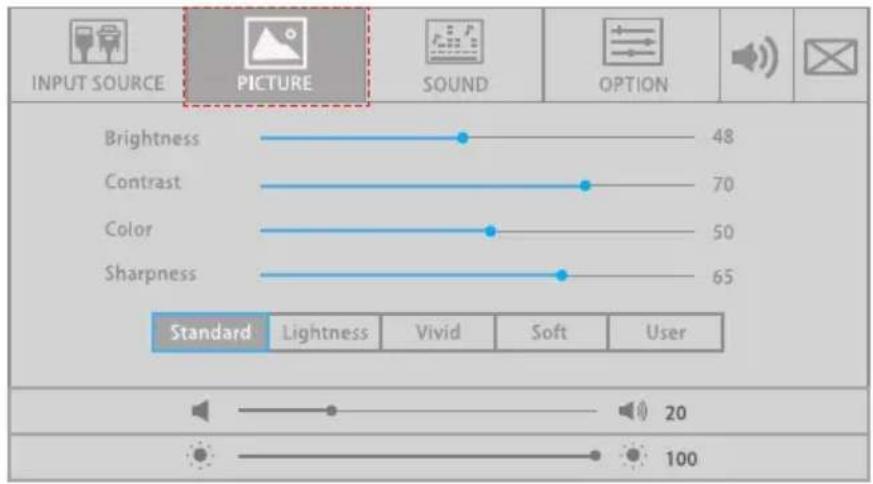
In the PICTURE interface, you can select the Standard, Lightness, Vivid, Soft, or User mode via the remote controller or by touch operation. Only in the User mode, you can manually adjust the Brightness, Contrast, Color, and Sharpness values. Press Exit on the remote controller to exit the setting menu.
bar
| Category | Value | | ------------ | ----- | | Brightness | 48 | | Contrast | 70 | | Color | 50 | | Sharpness | 65 |4.3 Sound Setting
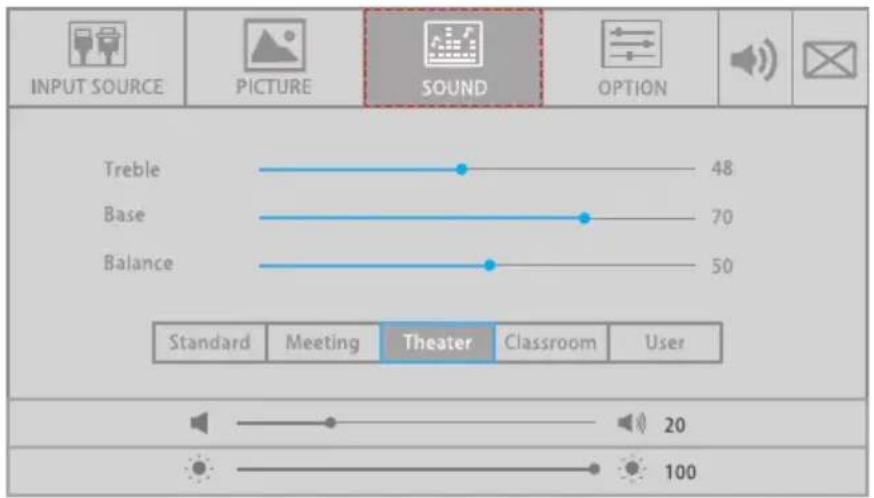
In the SOUND interface, you can select the Standard, Meeting, Theater, Classroom, or User mode for sound setting. Only in the User mode, you can manually adjust the Treble, Bass, and Balance values.
4.4 Option Setting
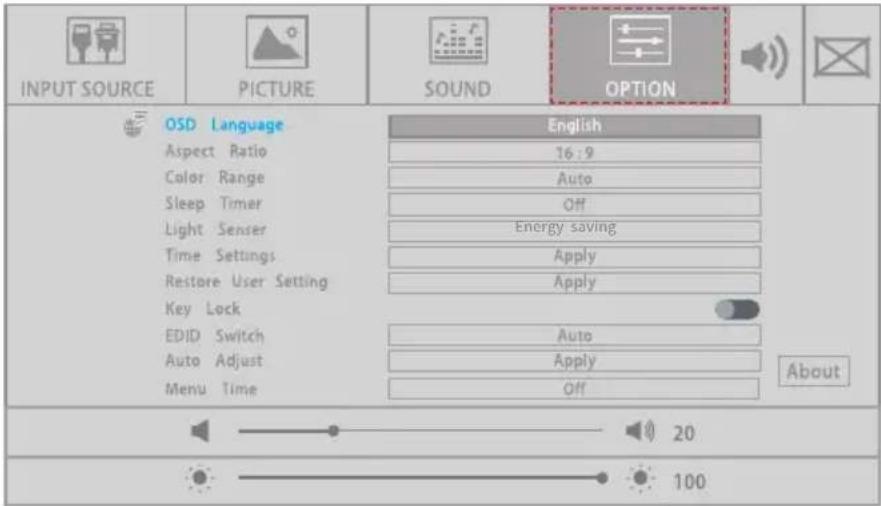
In the OPTION interface, you can set OSD Language, Aspect Ratio, Color Range, Sleep Timer, Light Senser(Back light mode), Time Settings, Restore User Setting, Key Lock, EDID Switch, Auto Adjust, and Menu Time options.
- Directly click an option or press ▲/▼ on the remote controller to switch the option.
- Click an option, and then click ◀/▶ on the sides of the option or press ◀/▶ on the remote controller to set the option value.
- Press Exit on the remote controller to exit the setting menu.
| Option Description | |
| OSD Language | Sets the on-screen menu language. |
| Aspect Ratio | Sets the aspect ratio for the screen display. Options include 16:9, Point-to-point, Panorama, Zoom2, Zoom1, 14:9, 4:3, Auto, and Just Scan. |
| Color Range Sets color range. Options include 0-255, 16-235, and auto. | |
| Sleep Timer | Enables or disables the machine sleep function. Options include Off, 5 Mins Backlight OFF, and 240 Mins Power OFF. |
| Light Sensor | Set the back light mode. Options include Energy saving and Standard. |
| Time Settings Sets the date, time, and auto power-on/power-off. | |
| About Display the version of the product firmware. | |
| Restore User Setting | Restores the system factory settings. |
| Key Lock | Enable or disable the key lock function by the remote controller. After this function is enabled, keys on the product cannot be used. |
| EDID Switch | Set the EDID version of the product. Options include Auto, EDID 2.0, and EDID 1.4. |
| Auto Adjust | Set whether to automatically adjust the image display. Options include Auto Adjust, Horizontal Pos. 50, Vertical Pos. 50, Size 0, and Phase 0. |
| Menu Time Set the menu display time. Options include Off, 5s, 10s, and 15s. | |
4.5 Audio Only Function
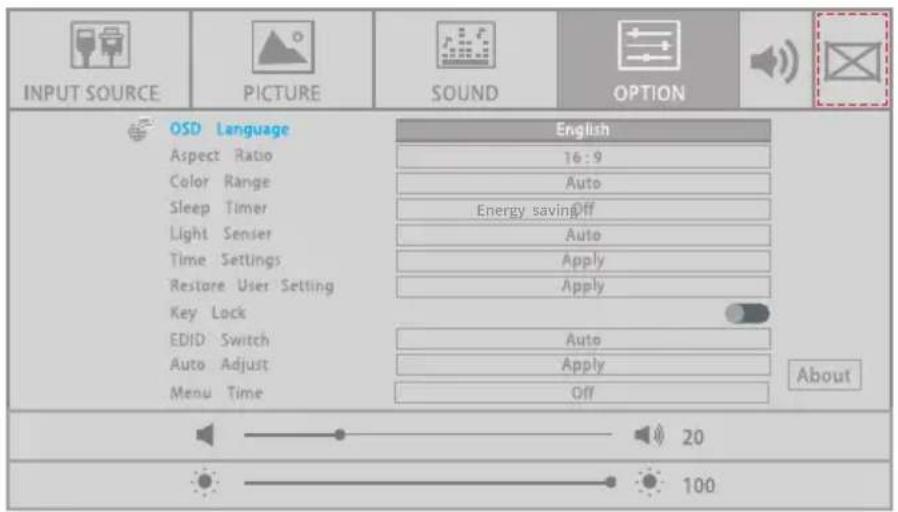
Click ☒ on the menu setting interface. The screen turns black. In the audio only mode, the power indicator blinks on red and green alternatively. Click anywhere on the screen to return to the standard screen status (bright screen).
Press SOURCE to enter the signal source selection menu. Press ◀/▶/▲/▼ to switch to DMP signal source and press OK on the remote controller to enter the single source.
5.1 Multi-media File Type
After you enter the multi-media signal source, the interface shows options including PHOTO, Music and Movie.
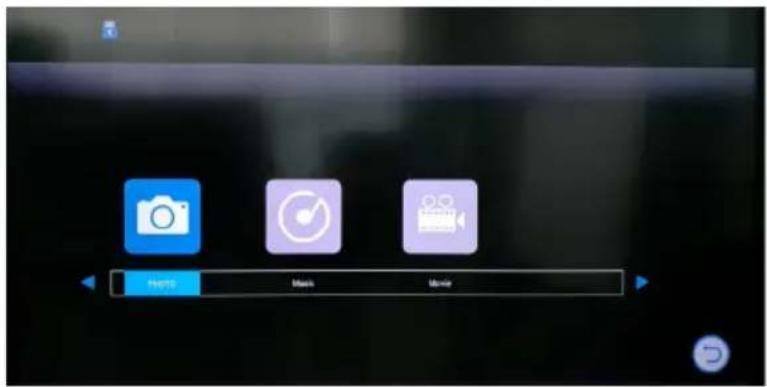
- Press ◀/▶ on the remote controller or screen to select the file type.
- Press OK on the remote controller or directly click the icon to enter the USB flash selection interface.
- Press EXIT on the remote controller or click 📋 to return to the main menu.
5.2 Select USB Flash
When the product detects an access USB flash, a USB icon will be displayed in the upper left corner of the screen. The number in the icon indicates the number of USB flash connected to this device. See the icon display in the "Multi-media File types" section. After you click the file type, the USB setting selection interface appears.
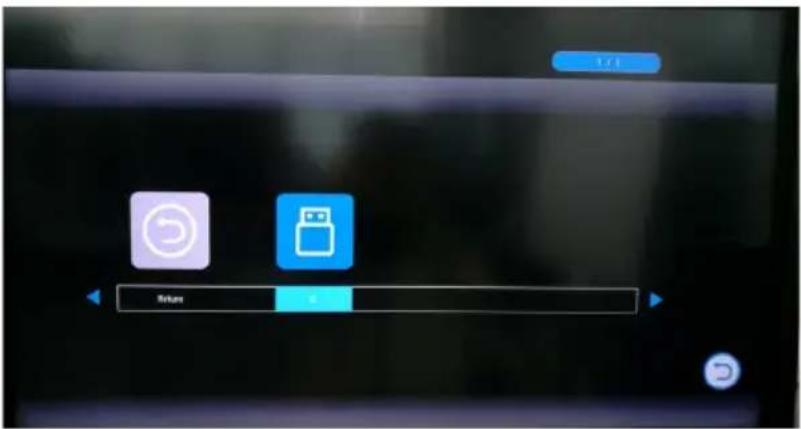
- Press ◀/▶ on the remote controller or screen to select the USB flash.
- Press OK on the remote controller or directly click the icon to enter the corresponding USB flash.
- Press EXIT on the remote controller or click 📋 to return to the preview menu.
5.3 Enter USB Flash
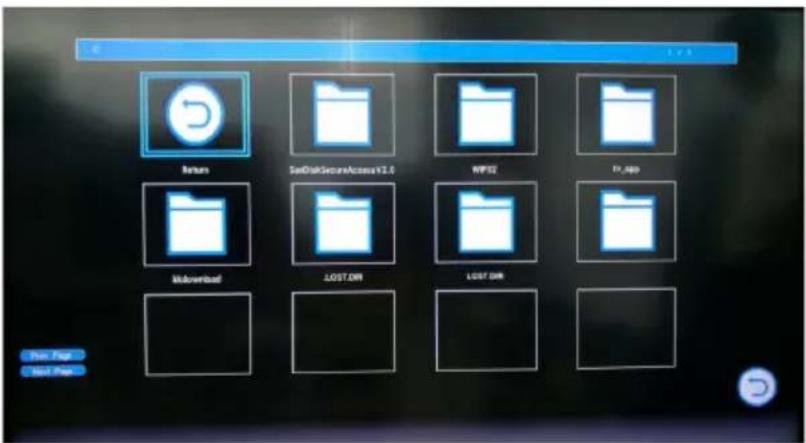
- Press OK on the remote controller or directly click the folder icon to enter the corresponding folder.
- Click Prev Page to go to the previous page or click Next Page to go to the next page.
- Press EXIT on the remote controller or click 📋 to return to the preview menu.

CAUTION
- Please switch off the panel when it is not used and enable the function of Audio Only when you do not need to watch the display, which help reduce power consumption and save energy.
- On the premise of ensuring viewing effect, the energy consumption can be reduced by lowering display brightness.
Press ECO on the remote controller to enter the ECO mode (Standard - Energy Saving). Hold the button to switch between the two modes.
- In the Energy Saving mode, the power output is reduced 50%.
- In the Standard mode, the screen brightness keeps the same.
The RS-232 port of the product is defined as follows.
| PIN Local PC | ||
| 1 NC NC | ||
| 2 RXD0 TXD0 | ||
| 3 | TXD0 RXD0 | |
| 4 NC NC | ||
| 5 | GND | GND |
| 6 NC NC | ||
| 7 NC NC | ||
| 8 NC NC | ||
| 9 NC NC | ||
| Shell GND GND | ||
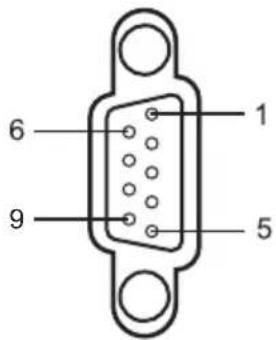
Connect RS-232 port to the PC or controlling device. Enable RS-233 serial port connection and complete the following configuration.
| Port: COM1 (Set according to PC or controlling device's port number) | |||
| Baud rate 38400 | Odd/even check None | ||
| Data bits 8 Stop bit 1 | |||
The following table lists button controlling codes. The buttons share same functions with corresponding buttons on the remote controller:
| Controlling Codes | ||
| Function Controlling Code Returned Value | ||
| Power on | 7F 08 99 A2 B3 C4 02 FF 01 00 CF | 7F 09 99 A2 B3 C4 02 FF 01 00 01 CF |
| Power off | 7F 08 99 A2 B3 C4 02 FF 01 01 CF | 7F 09 99 A2 B3 C4 02 FF 01 01 01 CF |
| Mute/Unmute | 7F 08 99 A2 B3 C4 02 FF 01 02 CF | 7F 09 99 A2 B3 C4 02 FF 01 02 01 CF |
| Sound mode | 7F 08 99 A2 B3 C4 02 FF 01 05 CF | 7F 09 99 A2 B3 C4 02 FF 01 05 01 CF |
| Function | Controlling Code Controlling Code | |
| Signal source | 7F 08 99 A2 B3 C4 02 FF 01 06 CF | 7F 09 99 A2 B3 C4 02 FF 01 06 01 CF |
| Display status | 7F 08 99 A2 B3 C4 02 FF 01 09 CF | 7F 09 99 A2 B3 C4 02 FF 01 09 01 CF |
| HDMI 1 | 7F 08 99 A2 B3 C4 02 FF 01 0A CF | 7F 09 99 A2 B3 C4 02 FF 01 0A 01 CF |
| HDMI 2 | 7F 08 99 A2 B3 C4 02 FF 01 0B CF | 7F 09 99 A2 B3 C4 02 FF 01 0B 01 CF |
| Internal PC | 7F 08 99 A2 B3 C4 02 FF 01 38 CF | 7F 09 99 A2 B3 C4 02 FF 01 38 01 CF |
| VGA 7F | 08 99 A2 B3 C4 02 FF 01 0D CF | 7F 09 99 A2 B3 C4 02 FF 01 0D 01 CF |
| Ypbpr 7F | 08 99 A2 B3 C4 02 FF 01 10 CF | 7F 09 99 A2 B3 C4 02 FF 01 10 01 CF |
| AV 7F 08 | 99 A2 B3 C4 02 FF 01 11 CF | 7F 09 99 A2 B3 C4 02 FF 01 11 01 CF |
| Volume- 7F | 08 99 A2 B3 C4 02 FF 01 17 CF | 7F 09 99 A2 B3 C4 02 FF 01 17 01 CF |
| Volume+ 7F | 08 99 A2 B3 C4 02 FF 01 18 CF | 7F 09 99 A2 B3 C4 02 FF 01 18 01 CF |
| Menu 7F | 08 99 A2 B3 C4 02 FF 01 1B CF | 7F 09 99 A2 B3 C4 02 FF 01 1B 01 CF |
| DMP 7F | 08 99 A2 B3 C4 02 FF 01 3A CF | 7F 09 99 A2 B3 C4 02 FF 01 3A 01 CF |
| Return 7F | 08 99 A2 B3 C4 02 FF 01 1D CF | 7F 09 99 A2 B3 C4 02 FF 01 1D 01 CF |
| Auto ADJ 7F | 08 99 A2 B3 C4 02 FF 01 20 CF | 7F 09 99 A2 B3 C4 02 FF 01 20 01 CF |
| OK 7F 08 | 99 A2 B3 C4 02 FF 01 2B CF | 7F 09 99 A2 B3 C4 02 FF 01 2B 01 CF |
| ← 7F 08 | 99 A2 B3 C4 02 FF 01 2C CF | 7F 09 99 A2 B3 C4 02 FF 01 2C 01 CF |
| → 7F 08 | 99 A2 B3 C4 02 FF 01 2D CF | 7F 09 99 A2 B3 C4 02 FF 01 2D 01 CF |
| ↑ 7F 08 | 99 A2 B3 C4 02 FF 01 2E CF | 7F 09 99 A2 B3 C4 02 FF 01 2E 01 CF |
| ↓ 7F 08 | 99 A2 B3 C4 02 FF 01 2F CF | 7F 09 99 A2 B3 C4 02 FF 01 2F 01 CF |
| Freeze 7F | 08 99 A2 B3 C4 02 FF 01 3B CF | 7F 09 99 A2 B3 C4 02 FF 01 3B 01 CF |
| Function Controlling Code Controlling Code | ||
| Set the volume | 7F 08 99 A2 B3 C4 02 FF 05 XX CFNote:XX indicates the volume value (0-100),hexadecimal: 00-64 | 7F 09 99 A2 B3 C4 02 FF 05 XX 01 CF |
| Set display mode | 7F 08 99 A2 B3 C4 02 FF 06 XX CFNote:XX indicates the mode: 00-standard,01-ECO modes. | 7F 09 99 A2 B3 C4 02 FF 06 XX 01 CF |
| Backlight brightness adjustment + | 7F 08 99 A2 B3 C4 02 FF 01 47 CF | 7F 09 99 A2 B3 C4 02 FF 01 47 01 CF |
| Backlight brightness adjustment - | 7F 08 99 A2 B3 C4 02 FF 01 48 CF | 7F 09 99 A2 B3 C4 02 FF 01 48 01 CF |
| Backlight brightness Settings | 7F 08 99 A2 B3 C4 02 FF 09 XX CFNote:XX indicates the backlight brightness value(0-100),hexadecimal: 00-64. | 7F 09 99 A2 B3 C4 02 FF 09 XX 01 CF |
| Switch the backlight 1 | 7F 08 99 A2 B3 C4 02 FF 01 15 CF7F 08 99 A2 B3 C4 02 FF 01 21 CF | 7F 09 99 A2 B3 C4 02 FF 01 15 XX CFNote:01=On 00=Off.7F 09 99 A2 B3 C4 02 FF 01 21 01 CF |
| 2 7F 08 | 99 A2 B3 C4 02 FF 01 22 CF 7F 09 99 | A2 B3 C4 02 FF 01 22 01 CF |
| 3 7F 08 | 99 A2 B3 C4 02 FF 01 23 CF 7F 09 99 | A2 B3 C4 02 FF 01 23 01 CF |
| 4 7F 08 | 99 A2 B3 C4 02 FF 01 24 CF 7F 09 99 | A2 B3 C4 02 FF 01 24 01 CF |
| 5 7F 08 | 99 A2 B3 C4 02 FF 01 25 CF 7F 09 99 | A2 B3 C4 02 FF 01 25 01 CF |
| 6 7F 08 | 99 A2 B3 C4 02 FF 01 26 CF 7F 09 99 | A2 B3 C4 02 FF 01 26 01 CF |
| 7 7F 08 | 99 A2 B3 C4 02 FF 01 27 CF 7F 09 99 | A2 B3 C4 02 FF 01 27 01 CF |
| 8 7F 08 | 99 A2 B3 C4 02 FF 01 28 CF 7F 09 99 | A2 B3 C4 02 FF 01 28 01 CF |
| 9 7F 08 | 99 A2 B3 C4 02 FF 01 29 CF 7F 09 99 | A2 B3 C4 02 FF 01 29 01 CF |
| 0 7F 08 | 99 A2 B3 C4 02 FF 01 2A CF 7F 09 99 | A2 B3 C4 02 FF 01 2A 01 CF |
| Set sound mode | 7F 08 99 A2 B3 C4 02 FF 03 XX CFNote:00=Standard 01=Meeting 02=Theater03=Classroom 04=User. | 7F 09 99 A2 B3 C4 02 FF 03 XX 01 CF |
| V811 VGA Source DDC |
| 720 x 400 @ 70Hz (IBM,VGA) |
| 800 x 600 @ 60Hz (VESA) |
| 1280 x 1024 @60Hz |
| 1920x1080 @ 60Hz(recommend) |
| 1360x768 @ 60Hz |
| Monitor Name IFPD(neutral) |
| Media category | Formats |
| Photo JPEG,BMP,PNG | |
| Movie | MPEG1, MPEG2, MPEG4, H.264, HEVCNeed License: AVS/RMVB(Highest resolution support 1080P@30Hz) |
| Music WMA, MP3, AAC, M4A, AC-3 (Need License) | |
Before you contact the technical support staff, please identify a fault according to the following table. If the fault cannot be restored based on the solutions, contact the local distributor for help. For your safety, please do not repair the product by your own.
| Failure Possible Cause | Solution | |
| The service program fails to be connected. | The drive program is not correctly installed. | Install the drive program correctly. |
| The USB port (lead) is not connected or is faulty. | Change the USB lead or check if the USB port is faulty. | |
| The infrared tube is blocked. | Ensure that the surrounding infrared tubes are not blocked. | |
| Repositioning is required every time the panel is switched on. | The computer is equipped with a recovery card. | Disable computer protection and perform the positioning again. |
| The calibration is inaccurate. | The positioning is not performed properly. | Press AUTO on the remote controller to show the full screen, and use the pen provided with the panel to perform positioning again. |
| Not sound and image. | ·Check whether the power plug is inserted into the power outlet and whether the panel is powered on. ·Check whether the rocker switch on the product is switched on. ·Check whether the power button on the panel is pressed. ·Check whether the video and audio input cables are connected correctly. ·Check whether the panel is switched to the right signal source. ·Check the settings on image brightness and contrast. ·Check the volume. | |
| Image is normal, but no sound. | ·Check the volume. ·Check whether the MUTE button on the remote controller is pressed. ·Check whether the audio cable between the PC and the product is connected correctly. | |
| No image or the image is black and white. | ·Modify the color settings. ·Check the color system. | |
| Symptom Possible Cause Solution | ||
| Image or sound is interrupted. | ·Find out the electric appliance that causes the interference and move it away from the product.·Do not share the power socket of the panel with the electric appliance that causes interference. | |
| The remote controller fails. | ·Change the batteries.·Clean the signal emitter at the top of the remote controller. (Check whether it is blocked.)·Check contacts of the batteries. | |
| Computer cannot be started (applicable for models with computers). | ·Check whether the PC adapter is correctly connected and whether the PC is powered on.·Check whether the PC is connected correctly to the product. | |
The following symptoms are not faults:
- A very few of constantly bright or dark pixels, such as tiny red, blue, green or dark points, may exist on the LED. This symptom is not a fault and does not affect running functions of the panel.
- Slight sound may occur due to the backlight adjustment or ventilation. This is a normal symptom.
- The image and sound are normal. However, you can sense static electricity when you touch the LED and metal back cover. This is a normal symptom.
11
Maintenance Tips
- Do not install or place the product near the heat source.
- Do not install or place the product under directly sunlight, or dust /damp place.
- Do not install or place the product in the places with mechanical vibration and vulnerable to impact.
- Please keep the product stay away from grid, large metal objects, radar stations and other equipment.
- Do not use chemical reagents to wipe the product body, solvent may cause deterioration or damage to the shell paint. If have dirt bilge, wipe it with drying warm cloth after cutting off power source. Display touch screen can be wiped gently with a clean soft cloth.
- Do not power on and off the product frequently, so as not to affect the service life of the product. After normal shutdown, please wait three minutes before starting up. If not in use for a long time, please turn off the power and unplug the device.
- Do not set the display brightness and contrast to the maximum for a long time to extend the service life of the LED.
- Do not use hard objects to write on the touch screen, so as not to scratch the glass and affect the display effect.
| Specification | Parameter | ||
| 65" 75" 86" | |||
| Backlight type LED LED LED | |||
| Package Size 1640x2 | 21x1036 mm 1859x247x1 | 136mm 2119x275x128 | 1mm |
| Aspect ratio 16:9 16:9 | 16:9 | ||
| Viewing angle 178° 178° | |||
| Physical resolution 38 | 40 × 2160 Pixel 3840 × 21 | 60 Pixel 3840 × 21 | 60 Pixel |
| Display color | 8bit + FRC(1.07billion) | 10bit(D), 1.07Billion colors | 10bit(D), 1.07Billion colors |
| Display contrast | MIN 3200:1 TYP 4000:1 | MIN 3200:1 TYP 4000:1 | MIN 900:1 TYP1200:1 |
| Working voltage | 100 - 240V, 50/60Hz | 100 - 240V, 50/60Hz | 100 - 240V, 50/60Hz |
| Standby power consumption | ≤ 0.5W | ≤ 0.5W | <0.5W |
| Rated power | ≤ 250W ≤ 300W | ≤450W | |
| Audio output | 15W 15W 15W | ||
| Touch screen material | Tempered glass | Tempered glass | Tempered glass |
| Sensing method | capacitance | capacitance | capacitance |
| Technical feature | HID drive-free | HID drive-free | HID drive-free |
| Touch point | 20 points | 20 points | 20 points |
| Communication interface | USB+UART | USB+UART | USB+UART |
| Storage temperature/humidity | -20°C ~ 60°C, 20% ~ 93%RH (no condensation) | -20°C ~ 60°C, 20% ~ 93%RH (no condensation) | -20°C ~ 60°C, 20% ~ 93%RH (no condensation) |
| Working temperature/humidity | -10 ~ 45°C, 20 ~ 93%RH (no condensation) | -10 ~ 45°C, 20 ~ 93%RH (no condensation) | -10 ~ 45°C, 20 ~ 93%RH (no condensation) |
| Installation method | Wall-mounted or moveable | Wall-mounted or moveable | Wall-mounted or moveable |
| Net weight | 36kg | 49kg | 60 |
| Gross weight | 46.5kg | 62kg | 76kg |
For More Information
Please visit our website (www.newline-interactive.com) for detailed instruction manual.
Our company is devoted to product innovation and technology enhancement. Therefore, we may change product spec and information without notice. Product pictures in the manual are for reference only, please refer to actual products.

- Welcome:
- Contents
- About This Document 01
- Safety Instruction 02
- Parts and Functions 05
- 2.Installation Guide 09
- 3.Turning On/Off 14
- 4.Menu 15
- 5.Multi-Media 19
- 6.ECO Mode 21
- 7.Serial Port Control 22
- Specifications of PC Mode (VGA Input) 25
- Formats Supported by Multi-media 26
- 10.FAQ & Troubleshooting 27
- About This Document
- Safety Instruction
- 1
- Parts and Functions
- Parts
- Ports
- Remote Controller
- WARNING
- Safety Precautions
- Installation Precautions
- - Weight Loading
- Note
- ♦ Vertical installation
- ♦ Ventilation
- Installation
- Installing the Internal PC (Optional)
- CAUTION
- Power On
- Power Off
- Select Signal Source
- Picture Setting
- Sound Setting
- Option Setting
- Audio Only Function
- Multi-media File Type
- Select USB Flash
- Enter USB Flash
- 11
- Maintenance Tips
- For More Information
Brand : Newline
Model : TT-7521IP
Category : Monitor