
GRS 5540 CC - Lawn Mower Accessory ECG - Free user manual and instructions
Find the device manual for free GRS 5540 CC ECG in PDF.


| Product Type | Multifunctional Trimmer (Grooming Set) |
| Model | GRS 5540 CC |
| Brand | ECG |
| Power Supply Adapter | PTC-030100EU, Input: 100-240 V~ 50/60 Hz 0.2 A, Output: 3 V ⎓ 1000 mA, Protection Class II |
| Battery Type | Ni-MH, 2.4 V, 600 mAh |
| Charging Time (First Charge) | Approximately 16 hours |
| Charging Time (Subsequent) | Approximately 8 hours |
| Operating Time (Full Charge) | Approximately 50 minutes |
| Number of Heads | 5 interchangeable heads: Beard Trimmer (U), Fine Hair Trimmer (T), Precision Trimmer, Shaver, Nose/Ear Trimmer |
| Comb Attachments | Adjustable combs for beard (4-18 mm) and hair (3-23 mm), including variable settings |
| Fine Adjustment Slider | Sliding switch for precision cut adjustment (3 positions) |
| Power Indicator | Red LED (constant on during charging, remains on after full charge) |
| Intended Use | Home use for cutting human hair, beard, nose/ear hair, and shaving on dry skin |
| Safety Features | Automatic shut-off not specified; use only original adapter; do not immerse; battery safety guidelines |
| Cleaning | Wipe body with damp cloth; rinse comb attachments under water; brush heads; do not remove shaver blade from frame |
| Lubrication | Apply a few drops of acid-free oil (e.g., sewing machine oil) to blades after cleaning |
| Accessories Included | Power adapter, cleaning brush, comb, removable battery, oil, storage case, user manual |
| Weight (approx.) | 250 g (estimated, including battery) |
| Dimensions (approx.) | 18 x 4.5 x 4 cm (estimated) |
| Disposal | Battery and device must be disposed of separately according to WEEE directive |
Frequently Asked Questions - GRS 5540 CC ECG
User questions about GRS 5540 CC ECG
0 question about this device. Answer the ones you know or ask your own.
Ask a new question about this device
Download the instructions for your Lawn Mower Accessory in PDF format for free! Find your manual GRS 5540 CC - ECG and take your electronic device back in hand. On this page are published all the documents necessary for the use of your device. GRS 5540 CC by ECG.
USER MANUAL GRS 5540 CC ECG
natural_image
Black ECG hairbrush with toothed head and control buttons (no visible text or symbols)GRS 5540 CC
CZ
MULTIFUNKČNÍ ZASTŘIHOVAČ
NAVOD K OBSLUZE
HU
MULTIFUNKCIÓS TESTSZÖRNYÍRÓ
HASZNÁLATI ÚTMUTATO
SK
MULTIFUNKČNÝ ZASTRIHÁVAČ
NÁVOD NA OBSLUHU
GB
GROOMING SET
INSTRUCTION MANUAL
PL
TRYMER WIELOFUNKCYJNY
INSTRUKCJA OBSŁUGI
POPIS / POPIS / OPIS / A KÉSZÜLÉK RÉSZEI / DESCRIPTION
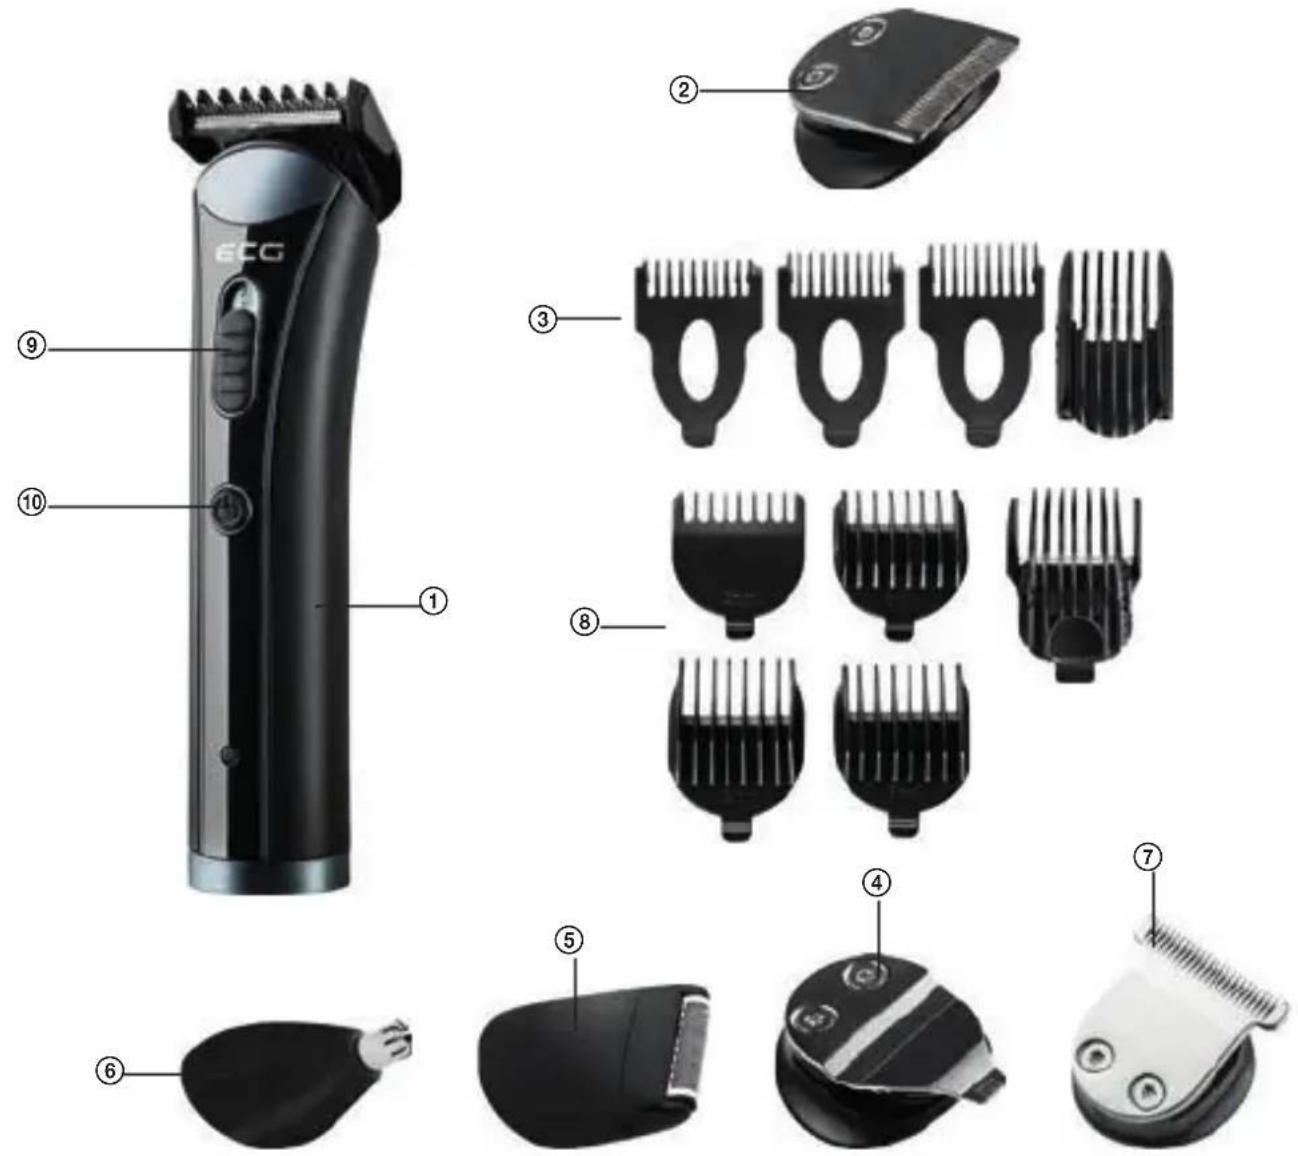
CZ
-
Body of the clipper
-
Head "U" with beard trimming blades
-
Comb attachment for beard trimmer – 4, 6, 8 mm and variable trimming attachments with adjustment options 4, 6, 9, 12, 15 and 18 mm
-
Head with blades for precise cutting
-
Replaceable head with razor blade
-
Attachment to trim nose/ear hair
-
Head "T" with fine hair cutting blades
-
Comb attachment for the hair trimmer attachment 3, 6, 9, 12 mm and a variable trimming attachment with adjustment option 13, 15, 17, 19, 21 and 23 mm
-
Sliding switch for precise cut adjustment
- On/Off switch
Other accessories (not pictured): power supply adapter, cleaning brush, comb, removable battery (included), oil, storage case, User's Manual
natural_image
Line drawing of a hand holding a car with a pen inserted (no text or symbols)natural_image
Close-up of a small hair comb with two circular buttons on the head (no text or symbols visible)natural_image
Simple cartoon character head with two eyes and a curved head (no text or symbols)natural_image
Close-up of a black mechanical component with three circular holes and a striped tip (no visible text or symbols)Nástavec na holení
natural_image
Close-up of a mechanical component with a curved internal feature and textured surface (no visible text or symbols)natural_image
Close-up of a metallic balloon with a small droplet at the tip (no text or symbols visible)ČIŠTĚNÍ A ÚDRŽBA
NEBEZPEČÍ!
natural_image
Line drawing of a hand holding a pen-like object with a small boat on the surface (no text or symbols)Nástavec na holení
VÝSTRAHA!
natural_image
Symbol of a trash bin with crossed lines indicating no waste or restriction, plus a solid black rectangle below (no text or symbols)08/05
natural_image
Line drawing of a hand holding a pen or tool, with no visible text or symbolsnatural_image
Close-up of a small hair comb with two circular buttons on the head (no text or symbols visible)SK
natural_image
Simple cartoon character head with two eyes and a mouth, no text or symbols presentnatural_image
Close-up of a black circular mechanical component with three circular holes and a striped tip (no visible text or symbols)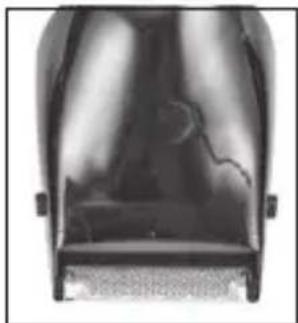
natural_image
Close-up of a mechanical component or housing with metallic base and internal structure (no visible text or symbols)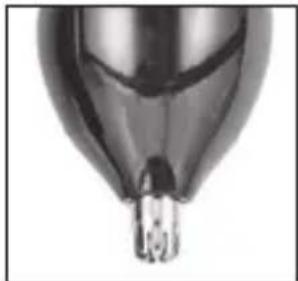
natural_image
Close-up of a metallic, conical object with a small protrusion at the tip (no visible text or symbols)ČISTENIE A ÚDRŽBA
NEBEZPEČENSTVO!
natural_image
Line drawing of a hand holding a pen or tool, no text or symbols presentNásadec na holenie
VÝSTRAHA!
Neskladajte holiacu planžetu z rámčeka planžety a nečistite ju kefkou.
natural_image
Symbol of a trash bin with crossed lines indicating no waste or restriction, accompanied by a solid black rectangle below (no text or symbols present)08/05
natural_image
Line drawing of a hand holding a car with a pen inserted (no text or symbols)natural_image
Close-up of a small hair comb with two circular buttons on the head (no text or symbols visible)natural_image
Simple cartoon character head with two eyes and a mouth, no text or symbols presentnatural_image
Close-up of a black circular mechanical component with four circular features and a textured surface (no visible text or symbols)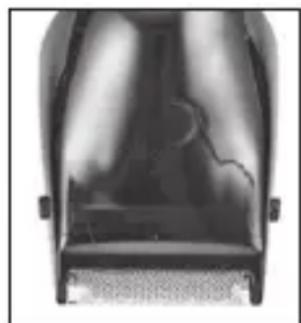
natural_image
Top-down view of a mechanical component or housing with internal structural details (no visible text or symbols)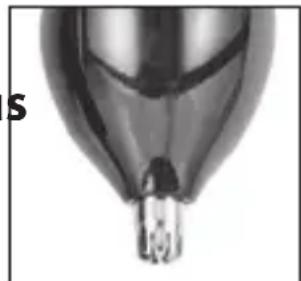
natural_image
Close-up of a metallic balloon with a pointed tip and a small protrusion (no text or symbols visible)CZYSZCZENIE I KONSERWACJA
NIEBEZPIECZEŃSTWO!
natural_image
Line drawing of a hand holding a pen and a tool, no text or symbols presentKońcówka do golenia
UWAGA!
natural_image
Symbol of a trash bin with crossed lines indicating no waste or restriction, plus a solid black rectangle below (no text or symbols)08/05
natural_image
Line drawing of a hand holding a small object, possibly a device or tool, with no visible text or symbols.HU
natural_image
Close-up of a small hair comb with two circular eyes (no text or symbols visible)natural_image
Simple cartoon character head with two eyes and a mouth, no text or symbols presentnatural_image
Close-up of a black cap with four circular buttons and a striped pattern (no text or symbols visible)Borotva
natural_image
Close-up of a mechanical component with a textured surface and a curved edge (no visible text or symbols)HU
natural_image
Close-up of a metallic, pointed object with a small protrusion at the bottom (no visible text or symbols)natural_image
Line drawing of a hand holding a pen, no text or symbols presentPlease read carefully and keep for future reference.
Warning: The safety measures and instructions contained in this manual do not include all potential conditions and scenarios. The user must understand that common sense, caution and care are factors that cannot be integrated into a product. These factors must therefore be ensured by the user/users using and operating this device. We are not liable for any damages caused during shipping, by incorrect use, voltage fluctuation or the modification or adjustment of any part of the appliance.
Read the operating instructions carefully before using the appliance for the first time and follow the safety instructions!
The device may only be used as described in this manual.
Keep this manual for future reference.
If you pass the device to another person, please pass also this manual.
Warnings in this manual
If necessary, the following warnings will be used in this manual:

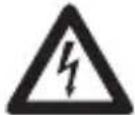
DANGER! High risk: Failure to observe this warning may endanger life or health.

DANGER! Medium risk: Failure to observe this warning may cause injury or considerable damage.
NOTICE: Low risk: Failure to observe this warning may cause slight injury or minor damage.
NOTE: Circumstances and specifics to be observed when handling the device.
SAFETY INSTRUCTIONS
Purpose
Multifunctional trimmer “5 in 1” is intended solely to cut human hair. Use the device on dry hair only.
The device is intended for home use and must not be used for commercial purposes.
The device may only be used indoors.
Possible ways of incorrect use
Do not use this device to cut artificial hair or animal fur.
Instructions for safe operation
- Use only the supplied original power supply to connect to the electric outlet. This appliance can be used by children aged 8 years and older and people with physical or mental abilities or lack of experience and knowledge, if they are supervised or have been instructed to use the product in a safe manner and understand the potential dangers. Children must not play with the appliance. Cleaning and maintenance operations performed by the user shall not be carried out by children, if they are not older than 8 years and under supervision. Children under the age of 8 must be kept away from the appliance and its power supply.
- Store the device in a dry place.

DANGER for children
Children may not play with the packaging material.
Do not let children play with the play bags.
Risk of suffocation.

DANGER
of electric shock due to moisture (during charging or while using the device when connected directly or via adapter to the electric outlet).
Never place the device in such a v that it could fall in the water while still connected to the adapter.
- Protect he device from moisture, dripping or splashing water.
- Never touch the device with wet hands.
- Do not immerse the device, the cable or the power adapter in water or other liquids, or rinse under running water.
• If...
...the device fall in water disconnect the power adapter immediately and only then remove the device from water. After that do not use the device, but have it checked by an expert technician.
...liquid enters the device have it checked before using it again.
...If you use the device in the bathroom, the adapter must be disconnected from the outlet after use, because the nearness of water presents a risk even if the device is turned off.
...Before you first connect the trimmer to the electrical outlet, make sure that its voltage matches the operating voltage of the power adapter. The outlet must be installed according to valid electrotechnical EN standard.
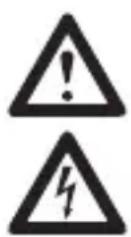
DANGER of electric shock
Do not use the trimmer 5 in 1, if the device, adapter or the cable show visible signs of damage or if you dropped it.
- First connect the adapter connector to the device and then plug the adapter into the outlet.
- Connect the adapter only to a properly installed electrical outlet with the voltage corresponding to the voltage on the product
label of the adapter. The electric outlet must be easily accessible after connection.
- Make sure that the cable can not be damaged by sharp edges or hot surfaces.
- Make sure that the cable is not pinched or crushed.
- Unplug the adapter from the electric outlet ...
...after each use when you use the device directly, with connected adapter.
...after each charging.
...in case of malfunction.
...before cleaning the device when you use the device directly with connected adapter.
...during thunderstorms.
- When disconnecting, do not pull on the cable.
- To avoid any risk, do not make any changes to the device or accessories. Repairs must be carried out by a specialized company.
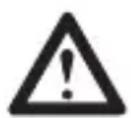
DANGER! When handling the Ni-MH batteries, observe the following guidelines.
- Charge the device only using the original power supply.
- Protect the battery from mechanical damage.
- Do not expose the device to direct sunlight or high temperatures. If the device is heated to more than 125°C, the cells may ignite.
- Do not leave the device near a fire source, as it may cause ignition. Common extinguishers can be used to extinguish fire (powder extinguishers with ABC powder, extinguishers with CO_2 ).
- If liquids leak from the batteries, avoid contact with eyes, mucuous membranes and skin as well as inhalation of vapours. Immediately rinse the affected area with plenty of clean water. In any case, contact your physician.
- Leaked liquids must be absorbed by the absorbent and properly disposed of.
- Open batteries are hazardous waste and must therefore be properly disposed of.
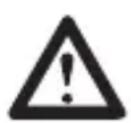
WARNING! Risk of cuts
The blades of the exchangeable cutting heads of hair, beard precise trimmer are very sharp. Handle them carefully.
- Do not use the device with a damaged head or attachment.
- Make sure to turn off the device before inserting or replacing the head and always before cleaning.

WARNING! Danger of injury
Do not insert the attachment for trimming the nose/ear hair too deep into the nostril or ears.
- Do not use the device in open wounds, cutting wounds, sunburns and blisters.

DANGER! Danger of injury from the trimmer oil
Keep the little container with oil out reach of children.
- Avoid contact of the trimmer oil with eyes. If the trimmer oil gets into your eyes, rinse them out immediately with plenty of water and remove the oil completely.
- Never swallow the trimmer oil.

NOTICE: Property damage
Use original accessories only.
- Never place the device on hot surfaces (e.g hot plates) or near sources of heat or naked flames.
- Do not cover the power source to prevent overheating.
- To prevent damage to the razor blade, do not apply excessive pressure to the blade.
- Do not remove the razor blade from the frame.
- Do not use coarse or abrasive cleaners.
CHARGING
GB
Charging
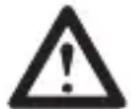
NOTICE: Property damage
Remember that the battery capacity is lower after long periods of storage. Therefore long charging times due to interruption between charging and discharge cycles should be avoided.
WARNING: Use only the PTC-030100EU adapter supplied with the trimmer for charging.
NOTES
- Connect the charging adapter to the body of the device.
- Connect the power adapter to an easily accessible electric outlet.
-
Place the device in the charging stand to connect the charging contacts.
After connecting the adapter to the power supply, the red LED on the trimmer body is constantly on.
To extend battery life, we recommend the following charging times:
First charging – charging time about 16 hours
Each following charging – charging time about 8 hours
1× in six months – we recommend to extend the charging time to about 16 hours
Warning: The red LED is lit continuously even after full charge. -
The operating time with a fully charged battery is about 50 minutes.
Note: You can connect the adapter directly to the body of the device.
OPERATION
NOTES:
• The cut hair must be dry.
- The length of the cut may vary according to the cutting angle.
- First, start with variable comb attachment for longer cut and then during cutting gradually use shorter cut lengths.
Regardless of the charge status of the battery, you can always use the hair trimmer with the power adapter.
- To use the power adapter, make sure the device is turned off.
- Connect the power adapter to an easily accessible electric outlet.
- Turn the device on with a switch ⑩.
Attaching / removing replacement heads with attachments

WARNING!
Turn off before inserting or removing the replaceable heads of the device.
NOTE: The sliding switch for precision setting should be in position 3 before you insert or remove attachments.
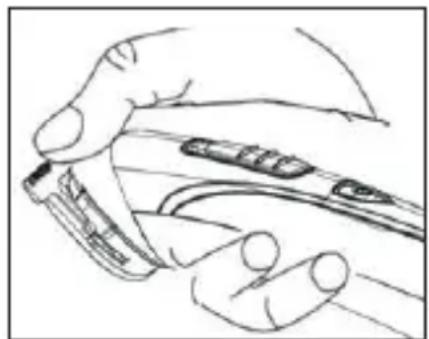
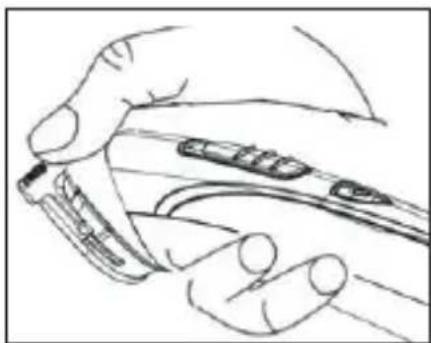
- If you want to insert/remove the replaceable head, remove it from the device by pushing with a thumb against the head (see picture).
- Replace the head by inserting the bottom fixation holder of the head in the groove on the device. Then press the top of the head on the device until it snaps into place with an audible click.
natural_image
Line drawing of a hand holding a small object, possibly a tool or device, with no visible text or symbols.Attaching/removing the comb attachments
- When attaching the comb attachments, put the comb behind the head with blades and press it back against the trimmer until the holding element clicks into place.
When installing the attachments with variable cut lengths, first set the attachments to a minimum length cut to avoid damaging the comb. - When removing / replacing the comb attachments, carefully release the attachment from the clamp by holding the bottom end with both thumbs and pulling it toward the rear.
Trimming fine hair
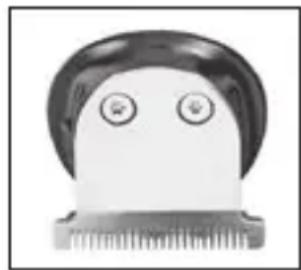
To trim the hair, select the "T" head as shown in the figure and the comb extension of the desired length. Each attachment is provided with the size of the cut in mm. Adjust the length of the cut on the variable attachment by moving the combs forward or backward. The numbers on the attachment correspond to the length of the cut in mm.
natural_image
Close-up of a small hair comb with two circular buttons on the head (no text or symbols visible)- Comb the hair thoroughly.
- Tie around the neck a sheet or a cutting cape to prevent hair clippings falling behind the collar.
- Start cutting hair on the neck or on the sides and cut toward the middle of the head. Then cut the front part of the hair toward the middle of the head.
- Hold the device so that the flat part of the comb attachment is in contact with the head. Move the device through the hair evenly.
- If it is possible, cut against the direction of the hair growth.
- To get all the hair, move the device through the same part of hair several times.
- For a very short cut, use the device without a comb attachment. To achieve a very precise cut, slide the blades by sliding the switch, since in position 3 the cut height is the shortest.
- Comb through the hair repeatedly and thoroughly.
Beard trimming
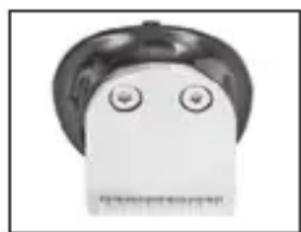
For beard trimming, select the "U" shaped head (see figure) and the comb attachment of the desired length. Adjust the length of the cut on the variable attachment
natural_image
Simple cartoon-style drawing of a character's head with two eyes and a mouth, no text or symbols present.by moving the combs forward or backward. The numbers on the attachment correspond to the length of the cut in mm.
- Comb the beard in the direction of growth.
- Start cutting the bear close to the ear and move to the chin on one side and then repeat it on the other side.
- If you want to trim a beard or mustache for a very short length or when trimming the shape, use the beard trimmer head without a comb attachment. The beard trimmer blade is directed at the beard at the correct angle.
- The variable attachment allows you to adjust the cut length on 6 levels. Numbers 4, 6, 9, 12, 15 and 18 correspond to the length of the cut in mm, if the fine adjustment is in position 1 (lowest position of the sliding switch). If the fine adjustment is in position 3 (the highest position of the sliding switch), the selected cut length will be slightly shorter.
- Hold the comb attachment with the rounded side at the beard and cut from the bottom upwards against the direction of the beard growth.
- When cutting the mustache, first comb the mustache straight down. Then use either a beard trimmer attachment or a precision cutter attachment. Start in the middle above the mouth and cut first one side, then the other.
Precision trimming head
- Using the attachment for precise trimming, trim the shape of the mustache, contours on the cheeks, sideburns and eyebrows.
- Place the blade of the attachment onto the required height of the hairline and move down with the device.
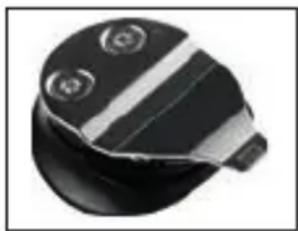
Shaving attachment
Note: The skin must be clean and dry.
- Hold the device at the correct angle to the surface of the skin and carefully move it over your face.
- Shave against the growth of the beard.
- At the places of the face which are more difficult to shave like a chin, stretch your skin to get better results.
natural_image
Close-up of a black circular mechanical component with three circular features on top (no visible text or symbols)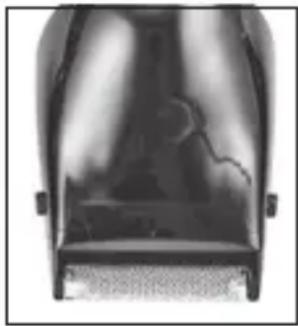
natural_image
Close-up of a metallic mechanical component with internal structure and textured surface (no visible text or symbols)Attachment for trimming the nose/ear hair
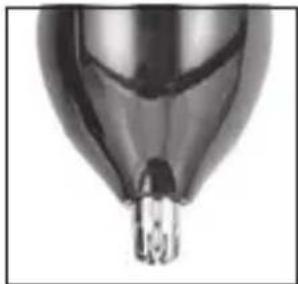
natural_image
Close-up of a metallic, conical object with a small protrusion at the tip (no visible text or symbols)- Slowly insert only the metal tip into the nostril or ear.
- To cut the hair, slowly rotate the device with a circular motion.
CLEANING AND MAINTENANCE
DANGER!
Before cleaning the device unplug the power supply from the electric outlet.
WARNING!
Always turn off the device before cleaning.
Do not immerse the body of the device or the accessories in water.
GB
NOTICE:
Do not use coarse or abrasive cleaners.
Note: Clean and lubricate the device after each use.
Appliance
- Wipe the body of the device with slightly wet cloth.
Comb attachments
- Remove the comb attachment. Rinse the comb attachment under running water and let it dry before next use.
Replaceable heads
-
Unclip the head from the device by pushing the head with your thumb back (see Fig.).
-
Use the supplied brush to remove hair and beard clippings from the attachment.
-
Apply a few drops of oil to the blade edges. Wipe the excess oil using a soft cloth. Use only oil without acids, e.g. oil for sewing machines.
natural_image
Line drawing of a hand holding a pen and a tool, no text or symbols presentShaving attachment
WARNING!
Do not remove the razor blade from the frame and do not clean it with the brush.
- Remove the head with the shaving blade from the body of the device.
- Press the side buttons on the shaving head and remove the shaving razor frame. Hold the razor blade frame on the sides and do not press against the razor blade.
- Clean the blade with the supplied cleaning brush.
- Rinse the razor blade in the shaving frame under running water and allow it to dry completely before reinserting it into the shaving attachment.
- Reattach the razor blade frame to the shaving attachment. When reattaching the razor blade frame, make sure that the fixing tabs fit into the appropriate recesses of the shaving attachment, and push it gently until it snaps into place.
Note: Apply from time to time a few drops of oil without acid to the blades (e.g. the oil for sewing machines). Attach the shaving attachment to the device and switch it on for a few seconds without using it. Wipe the excess oil using a soft cloth.
TROUBLESHOOTING

DANGER!
Do not attempt to repair the device yourself.
Whenever a malfunction occurs, pull the plug out of the electrical outlet.
| Malfunction: Check the following: | |
| The device does not work | • Is the power supply secured during charging?• Isn’t the battery empty? |
| The trimmer heads do not function smoothly | • Are the heads clean and lubricated? |
If there is a malfunction not listed here do not hesitate to contact our service center.
Repairs must be carried out by a specialized company.
TECHNICAL SPECIFICATIONS
| Power supply adapter:Input voltageOutput voltageProtection classOperating conditions | PTC-030100EU100–240 V~, 50/60 Hz, 0,2 A3 V =1000 mA□ IIDesigned exclusively for use indoors |
| Multifunctional hair trimmer:Input voltageBatteryPermissible ambient temperature | 3.0 V =1000 mA2,4 V NiMh battery, 600 mAh from 5°C to +35°C |
In order to continuously improve the product, we reserve the right to make technical or visual changes to the instrument or its accessories.
DISPOSAL
USE AND DISPOSAL OF WASTE
Wrapping paper and corrugated paperboard – deliver to scrapyard. Packing foil, PE bags, plastic elements – throw into plastic recycling containers.
DISPOSAL OF PRODUCTS AT THE END OF LIFETIME
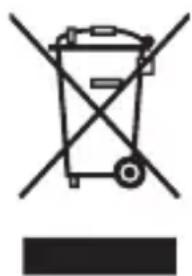
Disposal of electric and electronic equipment (valid in EU member countries and other European countries with an implemented recycling system)
The represented symbol on the product or package means the product shall not be treated as domestic waste. Hand over the product to the specified location for recycling electric and electronic equipment. Prevent negative impacts on human health and the environment by properly recycling your product.
natural_image
Symbol of a trash bin crossed with no text or numbers, representing waste sorting or disposal (no text present)08/05
Recycling contributes to preserving natural resources. For more information on the recycling of this product, refer to your local authority, domestic waste processing organization or store, where you purchased the product.
Dispose of the oil container only when it is empty.
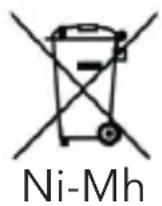
Battery Ni-Mh used in this appliance must not be disposed off in mixed household waste. The battery must be properly disposed off. For more information, check with your battery distributors or collection points for waste disposal.
This product complies with EU directive requirements on electromagnetic compatibility and electrical safety.
The instruction manual is available at website www.ecg-electro.eu. Changes in text and technical parameters reserved.
www.ecg-electro.eu

K+B Progres, a.s.
U Expertu 91 tel.: +420 272 122 111
250 69 Klíčany e-mail: ECG@kbexpert.cz



- GRS 5540 CC
- POPIS / POPIS / OPIS / A KÉSZÜLÉK RÉSZEI / DESCRIPTION
- CZ
- Nástavec na holení
- ČIŠTĚNÍ A ÚDRŽBA
- NEBEZPEČÍ!
- VÝSTRAHA!
- ČISTENIE A ÚDRŽBA
- NEBEZPEČENSTVO!
- Násadec na holenie
- CZYSZCZENIE I KONSERWACJA
- NIEBEZPIECZEŃSTWO!
- Końcówka do golenia
- UWAGA!
- Borotva
- Please read carefully and keep for future reference.
- Warnings in this manual
- SAFETY INSTRUCTIONS
- Purpose
- Possible ways of incorrect use
- Instructions for safe operation
- DANGER for children
- DANGER
- DANGER of electric shock
- DANGER! When handling the Ni-MH batteries, observe the following guidelines.
- WARNING! Risk of cuts
- WARNING! Danger of injury
- DANGER! Danger of injury from the trimmer oil
- NOTICE: Property damage
- CHARGING
- NOTES
- OPERATION
- NOTES:
- Attaching / removing replacement heads with attachments
- WARNING!
- Attaching/removing the comb attachments
- Trimming fine hair
- Beard trimming
- Precision trimming head
- Shaving attachment
- Attachment for trimming the nose/ear hair
- CLEANING AND MAINTENANCE
- DANGER!
- NOTICE:
- Appliance
- Comb attachments
- Replaceable heads
- TROUBLESHOOTING
- DISPOSAL
- USE AND DISPOSAL OF WASTE
- DISPOSAL OF PRODUCTS AT THE END OF LIFETIME
- Disposal of electric and electronic equipment (valid in EU member countries and other European countries with an implemented recycling system)
- www.ecg-electro.eu
Brand : ECG
Model : GRS 5540 CC
Category : Lawn Mower Accessory