
T500 3G - Tablet Navitel - Free user manual and instructions
Find the device manual for free T500 3G Navitel in PDF.


| Product Type | Tablet |
| Brand | Navitel |
| Model | T500 3G |
| Dimensions | 189 x 114 x 10 mm |
| Battery Type | Polymer-Lithium, 2200 mAh / 3.7 V |
| Processor | MTK8321 Cortex-A7 Quad Core 1.3 GHz |
| RAM | 1 GB DDR |
| Internal Storage | 8 GB Flash Memory |
| Expandable Storage | MicroSD up to 128 GB |
| Screen Size | 7.0" IPS |
| Screen Resolution | 1280 x 800 pixels |
| Operating System | Android 7.0 |
| Wi-Fi | 802.11 b/g/n |
| Bluetooth | Bluetooth 4.0 |
| Mobile Network | 3G WCDMA 900/2100 MHz, 2G 850/900/1800/1900 MHz |
| GPS | Yes |
| FM Radio | Yes |
| Front Camera | 0.3 MP |
| Rear Camera | 2.0 MP |
| SIM Card | Dual SIM (Micro-SIM) |
| Charging Port | Micro-USB (5 V / 2.0 A) |
| Headphone Jack | 3.5 mm |
| Included Accessories | Micro-USB Cable, Home Charger, User Manual, Warranty Card, Windscreen Holder and Car Charger |
| Navigation Software | Navitel Navigator pre-installed with free maps of 45 European countries |
| Operating Temperature | -10°C to +40°C |
Frequently Asked Questions - T500 3G Navitel
User questions about T500 3G Navitel
0 question about this device. Answer the ones you know or ask your own.
Ask a new question about this device
Download the instructions for your Tablet in PDF format for free! Find your manual T500 3G - Navitel and take your electronic device back in hand. On this page are published all the documents necessary for the use of your device. T500 3G by Navitel.
USER MANUAL T500 3G Navitel
Backup your important data to Google servers or perform factory reset on your device.
Účty
Obr. 7 Obr. 8 Obr. 9
The package includes:
• T500 3G Tablet
- Micro-USB - USB cable
• Home charger
- User Manual
- Warranty Card
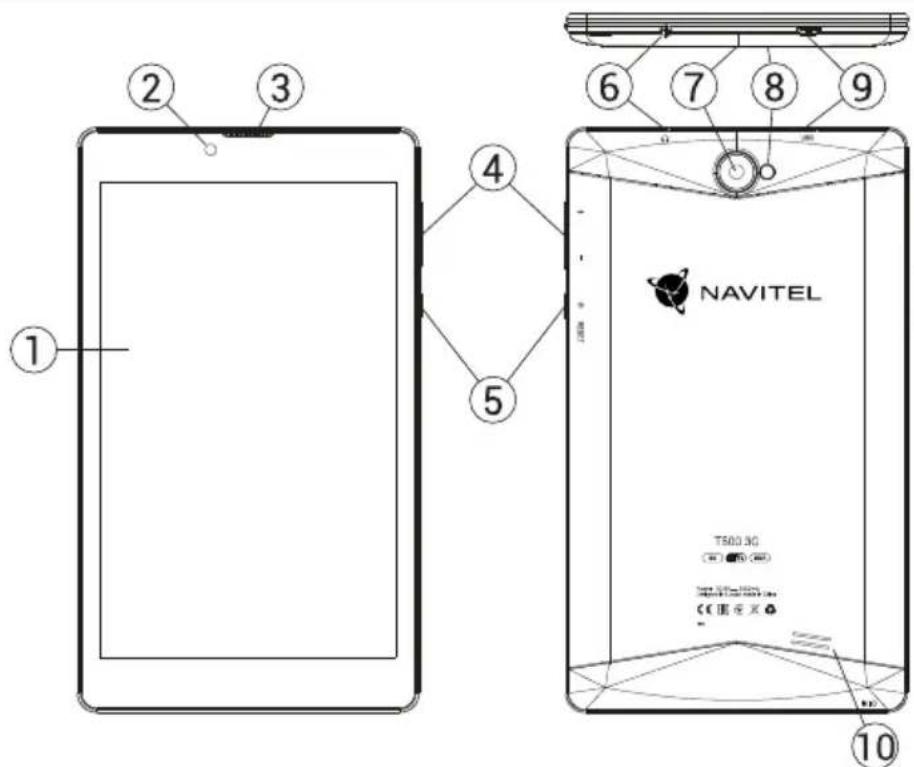
Device layout
- Screen 6. 3,5mm jack
- Front camera 7. Rear camera
- Speaker 8. Flash
- Volume 9. Micro-USB
- On/Off button 10. Speaker
NAVITEL s.r.o. hereby declares that the device NAVITEL T500 3G is compatible with the European directive RED 2014/53/EU. The full text of Declaration of conformity is available at the following internet address:
www.navitel.cz/en/declaration_of_conformity/t500-3g
Technical specifications
| Physical characteristics | |
| Battery Type Polymer-Lithium, 2200 mAh/3.7 V | |
| Power adapter input AC 100 V-240 V,output USB 5 V, 2.0 A | |
| Dimensions (mm) 189x114x10 | |
| Hardware specifications | |
| CPU MTK8321 Cortex-A7 Quad Core 1.3 GHz | |
| RAM 1 GB DDR | |
| Flash Memory 8 GB | |
| Screen Resolution 7.0" 1280x800 IPS | |
| WiFi 802.11 b/g/n | |
| Bluetooth Bluetooth 4.0 | |
| 3G WCDMA 900/2100 MHz | |
| 2G 850/900/1800/1900 MHz | |
Note: the specifications may change due to upgrades.
| GPS yes | |
| FM yes | |
| Camera Front 0.3 MP, Rear 2.0 MP | |
| SD slot | MicroSD, 128 GB |
| SIM Card slot | Dual SIM |
| Charging port Micro-USB (5 V 2.0 A) | |
| USB port | Micro-USB |
| Earphone jack 3.5 mm | |
| Photo format | JPEG, PNG, BMP, GIF |
| Video format | AVI, MOV, TS, M2TS, FLV, 3GP, MP4, MPEG, DAT, MKV (XVID/Vidx/H.264), RM/RMBV |
| Audio format | MP3, WMA, APE, FLAC, OGG, WAV |
| Software specifications | |
| OS | Android^TM 7.0 |
Using Device in Vehicle
Windscreen holder and battery charger are delivered as part of the product package.
Windscreen holder
Carefully select a place to attach the holder. Do not attach the holder to the windscreen in a way that limits the driver's line of sight. If the car windscreen contains a built-in heating system or UV protection, the quality of signal reception may be lower than usual.
Set-up of windscreen holder
First remove the protective layer from the vacuum cup. Then, select an appropriate place to attach the holder. Make sure the area is clear of dust, dirt, and moisture, and then secure the vacuum cup on the windscreen. Under normal operating conditions, the vacuum cup holder locks the device well. However, if you leave it there overnight, the holding strength may get weaker as a result of moisture condensation due to temperature fall. For this reason, in order to prevent the device and holder from being damaged, it is recommended to remove the device and holder from the windscreen.
Safety requirements
- Do not disassemble or repair tablet by yourself. In case of tablet failure, contact the service center.
- Permissible ambient temperature in operating mode: -10 to +40 °C. Storage temperature: +5 to +55 °C. Relative humidity: 5% to 90% without condensation (25 °C).
- Put the tablet away from fire sources to avoid explosion or fire.
- Do not expose the tablet to physical impacts.
- The manufacturer is not responsible if the screen is damaged by the user.
- Avoid contacting the tablet with sources of electromagnetic radiation.
- Do not use chemicals or detergents to clean the product; always turn off the tablet before cleaning.
- Use accessories only approved by manufacturer.
Installing and removing a SIM card
To install:
- Shut off the device.
- Remove the top part of the device's back panel to find the SIM card slot.
- Insert the SIM card into the slot so that the gold contacts are facing down, and the cut-off corner is facing away from the slot.
To remove:
EN
- Shut off the device.
- Remove the top part of the device's back panel to find the SIM card slot.
- Carefully remove the SIM card.
Installing and removing an SD card
To install:
- Shut off the device.
- Remove the top part of the device's back panel to find the SD card slot.
- Insert the SD card into the slot so that the gold contacts are facing down and the cut-off corner is facing towards the slot. Push it in until it clicks into place.
To remove:
- Unmount the SD card by going to Application Menu > Settings > Storage > Portable storage - click the arrow on the right side to dismount.
- Shut off the device.
- Remove the top part of the device's back panel to find the SD card slot.
- Lightly push the SD card into the slot and let it slide out.
Errors and Troubleshooting
Device does not work
- Check whether the device is charged or not. In case the device is not charged, connect the power supply and wait at least 5 minutes;
- Press and hold the Power button for at least 8 seconds;
- Even if the device is charged, connect the power supply and try to start the device again;
- If the device does not work even after recharging, contact our support team or any certified service center.
Device shuts down immediately upon startup
- It is possible that battery charge of the device is critically low. In such cases, the system shuts down automatically in order to prevent complete discharge of the battery, which may result in data loss. Before attempting to turn the device on again, charge it for at least 5 minutes, and keep the adapter plugged during subsequent operation of the device.
Fast battery discharge
- The battery discharges much faster in cold environment.
Battery does not get charged
- Check whether the adapter is connected to a socket;
- Make sure that you use the default power adapter and not the adapter of another device;
- It is possible that battery does not get charged in very hot climate.
Sound does not work
- Make sure the sound is turned on in the program settings;
- Make sure the volume is not too low.
Device does not recognize the microSD card
- Make sure the card is fully inserted into the correct slot until it is locked into place;
- Check that the card is not inserted the wrong way around;
- Check if the card is damaged. Try to use it in another device;
- Re-insert the card. Reboot the device;
• See the installation manual provided with your card.
Cannot copy files
- Check that the connection between your PC/laptop and the device was established properly;
- The device memory usage may be overflowing and requires deleting unnecessary files.
Accounts
Use accounts to synchronize your data - e-mails, contacts, calendar, etc.
Adding an account
Go to 📄 Application Menu > Settings, then scroll down to the "Accounts" section. Press "Add account".
You can add the following account types:
- Google – add a Gmail account to synchronize your calendar, contacts, mail, app data, as well as Google+ services.
• Corporate email – add a corporate email account. - IMAP email – add a personal email account (IMAP protocol).
- POP3 email – add a personal email account (POP3 protocol).
Contacts
You can save contacts, phone numbers, email addresses, and other related information.
New contacts
To add a new contact:
- Go to Contacts > New contact.
- Enter the contact's information.
- Press "√" (top right corner) to save the contact.
Edit a contact
- Press to open the contact list.
- Select the contact you want to edit, then press editing, press "√" to save the changes.
Delete a contact
- Press to open the contact list.
- Select a contact which you want to delete.
- Press ☐, in the pop-up list select "Delete".
- Mark the contacts you want to delete, then press "OK".
Backup contacts
You can export your contact data to an external memory card.
- Press to open the contact list.
- Press □> "Import/Export".
- Select "Export to storage".
Import contacts
- Press to open the contact list.
- Press ☐ > "Import/Export".
- Select "Import from storage".

NAVITEL
NAVITEL T500 3G
Favorite contacts
You can favorite frequently used or special contacts to access them more quickly. To do that, select a contact from your list, then press on the star icon next to their name.
To view your favorites, press "All contacts" (top left corner), and select "Favorites" in the pop-up list.
Phone call
Making a phone call
- Press

- Select a contact from your contact list or press enter a number using the dial pad. You can press remove the last entered digit.
- Press to make the call.
Receiving a phone call
When you get an incoming call, three options are available:
- Answer the phone – press and drag the icon onto the icon.
- Hang up - press and drag the icon onto the icon.
Hang up and write a message – press and drag the onto the ≡ icon.

icon
Call history
To view your call history, go to Phone > History. You can choose to only view:
- Incoming calls
- Outgoing calls
- Missed calls
Message
Sending a message
- Go to Messages > New message.
- Enter the intended recipient's number or press and find the recipient in your contact list.
- Write the text you want to send.
- Press ▶ to send the message.
Answering messages
You will be notified when you receive a new message.
- Go to Messages.
- Select the message you want to reply to.
- Enter the text you want to send.
-
Press ▶ to send the message.
-
Pictures – attach a picture stored on your device.
- Videos – attach a video stored on your device.
- Audio – attach an audio file stored on your device.
- Slideshow – create a picture slideshow to attach to the message.
- Press ▶ to send the message.
MMS
- Go to 🤐 Messages > New message.
- Enter the recipient's number or press and find the recipient in your contact list.
- Press clip icon in the top right corner, then select one of the following options:
- Capture picture – capture a photo that will be automatically attached to the message.
- Capture video – capture a video that will be automatically attached to the message.
- Record audio – record an audio file that will be automatically attached to the message.
Wi-Fi
Enabling and disabling Wi-Fi
Wi-Fi can be turned on from the Home Screen.
- Press in the Quick Settings Menu. The icon will turn white when Wi-Fi is on.
- Press on the icon again to disable Wi-Fi, if necessary.
Alternatively:
- Go to 📄 Application Menu > Settings.
- In the "Wireless&Networks" section, find the "Wi-Fi" entry.
- Use the toggle on the right to turn Wi-Fi on/off.
Connecting to a Wi-Fi network
When Wi-Fi is turned on, a notification icon [?] will appear in the Status Bar showing that there are available Wi-Fi networks. To connect to a network:
- Put your finger on the left side of the Status Bar and swipe down to display the list of notifications.
- Tap on "Wi-Fi network available". You will be shown the list of available networks.
- Choose a network from the list and tap on the corresponding entry. If the network is password protected, you will be prompted to enter the password.
Every time you connect to a new network, the device "remembers" it and connects automatically when it is available. To make your device "forget" a network, long press on the network's name, then select "Forget network" from the pop-up list.
Note: "forgetting" a network includes "forgetting" the password, thus to connect to a secured network again, you will have to re-enter the password.
Mobile network
To enable mobile Internet access, press Application Menu > Settings.
Note: you need to have a SIM card installed for mobile Internet to work.
Bluetooth
Enabling and disabling Bluetooth
Bluetooth can be turned on from the Home Screen:
- Press in the Quick Settings Menu. The icon will turn white when Bluetooth is on.
- Press on the icon again to disable Bluetooth.
Another way to enable Bluetooth:
- Go to 📄 Application Menu > Settings.
- Find the "Bluetooth" entry.
- Use the toggle on the right to turn it on/off.
Connecting devices via Bluetooth
- Tap on the Bluetooth entry to see the Bluetooth settings. The entry at the very top displays the name of your device and indicates whether it is visible to other Bluetooth devices. Tap on the entry to toggle the visibility of your device.
- The "Available devices" section below shows the devices that your device can currently see. Tap on a device's entry to pair with it. Another section will appear, titled "Paired devices", where all the Bluetooth connections to your device will be displayed.
- To unpair a device, press 📋 on the right in the device's entry, then press "Unpair".
Tethering&Portable hotspot
You can share your device's data connection with other devices. First, enable your mobile Internet connection. Then, go to
Application Menu > Settings and in the "Wireless&Networks" section press "More...", then "Tethering&portable hotspot". You will see several sharing options.
Wi-Fi hotspot
- Tap on the entry to configure your Wi-Fi hotspot.
- Press "Set up Wi-Fi hotspot". A window will pop up.
- Choose a name for your network and type it in the "Network SSID" text field.
- Choose a security protocol for your network or leave it open.
- Enter a password to protect your network, if necessary.
- Set the maximum number of allowed connections (1-8).
- Press "Save".
- Use the toggle in the top right corner to turn on the hotspot.
USB tethering
Share Internet connection between two devices via USB cable.
- Connect your device to the other device.
-
A USB icon will appear in the Status Bar. In the list of notifications you will see "Connected as a media device" (or other connection mode). It does not matter for tethering.
-
Go to 📄 Application Menu > 📋 Settings, under "Wireless&Networks" select "More...", then "Tethering&portable hotspot".
-
Tick the checkbox on the right in the "USB tethering" entry.

NAVITEL
NAVITEL T500 3G
Bluetooth tethering
Share Internet connection between two devices paired via Bluetooth.
- Enable Bluetooth on both devices.
- Pair the devices.
- If you want to use the other device's Internet connection, press in the device's entry under "Paired devices", then, under profiles, select "Internet access".
- If you want to share your Internet connection with the other device, perform step 3 on said device (consult the user manual for the device, if necessary).
Camera
The camera allows you to take pictures and record videos.
To access the camera, tap on the icon on the Home
Screen, or go to 📄 Application Menu > 📋 Camera.
Press 📄 to switch between front and rear cameras.
Taking a picture
- Point the camera at whatever you want to capture.
- "Stretch" and "pinch" the screen to zoom in or out, if necessary.
- Press 📂 to take a picture. It will be saved automatically to the gallery.
Recording a video
- Press ☐ to start recording a video. The icon will turn red, and a small red circle will appear in the bottom left corner of the screen indicating that the recording is in process. A timer next to it will show the length of the recording.
- If necessary, you can zoom in and out while recording by "stretching" and "pinching" the screen.
- Press ☐ once more to stop recording. The video will be saved to the gallery.
Camera settings
Press to open the Camera Settings Menu. It is divided into three tabs – General, Photo, and Video settings.
Press 📁 to open another menu, where you can set up exposure level, color effect, white balance, and day/night mode.
After changing the settings, tap anywhere on the screen to exit the Camera Settings Menu.
View gallery
Tap on the square frame in the down right corner of the screen to go to your gallery, where all your pictures and videos are contained.
You can perform various actions (i.e. edit, crop, rotate, mute, delete) on the items in your gallery. To do that, select an item from the gallery, then press and choose an action from the list.
Sharing pictures and videos
Select an item from the gallery, then press in the top right corner and choose a sharing method from the list. Press to share the file via Gmail (as an attachment).
Sound recorder
- Go to 📄application Menu > Sound recorder.
- Press to start recording.
- Press □ to stop.
- Press ▶ to play back the recording, if necessary.
- Press "Save", if you want to save the audio file, or press "Discard" to delete it.
Settings
To open the Settings Menu:
- Go to 📄 Application Menu > Settings.
- Tap on the Status Bar and in the pop-up menu press
The Settings Menu is divided into 5 sections:

- Wireless networks - set your device's wireless connection, such as WiFi, Bluetooth, mobile network, etc.
- Device - theme, sound, display, storage options, etc.
- Personal - location, security, language, backup.
- Accounts - Google and email accounts.
- System - time and date, accessibility, software version, legal information, etc.
Wireless&Networks
SIM cards
Enable/disable your SIM cards using the toggles on the right, or edit them by tapping on their respective entries.
Wi-Fi
Connect to wireless networks, view and edit your connection settings.
Bluetooth
Pair your device with other Bluetooth devices in the vicinity.
Data usage
View your data usage statistics.
(press "More..." to access the menus listed below)
Airplane mode
Disable all communication with your device.
Default SMS app
Set your default messaging application.
Tethering&portable hotspot
Share your Internet access with other devices.
VPN
Configure your virtual private networks.
Mobile networks
Enable/disable mobile data connection.
Device
Display
Select your wallpaper, set up notifications, brightness, font size, etc.
Storage
Choose a default write disk, view available and occupied space on your storage units.
Battery
View your battery status - current charge, time left, energy consumption per process.
Apps
View and manage your installed applications.
Personal
Location
Location service settings.
Security
Set up screen lock, SIM card protection, and other security parameters.
Language&input
Select your preferred language and input method.
Backup&reset
Backup your important data to Google servers or perform factory reset on your device.
Accounts
Create, edit, and manage your Google and email accounts.
EN System
Date&time
Set current date and time, date and time display format, your time zone.
Scheduled power On&Off
Set your device to turn on or off automatically at a certain time.
Accessibility
Accessibility options for people with disabilities.
About tablet
Updates, status, model number, software version, etc.
Navitel Navigator
Navitel Navigator is a multifunctional navigation application used for efficient address search and route planning. NAVITEL T500 3G Tablet includes pre-installed latest version of Navitel Navigator software.
Press the icon in your home screen to run the program. You will be able to download maps of 45 European countries available for free.
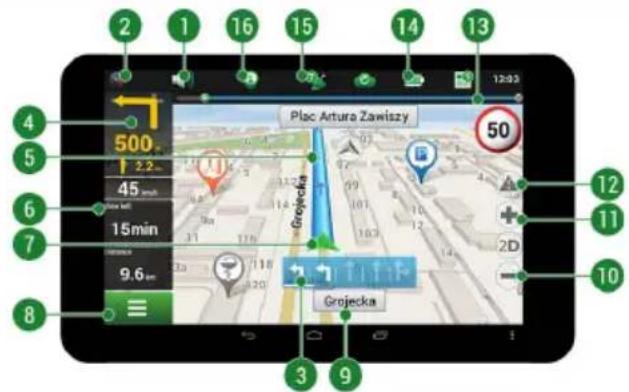
Program interface
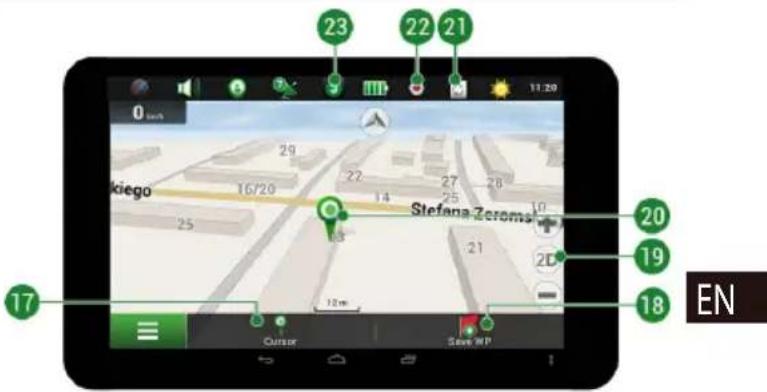
| # E | Element Function | |
| 1 | Sound | Tap on the button to open the sound menu. |
| 2 | Compass | Tap to open the context menu where you can choose map orientation (“North up” or “Track up”), map view (2D/3D), and skin (Night/Day/Auto). |
| 3 | Road lanes | This panel displays road lanes with possible maneuvers. |
| 4 | Information panel | This panel shows the upcoming maneuver and distance before it. Tap on the panel to open |
| # Element Function | ||
| 5 Route Visualization of the current route. | ||
| 6 | Information panel | The panel shows current speed, the remaining time to the destination point, distance to the destination point, and estimated time of arrival. |
| 7 GPS-cursor | Indicates current position on the map when the GPS receiver is switched on. | |
| 8 Menu | Tap on the button to open the main program menu. | |
EN
| # E | Element Function | |
| 9 | Information panel | The panel shows the name of the street you are currently on. The information is available only if GPS/ GLONASS connection is established and the map contains such information. If there is no street name, the movement direction will be displayed. |
| 10 | Zoom out button Tap to zoom out. | |
| 11 | Zoom in button Tap to zoom in. | |
| 12 | "Navitel.Events" | Button for controlling the "Navitel. Events" service. |
| 13 | Route progress bar | The progress bar displays the remaining route, waypoints (if any), and traffic density on the route, marked by color. |
| 14 | Battery | The icon indicates the level of battery charge. Tapping on the icon shows free device memory. |
| # E | Element Function | |
| 15 GPS | GPS-connection indicator. Grey indicator - GPS/GLONASS-receiver is off; red - receiver is turned on, but there is no connection with satellites; yellow - bad connection; green - connection is established. The number on the icon indicates the number of satellites. | |
| 16 "Navitel.Friends" | The icon of the “Navitel.Friends” service. Tap on it to open the settings menu. The service is intended for adding friends, viewing their location and exchanging messages with them. | |
| 17 | “Cursor” button | Tapping on the button shows the menu for operations with the point marked on the map (making it a destination point by pressing “Go!” button or proceeding to the properties screen). |
| 18 | “Save WP” button | Saves the point marked on the map as a waypoint. |
| 19 | 2D/3D | Switching between the plain 2D and the panoramic 3D map views. |
| 20 | Point on the map | Short tap on the map marks the point for further operations with it: saving as a waypoint, adding to the route or viewing the object’s data, and others. |
| 21 | Updates | Provides access to the program and map update menu screen. |
| 22 | Track recording | Button for track recording: red dot – recording is on, grey dot – recording is stopped. |
| 23 | Navitel.Traffic | The icon displays general traffic intensity on ten-point scale. Tapping on the button shows the menu for controlling the “Navitel.Traffic” service. |
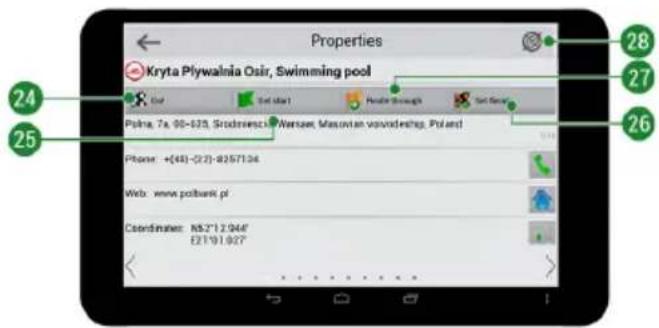
| # Element Function | ||
| 24 "Go!" | Tapping on the button gives a command to the program to calculate a route from the current position or the set initial point to the selected point. | |
| 25 "Set start" | Tapping on the button determines the selected point as a starting point of the route (GPS-receiver must be switched off). | |
| 26 "Set finish" | The button is active only when there is an existing route. Pressing the button continues the route up to the selected point making it the destination point of the route. | |
| # E | Element Function | |
| 27 | "Route through" | The button is active only when there is an existing route. Pressing the button marks the selected point as a point to be included in the route. The last added point becomes the first one in the route after the starting point. |
| 28 | Map Tap to return to | the map. |
Routing
Route to a point selected on the map
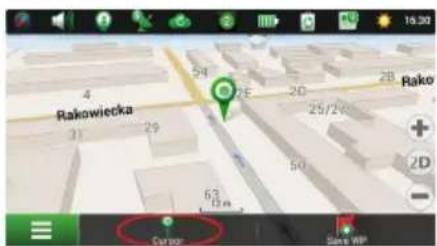
You can have a route planned to a point, which can be found and marked on the map and then set as the destination, while current position of the device, determined by the GPS system becomes the starting point. To plan a route press on the map to mark the point, select "Cursor" [1] and then "Go!" [2]. The program will offer 3 alternate routes with an approximate distance and time to the finish point [3]. Press «Go!» to start follow the route.
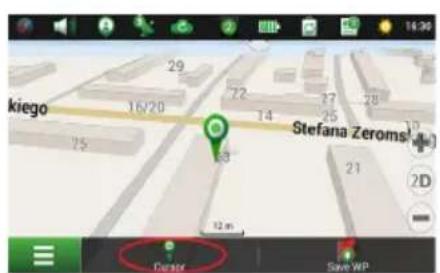
Fig. 1 Fig. 2
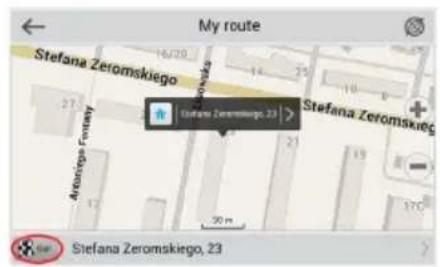
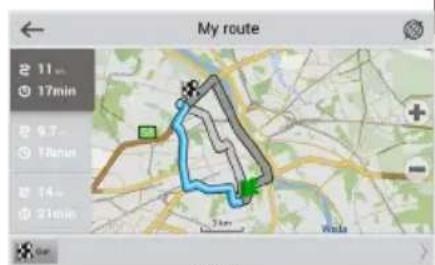
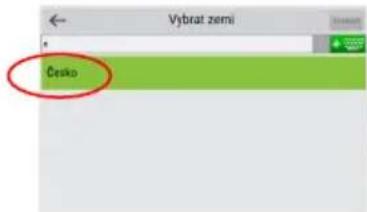
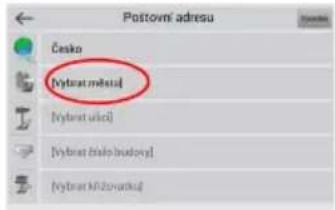
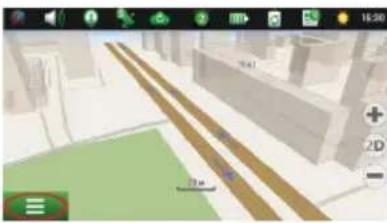
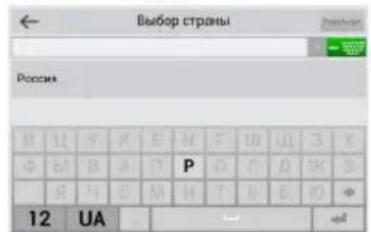
To have a route calculated to a point of a known address, press "Menu" in the bottom left corner of the screen [4] > "Find" [5] > "By address" [6], then press "Select country" and start entering the name of a country [7]. Press the icon in the upper right part of the screen to hide the keyboard. Select the country [8]. "Select city", "Select street" and «Select a building» become active only if the previous fields were filled out [9]. When all information is entered the object will be shown in the screen [10]. Press «Go!». The program will offer 3 route options from a current location to the indicated address [11]. Now you can follow the route [12].
natural_image
3D interior view of a modern building with wooden walkways and green flooring (no visible text or symbols)Fig. 4
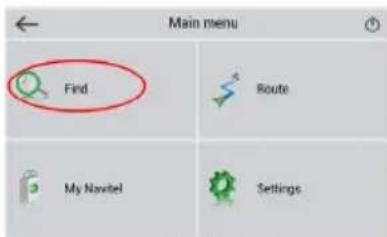
Fig. 5 Fig. 6
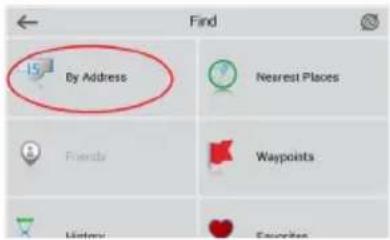
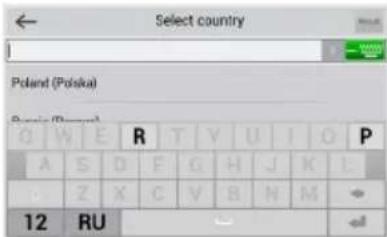
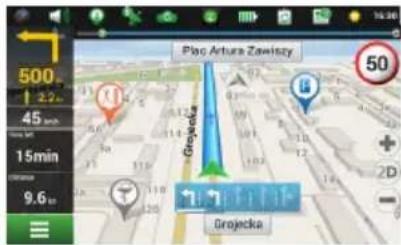
Fig. 12
Manual setting of all route points
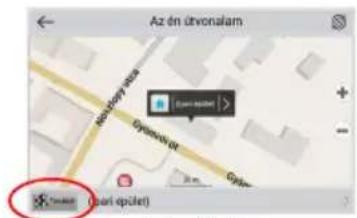
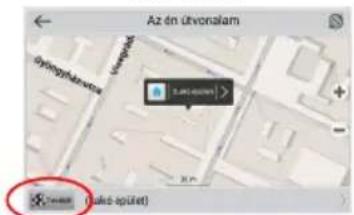
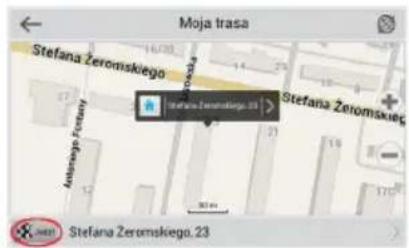
To plan a route, where the starting and the destination points are determined manually, first mark a point on the map where you plan to start and press «Cursor» [1] to proceed to the «My route» screen. Tap on the information panel at the bottom of the screen [2]. Press «Set start» in the «Properties» screen [3]. The GPS-receiver must be switched off. The point will be marked on the map as a starting point. Select a destination point on the map: tap on the map to mark the point, press «Cursor» [4] and then press «Go!» in the «My route» screen [5]. The program will offer 3 alternative routes [6]. Select the appropriate and press «Go!».
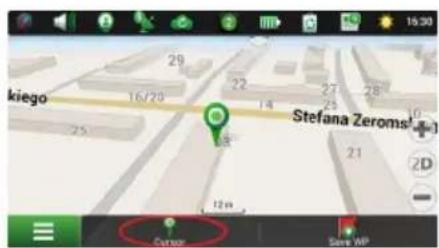
Fig. 1
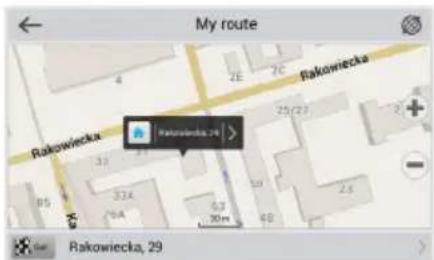
Fig. 2
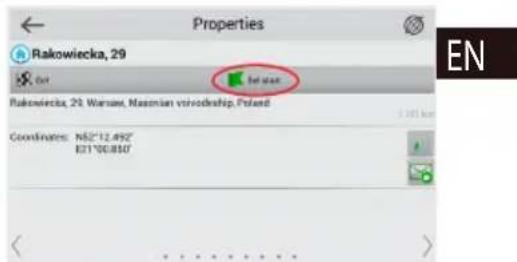
Fig. 3
This service provides real-time information about density of traffic on the map. If a part of a road is marked green on the map, this means that road traffic here is normal, if it is marked yellow – traffic is rather dense, orange – traffic is heavy, red – there is a traffic jam. To configure the service select "Menu" > "Settings" > "Online services".
Navitel.Friends
The "Navitel.Friends" interactive service allows viewing positions of friends on the map in real-time, to plan a route using their coordinates, or to share coordinates of other points and exchange messages. To turn the service on select "Menu" > "Settings" > "Online services" and switch on the "Turn on Navitel.Friends" toggle.
Navitel.Events
This interactive service allows users to mark and see on the map other users' marks of the various types of road events.
Navitel.Weather
Navitel.Weather service shows weather forecast for 4 days for any place on Earth.
Navitel.Cloud
Navitel.Cloud service allows you to save your settings, waypoints, and search history in the cloud data storage. The data saved in the cloud can be restored afterwards in case you have reinstalled the program. If you use Navitel Navigator on several devices, waypoints and history data can be synchronized between all of them, which might come handy, saving you time otherwise spent transferring the necessary files.
The Internet connection is required.

NAVITEL
NAVITEL T500 3G
To synchronize with another device:
- On the map screen, within the toolbar, tap the 📊 icon.
- If you do not see this icon, try rotating the screen in order to change the screen orientation. If it does not help and the icon does not appear, select Menu > Settings > Interface > Map buttons, and then enable the Navitel.Cloud icon display.
- In the newly opened dialog box, select Turn on.
- Enter your login and password data (same as on Navitel website or Navitel.Friends service). Alternatively, you can log in with either VK, FB, or Google Plus. Your Navitel account has to be synched with them.
- In the Navitel.Cloud dialog box, select Settings, then select data which you want to synchronize.
- Go back to the Navitel.Cloud dialog box, and tap the Synchronize now option.
- Repeat these steps on the other device that you want to synchronize with.
Navitel.News
With the help of the Navitel.News service we deliver to you important update and program news and announce special offers and discounts.
To open the service page, select Menu > My Navitel > News.
If you want to turn this feature on or off, select Menu > Settings > Online services, find the "Show Navitel.News notifications" menu option, and then set the toggle into the position of your choice.
You can also put the Navitel.News icon on the toolbar. Go to Menu > Settings > Interface > Map buttons, and then enable the Navitel.News icon display.
A csomag tartalma
- sz. ábra
- sz. ábr
- sz. ábra
Rys. 1 Rys. 2
"Wireless&Networks" select

ttings,
"More...", then
"Tethering&portable hotspot".
- Tick the checkbox on the right in the "USB tethering" entry.
Tethering prin Bluetooth
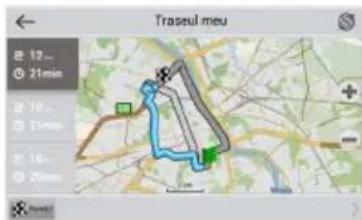
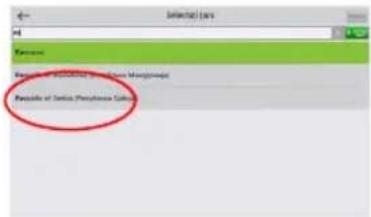
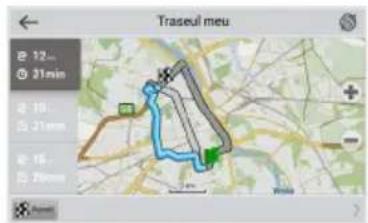
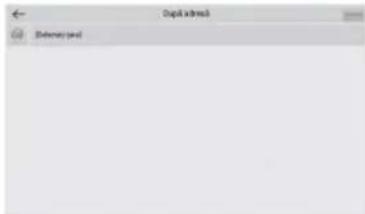
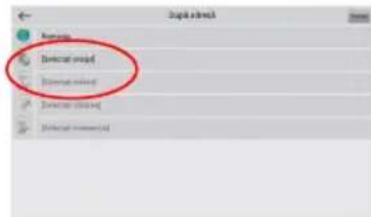
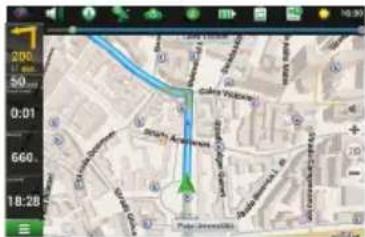
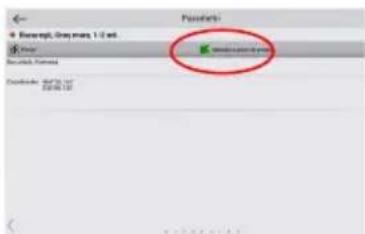
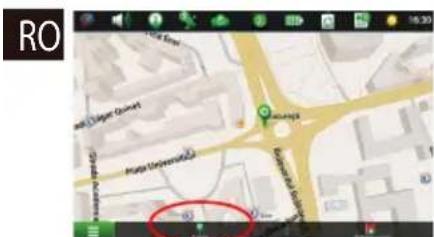
Рис. 1
The content of this user manual is subject to copyright law. No part of this document shall be utilized for commercial purposes without written permission from NAVITEL s.r.o.
Trademarks
NAVITEL® and the NAVITEL logo are registered trademarks of NAVITEL s.r.o.
Android is a trademark of Google Inc.
The Bluetooth® word mark and figure mark (stylized "B Design") are registered trademarks owned by the Bluetooth SIG.
Wi-Fi is a registered trademark of the Wireless Fidelity Alliance, Inc.
microSD ^TM and the microSD logo are trademarks of the SD Card Association.


- Účty
- Device layout
- Using Device in Vehicle
- Windscreen holder
- Set-up of windscreen holder
- Safety requirements
- Installing and removing a SIM card
- To install:
- To remove:
- EN
- Installing and removing an SD card
- Errors and Troubleshooting
- Device does not work
- Device shuts down immediately upon startup
- Fast battery discharge
- Battery does not get charged
- Sound does not work
- Device does not recognize the microSD card
- Cannot copy files
- Accounts
- Adding an account
- Contacts
- New contacts
- Edit a contact
- Delete a contact
- Backup contacts
- Import contacts
- Favorite contacts
- Phone call
- Making a phone call
- Receiving a phone call
- Call history
- Message
- Sending a message
- Answering messages
- MMS
- Wi-Fi
- Enabling and disabling Wi-Fi
- Connecting to a Wi-Fi network
- Mobile network
- Bluetooth
- Enabling and disabling Bluetooth
- Connecting devices via Bluetooth
- Tethering&Portable hotspot
- Wi-Fi hotspot
- USB tethering
- Bluetooth tethering
- Camera
- Taking a picture
- Recording a video
- Camera settings
- View gallery
- Sharing pictures and videos
- Sound recorder
- Settings
- Wireless&Networks
- SIM cards
- Data usage
- Airplane mode
- Default SMS app
- VPN
- Mobile networks
- Device
- Display
- Storage
- Battery
- Apps
- Personal
- Location
- Security
- Language&input
- Backup&reset
- EN System
- Date&time
- Scheduled power On&Off
- Accessibility
- About tablet
- Navitel Navigator
- Program interface
- Routing
- Route to a point selected on the map
- Manual setting of all route points
- Navitel.Friends
- Navitel.Events
- Navitel.Weather
- Navitel.Cloud
- Navitel.News
- A csomag tartalma
- Tethering prin Bluetooth
- Trademarks
Brand : Navitel
Model : T500 3G
Category : Tablet