
Podo-152 - Mp3 player LENCO - Free user manual and instructions
Find the device manual for free Podo-152 LENCO in PDF.


User questions about Podo-152 LENCO
0 question about this device. Answer the ones you know or ask your own.
Ask a new question about this device
Download the instructions for your Mp3 player in PDF format for free! Find your manual Podo-152 - LENCO and take your electronic device back in hand. On this page are published all the documents necessary for the use of your device. Podo-152 by LENCO.
USER MANUAL Podo-152 LENCO
Media Player with Pedometer
WARNINGS
- Do not place naked flames, such as lighted candles on or near the product.
- Do not place objects filled with liquids, such as vases on or near the product.
- Do not use or store this product in a place where it is subject to direct sunlight, heat, excessive dust or vibration.
- Do not use this product with wet hands.
- Do not clean this product with water or other liquids.
- Do not block or cover the slots and holes in the product.
- Do not push foreign objects into the slots or holes in the product.
- Do not attempt to open this product yourself. There are no user serviceable parts inside.
- Do not allow children access to plastic bags.
SAFETY WARNINGS
- Before using this product, read and follow all warnings and instructions.
- This product is not intended for use by young children. Young children should be properly supervised.
- This product is intended for household use only and not for commercial or industrial use.
- Do not expose to dripping or splashing.
- No naked flame sources, such as lighted candles, should be placed on the product.
- Ventilation should not be impeded by covering ventilation openings with items such as newspapers, table cloths, curtains and the like.
- Make sure the unit is adjusted to a stable position. Damage caused by using this product in an unstable position or by failure to follow any other warning or precaution contained within this user manual will not be covered by warranty.
Lenco, suggests retaining the packaging in case for future transport of the product.
Prolonged exposure to loud sounds from personal music players may lead to temporary or permanent hearing loss.

When participating in the traffic listening to a personal music player can make the listener less aware of potential dangers such as approaching cars.
If at any time in the future you should need to dispose of this product please note that: All batteries and accumulators need to be removed from this product (Removal of Waste Batteries and Accumulators).
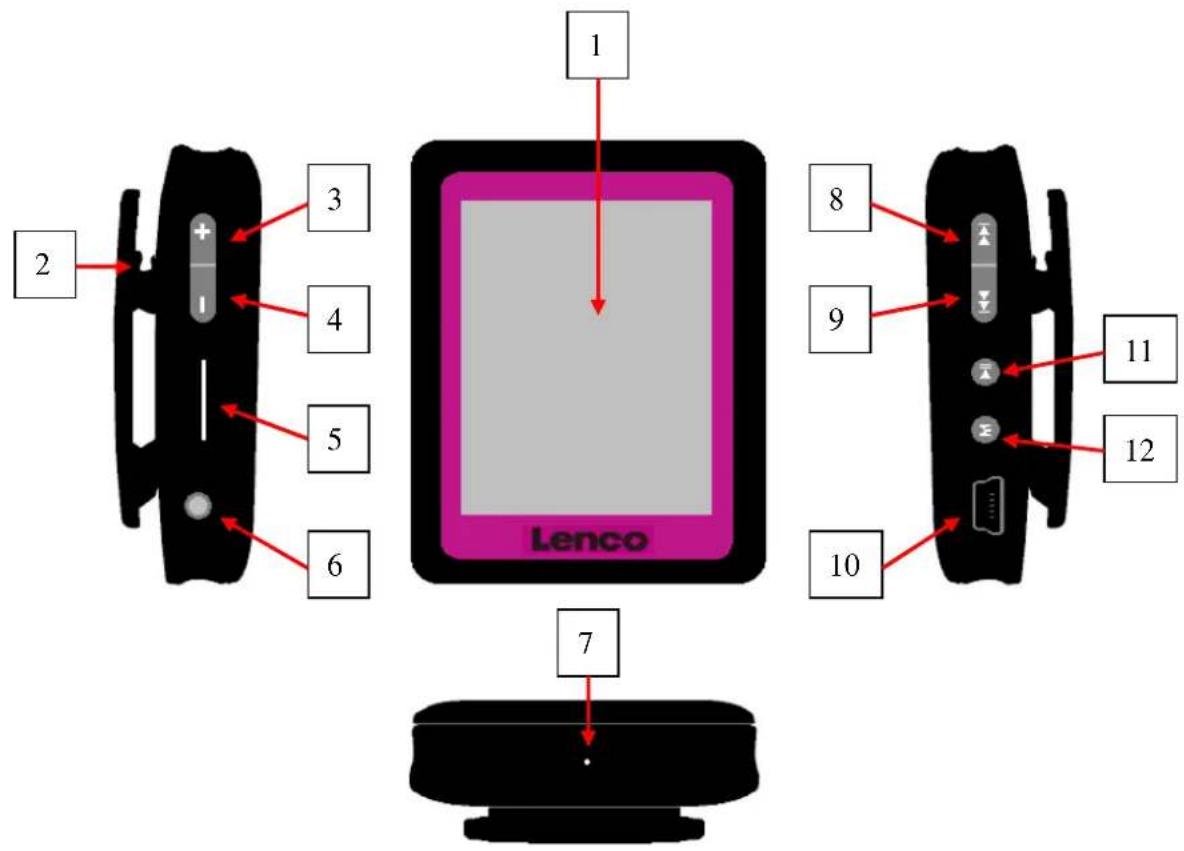
1. Get to know the controls on Player
text_image
1 2 3 4 5 6 7 Lenco 8 9 10 11 12| Item Description Item Description | |||
| 1 | TFT Display | 7 | Mic Hole / Reset Switch Hole |
| 2 | Clip | 8 (Previous / Fast-Backward) | |
| 3 (Volume-Up) 9 (Next / Fast-Forward) | ▶▶ | ||
| 4 (Volume-Down) 10 | USB Mini Connector | ||
| 5 | Memory Card Slot | 11 (Play/ Pause / Standby ON - OFF) | |
| 6 | Earphone Output Jack | 12 | M (Menu / Enter / Select) |
2. About Player Battery
Player has an internal, non-user-replaceable battery. For best results, the first time you use player, let it charge for about 2 hours or until the battery status icon in the “Connect” screen shows that the battery is in full.
Battery is in full
Note: Player continues to use battery power after it's been turned off, if unit isn't used for a while, the battery might need to be charged. Recharging the player at least 2 – 3 times in three months for maintain the battery life and performance.
a. Charging the Battery:
You can charge the player battery in two ways:
■ Connect player to your computer. Or,
■ Use the USB power charger. (not included)
b. Connection and Charging:
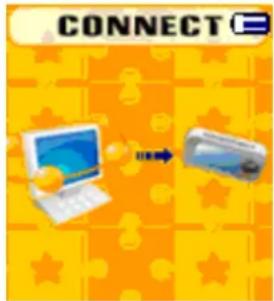
■ Once you have connected player with computer / power charger, then you will see the “Connect” screen appear on screen,
The level bars are running in battery status icon at the “Connect” screen. The battery is in charging.
"Connect" Screen
text_image
CONNECTIn Charging

text_image
Image showing four blue rectangular blocks with plus signs, likely representing a battery symbol or icon.Important: The battery does not charge when your computer is in sleep. The USB port on most keyboards does not provide enough power to charge the player. Connect player to a USB 2.0 port on your computer only to prevent charge problem.
3. Connecting and Disconnecting Player
You can connect the player with your computer to transfer those media files and recorded voice memos when necessary, and to charge the battery.
a. To Connecting Player
To connect player to your computer, plug the connector of USB Cable into a USB port on your computer, and connect the other end to player, then the “Connect” screen appear for view.
■ Now the player is ready for media files transfer with your computer and the battery is charging.
- You can transfer the media files by using the computer mouse use drag and place, or copy and paste, in between the player and your computer. Disconnect it when you’re done.
b. To Disconnecting Player
It's important not to disconnect player while it's syncing or transferring files. Eject the player before disconnect it.
To eject player, press and hold M button for about 2 seconds, the “Connect” screen will switch to “Main Menu” screen. And now is safe to disconnect the player with your computer. Unplug the USB cable from the player. Or,
If you're using a Windows PC, you can also eject player in My Computer or by clicking the "Safely Remove Hardware" icon in the Windows system tray, select the correspondence name of USB Device and choose "Stop" > choose "Confirm" > choose "Confirm" follow by the pop up windows you're your computer.
If you're using a Mac, you can also eject player by dragging the player icon on the desktop to the Trash.
■ Disconnect the USB cable from the player and computer, simply remove it.
If you accidentally disconnect player without ejecting it, reconnect it to your computer and sync again. However, some media file may loss.
4. Getting Start the Player
Turn ON / OFF the player and use of Main Menu.
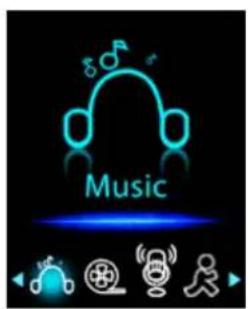
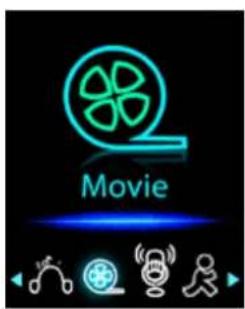
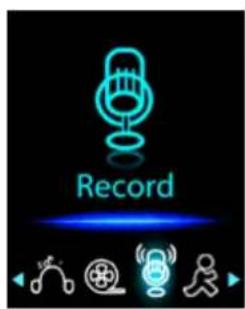
■ Press and hold ▶ button for 3 – 4 seconds to turn ON the player, then you will see any one of the following shown Main Menu screen, Music / Movie / Record / Pedometer / Voice / Photo / Setup / Game / eBook, will appear on LCD after the Loading and Opening screen have displayed.
■ To turn OFF the player, press and hold the ▶ button for 3 – 4 seconds.
"Main Menu" screens
text_image
Music(If Music chooses)
text_image
Movie(If Movie chooses)
text_image
Record(If Record chooses)

text_image
Pedometer(If Pedometer chooses)
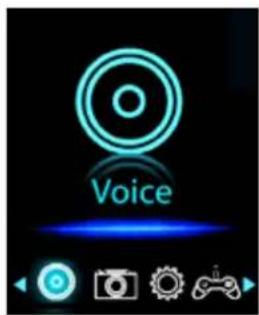
text_image
Voice(If Voice chooses)
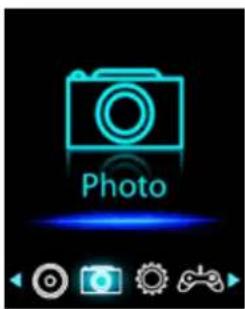
text_image
Photo(If Photo chooses)
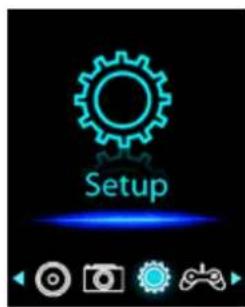
text_image
Setup(If Setup chooses)
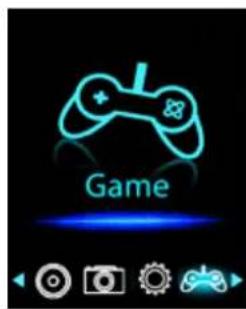
text_image
Game(If Game chooses)
natural_image
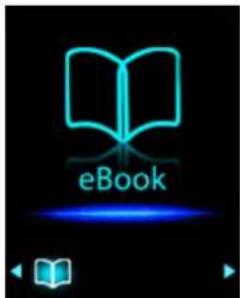
Icon of an open book with the label 'eBook' on a blue gradient background, no additional text or symbols present.(If eBook chooses)
5. Use Setup Menu
You might need to set date & time or change some default setting as you desired in setup sub menu before you start to use the player.
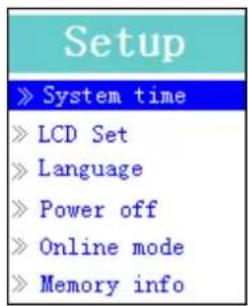
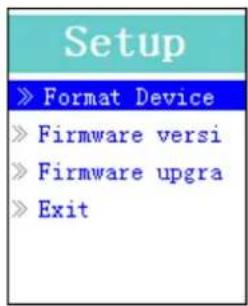
To go into setup menu, from main menu, choose "Setup" by use ◀◀ / ▶▶ button and then press M button, a "Setup" menu appears to use.
■ You can go back to previous menu by press the ▶ button during in setup menu. Or, press and hold the M button to return to main menu.
Setup Menu
text_image
Setup » System time » LCD Set » Language » Power off » Online mode » Memory info(Menu Page 1)
text_image
Setup » Format Device » Firmware versi » Firmware upgra » Exit(Menu Page 2)
a. To Setup "System time" (Date & Time):
- Choose “System time” by using ◀◀ / ▶▶ button and then press M button, a date & time setting screen appears to use.
■ Press “+” button, the year is highlighted then adjusting to current year by pressing the ◀◀ / ▶▶ button. And repeating the adjusting methods by “+” and ◀◀ / ▶▶ button again for finished those items; Month, Date, Hour, Minute and seconds setting adjustment.
■ Finally, you need to press the M button to confirm the adjustment and back to Setup menu, if not the date & time will not to memorize and you need to adjust them again.
b. To change "LCD set"
You can set the backlight to illuminate the screen for a certain amount of time as you desired or make the backlight to always ON when every time you turn ON the player.
■ To change LCD backlight, choose “LCD set” > choose “Dark mode”, a level bar with number appear then chose “0 (always On) / 5 / 10 / 15 / 20 / 25 / 30 / 35 / 40 / 45 / 50 (seconds)” as you desired by using M and ▶/ ▶buttons. Choose “0” to prevent the LCD backlight
from turning to off. (choosing this option decrease battery performance)
c. To Change "Language"
This player can use difference OSD languages.
■ To set the language, choose “Language”, and then choose which language as you desired by using M and ◀◀ / ▶▶ buttons.
d. To Set "Power Off"
The Power Off setting can extend the time between battery charges by turning OFF the player when you are not using the controls or no operation. Also, Sleep function provided for more choice.
■ To set power off time, choose “Power off”, then choose “Off time”, a levels bar with number menu appear, then choose “0 - 200 seconds” as you want by using M and ◀◀ / ▶▶ buttons.
■ To set sleep time, choose “Power off”, then choose “Sleep time”, a levels bar with number menu appear, choose “0 / 10 / 20 /30 / 40 / 50 / 60 / 70 / 80 / 90 / 100 / 110 / 120 minutes” as you want by using M and ◀◀/▶▶ buttons.
e. To Change “Online mode” (Applicable depend on Model)
You might need to change the online mode when connecting with computer system. In the sense that some operating systems (under Windows 2K SP4) cannot support two driver letters in one USB disk. The multiply driver is selected by device default; however, you can change it when necessary.
■ To change type of disk, choose “Online mode” choose “Multiply driver / Normal only (single ordinary disk) / Card only” by using M and ◀◀ / ▶▶ buttons.
f. To View "Memory info"
You can view about the memory status of player, such as the numbers of remaining memory space available and the percentage of memory have used.
■ To view the status, choose “Memory info” by using M and ◀◀ / ▶▶ buttons. An information screen, remaining memory space available and percentage of memory used, appear for view.
■ To return to setup menu or main menu press ▶ button or press and hold M button
g. To "Format Device"
You might need to format device the device memory. In some circumstances, the device memory may be corrupted, or you may need to format the memory card if it newly use with this device. However, you can format the device or memory card by the following method but all data will be losses.
- Choose “Format Device” then choose “Format Disk / Format Card” by using M and ◀◀/▶◀ buttons, and then choose OK to process or choose Cancel to exit and back to setup menu.
h. To View "Firmware Version"
You might need to view the details about firmware information inside the Player.
- Choose “Firmware version” by using M and ◀◀ / ▶▶ buttons, an information screen appear for view.
■ To return to setup menu or main menu, press ▶ button or press and hold M button.
i. To “Firmware Upgrade” (System Utility Tools required)
You might need to upgrade the firmware for advanced the player performance or firmware getting trouble or damaged in some circumstance, such as electrostatic voltage discharge issue happens. Please follow the instruction posted by the dealer (if any) or follow the instruction from System Utility Tools if provided. It is not recommended to do if the player is proper working.
j. To "Exit"
■ Select Exit to back to main menu. Or, press and hold the M button to go back main menu.
6. Use Music Menu
You can use music player to playback with supported music file format of audio coding; WMA and MP3 are supported by the player. To open the music player in Main Menu:
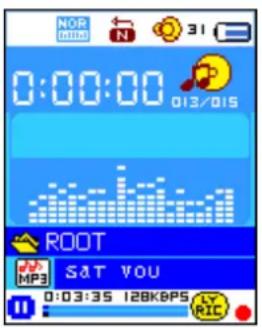
■ From main menu, choose “Music” by using ◀◀ / ▶▶ and M button, a “Music Now Playing” screen appears to use.
"Music Now Playing" Screen
text_image
0:00:00 013/015 ROOT S&T YOU MP3 0:03:35 128Kbps R/Ca. To Play Music
In Music Now Playing screen, press ▶|| button to start the play.
■ Press ▶|| button to pause the playing music. Press it again to play.
b. Play Previous or Next Music
■ Press ▶▶ button to play next music.
■ Press ◀ button to play previous music.
c. Use Fast-Forward or Fast-Backward
■ Press and hold ▶▶ button to use fast-forward
■ Press and hold ◀ button to use fast-backward.
d. Adjust volume level
In music playing, press or pressing + button to increase the volume levels, a change volume control screen appears to view.
In music playing, press or pressing — button to decrease the volume levels, a change volume control screen appears to view.
■ Wait for 6 – 8 seconds or press ▶|| button to return to music now playing screen.
For hearing protection; a beep warning will be heard from earphone, or display warning pop-up on TFT screen, when every time you increase the volume level and reach to the default setting level which may exceed 85dB. Press M button to accept the warning and enter into the volume control
for increase the level and until to maximum level.
e. Use Lyric Display
This player supports “*.LRC” lyric files and lyrics can synchronous displayed while playing music if you music has lyric included. How to know whether the lyrics exist? If the current song has matching lyric files, the color dot beside the Lyric Message icon will be turned to green color from red Music Now Playing screen.
■ Playing the music with lyrics, and then press and hold M button to enter the lyric display mode and the lyrics is displaying and moving up accordingly with the playing music.
■ Press M button to cancel the lyrics display and go back to Music Now Play screen if you want.
7. Use Music Submenu in Music Stop Mode
You might need to selecting folders for music play and delete music files. To do this:
a. Local Folder
In Music Now Playing screen, press ▶ button to stop the playing music if player is in playing, then press M button to call up the Music Submenu.
In Music Submenu screen, choose “Local folder” a list menu appear, and then select folder and / or choose a music file by using ◀◀ / ▶▶ and M button.
It will go back to music now playing screen once a music file is selected. Then press ▶ button to play.
b. Delete file
In Music Submenu screen, choose “Delete file” a list menu appear, and then choose which music file that you want to delete by using ◀◀ / ▶▶ and M buttons.
■ Once file is selected, press M button and choose Yes to confirm or No to cancel.
c. Delete All
In Music Submenu screen, choose “Delete all” then selects “Yes / No” by using |◀◀ / ▶▶| button.
■ One “YES” or “NO” appear then press M button to confirm.
All music files will be deleted once YES is selected and confirmed, a “Deleting” screen appear for a while and deleting process is in progress, then “Empty disk!” message will shown on screen for few seconds.
d. Exit
■ Select Exit to back to music now playing screen.
8. Use Music Submenu in Music Playing Mode
You might need to do some changes for music playing, such as repeat, EQ settings for music files... etc. To change setting:
a. To Set Repeat
In music playing mode, press M button, a Music Submenu appear, then choose “Repeat”, then choose “Normal / Repeat one / Folder / Repeat folder / Repeat all / Random / Intro” as
you desired by using ◀◀ and ▶▶M buttons.
b. To Change Equalizer
In music playing mode, press M button, a Music Submenu appear, the choose “Equalizer”, then choose “Natural / Rock / Pop / Classic / Soft / Jazz / DBB” as you desired.
c. To set Replay Mode
Set Repeat A-B:
In Music Submenu, press M button, a list menu appear, then choose “Replay mode” then choose “Replay”, a letter “A” is flashing in Music Now Playing screen, then press button to select the starting point of track “A”.
■ Then a letter “B” is flashing once “A” is selected, use ▶ button again to select the ending point of track “B” which you want by using ▶ button. And now the A – B distance of track is repeating.
However, the repeating time and the replay gap time is depend on the set values of Replay Time and Replay Gap have mentioned in below items.
■ To create another A – B distance of track to repeat, press ▶▶ button again and then again. a new created A – B distance of track is repeating.
■ To cancel the repeat A – B function, press the M button. Or press ▶|| button to pause.
Set Replay Times:
In music playing mode, press M button, a Music Sub-menu appear, the choose “Replay times”, then choose “1 / 2 / 3 / 4 / 5 / 6 / 7 / 8 / 9 / 10” as you desired by using ◀◀ / ▶▶ and M buttons. The Player will replay those music file as your selected number of times accordingly.
Replay Gap:
In music playing mode, press M button, a Music Sub-menu appear, the choose “Replay Gap”, then choose “1 / 2 / 3 / 4 / 5 / 6 / 7 / 8 / 9 / 10 second(s)” as you desired by using / |◀◀ ▶▶▶ and M buttons. The replay gap time in between music to music or in repeat A- B will replay and stop according the selected number of time.
d. Exit
■ Select Exit to back to music now playing screen.
9. Use Movie Menu
a. To Play Movie
■ From Main Menu, choose “Movie” by using ◀◀ / ▶▶ and M button, a “Movie Now Playing” screen appears to use.
In Movie Now Playing" screen, press ▶ key to start the play.
■ Press ▶ button to pause and to back to Movie Now Playing screen. Press it again, the video will play continue.
b. To Play Previous or Next Video
■ Press ▶▶▶ on to play next movie file.
■ Press ◀◀ button to play previous movie file.
c. Use Fast-Forward or Fast-Backward
■ Press and hold ▶▶ button to play fast-forward.
■ Press and hold ◀◀ button to play fast-backward.
d. Adjust Volume Level
In movie playing, press or pressing + button to increase the volume levels.
In movie playing, press or pressing — button to decrease the volume levels.
■ To preset the volume level at movie stop mode, in Movie Now Playing screen press + / - key to preset your desired volume levels, a volume control screen appears to view. Press ▶M button to return to Movie Now Playing.
For hearing protection; a beep warning will be heard from earphone, or display warning pop-up on TFT screen, when every time you increase the volume level and reach to the default setting level which may exceed 85dB. Press M button to accept the warning and enter into the volume control for increase the level and until to maximum level.
10. Use Movie Submenu
You might need to selecting folders, delete movie files and set repeat for movie play. you can make change during in the playing mode at Movie Now playing screen To do this:
In “Movie Now Playing” screen, press M button to enter to movie submenu.
a. Local Folder
In movie submenu screen, choose "Local Folder", a file list menu appear, and then select folder and / or choose a desired movie file to play by using ◀◀/▶▶ and M button.
It will go back to music now playing screen once a music file is selected. Then press ▶ll button to play.
b. Delete File
In movie submenu screen, choose "Delete file" a file list menu appear, and then choose which movie file that you want to delete by using ◀◀ / ▶▶ buttons.
■ Once file is selected, press M button and choose "Yes" to confirm or "No" to cancel.
c. Delete All
In movie submenu screen, choose “Delete all” then selects “Yes / No” by using |◀◀ / ▶▶| button.
■ One “YES” or “NO” appear then press M button to confirm.
All movie files will be deleted once YES is selected and confirmed, a “Deleting” screen appear for a while and deleting process is in progress, then “Empty disk!” message will shown on screen for few seconds.
d. Repeat
In movie submenu, choose “Repeat”, then choose “Normal / Repeat one / Folder / Repeat folder / Repeat all / Random / Intro” as you desired by using ◀◀/▶▶ and M buttons.
e. Exit
■ Select Exit to back to music now playing screen.
11. Convert Video files into AMV
This tool can be used to transform those video files into AMV files on the computer before you upload them to you player.
■ To install this video convert tool to you computer, click “Utilities > video conversion software” in provided CD. (or stored in your Player)
■ Select “Setup” to start the install program, the software will automatically install to you computer.
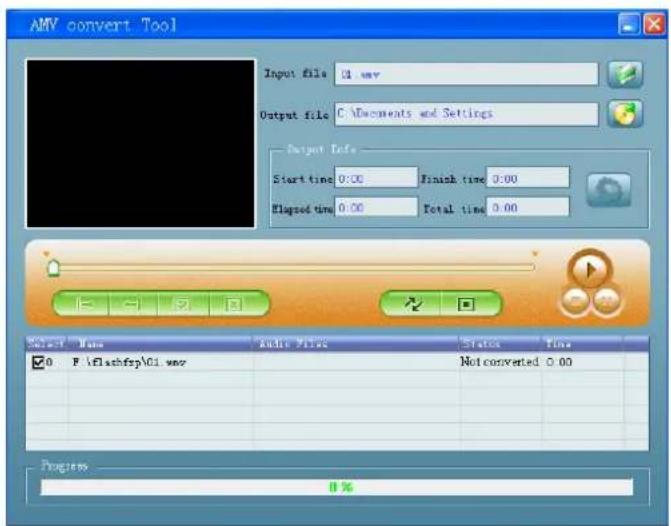
■ After installation is done, open AMV Video converter on the PC
text_image
AMV convert Tool Input file: 0.00 Output file: C:\Documents and Settings Output Info Start time: 0:00 Finish time: 0:00 Elapsed time: 0:00 Total time: 0:00 OK Cancel Close Audio Mode Status Time ✓ 0 F:\flashfrp\01.mov Not converted 0:00 Progress: 8%Noted: This program is used to convert video files into AMV format, currently only AMV format is supported.
- Run “AMV Video Converter”, click 📋 to choose the folder where to save the AMV files, and then click 📋 to select the folder where the original files are. The original file will show in the file window once selected.
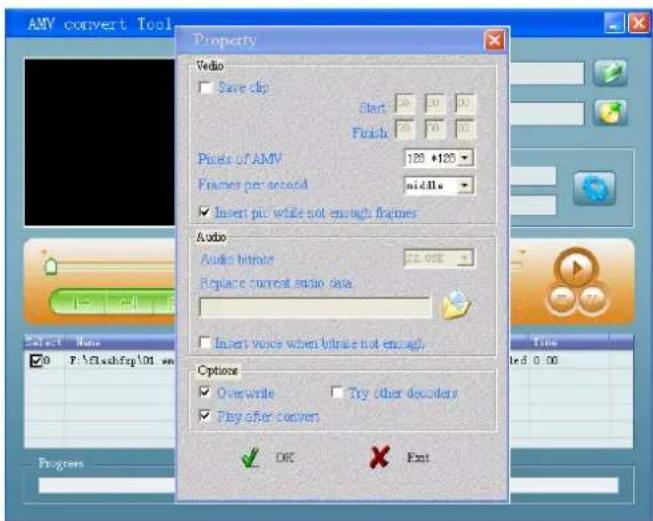
■ Select with highlight the unprocessed AMV files in the file window, the icon will be highlighted into And then click icon and a dialog box will be shown.
text_image
AMV convert Tool Property Audio Save clip Start 20 20 10 Finish 20 20 10 Photo of AMV 188 x185 Frames per second middle Insert pic while not enough frames Audio Audio bitrate 22.05% Replace current audio data Insert voice when bitrate not enough. Options Overwrite Try other decoders Play after convert OK Exit Made led 0:00 Progress- Choosing pixels of AMV to “160x120” and Frames per second to “middle”, then click OK to confirm.
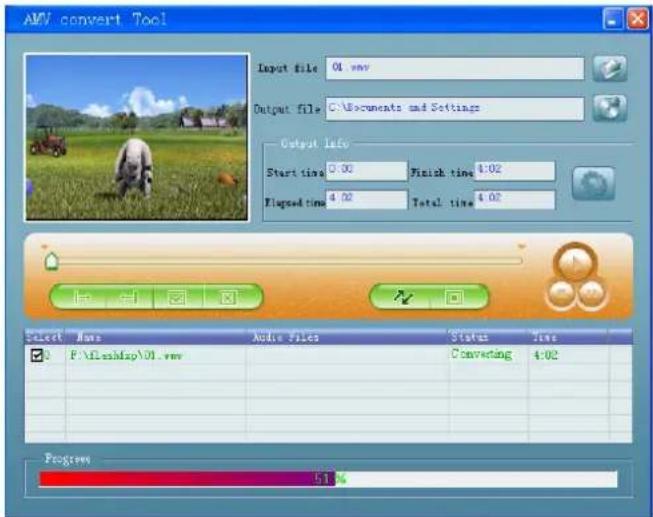
■ Click to start converting.
text_image
AMV convert Tool Input file: 01.mov Output file: C:\Documents and Settings Output Info Start time: 0.00 Finish time: 4.02 Flaped time: 4.02 Total time: 4.02 Select Name Audio Files Status Time P:\fleshapp\01.mov Converting: 4.02 Progress: 5.1%■ After conversion, the AMV files will play automatically for preview.
■ And now the converted AMV file is ready to transfer, you can simply copy and place those converted AMV files to the media player.
Note: Only pixels in 160x120 can be supported.
12. Use Record Menu
You can use the player as a Voice Recorder and recording voice memos using the built-in microphone.
a. To Start Recording Voice Memo
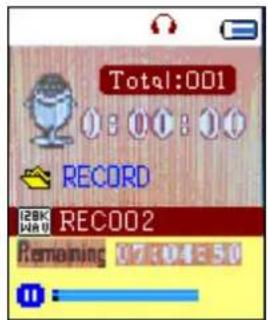
■ From main menu, choose “Record” by using ◀◀ / ▶▶ and M buttons, a “Now Recording” screen appear to use.
"Now Recording" Screen
text_image
Total:001 0:00:00 RECORD 128K REC002 Remaining 07:04:50b. To Start / Pause Recording
■ Press ▶|| button to start the recording and the recording time is running.
■ Press ▶|| button to pause the recording and recording time will stop and flashing. Press it
again the recording and time will run continue.
c. To Save and Stop Recording File
■ Press and hold M button, the recorded file will saving into memory.
13. Use Record Submenu (in Stop Mode)
You might need to change the folder locations which want to store the record file and / or change record quality to better compression values.
In Now Recording screen at stop mode, press M button, a “Record Sub-menu appear to use.
a. Local folder
In record submenu, choose "Local folder" and then choose the folder name which you want to save the record file by using ◀◀ / ▶▶ and M buttons.
■ Once folder name selected, press and hold the M button, then the folder location is changed and go back to Now Recording screen.
■ And now you can see the folder name is changed at the Record Folder icon in “Now Recording” screen.
b. Record Type
In record submenu, choose “Record type”, then choose “32K BPS / 64K BPS / 128K BPS / 256K BPS” values as you desired by using ◀◀ / ▶▶ and M buttons.
c. Exit
■ Select Exit to back to now recording screen.
14. Use Pedometer
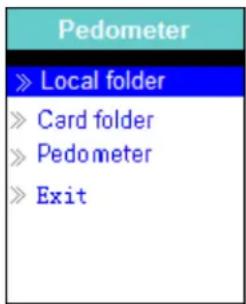
■ From main menu choose “Pedometer” by using ◀◀ / ▶▶ and M buttons. A pedometer menu appears to use.
Pedometer Menu
text_image
Pedometer » Local folder » Card folder » Pedometer » Exita. Setup your pedometer before start
Before you start to use the pedometer function, you need to input your personal information and calibrates the player's pedometer sensor to personalize it.
■ From pedometer menu, choose “Pedometer”, then choose “Setting” by using ◀◀ / ▶▶ and M buttons. A sub list menu appears to use.
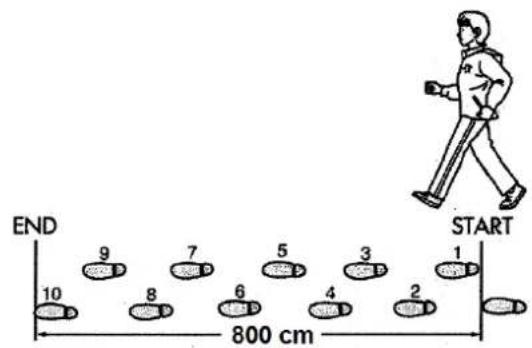
- Choose “Women / Man”, then choose stride “Walking / Jogging / Running”, a level bar with number appear to choose. Input your average stride length, for example 80 (cm) refer to “Stride Length Measurement” as illustrated below, by using ◀◀ / ▶▶ and M buttons.
Once average stride length is set, it will return to pedometer menu. (Adjustment range can be set from 10 – 200 (cm) by increase / decrease 1 cm step)
- Choose “Setting” to change the setting again if you want.
- Choose “Exit” to return to main menu.
b. Stride length measurement
■ Walk / Jog / Run 10 steps with your normal stride as illustrated below.
text_image
END 10 9 8 7 6 5 4 3 2 1 START 800 cm■ Measure the distance from START to END in centimeter (cm). Then calculate your stride length by dividing the total distance by 10. Example:
■ Total distance = 800 cm
■ 800 cm ÷ 10 steps = 80 cm
c. Start / Exit pedometer counts & Look Up record
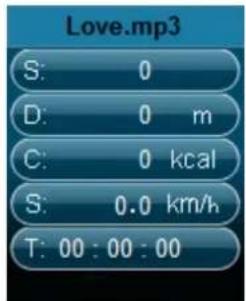
- Choose “Start” to enter and start pedometer counts function when settings are completed, the pedometer counts display is appearing and time is start running, from “00:00:00”. At same time pedometer sensor is starting to counts your move. Now you can start the walk.
■ Those wanted information; such as: Steps, Distance, Calorie burned and Speed, are showing on pedometer counts display screen for view.
Pedometer Counts Display
text_image
Love.mp3 S: 0 D: 0 m C: 0 kcal S: 0.0 km/h T: 00 : 00 : 00To Exit pedometer counts function and Save the personal counts record, press M button, a confirm screen appear, then choose "Yes" to confirm and the screen will return to main menu. The record saved. Or, choose "No" to cancel and continue the pedometer counts.
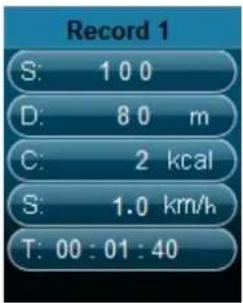
In pedometer menu, choose “Look up” to view the personal counts record. The player is allowed storing maximum 2 personal counts record “Record 1 / Record 2”. Moreover, the new records will overwrite the old Record 1 and Record 2. Press M button to exit from personal counts record display and back to main menu.
Personal Counts Record
text_image
Record 1 S: 100 D: 80 m C: 2 kcal S: 1.0 km/h T: 00 : 01 : 40d. Play Music in Pedometer Function
■ From pedometer menu, choose “Local folder / Card folder” > by using ◀◀ / ▶▶ and M buttons. A list menu with folders / files appears to choose.
■ Choose a folder and file, which music as the first music to play, when you start to play song in pedometer counts display mode. The screen will return to pedometer menu. Then,
- Choose “Start” to enter the pedometer counts display mode. Press ▶ button to start the music play music with the pedometer counts function if you wish, and you can pause / stop by press ▶ button again. Or, just only using the pedometer counts function.
e. Music controls in pedometer (same as music mode)
In pedometer counts mode
■ Press ▶ button to start the play. Press it again to pause.
■ Press button to play next music.
■ Press button to play previous music.
■ Press and hold ▶▶ button to use fast-forward
■ Press and hold ◀◀ button to use fast-backward.
In music playing, press or pressing + button to increase the volume levels, a change volume control screen appears to view.
In music playing, press or pressing — button to decrease the volume levels, a change volume control screen appears to view.
■ Press ▶|| button to return to music now playing screen.
Note: In pedometer mode, some music settings are defaulted and cannot be changed. Such as Repeat All (Cycling), In Order Play.
| f. Attaching the player for pedometer | |
| Place the unit on Armband■ Put the unit on your waistband and adjust it to comfortable position. | 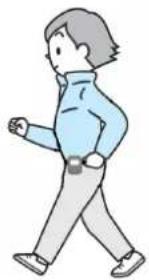 |
| Place the unit in your pocket■ Do not place the unit in the back pocket of your pants, to prevent sitting on it.■ Close the zipper / button of your pocket (if available) to prevent the unit from dropping. |  |
| Place the unit in your bag■ Place the unit in a secure section or partition of your bag.■ Make sure the unit is placed horizontal or vertical in a pocket in the bag. | 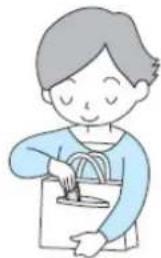 |
| Hanging the unit from your neck■ Attach a secure lanyard or string to the unit. (not provided)■ Place the lanyard around your neck and hang the unit as illustrated.NOTE: Make sure the lanyard / string is correctly sized to easily remove the unit from around your neck. If used hanging around neck, the lanyard / string can cause strangulation. Do not place the unit with lanyard / string around a child's neck. |  |
| g. The unit may not count steps correctly in the following conditions: | |
| The unit is not positioned correctly.■ When the front of the main unit is placed in the angle of less than 60° or horizontal to the ground.NOTE: The unit can count steps even if it is slanted or placed upside-down, or if the main unit is perpendicular to the ground. | 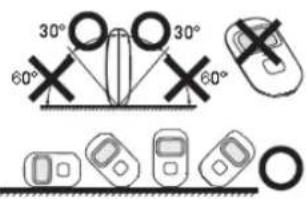 |
| The unit moves loosely.■ When the unit is loose or flat in your pocket or bag (not in a horizontal or vertical position).■ When the unit swings from your belt, the top of your pants or a bag. | 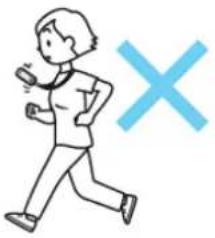 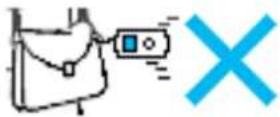 |
| Up and down movement.■ Standing up and/or sitting down movement.■ Playing sports other than walking.■ Ascending or descending movement at stairs or in a steep slope. | 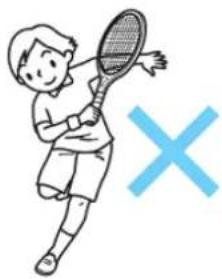 |
| Walking at an inconsistent stride.■ When you shuffle or wear sandals.■ Starting and stopping or other forms of inconsistent walking.■ Walking extremely slowly. | |
| Vibrations from a moving vehicle.■ Such as riding a bicycle, automobile, train or bus. | |
15. Use Voice Menu
For playback and manage the recorded voice memos file.
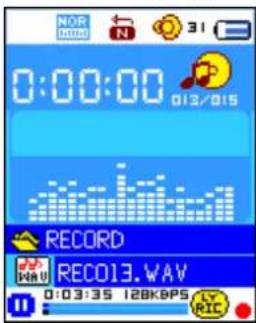
■ From main menu, choose “Voice” menu by using ◀◀ / ▶▶ and M buttons, a “Voice Now Playing” screen appear to use.
"Voice Now Playing" Screen
text_image
0:00:00 013/015 RECORD RECO13.WAV 0:03:35 128Kbpsa. To Play and Pause Recorded Voice Memos
In Voice Now Playing screen, press ▶|| button to start to play the recorded file.
■ Press ▶ button to pause the playing file.
b. To Play Previous or Next File
■ Press button to play next file.
■ Press button to play previous file.
c. To Fast-Forward or Fast-Backward
■ Press and hold ▶▶▶ buttons to use fast-forward
■ Press and hold ◀ button to use fast-backward.
d. Adjust volume level
In music playing, press or pressing + button to increase the volume levels, a change volume control screen appears to view.
In music playing, press or pressing — button to decrease the volume levels, a change volume control screen appears to view.
■ Wait for 6 – 8 seconds or press ▶|| button to return to music now playing screen.
16. Use Voice Submenu in Stop Mode
You might need to change some setting as you desired for playing Voice file, you can make change during in the playing mode at Voice Now Playing screen
a. Local Folder
In Voice Now Playing screen, press ▶|| button to pause / stop the playing file, if in playing mode, then press M button to call up the voice submenu.
In Voice submenu screen, choose "Local folder" a list menu appear, and then select folder and / or choose a voice file by using ◀◀/▶▶ and M button.
It will go back to music now playing screen once a music file is selected. Then press ▶ button to play.
b. Delete File
In voice submenu screen, choose "Delete file" a list menu appear, and then choose which voice
file that you want to delete by using ◀◀ / ▶▶ and M buttons.
■ Once file is selected, press M button and choose Yes to confirm or No to cancel.
c. Delete All
In voice sub-menu screen, choose “Delete all” then selects “Yes / No” by using ◀◀ / ▶▶ button.
■ One “YES” or “NO” appear then press M button to confirm.
All music files will be deleted once YES is selected and confirmed, a “Deleting” screen appear for a while and deleting process is in progress, then “Empty disk!” message will shown on screen for few seconds.
d. Exit
■ Select Exit to back to music now playing screen.
17. Use Voice Sub-menu in Playing Mode
You might need to do some changes for music playing, such as repeat, EQ settings for music files... etc. To change setting:
a. Repeat
In voice playing mode, press M button, a Music Sub-menu appear, then choose “Repeat”, then choose “Normal / Repeat one / Folder / Repeat folder / Repeat all / Random / Intro” as you desired by using ◀◀ and ▶◀M buttons.
b. Replay Mode
Set Repeat A-B:
In voice playing mode, press M button, a list menu appear, then choose “Replay mode” then choose “Replay”, a letter “A” is flashing in Voice Now Playing screen, then press ▶▶ button to select the starting point of track “A”.
Then a letter “B” is flashing once “A” is selected, use ▶ button again to select the ending point of track “B” which you want by using ▶ button. And now the A – B distance of track is repeating.
■ However, the repeating time and the replay gap time is depend on the set values of Replay Time and Replay Gap have mentioned in below items.
To create another A – B distance of track to repeat, press ▶▶ button again and then again. a new created A – B distance of track is repeating.
■ To cancel the repeat A – B function, press the M button. Or press ▶|| button to pause.
Set Replay Times:
In voice playing mode, press M button, a Music Sub-menu appear, the choose “Replay times”, then choose “1 / 2 / 3 / 4 / 5 / 6 / 7 / 8 / 9 / 10” as you desired by using ◀◀ / ▶▶ and M buttons. The Player will replay those music file as your selected number of times accordingly.
Replay Gap:
In voice playing mode, press M button, a Music Sub-menu appear, the choose “Replay Gap”, then choose “1 / 2 / 3 / 4 / 5 / 6 / 7 / 8 / 9 / 10 second(s)” as you desired by using ◀◀ / ▶ and M buttons. The replay gap time in between music to music or in repeat A- B will replay and
stop according the selected number of time.
c. Exit
■ Select Exit to back to music now playing screen.
Note: Press and hold the M button will go back to Main Menu directly.
18. Use Photo Browse
You can use the player as picture / photo viewer:
■ To browse picture / photo file, from main menu choose “Photo” by using ◀◀ / ▶▶ and M button, a list menu appear to use.
■ Choose a file by using ◀◀ / ▶▶ button, and then press ▶|| button to play.
■ Press ▶ button to stop and to go back to list menu for other files selection.
■ To change previous / next photo, press ◀◀ / ▶▶ button.
■ Press and hold M button to back to main menu.
19. Use Photo Submenu in List Screen
You might need to change some setting for photo browse. To change setting:
a. Local Folder
In list menu, press M button to call up the photo submenu.
In photo submenu, choose "Local folder" a list menu appear, and then choose folder and file to browse by using ◀◀ and ▶▶M button.
■ Once photo file is selected, press ▶|| button to play.
b. Playback Set
In photo submenu, choose “Playback set” and then choose “Manual play”. However, you need to use ◀◀ / ▶▶ button to browse next / previous photo in photo playing mode when Manual Play is selected.
- Choose “Auto play”, a setting menu appear, then choose “2 / 3 / 4 / 5 / 5 / 6 / 7 / 8 / 9 / 10 seconds)” as you desired by using ◀◀ / ▶▶ and M buttons. The slide show function is activated as your selected time gap to playing the photo files one by one automatically.
c. Delete file
In photo submenu, choose "Delete file" a list menu appear, and then choose which photo file that you want to delete by using ◀◀ button.
■ Once file is selected, press M button and choose Yes to confirm or No to cancel.
d. Delete All
In photo submenu, choose "Delete all" then selects "Yes / No" by using ◀◀ / ▶▶ button.
■ One “YES” or “NO” appear then press M button to confirm.
All photo files will be deleted once YES is selected and confirmed, a “Deleting” screen appear for a while and deleting process is in progress, then “Empty disk!” message will shown on screen for few seconds.
e. Exit
■ Select Exit for back to photo browse list menu screen.
20. Use Game Menu
There have a game name “Snake”. Control the snake move up, down, left and right to eat the food (dot) which will exist somewhere on TFT screen. The snake’s body will get longer at every eats for food, but don’t let the snake hit the walls and hit the snake body.
■ To play game, from Main menu, choose “Game” menu, then choose a game to play.
■ Control KEY instruction; Press: ◀◀ : up, ▶▶ : down, + : left, - : right, ▶∥ : Pause.
■ Press and hold M button to exit the game.
21. Use eBook Menu
You can use the player as a text reader with supported file format (.TXT).
a. To open eBook
■ From main menu, choose “eBook” by using ◀◀ / ▶▶ and M buttons. A list menu appears to use.
■ Choose a file which you want to read by using ◀◀ / ▶▶ button, and then press ▶|| button to play.
■ Press ▶ button to change next page,
■ Press ◀◀ button to go back to previous page,
■ Back to list menu screen, press button.
■ Go back to main menu, press and hold M button
22. Us eBook Submenu in list menu screen
You might need to change some setting for eBook reading. To change setting:
a. Local Folder
In eBook list menu screen, press M button to call up the eBook Submenu.
In eBook Submenu, choose "Local folder" a list menu appear, and then choose folder and file by using ◀◀ button.
■ Once file is selected, press M button then ▶|| button to read.
b. Playback Set
In eBook Submenu, choose “Playback set” and then choose “Manual play”. You need to use ◀◀ / ▶▶ button to change next / previous page for reading when Manual Play is selected. Or,
- Choose “Auto play”, a setting menu appears, then choose “1 / 2 / 3 / 4 / 5 / 5 / 6 / 7 / 8 / 9 / 10 second(s)” as you desired by using ◀◀ / ▶▶ and M buttons. The Page Flip function is activated as your selected time gap to playing.
c. Delete file
In eBook Submenu, choose "Delete file" a list menu appear, and then choose which eBook file that you want to delete by using ◀◀ button.
■ Once file is selected, press M button and choose Yes to confirm or No to cancel.
d. Delete All
In eBook Submenu, choose "Delete all" then selects "Yes / No" by using |◀◀ / ▶▶| button.
■ One “YES” or “NO” appear then press M button to confirm.
All eBook files will be deleted once YES is selected and confirmed, a “Deleing” screen appear for a while and deleting process is in progress, then “Empty disk!” message will shown on screen for few seconds.
e. Exit
■ Select Exit for back to eBook list menu screen.
23. Us eBook Submenu in Playing Mode
You might need to add, select and delete some bookmark when you reading, to do this:
a. Bookmark Select
In eBook playing mode, choose “Bookmark select” by using ◀◀ / ▶▶ and M button.
■ Choose a stored bookmark which you want to call and then press M button to play.
b. Bookmark Delete
In eBook playing mode, choose “Bookmark delete” a list menu appears, and then choose which saved bookmark you want to delete by using ◀◀ button.
■ Once bookmark is selected, press M button to confirm. The bookmark is deleted and go back to current reading play.
c. Bookmark Add
In eBook playing mode, select the reading page you want to bookmark, press M button to call up eBook submenu.
- Choose “Bookmark Add” by using ◀◀ / ▶▶ button and then press M button, the pages is saved into bookmark and go back to current reading page automatically.
d. Exit
■ Select Exit for back to eBook list menu screen.
24. Use Memory Card Slot
This player allows you to play those support media files from your memory card (T-Flash).
Also it will increase the mobile hard disk memory capacity of the player if you use this option.
a. To Play From Memory Card:
■ Turn Off the player. Now insert your Micro SD memory card into the memory card slot on side of player.
■ Turn On the player and now the Micro SD memory card, T-Flash, is ready to use.
The “Card folder” item will be existed to use when you enter into those music, movie, photo, , Record, Voice and eBook submenu.
■ Go into the card folder and choose you desired folder(s) and file(s) to play.
■ To take out the Micro SD memory card, turn Off the player.
25. To Reset Player
In some circumstances the device may hanging and need to reset. This player has design with built-in a mini tact switch which located at the bottom in the Mic hole, so it can provide the reset function to restart the device pass through the Mic hole.
■ To do reset, Use a 0.8 mm stick or similar object (like tooth stick), and carefully insert the stick, use dull side, into the Mic hole until you feel to hit the end. Actually that is the tact switch button surface.
■ Then add a bit of force and you will get a click sound and feeling return from switch. The device is reset; all settings are back to factory default. The device status LED will light up and will go into play mode automatically.
■ Do not reset the device if it is proper working.
26. Trouble Shooting
| Unit cannot turn ON * Check battery is it charged with enough energy. | |
| No sound is heard from headphone. * | Check whether Volume is set “0” and connect the headphone plugs firmly.* Check whether the headphone plug is dirty.* Corrupted MP3 may make a static noise and the sound may cut off. Make sure that the music files are not corrupted. |
| Characters in LCD are corrupted * Check whether the right language has been selected. | |
| Download of music files fails. * Check whether USB cable is damaged and is connected properly.* Check whether driver is installed correctly.* Check whether the player’s memory is in full. | |
27. Specification
| Dimension 53.5 mm (H) | x 43 mm (W) x 18 mm (D) | |
| Weight 28g | ||
| LCD 1.8 Inches, Resolution (RGB)128 x 160 | ||
| PC connection USB 2.0 (high speed) | ||
| Earphone Impedance 32 Ohm | ||
| Internal Memory See carton | ||
| Battery | Lithium 3.7V, 170mAh | |
| Max. Play Time: >8 - 10 Hours (MP3 music with power saving mode) | ||
| Audio | Max. Output Power of Earphone | L = 275mV(rms) at 32 OhmR = 275mV(rms) at 32 Ohm |
| Frequency Responses 20Hz to 20,000Hz | ||
| SNR >60dB | ||
| Music Format | MP3 / WMA | 32Kbps – 320kbps |
| Movie Format | AMV | |
| Recorder Coding | WAV | 32 / 64 / 128 / 256kbps |
| Picture Format | JPEG / BMP / GIF | |
| eBook Format | TXT | |
| Operating Temperature | 0 to 40°C | |
| Operating System Window 2000/XP/Vista/Win7, Mac 9.2 or above | ||
28. Disclaimer
Updates to Firmware and/or hardware components are made regularly. Therefore some of the instruction, specifications and pictures in this documentation may differ slightly from your particular situation. All items described in this guide for illustration purposes only and may not apply to particular situation. No legal right or entitlements may be obtained from the description made in this manual
29. Recycling
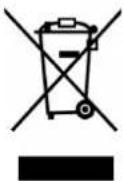
If at any time in the future you should need to dispose of this product, please note that: Waste electrical products should not be disposed of with household waste. Please recycle where facilities exist. Check with your Local Authority or Retailer for recycling advice. (Waste Electrical and Electronic Equipment Directive)