X995 - Gps WayteQ - Free user manual and instructions
Find the device manual for free X995 WayteQ in PDF.


| Type of product | GPS navigation device |
| Dimensions | Approx. 13.5 x 8.5 x 1.5 cm (estimate based on 5" screen) |
| Weight | Approx. 200 g |
| Power supply | DC 5V / 2A via MiniUSB; car charger DC 12-24V/2.5A output 5V/2A |
| Battery | Built-in Lithium-Ion, rechargeable |
| CPU | MediaTek MTK8127 Quad-core |
| RAM | 1 GB |
| Internal storage | 8 GB |
| Screen | 5" TFT LCD, 800x480 pixels |
| Memory card support | microSD up to 32 GB |
| GPS receiver | MT6627 |
| Operating system | Android 4.4.2 |
| FM Transmitter | Integrated |
| Bluetooth | Supported |
| Wi-Fi | Supported (802.11 b/g/n) |
| Audio output | Built-in speaker; 2.5 mm stereo headphone jack |
| USB connection | MiniUSB for charging and data transfer |
| Main functions | Navigation, music player, video player, photo viewer, FM transmitter, calculator, GPS info, email, calendar, browser |
| Maintenance and cleaning | Keep device clean with a soft dry cloth. Avoid moisture and direct sunlight. |
| Safety | Do not disassemble. Do not leave in direct sunlight. Do not use while driving. Follow traffic regulations. |
| Spare parts and repairability | Contact authorized service center. Do not attempt self-repair. |
| General information | Operating temperature 5°C~40°C; storage -10°C~50°C. Imported by WayteQ Europe Ltd. |
Frequently Asked Questions - X995 WayteQ
User questions about X995 WayteQ
0 question about this device. Answer the ones you know or ask your own.
Ask a new question about this device
Download the instructions for your Gps in PDF format for free! Find your manual X995 - WayteQ and take your electronic device back in hand. On this page are published all the documents necessary for the use of your device. X995 by WayteQ.
USER MANUAL X995 WayteQ
- FEATURES .... 5
- SAFETY AND GENERAL INFORMATIONS 7
2.1 Safety instructions .... 7
2.2 GPS (Global Positioning System) ...... 7
2.3 Safety instructions and remarks...... 8
2.4 Aircrafts and hospitals .... 10
- TECHNICAL SPECIFICATION ...... 12
- CONTROLS .... 14
4.1 Charging with AC adapter ..... 15
4.2 Battery 16
4.3 Using the windscreen mount ..... 16
4.4 Using memory cards .... 17
4.5 Resetting the device 17
- USING THE DEVICE .... 18
5.1 Changing the language ...... 18
5.2 Turn ON/OFF 19
5.3 Status bar ...... 21
5.4 Virtual keyboard 22
5.5 Applications ...... 23
5.6 Applications of the home screen ...... 24
5.6.1 Navigation ...... 24
5.6.2 Music Player 24
5.6.3 Gallery 27
5.6.4 FM Transmitter 28
5.6.5 Calculator 29
5.6.6 GPS Info 30
5.6.7 File manager 31
5.7 Other applications ...... 32
5.7.1 Video player 32
5.7.2 Downloads 33
5.7.3 Browser 34
5.7.4 Clock.... 37
5.7.5 Email 38
5.7.6 Calendar 39
- CONNECTIONS 40
6.1 Wi-Fi connection 40
6.2 Bluetooth connection 41
6.3 USB connection 43
-
DECLARATION OF COMFORMITY (ex.) 44
-
QUALITY CERTIFICATION ...... 44
-
IMPORTER / DISTRIBUTOR: 45
Thank you for choosing this WayteQ product!
1. FEATURES
The main function of the WayteQ GPS device is the navigation, but additionally it provides a number of other entertainment functions, like music and video playing, photo viewing, eBook reading, games, etc.
- Powerful MediaTek MTK8127 Quad-core CPU with low power consumption
- Friendly user interface
- Economical use of energy for longer and stable operation
• Data transfer to PC via miniUSB port
• Quality GPS signal receiving ability for the best navigation experience - Features entertainment functions for leisure time
You can use the navigation device anytime, anywhere, while driving, walking or when cycling.
The navigation and entertainment features can enrich your life and work!
To exploit the full potential of the device, please read these instructions carefully!
WARNING!
Before using the product, please make sure that you follow the guidelines described below:
- Fully charge the battery.
- Place the device in the car.
- Start the navigation application as it is described in its user manual.
- Make sure that the device has direct line of sight to the clear sky without obstructions.
An ideal placement can be at the lower part of the windscreen, make sure not to interfere with the view! - At first power-on – if the device was not turned on for a long time, or the battery is low, or you switched on the device farther compared to the last measured position – it may take the device 10-15 minutes to receive correct GPS position.
The device must „see“ a minimum of 4 satellites for accurate positioning.
After the first use, the device may get correct position in a shorter time frame.
2. SAFETY AND GENERAL INFORMATIONS
2.1 Safety instructions
2.2 GPS (Global Positioning System)
The GPS (Global Positioning System – GPS) is a satellite-based system, which can be used nearly anywhere in the world. It can provide GPS position at any time to the device.
The most widely used GPS satellite system belongs to the government of the USA, who controls the accuracy and accessibility of the system.
Changes in the availability and accuracy of the system could affect the operation of the device, therefore we can not take any responsibility for them.
2.3 Safety instructions and remarks
- Power off the device, If it will not be used for a long time.
- For your own safety, while driving, do not change the device or the navigation software settings! Stop the car, if you want to change the settings.
- This device only assists in navigation, it is not suitable for geographical positioning or precise direction and distance measurement.
- The calculated route is only a recommendation. The user is responsible for the signs, signals and compliance with current traffic regulations.
- If you leave the car, please, do not leave the device on the dashboard, or in the glove-compartment, or on the windscreen, where it could be exposed to direct sunlight. Overheating of the battery can cause device failure or accident.
- WayteQ reserves the right to change the user manual without any notice.
- The parameters of the product can change without any notice. We apologize for any inconvenience.
- Please, make a backup of your important data. WayteQ doesn't take any responsibility in case of data loss.
- Although the instruction manual was made with the greatest care, it may contain errors. In this case, please contact WayteQ Support.
- Please, carefully read this instruction manual, and use only original WayteQ accessories to prevent any malfunctions or failures. In case of any inappropriate use, WayteQ is not responsible if you do not comply with the instructions.
- The content of the digital maps cannot be always up-to-date, because of the changing real-life conditions. Please, always follow the applicable road traffic regulations.
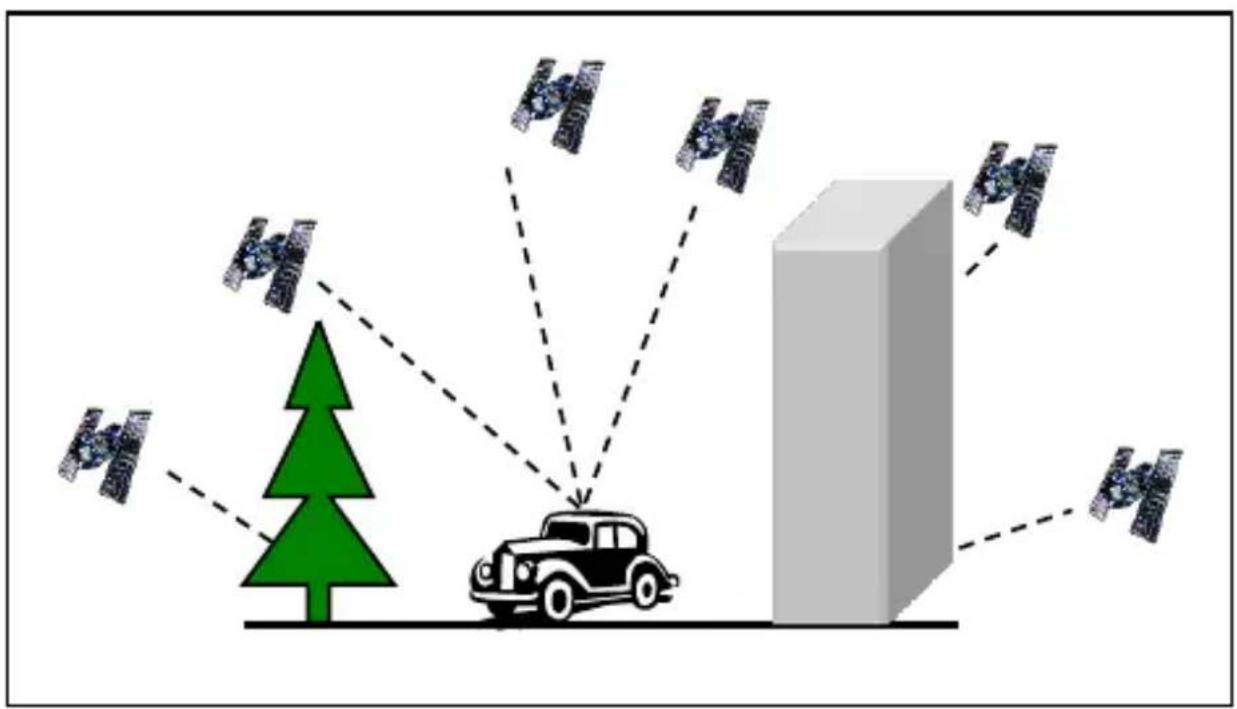
The signals of the GPS satellites cannot penetrate solid objects (except glass). The positioning does not work inside buildings and tunnels. Receiving of GPS signals may interfered by different environmental factors (bad weather, tall buildings, devices using wireless technology).
2.4 Aircrafts and hospitals
On most airplanes, in hospitals and other institutions, it is prohibited to use devices with antenna.
Do not expose the device to high temperatures or direct sunlight for long periods of time and do not leave it in the car. High temperatures can cause permanent damage to the device.
The proper functioning of the device can be guaranteed between 5^ C and 40^ C temperature. keep the device away from damp, wet room, objects.
Do not attempt to repair the device yourself. Do not attempt to open, puncture or disassemble it. Do not attempt to modify the device software. Do not use illegal or incompatible software with the device. It will void your warranty, if the problem is caused by not complying with the provisions above.
There is a security label placed on the device. Removal or damage of the label may cause warranty withdrawal.
3. TECHNICAL SPECIFICATION
| CPU | MediaTek MTK8127 |
| RAM memory | 1 GB |
| Internal flash | 8 GB |
| LCD screen | 5” TFT LCD, 800x480 pixel |
| MemoryExtensibility | microSD memory card,max. 32 GB |
| USB | MiniUSB connector |
| Speaker | Integrated |
| Headphone output | 2.5 mm stereo jack |
| GPS receiver | MT6627 |
| Battery | Built-in, Lithium-Ion |
| Charging current | DC 5V / 2 A |
| Car charger | DC 12-24V/2.5A – 5V/2A |
| Operating system | Android 4.4.2 |
| Navigation software | Optional |
| FM Transmitter | Integrated |
| Bluetooth speakerphone | Supported |
| Operating conditions | 5°C ~ 40°C operating-10°C ~ 50°C storage86KPa ~ 106KPaatmospherical pressure35% ~ 80% RH operating30% ~ 90% RH storage |
4. CONTROLS

natural_image
Technical line drawing of a rectangular electronic component with a labeled section (6), showing internal structure and mounting points (no text or symbols beyond the number)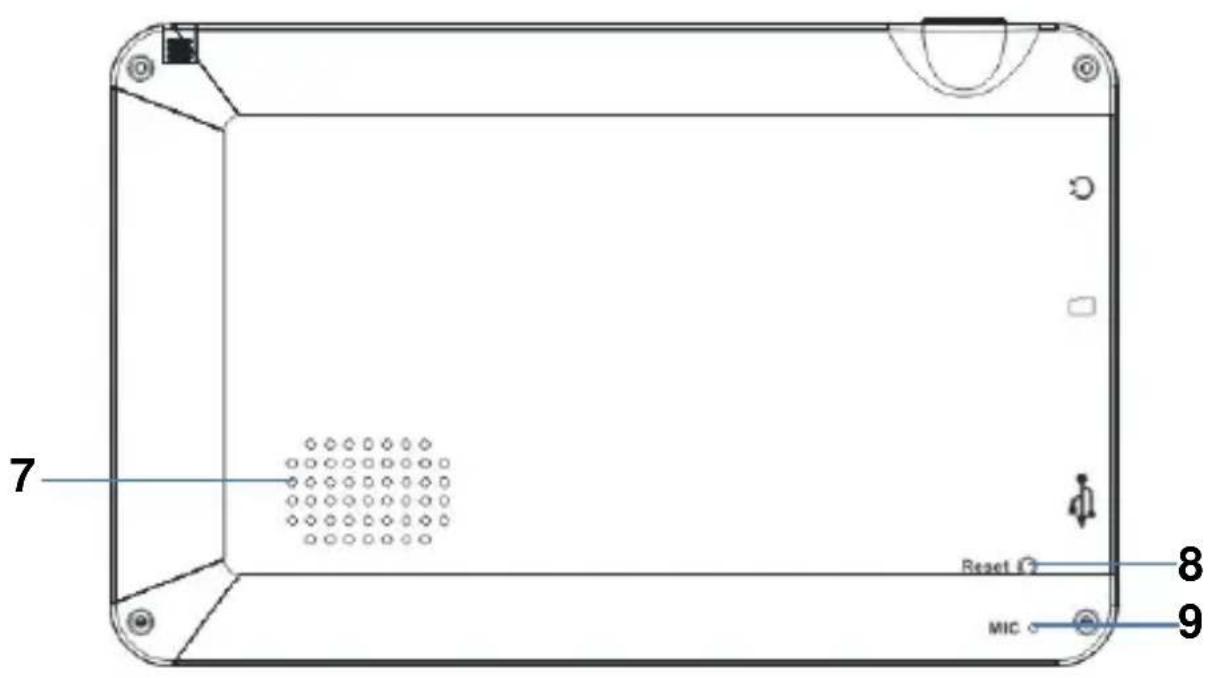
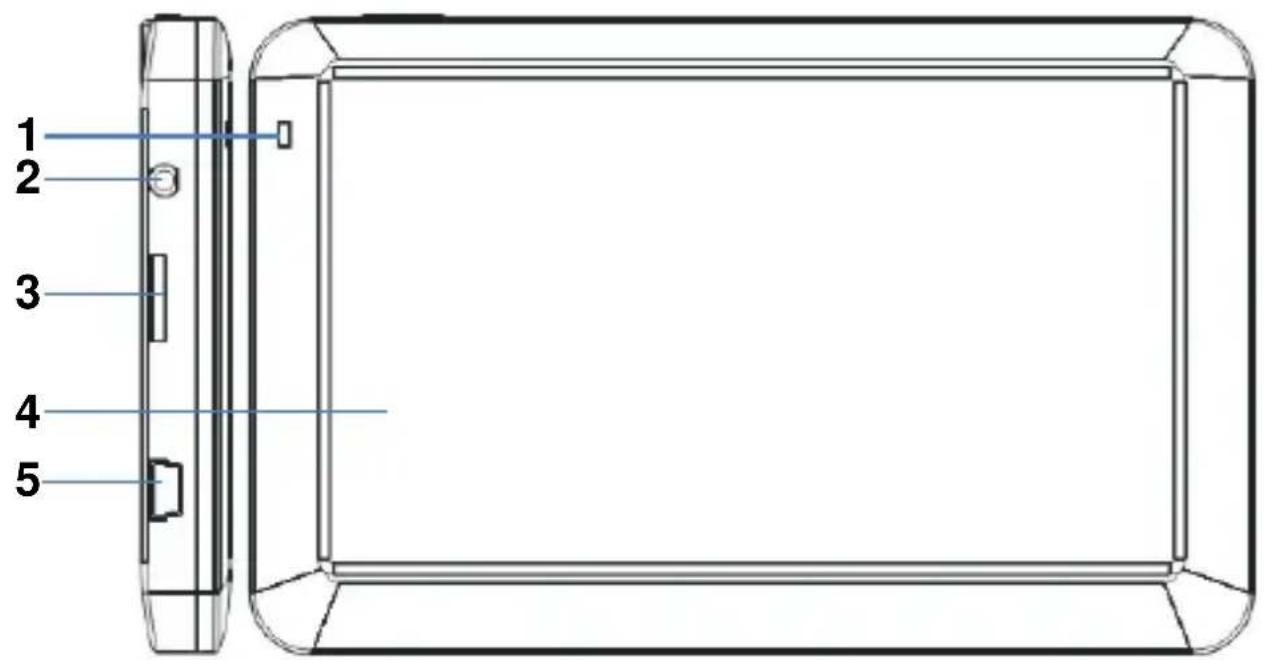
- Notification LED
- Earphone output
- MicroSD memory card
- LCD touchscreen
- MiniUSB charging and data socket
- Power ON/OFF switch
- Speaker
- RESET button
- Microphone
4.1 Charging with AC adapter
WARNING: During charging, the LED glows in red color. Do not disconnect the device from the charger until charging is complete and the LED glows in blue color. Charge the device when the battery level is low.
natural_image
Pure electrical plug diagram showing connections without any text or symbolsConnecting the car charger
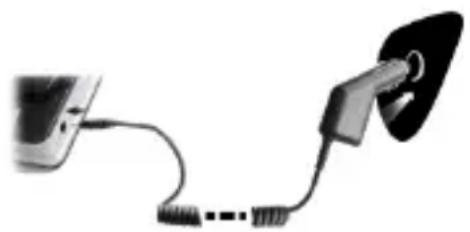
Use continuous power supply with the supplied car charger when the device in use.
WARNING: in order to avoid sudden power surges, attach the device only after you have started the engine.
Indicator of the fully charged battery.
4.2 Battery
The device can be operated between 5 - 40°C, and it can be stored safely between -10 - 50°C. Do not expose the device to high temperatures or hot environment for a prolonged time. For example do not leave the device exposed to direct sunlight in the car. To avoid damage to the device, keep it away from harsh environment. Please follow the local guidelines and regulations before you dispose the battery.
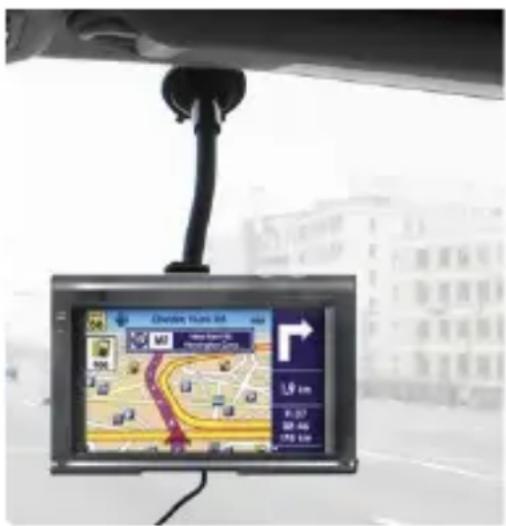
4.3 Using the windscreen mount
Place the device into the cradle. Take off the suction cup protector foil and find an ideal location to fix the mount on the windscreen. Verify that the suction cup
and the windscreen are not dirty, greasy or wet. Slightly press the suction cup to the windscreen and fasten the lever. Overnight temperature drop and possible moisture condensation may cause the suction cup to loose its adhesion capability. In order to avoid this, you should remove the mount unit for the night.
To remove the mount unit: loosen up the lever to cease the adhesion. If you still can not remove the suction cup, gently pull the little plastic tab at the edge of the suction cup.
4.4 Using memory cards
Place the memory card into its slot, with the contact pins looking in the same direction as the LCD screen. To lock the card into its place, push it inward until you hear a click. Push it again to unlock the card from its place and gently pull out the card to remove it from the slot.
4.5 Resetting the device
When the device does not respond to the commands, you can push the reset button to reset the device. This can cause unwanted data loss, so it is best to use it as a last resort.
5. USING THE DEVICE
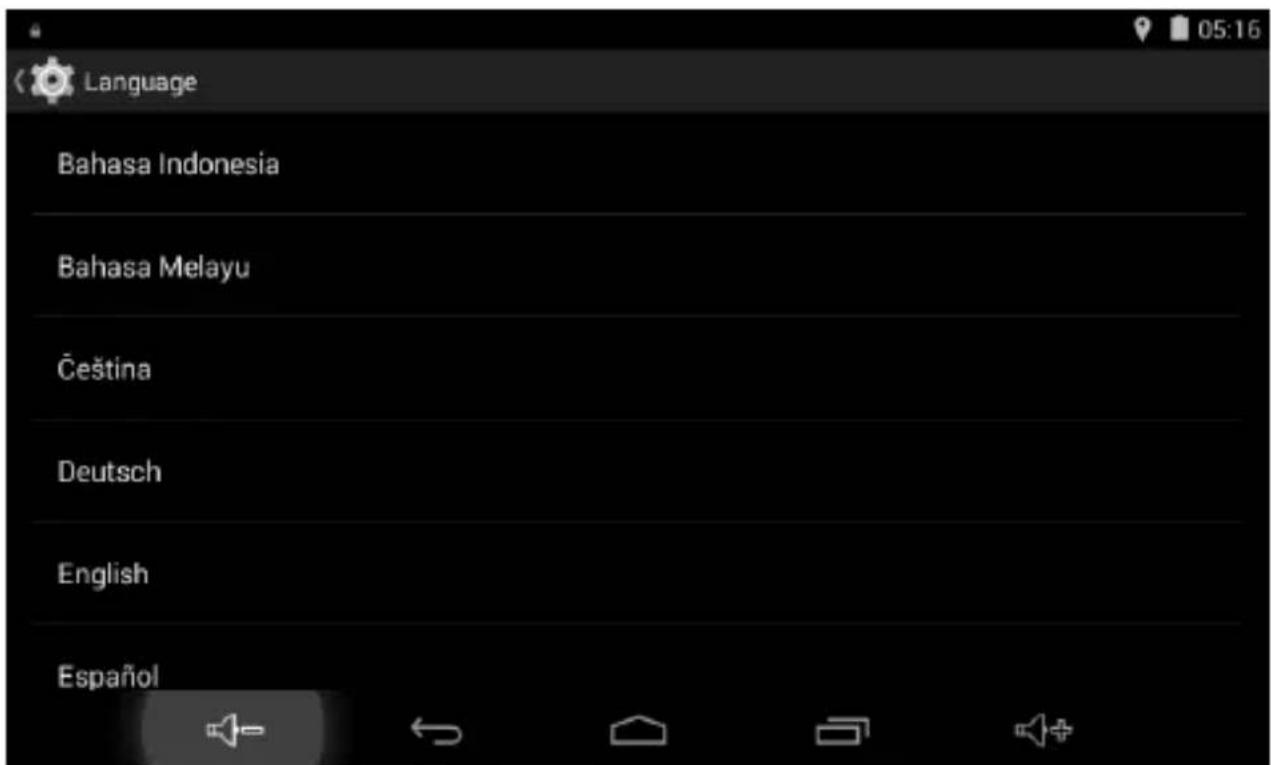
5.1 Changing the language
Touch the „Settings” button on the home screen, and select „Language & Input” menu item, then touch „Language” menu item and select your desired language.
5.2 Turn ON/OFF
In order to turn on the device, press the POWER button for 3 seconds. You will see the following screen when the system is started and it is ready to use:
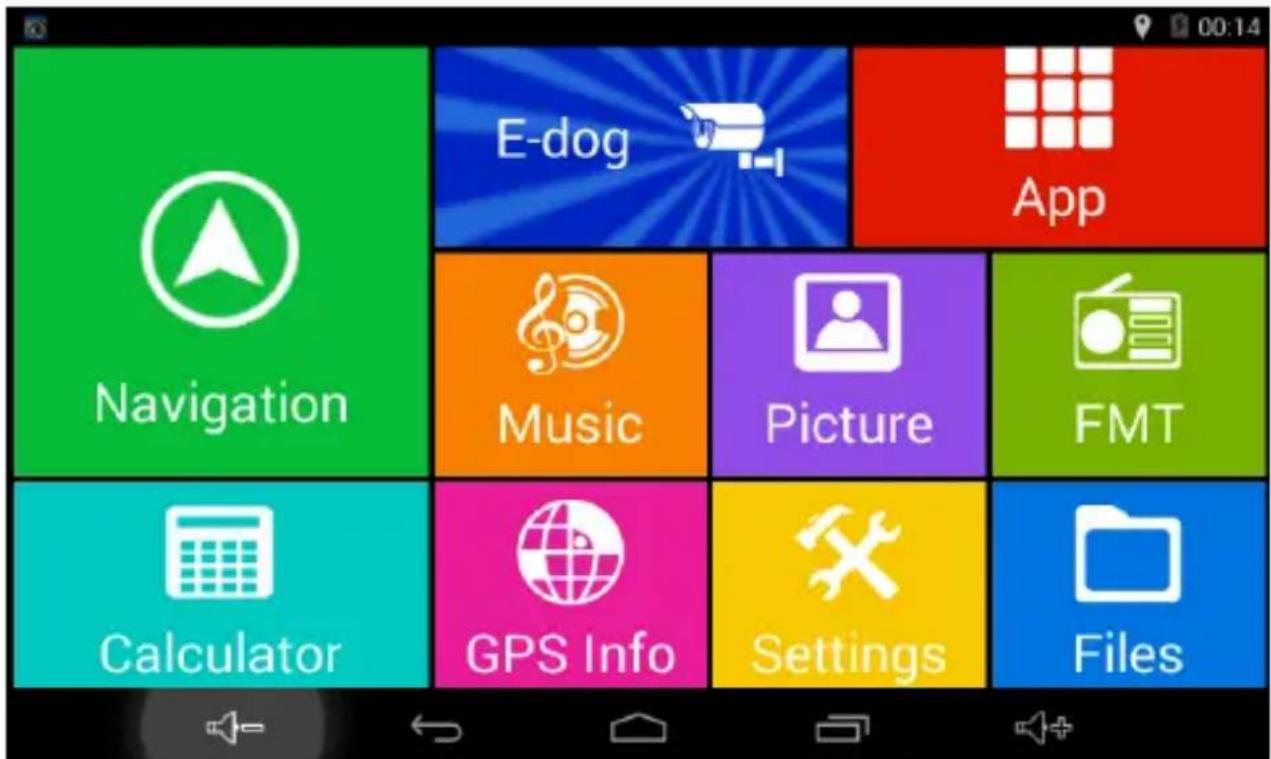
Main functions:
- Navigation application launcher
- Music/Video playback, photo viewer
- Application list
- FM transmitter
- File manager
- Calculator
- GPS receiver status and information
- Settings
In order to turn off the device: press and hold the POWER button for 2 seconds. A dialog box will appear. Select “Power off” menu item to safely shut down the device.
5.3 Status bar

At the bottom and top of the screen, the status bar contains the following icons: Back, Home, Recently viewed applications, Volume up/down adjustments. It also displays current time, Wi-Fi status, Bluetooth status, Battery level and other notifications.
 | On any functional screen, tap this icon to go back one screen or exit application. |
 | On any functional screen, tap this icon to go to the Home screen |
 | Shows a list of thumbnail images of applications you've recently opened. To re-open an application, touch its thumbnail image. To remove a thumbnail from the list, swipe it up or down. |
 | Current time |
 | Wi-Fi connection and signal strength |
 | Battery level. It will turn orange when battery is low and turn red when battery level is critically low. |
5.4 Virtual keyboard
The onscreen keyboard appears automatically every time you tap on a textbox for input. While entering text with the onscreen keyboard, each character will be placed into the position pointed by a vertical cursor. You can change the cursor position by tapping with your finger on the position you want to enter the next character.
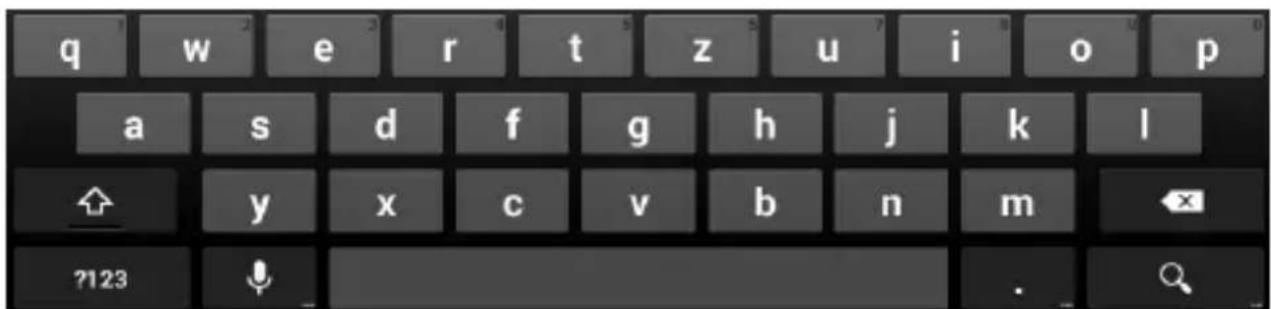
 | Voice input | ||
 | Hide keyboard | ||
 | Switch to numeric input | ||
 | Delete the last character (Backspace) | ||
 | Capital letters (Shift) |
5.5 Applications
In order to list the installed applications, please touch the "App" button on the home screen.
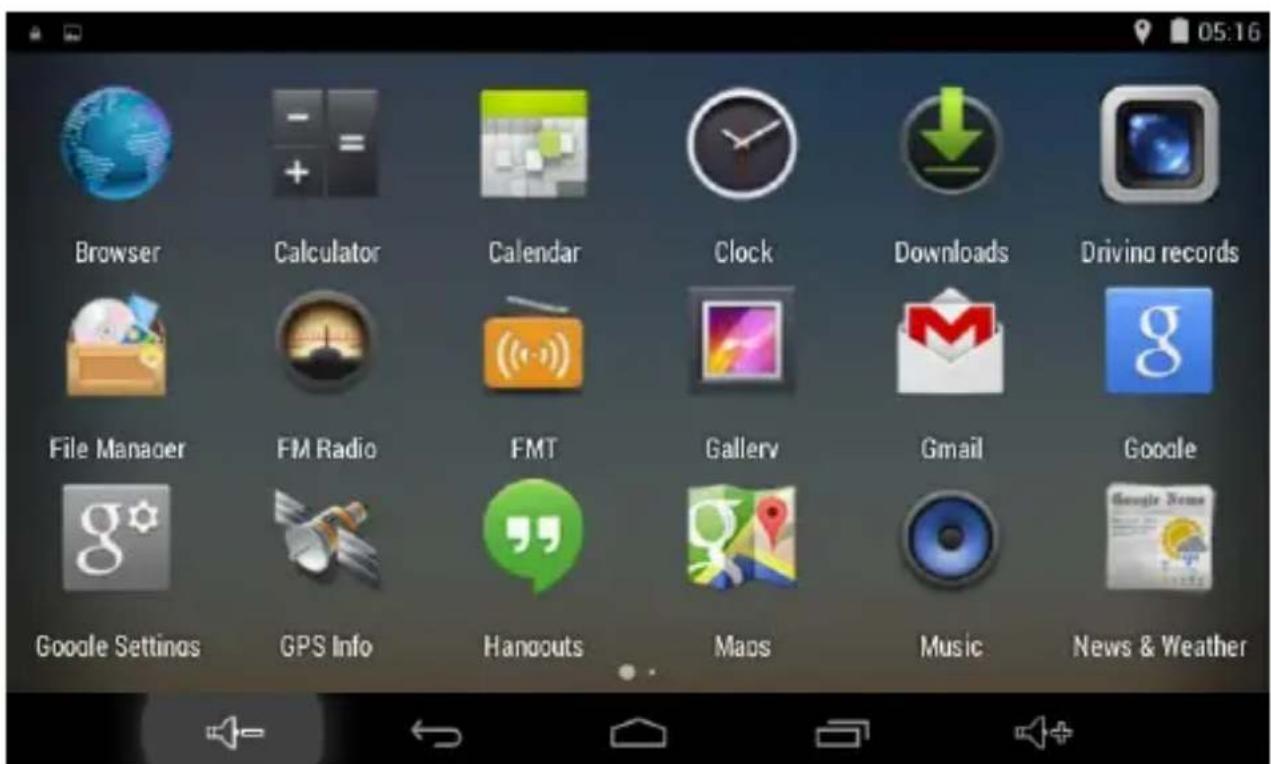
To start an application, touch the application's icon.
5.6 Applications of the home screen
5.6.1 Navigation
The „Navigation” shortcut on the home screen provides a quick and convenient way to start your preferred navigation application. In order to use this functionality, first you have to set the application to start. Touch and hold the „Navigation” button on the home screen, until the list of installed applications appears on the screen. Select the preferred navigation application which will be started by touching the „Navigation” shortcut. This configuration will be permanently saved after selecting the application. You can select any other installed application to start by using this method.
5.6.2 Music Player

Tap “Music” on the home screen to open the music list as you can see below:
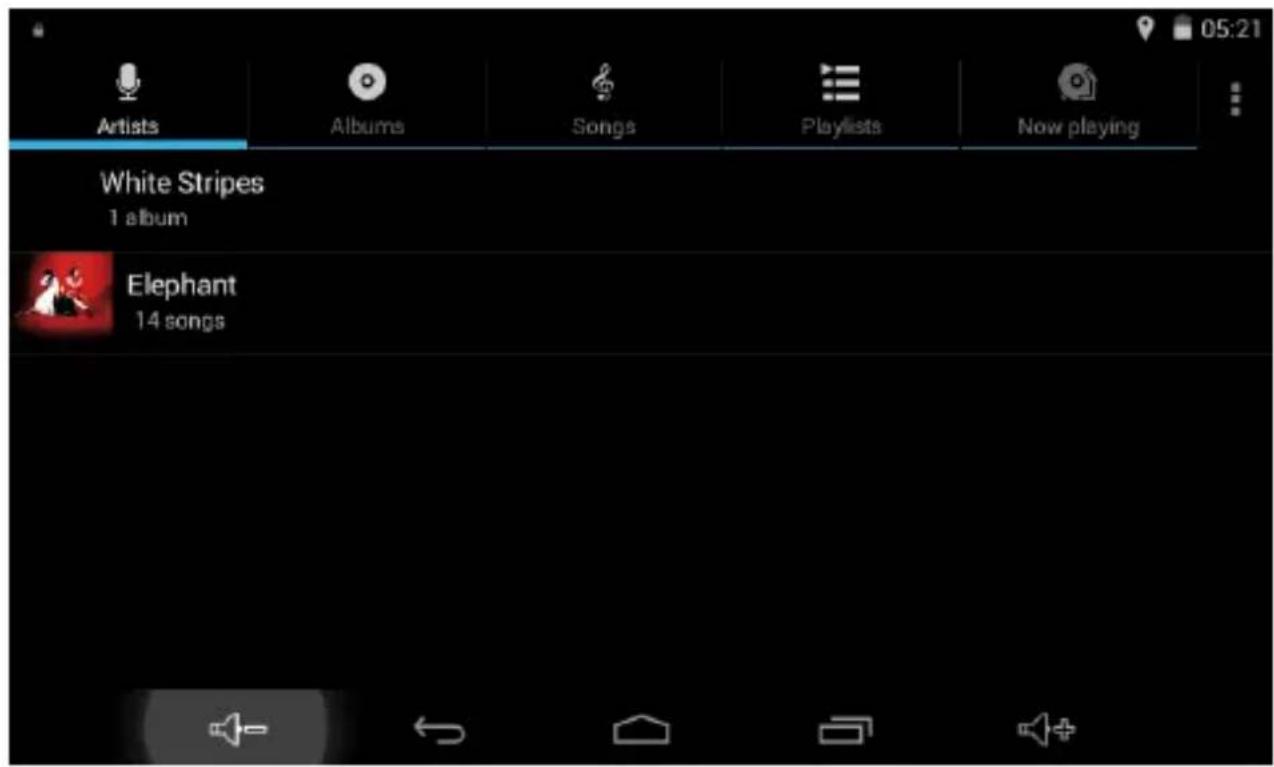
Select the artists/albums/songs or playlists mode to list music accordingly. Use the onscreen icons to configure how you want to play the songs.
 | Playlist |
 | Random song order / shuffle |
 | Repeat all songs, Current song, Off |
 | Previous song |
 | Pause / Stop |
 | Next song |
Remark:
Music will keep playing in the background when you leave the music playback screen. This feature allows you to browse files, view photos and surf the Internet while listening to music. To stop the playback, tap Pause on the music playback screen followed by the Back button.
Tap ☐ view further options of the application.
5.6.3 Gallery
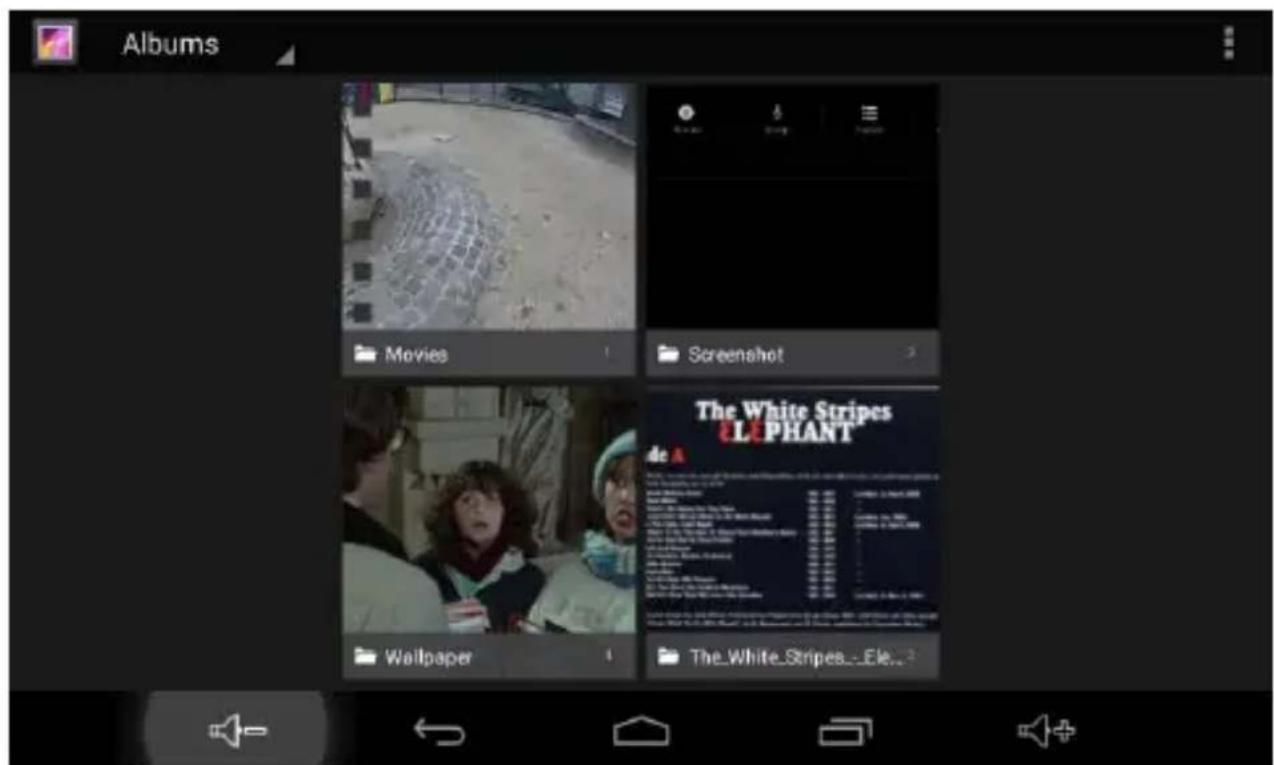
Tap “Gallery” on the Home screen to open the Gallery application.
- The first screen shows all photos and subfolders as albums.
- Tap on a picture or album to jump into photo thumbnail mode.
- Tap a thumbnail to view a photo in single view mode.
- When you are in single photo view mode, tap anywhere on the screen to show the local menu of the Gallery application related to the actual photo.
5.6.4 FM Transmitter
Using FM transmitter, you can wirelessly forward the sound of the applications to your car stereo.
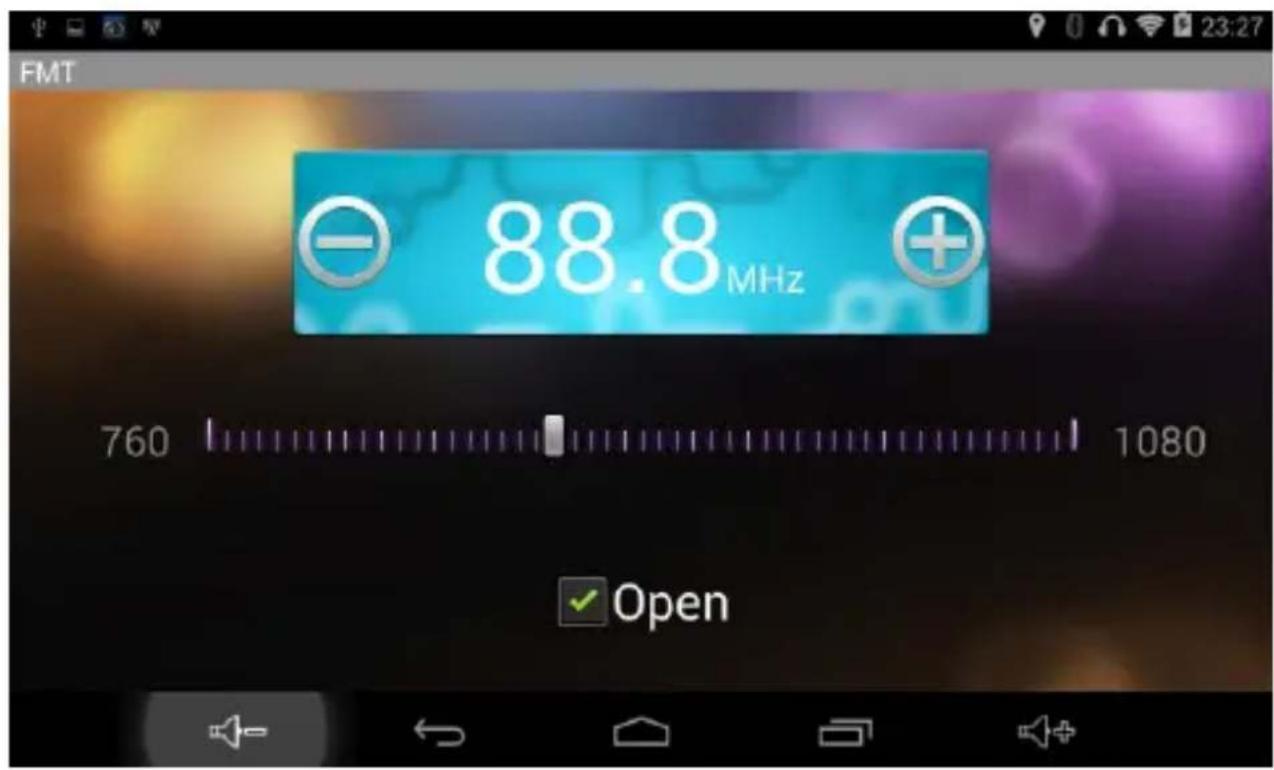
- Tap the „Open" label.
- With the + and – buttons you can choose an appropriate frequency.
- Tune your car stereo to this frequency.
Remark:
You should choose a frequency which is not used in your area to avoid any interference. Using the FM transmitter requires a connected car charger.
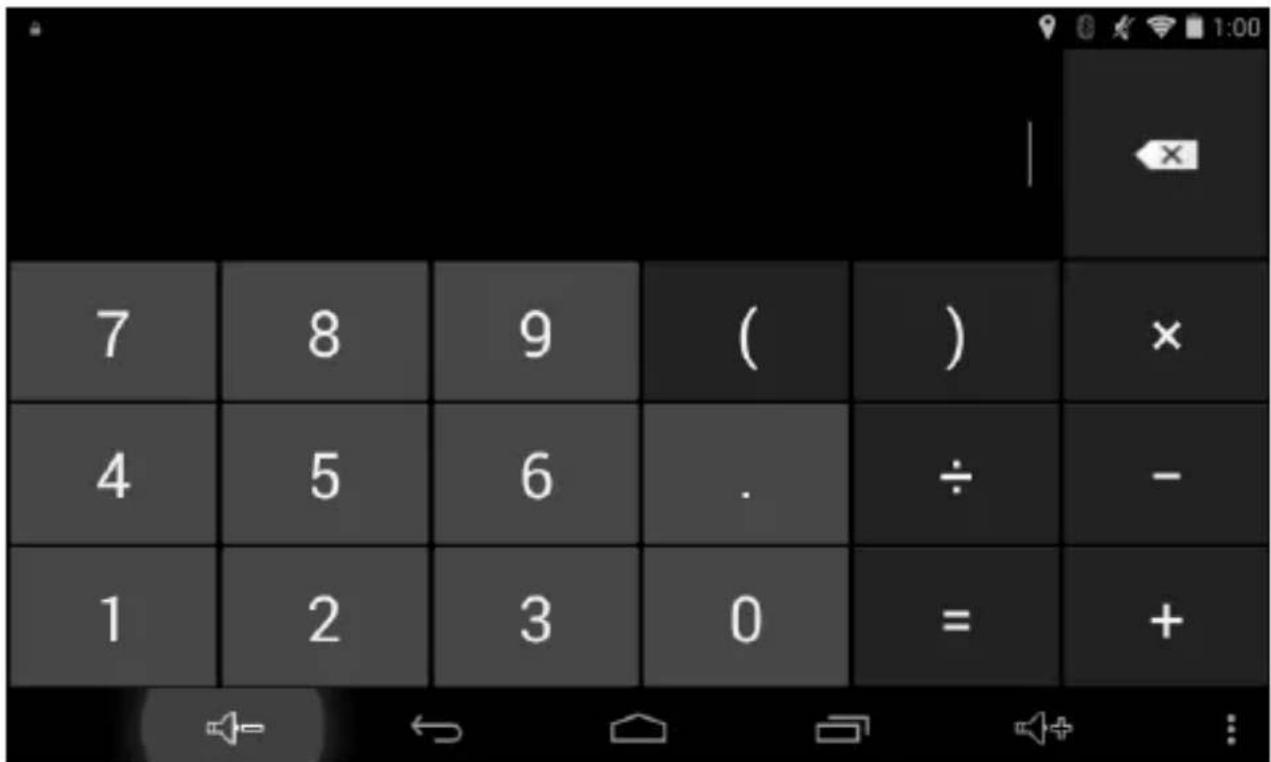
5.6.5 Calculator
Use the numbers and symbols to do mathematical operations.
5.6.6 GPS Info
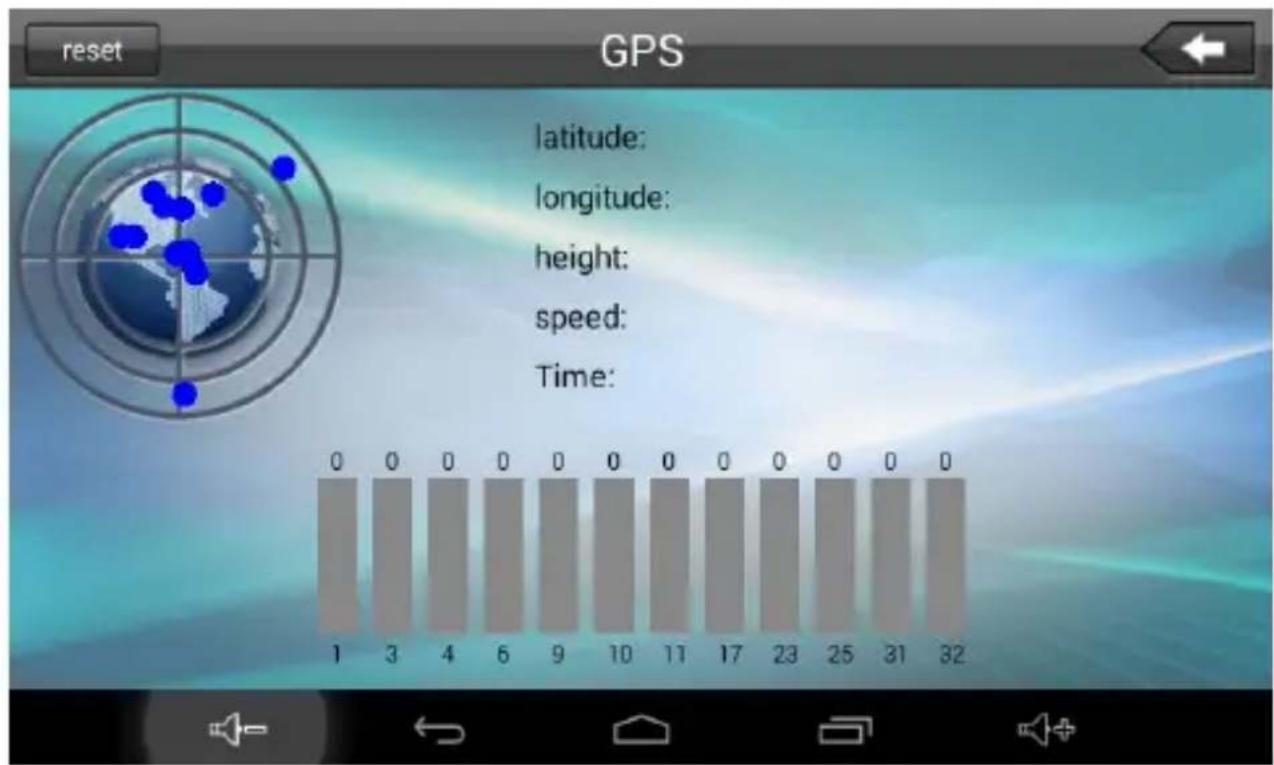
With this application, you can check the status of the GPS receiver without any navigation software.
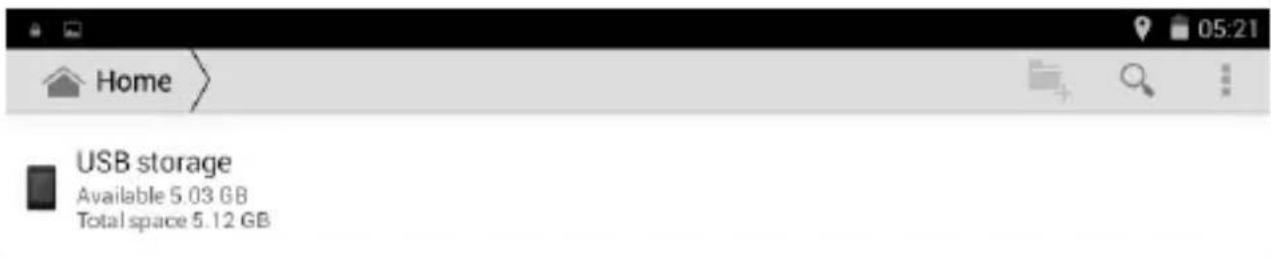
5.6.7 File manager

natural_image
Pure electrical circuit lines without any symbolsWith this application, you can manage your files within the internal memory or on your memory card. You can move, copy, remove files and share files with other applications.
5.7 Other applications
5.7.1 Video player
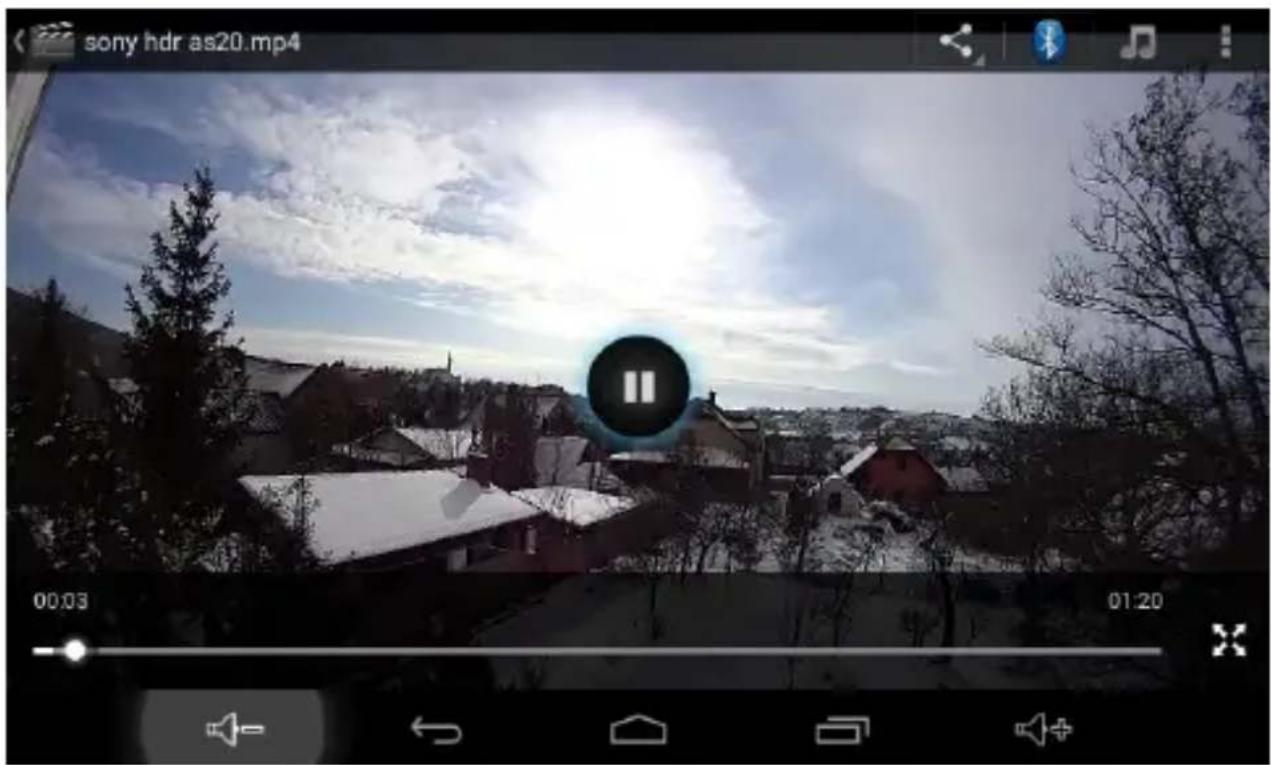
- Tap "Videos" in the application listing screen.
- Select the video that you want to watch.
To seek in the video, simply drag the white dot below video. To display controls, tap anywhere on the video. Tap again to hide the controls.
Play / Pause
 | Select audio track |
 | Select subtitle |
 | More options: stop, loop, etc. |
 | Change video aspect ratio |
5.7.2 Downloads

Files, photos, applications and other items you have downloaded with the Browser or Email applications will be stored in the device's internal memory. Use the „Downloads” application to view, open or delete what you have downloaded.
- Touch an item from the list of downloaded items to open it.
- Touch and hold your finger on the item
that you want to share, then tap the icon to choose a method for sharing the selected item.

- Select the items you want to delete, then tap the trash icon to delete the selected files.
- In the Downloads window you can sort the items by name, size or modification date.
5.7.3 Browser

The Browser application can be used for browsing the World Wide Web. You can browse websites, watch videos, download files, listen to music, etc.

natural_image
Pure graphical icons without any text or symbols- Tap the textbox in the address bar to bring up the onscreen keyboard. Then enter the website's address and tap the Go button.
- When you type in the address bar, the browser can help you complete the web addresses and search terms you're looking for.
- Double tap on the screen to zoom in or zoom out. Swipe with your finger across the screen to pan the content up, down, left or right.
Tap Menu button near the upper-right corner of the screen to display additional functions of the Browser application.
5.7.4 Clock

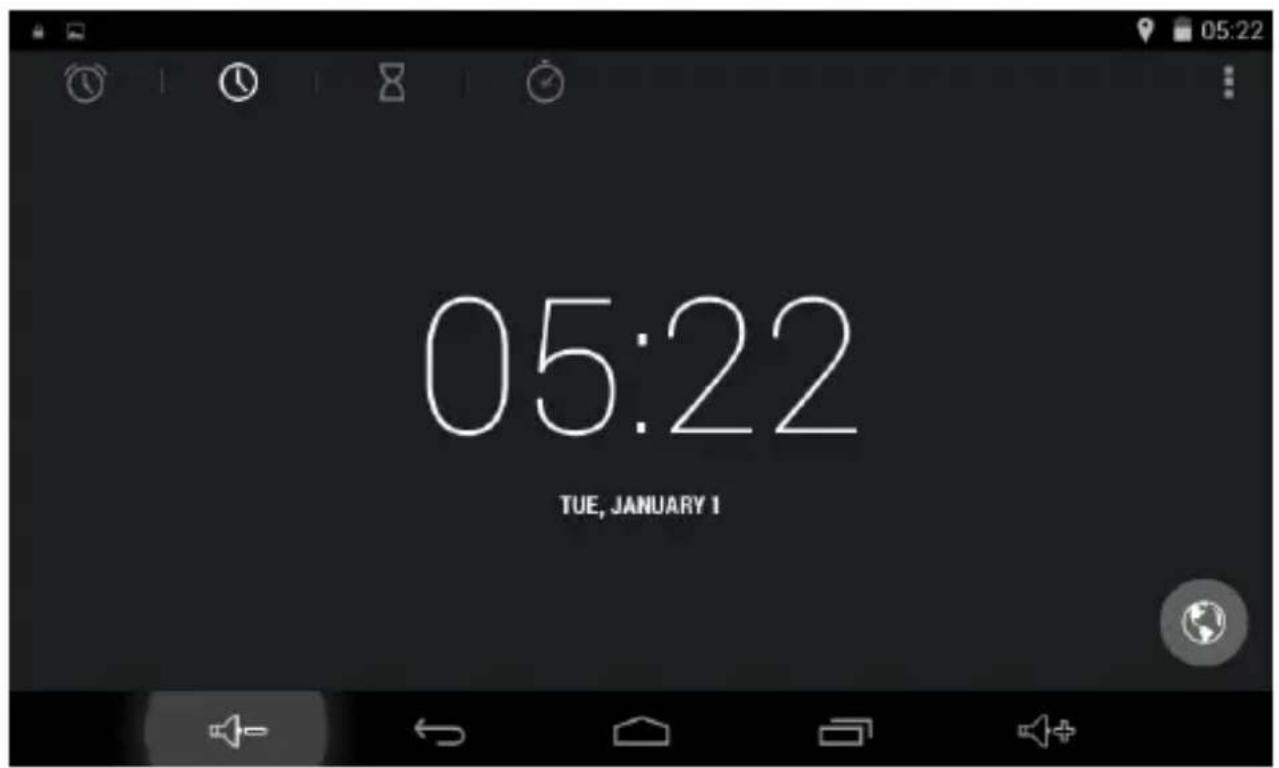
Touch the Clock icon in the application list. The following screen will be shown. Tap on the icon to set one or more alarms.
5.7.5 Email

You can configure Email for most accounts in just a few steps. For many popular email services, the device automatically provides most of the settings for you.
- Make sure that you have an active Internet connection.
- Open the Email application and enter your Email address and password, then tap "Next"
- Give a name to your account then tap "Next". Mail messages will be downloaded automatically.
 | Tap to compose a new e-mail |
 | Tap to search in your mailbox |
 | Check for new messages |
 | Tap to open Account settings. To remove your account from the system, tap Remove account. |
5.7.6 Calendar

Calendar makes it easy for you to stay on schedule. You can view your schedule in day/week/month/and agenda mode by touching icons near the upper-left corner. Swipe to scroll vertically or horizontally.
When using calendar for the first time, there are some steps you shall follow:
- Add a Google account to your Calendar in the Menu / Settings / Add account menu.
- You can tap on a specific date to start using your personal calendar. If you are connected to the Internet, the calendar events will be synchronized with your Google account.
| TODAY, MONDAYFebruary 13, 2012 | Tap to change the viewing mode:day/week/month/agenda | |
 | TODAY | Tap to view today's schedule |
 | Tap to create a new event | |
 | Tap to show more options:Refresh/Search/Settings/etc. | |
6. CONNECTIONS
6.1 Wi-Fi connection

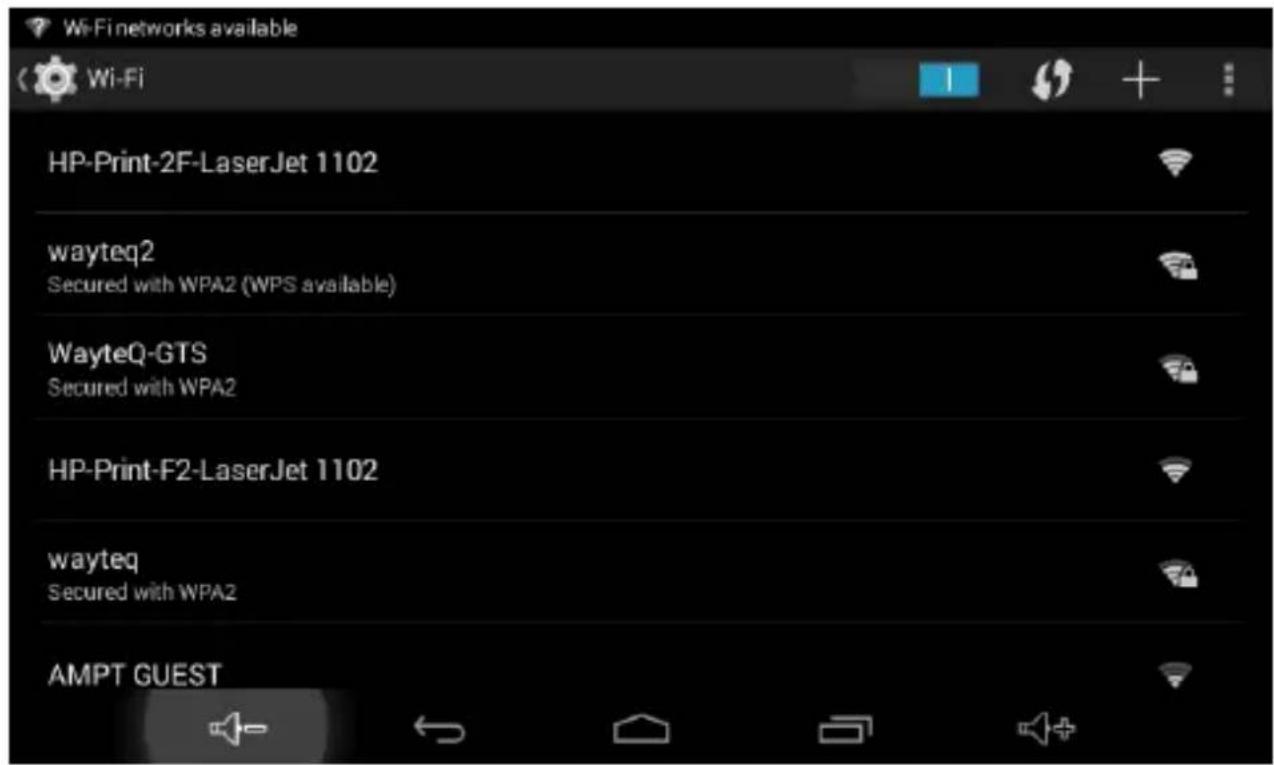
You can configure wireless networks in the Settings / WIRELESS & NETWORKS / Wi-Fi menu. To turn on the Wi-Fi module, slide the Wi-Fi switch to the I position.
The device periodically scans the available wireless networks in a specific time interval. You can manually force the device to scan for
wireless networks with the „Scan” command, which is available through the upper-right
corner's Menu button. After you have found the network that you want to connect to, tap on its SSID to initiate the connection. If it is a secured network, the system will prompt for a password. Then tap on the Connect button to start connecting to that network.
After the connection has been established, the Wi-Fi icon will appear on the status bar.
6.2 Bluetooth connection

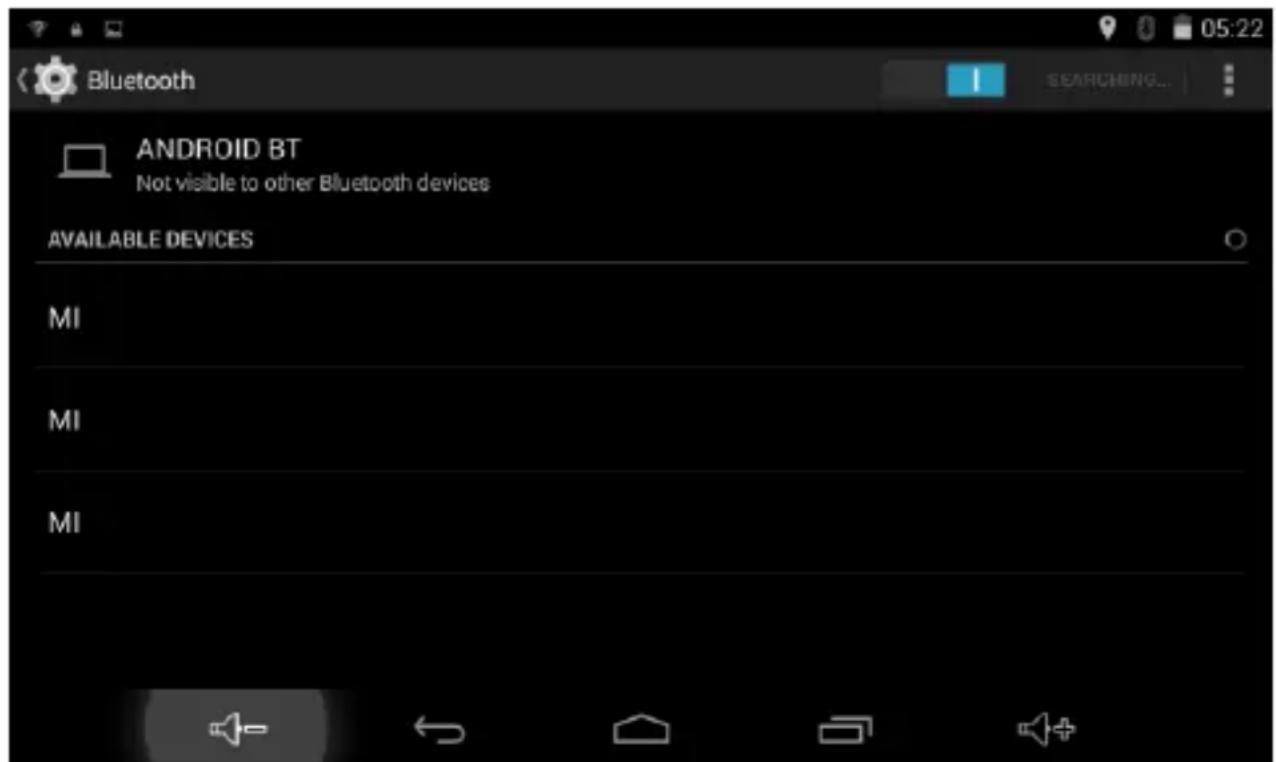
To turn on the Bluetooth module, go to Settings / WIRELESS & NETWORKS / Bluetooth menu and slide the Bluetooth switch to the I position. Tap „SEARCH FOR DEVICES” to discover nearby Bluetooth devices.
Tap on a device name that you want to establish a connection with.
Remark:
Some devices may require you to enter a PIN code. This can be 1234 or 0000. Please refer to the user manual of that device!
6.3 USB connection

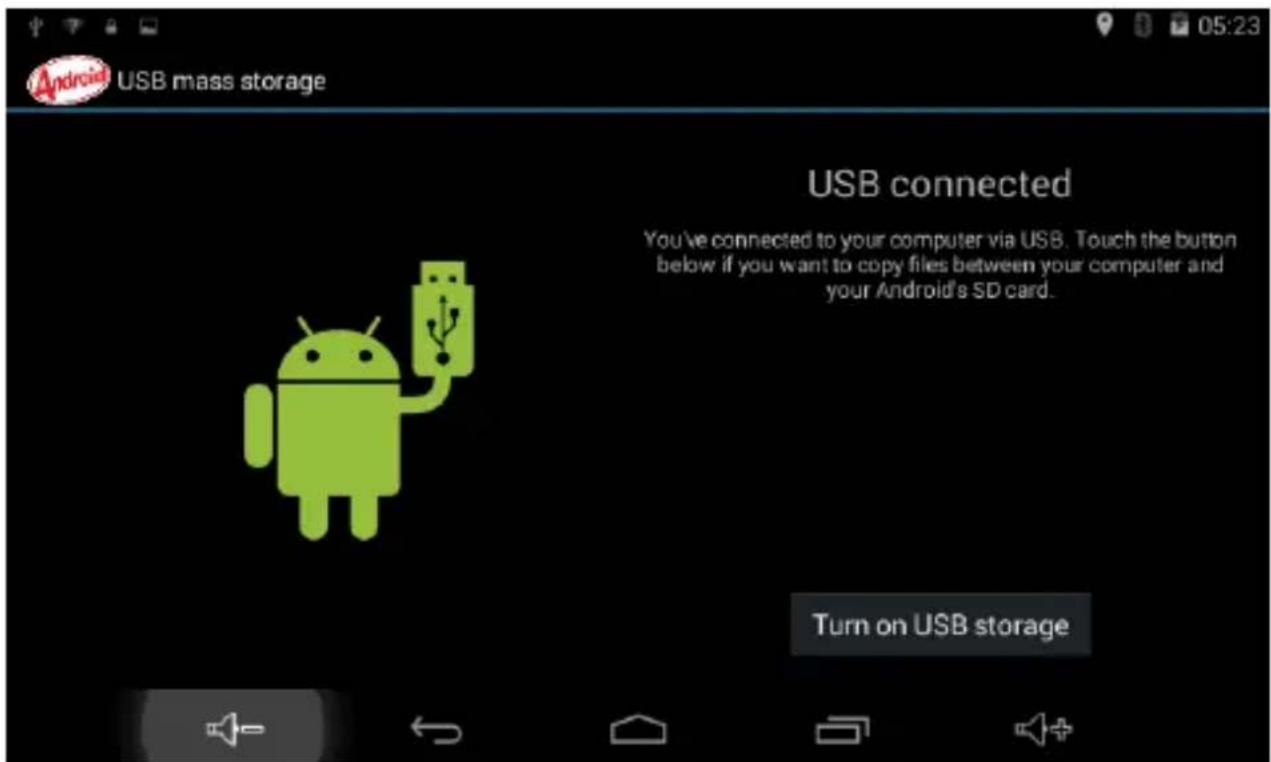
Connect the device with a PC using the supplied USB cable. After successful connection, you can manage and transfer files between the device and the PC.
-
Plug one end of the USB cable to the device and plug the other end to the PC. A „USB connected” message will appear on the screen. Tap „Turn on USB storage” button to connect to the PC.
-
When you have finished with managing your files, safely disconnect the device from the PC
by tapping on the „Turn off USB storage” button.
7. DECLARATION OF COMFORMITY (ex.)
The importer states, that this product complies with the conditions of use, and in accordance with regulations, there is a product sticker on it, and have a warranty card and a user's manual in the box.
Based on a statement issued by the manufacturer, the product will be placed on the market with CE marking, according to the 79/1997.(XXII.31.) IKIM regulation's 5.§ (1) point (HUNGARY).
8. QUALITY CERTIFICATION
The distributor testify, that this product is meets the technical characteristics of the disclosure, as provided for in 2/1984. (III.10.) IpM-BkM regulation (HUNGARY).
© 2015 All Rights Reserved, WayteQ Europe Ltd.
9. IMPORTER / DISTRIBUTOR:

WayteQ Europe Ltd.
6th Gubacsi str.
BUDAPEST, 1097
HUNGARY
Phone: +36-1 21 73 632
www.wayteq.eu
info@wayteq.eu
- Thank you for choosing this WayteQ product!
- FEATURES
- WARNING!
- SAFETY AND GENERAL INFORMATIONS
- Safety instructions
- GPS (Global Positioning System)
- Safety instructions and remarks
- Aircrafts and hospitals
- TECHNICAL SPECIFICATION
- CONTROLS
- Charging with AC adapter
- Connecting the car charger
- Battery
- Using the windscreen mount
- Using memory cards
- Resetting the device
- USING THE DEVICE
- Changing the language
- Turn ON/OFF
- Main functions:
- Status bar
- Virtual keyboard
- Applications
- Applications of the home screen
- Navigation
- Music Player
- Gallery
- FM Transmitter
- Remark:
- Calculator
- GPS Info
- File manager
- Other applications
- Video player
- Downloads
- Browser
- Clock
- Calendar
- CONNECTIONS
- Wi-Fi connection
- Bluetooth connection
- USB connection
- DECLARATION OF COMFORMITY (ex.)
- QUALITY CERTIFICATION
- IMPORTER / DISTRIBUTOR:
Brand : WayteQ
Model : X995
Category : Gps