
Walkman WM-GX90 - Cassette player SONY - Free user manual and instructions
Find the device manual for free Walkman WM-GX90 SONY in PDF.


User questions about Walkman WM-GX90 SONY
0 question about this device. Answer the ones you know or ask your own.
Ask a new question about this device
Download the instructions for your Cassette player in PDF format for free! Find your manual Walkman WM-GX90 - SONY and take your electronic device back in hand. On this page are published all the documents necessary for the use of your device. Walkman WM-GX90 by SONY.
USER MANUAL Walkman WM-GX90 SONY
Operating Instructions page 2
Before operating the unit, please read this manual thoroughly and retain it for future reference.
© 1992 by Sony Corporation
WALKMAN
The model number is located on the bottom of the unit and the serial number is located in the inside of the cassette holder.
Record the serial number in the space provided below. Refer to them whenever you call upon your Sony dealer regarding this product.
Model No. WM-GX90 Serial No.
INFORMATION
This equipment generates and uses radio frequency energy and if not installed and used properly, that is, in strict accordance with the manufacturer's instructions, may cause interference to radio and television reception. It has been type tested and found to comply with the limits for a Class B computing device in accordance with the specifications in Subpart J of Part 15 of FCC Rules, which are designed to provide reasonable protection against such interference in a residential installation. However, there is no guarantee that interference will not occur in a particular installation. If this equipment does cause interference to radio or television reception, which can be determined by turning the equipment off and on, the user is encouraged to try to correct the interference by one or more of the following measures:
Reorient the receiving antenna
Relocate the equipment with respect to the receiver
Move the equipment away from the receiver
Plug the equipment into a different outlet so that equipment and receiver are on different branch circuits.
If necessary, the user should consult the dealer or an experienced radio/television technician for additional suggestions. The user may find the following booklet prepared by the Federal Communications Commission helpful:
"How to Identify and Resolve Radio-TV Interference Problems". This booklet is available from the U.S. Government Printing Office, Washington, DC 20402, Stock No. 004-000-00345-4.
You are cautioned that any changes or modifications not expressly approved in this manual could void your authority to operate this equipment.
WARNING
To prevent fire or shock hazard, do not expose the unit to rain or moisture.
Table of Contents
Features 5
Inserting the lithium battery 7
Using with the rechargeable battery 8
Using with a dry battery 10
Using on external power sources 12
Basic Operations
Tape playback 13
Radio reception 19
Recording 21
Other Operations
How to set the clock 24
Memory preset tuning 26
Tuning in a preset station 28
Timer-activated recording 32
Precautions 36
Parts identifications 38
Cleaning 46
Specifications 47
Troubleshooting guide 50
Features
- Repeat play function for repeatedly playing a desired section of the tape which will be useful for studying a language.
• The built-in world wide tuner can store in memory up to 9 stations each on the FM and AM bands. - Timer-activated recording can be made from the built-in radio.
• The LCD display let you know the current operational mode.
• ATS (Automatic Tape Selector) automatically distinguishes the tape types during tape playback. - The supplied battery charger enables approx. 1.5 hours of playback time with the supplied rechargeable battery after 10 minutes of charging.
- Supplied with a battery case with built-in stereo microphones.
Supplied Accessories
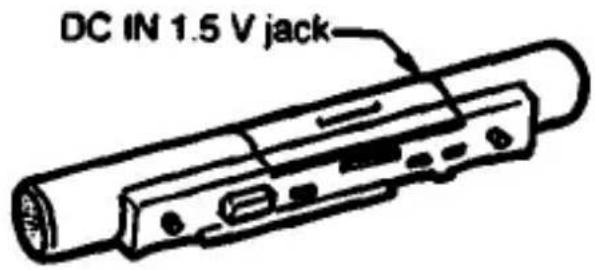
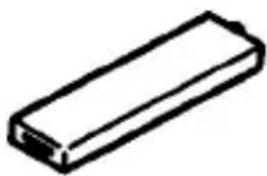
Battery case with stereo microphones
text_image
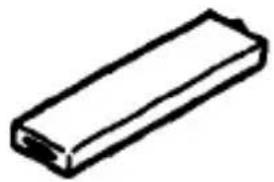
DC IN 1.5 V jackRechargeable battery
natural_image
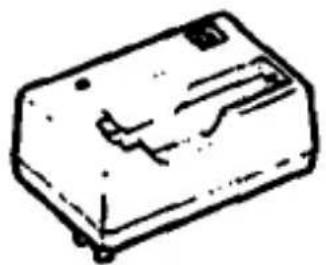
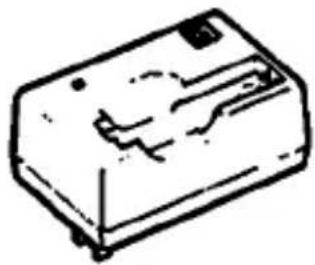
Simple line drawing of a rectangular electronic component (no text or symbols)Battery charger
natural_image
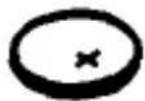
Simple line drawing of a rectangular electronic component with no text or symbolsLithium battery (CR2016)
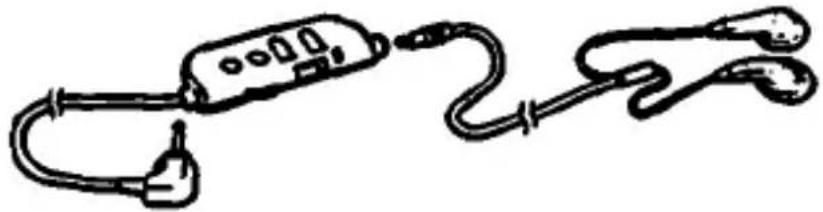
Stereo headphones with remote controller (The shape of the headphones for the USA model is different from that is illustrated below.)
natural_image
Simple line drawing of a medical or laboratory device with tubing and connectors (no text or symbols)Ear adaptors (except U.S.A.)
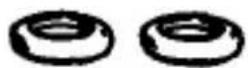
If the headphones do not fit your ears, attach these ear adaptors to the headphones.
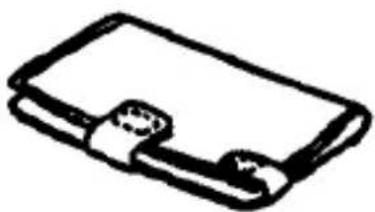
Carrying case
natural_image
Simple line drawing of a closed wallet or notebook (no text or symbols)Inserting the Lithium Battery
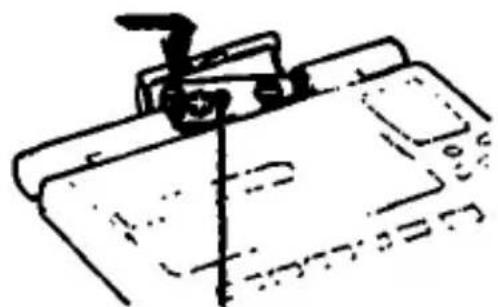
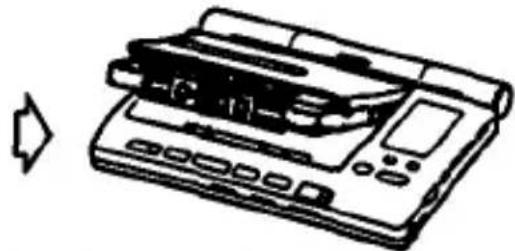
If the LCD display becomes faint or the clock starts losing time, replace the lithium battery.
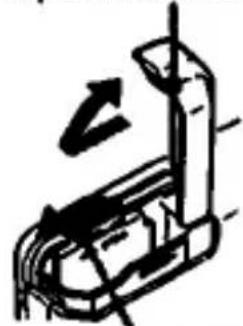
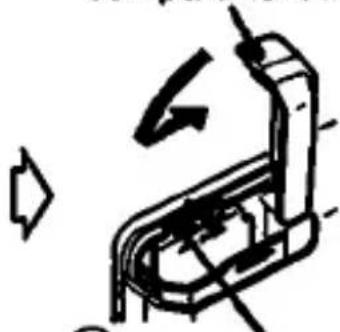
① Open the rechargeable battery compartment lid.
natural_image
Pure mechanical diagram showing a lever and shaft assembly without any text or symbols② Slide the OPEN switch to the direction of the arrow.

③ Insert the lithium battery with the + side facing the rear side of the unit.
⑤ Close the rechargeable battery compartment lid.
natural_image
Pure mechanical diagram of a lever mechanism without any text, numbers, or symbols④ Close the inner battery compartment lid for the lithium battery.
Notes on the lithium battery
• One lithium battery will last for about 6 months.
• The following functions cannot be activated without the lithium battery inserted:
— LCD display (when the unit is in the stop mode)
—Clock display
— Storing of the stations
— Memorizing the tape counter digits
— Changing the frequency range for using the unit in other countries.
— Forward side priority function*
Radio reception, recording and tape playback are possible without the lithium battery being inserted.
* If you open the cassette holder while the unit is in the stop mode and the tape inside is on the reverse side, the tape transport direction will be automatically changed to the forward side and the recording or playback will start from that side.
Using with the Rechargeable Battery
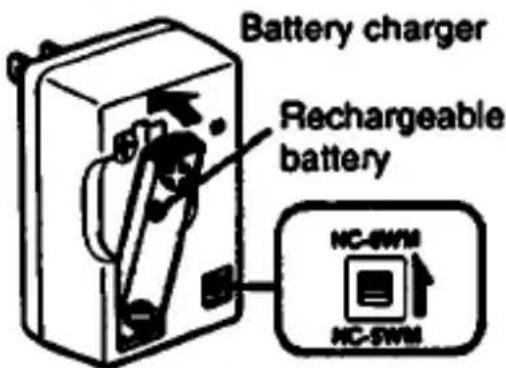
Before using the unit, charge the rechargeable battery with the supplied battery charger.
1 Insert the supplied rechargeable battery and set the selector to NC-6WM.
text_image
Battery charger Rechargeable battery NC-SWM NC-SWM2 Plug in to the wall outlet.
text_image
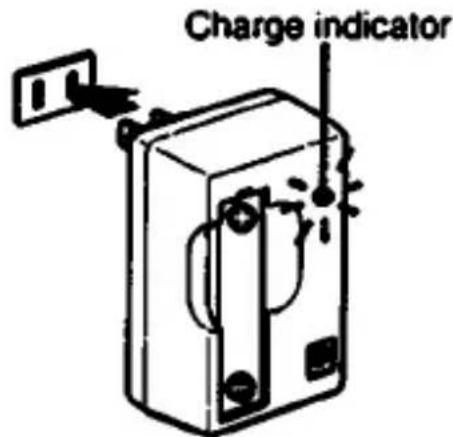
Charge indicator| High speed charging (50% charge in 10 minutes) | After the charge indicator flashes for approx. 5 – 10 seconds (while checking the remaining amount of power in the battery), it will begin to flash slowly and high speed charging will start*.When the indicator lights steadily (10 minutes later).the rechargeable battery is 50% charged. |
| Full charge | Leave the battery charger for approx. 20 minutes more until the indicator goes off. (Total charging time: approx. 30 minutes) |
- If after flashing rapidly, the indicator lights steadily instead of starting to flash slowly.
This shows that the power in the rechargeable battery still remains. If this happens, charging is performed in the normal speed mode instead of the high speed mode. The charging will be completed when the indicator goes off. The charging time varies according to the remaining amount of power (approx 40 min.).
When you use an optional rechargeable battery
Sony NC-6WM and NC-5WM rechargeable batteries are available.
NC-6WM: The same procedure as the supplied rechargeable battery.
NC-5WM: Set the selector on the battery charger to NC-5WM. You cannot charge the battery at a high speed.
The indicator lights up and the battery will be charged in approx. 40 minutes. (The indicator will go off.)
Notes
• The rechargeable battery may become warm during charging.
- Use only the NC-6WM or NC-5WM rechargeable battery with the supplied battery charger.
- Do not use the battery charger near a receiver. If you do so, it may interfere with the receiver.
- Detach the rechargeable battery from the battery charger when the indicator goes off. Overcharging (for more than 20 hours) may damage the battery.
- Do not short circuit the battery connecting points of the unit when the rechargeable battery is inserted.
- If the rechargeable battery is new or has not been used for a long period of time, it may not be charged completely. (The playing time is shorter.) The battery will be charged fully after it is used several times.
- Remove the rechargeable battery if it is inserted before using the unit on an external power source. Otherwise, the rechargeable battery may be damaged.
- The rechargeable battery can be recharged approx. 300 times.
Inserting the Rechargeable Battery to the Unit
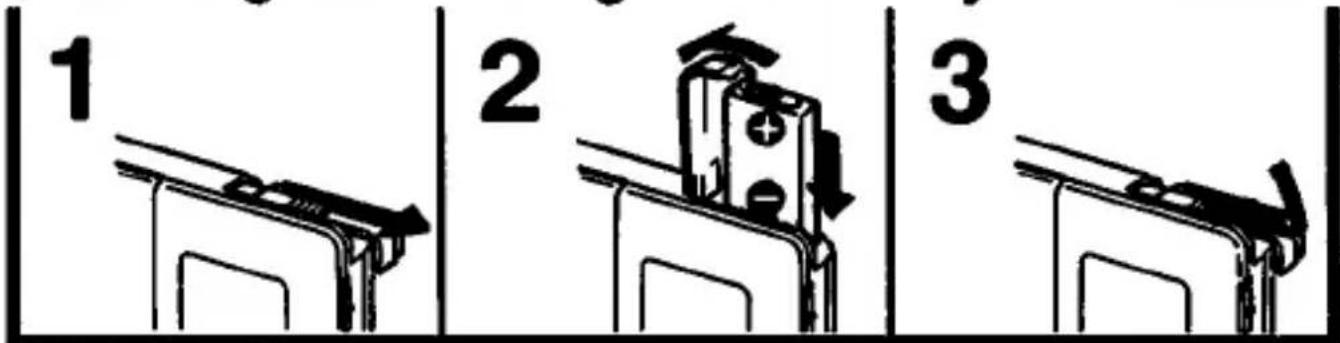
text_image
1 2 3Using with a Dry Battery
Attaching the Battery Case
Attach the battery case to the unit and then insert a dry battery to the battery case.

text_image
① Align the connecting points. Main unit (rear)② Tighten the screws to the "LOCK" side. (To detach the battery case, loosen the screws to the "RELEASE" side.)
Inserting the Battery
① Open the battery compartment lid.
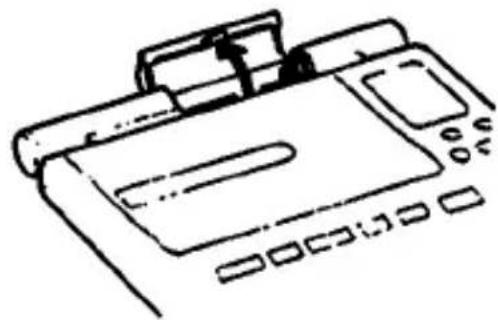
natural_image
Line drawing of a printer with paper lid and control panel (no text or symbols)② Insert the battery.
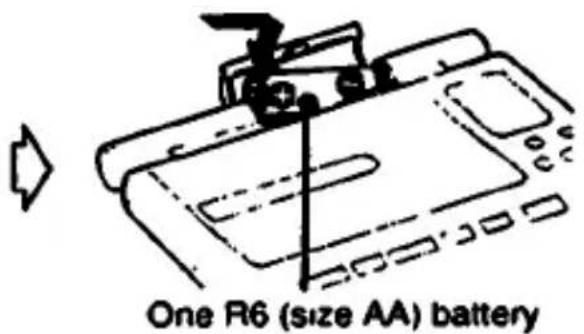
text_image
One R6 (size AA) batteryWhen the battery becomes weak
When the battery is weak, the beep tone will be heard (8 beeps), and the unit will stop, then the "BATT" indication will flash. In this case, charge the rechargeable battery or replace the dry battery.
Notes
- Make sure that you insert the battery only after you have attached the battery case to the unit. Otherwise the unit may not operate properly. Should this happen, remove the battery and the battery case and re-attach them in the correct manner after making sure that the LCD display has disappeared.
- Do not short circuit the terminals of the battery case when the battery is inserted.
- Insert the battery with the correct polarity.
- When the unit is not to be used for a long period of time, remove the battery to avoid damage caused by battery leakage and subsequent corrosion.
- It can be dangerous if the positive and negative terminals of a dry battery or the rechargeable battery are accidentally connected by a metallic object as this can generate heat: do not carry them in your pocket etc. with coins or other metallic objects.
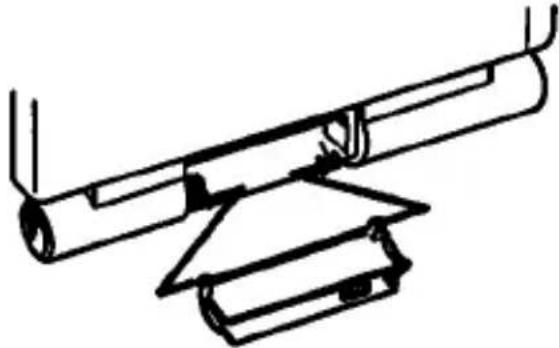
- When the battery compartment lid is detached accidentally, attach it as illustrated.
natural_image
Pure technical line drawing of a mechanical assembly without any text, numbers, or symbolsUsing on External Power Sources
Connect the AC-E15L AC power adaptor (not supplied) to the DC IN 1.5 V jack of the battery case.
Notes
- Remove the rechargeable battery or the dry battery if it is inserted before using the unit. Otherwise, the rechargeable battery will be damaged.
- Use only the AC-E15L AC power adaptor (not supplied). Do not use any other AC power adaptor.
natural_image
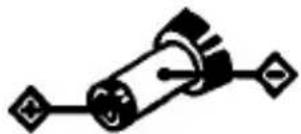
Pure electrical circuit lines without any symbolsPolarity of the plug
(Unified polarity type)
Tape Playback
1 Connect the supplied remote controller firmly to the REMOTE/Ω jack and set the REMOTE switch to "ON", and release the HOLD switch of the main unit and remote controller.
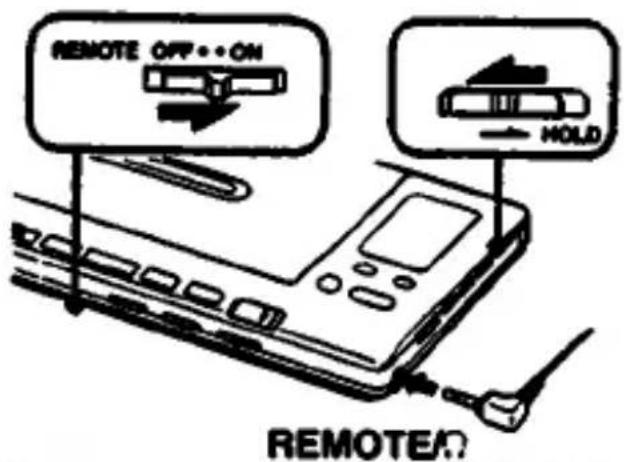
text_image
REMOTE OFF • • ON HOLD REMOTE/Ω2 Insert the cassette.
Slide the OPEN switch to the direction of the arrow to open the cassette holder.
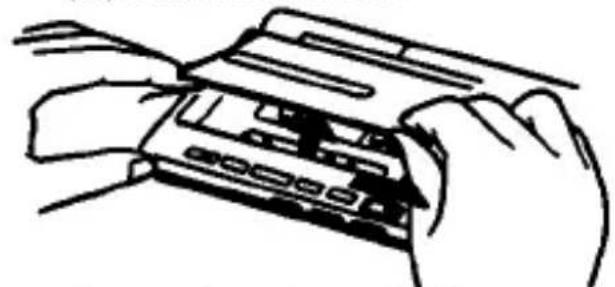
natural_image
Line drawing of two hands inserting a card into a device (no text or symbols)Insert the cassette.
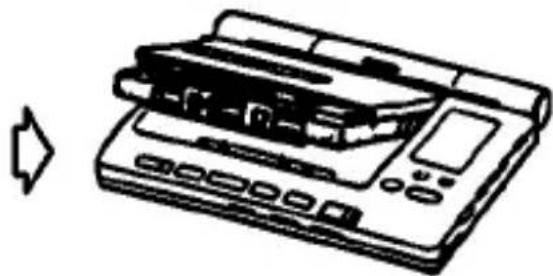
natural_image
Line drawing of a printer with a paper roll and control panel (no text or symbols)Do not slide the OPEN switch while the tape is moving.
3 Press the PLAY/DIR button and adjust the volume.
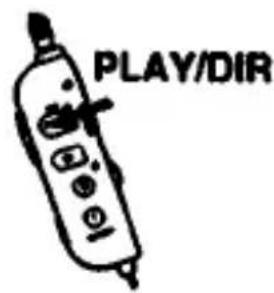
text_image
PLAY/DIR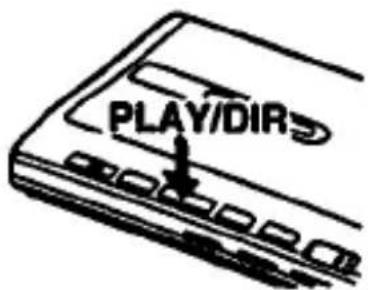
text_image
PLAY/DIRKeep the volume level of the main unit at around 6, and that of the remote controller at maximum.
Tape Operation
| Operating with the main unit | Operating with the remote controller | |
| To listen to the other side of the cassette during playback |  |  |
| To stop the tape |  |  |
| To fast forward the tape rapidly* |  |  |
| To rewind the tape rapidly* | REVIEW |  |
| To locate a desired section of the tape | To advance Keep the FF/CUE button pressed during playback, then release the button at the desired section. Keep the FF/CUE button pressed during playback, then release the button at the desired section. | |
To rewind Keep the REW/REVIEW button pressed during playback, then release the button at the desired section. Keep the REW/REVIEW button pressed during playback, then release the button at the desired section. | ||
| LCD indication | |
| Forward side | Reverse side |
Note
If the AC power adaptor is disconnected or the rechargeable battery or the dry battery is removed during tape playback or recording, you will not be able to open the cassette holder. In this case, connect the AC power adaptor or insert the rechargeable battery or the dry battery again while the "BATT" indication is flashing.
- Press the FF/CUE or REW/REVIEW button when the unit is in the stop mode.
During Playback - Repeat Function
| LCD indication | |
| Forward side | Reverse side |
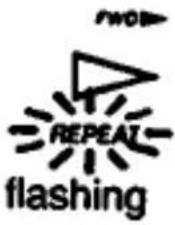 | 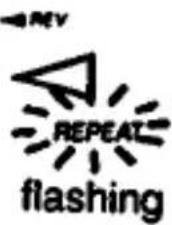 |
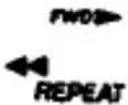 | 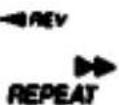 |
 |  |
 | 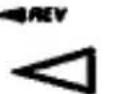 |
| REPEAT | REPEAT |
Tape Playback
Beep Tones
When you press a button or while the unit is in operation, a beep will be heard to let you know which operation is now being carried out.
| Beep patterns | |
| The FWD side starts playback. | - |
| The REV side starts playback. | -- |
| The FF/CUE or REW/REVIEW button is pressed. | - |
| When you set the repeat section. | - |
| At the end of the tape | — |
| Stop | - |
| The rechargeable battery or dry battery is exhausted. | ---- (8 beeps) |
HOLD Switch
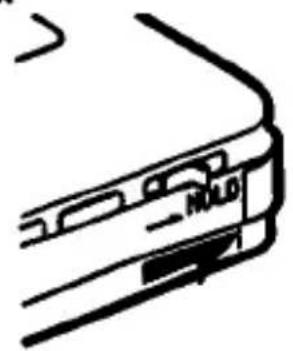
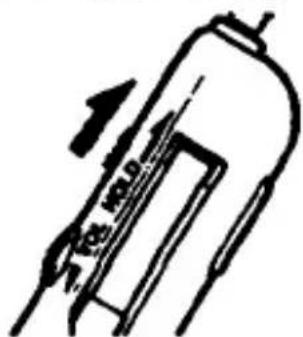
Slide the HOLD switch to the direction of the arrow to avoid accidental operation of the unit or remote controller. You can operate the unit with the remote controller when the HOLD switch of the main unit is set and you can operate the unit with its buttons when the HOLD switch of the remote controller is set.
Main unit
natural_image
Simple line drawing of a car front panel with no text or symbolsRemote controller
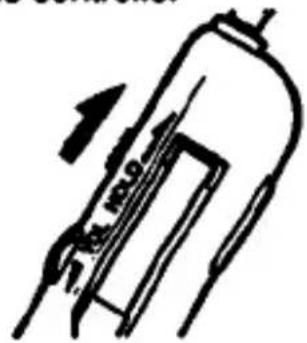
text_image
1.0 2.0Radio Reception
Insert the supplied lithium battery before using the unit for the first time (see "Inserting the Lithium Battery"), and connect the supplied remote controller and release the HOLD switch (see step 1 of "Tape Playback").
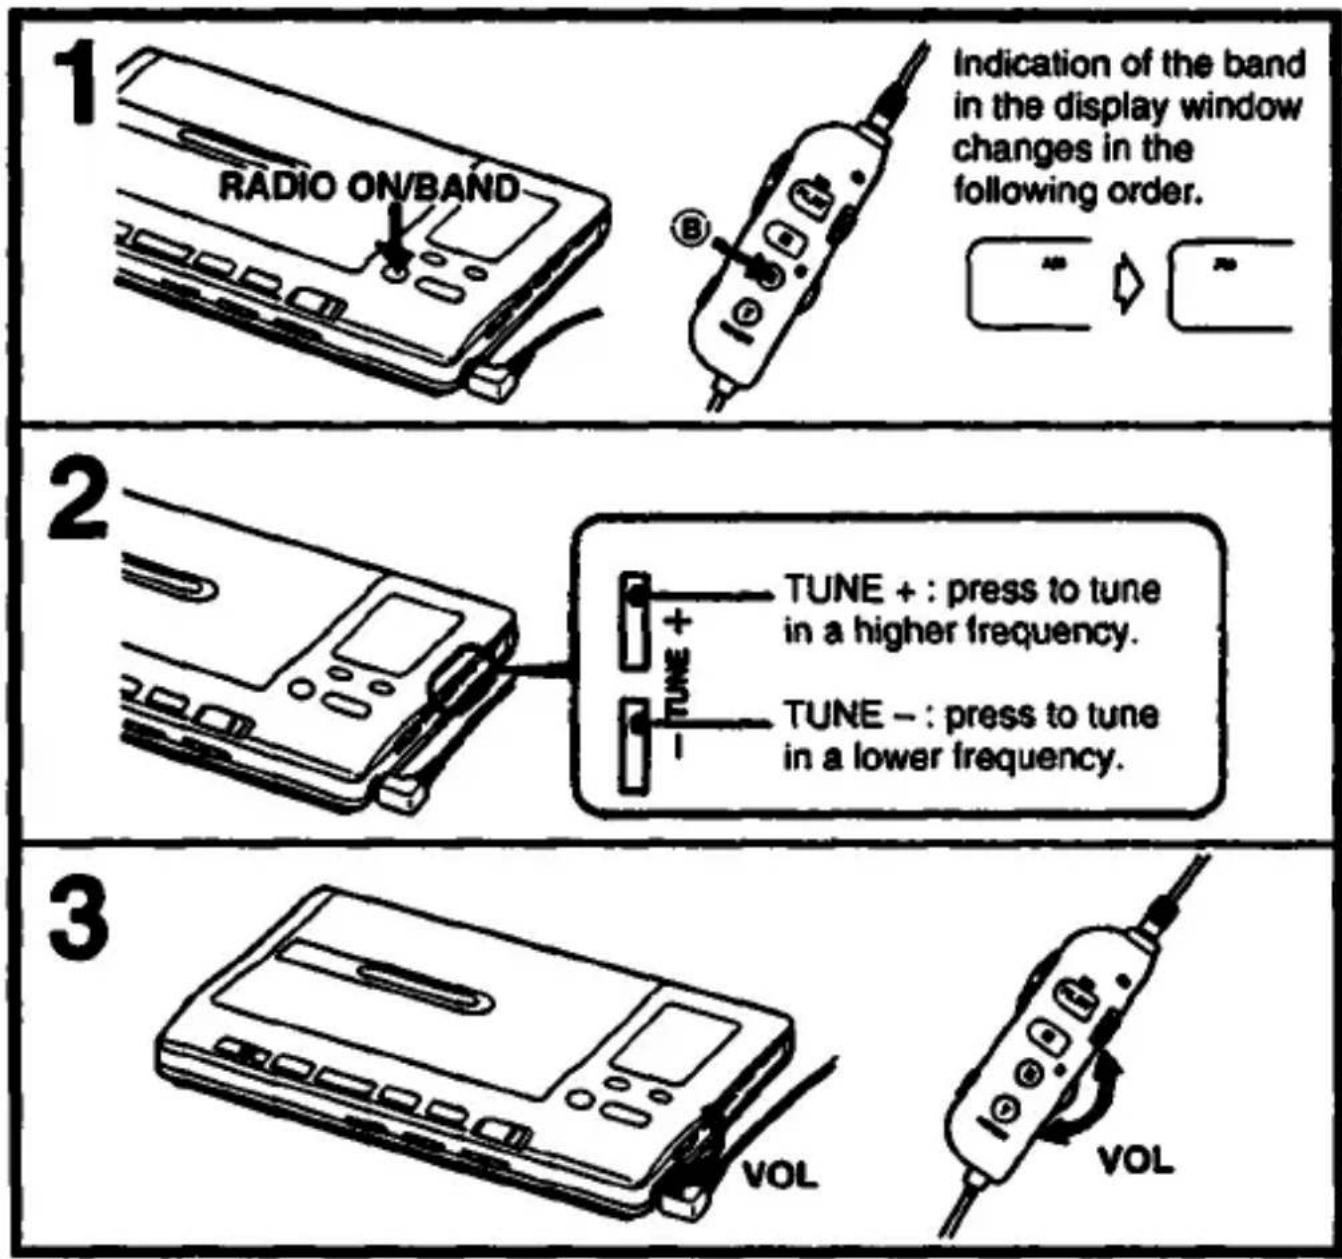
Indication of the band in the display window changes in the following order.
TUNE + : press to tune in a higher frequency.
TUNE – : press to tune in a lower frequency.
Display window
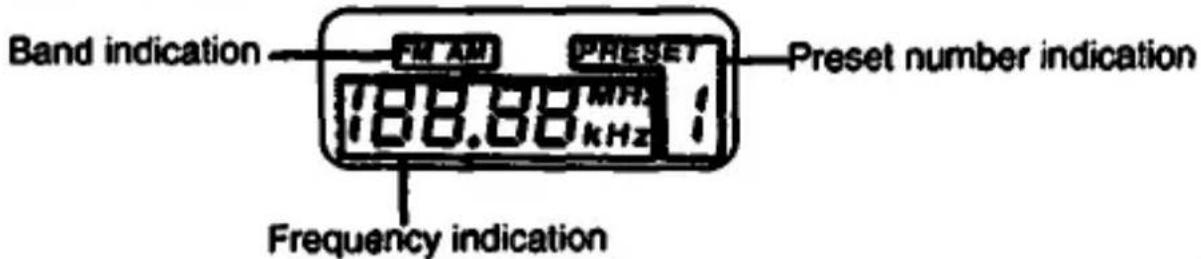
text_image
Band indication FM AM PRESET 188.88 MHz kHz Frequency indication Preset number indicationRadio Reception
To turn off the radio
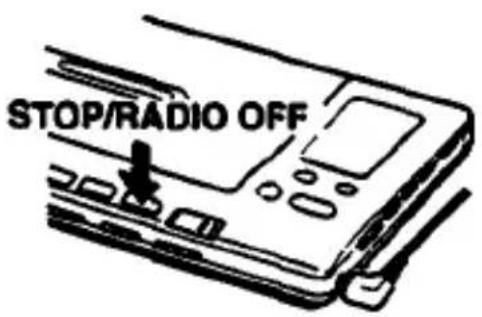
text_image
STOP/RADIO OFF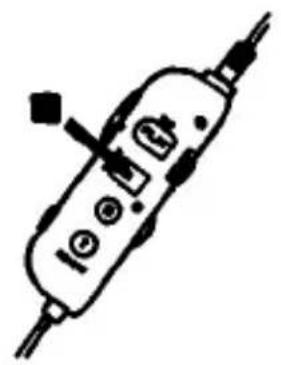
natural_image
Simple line drawing of a handheld electronic device with ports and cables (no text or symbols)Seeking scan
Press either of the TUNE buttons for a second, then release it. The frequency goes up or down automatically and each station can be heard. When a desired station is heard, press the TUNE button again to stop the scanning.
Fast scan
Keep either of the TUNE buttons pressed for more than 1.5 seconds. The frequency goes up or down quickly. When it comes up to your desired station, release the button. When a desired station is heard, press TUNE button again to stop the scanning.
Last channel memory
The currently tuned in station will be memorized when the radio is turned off. The same station will be automatically tuned in when the radio is turned on again.
When the FM Reception is Poor
FM SENS (LOCAL/DX) selector (U.S.A.)
For FM reception, normally set the selector to "DX". If a very strong station signal causes noise, set it to "LOCAL". The noise will be reduced.
FM MODE (MONO/ST) selector (Other countries)
For FM reception, normally set the selector to "ST". Set it to "MONO" when it is hard to listen to a station due to interference. The reception will be more stable and noise will be reduced. In this mode, there is no stereo effect.
Recording
Use the normal (TYPE I) tapes for recording.
| Recording with the Built-in Microphones | Recording from the Built-in Radio |
| Attach the battery case to the unit as the microphones are built in the battery case. | 1 Connect the remote controller to the REMOTEΩ jack.2 Receive the desired station.(See pages 19 and 28.) |
1 Insert the cassette.
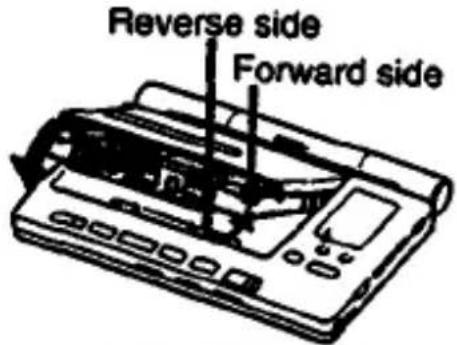
text_image
Reverse side Forward side| The side to start | Display window | |
| Recording on both side | Forward side | FWD▶ |
| Recording on one side only | Reverse side | ◀REV* |
• To indicate ▶ REV, press the PLAY/DIR button twice and then press the STOP button after inserting the cassette.
Slide the REC switch to the direction of the arrow.
(The REC switch returns to the original position after sliding to the REC position.)
Main unit
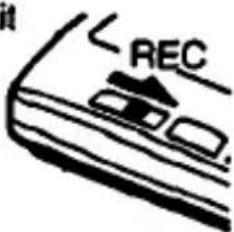
text_image
RECRemote controller
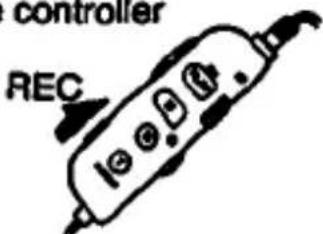
text_image
controller RECRecording
Notes
- Do not use CrO2/metal (TYPE II/TYPE IV) tapes for recording. If you do so, the sound may become distorted.
- Make sure that the small record-protect tabs on the back of the cassette are not broken off.
- You can record with an external microphone (not supplied) by connecting it to the MIC jack. (When the external microphone is connected to the MIC jack, the built-in microphones will not activate.)
Reaching the end of the tape during recording
When you start the recording on the forward side and the end of the tape is reached, the recording will automatically start on the reverse side. At the end of the reverse side, the tape transport will stop.
To prevent accidental erasure
Break off the small record-protect tab on the side which you wish to protect. To record on the side after the tab has been removed, simply cover the slot with a plastic tape.
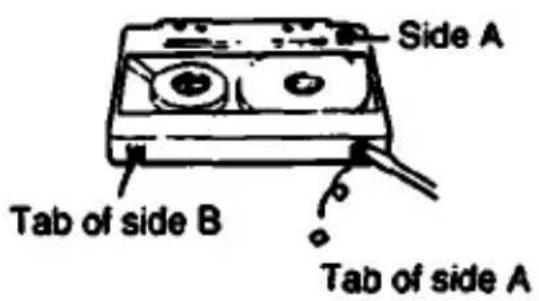
text_image
Side A Tab of side B Tab of side A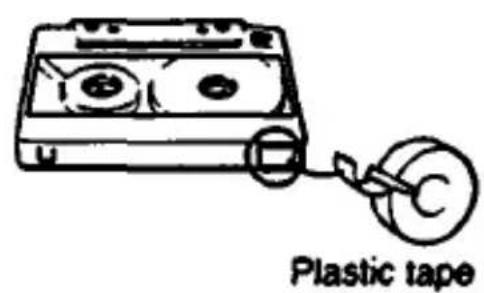
text_image
Plastic tapeReducing the Noise during AM Recording
If a whistling noise is heard, which was inaudible before the REC switch was moved, set the ISS switch on the side panel to 1,2 or 3, depending on which one best reduces the noise.
Notes
- While recording, all buttons cannot be operated except for the STOP button.
- The HOLD switch of the main unit does not function for the ■ button of the remote controller.
- When recording the FM programs, the headphones must be plugged in. The cord of the headphones activates as an antenna.
- Slide the REC switch approx. two seconds before the start of the program to be recorded, or the beginning section will be missed.
- The REC switch can only be operated when the unit is in the stop mode or radio reception mode.
- The tape transport mode set by the MODE switch will automatically changed to "→" when you slide the REC switch.
• The DOLBY NR selector does not function when recording. - Use a new dry battery or the fully charged rechargeable battery for recording.
- Make sure that the headphones volume is not set too high, or a howling effect may occur.
- Do not record with the built-in microphones near a lamp cord or a fluorescent lamp in order to avoid noises being picked up.
- Set the EX DBB selector switch to NORM when monitoring the sound being recorded with the built-in microphones.
How to Set the Clock
Before setting the clock, make sure that the lithium battery is securely placed in the battery compartment.
Example: Setting the clock at 2:05 p.m. in 12-hour display.
| 1 | Press the CLOCK button for more than 3 seconds until the hour digit(s) start(s) flashing. | 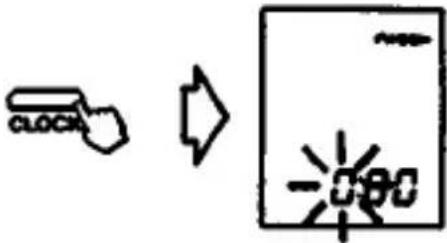 |
| 2 | Set the hour with the - or + button. When either of these buttons is kept pressed, the digit(s) will advance rapidly. | 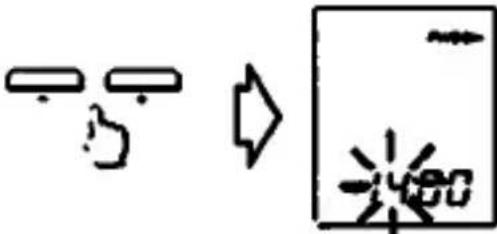 |
| 3 | Press the CLOCK button to enter the hour. | 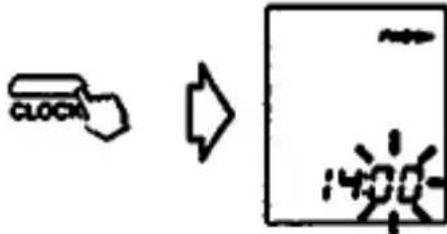 |
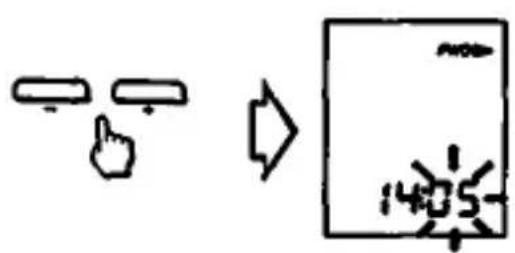
4 Repeat step 2 to set the minute.
flowchart
graph TD
    A["Input Icon"] --> B["Process Box"]
    C["Input Icon"] --> B
    B --> D["1405"]
5 Press the CLOCK button again to activate the clock.
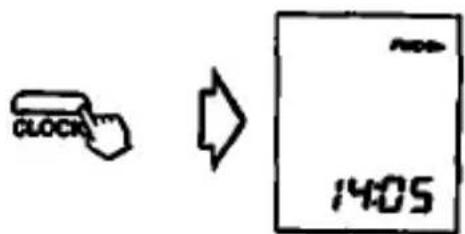
text_image
clock 14056 Choose either the 12-hour display or 24-hour display by pressing either the + or - button.
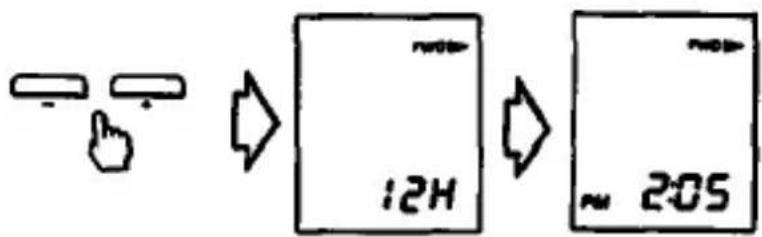
flowchart
graph TD
    A["Hand icon"] --> B["Button with '12H'"]
    B --> C["Output box with '205'"]
You can change the display to 12-hour or 24-hour display even after the clock has been set.
Memory Preset Tuning
Storing Stations Manually
Proceed with steps 4 to 6 quickly as steps 4 and 5 will be cancelled if you do not proceed to next step within 4 seconds.
| 1 | 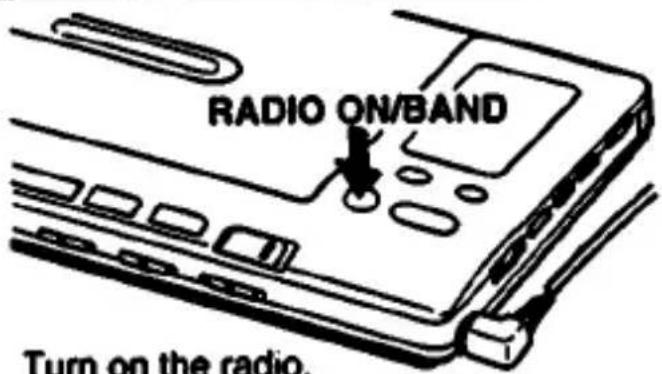 | Example:To memorize FM104.1 MHz on thepreset number 4. |
| 2 | 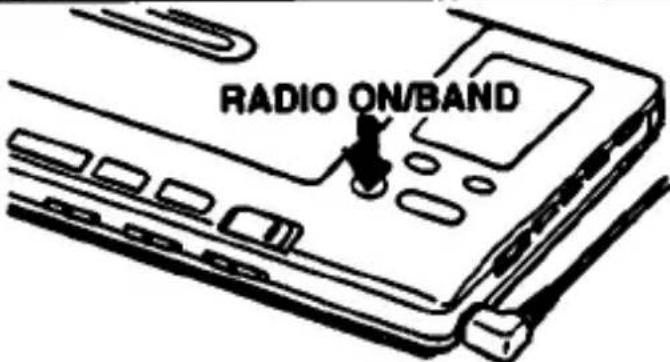 Select the band (AM or FM). Select the band (AM or FM). | 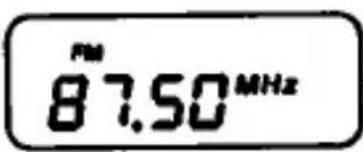 |
| 3 | 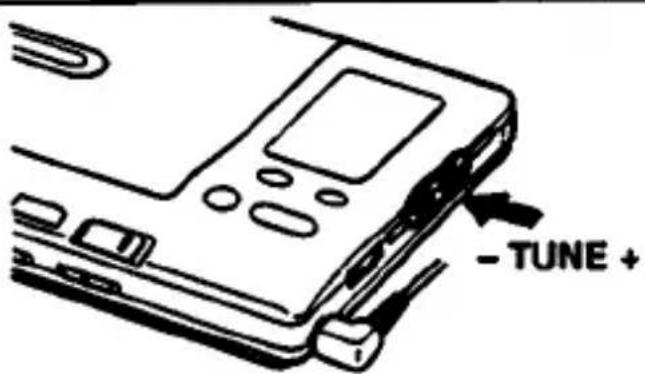 Tune in a desired station that youwish to store. Tune in a desired station that youwish to store. | 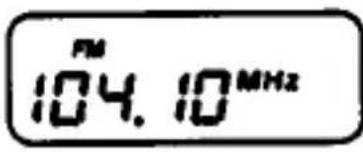 |
| 4 | 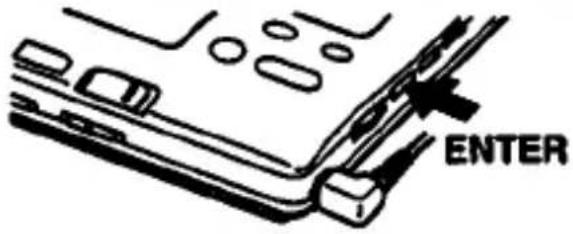 The "PRESET" indication and a preset number will flash for approx. 4 seconds. The "PRESET" indication and a preset number will flash for approx. 4 seconds. | 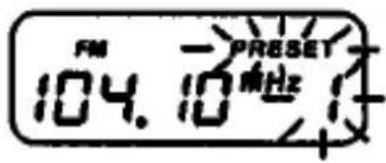 |
| 5 | 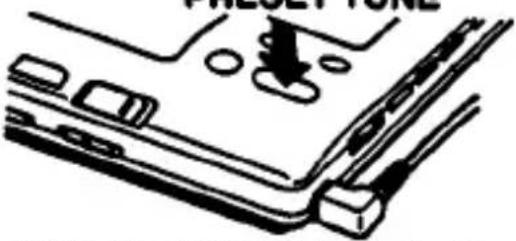 While the "PRESET" indication is flashing, select a desired preset number on which you wish to store until it is shown in the display window. While the "PRESET" indication is flashing, select a desired preset number on which you wish to store until it is shown in the display window. | 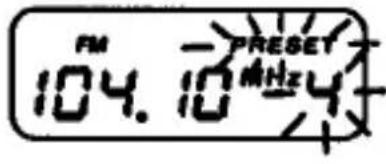 |
| 6 |  Now the station is stored. Now the station is stored. | 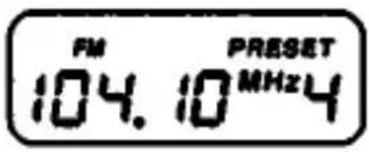 |
Repeat steps 1 to 6 for AM and FM.
To turn off the radio, press the STOP/RADIO OFF button.
Notes
- Proceed above mentioned steps with the main unit. (You cannot use the remote controller.)
- When the "PRESET" indication and a preset number stop flashing before you store the station, repeat steps 4 to 6. The indication will continue to flash only for 4 seconds.
Tuning in a Preset Station
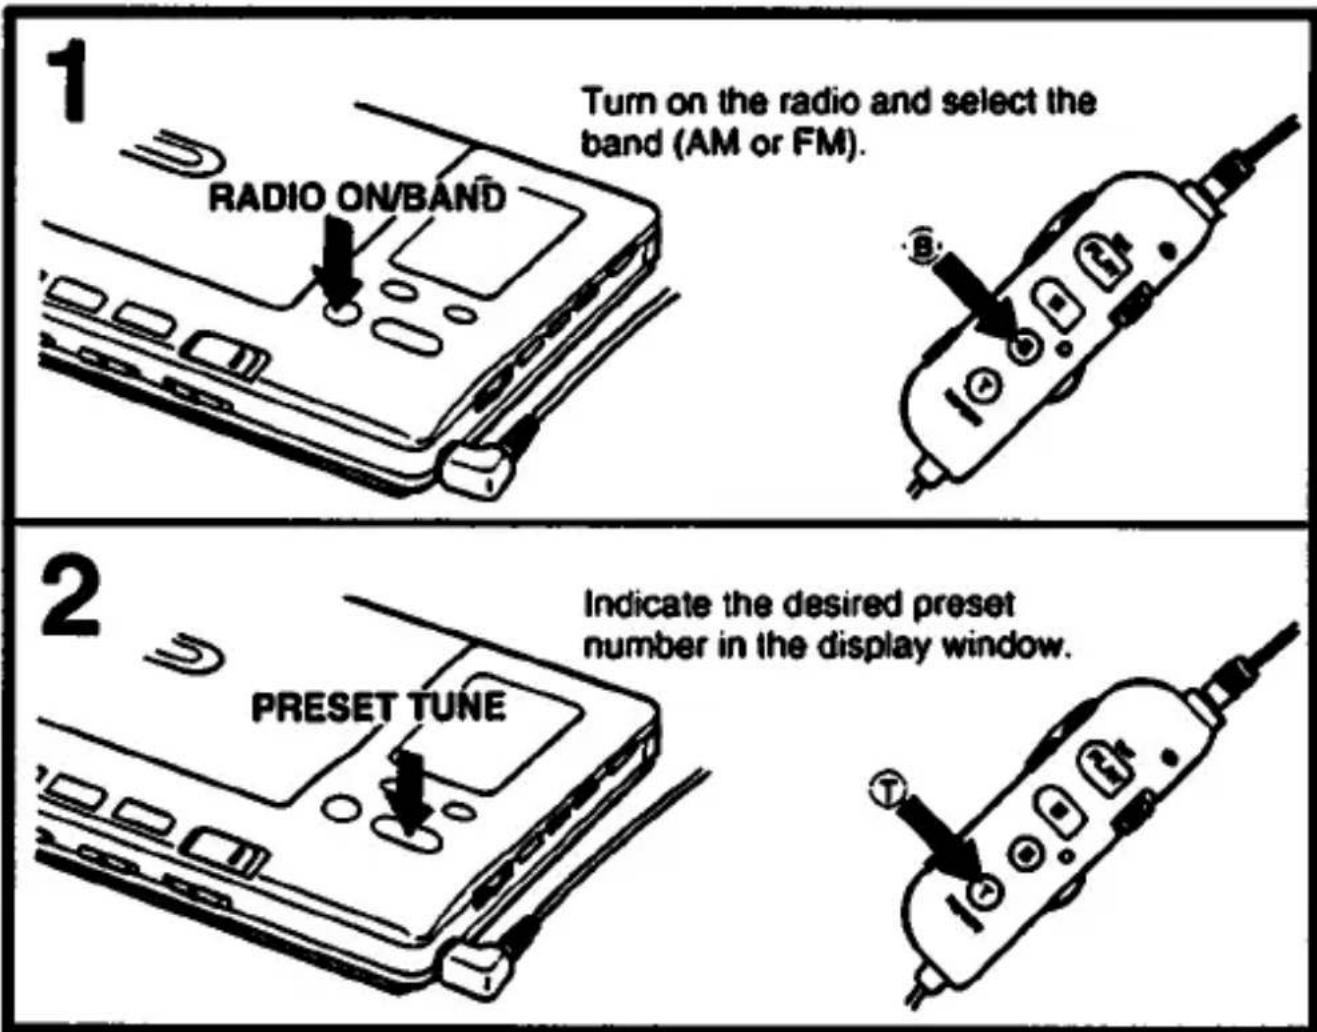
text_image
1 Tum on the radio and select the band (AM or FM). RADIO ON/BAND 2 PRESET TUNE Indicate the desired preset number in the display window.If you keep the PRESET TUNE button on the main unit or the Ⓤ button on the remote controller pressed for more than 1 second, the preset number returns to "1" with the beep tone.
To turn off the radio, press the STOP/RADIO OFF button.
Beep tone
You can hear the beep tone when you press the RADIO ON/BAND button or PRESET TUNE button during radio reception.
Improving Receiving Condition
FM: Since the headphones cord serves as an FM antenna, extend it for better reception.
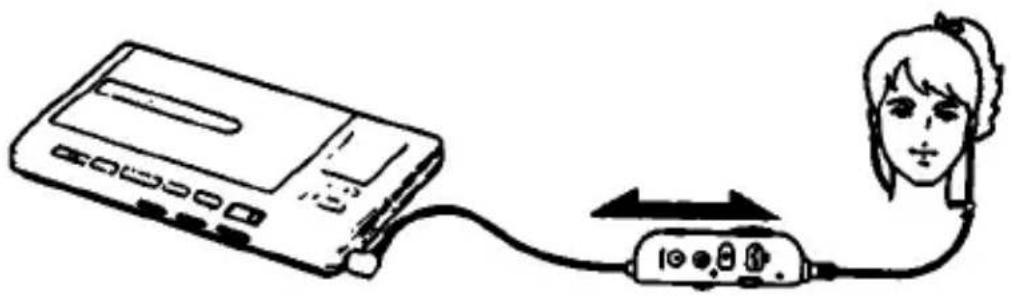
text_image
Diagram showing connection between a CD and a device with a person's face, labeled in English.Note
Remove the cassette tape inside the unit if it has metallic cassette shell or metallic labels. Such cassettes may cause interference or difficulty in tuning.
AM: Since the reception is affected by the direction of the unit, rotate the unit horizontally for optimum reception.
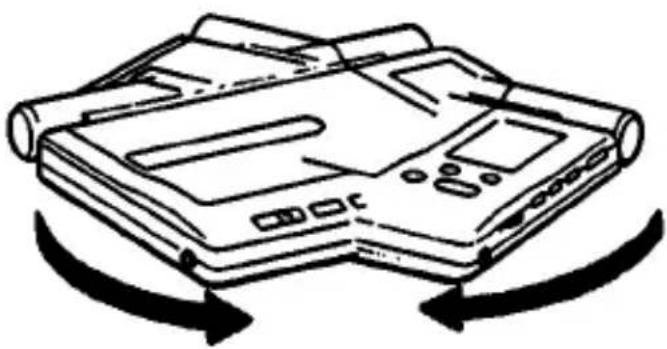
natural_image
Line drawing of a computer monitor with scroll and keyboard, showing bidirectional arrow (no text or symbols)Tuning in a Preset Station
Using the Unit in Other Countries
Radio frequency ranges can be changed when you use this unit in other countries.
For the customers in the U.S.A.
1 Insert the lithium battery and a dry battery or the rechargeable battery.
2 When using in Japan
Press the TIMER button and the TUNE + button on the main unit at the same time for more than 3 seconds.
The radio frequency ranges will change to FM: 76 - 90 MHz/
AM: 531 - 1,710 kHz.
When using in other countries
Press the PRESET TUNE button and TUNE + button on the main unit at the same time for more than 3 seconds.
The radio frequency ranges will change to FM: 87.5 - 108 MHz/AM: 531 - 1,602 kHz.
For the customers in other countries
1 Insert the lithium battery and a dry battery or the rechargeable battery.
2 When using in Japan
Press the TIMER button and the TUNE + button on the main unit at the same time for more than 3 seconds.
The radio frequency ranges will change to FM: 76 - 90 MHz/AM: 531 - 1,710 kHz.
When using in U.S.A.
Press the PRESET TUNE button and TUNE + button on the main unit at the same time for more than 3 seconds.
The radio frequency ranges will change to FM: 87.5 – 108 MHz/AM: 530 – 1,710 kHz.
Returning to the original frequency range
Press the STOP/RADIO OFF button and the TUNE + button on the main unit at the same time for more than 3 seconds or remove the lithium battery.
Notes
- Proceed above mentioned steps when the unit is in the stop mode.
• After you have changed the frequency ranges of the AM and FM bands, the memories of the stations you have stored before changing the frequency ranges will be cancelled.
Timer-Activated Recording
1 Turn on the radio and receive the desired station (see pages 19 and 28).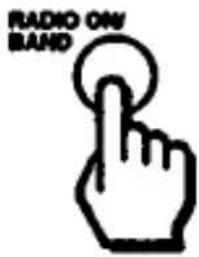 | 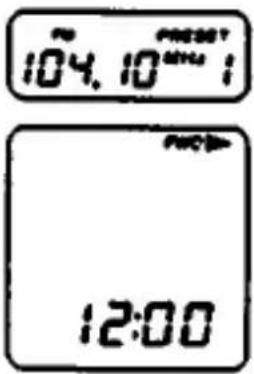 Current time Current time |
| 2 Insert a cassette. | |
3 Press the TIMER button. | 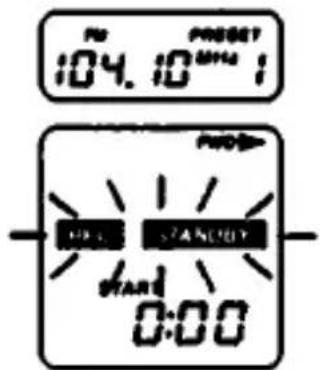 |
4 Set the starting time.1Press the ENTER/CLOCK button. | 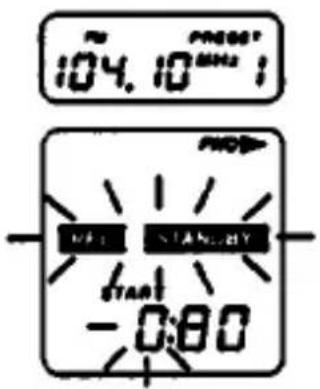 |
② Set the hour with the - TUNE + buttons.
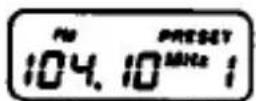
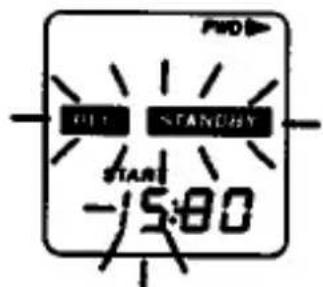
text_image
PUD PUD STANDAY STAR -15:00③ Press the ENTER/CLOCK button.
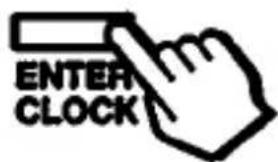
text_image
ENTER CLOCK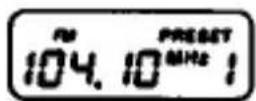
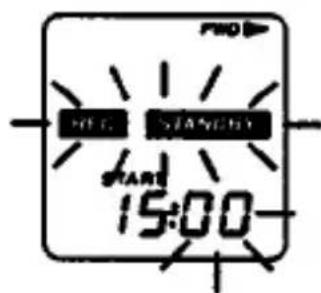
text_image
PUD PUD STANLEY START 15:00④ Set the minute with the - TUNE + buttons.
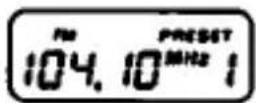
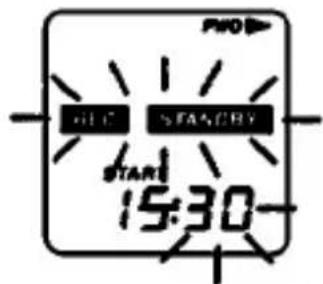
text_image
PNO FIRE SANSORY START 15:30⑤ Press the ENTER/CLOCK button.
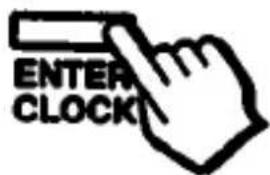
text_image
ENTER CLOCK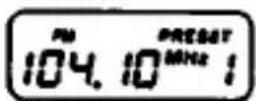
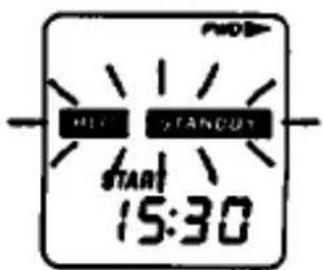
text_image
HILL TANCOU START 15:30Timer-Activated Recording
5 Set the ending time.
① Press the TIMER button.
text_image
TIMER② Repeat steps ① to ⑤ described in step 4.
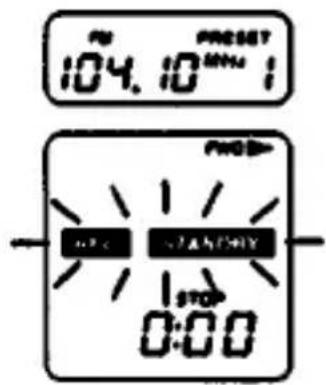
text_image
PRESET 104.10 PRESET 1/1 STOPS STOP 0:00Press the TIMER button.
The unit will enter the standby mode for the timer-activated recording.
text_image
TIMER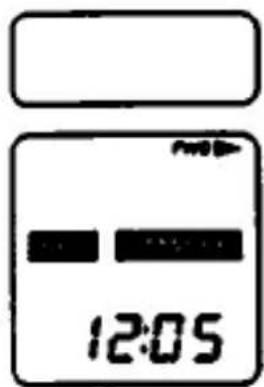
text_image
12:05Current time
Notes
- Before setting the recording time, check if the clock is set accurately.
- Before inserting a cassette, check that the small record-protect tabs on the back of the cassette are not broken off.
- If the cassette holder is open when you are setting the timer-activated recording, the unit will not enter the standby mode.
Using the timer-activated recording with the previously set time
Unless the timer is reset, the time previously set will remain in effect. You do not to reset the recording time when you want to record at the time previously set.
1 Press the TIMER button to check the starting time.
2 Press the TIMER button again to check the ending time.
3 Press the TIMER button once more.
The unit will enter the standby mode for the timer-activated recording. If you want to record at the same time everyday, repeat the above steps everyday.
Cancelling the standby mode
Choose from the methods mentioned below.
- Press the STOP button.
- Open the cassette holder.
- Press the TIMER button. The unit will receive radio programs.
Cancelling the timer-activated recording
Press either the STOP or TIMER button. In this case, the unit will not activate the radio.
Precautions
Notes on headphones
Road Safety
Do not use headphones while driving, cycling, or operating any motorized vehicle. It may create a traffic hazard and is illegal in some areas. It can also be potentially dangerous to play your headsets at high volume while walking, especially at pedestrian crossings. You should exercise extreme caution or discontinue use in potentially hazardous situations.
Preventing hearing damage
Avoid using headphones at high volume. Hearing experts advise against continuous, loud and extended play. If you experience a ringing in your ears, reduce volume or discontinue use.
Caring for others
Keep the volume at a moderate level. This will allow you to hear outside sounds and to be considerate to the people around you.
- Do not drop the unit or give a shock to the unit. Doing so may cause a malfunction of the unit.
- Do not leave the unit in a location near heat sources, or in places subject to direct sunlight, excessive dust, sand, moisture, rain, mechanical shocks, or in a car with its windows closed.
- If the unit has not been used for a long period of time, set it in the playback mode and warm it up for a few minutes before inserting a cassette.
Note on cassettes longer than 90 minutes
The use of cassettes longer than 90 minutes is not recommended except for a long continuous playback.
About the headphones with a remote controller
- The supplied headphones with a micro plug can be detached from the remote controller.
- Be sure to plug in the micro plug firmly, never pull it by the cord in order to detach it from the remote controller.
- The supplied remote controller is to be used with this unit only.
- This unit cannot be operated with headphones supplied to other models though they may have the same plugs as the remote controller supplied to this unit. Also other models cannot be operated with the remote controller supplied to this unit. (But sound can be heard in either case.)
Cautions on the lithium battery
- Keep the lithium battery and the walkman out of the reach of children.
- Should the battery be swallowed, immediately consult a doctor.
If you have any questions or problems concerning your unit that are not covered in this manual, please consult your nearest Sony dealer.
Parts Identification
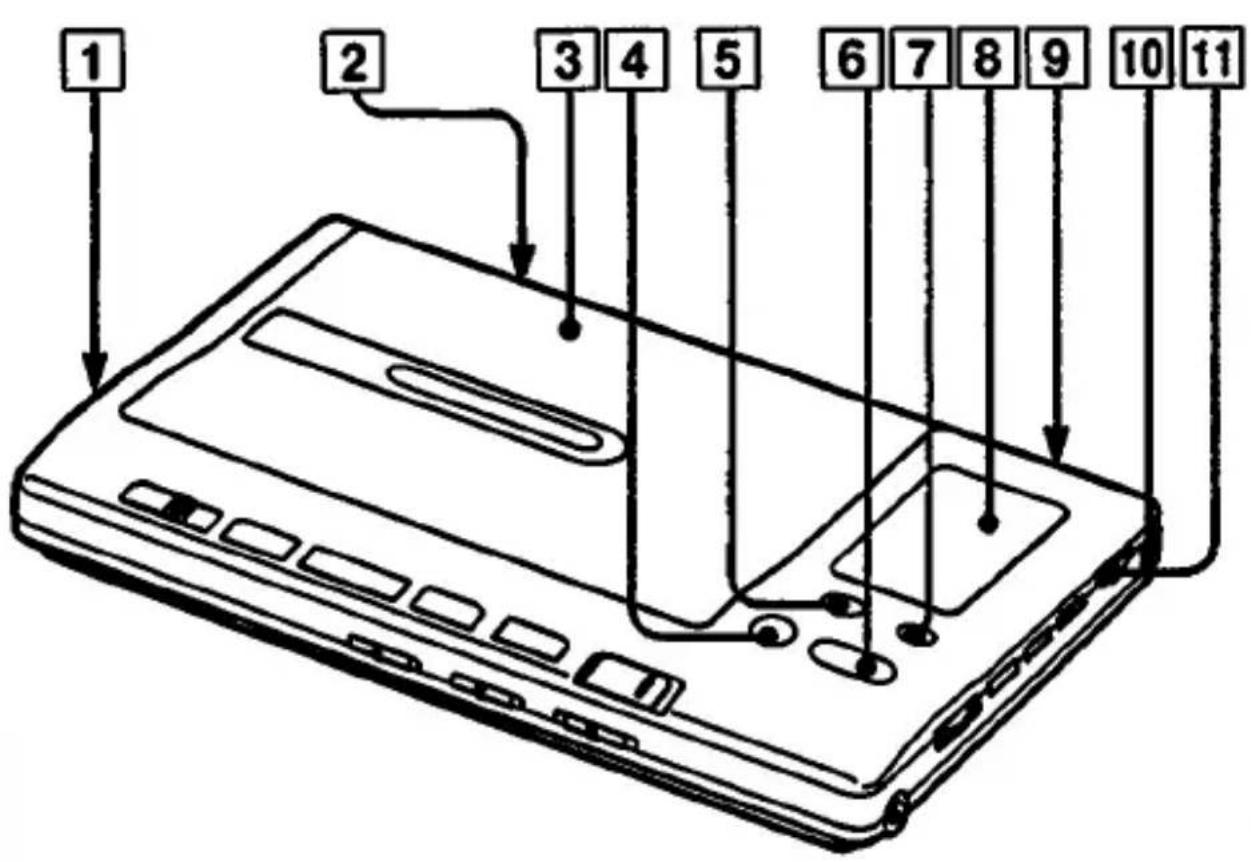
Main Unit
text_image
1 2 3 4 5 6 7 8 9 10 11MIC (microphone) jack (side)
② Battery connecting points (side)
③ Cassette holder
4 RADIO ON/BAND button
5 TIMER button
6 PRESET TUNE/REPEAT button
⑦ COUNTER RESET button
When you press this button, the tape counter will display "000".
8 LCD display window
9 ISS (Interference Suppress Switch) switch (side)
10 Battery compartment lid for rechargeable battery and lithium battery
11 HOLD switch
When you set the switch to the HOLD position, all the buttons will be locked to prevent an accidental pressing of the buttons.
Main Unit
text_image
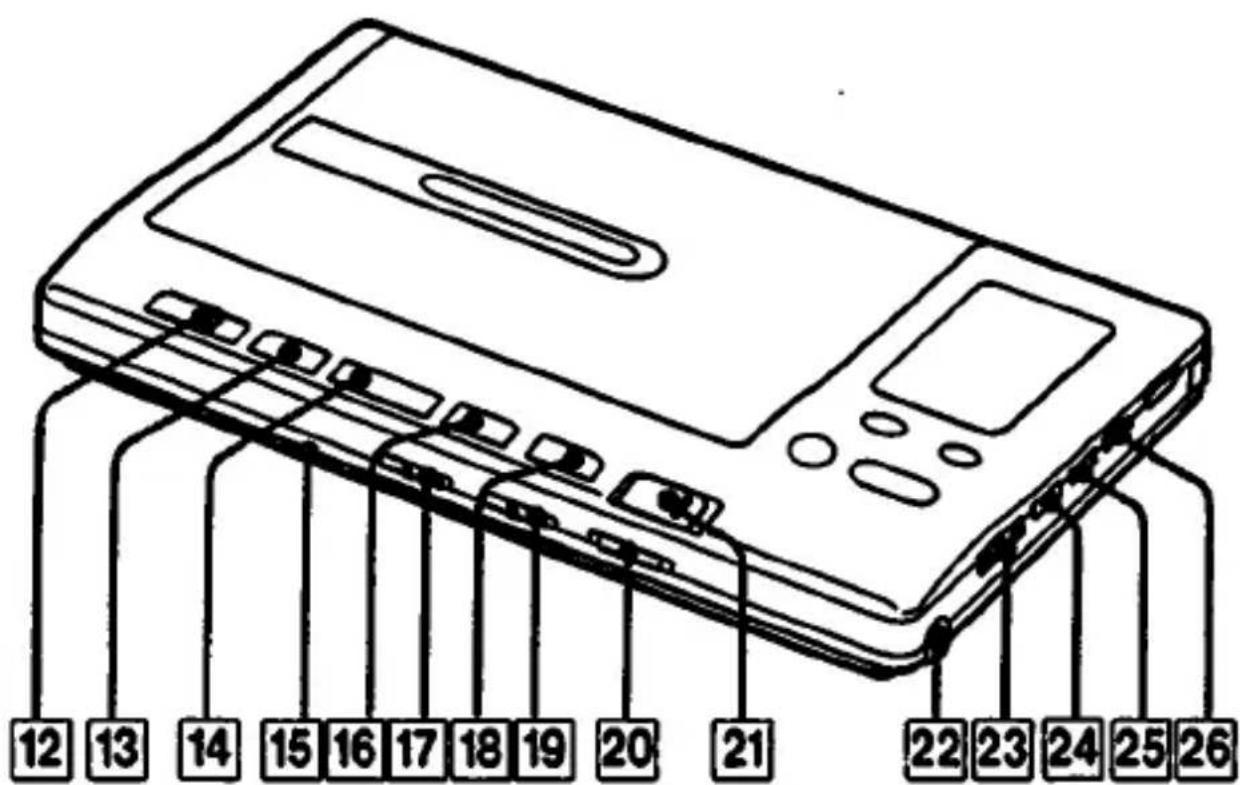
12 13 14 15 16 17 18 19 20 21 22 23 24 25 2612 REC (recording) switch
13 REW/REVIEW (rewind/review) button
14 PLAY/DIR (playback/tape transport direction change) button
15 REMOTE ON/OFF (plug selector) switch
16 FF/CUE (fast-forward/cue) button
17 MODE ➕• ➕ (tape transport)/FM SENS (LOCAL/DX)(U.S.A.) or FM MODE (MONO/ST)(other countries) selector ➕ : Playing back both side of the cassette once ➕ : Playing back both side of the cassette repeatedly.
18 STOP/RADIO OFF button
19 DOLBY NR (Dolby noise reduction) (ON/OFF) selector
20 EX DBB (Mega bass) (NORM/MID/MAX) selector
Set this selector to desired position to listen to heavy and powerful sound.
21 OPEN switch
22 REMOTE/Ω (headphones with remote controller) jack
23 VOL (volume) control
24 ENTER/CLOCK button
25 TUNE -/12H (tuning/12 hour indication) button
26 TUNE +/-24H (tuning/24 hour indication) button
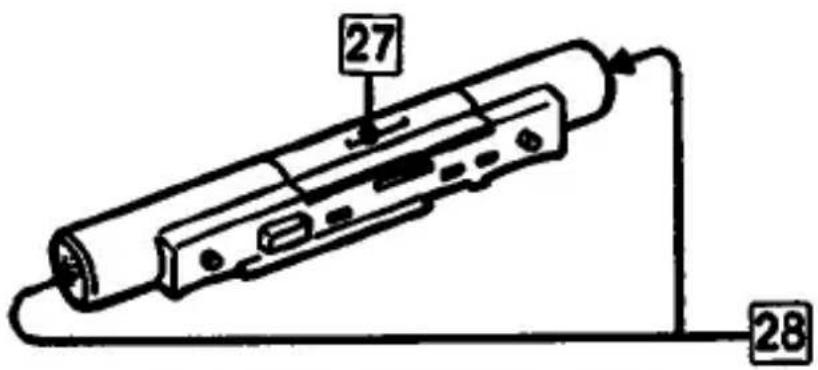
Battery Case
text_image
27 28Stereo Headphones with Remote Controller
Stereo headphones
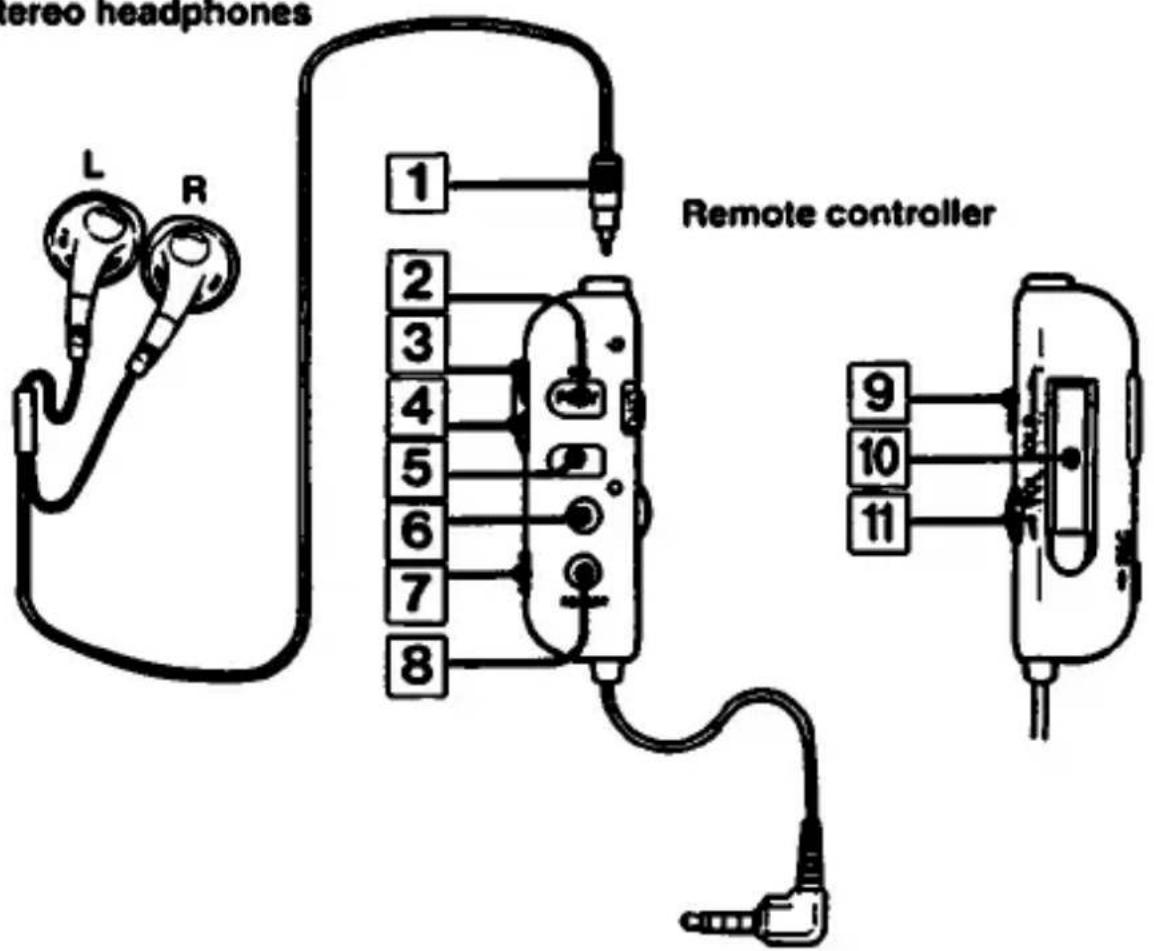
text_image
tereo headphones L R 1 2 3 4 5 6 7 8 Remote controller 9 10 1127 Battery compartment lid for dry battery
28 Built-in stereo microphones (battery case)
① Micro plug
② PLAY/DIR button
3 FF (fast-forward/cue) button
4 REW (rewind/review) button
5 ■ (stop/radio off) button
6 ⑧ (radio on/band) button
7 REC switch
8 ① (preset tune/repeat) button
9 HOLD switch
10 Receiver clip
11 VOL control
Parts Identification
LCD Display
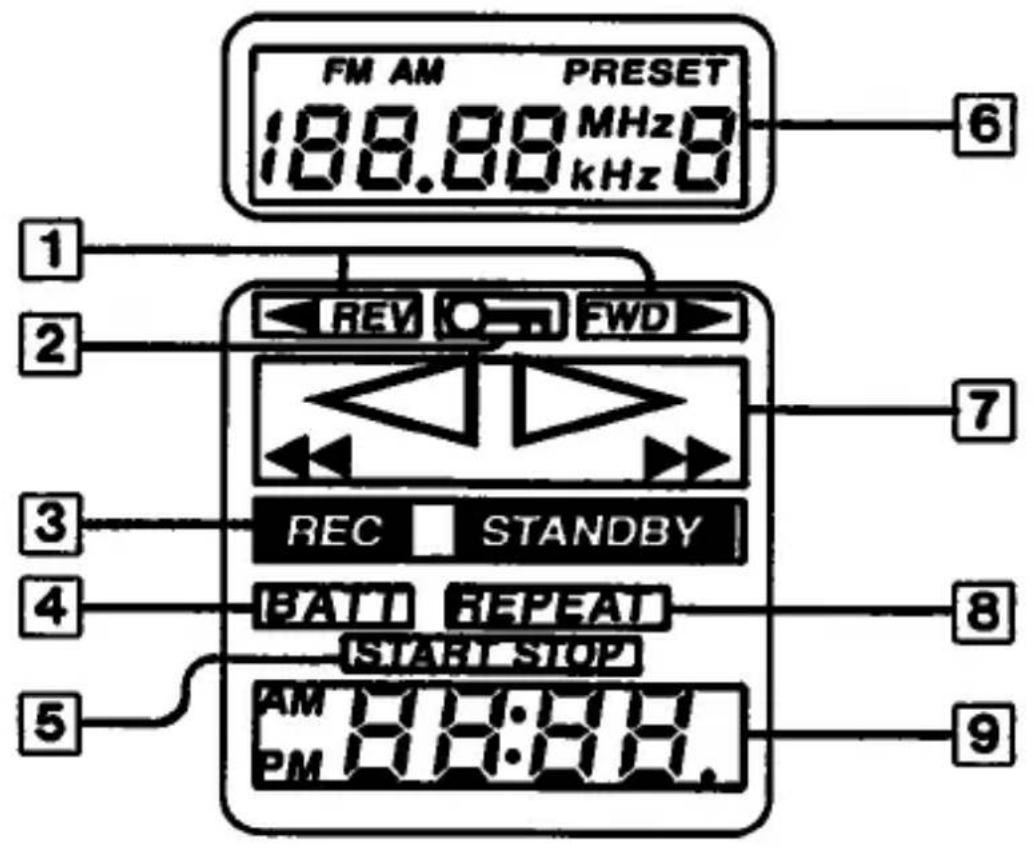
text_image
FM AM PRESET 188.89 MHz 8 kHz 8 REV FWD REC STANDBY BATT REPEAT START STOP AM 11:11 PM 11:11① Tape transport direction indications
FWD ▶ : Forward side
REV : Reverse side
② O-m (HOLD) indication
3 Recording indications
: Appears while standby mode for timer-activated recording
: Appears while recording
4 BATT indication
Flashes when the battery is weak or not inserted
⑤ Starting and ending time for timer-activated recording
START: Flashes while setting the starting time STOP: Flashes while setting the ending time
6 Band and frequency indication of the currently received station (See page 20.)
⑦ Operation indications
◀◀: Play/recording
←: FF/CUE or REW/REVIEW
8 REPEAT indication
9 Clock/Tape counter
While playing the tape, the tape counter will be displayed.
Approximately 3 seconds after the STOP button is pressed, the counter will automatically change to the time display. To have the tape counter temporarily displayed, keep the STOP button pressed.
Cleaning
- Clean the tape heads after every 10 hours of use to enjoy optimum stereo sound. Moisten a cotton swab or a soft cloth with alcohol and wipe the heads, pinch-rollers and the capstans.
- Clean the exterior of the unit with a soft cloth slightly moistened in water. Do not use alcohol, benzine or thinner.
- Clean your headphones plug periodically for optimum sound.
Specifications
Radio section
Frequency range
| U.S.A. | FM: 87.5 – 108.0 MHzAM: 530 – 1,710 kHz |
| Other countries | FM: 87.5 – 108.0 MHzAM: 531 – 1,602 kHz |
Antenna
FM: Headphones cord antenna
AM: Built-in ferrite bar antenna
Tape recorder section and general
Frequency response (DOLBY NR* off)
Tape playback: 30 - 18,000 Hz
Recording/tape playback: 150 - 8,000 Hz
Input External microphone input (stereo minijack): sensitivity 0.4 mV for low impedance microphone
Output Headphones (stereo minijack): load impedance 8 - 300Ω
Power output 5 mW + 5 mW (16Ω) (at 10% harmonic distortion)
• Dolby noise reduction manufactured under license from Dolby Laboratories Licensing Corporation.
"DOLBY" and the double-D symbol are trademarks of Dolby Laboratories Licensing Corporation.
Specification
Battery life
(Approximately hours)
| Battery | Playback | Radio reception | Recording with built-in stereo microphone | Recording from the built-in radio |
| Rechargeable NC-6WM fully charged | 3.5 | 5.5 | 3 | 1.5 |
| Sony SUM-3 (NS) | 3 | 5.5 | 2.5 | 1 |
| Sony AM3 (N) | 10 | 15 | 9 | 5 |
| Rechargeable NC-6WM with Sony AM3 (N) | 13 | 20 | 12 | 7 |
For a maximum performance we recommend the use of an alkaline battery.
Power requirements
1.5 V DC
Rechargeable battery
One R6 (size AA) battery
DC IN 1.5 V jack accepts:
Sony AC-E15L AC power adaptor (not supplied)
for use on 120 V AC, 60 Hz in the U.S.A., 100 -
240 V AC. 50/60 Hz in other countries.
Dimensions
Approx. 154.2 × 19.9 × 95.4 mm (w/h/d)
(6^1/8×^13/16×3^7/_8in.)
incl. projecting parts and controls, not incl. battery case
Weight
Approx. 315 g (11.2 oz.) incl. rechargeable battery, not incl. other accessories
Accessories supplied
Battery case with stereo microphones (1)
Rechargeable battery (1)
Lithium battery (1)
Battery charger (1)
Stereo headphones with remote controller (1)
Ear adaptors (2) (except U.S.A.)
Carrying case (1)
AC plug adaptor (1) (except U.S.A.):
Use it if the plug of the battery charger does not suit your wall outlet.
Design and specifications subject to change without notice.
Optional accessories
AC power adaptor AC-E15L
Rechargeable battery NC-6WM, NC-5WM
Lithium battery CR2016
Battery charger BC-7AU (U.S.A.), BC-7BT (other countries)
Troubleshooting Guide
| Problem | Cause | Solution |
| The cassette holder will not open. | The power supply is disconnected while the tape is moving. | Connect the power supply. |
| The unit stops operation with the beep tones. | The battery is weak. | Charge the rechargeable battery or replace the dry battery. |
| The rechargeable battery cannot be charged in the high speed mode. | The power in the rechargeable battery still remains. | See page 8. |
| The rechargeable battery or the battery charger becomes warm. | - | This is not a sign of malfunction. |
| The playing time is short when the unit is used with the rechargeable battery. | The rechargeable battery is new or has not been used for a long period of time. | The battery will be charged completely after it is used several times. |
| The playback sound is unstable. | The battery is weak. | Charge the rechargeable battery or replace the dry battery. |
| The volume cannot be turned down completely. | The volume cannot be turned down completely with the VOL control of the remote controller. | Turn the volume down with the VOL control of the main unit. |
| The playback sound is distorted. | · The EX DBB selector is set to "MAX" while playing back hard and stressed sound.· The VOL control of the main unit is set over 8. | · Set the EX DBB selector to "NORM" or "MID".· Adjust the VOL control less than 8. |
| You cannot operate the unit. | The HOLD switch is set.The REMOTE switch is set to "ON" when using a separately sold headphones. | Release the HOLD switch.Set to the REMOTE switch to "OFF".→If there is no sign of recovery after doing these solutions, remove the lithium battery and after the indication goes off, insert it again. |
| The LCD display becomes weak.The clock and the tape counter do not function properly. | The lithium battery is weak. | Replace the lithium battery. |
| The LCD display does not function properly. | — | Remove the lithium battery and after the indication goes off, insert it again. |
| The unit cannot be operated with the use of the battery case. | The battery case is not attached properly. | Attach the battery case properly. |
AVERTISSEMENT
text_image
Pase DC IN 1.5 VPile rechargeable
natural_image
Simple line drawing of a rectangular electronic component (no text or symbols)Chargeur de pile
natural_image
Simple line drawing of a rectangular electronic component or enclosure (no text or symbols)natural_image
Simple line drawing of a medical or electrical device with tubing and connectors (no text or symbols)natural_image
Simple line drawing of a closed notebook or wallet (no text or symbols)natural_image
Pure mechanical diagram showing a lever mechanism without any text, numbers, or symbolsnatural_image
Simple line drawing of a mechanical device with no visible text or symbolsnatural_image
Pure mechanical component diagram without any text, numbers, or symbolsnatural_image
Simple line drawing of a clipboard with a clip and paper (no text or symbols)② Installer la pile.
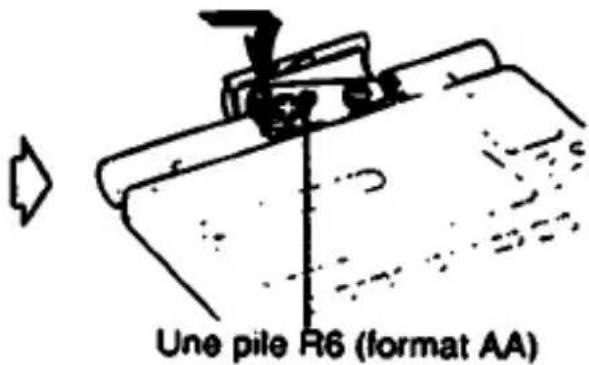
text_image
Une pile R6 (format AA)natural_image
Simple line drawing of a mechanical assembly with no text or symbolsnatural_image
Pure electrical circuit lines without any symbolsnatural_image
Line drawing of hands typing on a keyboard (no text or symbols present)natural_image
Line drawing of a printer with a paper roll and control panel (no text or symbols)text_image
Apparel principal HOLD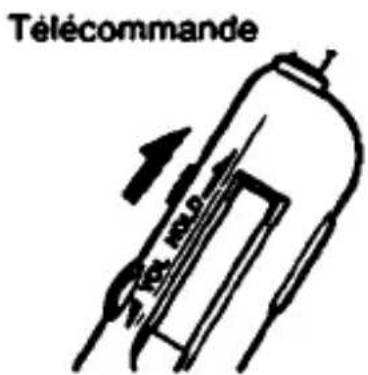
natural_image
Simple line drawing of a square with a central star-like pattern and a horizontal line above it (no text or symbols)text_image
Hand-drawn diagram showing two hand gestures pointing at a target, followed by an arrow pointing to a target box with '1405' and a starburst symbol.text_image
clock 14:05text_image
Diagram showing connection between a device and a person's face via a device with an arrow indicating direction.Remarque
natural_image
Line drawing of a computer monitor with scroll and keyboard, showing bidirectional arrows indicating rotation (no text or symbols)text_image
MOD 12:00Current time
Pile rechargeable ou 1 pile R6 (format AA)
La prise DC IN 1.5 V accepte
Pile rechargeable (1)
Pile au lithium (1)
Pile rechargeable NC-6WM, NC-5WM
natural_image
Simple line drawing of a rectangular electronic device with internal components (no text or symbols)Pila de litio (CR2016)
natural_image
Simple line drawing of a rectangular electronic component (no text or symbols)
natural_image
Simple line drawing of a medical or electrical device with tubing and connectors (no text or symbols)Adaptadores aunculares
Funda de transporte
natural_image
Simple line drawing of a closed notebook with a strap (no text or symbols)natural_image
Pure mechanical diagram showing a lever mechanism without any text, numbers, or symbolsnatural_image
Pure mechanical diagram showing a gear and shaft assembly without any text, numbers, or symbolsnatural_image
Mechanical component diagram showing a bracket with a handle and arrow indicator (no text or symbols)natural_image
Simple line drawing of a printer with a paper roll and paper tray, no text or symbols present② Inserte una pila.
natural_image
Simple line drawing of a mechanical device with a lever and base plate (no text or symbols)natural_image
Simple line drawing of a mechanical assembly with no text or symbolsnatural_image
Pure electrical circuit lines without any symbolsnatural_image
Line drawing of hands inserting a card into a banknote (no text or symbols)Inserte el cassette.
natural_image
Line drawing of a portable electronic device with control panel and scroll (no text or symbols)natural_image
Simple line drawing of a car front panel with no text or symbolsControlador remoto
natural_image
Pure mechanical component diagram without any text, numbers, or symbolsRadiorrecepción
text_image
Diagram of a handheld electronic device with labeled ports and indicator lightsnatural_image
Simple line drawing of a handheld electronic device with ports and cables (no text or symbols)text_image
remoto RECGrabación
Notas
natural_image
Simple line drawing of a rectangular frame with a starburst and partial circular symbol inside (no text or numbers)natural_image
Simple line drawing of a square with a central cross and radiating lines, no text or symbols present.text_image
Diagram showing connection between a device and a person's head, with labeled ports and directional arrows indicating signal flow.Nota
natural_image
Line drawing of a computer monitor with scroll and keyboard (no text or symbols)text_image
104.10 PRESS MHz 12:00Hora actual
2 Inserte un cassette.
text_image
PHOD PHO STANDY START 15:00text_image
PHO PHO STANSHY START 15:30text_image
FM AM PRESET 188.88 MHz 0 kHz 0 6 1 2 REV EWD 7 3 REC STANDBY 4 BATT REPEAT START STOP 5 AM 11:11. PM 11:11. 8 9FWD ▶ : Cara frontal