X100 - Video camera Kaiser Baas - Free user manual and instructions
Find the device manual for free X100 Kaiser Baas in PDF.


User questions about X100 Kaiser Baas
0 question about this device. Answer the ones you know or ask your own.
Ask a new question about this device
Download the instructions for your Video camera in PDF format for free! Find your manual X100 - Kaiser Baas and take your electronic device back in hand. On this page are published all the documents necessary for the use of your device. X100 by Kaiser Baas.
USER MANUAL X100 Kaiser Baas
natural_image
Black X100 digital camera with lens and control buttons (no visible text or symbols beyond branding)X100 | Action Camera
KAISER BAAS

text_image
f You Tube v/kaiserbaas Share your footage with us on our social media
Register this product for 12 month warranty and updates.
www.kaiserbaas.com/updates
Need help? www.kaiserbaas.com/support
For the full Kaiser Baas accessories range visit www.kaiserbaas.com
Table of Contents
Contents
Table of Contents 3
Safety Precautions 5
What's in the Box 6
Product Diagram 7
Remote Diagram 9
Setup Your X100 10
Camera 10
Video Mode 11
Video Settings 12
General Settings 15
πZ
Picture Mode 19
Using Your X100 23
Camera 23
Playback Mode 26
Wi-Fi Setup 28
Saving And Viewing Options 30
Installing X100 Camera into waterproof case 32
FAQ 33
Specifications 34
System Requirements 35
Contact Us 36
Safety Precautions

Before using the X100 camera please ensure you read and understand the safety precautions.
- Do not attempt to open the case of the camera or modify it in any way. If the camera has been opened the warranty will be void. Maintenance and repairs can only be performed by Kaiser Baas.
- Keep the camera away from water and other liquids (unless used in the waterproof case). Do not handle the X100 camera with wet hands (unless used in the waterproof case). This may cause the camera to malfunction.
- Recharge the battery using the micro USB connector (5V/XXXA). Any variation to voltage or current will cause the camera to fail.
- The X100 camera should not be used in heat exceeding 99°C (159°F).
• DO NOT drop the X100 camera. - Avoid placing heavy objects on the X100 camera.
- Do not dispose of this unit in domestic waste.
• If you have any questions please contact us at www.kaiserbaas.com/support.
三
What's in the Box
Please ensure the product package has the following contents:
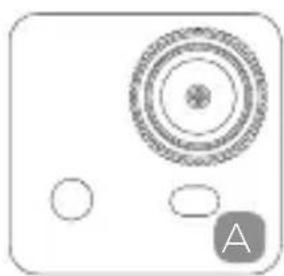
A X100 Camera
B Waterproof case
C USB Cable
D Screw Bolt
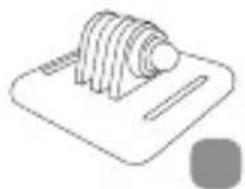
E Curved Mount
F 2 x Adhesive Pads
G Wrist Remote control (not waterproof)
natural_image
Simple diagram with concentric circles and two small circles, no text or symbols present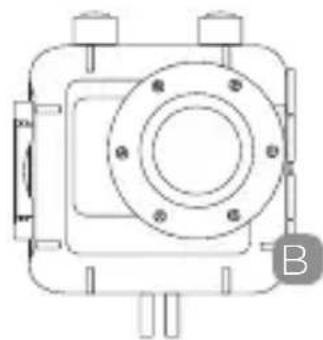
natural_image
Technical line drawing of a mechanical component with mounting holes and a central circular feature (no text or symbols)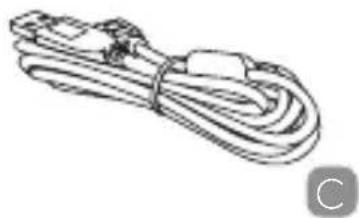
natural_image
Line drawing of a cable with connectors and a connector pin (no text or symbols)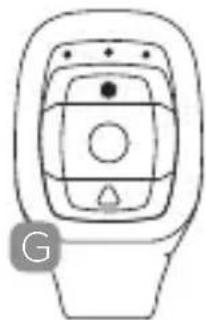
natural_image
Line drawing of a toilet with control panel and vent (no text or symbols)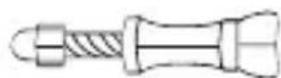
natural_image
Simple line drawing of a mechanical component with threaded shaft and base plate (no text or symbols)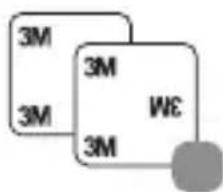
text_image
3M 3M 3M 3M WE
Product Diagram
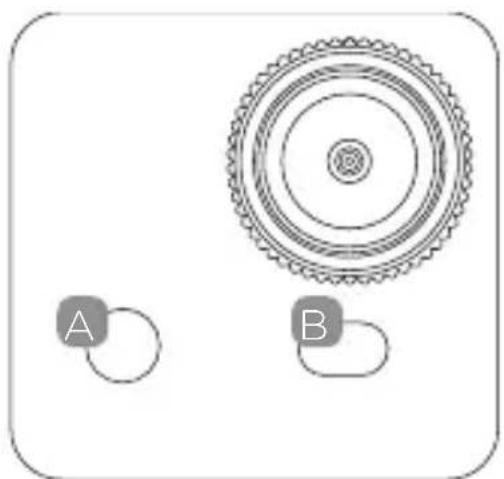
A Wi-Fi Activation button
B LED power indicator
© LCD screen
D SHOOT(menu select)
E Microphone
F POWER (and menu)
G USB interface
H Micro SD card port
Mini HDMI interface
J Battery
natural_image
Diagram showing a gear-like structure with two labeled components A and B, no text or symbols present.Front Back
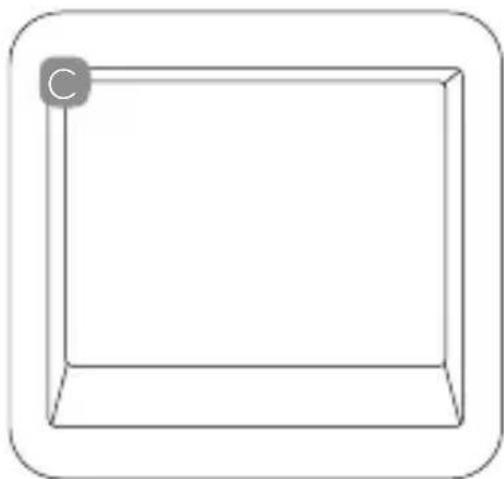
natural_image
Simple line drawing of a rectangular frame with a small circular button at the top-left corner (no text or symbols)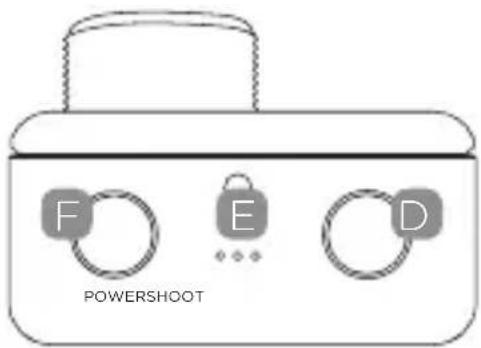
text_image
F E D POWERSHOOTTop
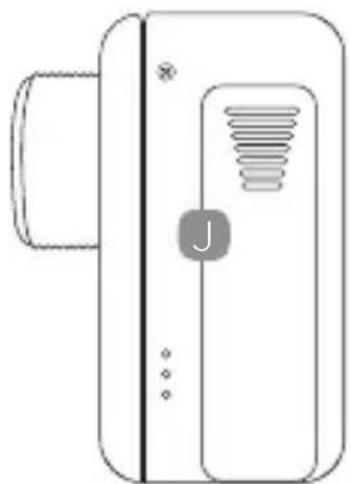
natural_image
Line drawing of a door with a handle and a button labeled 'J' (no text or symbols beyond the label)Left Side
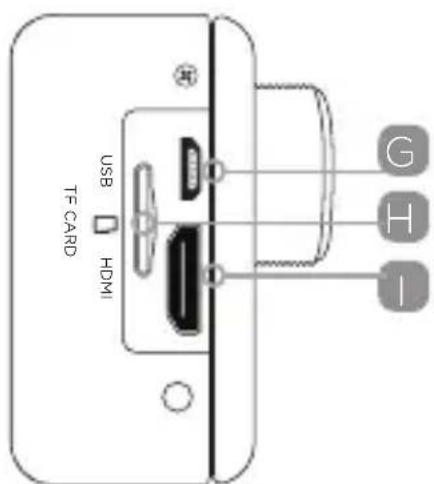
text_image
USB HDMI TF CARD G H IRight Side
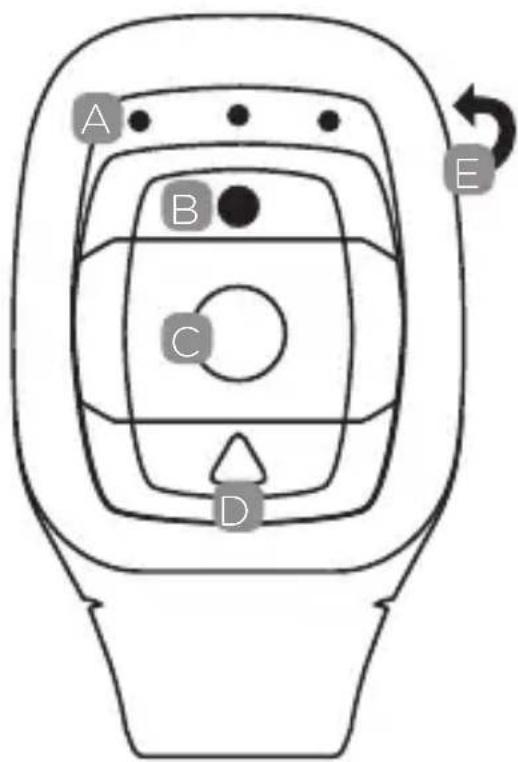
Remote Diagram
Please note: with the remote control you cannot turn the camera on. Please ensure the camera is switched on before using the remote. This item is not waterproof.
A LED Indicators
B Shoot Photo
C Record Video
D Power Off
Micro USB Charge Port On the Back of Remote
text_image
A B C D E

Setup Your X100 Camera
Turn the camera on - press and hold the POWER button for several seconds.
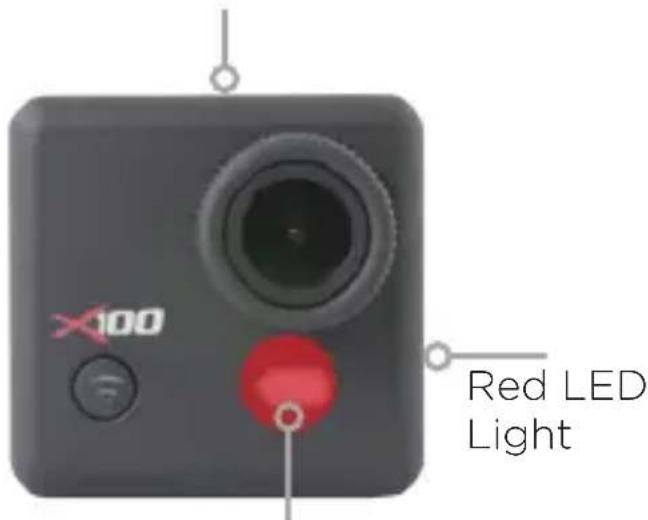
When the camera is on the X100 logo will appear on the screen and the three red LED lights will glow red. The camera is now in video mode.
X100 Logo on screen

text_image
KAISER BAAS® KAISER BAAS®Red LED light
text_image
X100 Red LED LightRed LED light
Video Mode
text_image
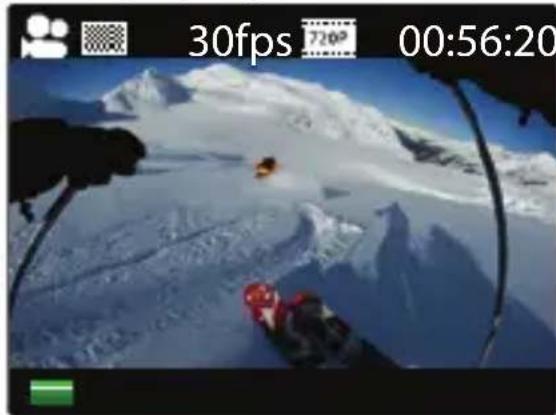
30fps 720 00:56:20Video Mode Screen Once the camera is turned on, it goes to the video capture mode by default. Press SHOOT button to start recording. When the recording starts, you will see the red lights start flashing. To end recording, press the SHOOT button again.
To enter the Settings menu, press the POWER button (press and release immediately - if it is held too long the camera will switch off).
Note: the Setup menu is depending on the active mode. If the "Video mode" is active, it will display video capture settings or if the "Picture mode" is active, it will display the Image capture settings. By default, Video mode is the active mode when you turn the device on.
Video Settings
text_image
Resolution 720° Video Looping OFF White Balance AUTO Microphone ON Timelapse+Video 10 SHOOTP Enter BackVideo Settings Screen (Page 1)
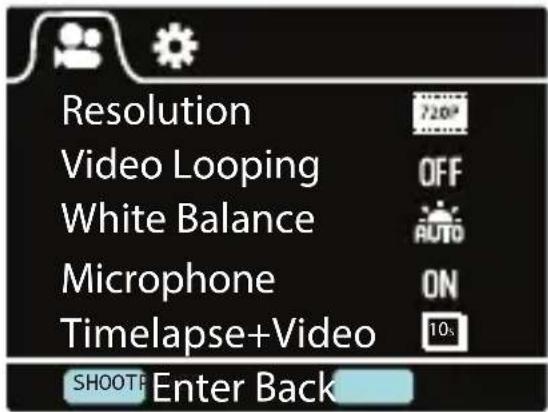
This allows user to adjust Video quality settings.
Navigation: Use Wi-Fi button to navigate, Shoot button to Enter/Confirm selection, Power button to go back
Resolution
This allows user to set the recording video resolution:
This allows user to set recording duration:
- OFF- In this mode, camera will generate new file on every 30 min
- 2 Min - In this mode, camera will generate new file on every 2 min
- 5 Min- In this mode, camera will generate new file on every 5 mins
White Balance
Factory default is Auto. If you switch Auto OFF, remember to adjust when lighting conditions change
Following pre-set modes are also available
Daylight, Cloudy, Tungsten, Fluor H, Fluor L, Custom
Microphone
SELECT ON to record audio, SELECT OFF for video only.
text_image
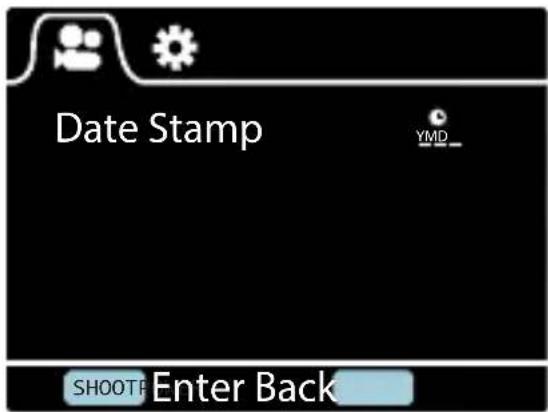
Date Stamp YMD_ SHOOTF Enter BackVideo Settings Screen (Page 2)
Timelapse + Video
This will enable auto image capture during the video recording:
• Off - Disable Auto Image Capture
• 10 Sec - Auto capture every 10 sec
• 20 Sec- Auto capture every 20 sec
• 30 Sec- Auto capture every 30 sec
• 60 Sec- Auto capture every 60 sec
Date Stamp
• Off: to turn off displaying date stamp on captures
• Date: to display date on captures
• Date & Time: to display date & time on captures
General Settings
text_image
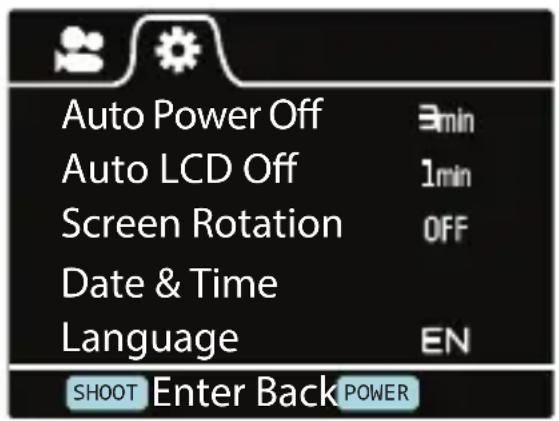
Auto Power Off Auto LCD Off Screen Rotation Date & Time Language 3min 1min OFF EN SHOOT Enter Back POWERGeneral Settings Screen (Page 1)
This allows user to adjust the general device settings To enter General Settings, enter the Settings menu first
by pressing POWER button, then press and hold the shoot button for 3 secs
Navigation: Use Wi-Fi button to navigate, Shoot button to Enter/Confirm selection, Power button to go back
Auto Power Off
• To set Auto Power off function
Auto LCD Off
This will determine if the LCD will turn off after 1min, 3min or 5min. Press any key to turn the screen on.
Select OFF to keep the screen always ON.
Screen rotation
To rotate the screen
Date & Time
This allows user to adjust the date &time.
Note: Use the Wi-Fi button to change the date and time, use shoot button to confirm. The date is entered in Year/Month/Day format. Time is based on a 24hr clock.
text_image
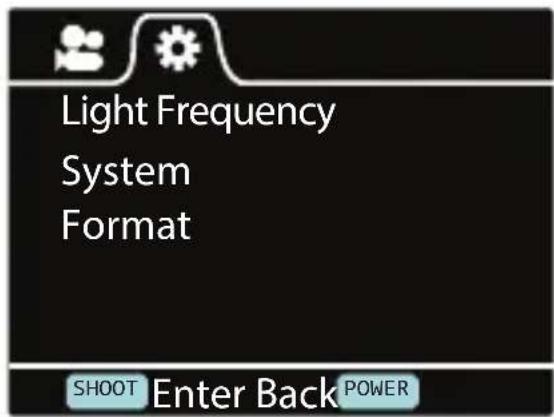
Light Frequency System Format SHOOT Enter Back POWERGeneral Settings Screen (Page 2)
Language
To select the device language
Light Frequency
Selecting the correct light frequency will avoid the possibility for strobing*.

System
- Factory Reset; To reset the camera to factory default.
• System Info; To check the firmware version
• Card Info; To see the SD card information
Format
This is to format the card. Choosing to format the card will permanently erase all data on the card.
Picture Mode
This mode will allow users to take snapshots
natural_image
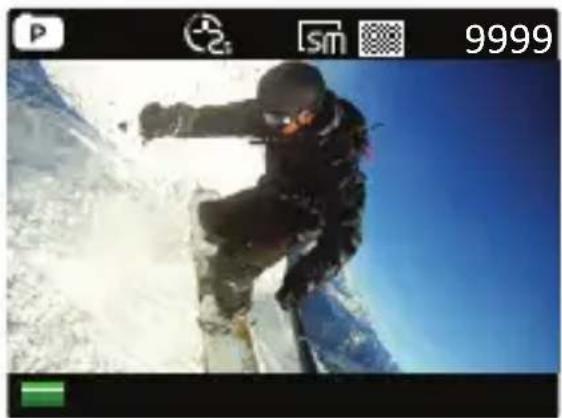
Snowboarder in action against a clear blue sky, no visible text or symbolsPicture Mode Screen
To activate this mode:
• Turn the camera on
- Press and hold the SHOOT button for 3 secs
• You will see P(e) on top left corner of the screen
- Press SHOOT button to take snapshots
Picture Settings
text_image
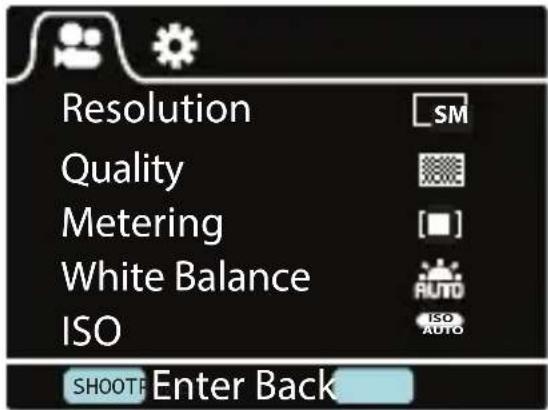
Resolution Quality Metering White Balance ISO SM AUTO AUTO SHOOTF Enter BackPicture Settings Screen 1
To enter the SETUP menu for Picture Mode, press the POWER button (press and release immediately – if it is held too long the camera will switch off).
Resolution
To select the image resolution.
Quality
To set the image quality
Metering
Metering mode refers to the way in which a camera determines the exposure.
White Balance
Factory default is Auto. If you switch Auto OFF, remember to adjust when lighting conditions change
text_image
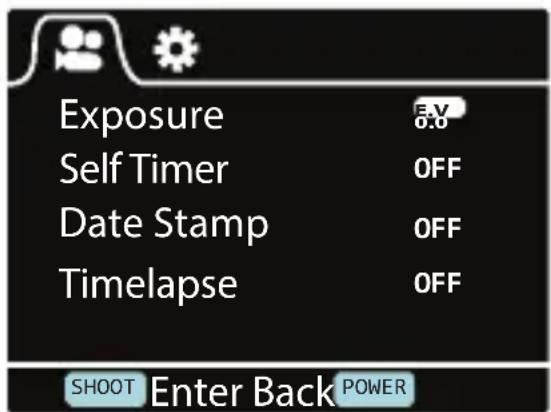
Exposure Self Timer Date Stamp Timelapse E.V. OFF OFF OFF SHOOT Enter Back POWERPicture Settings Screen 2
ISO
This is the measurement of how sensitive a digital camera's sensor is to light
Exposure
This allows user to set the light exposure value
Self-timer
This allows user to set the timer for auto image capture
Date & Time
This allows user to adjust the date &time.
Note: Use the Wi-Fi button to change the date and time, use shoot button to confirm. The date is entered in Year/Month/Day format. Time is based on a 24hr clock.
Time lapse
This feature allows you to set the intervals/frequency at which a frame is captured. You can set the time frequency here.
Using Your X100 Camera
Preparation
Charging the battery
Before using the X100 camera for the first time you should fully charge the battery.
Procedure:
- Connect X100 camera to a computer (or other USB power source) using the USB cable (provided)
- A: If the Camera is on when charging, 3 red lights will blink until the battery is fully charged. B: Only one red light will blink if the camera is off when charging.
- A completely flat battery will take about 5 hours to be fully charged. The red indicator lights will turn off when the battery is fully charged.
Insert the Micro SD\*
- It is recommended to use Class 6 (or higher) TF card to shoot smooth video files. Lower class cards may cause the video to be blurry or jerky.
• * Micro SD cards are also called TF cards. - There is only one correct direction to insert the Micro SD (TF) card into the slot. Do not force the card into the card slot, as it may damage both the camera and the card.
- It is recommended to format new cards or cards that have been previously used in other cameras. To format the Micro SD card:
Enter the General Settings menu by pressing the POWER button. Then press and hold the shoot button for 3 secs to enter the general settings. The format card option is on the second page of this menu. Use the WiFi button to navigate and SHOOT to select.
Note: formatting the card will permanently delete the contents.
Video Recording
Once the camera is turned on, it goes to the video capture mode by default. Press the SHOOT button to start recording. When the recording starts, you will see the red lights start flashing. To end recording, press the SHOOT button again.
Image Capturing
To take a snapshot, you will need to switch the camera from video mode to image capture mode. To enter this mode:
- Turn the camera on
- Press and hold the SHOOT button for 3 secs
• You will see on top left corner of the screen
Playback Mode
Navigation: Use Wi-Fi button to navigate, Shoot button to Enter/Confirm selection, Power button to go back
This will allow you to watch the captured videos & images. Enter the Picture mode first, then press and hold the SHOOT button for 3 secs.
To watch a captured video, Go to Video and select the file.
To view a captured image, go to Image.
To view a loop recording go to Loop
To delete the image, select the file and Press POWER button. You will see delete option there. You can select the option to delete a single file or all files.
To exit playback mode press and hold the 'SHOOT' button to return to the normal recording mode.
Connecting to TV
You can display the camera LCD screen on a TV Screen
Note: You will need a Mini HDMI to HDMI cable
- Turn the camera on
- Connect Mini HDMI end to the port on the camera and HDMI end to HDMI port on the TV
- Select the right source on the TV
- Turn the camera on
Wi-Fi Setup
The X100 allows full camera control, live previewing and playback of photos/videos on most Smartphones and Tablets.
- Download the App onto your Smart Phone:
www.kaiserbaas.com/apps/x100-app

Kaiser Baas X100
- Activate Wi-Fi on your X100 camera by pressing Wi-Fi button.
-
Go to the Wi-Fi settings on your Phone, you will see Kaiser Baas X100 in the list of available Wireless networks
-
Connect your Phone to the Kaiser Baas X100 via Wi-Fi
-
The WiFi Password for the X100 is:
1234567890
- Open the app 'Kaiser Baas X100'
Important: Before connecting camera via Wi-Fi, you need to download the 'Kaiser Baas X100' app on your smartphone or tablet.
App Interface Diagram
Battery Icon Video Resolution Settings
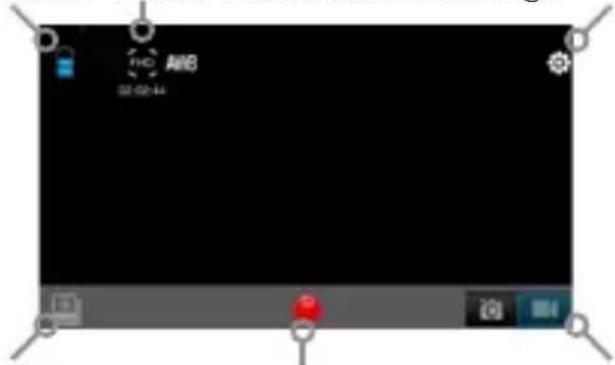
Note: To watch the recorded videos on your phone, you need to download it first.
Saving And Viewing Options
Transferring files to PC
Use the USB cable supplied (C) to connect the camera to your computer.
The camera LCD will display MSDC icon and your computer will see your camera as an external storage device. Alternatively you can remove the Micro SD card and use a card reader (not included) to achieve the same result.
- Select the file(s) you want to transfer to your computer by highlighting them.
- Either drag the files to the desired place on your computer (this will make a copy of the file on your computer) OR right-click the file, select 'Copy' and right-click in the desired place in your computer and select 'Paste'.
NOTE: you can also transfer entire folders of pictures or videos to your computer
Using the camera as a Webcam
Connect the camera to PC using supplied USB cable, when you see MSDC on the camera LCD screen, press and hold the SHOOT button for 3 secs. Then you will see PCCAM on the camera Screen.
Note: You will not be able to record when the camera is on PCCAM mode.
Installing X100 Camera into waterproof case
- The X100 camera is designed to be used in the water proof case (B). Before inserting the X100 camera in the case, select video or picture mode.
Notes:
- Ensure the case is dry and clean
- Insert X100 camera, ensuring the lens fits neatly in the lens cavity.
- Close the security latch.
- The X100 camera can be mounted using the accessories provided or you can select more options at www.kaiserbaas.com
FAQ
Q. Why are the red LEDs flickering?
A. The battery is running low. You must recharge the camera.
Q. My X100 camera will NOT turn on. Why?
A. The battery is flat. You need to recharge it (full recharge from flat will take about 5 hours).
Q. I cannot power the X100 camera/switch it on. Why?
A. Hold SHOOT button for 11 seconds to reset the X100 camera. After a reset all settings will go back to factory default.
Specifications
| Underwater Down to 30m (with waterproof casing) | |
| Sensor 1/2.5" 5.0 megapixels CMOS sensor | |
| Resolution Video: | 1080P@30fps |
| Still photo: 5 megapixel (12 megapixel inter-polated) | |
| Storage type Micro SD card up to 32GB (not included) | |
| Lens 150°- view fixed lens | |
| Lens aperture F/2.5 f=2.65mm | |
| Lens Focus 0.5m to infinity | |
| Shutter speed 1/30 to 1/2000 sec | |
| Video Looping OFF, every 2mins, every 5 mins | |
| Sensitivity Automatic ISO 100-200 | |
| Microphone Inbuilt | |
| Display 2" TFT LCD | |
| Format Video: MOV H.264 | |
| Still photo: JPEG | |
| Power supply 3.7V/1000mAh Li-Battery | |
| Battery life Video: 2.5 hours without WiFi | |
| Language English | |
| Dimensions 54x37x51mm | |
| Casing 49.5×76×84mm | |
System Requirements
| Operating system | Windows XP / Vista / 7 / 8 / MAC OS |
| App Requirements | Apple iOS & Android |
| Interface HDMI (H) | HDMI cable not included) |
| High speed USB 2.0 | |
| Language English |
mZ
Contact Us
Need further assistance? Please visit: www.kaiserbaas.com/support
Or email:
helpdesk@kaiserbaas.com
For the full Kaiser Baas accessories range visit www.kaiserbaas.com