
R20 - Dash cam Kaiser Baas - Free user manual and instructions
Find the device manual for free R20 Kaiser Baas in PDF.


| Product Type | Dash Camera |
| Brand | Kaiser Baas |
| Model | R20 |
| Video Resolution | Full HD 1080p (1920x1080) |
| Lens Angle | 140° wide angle |
| Display | 2.0 inch LCD |
| Storage | microSD card up to 32GB (Class 10) |
| Battery | Built-in rechargeable lithium-ion battery |
| Power Input | 5V DC via USB car charger |
| G-Sensor | Yes, automatic emergency recording |
| Loop Recording | Yes |
| Night Vision | Yes, with low-light sensitivity |
| Motion Detection | Yes, parking mode |
| Dimensions | Approx. 6.3 x 4.5 x 3.0 cm |
| Weight | Approx. 70 g |
| Mount | Suction cup mount |
| Audio | Built-in microphone |
| Date Stamp | Yes |
Frequently Asked Questions - R20 Kaiser Baas
User questions about R20 Kaiser Baas
0 question about this device. Answer the ones you know or ask your own.
Ask a new question about this device
Download the instructions for your Dash cam in PDF format for free! Find your manual R20 - Kaiser Baas and take your electronic device back in hand. On this page are published all the documents necessary for the use of your device. R20 by Kaiser Baas.
USER MANUAL R20 Kaiser Baas
natural_image
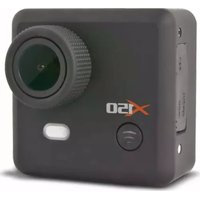
Exterior view of a black KAISER BAAS digital camera with lens and external frame (no text or symbols on device body)R20 CAR DVR
Capture your journey
KAISER BAAS
Languages
English
Community

/kaiserbaas
Register this product for 12 month warranty: www.kaiserbaas.com/register
Get product updates: www.kaiserbaas.com/updates
Tech support:
e: helpdesk@kaiserbaas.com
w: www.kaiserbaas.com/support
p: Australia 1300 302 306
p: New Zealand 0800 302 306
(business hours, AEST)
Contents
Safety Precautions 6
What's in the Box 7
Product Diagram 8
Setting up the R20 Car DVR 9
In Car Operation 10
Computer Connection 11
Interface 12
Settings 16
Software 18
Specifications 23
Frequently Asked Questions 24
Contact Us 25
Safety Precautions
Before using your R20 Car DVR, please ensure you have read and understand all of the safety precautions below.
- Only use the provided power cables to charge the device.
- Do not expose the R20 camera to water, dust, oil and temperatures over 70°C.
- Avoid leaving your R20 camera in direct sunlight for prolonged periods of time.
- Please do not attempt to adjust the camera settings while you are operating your vehicle.
PLEASE USE YOUR CAMERA WITHIN YOUR COUNTRIES ROAD LAWS. PLEASE CHECK YOUR LOCAL ROAD LEGISLATION BEFORE USE.
What's in the Box
Please ensure the product package has all the following contents:
A R20 Car DVR
B Mount
C Micro USB Cable
D User Guide
E USB Car Charger
F 6 x Cable Management Clips
G USB DC power cable

Product Diagram
1 Wide Angle Lens
2 Mounting Socket
3 DC Power Port
4 HDMI Mini Port
5 Micro USB Port
6 Up/Playback Button
7 Down/Photo Shutter Button
8 2.7" Display
9 Power/Back/Settings Button
10 OK/Event Recording Button
11 Reset Button
12 Micro SD Slot


Bottom

Setting up the R20 Car DVR
General:
- Insert Micro SD card in the Micro SD card slot on the bottom of the camera.
- Camera will power up and start recording as soon as it receives power from the DC power connection (eg. when you start your car).

Car set up:
- Clean the area on your windscreen making sure desired placement is not blocking the drivers view.
- Attach the camera to the mount by sliding the camera connection from right to left along the mount connection until latched.
- Remove the protective skin from the 3M adhesive on the mount.
- Stick the adhesive to the inside of the front windscreen in the desired position, and press for 30 seconds to ensure that the camera is secure.
- Adjust the nut to ensure that the camera is correctly angled.
- Finally connect the R20 to power using the DC power cable and the USB car charge adaptor.

In Car Operation
- Once camera is set up and connected to DC power, the camera will automatically power on and start recording when the car is started.
• The car camera requires a class 6 or above Micro SD card (not included) with at lease 8GB of free space. - The internal G sensor will register any bumps that could be accidents and registers them as an "Event". These event files will not be recorded over by regular footage, these files need to be manually deleted from your SD card using the provided management software.
- Event recording can be manually triggered using the "OK" button during recording.
- Still photos can be taken using the Down button during recording.
- LDWS (Lane Departure Warning System) will warn the driver if they are not correctly in their lane. This feature can be adjusted through the Camera setting.
Note: For more information on the R20 interface please see section marked "Interface".
Computer Connection
- Download and install the supplied Motor+ software to your PC or Mac. The software can be found at:
www.kaiserbaas.com/software/r30
- Follow the on screen set up guide.
- Connect your R20 camera to your computer using the supplied micro USB cable.
- Open the Motor+ software.
- Select if you want to review media on the camera (left icon), or your computer (right icon)
Note: For more information on software functions please see section marked "Software".
Interface
Recording Screen
This is the device's main recording screen; this will show while your R20 is powered on and not in screensaver mode. The four on screen icons are selected by using their adjacent buttons.

Recording Screen Screen
1 Library/Playback
2 Photo Shutter Button
3 Settings
4 Event Record
5 Mode
6 Resolution
7 Microphone/Mute
8 GPS Signal
9 Photo Capacity
10 Event Capacity
11 Time
12 Power
Library
This menu is found by pushing the up button while at the recording screen. From here you can review your media, select either Event Recording, Loop Recording, or Photos by using the Up and Down buttons and the OK button to select.
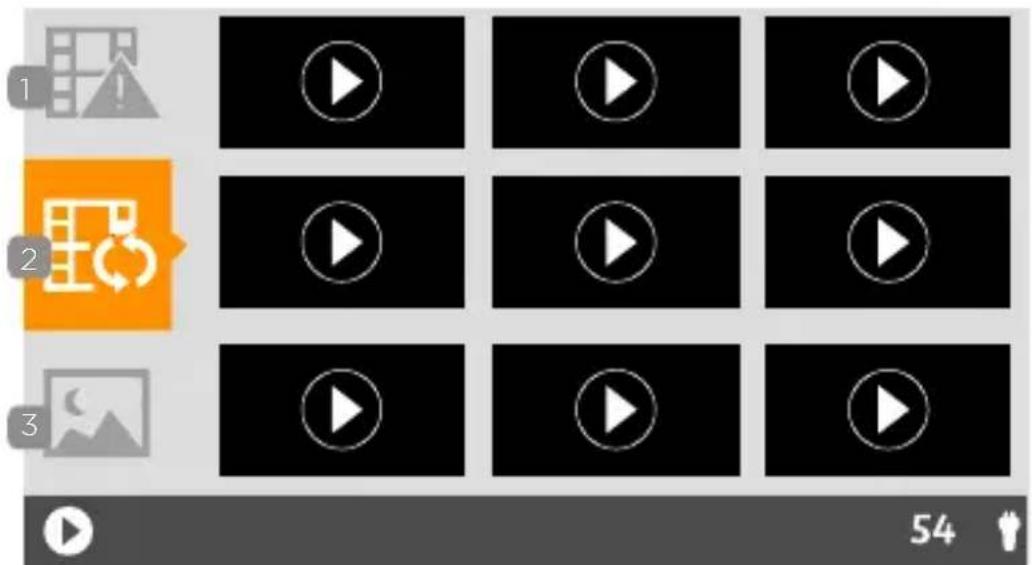
Library Screen
1 Event recording
3 Photos
2 Normal Recording
Media
Once you have selected your media from the library screen, this screen gives the option of skipping to the next or previous file, or playing the currently selected file.

Media Screen
1 Previous
3 Back
2 Next
4 Play
Player
This is the player screen, which is controlled by using the buttons on the side of the screen.
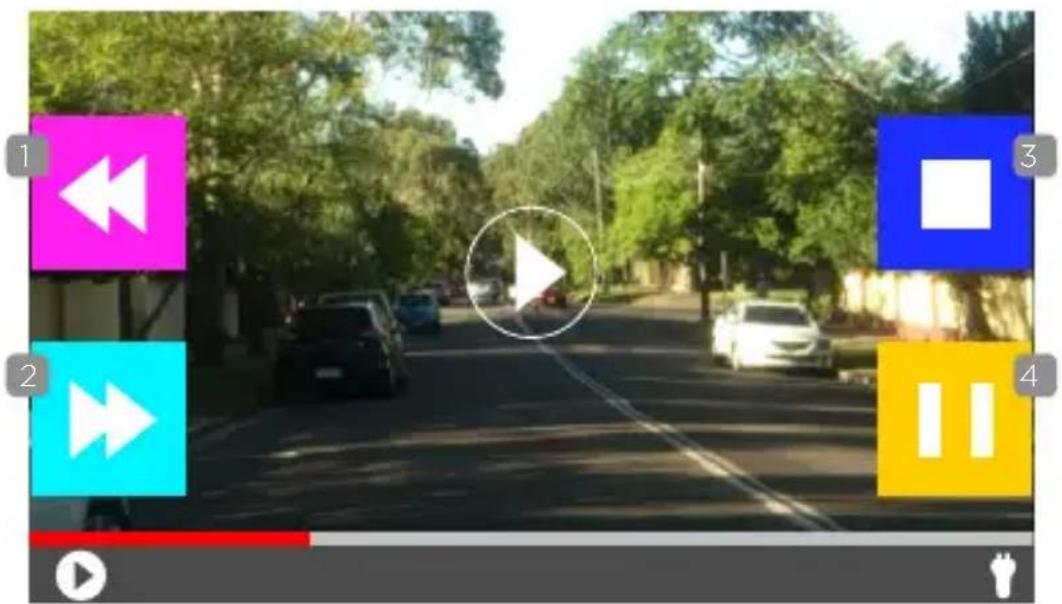
Player Screen
1 Rewind
3 Stop
2 Fast Forward
4 Pause
Settings
Camera
| Video Resolution | Set the video resolution of Normal Looping Video and Event Protection Video | 1296p: 2304x1296 P301080p: 1920x1080 P30720P: 1280x720 P30 |
| LDWS Turn on/off the LDWS function | OnOff | |
| LDWS Calibration | Adjust the lane sensing upper line & bottom line | - |
| Recording Duration | Set the duration of each Normal Looping Video | 3 min5 min10 min (Disabled in 1296p) |
Driving
| Screen Saver Duration | Set the amount of time you would like the screen saver to activate or turn off the screen saver function | 30 sec1 min3 minOff |
| Screen Saver Type | Set the Screen saver type | Display offTimeDirection |
| Microphone Turn on/off the microphone during recording | • On• Off |
| Volume Adjust the Speaker volume of Voice/ Sound/Playback | • 0-5 |
| Sensitivity Set the sensitivity of the G-sensor to activate the Event Protection Recording or turn off this function | • High• Mid• Low• Off |
| Voice Guide Turn on/off the voice prompt function | • On• Off |
General
| Language Set | the device language | EnglishGermanSpanishFrenchItalianRussianJapaneseKoreanS. ChineseT. Chinese |
| Date/Time Set | Set the date and time of the device | YYYY/MM/DD/HH/MM |
Software
Opening Screen
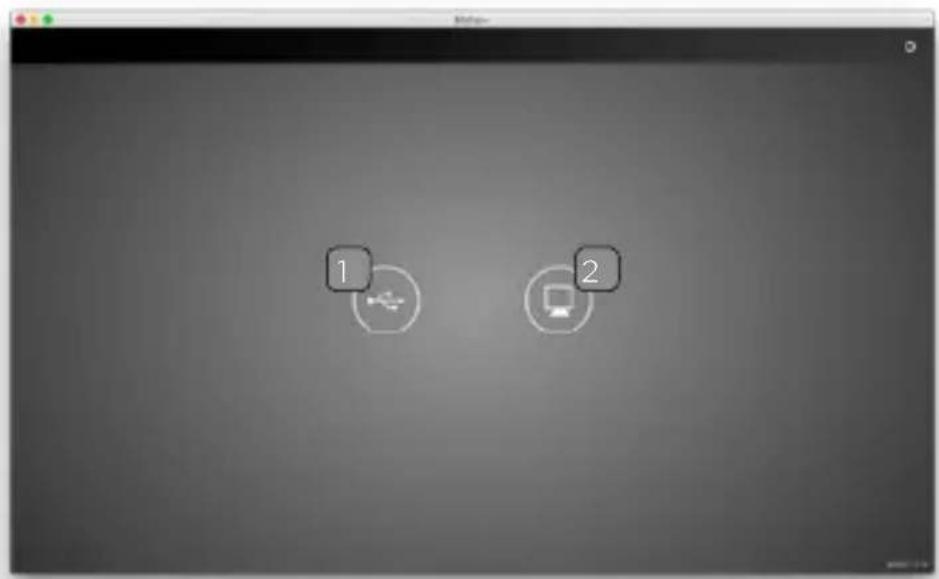
Opening Screen Screen
1 Camera media
2 Media Stored on Computer
Media Manager

Media Manager Screen
1 Photo
5 Media
2 Video
6 Camera Settings
3 Event Video
7 General Settings
4 Media Stored on Computer
Media Player

Media Player Screen
1 Speed
2 Compass
3 Player Controls
4 GPS position
5 Share to Social Media
6 Copy Video from Camera
General Settings

General Settings Screen
1 Language Selection
2 DirectorytoSave Videos to Computer
Camera Settings

Camera Settings Screen
1 Mute/Volume
2 Event Recording Sensitivity
3 Video Resolution Settings
4 Voice Guidance Settings
5 Video Duration Settings
Specifications
| Sensor 3MP CMOS | |
| Lens 135° Wide Angle Lens | |
| Still Image Resolution on Recording | 3MP on 1296p/2MP on 1080p/1MP on 720p |
| Video Resolution 1296P: 2 | 304x1296 P30/1080P: 1920x1080 P30/720P: 1280x720 P30 |
| Video Format MPEG4 (H.264) .MOV File | |
| Photo Format JPG | |
| Display Panel 2.7" Color Display 16:9 | |
| Indicator LED 1 pc, 3 colors | |
| GPS Sensor Yes | |
| G Sensor Yes | |
| TV Out Mini HDMI | |
| USB Port Micro USB | |
| Power DC in | |
| Microphone Yes | |
| Speaker | Yes |
| Voice Language | English, Mandarin |
| Operation Temperature | -20 to 70 degree |
| Storage Temperature | -40 to 80 degree |
| Dimension (L x W x H) | 92 x 51 x 29.3mm |
| Weight 104g | |
Frequently Asked Questions
Q. The image is blurry
A. Try repositioning the camera. For best results, try to aim the camera through a section of the windshield that is not overly curved or angled as this can cause a blurring effect with footage.
Q. I can't find the App in the App store
A. Go to www.kaiserbaas.com/R20 using your mobile phone for a direct link to the app store in your country.
Q. My device will not record
A. Please ensure that you have power connected to the camera using the supplied DC power cable and that you have a SD card inserted that is Cat 6 or above.
Q. My HDMI cable will not fit in the HDMI socket on the camera
A. The socket on the side of the camera is a mini HDMI port and requires a mini HDMI adaptor (not included).
Contact Us
Having trouble setting your R20 Car DVR up?
Please contact us. No question too big or small and we are more than happy to help.
Please visit:
www.kaiserbaas.com/support
Or email:
helpdesk@kaiserbaas.com
For further information please visit:
www.kaiserbaas.com
Tech support:
e: helpdesk@kaiserbaas.com
w: www.kaiserbaas.com/support
p: Australia 1300 302 306
p: New Zealand 0800 302 306
(business hours, AEST)

natural_image
Illustration of a crossed screwdriver and wrench (no text or symbols)
natural_image
Abstract black and white geometric shape resembling a stylized letter 'K' with radiating lines (no text or symbols)KAISER® BAAS



- Languages
- Community
- /kaiserbaas
- Contents
- Safety Precautions
- What's in the Box
- Product Diagram
- Setting up the R20 Car DVR
- General:
- Car set up:
- In Car Operation
- Computer Connection
- Interface
- Recording Screen
- Library
- Media
- Player
- Settings
- Software
- Opening Screen
- Media Manager Screen
- Media Player
- Camera Settings
- Frequently Asked Questions
- The image is blurry
- I can't find the App in the App store
- My device will not record
- My HDMI cable will not fit in the HDMI socket on the camera
- Contact Us
- KAISER® BAAS
Brand : Kaiser Baas
Model : R20
Category : Dash cam