S1iPBTW12E - Uncategorized Sandstrøm - Free user manual and instructions
Find the device manual for free S1iPBTW12E Sandstrøm in PDF.


| Product Type | Speaker with Docking for iPhone/iPod/iPad and Bluetooth® Technology |
| Model | Sandstrøm S1iPBTW12E |
| Power Supply | AC 100-240V ~50/60Hz, DC 18V 1.5A (mains adapter included) |
| Output Power | 2 x 15 Watts |
| Bluetooth Range | Up to 10 metres |
| Bluetooth Pairing | Supports up to 8 devices, automatic reconnection to last device |
| Dock Connector | 30-pin for iPod/iPhone/iPad |
| Compatible Devices (iPod) | iPod Touch 2nd/3rd/4th Gen, iPod Nano 2nd–6th Gen |
| Compatible Devices (iPhone) | iPhone, iPhone 3G/3GS/4/4S |
| Compatible Devices (iPad) | iPad, iPad 2, iPad 3rd Gen |
| Radio Tuner | FM, with 20 programmable presets |
| Audio Inputs | AUX IN (3.5mm), Bluetooth |
| Video Output | VIDEO OUT (composite) |
| Sound Modes | POP, JAZZ, ROCK, CLASSIC, FLAT (via remote) |
| Display | LED clock display with 3 brightness levels |
| Remote Control | Included, operates up to 5m, uses CR2025 battery |
| Auto Standby | After 20 minutes of inactivity or near-mute volume |
| Charging | Charges docked iPod/iPhone/iPad (in ON or Standby) |
| Sleep Timer | 5/10/15/20/30/45/60/90 minutes or OFF |
| Accessories Included | Main unit, remote control, FM aerial, mains adapter, manual |
Frequently Asked Questions - S1iPBTW12E Sandstrøm
User questions about S1iPBTW12E Sandstrøm
0 question about this device. Answer the ones you know or ask your own.
Ask a new question about this device
Download the instructions for your Uncategorized in PDF format for free! Find your manual S1iPBTW12E - Sandstrøm and take your electronic device back in hand. On this page are published all the documents necessary for the use of your device. S1iPBTW12E by Sandstrøm.
USER MANUAL S1iPBTW12E Sandstrøm
Speaker with Docking for iPhone/iPod/iPad and Bluetooth® Technology
GB
Instruksjonsmanual
natural_image
Black electronic device with a smartphone mounted on top, no visible text or symbols on the device body
Bluetooth®
iPhone, iPod and iPad not included
Safety Warnings....6
Unpacking....10
Product Overview....11
Main Unit....11
-Front View....11
-Rear View 11
-Top View 12
Remote Control 13
Removing the Plastic Strip from the Remote Control....15
Battery Replacement for the Remote Control....15
-Handling the Battery 15
-Handling the Remote Control....16
Remote Control Operation Range....16
Connecting the Aerial 17
Power Source 17
Mains Power....17
General Operation....18
Switching ON / OFF....18
Selecting Modes....18
Adjusting the volume....18
Adjusting the Sound Effect 18
Dimming the display 18
Docking an iPod / iPhone/ iPad 19
iPod / iPhone / iPad Operation 20
Inserting the iPod / iPhone / iPad 20
To Play / Pause music....20
Skipping and searching tracks....20
Random Playback....20
Repeat Playback....21
Charging your iPod / iPhone / iPad 21
Video Out Function 21
iPod / iPhone / iPad Compatibility....21
Bluetooth® Audio....22
AUX IN Operation 23
Listening to the Radio 23
Programming radio stations....23
Selecting a stored radio station....23
Auto Setting the Clock 23
Manually Setting the Clock....24
Sleep Function 24
Maintenance 24
Cleaning the Unit 24
Hints and Tips....25
Specifications....25
iPod/iPhone/iPad-betjening....36
Sette inn iPod/iPhone/iPad 36
Lade iPod/iPhone/iPad 37
Ladda iPod/iPhone/iPad....53
Bluetooth® Audio....102
- Read all the instructions carefully before using the unit and keep them for future reference.
- Retain the manual. If you pass the unit onto a third party make sure to include this manual.
- Check that the voltage marked on the rating label matches your mains voltage.
Damage
- Please inspect the unit for damage after unpacking.
- Do not continue to operate the unit if you are in any doubt about it working normally, or if it is damaged in any way - switch off, withdraw the mains adapter and consult your dealer.
Location of Unit
- The unit must be placed on a flat stable surface and not subjected to vibrations.
- Do not place the unit on sloped or unstable surfaces as the unit may fall off or tip over.
- The mains socket must be located near the unit and should be easily accessible.
- This unit is designed for indoor use only.
Temperature
- Avoid extreme degrees of temperature, either hot or cold. Place the unit well away from heat sources such as radiators or gas / electric fires.
- Avoid exposure to direct sunlight and other sources of heat.
Naked Flames
- Never place any type of candle or naked flame on the top of or near the unit.
Moisture
- To reduce the risk of fire, electric shock or product damage, do not expose this unit to rain, moisture, dripping or splashing. No objects filled with liquids, such as vases, should be placed on the unit.
- If you spill any liquid into the unit, it can cause serious damage. Switch it off at the mains immediately. Withdraw the mains plug and consult your dealer.
Ventilation
- To prevent the risk of electric shock or fire hazard due to overheating, ensure that curtains and other materials do not obstruct the ventilation vents.
- A minimum distance of 5cm around the unit should be maintained to allow for sufficient ventilation.
- Do not install or place this unit in a bookcase, built-in cabinet or in another confined space. Ensure the unit is well ventilated.
Safety
- Always disconnect the unit from the mains supply before connecting / disconnecting other devices or moving the unit.
- Unplug the unit from the mains socket during a lightning storm.
- In the interests of safety and to avoid unnecessary energy consumption, never leave the unit switched on while unattended for long periods of time, e.g. overnight, while on holiday or while out of the house. Switch it off and disconnect the mains plug from the mains socket.
Mains Adapter Cable
- Make sure the unit or unit stand is not resting on top of the mains adapter cable, as the weight of the unit may damage the cable and create a safety hazard.
Mains Adapter
- The mains adapter will continue to draw electricity from the mains supply when plugged in the mains socket. In the interests of safety and to avoid unnecessary energy consumption, never leave the adaptor plugged in the mains socket while unattended for long periods of time. Disconnect the adapter from the power supply.
Interference
- Do not place the unit on or near appliances which may cause electromagnetic interference. If you do, it may adversely affect the working of the unit, and cause a distorted sound.
Batteries
- Batteries used in the unit are easily swallowed by young children and this is dangerous.
- Keep loose batteries away from young children and make sure that the battery holder tray is secure in the unit. Seek medical advice if you believe a cell has been swallowed.
- Please dispose of batteries correctly by following the guidance in this manual.
- Do not expose the battery to direct sunlight or sources of excessive heat.
Supervision
- Children should be supervised to ensure that they do not play with the unit.
- Never let anyone especially children push anything into the holes, slots or any other openings in the case - this could result in a fatal electric shock.


The lightning flash with arrowhead symbol, within an equilateral triangle, is intended to alert the user to the presence of uninsulated “dangerous voltage” within the unit’s enclosure that may be of sufficient magnitude to constitute a risk of electric shock.

The exclamation point within an equilateral triangle is intended to alert the user to the presence of important operating and maintenance (servicing) instructions in the manual accompanying the unit.
Service
- To reduce the risk of electric shock, do not remove screws. The unit does not contain any user-serviceable parts. Please leave all maintenance work to qualified personnel.
- Do not open any fixed covers as this may expose dangerous voltages.
Maintenance
- Ensure to unplug the unit from the power supply before cleaning.
- Do not use any type of abrasive pad or abrasive cleaning solutions as these may damage the unit's surface.
- Do not use liquids to clean the unit.
- The mains adapter will continue to draw electricity from the mains supply when plugged in the mains socket. In the interests of safety and to avoid unnecessary energy consumption, never leave the adaptor plugged in the mains socket while unattended for long periods of time. Disconnect the adaptor from the power supply.
Rušenie
Thank you for purchasing your new Sandstrøm Wireless speaker with docking for iPhone / iPod / iPad.
We recommend that you spend some time reading this instruction manual in order that you fully understand all the operational features offered. You will also find some hints and tips to help you resolve any issues.
Read all the safety instructions carefully before use and keep this instruction manual for future reference.
Unpacking
Remove all items from the packaging. Retain the packaging. If you dispose of it please do so according to local regulations.
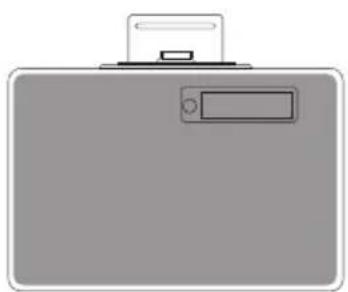
The following items are included:
natural_image
Simple illustration of a gray rectangular device with a small screen and top handle (no text or symbols)Mains Unit

Remote Control


Instruction ManualMains Adapter FM Aeria
Product Overview
Main Unit
Front View
- iPod / iPhone / iPad dock
- Remote control sensor
- Display
- Speakers

GB
Rear View

- DC IN socket
-
AUX IN socket
-
VIDEO OUT Socket
- FM aerial socket
Top View
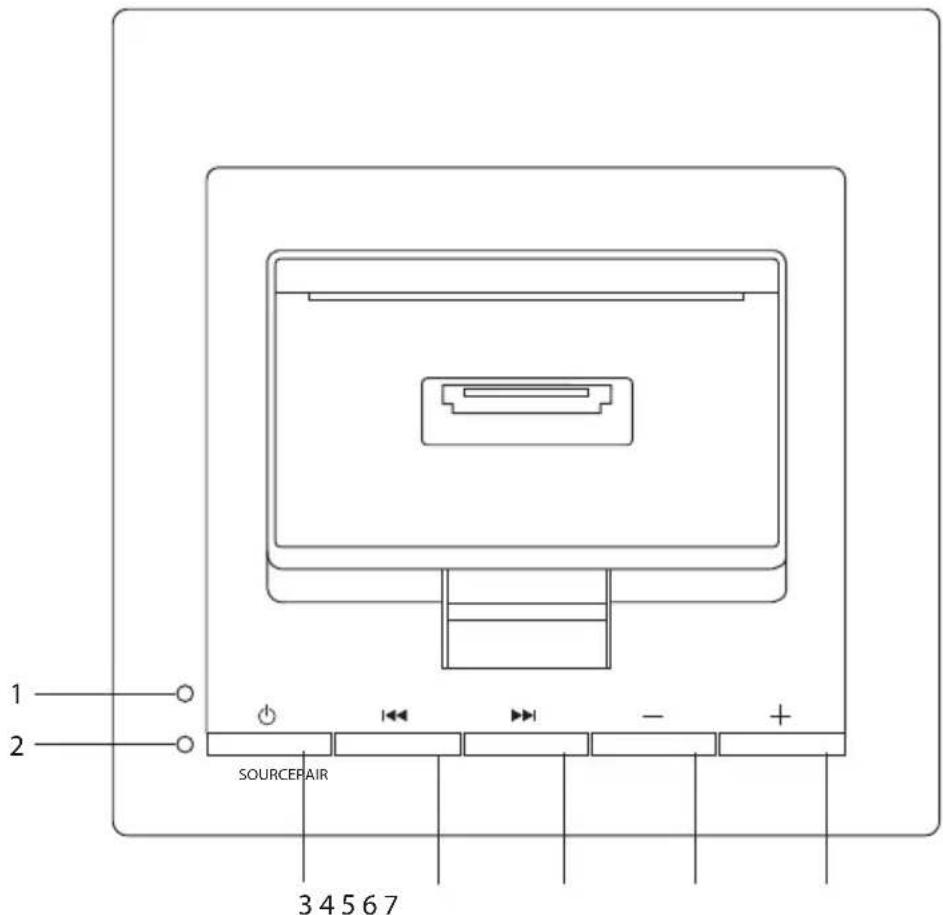
1. Blue LED Pairing indicator
Flashes blue when searching for a Bluetooth device. Stops flashing when paired to a Bluetooth device.
2. Green LED indicator
Shows the unit is in iPOD mode. Flashes to indicate the unit is in MUTE mode. Turns amber to indicate is in AUX mode. If in FM Mode, LED indicator remains unlit.
3. SOURCE Button
Switches between modes: iPod / Bluetooth - AUX - FM - STANDBY.
4. PAIR Button / BACKWARDS SKIP button
- Access Bluetooth function to pair with Bluetooth device.
-
Press to skip back to the beginning of the track or to the previous track.
-
Press to fast reverse the current track.
- Press to search for a radio station going backward through accessible radio frequencies.
5. FORWARD SKIP Button
- Press to skip to the next track.
- Press and hold to fast forward the current track.
- Press to search for a radio station going forwards through accessible radio frequencies.
6. VOLUME - Button
Press to decrease the volume.
7. VOLUME + Button
Press to increase the volume.
Remote Control
1. STANDBY Button
Switches the unit between ON and STANDBY modes.
2. FM Button
Switches to FM mode.
3. AUX Button
Switches to AUX mode.
4. Button
Press to scroll up menus or programmed radio stations.
5. ▶ / PAIR Button
Press to play or pause a track in iPod mode. Press and hold to pair to a Bluetooth device.
6. >Button
- Press to skip to the next track.
- Press and hold to fast forward the current track.
- Press to search for a radio station going forwards through accessible radio frequencies.
7. ∨ Button
Press to scroll down menus or programmed radio stations.
8. ENTER Buttons
Press to select a menu option.
9. REPEAT ⇌ Button
Press once to repeat the track that is playing. Press again to repeat all the tracks. Press again to switch repeat off.
10. MUTE Button
Press to mute the volume.
11. VOLUME + Button
Press to increase the volume.
12. POP Button
Press to listen to music in a preset POP sound effect.
13. CLASSIC Button
Press to listen to music in a preset CLASSIC sound effect.

14. DIM / SLEEP Button
- Press to adjust brightness level.
- Press to enable / disable sleep timer.
15. FLAT Button
Press to listen to music in a preset FLAT sound effect.
16. STORE Button
Press to store radio stations.
17. DOCK Button
Press to select IPOD mode
18.
- Press to skip back to the beginning of the track or to the previous track.
- Press to fast reverse the current track.
- Press to search for a radio station going backward through accessible radio frequencies.
19. MENU Button
Press to scroll back through menus.
20. SHUFFLE ✗ Button
Press to listen to tracks in a random order.
21. VOLUME - Button
Press to decrease the volume.
22. ROCK Button
Press to listen to music in a preset ROCK sound effect.
23. JAZZ Button
Press to listen to music in a preset JAZZ sound effect.
24. RECALL Button
Press to select preset radio stations.

Removing the Plastic Strip from the Remote Control
Remove the protective plastic strip from the battery if the battery is being used for the first time. It is located at the bottom side of the remote control.

natural_image
Line drawing of a hand pressing down on a curved object with an arrow indicating force (no text or symbols)
GB
Battery Replacement for the Remote Control
The remote control requires a CR2025, 3V Lithium battery.
1. Slide and hold the battery release tab in the direction of the arrow. (If you are having difficulty with the tab, use a paper clip to squeeze the tab.)
2. Pull out the battery holder and remove the old battery.
3. Replace with a new battery. (Ensure the + polarity faces up.)
4. Insert the battery holder back into the remote control. It will close with a click.

flowchart
graph TD
    A["Device with battery"] --> B["Component 1"]
    B --> C["Component 2"]
    C --> D["Component 3"]
    D --> E["Component 4"]
Handling the Battery
\- Improper or incorrect use of batteries may cause corrosion or battery leakage, which could cause fire, personal injury or damage property.
\- Install the battery correctly in the battery compartment. Normally the battery's positive polarity (+) will face up.
\- When the battery is exhausted, the remote control will not function.
\- Only use the battery type indicated in this manual.
\- Do not dispose of the used battery as domestic waste. Dispose of it in accordance with local regulations.
\- Small button cell batteries such as the one used in the remote control are easily swallowed by young children and this is dangerous. Keep loose button cells away from young children and make sure that the battery is secure in the remote control. Seek medical advice if you believe a battery cell has been swallowed.
Handling the Remote Control
- If you are having difficulty removing the battery cover, use a paper clip to squeeze the battery tab before pulling out the battery cover. Remove the battery.
- Do not drop the remote control.
- Do not allow anything to impact the remote control.
- Do not spill water or liquid on the remote control.
- Do not place the remote control on a wet object.
- Do not place the remote control under direct sunlight or near sources of excessive heat.
- Remove the battery from the remote control when not in use for a long period of time, as corrosion or battery leakage may occur and result in physical injury, and/or property damage, and/or fire.
Remote Control Operation Range
- The remote control sensor on the front unit is sensitive to the remote control's commands up to a maximum of 5 metres away and within a maximum of a 60^ arc.
- Please note that the operating distance may vary depending on the brightness of the room.

Connecting the Aerial
Insert the aerial into the FM socket and tighten the nut.
Extent and angle the aerial to get the best reception.

Please use only the FM aerial supplied with this unit.

GB
Power Source
Mains Power
- This unit operates with a DC 18V/1.5A mains adapter (included).
- Connecting the unit to any other power source may damage the unit. Unwind the mains adapter to its full length. Connect the mains adapter to the DC socket on the rear of the unit and a mains socket. Make sure the mains adapter is fully inserted into the mains socket. The unit is now connected and ready to use.
- To switch the unit off completely, unplug the mains adapter from the mains socket.

natural_image
Line drawing of a mechanical or electrical component with a vertical rod, threaded connectors, and a cable (no text or symbols)
General Operation
Switching ON / OFF
- When you first connect the unit to the mains socket, the unit will be in STANDBY mode. '00:00' will flash on the display.
- Press the SOURCE ⏻ button on the unit or press the STANDBY∅button on the remote control to turn the unit on. 'IPOD' will be displayed.
- To switch the unit back into standby, press the SOURCE ⏻ button on the remote control or press and hold the STANDBY∅button on the unit.
- Disconnect the mains adapter from the mains socket if you want to switch the unit off completely.

If the unit volume is close to mute or idle for 20 minutes, it will automatically switch to standby mode, the LED indicators will flash for 5 minute before it switches to standby. Press any buttons to extend the time.
Selecting Modes
- Press the SOURCE button repeatedly on the unit to switch to iPod/Bluetooth, AUX, or FM mode. The status indicator will light up green or orange, or remain unlit depending on mode selected.
- Press the DOCK button on the remote control to select iPod/Bluetooth mode. (Status indicator will light up green (iPod mode) or blue (Bluetooth mode).)
- Press the FM button on the remote control to select FM mode. (No status indicator.)
- Press the AUX button on the remote control to select AUX mode. (Status indicator will light up orange.)
Adjusting the volume
- Press the VOLUME + or - buttons to increase or decrease the volume level.
- Press the MUTE button to turn the sound off. The status indicator and display will flash. Press the MUTE button again to resume audio listening.
Adjusting the Sound Effect
Press the POP, JAZZ, ROCK, CLASSIC or FLAT buttons on the remote control to select a desired music mode.
Dimming the display
When the unit is in standby press the DIM/SLEEP button. The unit has 3 display light setting, repeatedly press the DIM/SLEEP button to scroll through the settings.
Docking an iPod / iPhone/ iPad
1

natural_image
Line drawing of a mechanical device with a tray, handle, and bracket (no text or symbols)
GB

natural_image
Line drawing of a mechanical device with a base plate, drawer, and handle (no text or symbols)

natural_image
Line drawing of a smartphone with blank screen and buttons (no text or symbols)
3

natural_image
Line drawing of a mechanical device with a downward arrow and base plate (no text or symbols)
iPod / iPhone / iPad Operation
This unit can support the iPad, iPad2, iPad3, iPhone, iPhone 3G/3GS/4/4S and various iPod models with 30-pin dock connectors, such as the iPod touch 2^nd/3^rd/4^th Generation and iPod nano 2^nd/3^rd/4^th/5^th/6^th Generation.
Inserting the iPod / iPhone / iPad
1. The iPod / iPhone / iPad battery will automatically charge when docked with the unit until the battery is fully charged.
2. Press the DOCK button your iPod/iPhone/iPad with start to play automatically.
3. Press the MENU button to go back through the menus.
4. Press the ▲ or √ buttons to move up and down the menus.
5. Press the ENTER button to select a menu option.
To Play / Pause music
- Press the I/PAIR button on the remote control pause playback.
- To resume playback, press the II▶ / PAIR button on the remote control again.
- Press and hold the II▶ / PAIR button to send the iPod /iPhone / iPad into sleep mode.
Skipping and searching tracks
- Press the >buttons on the remote control to skip forwards to the next track.
- Press the < buttons on the remote control to skip backwards to the previous track.

- The unit does not show any music information from your iPod / iPhone / iPad. Please view the music information on your iPod / iPhone / iPad display.
- To avoid damaging your iPod / iPhone / iPad or the unit, please take care when inserting and removing your iPod / iPhone / iPad from the dock.

- To use the remote control to operate the menus of the iPod touch series, iPhone series and iPod nano 6^th generation, you need to enter the music menus on your iPod / iPhone / iPad first.
- This manual provides the basic instructions of menu navigation on iPod / iPhone / iPad. For advance operations, please refer to the instructions that accompanied your iPod / iPhone / iPad.
\- Press and hold the or during playback to search forwards and backwards.
Random Playback
All the tracks on the disc can be played in a random order.
- During playback, press the ✗ button on the remote control.
• After all the tracks have been played once, the playback will stop automatically.
- To cancel the random playback, press the ✗ button on the remote control during RANDOM playback. Normal playback will resume.
Repeat Playback
- Press the button once on the remote control. The unit will play the current track repeatedly.
- Press the ≡ button twice. The unit will play all tracks repeatedly.
- Press the ≡ button once more to cancel the repeat function.
Charging your iPod / iPhone / iPad
1. Your iPod / iPhone / iPad has an internal non-removable battery, the battery may need to be charged if it has not been used for a while.
2. You can automatically charge the iPod / iPhone / iPad through the unit when it is docked.
Video Out Function
When any iPod / iPhone / iPad model with video playback function is plugged into the unit, videos / photos can be viewed on another display screen.
1. Connect a TV or display screen using the Video Out socket via the video connection cable (not included).
2. Set your TV to the correct input.
3. Choose the video / photo file you would like to play / display and the iPod / iPhone / iPad will automatically play / display the file on the desired video display.

- If you charge the iPod / iPhone / iPad while playing music, it may take longer than normal to fully charge the battery.
- At any time, you can control the iPod / iPhone / iPad player itself directly.
- 1^st , 2^nd & 3^rd generation iPods cannot be charged.
- The charging function will only work with the mains adapter connected.
• The iPod / iPhone / iPad can be charged with this unit in either ON or Standby mode.
iPod / iPhone / iPad Compatibility
Your unit is compatible with the following:
iPod
- iPod Touch 4th generation - 8GB, 32GB, 64GB
- iPod Touch 3rd generation - 32GB, 64GB
- iPod Touch 2nd generation - 8GB, 16GB, 32GB, 64GB
- iPod Nano 6th generation - 8GB, 16GB
- iPod Nano 5th generation (video camera) - 8GB, 16GB
- iPod Nano 4th generation (video camera) - 8GB, 16GB
- iPod Nano 3rd generation (video camera) - 4GB, 8GB
- iPod Nano 2nd generation - 2GB, 4GB, 8GB
iPhone
- iPhone 4S - 16GB, 32GB, 64GB
- iPhone 4 - 16GB, 32GB
- iPhone 3GS - 8GB, 16GB, 32GB
- iPhone 3G - 8GB, 16GB
- iPhone - 4GB, 6GB, 16GB
iPad
- iPad 3rd generation - 16GB, 32GB, 64GB
- iPad 2 generation - 16GB, 32GB, 64GB
- iPad generation - 16GB, 32GB, 64GB
Bluetooth® Audio
The unit has a Bluetooth function that can receive a signal within 10 metres.
To pair the unit with a Bluetooth device to listen to music:
1. Press the ⏻ button to switch the unit on.
2. Press the DOCK button to select IPOD mode and make sure the dock is empty.
3. Press and hold the ▶ / PAIR button until you hear 2 "beeps". The pairing indicator will flash blue. The system has entered pairing mode and can be found.
4. Activate your Bluetooth device and select the search mode.
5. "S1IPBTX12E" will appear on your Bluetooth device list.
6. When pairing is successful, the Bluetooth indicator will light up blue and stop flashing.
7. When switched on, the unit will automatically reconnect with the latest connected Bluetooth device.
8. If the unit's Bluetooth connection is lost, press ▶ /PAIR to reconnect with the latest connected Bluetooth device.
9. If the power is cut off from a device that your speaker is connected to, it may not automatically reconnect when the power resumes. You may have to pair the speaker again.

- If the signal strength is weak, your Bluetooth receiver may disconnect, but it will re-enter pairing mode automatically.
- The unit supports pairing for up to 8 Bluetooth devices.
- While in Pairing Mode (the LED will flash blue) press the ▶ / PAIR button 2 times (1 second apart each time) to clear all pairing settings. If successful, you will hear 2 beeps.
AUX IN Operation
1. Before connecting to the mains socket, use a 3.5mm AUX IN cable (not included) to connect your audio device through the AUX IN socket at the rear of the unit.
2. Connect the mains adapter to the unit and then the mains socket.
3. Press the AUX button on the remote control to switch to AUX mode. The status indicator will light up orange.
4. Press the VOL +/- buttons to adjust the volume to your desired level.
5. In AUX mode, operate your audio device directly for playback features.
Listening to the Radio
Extend the FM aerial to receive the best FM reception.
1. Press the FM button on the remote control to select FM mode.
2. Press and hold the button to automatically search for the next available radio station.
3. To fine tune a station press the button. Each press will adjust the frequency by 0.1MHz.
Programming radio stations
You can store up to 20 radio stations in your units memory.
1. When you have found a radio station that you would like to store press the STORE button.
2. Press the ∧ or √ buttons to select a programme position number 1-20.
3. Press the ENTER button to store the radio station.
Selecting a stored radio station
1. Press the RECALL button or the buttons to scroll through the stored stations.
Auto Setting the Clock
Your unit can display the time. The time can be set from the clock on your iPod / iPhone / iPad.
Manually Setting the Clock
In STANDBY mode:
1. Press and hold STORE.
2. Press <> to adjust the time.
3. Press ENTER to confirm.
4. Repeat steps (2) and (3) until you have finished setting the clock.
Sleep Function
You can switch the unit to standby after a set time.
1. Press the DIM/SLEEP button to scroll through the sleep times when the unit is switched on.
The times are as follows:
5 mins - 10 mins - 15 mins - 20 mins - 30 mins - 45 mins - 60 mins - 90 mins - OFF '--'
2. When the sleep timer is set if you press DIM/SLEEP the remaining time will be displayed.
3. To cancel the SLEEP function, press and hold DIM/SLEEP until the display shows "S --".
Maintenance
Cleaning the Unit

Ensure the unit is fully unplugged from the mains socket before cleaning.
- To clean the unit, wipe the case with a slightly moist, lint-free cloth.
- Do not use any cleaning fluids containing alcohol, ammonia or abrasives.
- Do not spray an aerosol at or near the unit.
Hints and Tips
If a problem does occur, it may often be due to something very minor. The following table contains various tips.
Problem Cause / Solution PowerSystem does not turn on or does not respond to the remote control. Make sure mains adapter is connected to the mains socket and the unit properly and that the mains socket is turned on.Check that the remote control has a battery. The battery may need to be replaced. iPod/iPhone/iPadThe unit doesn’t play iPod / iPhone / iPad files or doesn’t function as expected. Make sure the iPod / iPhone / iPad is connected properly.Check if the unit is off or in AUX or FM mode. Press the SOURCE button repeatedly on the unit or press the DOCK button on the remote control switch to iPod mode.Make sure the iPod / iPhone / iPad is switched on.Vibrations may have caused the iPod / iPhone / iPad to come loose from the docking station. BluetoothI cannot find “S1IPBTX12E” on my Bluetooth device. Ensure the Bluetooth function is activated on your Bluetooth device. Remote ControlNo functions or short range. Insert a new battery.Aim remote control directly at the unit’s remote sensor.
Specifications
Model S1IPBTB12E, S1IPBTW12E, S1IPBTR12E AC Power AC 100 -240V ~50/60Hz Unit Output Power 2 x 15 Watts DC Output Voltage 18V 1.5A
Features and specifications are subject to change without prior notice.
Takk for at du kjøpte den nye Sandstrøm Trådløs høyttaler med iPhone / iPod / iPad-dokking.
Vi anbefaler at du tar deg tid til å lese gjennom hele bruksanvisningen for å bli fortrolig med alle funksjonene som tilbys. Veiledningen gir deg også mange tips og råd for å løse eventuelle problemer.
Les alle sikkerhetsanvisningene nøye før bruk og oppbevar bruksanvisningen for fremtidig referanse.
Pakke opp
Fjern alle gjenstander fra emballasjen. Ta vare på emballasjen. Ta hensyn til lokale forskrifter om avfallshåndtering hvis du må kaste emballasjen.
Følgende elementer er vedlagt:

natural_image
Simple illustration of a gray rectangular device with a small screen and top handle (no text or symbols)
Hovedenhet

Fjernkontroll


InstruksjonsmanualStrømadapter FM-antenr
Produktoversikt
Hovedenhet
Sett forfra
1. iPod/iPhone/iPad-forankring
2. Fjernkontrollsensor
3. Skjerm
4. Høyttalere

NO
Sett bakfra

5. DC-IN-kontakt
6. AUX IN-kontakt
7. VIDEO UT-kontakt
8. FM-antennekontakt
Sett ovenfra
NO

1. Blå LED-pareindikator
Blinker blått när det søkes etter en Bluetooth-enhet. Slutter å blinke ved paring til en Bluetooth-enhet.
2. Grønn LED-indikator
Viser enheten i iPOD-modus.
Blinker for å indikere at enheten er i
DEMP-modus. Blir gul for å indikere
AUX-modus. I FM-modus, forblir LED-
indikatoren utent.
3. KILDE-knapp
Bytter mellom moduser: iPod / Bluetooth - AUX - FM - STANDBY.
4. PAR-knapp / HOPPER BAKOVER-knapp
- Få tilgang til Bluetooth-funksjon for å pare med en Bluetooth-enhet.
- Trykk for å hoppe bak til begynnelsen av sporet eller til det forrige sporet.
- Trykk for å spole fort bakover i det gjeldende sporet.
- Trykk for å søke etter en radiostasjon ved å gå bakover gjennom tilgjengelige radiofrekvenser.
5. HOPP FREMOVER-knapp
- Trykk for å hoppe til det neste sporet.
- Trykk og hold for å spole fort forover i det gjeldende sporet.
- Trykk for å søke etter en radiostasjon ved å gå fremover gjennom tilgjengelige radiofrekvenser.
6. VOLUM --knapp
Trykk for å redusere volumet.
7. VOLUM +-knapp
Trykk for å øke volumet.
Fjernkontroll
1. STANDBY-knapp
Veksler enheten mellom på og ventemodus.
2. FM-knapp
Bytter til FM-modus.
3. AUX-knapp
Bytter til AUX-modus.
4. ∧-knapp
Trykk for å rulle opp menyer eller programmerte radiostasjoner.
5. ▶ / PAR-knapp
Trykk for å spille av eller pause et spor i iPod-modus. Trykk og hold for å pare til en Bluetooth-enhet.
6. > -knapp
- Trykk for å hoppe til det neste sporet.
- Trykk og hold for å spole fort forover i det gjeldende sporet.
- Trykk for å søke etter en radiostasjon ved å gå fremover gjennom tilgjengelige radiofrekvenser.
7. V-knapp
Trykk for å rulle ned menyer eller programmerte radiostasjoner.
8. ENTER-knapper
Trykk for å velge et menyalternativ.
9. REPETER ⇌-knapp
Trykk én gang til for å gjenta sporet som spiller. Trykk igjen for å gjenta alle sporene. Trykk igjen for å slå gjentak av.
10. DEMP-knapp
Trykk for å dempe volumet.
11. VOLUM +-knapp
Trykk for å øke volumet.
12. POP-knapp
Trykk for å lytte til musikk i en forhåndsinnstilt POP-lydeffekt.

13. KLASSISK-knapp
Trykk for å lytte til musikk i en forhåndsinnstilt KLASSISK-lydeffekt.
14. DEMPE/SOVE-knapp
- Trykk for å justere lysstyrkenivå.
- Trykk for å aktivere/deaktivere hviletidtaker.
15. FLAT-knapp
Trykk for å lytte til musikk i en forhåndsinnstilt FLAT-lydeffekt.
16. LAGRE-knapp
Trykk for å lagre radiostasjoner.
17. DOCK-knapp
Trykk for å velge IPOD-modus.
18. <-knapp
- Trykk for å hoppe bak til begynnelsen av sporet eller til det forrige sporet.
- Trykk for å spole fort bakover i det gjeldende sporet.
- Trykk for å søke etter en radiostasjon ved å gå bakover gjennom tilgjengelige radiofrekvenser.
19. MENY-knapp
Trykk for å rulle tilbake gjennom menyene.
20. STOKKET ✗-knapp
Trykk for å lytte til spor i en tilfeldig rekkefølge.
21. VOLUM --knapp
Trykk for å redusere volumet.
22. ROCK-knapp
Trykk for å lytte til musikk i en forhåndsinnstilt ROCK-lydeffekt.
23. JAZZ-knapp
Trykk for å lytte til musikk i en forhåndsinnstilt JAZZ-lydeffekt.
24. TILBAKEKALL-knapp
Trykk for å velge forhåndsinnstilte radiostasjoner.

Fjerne isoleringsteipen fra fjernkontrollen
Fjern isoleringsteipen fra batteriet hvis dette er første gang det brukes. Du finner batteriet bakerst under fjernkontrollen.

natural_image
Diagram of a hand holding a small object with an arrow indicating direction (no text or symbols)
NO
Skifte batteriet i fjernkontrollen
Fjernkontrollen krever et 3 V litiumbatteri av typen CR2025.
1. Skyv og hold batteriets låseflik i pilens retning.
2. Trekk ut batteriholderen og fjern det gamle batteriet.
3. Erstatt med et nytt batteri.
4. Skyv batteriholderen tilbake på plass i fjernkontrollen.

flowchart
graph TD
    A["Device with battery"] --> B["Component 1"]
    B --> C["Component 2"]
    C --> D["Component 3"]
    D --> E["Component 4"]
Behandle batteriet
\- Skjødesløs eller feil bruk av batterier kan føre til korrosjon eller batterilekkasje, noe som kan føre til personskade, brann eller annen skade på eiendom.
\- Sett batteriet riktig inn i batterirommet. Normalt vender batteriets positive pol (+) opp.
\- Når batteriet er tomt, vil ikke fjernkontrollen fungere.
\- Bruk kun batteritypen som angis i denne håndboken.
\- Ikke kast det brukte batteriet som husholdningsavfall. Kast det i henhold til lokale bestemmelser.
\- Små knappebatterier, f.eks. det som brukes i denne fjernkontrollen, kan lett svelges av små barn, noe som er farlig. Hold løse knappebatterier borte fra små barn og påse at batteridekslet sitter godt fast i fjernkontrollen. Ta kontakt med lege hvis du tror at et knappebatteri er blitt svelget.
Håndtere fjernkontrollen
- Hvis du finner det vanskelig å åpne batterirommet, kan du bruke en binders i trinn 1 i avsnittet «Skifte batteriet i fjernkontrollen».
- Ikke la fjernkontrollen falle ned.
- Ikke utsett fjernkontrollen for støt.
- Ikke søl vann eller andre væsker på fjernkontrollen.
- Ikke legg fjernkontrollen på en fuktig gjenstand.
- Ikke legg fjernkontrollen i direkte solskinn eller nær varmekilder.
- Ta batteriet ut av fjernkontrollen hvis den ikke skal brukes på en lang stund. I motsatt fall kan korrosjon eller batterilekkasje oppstå, noe som kan føre til personskade, skade på eiendom og/eller brann.
Fjernkontrollens virkeområde
- Fjernkontrollsensoren foran på enheten gjenkjenner signaler fra fjernkontrollen opptil 5 meter unna og innenfor en vinkel på maksimum 60°.
- Vær oppmerksom på at bruksavstanden kan variere avhengig av lysstyrken i rommet.

Koble til antennen
Sett antennen inn i FM-kontakten og stram til mutteren.
Utvid og vinkle antennen for å få best mottak.

\- Bruk bare FM-antennen som følger med denne enheten.

NO
Strømkilde
Strømnett
- Denne enheten opererer med en DC 18V/1.5A strømadapter (følger med).
- Kobles enheten til en annen strømkilde kan enheten påføres skade. Strekk strømadapterledningen til sin fulle lengde. Koble strømadapteren til DC kontakten på baksiden av enheten og en stikkontakt. Kontroller at strømadapteren er satt helt inn i stikkontakten. Enheten er nå tilkoblet og klar til bruk.
- For å slå enheten helt av, trekk strømadapteren ut av stikkontakten.

natural_image
Technical line drawing of a mechanical or electrical component with a vertical rod, threaded connectors, and a cable (no text or symbols)
Generell bruk
Slå PÅ/AV
- Når du først kobler enheten til stikkontakten, vil den være i ventemodus. "00:00" blinker på displayet.
- Trykk på VENTEMODUS Ⓧ-knappen på hovedenheten eller trykk på VENTEMODUS Ⓧ -knappen på fjernkontrollen for å slå på enheten. "IPOD" vises.
- For å sette enheten tilbake i hvilemodus, trykk på VENTEMODUS Ⓧ-knappen på fjernkontrollen eller trykk og hold VENTEMODUS Ⓧknappen på enheten.
- Koble strømadapteren fra stikkontakten for å slå av enheten fullstendig.

Dersom enhetsvolumet er nesten dempet eller står inaktiv i 20 minutter, bytter den automatisk til standbymodus, blinker LED-indikatorene i 5 minutter før den går inn i hvilemodus. Trykk på en knapp for å forlenge tiden.
Velge modus
- Trykk på KILDE®-knappen gjentatte ganger på enheten for å bytte til iPod/Bluetooth, AUX eller FM-modus. Statusindikatoren lyser grønn eller oransje, eller forblir utent avhengig av valgt modus.
- Trykk på DOCK-knappen på fjernkontrollen for å velge iPod/Bluetooth-modus. (Statusindikator tennes i grønt (iPod-modus) eller blått (Bluetooth-modus).)
- Trykk på FM-knappen på fjernkontrollen for å velge FM-modus. (Ingen statusindikator.)
- Trykk på AUX-knappen på fjernkontrollen for å velge AUX-modus. (Statusindikator lyser oransje.)
Justere lydstyrken
- Bruk VOLUM + eller --knappen for å øke eller minske lydstyrken.
- Trykk på DEMP -knappen for å slå av lyden. Statusindikatoren og skjermen blinker. Trykk på DEMP knappen igjen for å gjenoppta lyttingen.
Justere lydeffekten
Trykk på POP, JAZZ, ROCK, KLASSISK eller FLAT-knappene på fjernkontrollen for å velge ønsket musikkmodus.
Dempe skjermen
Når enheten er i hvilemodus, trykk på DEMP/HVILE-knappen. Enheten har 3 skjermlysinnstillinger, trykk gjentatte ganger på DEMP/HVILE-knappen for å bla gjennom innstillingene.
Forankre en iPod / iPhone/ iPad
1

natural_image
Line drawing of a mechanical device with a tray, handle, and bracket (no text or symbols)
NO

natural_image
Line drawing of a mechanical device with a base plate, drawer, and handle (no text or symbols)

natural_image
Line drawing of a smartphone with blank screen and buttons (no text or symbols)
3

natural_image
Line drawing of a mechanical device with a downward arrow and base plate (no text or symbols)
iPod/iPhone/iPad-betjening
Denne enheten kan støtte iPad, iPad2, iPad3, iPhone, iPhone 3G/3GS/4/4S og forskjellige modeller av iPod-spillere med 30-pins forankringskonnektorer, som iPod touch 2^nd/3^rd/4^th Generation og iPod nano 2^nd/3^rd/4^th/5^th/6^th Generation.
Sette inn iPod/iPhone/iPad
1. iPod / iPhone / iPad-batteriet vil automatisk lade når den er forankret med enheten til batteriet er ladet helt opp.
2. Trykk på DOCK-knappen på iPod/iPad/iPhone for å starte avspilling automatisk.
3. Trykk på MENUY-knappen for å gå tilbake gjennom menyene.
4. Trykk på ∧ eller √knappen for å flytte opp og ned i menyene.
5. Trykk på ENTER-knappen for å velge et menyalternativ.
Spille av/pause musikk
- Trykk på II▶ / PAR-knappen på fjernkontrollen for å pause avspillingen.
- Trykk på II▶ / PAR-knappen på fjernkontrollen igjen for å fortsette avspillingen.
- Trykk og hold II▶ / PAR-knappen for å sende iPod /iPhone / iPad inn i hvilemodus.
Hoppe over og søke spor
- Trykk på >knappene på fjernkontrollen for å hoppe framover til det neste sporet.
- Trykk på <-knappene på fjernkontrollen for å hoppe bakover til det forrige sporet.

- Enheten viser ikke noe musikkinformasjon fra iPod / iPhone / iPad. Vis musikkinformasjonen på iPod / iPhone / iPad-skjermen.
- For å unngå skade på iPod / iPhone / iPad eller enheten, må du være forsiktig når du setter inn og fjerner iPod / iPhone / iPad fra forankringsstasjonen.

- For å bruke fjernkontrollen til å betjene menyene på iPod touch-serien, iPhone-serien og iPod nano 6. generasjon, må du først gå inn i musikkmenyen på iPod / iPhone / iPad.
- Denne håndboken gir grunnleggende instrukser om menynavigering på iPod / iPhone / iPad. For avanserte operasjoner, henvis til instruksene som fulgte med iPod / iPhone / iPad.
\- Trykk og hold eller under avspilling for å søke fremover og bakover.
Vilkårlig avspilling
Alle sporene på platen kan spilles av i en vilkårlig rekkefølge.
- Under avspilling, trykk på ✗-knappen på fjernkontrollen.
- Etter at alle sporene har blitt spilt av én gang, stopper avspillingen automatisk.
- Under vilkårlig avspilling, trykk på ✗ -knappen på fjernkontrollen for å avbryte TILFELDIG-funksjonen. Normal avspilling gjenopptas.
Gjenta avspilling
- Trykk én gang på knappen på fjernkontrollen. Enheten vil spille av det gjeldende sporet gjentatte ganger.
- Trykk to ganger på ⇌ -knappen. Enheten vil spille av alle sporene gjentatte ganger.
- Trykk én gang til på ⇌ -knappen for å avbryte gjentakelsesfunksjonen.
Lade iPod/iPhone/iPad
1. Hvis iPod/iPhone/iPad-enheten ikke har vært i bruk på en stund, kan det interne batteriet trenge ladning.
2. Du kan lade en iPod/iPhone/iPad automatisk gjennom enheten når den er forankret.
Video ut-funksjon
Når en iPod/iPhone/iPad-modell med videoavspillingsfunksjon er koblet til enheten, kan videoer/fotoer vises på en annen skjerm.
1. Koble en TV eller dataskjerm til videokontakten ved hjelp av en videokabel (ikke vedlagt).
2. Still inn TV-en din til riktig inngang.
3. Velg video-/fotofilen som du vil spille av eller vise, så spiller iPod / iPhone / iPad filen automatisk av eller viser den på ønsket videoskjerm.

- Hvis du spiller av musikk samtidig med at iPod/iPhone/iPad lades, kan det ta lenger tid å lade batteriet helt opp.
- Du kan när som helst kontrollere selve iPod / iPhone / iPad-spilleren direkte.
- 1^st , 2^nd & 3^rd Generation iPod kan ikke lades.
- Ladefunksjonen fungerer bare med strømadapteren koblet til.
- iPod / iPhone / iPad kan lades med denne enheten enten i PÅ- eller hvilemodus.
iPod/iPhone/iPad-kompatibilitet
Enheten din er kompatibel med følgende:
iPod
- iPod Touch 4th generation - 8 GB, 32 GB, 64 GB
- iPod Touch 3rd generation - 32 GB, 64 GB
- iPod Touch 2nd generation - 8 GB, 16 GB, 32 GB, 64 GB
- iPod Nano 6th generation - 8 GB, 16 GB
- iPod Nano 5th generation (videokamera) - 8 GB, 16 GB
- iPod Nano 4th generation (videokamera) - 8 GB, 16 GB
- iPod Nano 3rd generation (videokamera) - 4 GB, 8 GB
- iPod Nano 2nd generation - 2 GB, 4 GB, 8 GB
iPhone
- iPhone 4S - 16 GB, 32 GB, 64 GB
- iPhone 4 - 16 GB, 32 GB
- iPhone 3GS - 8 GB, 16 GB, 32 GB
- iPhone 3G - 8 GB, 16 GB
- iPhone - 4 GB, 6 GB, 16 GB
iPad
- iPad 3rd generation - 16 GB, 32 GB, 64 GB
- iPad 2 generation - 16 GB, 32 GB, 64 GB
- iPad generation - 16 GB, 32 GB, 64 GB
Bluetooth®-lyd
Enheten har en Bluetooth-funksjon som kan motta et signal innenfor 10 meter.
Slik pares enheten med en Bluetooth-enhet for å lytte til musikk:
1. Trykk på ⏻-knappen for å slå på enheten.
2. Trykk på DOCK-knappen for å velge IPOD-modus og sørg for at forankringen er tom.
3. Trykk og hold II▶ / PAR-knappen til du hører 2 "pipelyder". Pareindikatoren vil blinke blått. Systemet har gått inn i paremodus og kan bli funnet.
4. Aktiver Bluetooth-enheten og start søk etter andre enheter.
5. Du vil se «S1IPBTX12E» i listen med tilgjengelige Bluetooth-enheter.
6. Når paring er vellykket, tennes Bluetooth-indikatoren blått og slutter å blinke
7. Når den er slått på, vil enheten automatisk koble til den sist tilkoblede Bluetooth-enheten.
8. Hvis enhetens Bluetooth-forbindelse er tapt, trykk på II▶ / PAR for å koble til igjen med sist tilkoblet Bluetooth-enhet.
9. Hvis strømmen er slått av fra en enhet som høyttaleren er koblet til, kan den kanskje ikke automatisk koble til igjen när strømmen kommer tilbake. Det kan hende at du må pare høyttaleren igjen.

- Hvis signalstyrken er svak, kan Bluetooth-mottakeren koble fra, men vil da automatisk være klar til paring igjen.
- Enheten støtter paring for opptil 8 Bluetooth-enheter.
- I paringmodus (LED-lampen blinker blått), trykk på II▶ / PAR-knappen 2 ganger (1 sekund mellom hvert trykk) for å fjerne alle paringsinnstillinger. Du vil høre 2 pipelyder hvis det er vellykket.
Bruk av ekstrautstyr
1. Før tilkobling til stikkontakten, bruk en 3,5 mm AUX IN (ikke inkludert) til å koble til lydenheten din gjennom denne AUX IN-kontakten på baksiden av enheten.
2. Kople strømadapteren til enheten og deretter stikkontakten.
3. Trykk på AUX-knappen på fjernkontrollen for å bytte til AUX-modus. Statusindikatoren lyser oransje.
4. Trykk på VOL + / --knappene for å justere lydstyrken til ønsket nivå.
5. I AUX-modus, betjen den eksterne lydenheten direkte når det gjelder avspillingsfunksjoner.
Lytte til radioen
Strekk ut FM-antennen for best mulig FM-mottak.
1. Trykk på FM-knappen på fjernkontrollen for å velge FM-modus.
2. Trykk og hold <- eller >knappen for å automatisk søke etter neste tilgjengelige radiostasjon.
3. For å fininnstille en stasjon, trykk på <- eller >knappen. Hvert trykk justerer frekvensen med 0,1MHz.
Programmere radiostasjoner
Du kan lagre opptil 20 radiostasjoner i enhetens minne.
1. Når du har funnet en radiostasjon som du vil lagre, trykk på LAGRE-knappen.
2. Trykk på ⚠- eller Vknappene for å velge et programposisjonsnummer 1-20.
3. Trykk på ENTER-knappen for å lagre radiostasjonen.
Velge en lagret radiostasjon.
1. Trykk på TILBAKEKALL-knappen eller -Anappene for å bla gjennom de lagrede stasjonene.
Stille klokken automatisk
Enheten din kan vise tiden. Tiden stilles inn fra klokken på iPod / iPhone / iPad.
Stille klokken manuelt
| VENTEMODUS:
1. Trykk og hold STORE.
2. Trykk på Utkoplingstimer
19. MENU Button
Press to scroll back through menus.20. SHUFFLE ✗ Button
Press to listen to tracks in a random order.21. VOLUME - Button
Press to decrease the volume.22. ROCK Button
Press to listen to music in a preset ROCK sound effect.23. JAZZ Button
Press to listen to music in a preset JAZZ sound effect.24. RECALL Button
Press to select preset radio stations. Removing the Plastic Strip from the Remote Control
Remove the protective plastic strip from the battery if the battery is being used for the first time. It is located at the bottom side of the remote control. natural_image
Line drawing of a hand pressing down on a curved object with an arrow indicating force (no text or symbols)Battery Replacement for the Remote Control
The remote control requires a CR2025, 3V Lithium battery. 1. Slide and hold the battery release tab in the direction of the arrow. (If you are having difficulty with the tab, use a paper clip to squeeze the tab.) 2. Pull out the battery holder and remove the old battery. 3. Replace with a new battery. (Ensure the + polarity faces up.) 4. Insert the battery holder back into the remote control. It will close with a click. flowchart
graph TD
A["Device with battery"] --> B["Component 1"]
B --> C["Component 2"]
C --> D["Component 3"]
D --> E["Component 4"]
Handling the Battery
\- Improper or incorrect use of batteries may cause corrosion or battery leakage, which could cause fire, personal injury or damage property. \- Install the battery correctly in the battery compartment. Normally the battery's positive polarity (+) will face up. \- When the battery is exhausted, the remote control will not function. \- Only use the battery type indicated in this manual. \- Do not dispose of the used battery as domestic waste. Dispose of it in accordance with local regulations. \- Small button cell batteries such as the one used in the remote control are easily swallowed by young children and this is dangerous. Keep loose button cells away from young children and make sure that the battery is secure in the remote control. Seek medical advice if you believe a battery cell has been swallowed.Handling the Remote Control
- If you are having difficulty removing the battery cover, use a paper clip to squeeze the battery tab before pulling out the battery cover. Remove the battery. - Do not drop the remote control. - Do not allow anything to impact the remote control. - Do not spill water or liquid on the remote control. - Do not place the remote control on a wet object. - Do not place the remote control under direct sunlight or near sources of excessive heat. - Remove the battery from the remote control when not in use for a long period of time, as corrosion or battery leakage may occur and result in physical injury, and/or property damage, and/or fire.Remote Control Operation Range
- The remote control sensor on the front unit is sensitive to the remote control's commands up to a maximum of 5 metres away and within a maximum of a 60^ arc. - Please note that the operating distance may vary depending on the brightness of the room. Connecting the Aerial
Insert the aerial into the FM socket and tighten the nut. Extent and angle the aerial to get the best reception.  Please use only the FM aerial supplied with this unit.  GBPower Source
Mains Power
- This unit operates with a DC 18V/1.5A mains adapter (included). - Connecting the unit to any other power source may damage the unit. Unwind the mains adapter to its full length. Connect the mains adapter to the DC socket on the rear of the unit and a mains socket. Make sure the mains adapter is fully inserted into the mains socket. The unit is now connected and ready to use. - To switch the unit off completely, unplug the mains adapter from the mains socket. natural_image
Line drawing of a mechanical or electrical component with a vertical rod, threaded connectors, and a cable (no text or symbols)General Operation
Switching ON / OFF
- When you first connect the unit to the mains socket, the unit will be in STANDBY mode. '00:00' will flash on the display. - Press the SOURCE ⏻ button on the unit or press the STANDBY∅button on the remote control to turn the unit on. 'IPOD' will be displayed. - To switch the unit back into standby, press the SOURCE ⏻ button on the remote control or press and hold the STANDBY∅button on the unit. - Disconnect the mains adapter from the mains socket if you want to switch the unit off completely.  If the unit volume is close to mute or idle for 20 minutes, it will automatically switch to standby mode, the LED indicators will flash for 5 minute before it switches to standby. Press any buttons to extend the time.Selecting Modes
- Press the SOURCE button repeatedly on the unit to switch to iPod/Bluetooth, AUX, or FM mode. The status indicator will light up green or orange, or remain unlit depending on mode selected. - Press the DOCK button on the remote control to select iPod/Bluetooth mode. (Status indicator will light up green (iPod mode) or blue (Bluetooth mode).) - Press the FM button on the remote control to select FM mode. (No status indicator.) - Press the AUX button on the remote control to select AUX mode. (Status indicator will light up orange.)Adjusting the volume
- Press the VOLUME + or - buttons to increase or decrease the volume level. - Press the MUTE button to turn the sound off. The status indicator and display will flash. Press the MUTE button again to resume audio listening.Adjusting the Sound Effect
Press the POP, JAZZ, ROCK, CLASSIC or FLAT buttons on the remote control to select a desired music mode.Dimming the display
When the unit is in standby press the DIM/SLEEP button. The unit has 3 display light setting, repeatedly press the DIM/SLEEP button to scroll through the settings.Docking an iPod / iPhone/ iPad
1 natural_image
Line drawing of a mechanical device with a tray, handle, and bracket (no text or symbols)natural_image
Line drawing of a mechanical device with a base plate, drawer, and handle (no text or symbols)natural_image
Line drawing of a smartphone with blank screen and buttons (no text or symbols)natural_image
Line drawing of a mechanical device with a downward arrow and base plate (no text or symbols)iPod / iPhone / iPad Operation
This unit can support the iPad, iPad2, iPad3, iPhone, iPhone 3G/3GS/4/4S and various iPod models with 30-pin dock connectors, such as the iPod touch 2^nd/3^rd/4^th Generation and iPod nano 2^nd/3^rd/4^th/5^th/6^th Generation.Inserting the iPod / iPhone / iPad
1. The iPod / iPhone / iPad battery will automatically charge when docked with the unit until the battery is fully charged. 2. Press the DOCK button your iPod/iPhone/iPad with start to play automatically. 3. Press the MENU button to go back through the menus. 4. Press the ▲ or √ buttons to move up and down the menus. 5. Press the ENTER button to select a menu option.To Play / Pause music
- Press the I/PAIR button on the remote control pause playback. - To resume playback, press the II▶ / PAIR button on the remote control again. - Press and hold the II▶ / PAIR button to send the iPod /iPhone / iPad into sleep mode.Skipping and searching tracks
- Press the >buttons on the remote control to skip forwards to the next track. - Press the < buttons on the remote control to skip backwards to the previous track.  - The unit does not show any music information from your iPod / iPhone / iPad. Please view the music information on your iPod / iPhone / iPad display. - To avoid damaging your iPod / iPhone / iPad or the unit, please take care when inserting and removing your iPod / iPhone / iPad from the dock.  - To use the remote control to operate the menus of the iPod touch series, iPhone series and iPod nano 6^th generation, you need to enter the music menus on your iPod / iPhone / iPad first. - This manual provides the basic instructions of menu navigation on iPod / iPhone / iPad. For advance operations, please refer to the instructions that accompanied your iPod / iPhone / iPad. \- Press and hold the or during playback to search forwards and backwards.Random Playback
All the tracks on the disc can be played in a random order. - During playback, press the ✗ button on the remote control. • After all the tracks have been played once, the playback will stop automatically. - To cancel the random playback, press the ✗ button on the remote control during RANDOM playback. Normal playback will resume.Repeat Playback
- Press the button once on the remote control. The unit will play the current track repeatedly. - Press the ≡ button twice. The unit will play all tracks repeatedly. - Press the ≡ button once more to cancel the repeat function.Charging your iPod / iPhone / iPad
1. Your iPod / iPhone / iPad has an internal non-removable battery, the battery may need to be charged if it has not been used for a while. 2. You can automatically charge the iPod / iPhone / iPad through the unit when it is docked.Video Out Function
When any iPod / iPhone / iPad model with video playback function is plugged into the unit, videos / photos can be viewed on another display screen. 1. Connect a TV or display screen using the Video Out socket via the video connection cable (not included). 2. Set your TV to the correct input. 3. Choose the video / photo file you would like to play / display and the iPod / iPhone / iPad will automatically play / display the file on the desired video display.  - If you charge the iPod / iPhone / iPad while playing music, it may take longer than normal to fully charge the battery. - At any time, you can control the iPod / iPhone / iPad player itself directly. - 1^st , 2^nd & 3^rd generation iPods cannot be charged. - The charging function will only work with the mains adapter connected. • The iPod / iPhone / iPad can be charged with this unit in either ON or Standby mode.iPod / iPhone / iPad Compatibility
Your unit is compatible with the following:iPod
- iPod Touch 4th generation - 8GB, 32GB, 64GB - iPod Touch 3rd generation - 32GB, 64GB - iPod Touch 2nd generation - 8GB, 16GB, 32GB, 64GB - iPod Nano 6th generation - 8GB, 16GB - iPod Nano 5th generation (video camera) - 8GB, 16GB - iPod Nano 4th generation (video camera) - 8GB, 16GB - iPod Nano 3rd generation (video camera) - 4GB, 8GB - iPod Nano 2nd generation - 2GB, 4GB, 8GBiPhone
- iPhone 4S - 16GB, 32GB, 64GB - iPhone 4 - 16GB, 32GB - iPhone 3GS - 8GB, 16GB, 32GB - iPhone 3G - 8GB, 16GB - iPhone - 4GB, 6GB, 16GBiPad
- iPad 3rd generation - 16GB, 32GB, 64GB - iPad 2 generation - 16GB, 32GB, 64GB - iPad generation - 16GB, 32GB, 64GBBluetooth® Audio
The unit has a Bluetooth function that can receive a signal within 10 metres. To pair the unit with a Bluetooth device to listen to music: 1. Press the ⏻ button to switch the unit on. 2. Press the DOCK button to select IPOD mode and make sure the dock is empty. 3. Press and hold the ▶ / PAIR button until you hear 2 "beeps". The pairing indicator will flash blue. The system has entered pairing mode and can be found. 4. Activate your Bluetooth device and select the search mode. 5. "S1IPBTX12E" will appear on your Bluetooth device list. 6. When pairing is successful, the Bluetooth indicator will light up blue and stop flashing. 7. When switched on, the unit will automatically reconnect with the latest connected Bluetooth device. 8. If the unit's Bluetooth connection is lost, press ▶ /PAIR to reconnect with the latest connected Bluetooth device. 9. If the power is cut off from a device that your speaker is connected to, it may not automatically reconnect when the power resumes. You may have to pair the speaker again.  - If the signal strength is weak, your Bluetooth receiver may disconnect, but it will re-enter pairing mode automatically. - The unit supports pairing for up to 8 Bluetooth devices. - While in Pairing Mode (the LED will flash blue) press the ▶ / PAIR button 2 times (1 second apart each time) to clear all pairing settings. If successful, you will hear 2 beeps.AUX IN Operation
1. Before connecting to the mains socket, use a 3.5mm AUX IN cable (not included) to connect your audio device through the AUX IN socket at the rear of the unit. 2. Connect the mains adapter to the unit and then the mains socket. 3. Press the AUX button on the remote control to switch to AUX mode. The status indicator will light up orange. 4. Press the VOL +/- buttons to adjust the volume to your desired level. 5. In AUX mode, operate your audio device directly for playback features.Listening to the Radio
Extend the FM aerial to receive the best FM reception. 1. Press the FM button on the remote control to select FM mode. 2. Press and hold theProgramming radio stations
You can store up to 20 radio stations in your units memory. 1. When you have found a radio station that you would like to store press the STORE button. 2. Press the ∧ or √ buttons to select a programme position number 1-20. 3. Press the ENTER button to store the radio station.Selecting a stored radio station
1. Press the RECALL button or the buttons to scroll through the stored stations.Auto Setting the Clock
Your unit can display the time. The time can be set from the clock on your iPod / iPhone / iPad.Manually Setting the Clock
In STANDBY mode:
1. Press and hold STORE. 2. Press <> to adjust the time. 3. Press ENTER to confirm. 4. Repeat steps (2) and (3) until you have finished setting the clock.Sleep Function
You can switch the unit to standby after a set time. 1. Press the DIM/SLEEP button to scroll through the sleep times when the unit is switched on. The times are as follows: 5 mins - 10 mins - 15 mins - 20 mins - 30 mins - 45 mins - 60 mins - 90 mins - OFF '--' 2. When the sleep timer is set if you press DIM/SLEEP the remaining time will be displayed. 3. To cancel the SLEEP function, press and hold DIM/SLEEP until the display shows "S --".Maintenance
Cleaning the Unit
 Ensure the unit is fully unplugged from the mains socket before cleaning. - To clean the unit, wipe the case with a slightly moist, lint-free cloth. - Do not use any cleaning fluids containing alcohol, ammonia or abrasives. - Do not spray an aerosol at or near the unit.Hints and Tips
If a problem does occur, it may often be due to something very minor. The following table contains various tips.| Problem Cause / Solution | |
| PowerSystem does not turn on or does not respond to the remote control. | Make sure mains adapter is connected to the mains socket and the unit properly and that the mains socket is turned on.Check that the remote control has a battery. The battery may need to be replaced. |
| iPod/iPhone/iPadThe unit doesn’t play iPod / iPhone / iPad files or doesn’t function as expected. | Make sure the iPod / iPhone / iPad is connected properly.Check if the unit is off or in AUX or FM mode. Press the SOURCE button repeatedly on the unit or press the DOCK button on the remote control switch to iPod mode.Make sure the iPod / iPhone / iPad is switched on.Vibrations may have caused the iPod / iPhone / iPad to come loose from the docking station. |
| BluetoothI cannot find “S1IPBTX12E” on my Bluetooth device. | Ensure the Bluetooth function is activated on your Bluetooth device. |
| Remote ControlNo functions or short range. | Insert a new battery.Aim remote control directly at the unit’s remote sensor. |
Specifications
| Model S1IPBTB12E, S1IPBTW12E, S1IPBTR12E |
| AC Power AC 100 -240V ~50/60Hz |
| Unit Output Power 2 x 15 Watts |
| DC Output Voltage 18V 1.5A |
Pakke opp
Fjern alle gjenstander fra emballasjen. Ta vare på emballasjen. Ta hensyn til lokale forskrifter om avfallshåndtering hvis du må kaste emballasjen. Følgende elementer er vedlagt: natural_image
Simple illustration of a gray rectangular device with a small screen and top handle (no text or symbols)Produktoversikt
Hovedenhet
Sett forfra
1. iPod/iPhone/iPad-forankring 2. Fjernkontrollsensor 3. Skjerm 4. Høyttalere  NOSett bakfra
 5. DC-IN-kontakt 6. AUX IN-kontakt 7. VIDEO UT-kontakt 8. FM-antennekontaktSett ovenfra
NO 1. Blå LED-pareindikator
Blinker blått när det søkes etter en Bluetooth-enhet. Slutter å blinke ved paring til en Bluetooth-enhet.2. Grønn LED-indikator
Viser enheten i iPOD-modus. Blinker for å indikere at enheten er i DEMP-modus. Blir gul for å indikere AUX-modus. I FM-modus, forblir LED- indikatoren utent.3. KILDE-knapp
Bytter mellom moduser: iPod / Bluetooth - AUX - FM - STANDBY.4. PAR-knapp / HOPPER BAKOVER-knapp
- Få tilgang til Bluetooth-funksjon for å pare med en Bluetooth-enhet. - Trykk for å hoppe bak til begynnelsen av sporet eller til det forrige sporet. - Trykk for å spole fort bakover i det gjeldende sporet. - Trykk for å søke etter en radiostasjon ved å gå bakover gjennom tilgjengelige radiofrekvenser.5. HOPP FREMOVER-knapp
- Trykk for å hoppe til det neste sporet. - Trykk og hold for å spole fort forover i det gjeldende sporet. - Trykk for å søke etter en radiostasjon ved å gå fremover gjennom tilgjengelige radiofrekvenser.6. VOLUM --knapp
Trykk for å redusere volumet.7. VOLUM +-knapp
Trykk for å øke volumet.Fjernkontroll
1. STANDBY-knapp
Veksler enheten mellom på og ventemodus.2. FM-knapp
Bytter til FM-modus.3. AUX-knapp
Bytter til AUX-modus.4. ∧-knapp
Trykk for å rulle opp menyer eller programmerte radiostasjoner.5. ▶ / PAR-knapp
Trykk for å spille av eller pause et spor i iPod-modus. Trykk og hold for å pare til en Bluetooth-enhet.6. > -knapp
- Trykk for å hoppe til det neste sporet. - Trykk og hold for å spole fort forover i det gjeldende sporet. - Trykk for å søke etter en radiostasjon ved å gå fremover gjennom tilgjengelige radiofrekvenser.7. V-knapp
Trykk for å rulle ned menyer eller programmerte radiostasjoner.8. ENTER-knapper
Trykk for å velge et menyalternativ.9. REPETER ⇌-knapp
Trykk én gang til for å gjenta sporet som spiller. Trykk igjen for å gjenta alle sporene. Trykk igjen for å slå gjentak av.10. DEMP-knapp
Trykk for å dempe volumet.11. VOLUM +-knapp
Trykk for å øke volumet.12. POP-knapp
Trykk for å lytte til musikk i en forhåndsinnstilt POP-lydeffekt. 13. KLASSISK-knapp
Trykk for å lytte til musikk i en forhåndsinnstilt KLASSISK-lydeffekt.14. DEMPE/SOVE-knapp
- Trykk for å justere lysstyrkenivå. - Trykk for å aktivere/deaktivere hviletidtaker.15. FLAT-knapp
Trykk for å lytte til musikk i en forhåndsinnstilt FLAT-lydeffekt.16. LAGRE-knapp
Trykk for å lagre radiostasjoner.17. DOCK-knapp
Trykk for å velge IPOD-modus.18. <-knapp
- Trykk for å hoppe bak til begynnelsen av sporet eller til det forrige sporet. - Trykk for å spole fort bakover i det gjeldende sporet. - Trykk for å søke etter en radiostasjon ved å gå bakover gjennom tilgjengelige radiofrekvenser.19. MENY-knapp
Trykk for å rulle tilbake gjennom menyene.20. STOKKET ✗-knapp
Trykk for å lytte til spor i en tilfeldig rekkefølge.21. VOLUM --knapp
Trykk for å redusere volumet.22. ROCK-knapp
Trykk for å lytte til musikk i en forhåndsinnstilt ROCK-lydeffekt.23. JAZZ-knapp
Trykk for å lytte til musikk i en forhåndsinnstilt JAZZ-lydeffekt.24. TILBAKEKALL-knapp
Trykk for å velge forhåndsinnstilte radiostasjoner. Fjerne isoleringsteipen fra fjernkontrollen
Fjern isoleringsteipen fra batteriet hvis dette er første gang det brukes. Du finner batteriet bakerst under fjernkontrollen. natural_image
Diagram of a hand holding a small object with an arrow indicating direction (no text or symbols)Skifte batteriet i fjernkontrollen
Fjernkontrollen krever et 3 V litiumbatteri av typen CR2025. 1. Skyv og hold batteriets låseflik i pilens retning. 2. Trekk ut batteriholderen og fjern det gamle batteriet. 3. Erstatt med et nytt batteri. 4. Skyv batteriholderen tilbake på plass i fjernkontrollen. flowchart
graph TD
A["Device with battery"] --> B["Component 1"]
B --> C["Component 2"]
C --> D["Component 3"]
D --> E["Component 4"]
Behandle batteriet
\- Skjødesløs eller feil bruk av batterier kan føre til korrosjon eller batterilekkasje, noe som kan føre til personskade, brann eller annen skade på eiendom. \- Sett batteriet riktig inn i batterirommet. Normalt vender batteriets positive pol (+) opp. \- Når batteriet er tomt, vil ikke fjernkontrollen fungere. \- Bruk kun batteritypen som angis i denne håndboken. \- Ikke kast det brukte batteriet som husholdningsavfall. Kast det i henhold til lokale bestemmelser. \- Små knappebatterier, f.eks. det som brukes i denne fjernkontrollen, kan lett svelges av små barn, noe som er farlig. Hold løse knappebatterier borte fra små barn og påse at batteridekslet sitter godt fast i fjernkontrollen. Ta kontakt med lege hvis du tror at et knappebatteri er blitt svelget.Håndtere fjernkontrollen
- Hvis du finner det vanskelig å åpne batterirommet, kan du bruke en binders i trinn 1 i avsnittet «Skifte batteriet i fjernkontrollen». - Ikke la fjernkontrollen falle ned. - Ikke utsett fjernkontrollen for støt. - Ikke søl vann eller andre væsker på fjernkontrollen. - Ikke legg fjernkontrollen på en fuktig gjenstand. - Ikke legg fjernkontrollen i direkte solskinn eller nær varmekilder. - Ta batteriet ut av fjernkontrollen hvis den ikke skal brukes på en lang stund. I motsatt fall kan korrosjon eller batterilekkasje oppstå, noe som kan føre til personskade, skade på eiendom og/eller brann.Fjernkontrollens virkeområde
- Fjernkontrollsensoren foran på enheten gjenkjenner signaler fra fjernkontrollen opptil 5 meter unna og innenfor en vinkel på maksimum 60°. - Vær oppmerksom på at bruksavstanden kan variere avhengig av lysstyrken i rommet. Koble til antennen
Sett antennen inn i FM-kontakten og stram til mutteren. Utvid og vinkle antennen for å få best mottak.  \- Bruk bare FM-antennen som følger med denne enheten.  NOStrømkilde
Strømnett
- Denne enheten opererer med en DC 18V/1.5A strømadapter (følger med). - Kobles enheten til en annen strømkilde kan enheten påføres skade. Strekk strømadapterledningen til sin fulle lengde. Koble strømadapteren til DC kontakten på baksiden av enheten og en stikkontakt. Kontroller at strømadapteren er satt helt inn i stikkontakten. Enheten er nå tilkoblet og klar til bruk. - For å slå enheten helt av, trekk strømadapteren ut av stikkontakten. natural_image
Technical line drawing of a mechanical or electrical component with a vertical rod, threaded connectors, and a cable (no text or symbols)Generell bruk
Slå PÅ/AV
- Når du først kobler enheten til stikkontakten, vil den være i ventemodus. "00:00" blinker på displayet. - Trykk på VENTEMODUS Ⓧ-knappen på hovedenheten eller trykk på VENTEMODUS Ⓧ -knappen på fjernkontrollen for å slå på enheten. "IPOD" vises. - For å sette enheten tilbake i hvilemodus, trykk på VENTEMODUS Ⓧ-knappen på fjernkontrollen eller trykk og hold VENTEMODUS Ⓧknappen på enheten. - Koble strømadapteren fra stikkontakten for å slå av enheten fullstendig.  Dersom enhetsvolumet er nesten dempet eller står inaktiv i 20 minutter, bytter den automatisk til standbymodus, blinker LED-indikatorene i 5 minutter før den går inn i hvilemodus. Trykk på en knapp for å forlenge tiden.Velge modus
- Trykk på KILDE®-knappen gjentatte ganger på enheten for å bytte til iPod/Bluetooth, AUX eller FM-modus. Statusindikatoren lyser grønn eller oransje, eller forblir utent avhengig av valgt modus. - Trykk på DOCK-knappen på fjernkontrollen for å velge iPod/Bluetooth-modus. (Statusindikator tennes i grønt (iPod-modus) eller blått (Bluetooth-modus).) - Trykk på FM-knappen på fjernkontrollen for å velge FM-modus. (Ingen statusindikator.) - Trykk på AUX-knappen på fjernkontrollen for å velge AUX-modus. (Statusindikator lyser oransje.)Justere lydstyrken
- Bruk VOLUM + eller --knappen for å øke eller minske lydstyrken. - Trykk på DEMP -knappen for å slå av lyden. Statusindikatoren og skjermen blinker. Trykk på DEMP knappen igjen for å gjenoppta lyttingen.Justere lydeffekten
Trykk på POP, JAZZ, ROCK, KLASSISK eller FLAT-knappene på fjernkontrollen for å velge ønsket musikkmodus.Dempe skjermen
Når enheten er i hvilemodus, trykk på DEMP/HVILE-knappen. Enheten har 3 skjermlysinnstillinger, trykk gjentatte ganger på DEMP/HVILE-knappen for å bla gjennom innstillingene.Forankre en iPod / iPhone/ iPad
1 natural_image
Line drawing of a mechanical device with a tray, handle, and bracket (no text or symbols)natural_image
Line drawing of a mechanical device with a base plate, drawer, and handle (no text or symbols)natural_image
Line drawing of a smartphone with blank screen and buttons (no text or symbols)natural_image
Line drawing of a mechanical device with a downward arrow and base plate (no text or symbols)iPod/iPhone/iPad-betjening
Denne enheten kan støtte iPad, iPad2, iPad3, iPhone, iPhone 3G/3GS/4/4S og forskjellige modeller av iPod-spillere med 30-pins forankringskonnektorer, som iPod touch 2^nd/3^rd/4^th Generation og iPod nano 2^nd/3^rd/4^th/5^th/6^th Generation.Sette inn iPod/iPhone/iPad
1. iPod / iPhone / iPad-batteriet vil automatisk lade når den er forankret med enheten til batteriet er ladet helt opp. 2. Trykk på DOCK-knappen på iPod/iPad/iPhone for å starte avspilling automatisk. 3. Trykk på MENUY-knappen for å gå tilbake gjennom menyene. 4. Trykk på ∧ eller √knappen for å flytte opp og ned i menyene. 5. Trykk på ENTER-knappen for å velge et menyalternativ.Spille av/pause musikk
- Trykk på II▶ / PAR-knappen på fjernkontrollen for å pause avspillingen. - Trykk på II▶ / PAR-knappen på fjernkontrollen igjen for å fortsette avspillingen. - Trykk og hold II▶ / PAR-knappen for å sende iPod /iPhone / iPad inn i hvilemodus.Hoppe over og søke spor
- Trykk på >knappene på fjernkontrollen for å hoppe framover til det neste sporet. - Trykk på <-knappene på fjernkontrollen for å hoppe bakover til det forrige sporet.  - Enheten viser ikke noe musikkinformasjon fra iPod / iPhone / iPad. Vis musikkinformasjonen på iPod / iPhone / iPad-skjermen. - For å unngå skade på iPod / iPhone / iPad eller enheten, må du være forsiktig når du setter inn og fjerner iPod / iPhone / iPad fra forankringsstasjonen.  - For å bruke fjernkontrollen til å betjene menyene på iPod touch-serien, iPhone-serien og iPod nano 6. generasjon, må du først gå inn i musikkmenyen på iPod / iPhone / iPad. - Denne håndboken gir grunnleggende instrukser om menynavigering på iPod / iPhone / iPad. For avanserte operasjoner, henvis til instruksene som fulgte med iPod / iPhone / iPad. \- Trykk og hold eller under avspilling for å søke fremover og bakover.Vilkårlig avspilling
Alle sporene på platen kan spilles av i en vilkårlig rekkefølge. - Under avspilling, trykk på ✗-knappen på fjernkontrollen. - Etter at alle sporene har blitt spilt av én gang, stopper avspillingen automatisk. - Under vilkårlig avspilling, trykk på ✗ -knappen på fjernkontrollen for å avbryte TILFELDIG-funksjonen. Normal avspilling gjenopptas.Gjenta avspilling
- Trykk én gang på knappen på fjernkontrollen. Enheten vil spille av det gjeldende sporet gjentatte ganger. - Trykk to ganger på ⇌ -knappen. Enheten vil spille av alle sporene gjentatte ganger. - Trykk én gang til på ⇌ -knappen for å avbryte gjentakelsesfunksjonen.Lade iPod/iPhone/iPad
1. Hvis iPod/iPhone/iPad-enheten ikke har vært i bruk på en stund, kan det interne batteriet trenge ladning. 2. Du kan lade en iPod/iPhone/iPad automatisk gjennom enheten når den er forankret.Video ut-funksjon
Når en iPod/iPhone/iPad-modell med videoavspillingsfunksjon er koblet til enheten, kan videoer/fotoer vises på en annen skjerm. 1. Koble en TV eller dataskjerm til videokontakten ved hjelp av en videokabel (ikke vedlagt). 2. Still inn TV-en din til riktig inngang. 3. Velg video-/fotofilen som du vil spille av eller vise, så spiller iPod / iPhone / iPad filen automatisk av eller viser den på ønsket videoskjerm.  - Hvis du spiller av musikk samtidig med at iPod/iPhone/iPad lades, kan det ta lenger tid å lade batteriet helt opp. - Du kan när som helst kontrollere selve iPod / iPhone / iPad-spilleren direkte. - 1^st , 2^nd & 3^rd Generation iPod kan ikke lades. - Ladefunksjonen fungerer bare med strømadapteren koblet til. - iPod / iPhone / iPad kan lades med denne enheten enten i PÅ- eller hvilemodus.iPod/iPhone/iPad-kompatibilitet
Enheten din er kompatibel med følgende:iPod
- iPod Touch 4th generation - 8 GB, 32 GB, 64 GB - iPod Touch 3rd generation - 32 GB, 64 GB - iPod Touch 2nd generation - 8 GB, 16 GB, 32 GB, 64 GB - iPod Nano 6th generation - 8 GB, 16 GB - iPod Nano 5th generation (videokamera) - 8 GB, 16 GB - iPod Nano 4th generation (videokamera) - 8 GB, 16 GB - iPod Nano 3rd generation (videokamera) - 4 GB, 8 GB - iPod Nano 2nd generation - 2 GB, 4 GB, 8 GBiPhone
- iPhone 4S - 16 GB, 32 GB, 64 GB - iPhone 4 - 16 GB, 32 GB - iPhone 3GS - 8 GB, 16 GB, 32 GB - iPhone 3G - 8 GB, 16 GB - iPhone - 4 GB, 6 GB, 16 GBiPad
- iPad 3rd generation - 16 GB, 32 GB, 64 GB - iPad 2 generation - 16 GB, 32 GB, 64 GB - iPad generation - 16 GB, 32 GB, 64 GBBluetooth®-lyd
Enheten har en Bluetooth-funksjon som kan motta et signal innenfor 10 meter. Slik pares enheten med en Bluetooth-enhet for å lytte til musikk: 1. Trykk på ⏻-knappen for å slå på enheten. 2. Trykk på DOCK-knappen for å velge IPOD-modus og sørg for at forankringen er tom. 3. Trykk og hold II▶ / PAR-knappen til du hører 2 "pipelyder". Pareindikatoren vil blinke blått. Systemet har gått inn i paremodus og kan bli funnet. 4. Aktiver Bluetooth-enheten og start søk etter andre enheter. 5. Du vil se «S1IPBTX12E» i listen med tilgjengelige Bluetooth-enheter. 6. Når paring er vellykket, tennes Bluetooth-indikatoren blått og slutter å blinke 7. Når den er slått på, vil enheten automatisk koble til den sist tilkoblede Bluetooth-enheten. 8. Hvis enhetens Bluetooth-forbindelse er tapt, trykk på II▶ / PAR for å koble til igjen med sist tilkoblet Bluetooth-enhet. 9. Hvis strømmen er slått av fra en enhet som høyttaleren er koblet til, kan den kanskje ikke automatisk koble til igjen när strømmen kommer tilbake. Det kan hende at du må pare høyttaleren igjen.  - Hvis signalstyrken er svak, kan Bluetooth-mottakeren koble fra, men vil da automatisk være klar til paring igjen. - Enheten støtter paring for opptil 8 Bluetooth-enheter. - I paringmodus (LED-lampen blinker blått), trykk på II▶ / PAR-knappen 2 ganger (1 sekund mellom hvert trykk) for å fjerne alle paringsinnstillinger. Du vil høre 2 pipelyder hvis det er vellykket.Bruk av ekstrautstyr
1. Før tilkobling til stikkontakten, bruk en 3,5 mm AUX IN (ikke inkludert) til å koble til lydenheten din gjennom denne AUX IN-kontakten på baksiden av enheten. 2. Kople strømadapteren til enheten og deretter stikkontakten. 3. Trykk på AUX-knappen på fjernkontrollen for å bytte til AUX-modus. Statusindikatoren lyser oransje. 4. Trykk på VOL + / --knappene for å justere lydstyrken til ønsket nivå. 5. I AUX-modus, betjen den eksterne lydenheten direkte når det gjelder avspillingsfunksjoner.Lytte til radioen
Strekk ut FM-antennen for best mulig FM-mottak. 1. Trykk på FM-knappen på fjernkontrollen for å velge FM-modus. 2. Trykk og hold <- eller >knappen for å automatisk søke etter neste tilgjengelige radiostasjon. 3. For å fininnstille en stasjon, trykk på <- eller >knappen. Hvert trykk justerer frekvensen med 0,1MHz.Programmere radiostasjoner
Du kan lagre opptil 20 radiostasjoner i enhetens minne. 1. Når du har funnet en radiostasjon som du vil lagre, trykk på LAGRE-knappen. 2. Trykk på ⚠- eller Vknappene for å velge et programposisjonsnummer 1-20. 3. Trykk på ENTER-knappen for å lagre radiostasjonen.Velge en lagret radiostasjon.
1. Trykk på TILBAKEKALL-knappen eller -Anappene for å bla gjennom de lagrede stasjonene.Stille klokken automatisk
Enheten din kan vise tiden. Tiden stilles inn fra klokken på iPod / iPhone / iPad.Stille klokken manuelt
| VENTEMODUS:
1. Trykk og hold STORE. 2. Trykk pånatural_image
Simple illustration of a gray rectangular device with a small screen and handle (no text or symbols)Huvudenhet

Fjärrkontroll

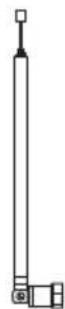

InstruktionsbokNätadapter FM-antenn
Produktöversikt
Huvudenhet
Vy framifrån
- iPod/iPhone/iPad dockning
- Fjärrkontrollsensor
- Display
- Högtalare
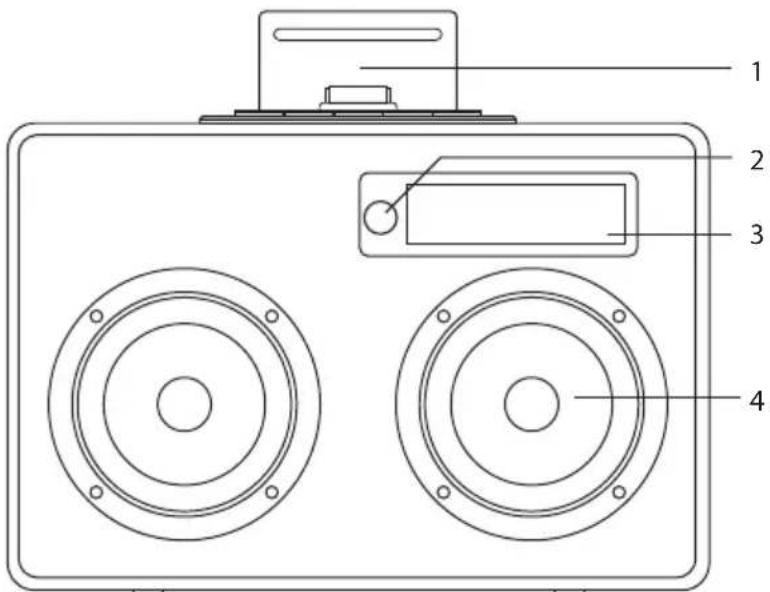
Baksida
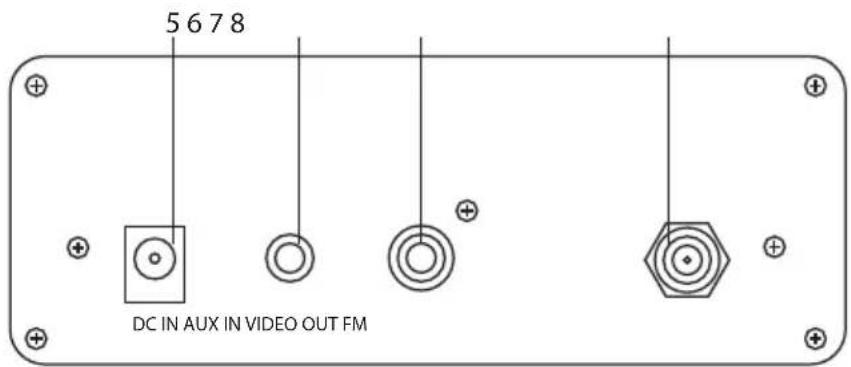
- DC IN-uttag
-
AUX IN-uttag
-
VIDEO UT uttag
- FM-antennuttag
Vy ovanifrån

1. Blå LED parningsindikator
3. SOURCE (KÄLL)-knapp
4. PAIR (Parnings) knapp/
BACKWARDS SKIP (hoppa bakåt) knapp
5. ▶ / PARNINGS-knapp
Ladda iPod/iPhone/iPad
natural_image
Simple illustration of a gray rectangular device with a small screen and top handle (no text or symbols)Päälaite

Kaukosäädin


FI
Näkymä takaa

5. ▶ / PARIUTA-painike
13. KLASSINEN-painike
natural_image
Diagram showing a hand pressing down on a curved object with an arrow indicating force or movement (no text or symbols)natural_image
Technical line drawing of a mechanical or electrical component with a vertical rod, connectors, and cable (no text or symbols)Yleinen käyttö
Kytkeminen PÄÄLLE/POIS
natural_image
Line drawing of a mechanical device with a tray, handle, and bracket (no text or symbols)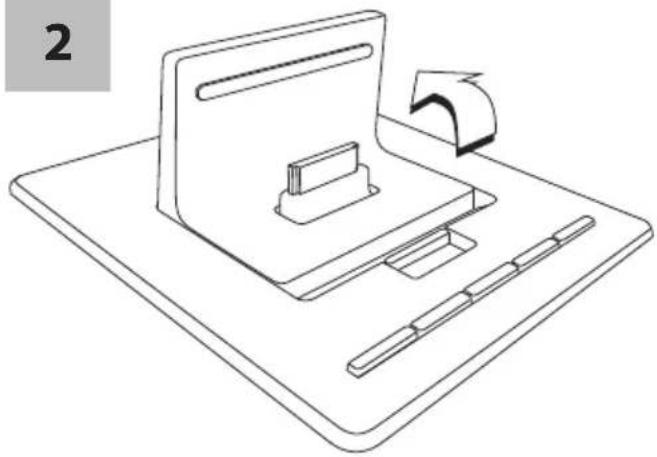
natural_image
Line drawing of a mechanical device with a base plate, drawer, and handle (no text or symbols)FI
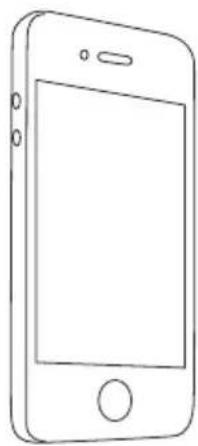
natural_image
Line drawing of a smartphone with blank screen and buttons (no text or symbols)3

natural_image
Line drawing of a mechanical device with a downward arrow and base plate (no text or symbols)- The unit does not show any music information from your iPod / iPhone / iPad. Please view the music information on your iPod / iPhone / iPad display.
- To avoid damaging your iPod / iPhone / iPad or the unit, please take care when inserting and removing your iPod / iPhone / iPad from the dock.

- To use the remote control to operate the menus of the iPod touch series, iPhone series and iPod nano 6^th generation, you need to enter the music menus on your iPod / iPhone / iPad first.
- This manual provides the basic instructions of menu navigation on iPod / iPhone / iPad. For advance operations, please refer to the instructions that accompanied your iPod / iPhone / iPad.
natural_image
Simple illustration of a gray rectangular device with a handle and a small circular button on the side (no text or symbols)Hovedenhed

Fjernbetjening

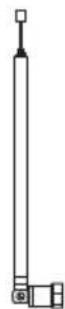

1. Blå lysdiode-indikator til pardannelse
natural_image
Line drawing of a hand pressing down on a curved object with an arrow indicating downward motion (no text or symbols)natural_image
Technical line drawing of a mechanical or electrical component with connectors and a vertical rod (no text or symbols)Generel betjening
Tænd og sluk
natural_image
Line drawing of a mechanical device with a tray, handle, and bracket (no text or symbols)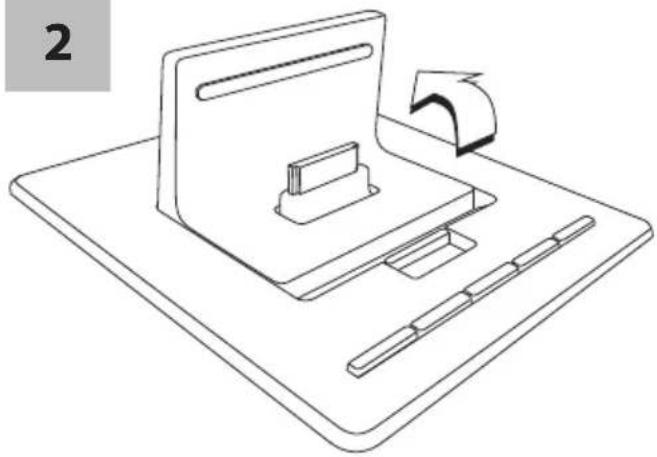
natural_image
Line drawing of a mechanical device with a base plate, drawer, and handle (no text or symbols)DK

natural_image
Line drawing of a smartphone with blank screen and buttons (no text or symbols)3

natural_image
Line drawing of a mechanical device with a downward arrow and base plate (no text or symbols)Betjening af iPod/iPhone/iPad
Denne enhed understøtter iPad, iPad2, iPad3, iPhone, iPhone 3G/3GS/4/4S og forskellige iPod-modeller med 30-bens dock-stik, såsom iPod touch 2. - 4. generation, og iPod nano 2. - 6. generation.
natural_image
Simple illustration of a gray rectangular device with a small screen and top handle (no text or symbols)Hlavní jednotka

Dálkový ovladač


CZ
natural_image
Diagram of a hand holding a small object with an arrow indicating direction (no text or symbols)natural_image
Technical line drawing of a mechanical or electrical component with connectors and a vertical rod (no text or symbols)Obecné používání
Zapnutí a vypnutí
natural_image
Line drawing of a mechanical device with a tray, handle, and bracket (no text or symbols)
natural_image
Line drawing of a mechanical device with a base plate, drawer, and handle (no text or symbols)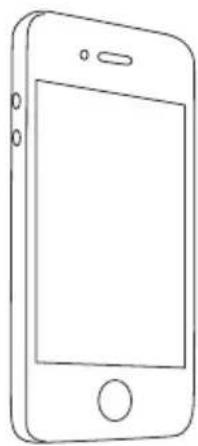
natural_image
Line drawing of a smartphone with blank screen and buttons (no text or symbols)3

natural_image
Line drawing of a mechanical device with a downward arrow and base plate (no text or symbols)CZ
natural_image
Simple illustration of a gray rectangular device with a small screen and top handle (no text or symbols)Hlavná jednotka

Dialkový ovládač
SK


natural_image
Line drawing of a finger pressing down on a curved object with an arrow indicating force (no text or symbols)natural_image
Line drawing of a wireless router with cable and connector (no text or symbols)Bežná prevádzka
Zapnutie/vypnutie
- Jednotka sa pri prvom zapojení do sietovej zásuvky uvedie do POHOTOVOSTNÉHO režimu. Na displeji bude blikať „00:00“.
- Na jednotke stlačte tlačidlo POHOTOVOSTNÉHO REŽIMU ⏻ alebo stlačte tlačidlo POHOTOVOSTNÉHO REŽIMU ♦na dialkovom ovládači, čím jednotku zapnete. Zobrazí sa „IPOD“.
- Na prepnutie jednotky do pohotovostného režimu stlačte tlačidlo POHOTOVOSTNÉHO REŽIMU ☐ na dialkovom ovládači alebo stlačte a podržte tlačidlo POHOTOVOSTNÉHO REŽIMU ∅ na jednotke.
- Na úplné vypnutie zariadenia vytiahnite zástrčku napájacieho kábla z elektrickej zásuvky.

natural_image
Line drawing of a mechanical device with a tray, handle, and bracket (no text or symbols)
natural_image
Line drawing of a mechanical device with a base plate, drawer, and handle (no text or symbols)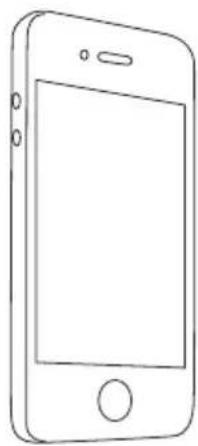
natural_image
Line drawing of a smartphone with blank screen and buttons (no text or symbols)3

natural_image
Line drawing of a mechanical device with a downward arrow and base plate (no text or symbols)SK
This symbol on the product or in the instructions means that your electrical and electronic equipment should be disposed at the end of its life separately from your household waste. There are separate collection systems for recycling in the EU.
For more information, please contact the local authority or your retailer where you purchased the product.
Notes for battery disposal
The batteries used with this product contain chemicals that are harmful to the environment.
To preserve our environment, dispose of used batteries according to your local laws or regulations. Do not dispose of batteries with normal household waste.
For more information, please contact the local authority or your retailer where you purchased the product.
The Bluetooth ^® word mark and logos are registered trademarks owned by Bluetooth ^® SIG, Inc. and any use of such marks by DSG Retail Limited is as an Affiliate under the License held by DSG International Sourcing Ltd. Other trademarks and trade names are those of their respective owners and all rights are acknowledged.
All trademarks are the property of their respective owners and all rights are acknowledged.
SE

"Made for iPod", "Made for iPhone" and "Made for iPad" mean that an electronic accessory has been designed to connect specifically to iPod, iPhone and iPod, respectively, and has been certified by the developer to meet Apple performance standards.
Apple is not responsible for the operation of this device or its compliance with safety and regulatory standards.
Please note that the use of this accessory with iPod, iPhone or iPad may affect wireless performance.
iPhone, iPad, iPod, iPod classic, iPod nano, and iPod touch are trademarks of Apple Inc., registered in the U.S. and other countries.
All other trademarks appearing herein are the property of their respective owners.
- Damage
- Location of Unit
- Temperature
- Naked Flames
- Moisture
- Ventilation
- Safety
- Mains Adapter Cable
- Mains Adapter
- Interference
- Batteries
- Supervision
- Service
- Maintenance
- Rušenie
- Unpacking
- Product Overview
- Main Unit
- Front View
- Rear View
- Top View
- Blue LED Pairing indicator
- Green LED indicator
- SOURCE Button
- PAIR Button / BACKWARDS SKIP button
- FORWARD SKIP Button
- VOLUME - Button
- VOLUME + Button
- Remote Control
- STANDBY Button
- FM Button
- AUX Button
- Button
- ▶ / PAIR Button
- >Button
- ∨ Button
- ENTER Buttons
- REPEAT ⇌ Button
- MUTE Button
- VOLUME + Button
- POP Button
- CLASSIC Button
- DIM / SLEEP Button
- FLAT Button
- STORE Button
- DOCK Button
- - Press to skip back to the beginning of the track or to the previous track. - Press to fast reverse the current track. - Press to search for a radio station going backward through accessible radio frequencies. 19. MENU Button
- SHUFFLE ✗ Button
- VOLUME - Button
- ROCK Button
- JAZZ Button
- RECALL Button
- Removing the Plastic Strip from the Remote Control
- Battery Replacement for the Remote Control
- Handling the Battery
- Handling the Remote Control
- Remote Control Operation Range
- Connecting the Aerial
- Power Source
- Mains Power
- General Operation
- Switching ON / OFF
- Selecting Modes
- Adjusting the volume
- Adjusting the Sound Effect
- Dimming the display
- Docking an iPod / iPhone/ iPad
- iPod / iPhone / iPad Operation
- Inserting the iPod / iPhone / iPad
- To Play / Pause music
- Skipping and searching tracks
- Random Playback
- Repeat Playback
- Charging your iPod / iPhone / iPad
- Video Out Function
- iPod / iPhone / iPad Compatibility
- iPod
- iPhone
- iPad
- Bluetooth® Audio
- AUX IN Operation
- Listening to the Radio
- Programming radio stations
- Selecting a stored radio station
- Auto Setting the Clock
- Manually Setting the Clock
- In STANDBY mode:
- Sleep Function
- Cleaning the Unit
- Hints and Tips
- Specifications
- Pakke opp
- Produktoversikt
- Hovedenhet
- Sett forfra
- Sett bakfra
- Sett ovenfra
- Blå LED-pareindikator
- Grønn LED-indikator
- KILDE-knapp
- PAR-knapp / HOPPER BAKOVER-knapp
- HOPP FREMOVER-knapp
- VOLUM --knapp
- VOLUM +-knapp
- Fjernkontroll
- STANDBY-knapp
- FM-knapp
- AUX-knapp
- ∧-knapp
- ▶ / PAR-knapp
- > -knapp
- V-knapp
- ENTER-knapper
- REPETER ⇌-knapp
- DEMP-knapp
- VOLUM +-knapp
- POP-knapp
- KLASSISK-knapp
- DEMPE/SOVE-knapp
- FLAT-knapp
- LAGRE-knapp
- DOCK-knapp
- <-knapp
- MENY-knapp
- STOKKET ✗-knapp
- VOLUM --knapp
- ROCK-knapp
- JAZZ-knapp
- TILBAKEKALL-knapp
- Fjerne isoleringsteipen fra fjernkontrollen
- Skifte batteriet i fjernkontrollen
- Behandle batteriet
- Håndtere fjernkontrollen
- Fjernkontrollens virkeområde
- Koble til antennen
- Strømkilde
- Strømnett
- Generell bruk
- Slå PÅ/AV
- Velge modus
- Justere lydstyrken
- Justere lydeffekten
- Dempe skjermen
- Forankre en iPod / iPhone/ iPad
- iPod/iPhone/iPad-betjening
- Sette inn iPod/iPhone/iPad
- Spille av/pause musikk
- Hoppe over og søke spor
- Vilkårlig avspilling
- Gjenta avspilling
- Lade iPod/iPhone/iPad
- Video ut-funksjon
- iPod/iPhone/iPad-kompatibilitet
- Bluetooth®-lyd
- Bruk av ekstrautstyr
- Lytte til radioen
- Programmere radiostasjoner
- Velge en lagret radiostasjon.
- Stille klokken automatisk
- Stille klokken manuelt
- | VENTEMODUS:
- Utkoplingstimer
- Produktöversikt
- Huvudenhet
- Vy framifrån
- Baksida
- Vy ovanifrån
- Blå LED parningsindikator
- SOURCE (KÄLL)-knapp
- PAIR (Parnings) knapp/
- BACKWARDS SKIP (hoppa bakåt) knapp
- ▶ / PARNINGS-knapp
- Ladda iPod/iPhone/iPad
- Näkymä takaa
- ▶ / PARIUTA-painike
- KLASSINEN-painike
- Yleinen käyttö
- Kytkeminen PÄÄLLE/POIS
- Blå lysdiode-indikator til pardannelse
- Generel betjening
- Tænd og sluk
- Betjening af iPod/iPhone/iPad
- CZ
- Obecné používání
- Zapnutí a vypnutí
- Bežná prevádzka
- Zapnutie/vypnutie
- Notes for battery disposal
- SE
Brand : Sandstrøm
Model : S1iPBTW12E
Category : Uncategorized