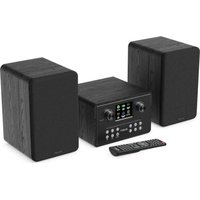
Homerton Hi-Fi - Hi-fi system Majority - Free user manual and instructions
Find the device manual for free Homerton Hi-Fi Majority in PDF.


| Product type | Compact hi-fi system |
| Brand | Majority |
| Model | Homerton Hi-Fi |
| Audio sources | DAB/DAB+ radio, FM, Internet, Spotify, Bluetooth 5.3, CD, USB, AUX |
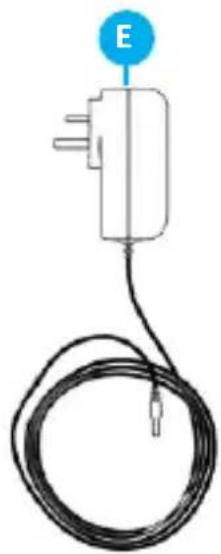
| Power supply | DC 24V / 1.5A power adapter (input 100-240V~50/60Hz) |
| Standby power consumption | < 1 W (WiFi off), < 2 W (WiFi on) |
| Network connectivity | WiFi 2.4 GHz and 5 GHz, WPS |
| Bluetooth | Version 5.3 |
| Speakers | 2 passive speakers included (cable connection) |
| Remote control | Yes (AAA batteries included) |
| Display | Digital display with brightness adjustment |
| Equalizer | Normal, Jazz, Rock, Classic, Pop, My EQ (customizable) |
| Alarm / Sleep timer | Dual alarm with snooze, sleep timer (15/30/45/60 min) |
| Headphone jack | Yes, 3.5mm jack |
| USB port | USB 5V / 1A (MP3 playback) |
| AUX input | 3.5mm jack |
| Remote control | OKTIV app (iOS/Android) via network |
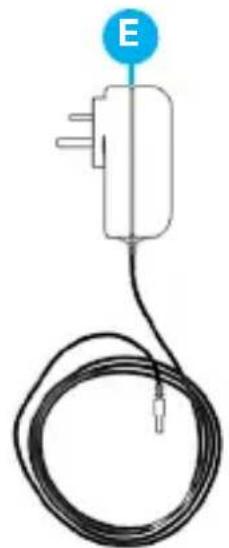
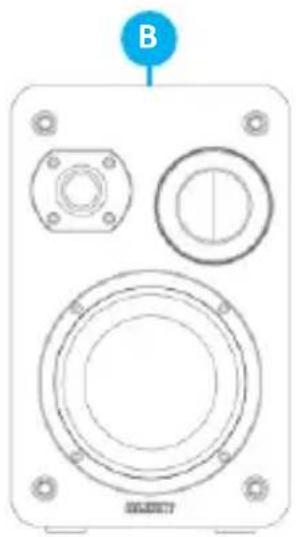
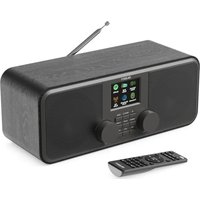
| Box contents | Main unit, 2 speakers, speaker cables (x2), remote control, power adapter, user guide |
| Warranty | 12 months (freely extendable to 24 months with online registration) |
| Cleaning and maintenance | Unplug before cleaning; use a dry cloth only |
Frequently Asked Questions - Homerton Hi-Fi Majority
User questions about Homerton Hi-Fi Majority
0 question about this device. Answer the ones you know or ask your own.
Ask a new question about this device
Download the instructions for your Hi-fi system in PDF format for free! Find your manual Homerton Hi-Fi - Majority and take your electronic device back in hand. On this page are published all the documents necessary for the use of your device. Homerton Hi-Fi by Majority.
USER MANUAL Homerton Hi-Fi Majority
What's In the Box? 3
Controls And Functions.... 4
Instructions Guide....
Basic Information.... 8
Getting Started/Product Set-up....9
Connecting to Network.... 11
System Settings.... 13
Internet Radio & Podcasts.... 16
Spotify.... 18
Media Player - USB Playback.... 18
CD Mode.... 19
DAB/DAB+ Radio 21
FM Radio 23
Bluetooth.... 25
AUX – In Mode.... 26
Headphone Jack.... 26
OKTIV App/ Net-Remote 27
Alarm.... 28
Sleep Timer.... 28
Troubleshooting.... 29
Specification.... 31
Warranty & Support.... 31
Safety Information.... 32
What's in the Box?
A. Majority Homerton HIFI main unit
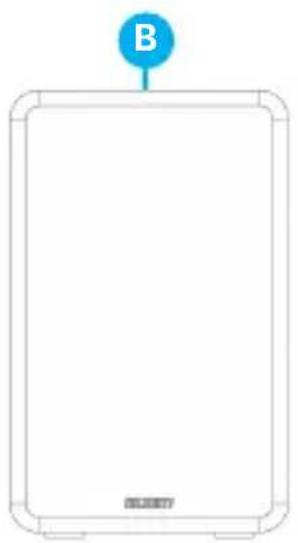
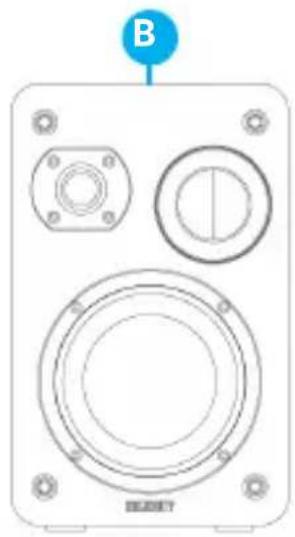
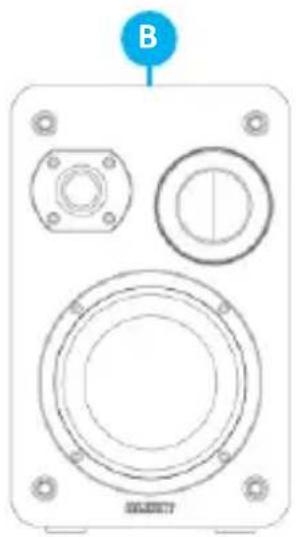
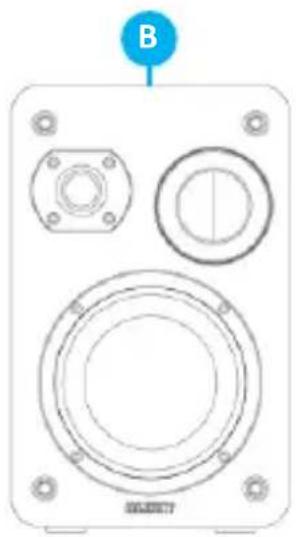
B. One pair of speakers
C. Speakers connecting cable x2
D. Remote Control
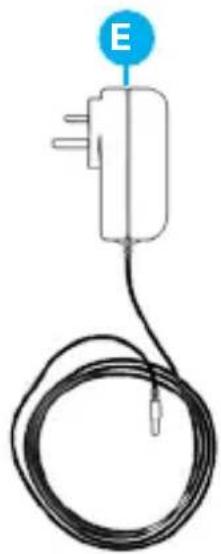
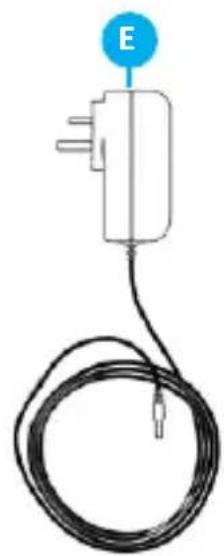
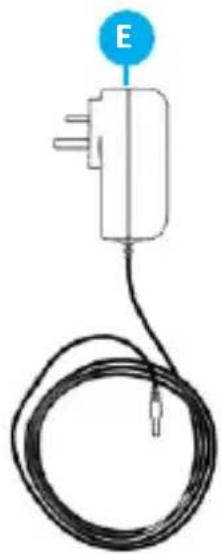
E. Power Adaptor
F. User Guide
natural_image
Front view of a medical or laboratory device with control panel and display (no visible text or symbols)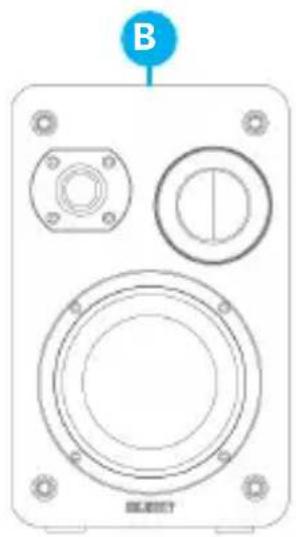
natural_image
Technical diagram of a speaker or audio device with three circular components and mounting holes (no text or symbols)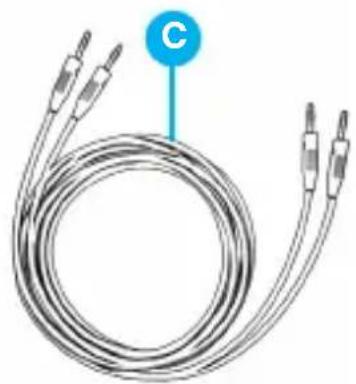
natural_image
Coiled electrical test probe with two leads and a blue circular label marked 'C' (no text or symbols on the main subject)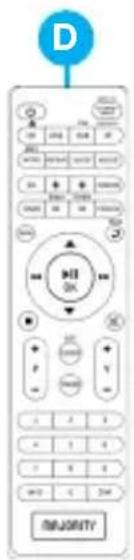
natural_image
Simple line drawing of a medical or electrical device with a coiled cable and a labeled 'E' on top (no text or symbols on the device itself)
natural_image
Illustration of a blank book with a blue circular icon labeled 'F' on top (no text or symbols on the book itself)Front View
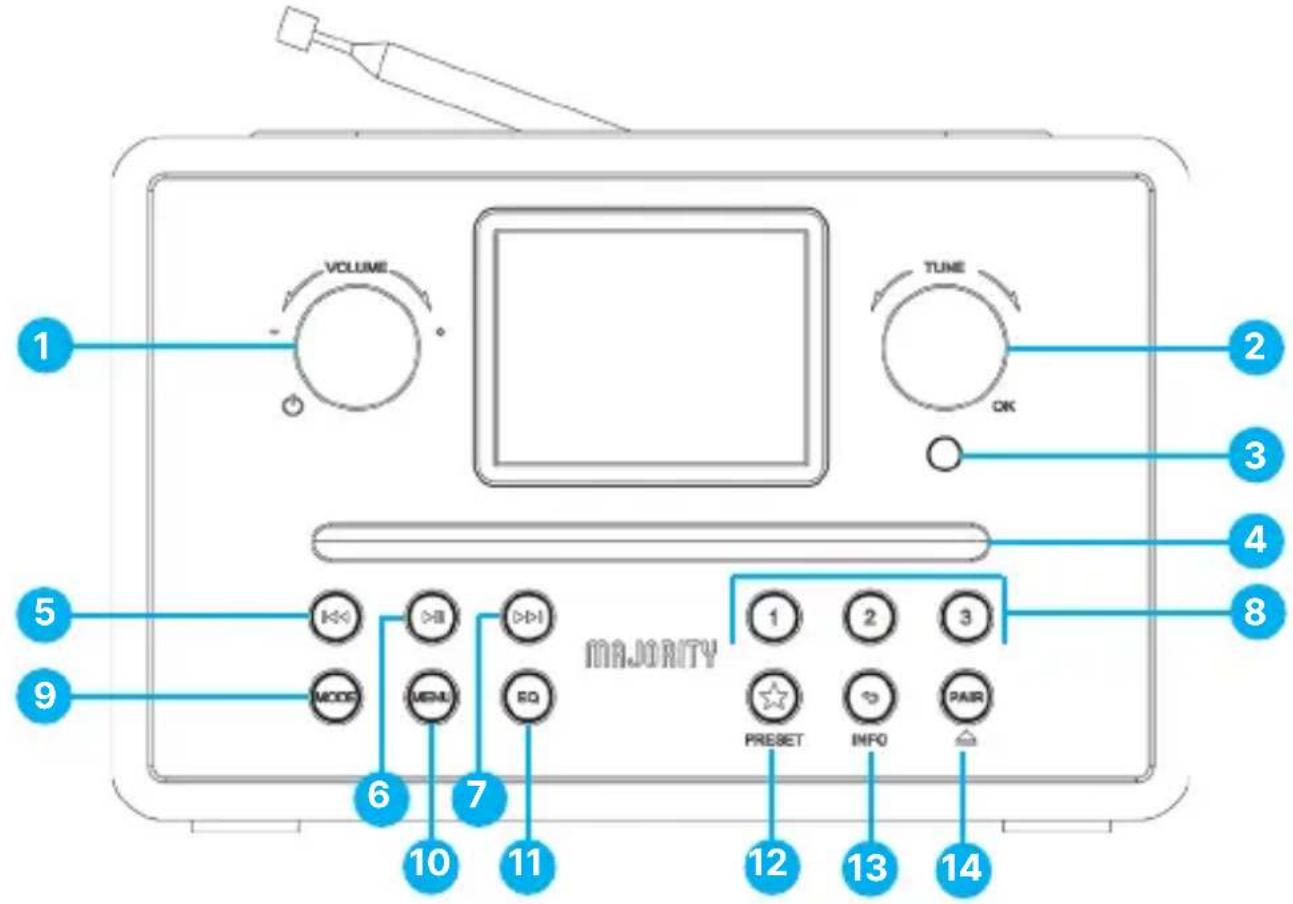
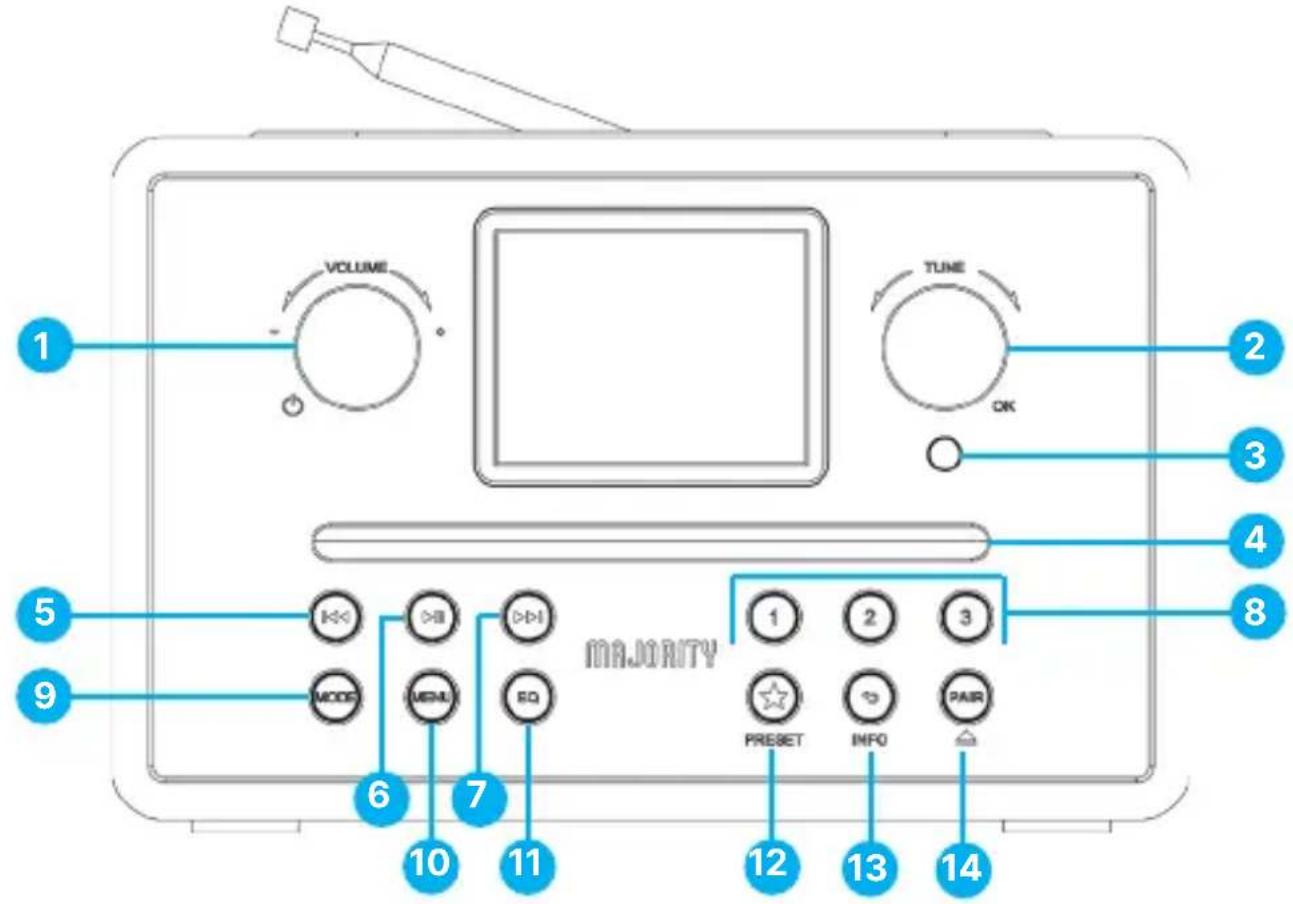
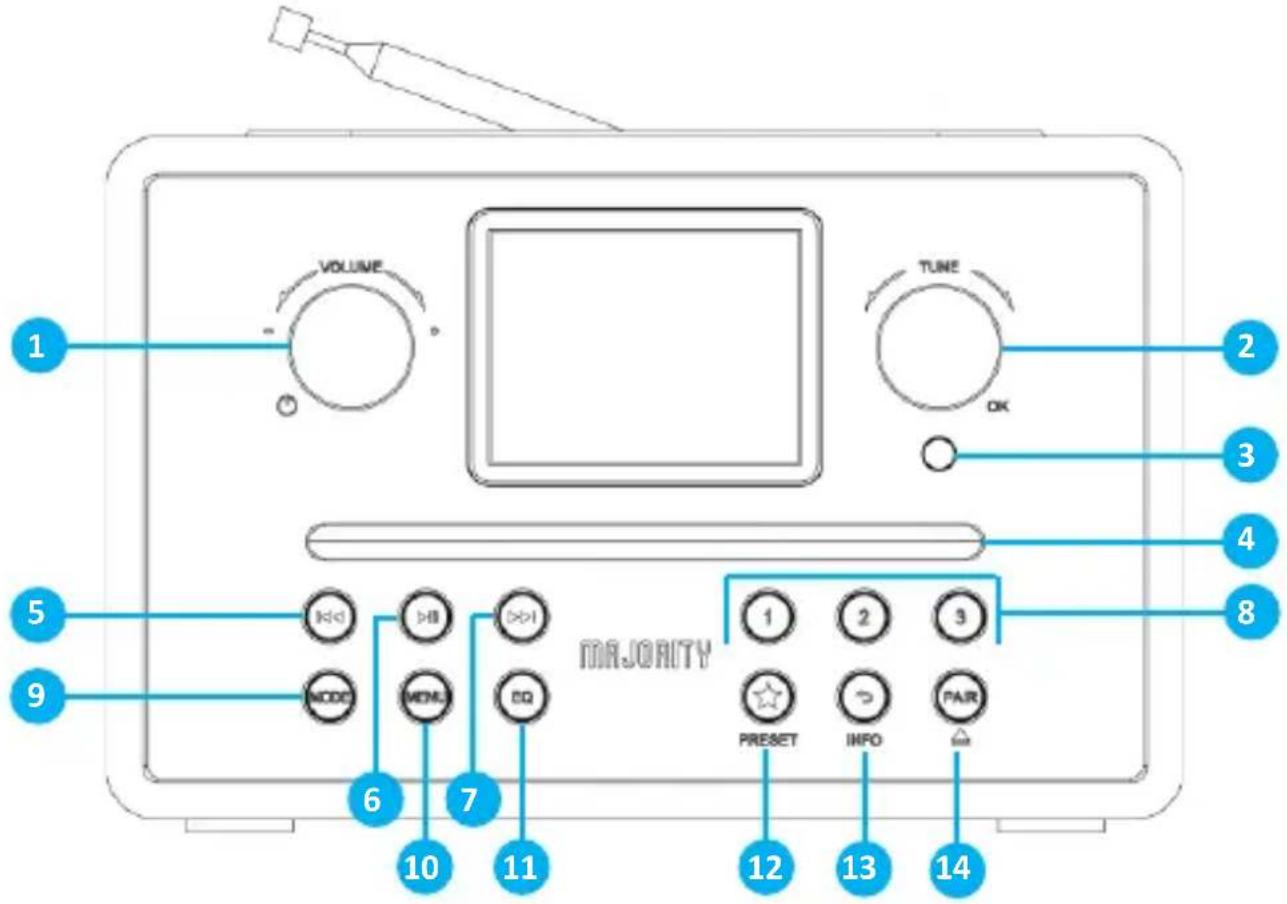
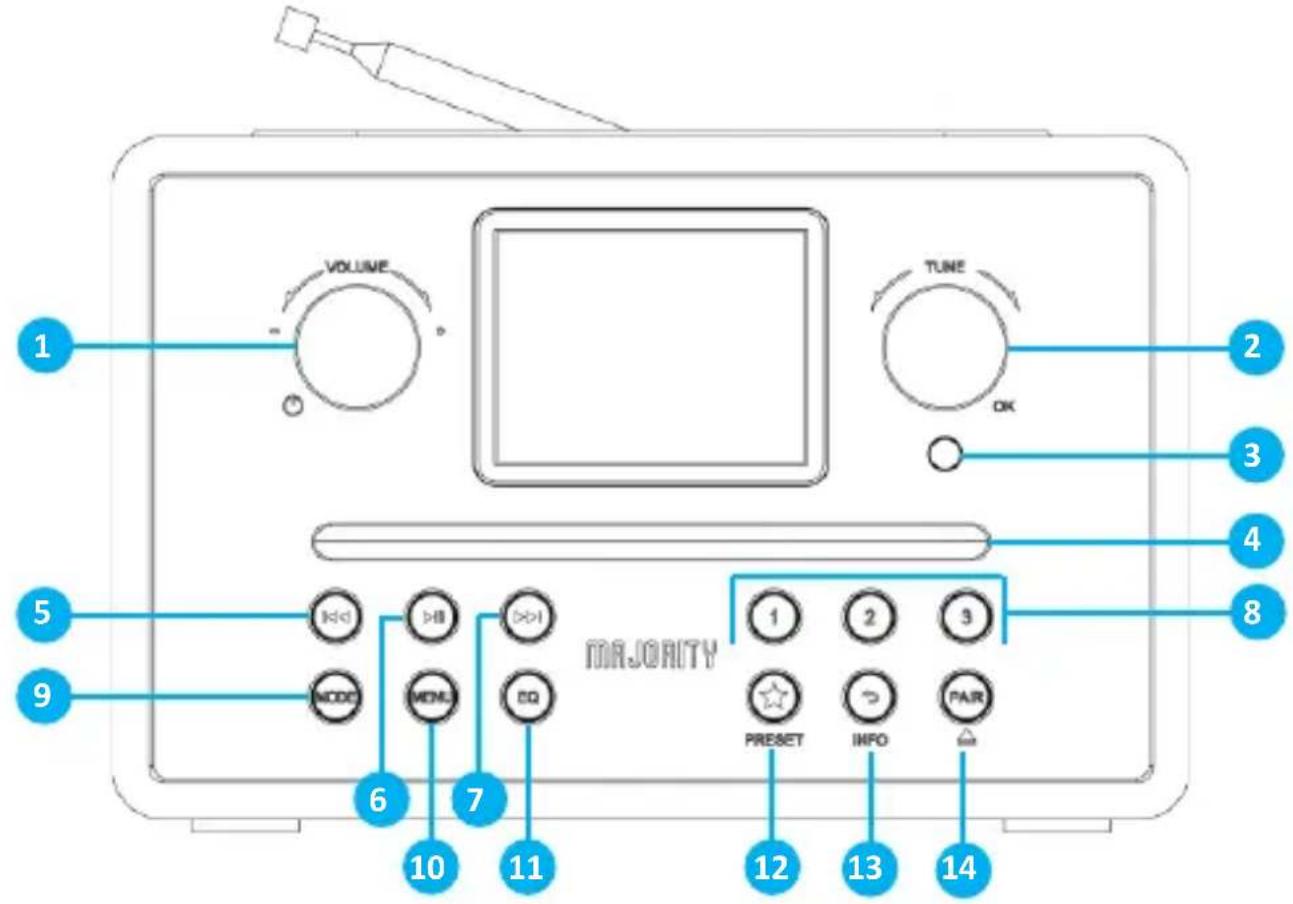
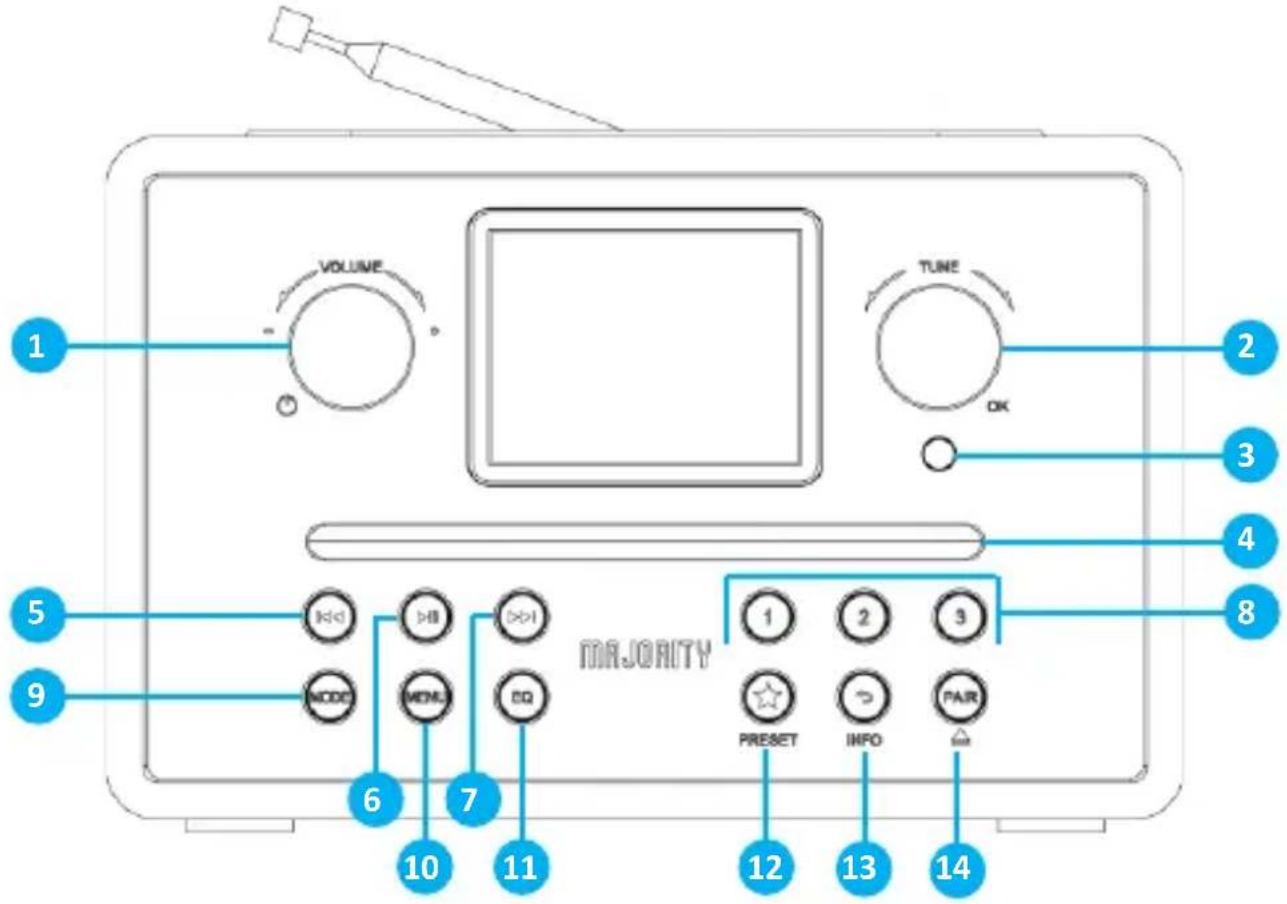
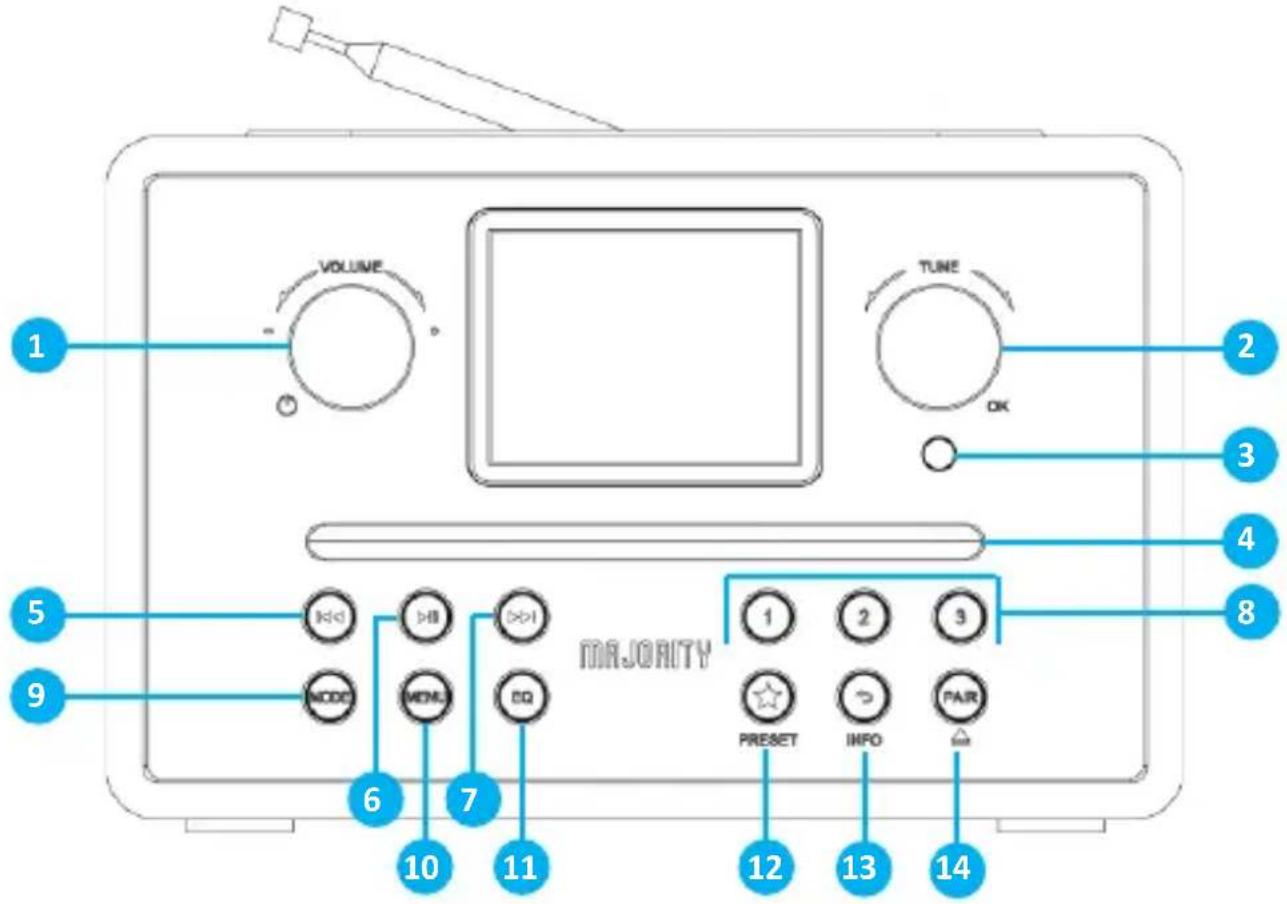
- VOLUME +/-. Press to Power ON/OFF
- NAVIGATION DIAL/ TUNE/ OK
- Remote Sensor
- CD Player
- Previous
- Play/Pause
-
Next
-
1/2/3 - numeric buttons
- MODE
- MENU
- EQ
- PRESET
- INFO/BACK
- PAIR /CD Eject
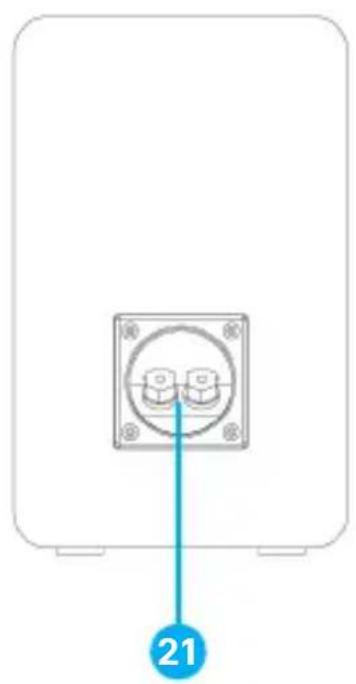
The Back View
natural_image
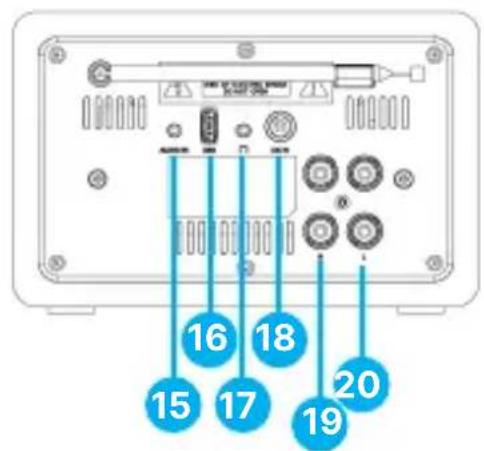
Simple line drawing of a wall-mounted electrical socket with two buttons and a numbered label (21) pointing to the socket (no text or symbols on the socket itself)- AUDIO IN Jack
- USB/5V=1A Output Jack
- Headphone Socket
- DCIN Jack (DC24V/1.5A)
- Connecting port for the speaker
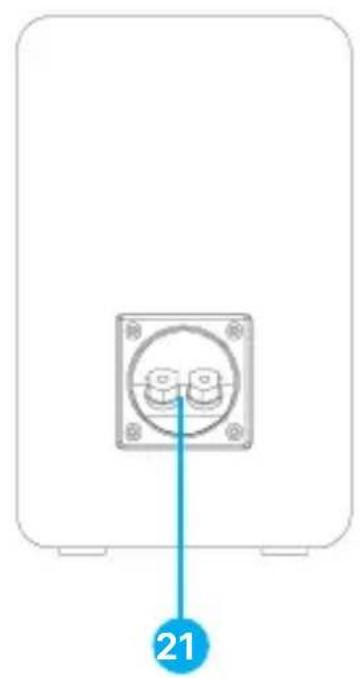
positioned on the right side of the main unit
natural_image
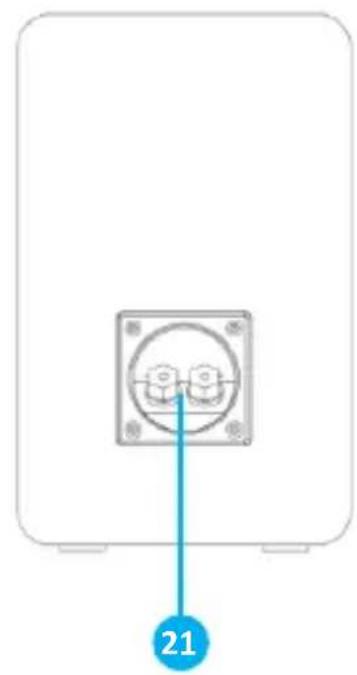
Simple diagram of a device mounting with a circular component and two connectors, labeled with number 21 (no text or symbols on the diagram itself)- Connecting port for the speaker positioned on the left side of the main unit
- Speaker connecting ports
Product setup
Remove all packaging and prepare the main unit and speakers for use. Position the main unit and the two speakers on a flat, stable surface, with one speaker placed to the right side of the unit and the other to the left side. Using the connecting cable included in the box, connect the speaker positioned on the right side of the unit to the right channel output on the main unit (Ref.19). Insert the red-coloured jack into the terminal marked '+' and the black-coloured jack into the terminal marked '-''. Then, take the speaker positioned on the left side of the unit and connect it to the left channel output on the main unit (Ref.20), again inserting the red jack into the '+' terminal and the black jack into the '-' terminal. Once both speakers are properly connected, insert the power cable into its socket (Ref.18) on the main unit, and plug it into the mains power supply.
Remote Control
- Power ON/OFF ⏻
- CD▲ /USB/DAB/FM/BT/Podcasts/audio
- INTRO/AMS
- REPEAT
- EQ
- BASS +/-
- USER
- MENU
- UP ▲
- OK/▶II
- BACK
- DOWN ▼
- STOP ■
- CLOCK
- P +/-
- Remote numeric keypad buttons
- INFO
- INTERNET RADIO/SPOTIFY
- SLEEP
- RANDOM
- TREBLE +/-
- PROGRAM
- PAIR
- NEXT ▶
- MUTE
- V +/-
- TIMER
- DIM
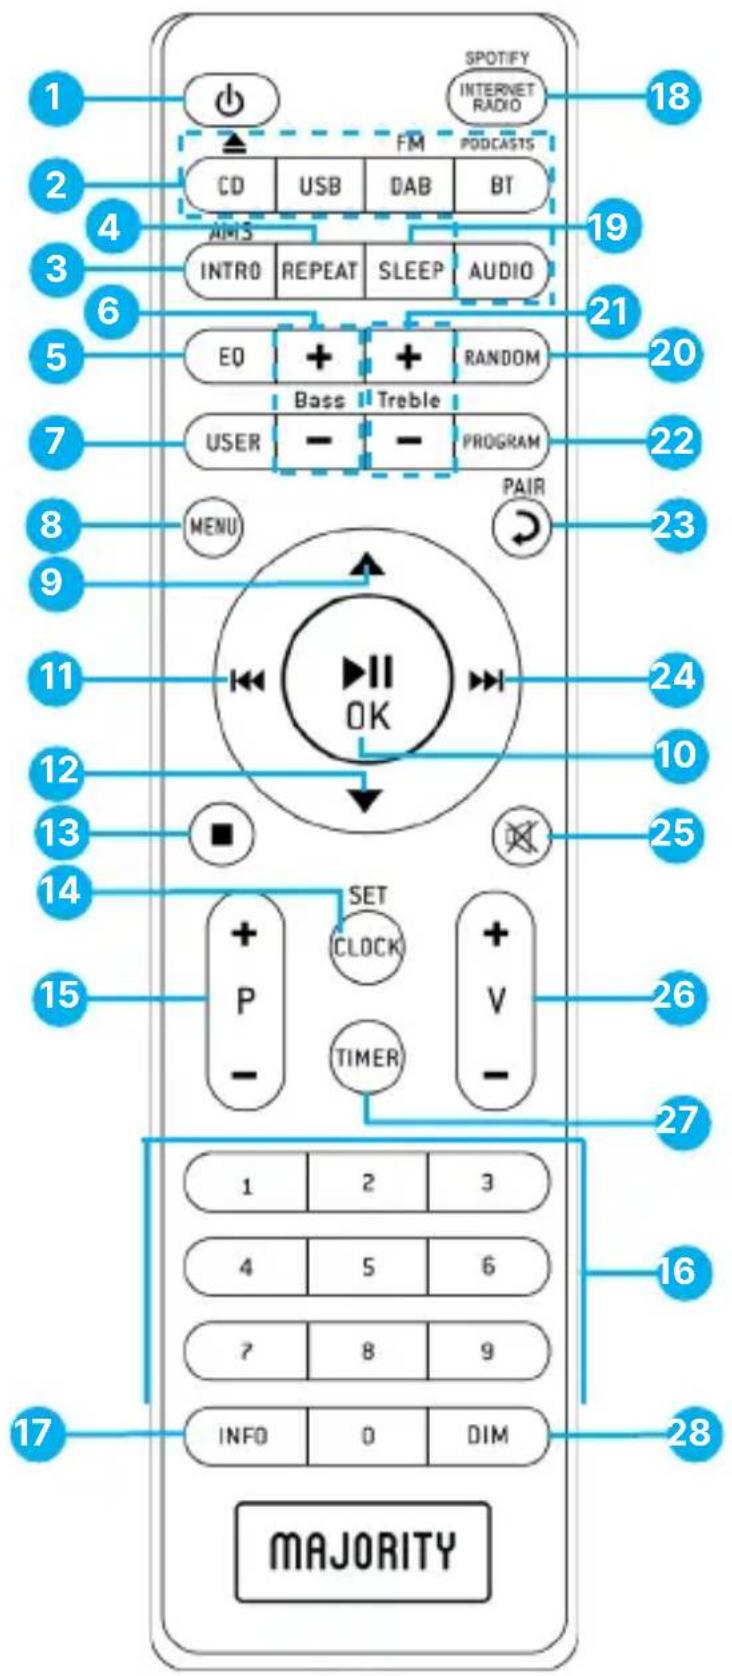
Power ON/OFF (Rem.1) Turn the unit ON or set in Standby Mode.
CD/Eject (Rem.2). Press to eject CD.
CD/BT /USB/DAB/FM/AUDIO/PODCAST/Press the corresponding button to change the audio source/Mode.
INTRO/AMS (Rem 3). Press to start browsing audio tracks in CD/USB Mode. While in FM or DAB Mode press this button to initiate an automatic full scan. Press again to stop searching.
REPEAT (Rem.4). Press to select a repeat Playback Mode while in CD or USB Mode.
EQ (Rem.5). Press to select an equalizer sound mode: Normal/Jazz/Rock/Classic/Pop/My EQ.
BASS +/- (Rem.6). Press to adjust manually BASS and change to User Mode.
USER (Rem.7). Press to enter the equaliser (My EQ) user mode and adjust the Bass and Treble manually.
MENU (Rem.8). Press to enter the Radio Menu.
ARROWUP (Rem.9). Press to move up the menu screen.
OK/PLAY/PAUSE (Rem.10). Press to Play/Pause or to select/skip to subsequent menu in BT/CD/USB & Internet Radio Modes.
BACK/PREVIOUS (Rem.11). Press to move down within the menu. Press and hold to reverse quickly while in CD or USB Mode. Press to select the previous track whilst in CD & USB Mode. Press to display the channel list while in DAB, FM & Internet Radio Mode. Press to fine tune stations while in FM Mode. Press and hold for manual tuning in FM Mode.
ARROW DOWN (Rem.12). Press to move down the menu screen.
STOP (Rem.13). Press to stop playing while in CD or USB Mode.
CLOCK (Rem.14).Press and hold to set clock.
P +/- (Rem.15). Press to skip the beginning of the current/previous/subsequent album. Press to select the previous/next/preset channel in the FM and DAB Mode.
0-9 (Rem.16). Remote numeric keypad buttons.
INFO (Rem.17). Press to view the information.
INTERNET RADIO/ SPOTIFY. Press to enter the Internet Radio or Spotify.
SLEEP (Rem.19). Press to set a sleep timer. Press to snooze the alarm when sounding.
RANDOM (Rem.20). Press to play the audio tracks in random order while in CD Mode.
TREBLE +/- (Rem.21). Press to manually adjust the Treble and change to User Mode.
PROGRAM (Rem.22). Press to program audio tracks while in CD/USB Mode. Press to recall a preset in DAB/FM/Internet Radio Mode. Press and hold for 2-3 seconds to save a preset.
PAIR/Return (Rem.23). Press to return to the previous menu. Press and hold for 2–3 seconds to activate the pairing function or disconnect the existing paired BT device.
NEXT/ FORWARD (Rem 24). Press and hold for 2-3 seconds to fast forward while in CD or USB Mode. Press to select the next track in CD and USB Mode. Press to display the channel list in DAB/FM and Internet Radio. Press to fine tune stations while in FM Mode. Press and hold for manual tuning in FM Mode.
MUTE (Rem.25). Press to mute or resume the sound.
VOLUME +/- (Rem.26). Press to increase/decrease the volume level.
TIMER (Rem.27). Press to set a timer.
DIM (Rem.28). Select the brightness level of the display.
Please note that the instructions within this user manual will refer to the button number on the unit e.g. (Ref. 'Number'), or buttons on remote control e.g. (Rem. 'Number'), in accordance with the diagrams from pages number 4-7.
Remote Control
- Press and slide the back cover to open the battery compartment of the remote control.
- Insert two AAA size batteries. Ensure the (+) and (-) ends of the batteries match with the (+) and (-) ends indicated in the battery compartment.
- Close the battery compartment cover.
Getting started.
Remove all packaging and prepare the Majority Homerton HIFI for set-up. Position the HIFI unit where you would like and prepare for use following the instructions described on page 5.
Extend the radio antenna in full before scanning for DAB/FM radio stations. Connect the unit to a suitable power source using the power cable included in the box. The Majority Homerton HIFI will display the 'Welcome' screen and will enter in the last used listening mode.
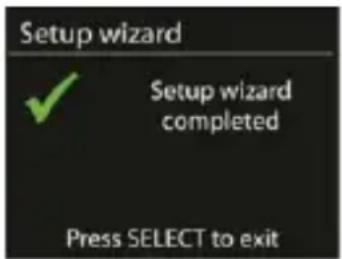
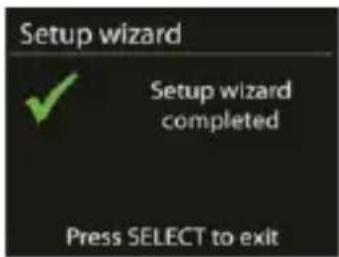
When the unit is switched on for the first time, the Setup Wizard will be automatically launched.
Get the Internet Network environment ready.
Ensure you have setup the wireless network and you have the WEP, WPA or WPA2 security password to activate the Internet connection. You can also use the WPS (Wi-Fi Protected Setup) function for easy pairing your network device with the Majority Homerton HIFI.
Ensure the light indicators on your network device/router are in appropriate status.
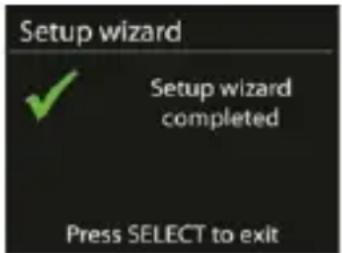
When powering the Majority Homerton HIFI for the first time, the Setup Wizard will be automatically launched. The Setup Wizard guides you through the basic setup parameters such as Language, Time/Date and Network connection.
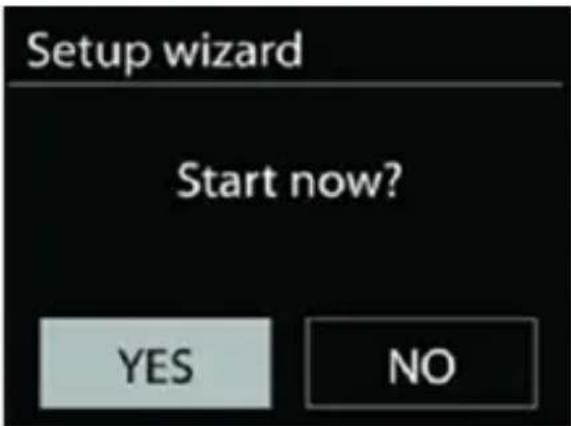
Note: If you choose not to launch the Setup Wizard and skip this step, or if the Setup Wizard is interrupted before completing a network setup, the Majority Homerton HIFI generates its own Wi-Fi access which you can later on configure using the OKTIV APP.
Network connection indicator:

= Network connection established.

= Network connection not established.
Select and confirm the Language.
Use the navigation dial button on the unit (Ref.2) to scroll through the list. Select your preferred menu language then press the 'OK' dial button (Ref.2) to confirm your selection.
Agree and confirm the Privacy Policy.
Once the language has been confirmed, the next screen shows the 'Privacy Policy'. To continue installation, please agree and confirm the Privacy Policy by pressing the 'OK' dial button on the unit (Ref.2). Further information related to the Privacy Policy is available here: www.frontiersmart.com/privacy.
Start the Setup Wizard
Once the Setup Wizard launches, select 'YES' to confirm, and continue your set-up. If you select 'NO,' in the next window you will be asked if you want to start the Setup Wizard again the next time you power the device on.
Select the Clock format
Select the clock format as '12' for 12-hour display format or '24' for 24-hour display format.
If you select the 12-hour format, the display shows 'AM' in the morning or 'PM' in the afternoon hours.
Note: 'AM'/'PM' displays only if you have chosen the 12-hour time format. Select 'AM' for the morning hours or 'PM' for the afternoon hours.
Set up the Time and the Date
The time and date can be set to be an automatic update (DAB radio, FM radio, or Network) or you can choose 'No Update' for manual set-up.
•Time/ Date: Automatic Update
The Time and Date Automatic Update works with data sent over DAB radio, the FM radio or by the Internet Network.
If you choose any of these options, the clock will then be updated when the unit is in any of these corresponding modes. It would be recommended to choose the mode you are using frequently.
DAB and FM radio uses time signals broadcast with radio transmissions. Network uses a time signal sent by the Internet radio/podcasts portal.
• Time/ Date Manual Update
To manually set the date and time, choose 'No Update'. The Setup Wizard prompts you to set the date and the time manually. These are displayed in this format: dd-mm-yyyy and hh:mm.
The flashing value is the one that needs to be changed when appointed. Adjust each value using the 'OK' dial on the unit (Ref.2). Once the value is set, press the 'OK' dial button on the unit (Ref.2) to continue setting the next value.
Set the Time Zone/Daylight
Select and switch ON 'Daylight Savings' if the country selected has this clock change and if it is in effect. This option is only available when the Time/Date is set to auto update from Internet network.
Connecting the Majority Homerton HIFI to the Internet Network
Keep the Network Connected
At the next step you will be asked if you would like to keep the network connected. Select this option if you would like to have the Majority Homerton HIFI connected to your network even when the unit is in Standby Mode. To control the device in all operating modes via the OKTIV app and have the unit connecting faster to your Network, select 'YES' to confirm.
If you choose 'NO,' it is not possible to switch on the unit while in Standby Mode via the app.
Please note: The power consumption in Standby Mode will be higher when the Network is kept connected at all times.
WLAN region
Select the WLAN region to obtain the optimal WLAN connectivity such as Europe.
Scanning/searching for the network.
The Majority Homerton HIFI is compatible with all common network protocols and encryption methods. It searches for the available networks and list them out for you.
There will be hints for the type of network displayed on the radio. For example, if your network devices support WPS function, it will be [WPS] before the SSID (the name of the network device).
Select your Internet network from the list to connect the radio with.
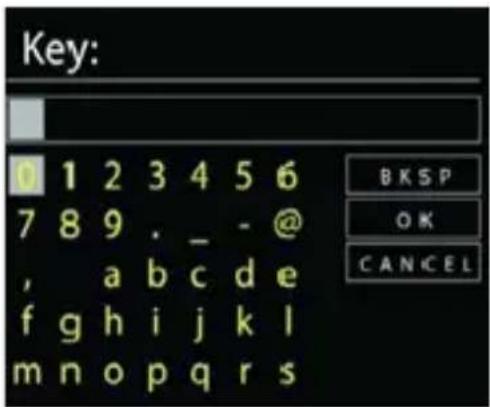
For the wireless connection, you will be asked to input the encryption in the next step (Wi-Fi only). To enter the network keys, using the navigation dial (Ref.2) rotate to move the cursor through the characters and press 'OK' to confirm. Each character selected will be visible near the top of the display as the key is built up.
There are three options accessible by tuning the navigation reel back before the first characters. These are 'Backspace', 'OK' and 'Cancel'.
WPS encrypted network
WPS encrypted networks are identified by WPS at the start of the network name when the Majority Homerton HIFI searches the available AP. Use one of the following three methods to connect the device with your Internet Network:
There is the shortcut WPS key on the unit.
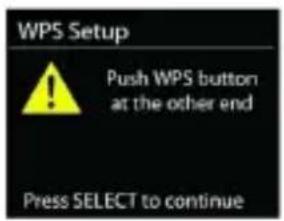
• Method 1: Using the Push button to connect
The Majority Homerton HIFI prompts you to press the connect button on your router. It then scans for a ready Push Button Connect to the network and connects with your
router within seconds.
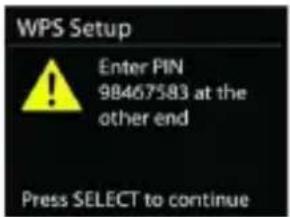
• Method 2: Using a Pin Code to connect
The Majority Homerton HIFI generates an 8-digit pin code number which you enter into the wireless router, access point, or an external registrar.
• Method 3: Skip WPS
Enter the key as for a standard encrypted network.
For more information on setting up a WPS (Wi-Fi Protected Setup) encrypted network, see your WPS router's instructions.
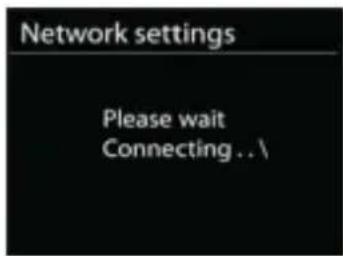
Completion: The Majority Homerton HIFI attempts to connect to the selected network. It will show connected if the setup is successful.
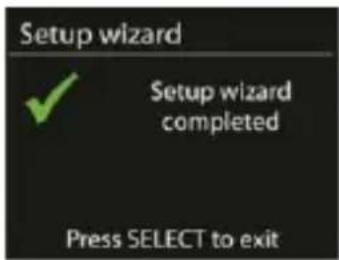
If connection fails, the Majority Homerton HIFI returns to a previous screen to try again. Press 'OK' to quit the setup wizard.
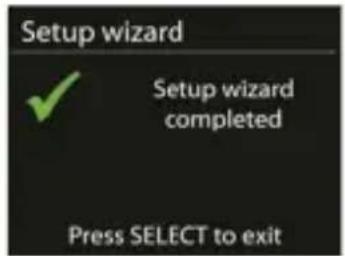
Please Note: If your router has no push button, or the possibility to connect with a device using a pin code, choose 'Skip WPS' method to connect with your internet network using the key password.
SYSTEM SETTINGS
EQUALISER
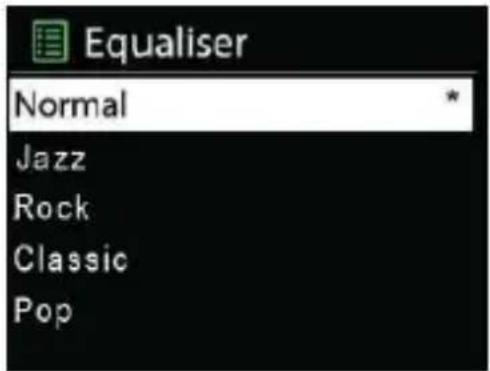
Several EQ preset sound modes are available to choose from: Normal, Jazz, Rock, Classic, Pop and My EQ.
In the 'My EQ settings', you can create your own EQ with custom bass and treble as per your preferences. Once saved, select 'My EQ' as your EQ.
NETWORK
Network Wizard
Enter this section to manually connect the Majority Homerton HIFI with your network. Search AP SSID, then input the WEP / WPA key or choose Push Button/Pin/Skip WPS to connect to the wireless network.
PBC WLAN Setup
Push Button Configuration connects the AP that supports WPS (Wi-Fi Protected Setup).
View Settings
View the information of current connected network: Active connection, MAC address, WLAN region, DHCP, SSID, IP address, Subnet mask, Gateway address, Primary ONS and Secondary ONS.
Manual Settings
Choose a wireless network connection and enable or disable DHCP (Dynamic Host Configuration Protocol).
Network Profile
The Majority Homerton HIFI remembers the last four wireless networks it has connected with. The Majority Homerton HIFI automatically tries to connect to whichever one of these are available from previous connections. In 'Network Profile', you can see the list of registered networks. You can delete unwanted networks by rotating and pressing using the Navigation dial (Ref.2), and then choosing 'YES' to confirm and delete.
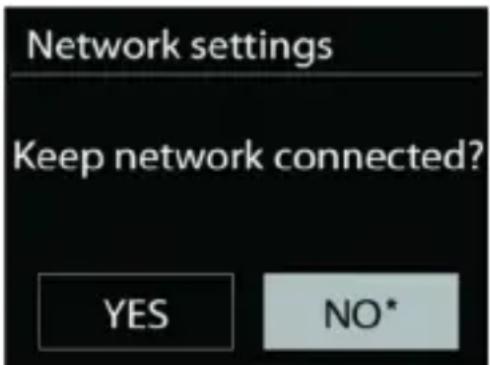
Keep network connected.
If you choose to keep network connected, the Wi-Fi will not disconnect even you are in Standby Mode.
Otherwise, the connection will only be available in Internet Radio and Music Player Modes. This option allows the Majority Homerton HIFI to be ready for DLNA streaming in any operating modes.
TIME/DATE
Enter this section to set the time/date manually or set to automatic update. Select and adjust the time format, time zone and daylight.
BRIGHTNESS
Adjust the display backlight of each environment in Working or Standby Modes to: High, Medium, Low.
LANGUAGE
Enter this section to change the radio menu language.
SOFTWARE UPDATE
From time to time, software upgrades may be created with bug fixes and/or additional features. You can either check manually or set the Majority Homerton HIFI to check periodically automatically (this is the default). If newer available software is detected, you will be asked if you want to go ahead with an update. If you agree, the new software is then downloaded and installed. After a software upgrade, all user settings are maintained.
NOTE: Before starting a software upgrade, ensure that the Majority Homerton HIFI is plugged into a stable main power socket. Disconnecting power during an upgrade may permanently damage the unit.
INFO
View the firmware version and the radio ID.
FACTORY RESET
This option can be found within the 'System Settings' and should be used in case you experience any kind of functionality issue. A factory reset will set the radio to its default settings therefore, the time and date, network configuration and presets are lost.
MAIN MENU
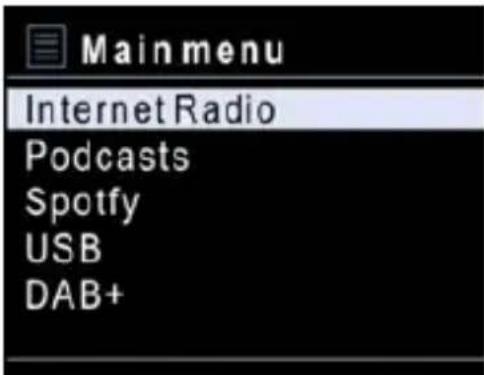
Enter the 'Main Menu' to access and select the following modes: Internet Radio, Podcasts, Spotify, Media Player (USB), DAB, FM, Bluetooth®, CD, AUX-In, Alarm and Sleep Timer.
Internet Radio & Podcasts
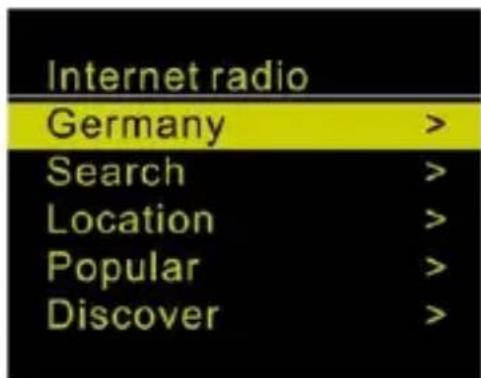
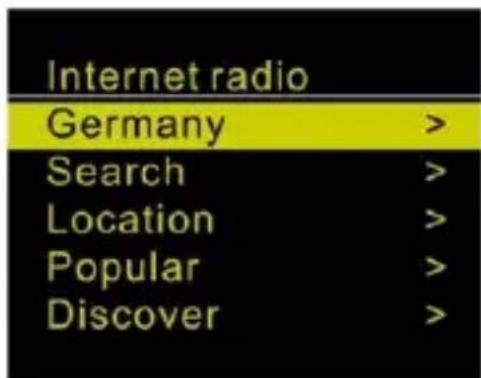
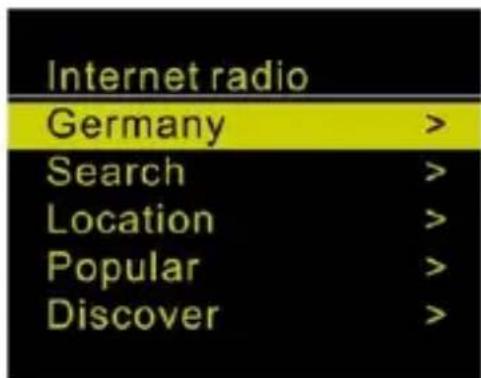
Homerton HIFI can play thousands of radio stations and podcasts from all over the world through a broadband Internet Connection.
When selecting the Internet Radio or Podcasts, the Majority Homerton HIFI directly contacts the Frontier Silicon Internet radio portal (which is supported by Airable) to get the radio stations or podcasts available at your location. The list menu is provided from the portal, so it is only accessible when the device is connected to the Internet.
If you are already listening to an Internet radio station or Podcast, you can press the 'Pair/Back' button on the remote control (Rem.23) to quickly return to the last visited branch of the menu tree, rather than the 'Menu' button (Rem.8) to enter the first menu of the Internet Radio Mode.

Last listened.
When Internet Radio Mode restarts, the last station you listened to is selected. To select another recently used station, enter here to select the listed station. The most recent stations appear at the top of the list.
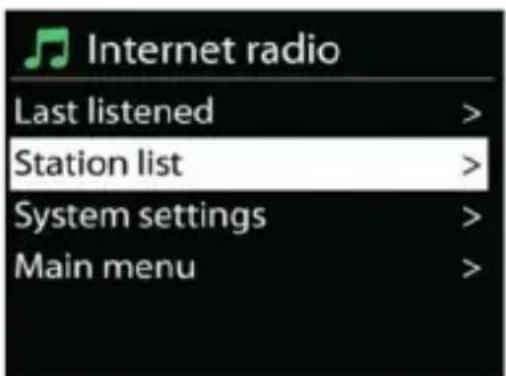
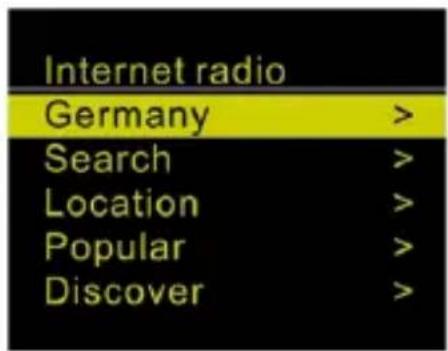
Station list
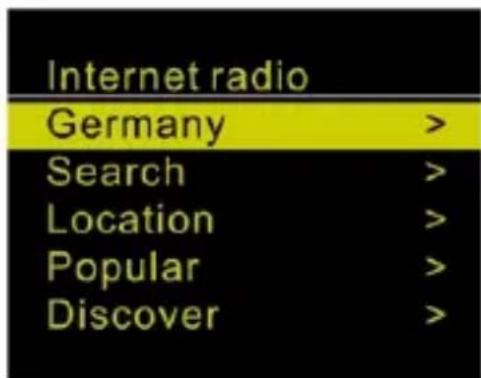
Browse Internet broadcasts organised into different filter search criteria such as Countries, Location, Popular and Discover.
You can also find a specific Internet radio station by typing a keyword within the 'Search' filter.
Saving & Recalling Presets
While the stream is playing, to store this as a preset, press and hold the PROGRAM on the remote control (Rem.22) button, or the 'Preset' button on the radio (Ref.12) for 2-3 seconds, until the display shows 'Save to Preset' on the screen.
Select one of the 40 presets slots (for Internet Radio and Podcasts) available to save the current station. Press the 'OK' button on the remote control (Rem.10) to confirm or press the navigation dial on the unit (Ref.2).
To recall a preset, briefly press the 'PRESET' button on the unit (Ref.12) or the 'PROGRAM' button on the remote control (Rem.22), and then select one of the listed preset stations and press 'OK' to confirm. To quickly recall the presets saved on positions 1-9, press the corresponding key number on remote control keypad (Rem.16).
Now playing information
While the stream is playing, the screen shows its name and description. To view further information, press the 'INFO' button on the radio (Ref.13) or on the remote control (Rem.17). Each time you press the 'INFO' button, another set of details will be displayed. Cycle through Name/Description, Genre/Location, Reliability, Codec/Sampling Rate, Playback Buffer and Today's Date.
Spotify
Use your smartphone, tablet, or computer as a remote control for Spotify. Go to spotify.com/connect to learn how.
The Spotify Software is subject to third party licenses found here:
https://www.spotify.com/connect/third-partylicenses
Music Player
USB Playback
To change the mode into USB, press the USB button for direct access on the remote control (Rem.2).
In USB Mode, files in MP3 format can be played back from an USB stick (not included).
Insert the USB stick into its USB playback port on the unit (Ref.16). Use the 'Previous' and 'Next' buttons on the remote control (Rem.11 and 24) to play the previous or the next track. Press and hold these buttons for 2-3 seconds to fast forward or rewind.
Repeat/Shuffle
You can set these options to repeat tracks or play them in random order. To activate Repeat, press the corresponding button on the remote control (Rem.4) to repeat a song or all songs. To shuffle all songs, press the 'RANDOM' button on the remote control (Rem.20).
Now playing information
While a track is playing, the screen shows its track and artist. There is also a progress bar with figures for elapsed and total track time. To view further information if available, press the 'INFO' button. Each time you press INFO, another set of information will display, cycling through the information: Artist, Album, Codec / Sampling Rate & Playback Buffer.
Note: In USB Mode, the Album cover is not supported.
Please note:
- Improper operation can result in material damages!
- Do not insert any recording media that deviate from the standard CD format (e.g.: mini discs) into the CD player. These may not be played and ejected correctly.
- Insert only one disc at a time into the CD player.
- This model does not support the 8cm disc. Do not insert this type of disc into the CD compartment to prevent disc jam.
Inserting & Playing a CD
Press the 'MODE' button on the unit (Ref.9) repeatedly to change into CD Mode, and then press 'OK' on the navigation knob (Ref.2) or on the remote control to confirm. Alternatively, press the 'CD' button on the remote control (Rem.2) to change in CD.
Insert a disc (with printing side facing up) inside. The display will then show 'Loading' while the Majority Homerton HIFI is reading the disc. Once read, the CD playback will automatically start.
Please note: The display will show 'No Disc' when the unit is set to CD Mode and there is no CD inserted.
- To PAUSE/RESUME the CD Playback, press the 'PLAY'/'PAUSE'/'OK' button on the remote control (Rem.10).
- To skip and play the next audio track press the 'Next'/'Forward' button on the remote control (Rem.24). Press and hold for 2-3 seconds to fast forward.
- To skip and play the previous audio track, press the 'Previous' button on the remote control (Rem.11). Press and hold for 2-3 seconds to fast backward.
- To stop playing a CD, press the 'Stop' button on the remote control (Rem.13).
Programming a CD/USB:
- While playing a CD/USB, to start programming, press the 'STOP' button on the remote control (Rem.13), to stop playing and begin programming your CD/USB.
- Press the 'PROGRAM' button on the remote control (Rem.22). The display will flash 'TOI P0I' and 'TOI'.
- Using the 'PREVIOUS'/'NEXT' buttons on the remote control (Rem.11,24), find the audio track you would like to save on the first programmed position. Once selected, press the 'PROGRAM' button on the remote control (Rem.22) again to confirm and save the track. Right after, the display will read to 'P02'.
Please note: To find an audio track quickly that you are about to programme, you can also use the remote control keypad buttons numbered between 0-9 (Rem.16).
- To continue CD/USB programming repeat this step 3 again for each audio track you would like to programme.
- Once you have completed and saved the programmed order, press the 'OK'/'Play'/'Pause' button on the remote control to start playing (Rem.10).
Repeat & Random Play in CD Mode
Press the 'RANDOM' button on the remote control (Rem.20) to shuffle all songs. The display will show the Shuffle indicator.
While playing a CD press once the 'REPEAT' button on the remote control (Rem.4) to repeat one song. Press twice to repeat all songs.
To cancel Repeat Mode, press the 'REPEAT' button on the remote control (Rem.4) until all symbols of this feature will disappear from the radio display.
DAB/ DAB+ Radio
The Majority Homerton HIFI has DAB and DAB+ digital radio.
Press the 'Mode' button on the radio (Ref.9) or press the 'DAB' button on the remote control (Rem.2) to change into DAB Mode.
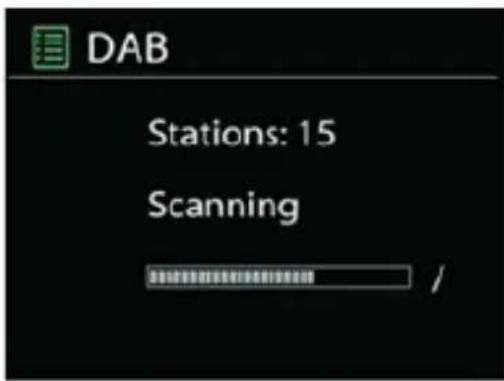
Scanning for DAB/DAB+ radio stations
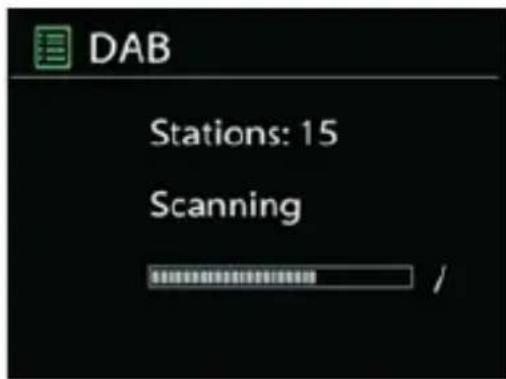
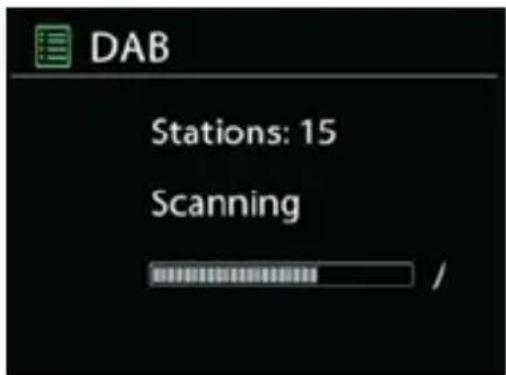
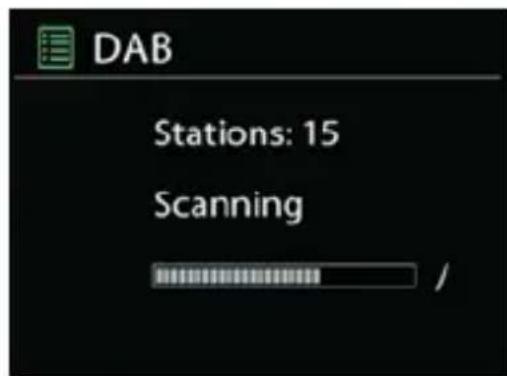
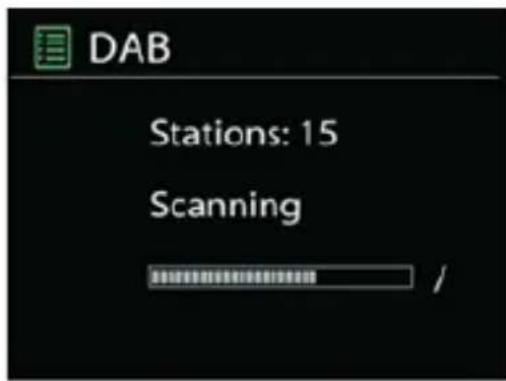
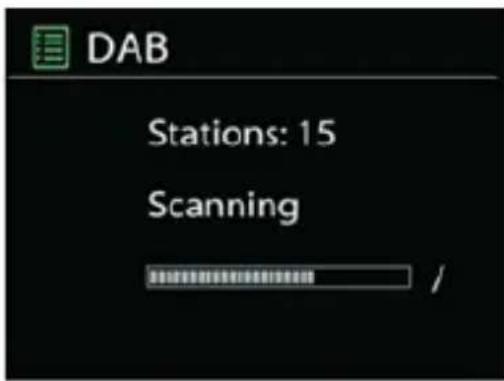
The first time you select DAB Radio Mode, or if the station list is empty, the Majority Homerton HIFI automatically performs a full scan searching the radio stations available at your location. Once completed a list of found stations will be saved. You may also need to start a scan manually to update the list of stations for one of the following reasons:
- Available stations change from time to time.
- If reception was not good for the original scan, this may result in an empty or incomplete list of available stations.
- If you have poor reception of some stations, you may wish to list only stations with good signal strength.
To start a scan manually, choose 'Full Scan' option. To scan only stations with good signal strength, select the 'Local Scan'. Once the scan is completed, the radio shows a list of available radio stations found. To remove the radio stations found with weak signal which cannot be listened to but are saved on the list, choose 'Prune Invalid' and these will be automatically removed from the list.
Saving and Recalling DAB/ DAB+ Radio Presets
To store a DAB/DAB+ radio station as a preset, press and hold the 'PROGRAM' on the remote control (Rem.22) for 2-3 seconds until the display shows 'Save to Preset' on the screen. Select one of the 40 presets to save the current playing radio station then press 'OK' to confirm.
To quickly save a radio station directly on a preset slot using the keypad buttons, press and hold the 1-9 numeric buttons on the remote-control keypad (Rem.16) for 2-3 seconds, to store the current playing station into corresponding number preset.
To recall a preset, press the 'PRESET' button on the unit (Ref.12) or the 'PROGRAM' button on the remote control (Rem.22). Select one of the listed preset stations and press 'OK' to confirm and start playing. To quickly recall presets saved on position 1-9, press the corresponding numeric button on the remote control keypad (1-9).
(Rem.16).
Now playing information
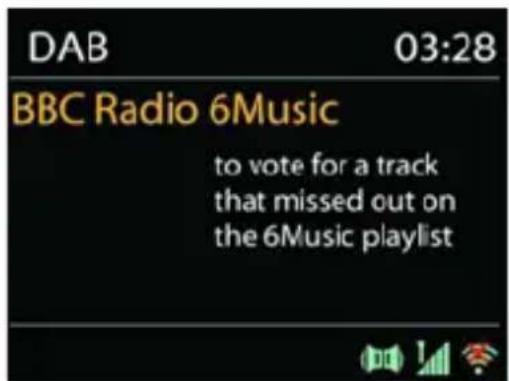
While the stream is playing, the screen shows its name and DLS (Dynamic Label Segment) information provided by the station broadcast in real-time such as: Programme Name, Track Title, Contact Details and Stereo Broadcasts are indicated with an icon at the bottom of the screen.
To view further information, press the 'INFO' button on the radio. (Ref.13), or the one on the remote control (Rem.17).
Each time you press the 'INFO' button another set of information will be displayed, cycling through DLS Text, Program Type, Ensemble Name/Frequency, Signal Strength/Error Rate, Bite Rate/Codec/Channels and Today's Date.
DAB/ DAB+ Mode- Settings
Dynamic Range Compression (DRC)
If you are listening to music with a high dynamic range in a noisy environment, you may wish to compress the audio dynamic range. This makes quiet sounds louder, and loud sounds quieter. You can change DRC as off, low, or high.
DAB/ DAB + Radio stations listed order
Choose the order that you would like to have the DAB/DAB+ radio stations listed, which can be either Alphanumeric, Ensemble or Valid.
Ensemble lists means groups of stations that are broadcast together on the same ensemble.
Valid lists will order the valid stations first, alphanumerically, then off-air stations.
FM Radio Mode receives analogue radio from the FM band and displays RDS (Radio Data System) information about the station and where broadcast.
Press the 'MODE' button on the radio (Ref.9), or press the 'FM' button on the remote control (Rem.2) to change into FM Radio Mode.
Once in FM Radio Mode for the first time, the frequency band will be displayed on the radio screen and a full scan of the FM band will automatically start.
To process a full scan manually, press the 'INTRO' button on the remote control (Rem.3).
To fine tune the FM Radio band, rotate the Navigation Dial Knob (Ref.2) or press the 'PREVIOUS' and 'NEXT' buttons on the remote control (Rem.11 & 24). The unit will then search in 0.05 MHz sequences.
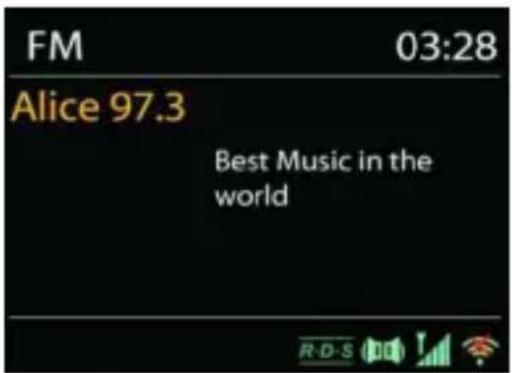
Saving & Recalling FM Radio - Presets
To store a FM Radio station as a preset, press and hold the 'PROGRAM' on the remote control (Rem.22) or the 'PRESET' button on the radio (Ref.12) until the display shows 'Save Preset' on the screen. Select one of the 40 presets to save the current station and press 'OK' to confirm.
To quickly save a radio station directly onto a preset slot, press and hold the 1-9 numeric buttons on the remote-control keypad (Rem.16) for 2-3 seconds, to store the current playing station into the preset corresponding number of remote keypad.
To recall a preset, press the 'PRESET' button on the unit (Ref.12) or the 'Program' button on the remote control (Rem.22). Select one of the listed preset stations and press 'OK' to confirm and start playing. To quickly recall presets saved on position 1-9, press the corresponding numeric button on remote control keypad 1-9 (Rem.16).
Now playing information
While the FM radio station is playing, the screen shows its frequency. If RDS signal is available, the station name and any further RDS information such as Program Name and Title will be displayed if available. Stereo broadcasts are indicated with an icon which can be seen at the bottom of the screen.
To view further information, press the 'INFO' button on the remote control (Rem.17), or on the radio (Ref.12). Each time you press of the 'INFO' button, another set of details will be displayed if available, cycling through Radio Text, Program Type, Frequency, and Today's Date.
FM Radio Mode- Settings
FM Radio Scan settings
By default, FM scans stop at any available station. This may result in a poor signal-to-noise ratio (hissing noise) from radio stations with weak signal. To change the scan settings to stop only at stations with good signal strength, select 'Yes' after choosing 'Strong station only'.
FM Radio Mode - Audio Settings
All stereo stations are reproduced in stereo. For radio stations with weak signal, which may result in a poor signal-to-noise ratio (hissing noise) it would be recommended to use MONO instead of STEREO. To play weak stations in Mono, select 'FM weak reception: Listen in Mono only' and then select 'YES' to confirm.
The Majority Homerton HIFI can be paired via Bluetooth with devices such as a phone, a tablet, or an MP3 player to play audio from via its speakers.
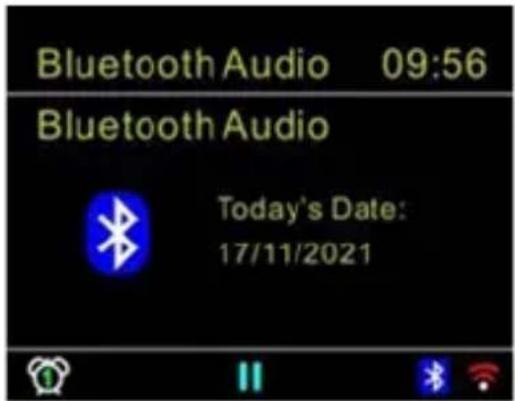
Press the 'BT' button on the remote control (Rem.2) to set the radio on Bluetooth or change the mode using the MODE button on the radio (Ref.9).
When the Majority Homerton HIFI is set to Bluetooth Mode, the unit will automatically start searching for Bluetooth devices to pair with. While searching, the Bluetooth icon is flashing.
Switch on your Bluetooth device that you would like to pair the radio with and search on your list of devices for 'Majority Homerton HIFI'. Select and connect.
Once both devices are successfully connected, the Bluetooth icon on the radio display will stop flashing. You can now play audio from your device via the Majority Homerton HIFI.
While playing via Bluetooth from your device through the Majority Homerton HIFI speakers, you can also use some of the buttons on the radio remote control such as: Play/Pause/OK, Previous, Next buttons or Volume.
Please note: The Majority Homerton HIFI is not compatible with Bluetooth earbuds.
AUX- IN (Audio Input port)
The Aux-In Mode can be used to play audio from an external source such as an MP3 player, a phone, a tablet, or any other similar device via the Majority Homerton HIFI's speakers using an audio cable of 3.5 mm (not included).
Connect the external audio source to the Aux-In 3.5mm stereo jack port on the Majority Homerton HIFI (Ref.15). Adjust the volume level on the radio and on the audio source device that you are connecting with, if necessary, then start playing from your device via the Majority Homerton HIFI speakers.
Headphone Jack
To listen to music privately, use wired headphones with a 3.5 stereo jack plug (not included). Insert the headphones 3.5mm jack into the port on the radio (Ref.17). The speakers will then be muted, and sound will be heard only on headphones. To prevent possible hearing damage, do not listen at high volume levels for long period of time.
OKTIV App (Net-Remote)
The Majority Homerton HIFI supports the Net Remote control from Apple iPhone, iPad and Android using the OKTIV app. The apps are available in Apple App Store and Google Play.
The OKTIV app allows you to:
- Create a group.
- Rename a group.
- Edit a group - add, remove, or delete one or more products.
- Control a group - choose operating mode and browse for content.
- Adjust volume for an entire group or for individual products within a group.
- Control products which have not been assigned to any group.
- Control all modes of the Majority Homerton HIFI, including Internet Radio, Media Player, USB playback, DAB, FM, Bluetooth, CD and AUX-In
- Setting EQ for various audio presets
- Setting Sleep timer
- Editing the displayed name of the radio.
ALARM
There are two versatile wake-up alarms with snooze facility.
Press the 'MENU' button on the remote control (Rem.8) to enter the 'Main Menu', rotate the navigation dial (Ref.2), to find 'Alarm', and then press 'OK' to enter.
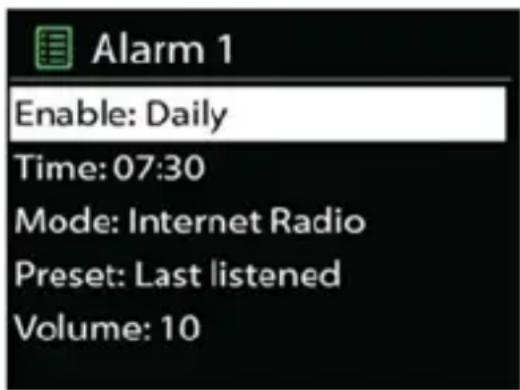
Select 'Alarm 1' or 'Alarm 2' then configure the following parameters:
- Enable: On/Off, Frequency: Daily, Once, Weekends or Weekdays,
- Time: Set the time when the alarm should sound
- Sound Mode: Buzzer, Internet Radio, CD, DAB or FM,
- Preset: Last Listened, 1 - 40,
- Volume level: 0 - 64
To activate the new settings, scroll down and select 'Save'.
The screen shows active alarm set, with an icon visible on display bottom left side.
To snooze the sounding alarm, press the 'Sleep' button. To cancel the alarm while sounding, press any button except the 'Sleep' button.
SLEEP Timer
To set the Sleep Timer, press the 'SLEEP' button on the remote control (Rem.19). Choose one of the options: Sleep OFF, 15mins, 30mins, 45mins or 60mins. Once selected, the system returns to the 'Now playing' screen and will start counting the time set. Once the sleep timer counting is ending the radio will automatically switch in Standby Mode.
If you set the Sleep Timer via 'Main Menu', press the 'MENU' on the unit (Ref.10) or on the remote control (Rem.8) to return to the 'Now playing' screen.
| Observation Potential Cause/Solution | |
| The device does not turn on. | Check it the power adaptor is connected properly. |
| Switch automatically off. | Due to ErP2 requirements and environmental protection, the unit automatically switches to Standby Mode when no music is played for more than 15 minutes. |
| No sound. | 1. Increase the volume as it may be muted.2. Remove any connected headphones3. Unplug the unit and disconnect the speakers. Leave it for 10 minutes, and then reconnect the speakers to the main unit. Plug this back to mains, power on, and start playing in different modes. Increase the volume level. |
| No network connection can be established. | 1. Check the WLAN function.2. Try to set an IP address at the device.3. Activate the DHCP function on the router and make the connection again at the device.4. A firewall is activated on the network - set the respective program in such a way that access is possible.5. Reboot the router. |
| WiFi connection cannot be established. | 1. Check the availability of WLAN network on the router.2. Place the device closer to the router.3. Make sure the password is correct. |
| No station found. | 1. Check the network as well as the access point and firewall.2. The station may not be available currently, try it again later or select another station.3. The link of the station is changed, or the station no longer transmits - ask the provider for information. |
| Hissing noise in FM Mode. | Check/extend the radio antenna or position in a different place. |
| No stations available/burbling/ intermittent in DAB Mode. | 1. Move the radio.2. Rescan local stations only (strong radio signal).3. Check the local DAB coverage. |
| Alarm does not work. | 1. Switch on the alarm.2. Due to the volume setting, refer to the solutions of 'No sound'.3. The source of alarm was set to be station but there is no network connection. Change the source of alarm or reconfigure the connection. |
| USB Driver or MP3 player is not detected. | 1. Check if the USB driver or MP3 player is properly inserted2. Some USB hard disks need external power supply, make sure it is connected to the power.3. Not all MP3 players can be read directly on the device - use an USB drive instead. |
| NetRemote does not show or connect to Homerton HIFI | 1. Reopen the App.2. If you have several streaming from several devices at the same time, it may cause crash, reboot Homerton HIFI and/or your device. |
| All other undetermined a period cases. | The Majority Homerton HIFI may process large amount of data after of operation, no matter in which mode, it will cause the system, freeze or malfunction. Reboot the unit if necessary.The normal function of the product may be disturbed by strong Electro-Magnetic interference. If so, simply reset the product to resume normal operation by following the instruction manual. In case the function could not resume, please use the product in other location.The device may malfunction when used in areas with strong radio interference. The device will work properly again once there is no more interference. |
Do you still need help with your Homerton HIFI? Contact Tech Support
If you require further assistance with your Majority product, please contact our team on the Majority website: www.majority.co.uk/support or email us @techsupport@majority.co.uk
Specification & Warranty & Support
Product Specification
| Power supply: Use only the supplied adaptor | |
| Power input: 100-240V~50/60Hz | |
| Power output: DC24V/1.5A | |
| DAB+ range: Band III: 174.928- 239.200 MHz | |
| FM range: | 87.5 -108MHz |
| Bluetooth® Version: | Version 5.3 |
| Connectivity: | WiFi Dual modes to support 2.4GHz and 5GHz WiFi system |
| Standby Power consumption | - Standby (WiFi Off): <1W- Networked Standby (Wi-Fi On): <2W |
Wireless Network Wi-Fi Control
Enable/Disable Wi-Fi
Go to: Menu -> System Settings -> Network -> Keep network connected
- select YES to keep the radio always connected to your WIFI network
- select NO to disable Wi-Fi
Warranty
All products come with a standard 12-month warranty. All items must be registered within 30 days of purchase on www.majority.co.uk for the warranty to be valid. Once on the web page, use the menu to find 'Register Your Product'. You will also be given the chance to extend your warranty for an additional 24 months, free of charge.
Homerton HiFi
Benutzerhandbuch
MAJORITY
natural_image
Technical diagram of a speaker or audio device with three circular components and mounting holes (no text or symbols)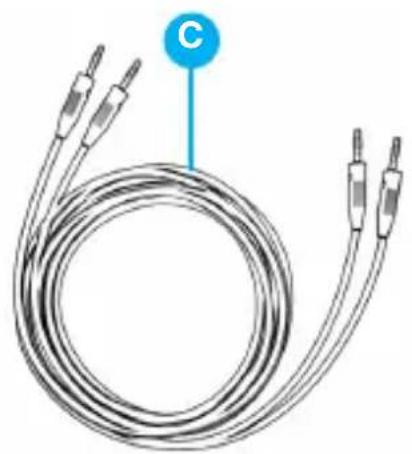
natural_image
Coiled electrical test probe with two terminal leads, labeled 'C' at top (no text or symbols on the main subject)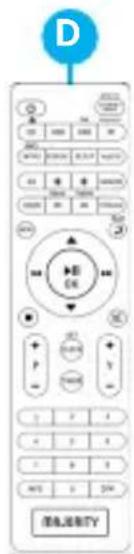
natural_image
Simple line drawing of a medical or electrical device with a coiled cable and a labeled 'E' (no text or symbols on the device itself)
natural_image
Illustration of a blank book with a blue circular icon labeled 'F' on top (no text or symbols on the book itself)Vorderansicht
natural_image
Simple line drawing of a device mounting bracket with two connectors and a blue arrow pointing to the corner (no text or symbols)natural_image
Simple line drawing of a device front panel with a blue arrow pointing to a numbered label '21' (no text or symbols on the diagram itself)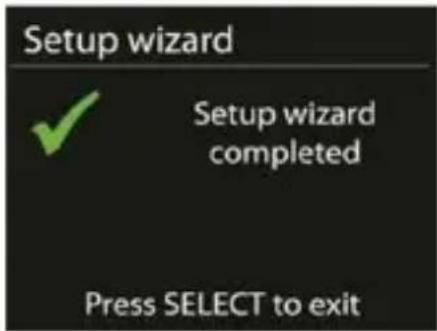
SYSTEMEINSTELLUNGEN
EQUALISER
ZEIT/DATUM
www.majority.co.uk/support
Homerton HiFi
natural_image
Blank tablet device with a blue circular label labeled 'B' at the top (no text or symbols on the device itself)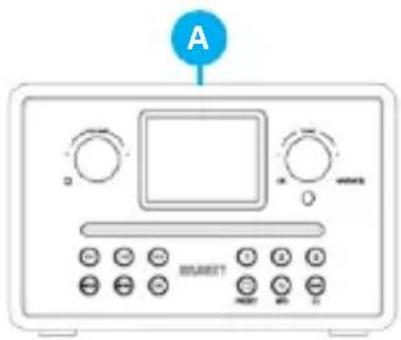
natural_image
Technical diagram of a speaker or audio device with three circular components and mounting holes (no text or symbols)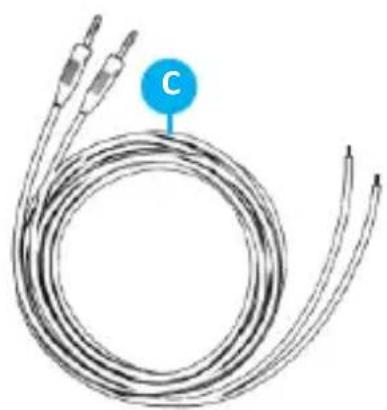
natural_image
Coiled medical or electrical probe with two connectors and a blue circular marker labeled 'C' (no text or symbols on the main subject)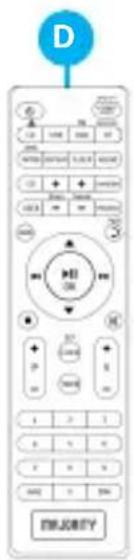
natural_image
Simple line drawing of a cable with a labeled component (E) above it, no text or symbols present.
natural_image
Simple line drawing of a blank book with a blue circular icon labeled 'F' on top (no text or symbols on the book itself)Vue De Face
natural_image
Simple diagram of a device outlet with a numbered label pointing to the outlet (no text or symbols on the main structure)natural_image
Simple diagram of a wall-mounted electrical socket with two pins, labeled '21' at the bottom (no text or symbols on the socket itself)www.frontiersmart.com/privacy.
HEURE/DATE
Radio Internet & Podcasts
https://www.spotify.com/connect/third-partylicenses
natural_image
Technical diagram of a speaker or audio device with three circular components and mounting holes (no text or symbols)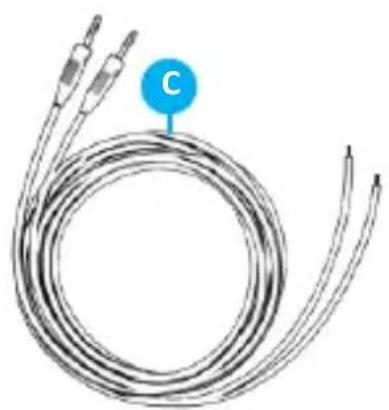
natural_image
Coiled medical or electrical probe with two connectors and a blue circular marker labeled 'C' (no text or symbols on the main subject)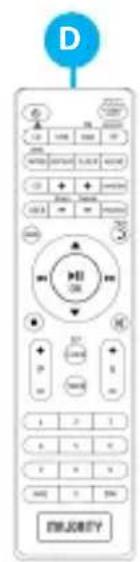
natural_image
Simple line drawing of a plug connected to a cable with a labeled 'E' (no text or symbols on the diagram itself)
natural_image
Simple line drawing of a blank book with a blue circular icon labeled 'F' on top (no text or symbols on the book itself)Vista Frontale
natural_image
Simple diagram of a device outlet with a numbered label pointing to the outlet (no text or symbols on the diagram itself)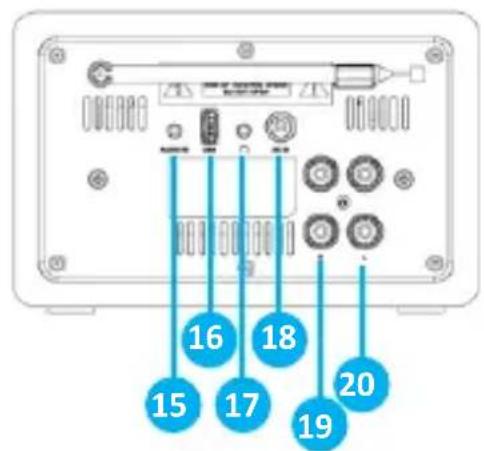
natural_image
Simple diagram of a device mounting with a square socket and two connectors, labeled with number 21 (no text or symbols on the diagram itself)- Metodo 3: Ignora WPS
ORA/DATA
Radio Internet e Podcast
https://www.spotify.com/connect/third-partylicenses
Dynamic Range Compression (DRC)
natural_image
Blank rectangular device with a blue circular label labeled 'B' at the top (no text or symbols on the device itself)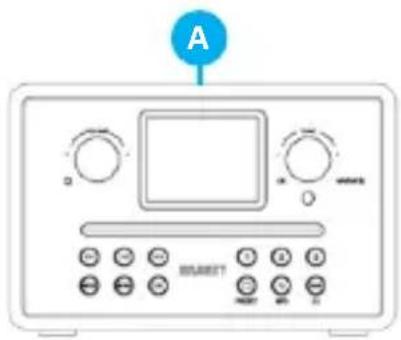
natural_image
Technical diagram of a speaker or audio device with three circular components and mounting holes (no text or symbols)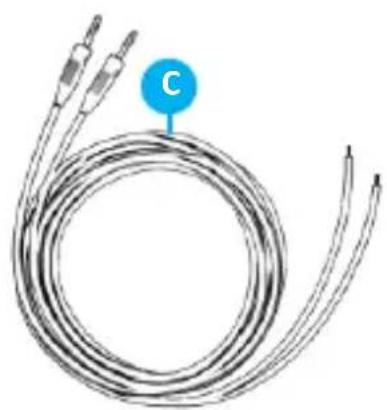
natural_image
Coiled medical or electrical probe with two connectors and a blue circular marker labeled 'C' (no text or symbols on the main subject)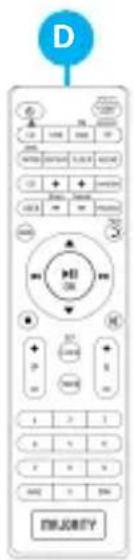

natural_image
Simple line drawing of a cable with a labeled component (E) above it, no text or symbols present.
natural_image
Simple line drawing of a blank book with a blue circular icon labeled 'F' on top (no text or symbols on the book itself)Edestä Katsottuna
- VOLUME +/- - Paina
natural_image
Simple diagram of a device outlet with a numbered label pointing to the outlet (no text or symbols on the main structure)- Menetelmä 3: Ohita WPS
AIKA/PÄIVÄYS
Internet-radio & Podcastit

Tallenna Ja Palauta Esivalinnat
https://www.spotify.com/connect/third-partylicenses
natural_image
Blank tablet device with a blue circular label labeled 'B' at the top (no text or symbols on the device itself)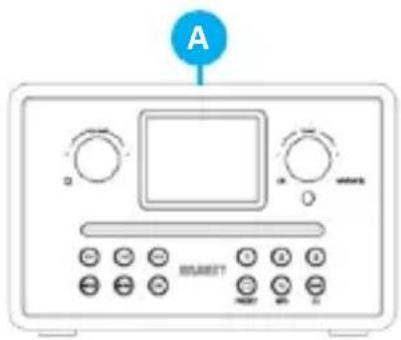
natural_image
Technical diagram of a speaker or audio device with three circular components and mounting holes (no text or symbols)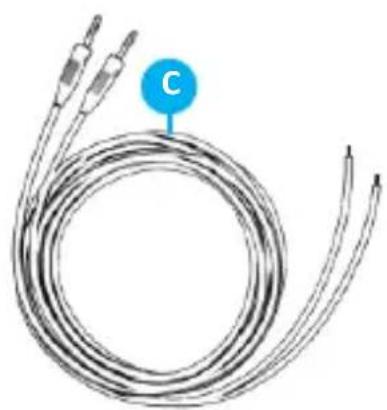
natural_image
Coiled medical or electrical probe with two connectors and a blue circular marker labeled 'C' (no text or symbols on the main subject)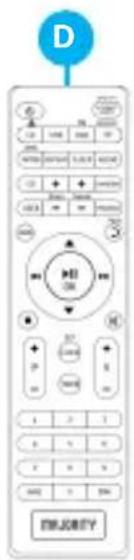
natural_image
Simple line drawing of a plug connected to a wire, labeled 'E' at the top (no text or symbols on the diagram itself)
natural_image
Simple line drawing of a blank book with a blue circular icon labeled 'F' on top (no text or symbols on the book itself)Vista Frontal
natural_image
Simple diagram of a device outlet with a numbered label pointing to the outlet (no text or symbols on the main structure)- Método 2: Usar un Código PIN para conectar
- Método 3: Omitir WPS
HORA/FECHA
Guardar y Recuperar Preajustes
https://www.spotify.com/connect/third-partylicenses
Guardar y Recuperar Preajustes de Radio FM
EN Safety and Usage Guidelines (All where applicable)
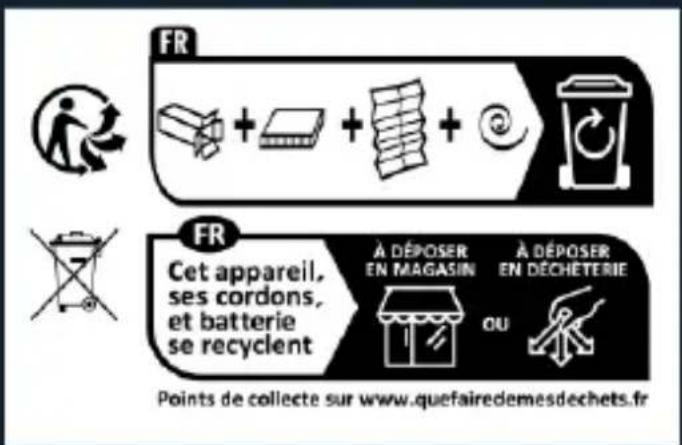
General Safety Information - Read and Retain: Review all safety and operating instructions before use; keep them for future reference. Follow Instructions: Adhere strictly to all safety and operational guidelines. Water Exposure: Keep the device away from water; avoid placing liquids near it. Ventilation: Ensure ventilation openings are unobstructed to prevent overheating. Heat Sources: Keep the device away from heat-emitting appliances. Wall Mounting - Installation Safety: Follow the manufacturer's instructions and use approved mounting kits only. Avoid drilling into areas with cables, gas, or water lines. Use proper tools and safety apparatus. Regular Maintenance: Inspect regularly for wear or damage, especially if wall-mounted. Relocation: Detach from the wall mount before moving. Child Safety: Keep out of children's reach and ensure heavy items are securely mounted. Seismic Precautions: Use specialized mounts in earthquake-prone areas. Electrical Safety - Power Source: Use the specified power source; consult an electrician if unsure. Cable Management: Protect the power cord from damage. Power Disconnection: Keep the main plug accessible; unplug during storms or long periods of non-use. Battery Safety - Charging: Use the manufacturer's charger; avoid extreme conditions. Heat Exposure: Keep batteries away from heat to prevent explosion or leakage. Battery Condition: Discontinue use if the battery is damaged; dispose of it properly. Replacement: Only use recommended batteries; incorrect types can cause hazards. External Batteries: Use only specified types, observing correct polarity. Battery Removal: Remove batteries if not used for an extended period. Disposal: Follow local regulations for battery disposal; do not incinerate. Connectivity Safety - Cable Connections: Power off devices before connecting or disconnecting cables. Bluetooth Pairing: Ensure a secure connection; avoid interference from other devices. Volume Control: Keep volume moderate to prevent hearing damage. Connectivity and Data Security - Wireless Security: Review privacy policies and secure your network. Software Updates: Keep software updated for security and performance. Children's Safety Warnings - Product Use: Intended for adults; keep away from children. Battery Warning: Keep batteries and items containing batteries out of children's reach. Volume Control: Maintain a safe volume level to protect children's hearing. Fire Hazard - Flammable Materials: Do not place open flames near the product. Overheating: Avoid covering the product to prevent overheating and fire risks. Disposal and Recycling - Product Disposal: Dispose of at a recycling centre according to local laws. Environmental Compliance: Follow regulations for battery and electronic waste disposal. User Maintenance - Cleaning: Unplug before cleaning; use a dry cloth only. Servicing: Only qualified personnel should perform repairs. Data Protection: Reset to factory settings before returning or disposing of the product. Disclaimer: Failure to follow these instructions may result in injury, death, or property damage. The manufacturer is not liable for damage caused by improper use.
Declaration of Conformity:
We, iZilla Limited, 1 Cygnus Business Park, Middlewatch, Swavesey, Cambridgeshire
CB24 4AA, declare under our sole responsibility that the product: Product Name:
Homerton HiFi Model: 1000003061 Brand Name: Majority
To which this declaration referred is in conformity to the following harmonized standards or normative documents (CE & Rohs 2.0);
EN 55035:2017, EN 55032:2015, EN61000-3-2:2014, EN61000-3-3:2013, EEN62368-1:2004+A11:2017, ETSI EN 301 489-1 V2.2.3(2019-11), ETSI EN 301 489-17, V3.2.2(2019-12), ETSI EN 300 328 V2.2.2 (2019-07), EN 62479: 2010, IEC 62321-3-1:2013, IEC 62321-4:2013, IEC 62321-5:2013, IEC 62321-6:2015, IEC 62321-7-1:2015, IEC 62321-7-2:2017, IEC 62321-8:2017, (EC)NO 1275/2008,EN50564:2011, (EC)NO 801/2013.
Complying with the requirements or provisions of Council Directives which relate to:
EMC Directive 2014/30/EU, RED Directive 2014/53/EU, LVD Directive 2014/35/EU, Directive (2011/65/EU) and its amendment directives 2015/863/EU (RoHS 2.0) of the, European parliament, ERP Directive 2009/125/EC.
All essential test suites have been carried out.
Point of Contact: Eddie Latham | Founder
Signed: F. Iatham Date of Issue: January 2024 Place of Issue: Cambridge, UK
Importer's Addresses:
UK: iZilla Limited,1 Cygnus Business Park, Middlewatch, Swavesey, Cambridgeshire CB24 4AA
Email: techsupport@majority.co.uk
EU RP: AR Experts, Po Box 5047, 3620 AA Breukelen, The Netherlands
Email: info@ar-experts.eu
US: iZilla Ltd C/O A.N.Deringer Inc, 19520 Wilmington Ave, Rancho
Dominguez, CA, 90220
Email: techsupport@majority.co.uk

ATTENTION
RISK OF ELECTRIC SHOCK DO NOT OPEN


CAUTION
RISQUE D'ELECTROCUTION NE PAS OUVRIR


IMPORTANT: Please read all instructions carefully before use and keep for future reference
Statement of Compliance
Product Security and Telecommunications Infrastructure Act 2022 and the Product Security and Telecommunications Infrastructure (Security Requirements for Relevant Connectable Products) Regulations 2023
1. Responsible Person
Company Name: IZILLA LIMITED (Company No. 08520738)
Registered Office: 1 Cygnus Business Park, Middlewatch, Swavesey, Cambridgeshire CB24 4AA
Contact for Compliance Purposes: info@majority.co.uk
2. Product Identification
Product Range Name: Majority Steramers
Brand: Majority
Models Covered: Homerton HiFi
Product Description: Consumer connectable streaming audio products capable of network connectivity for media playback and control.
3. Declaration of Compliance
IZILLA LIMITED declares that, in our opinion, the products identified in Section 2 comply with the applicable security requirements under the Product Security and Telecommunications Infrastructure Act 2022 and the associated Regulations.
4. Security Requirements Met
4.1 No Universal Default Passwords
The products are not supplied with universal default passwords. Where authentication is used, the product uses unique credentials and or requires the user to set credentials during setup, as applicable.
4.2 Vulnerability Disclosure Policy
A vulnerability reporting process exists for these products. Security issues and vulnerabilities can be reported to:
info@majority.co.uk
4.3 Security Update Commitment
Security updates will be provided for a minimum period of 10 years from the date of first UK sale. Information on security updates is available via: https://www.majority.co.uk/support
5. Supporting Evidence
IZILLA LIMITED maintains documentation to support this declaration, which may include:
- Default password and authentication approach
• Vulnerability intake and handling process
• Security update policy and support period records
• Relevant technical and compliance records
This information will be made available to UK enforcement authorities on request.
6. Signature
Signed for and on behalf of IZILLA LIMITED:
Name: E Latham
Position: Owner
Date: 1 ^st Jan 2024
MAJORITY
www.majority.co.uk
- What's in the Box?
- The Back View
- Product setup
- Remote Control
- Getting started.
- Get the Internet Network environment ready.
- Select and confirm the Language.
- Agree and confirm the Privacy Policy.
- Start the Setup Wizard
- Select the Clock format
- Set up the Time and the Date
- •Time/ Date: Automatic Update
- • Time/ Date Manual Update
- Set the Time Zone/Daylight
- Connecting the Majority Homerton HIFI to the Internet Network
- Keep the Network Connected
- WLAN region
- Scanning/searching for the network.
- WPS encrypted network
- • Method 1: Using the Push button to connect
- • Method 2: Using a Pin Code to connect
- • Method 3: Skip WPS
- SYSTEM SETTINGS
- EQUALISER
- NETWORK
- Network Wizard
- PBC WLAN Setup
- View Settings
- Manual Settings
- Network Profile
- Keep network connected.
- TIME/DATE
- BRIGHTNESS
- LANGUAGE
- SOFTWARE UPDATE
- INFO
- FACTORY RESET
- MAIN MENU
- Internet Radio & Podcasts
- Last listened.
- Station list
- Saving & Recalling Presets
- Now playing information
- Spotify
- Music Player
- USB Playback
- Repeat/Shuffle
- Please note:
- Inserting & Playing a CD
- Programming a CD/USB:
- Repeat & Random Play in CD Mode
- DAB/ DAB+ Radio
- Scanning for DAB/DAB+ radio stations
- Saving and Recalling DAB/ DAB+ Radio Presets
- DAB/ DAB+ Mode- Settings
- Dynamic Range Compression (DRC)
- DAB/ DAB + Radio stations listed order
- Saving & Recalling FM Radio - Presets
- FM Radio Mode- Settings
- FM Radio Scan settings
- FM Radio Mode - Audio Settings
- AUX- IN (Audio Input port)
- Headphone Jack
- OKTIV App (Net-Remote)
- ALARM
- SLEEP Timer
- Do you still need help with your Homerton HIFI? Contact Tech Support
- Specification & Warranty & Support
- Wireless Network Wi-Fi Control
- Warranty
- Homerton HiFi
- SYSTEMEINSTELLUNGEN
- ZEIT/DATUM
- HEURE/DATE
- Radio Internet & Podcasts
- - Metodo 3: Ignora WPS
- ORA/DATA
- Radio Internet e Podcast
- - Menetelmä 3: Ohita WPS
- AIKA/PÄIVÄYS
- Internet-radio & Podcastit
- Tallenna Ja Palauta Esivalinnat
- - Método 2: Usar un Código PIN para conectar
- - Método 3: Omitir WPS
- HORA/FECHA
- Guardar y Recuperar Preajustes
- Guardar y Recuperar Preajustes de Radio FM
- EN Safety and Usage Guidelines (All where applicable)
- Declaration of Conformity:
- To which this declaration referred is in conformity to the following harmonized standards or normative documents (CE & Rohs 2.0);
- Complying with the requirements or provisions of Council Directives which relate to:
- Importer's Addresses:
- Statement of Compliance
- Responsible Person
- Product Identification
- Declaration of Compliance
- Security Requirements Met
- No Universal Default Passwords
- Vulnerability Disclosure Policy
- Security Update Commitment
- Supporting Evidence
- Signature
- MAJORITY
Brand : Majority
Model : Homerton Hi-Fi
Category : Hi-fi system