
Velaire Flex - Cooker Klarstein - Free user manual and instructions
Find the device manual for free Velaire Flex Klarstein in PDF.

| Product Type | Induction hob with integrated extractor hood |
| Brand | Klarstein |
| Model | Velaire Flex |
| Article Number | 10047374 (also 10047465) |
| Appliance dimensions (W x D x H) | Approx. 800 x 520 x 225 mm |
| Cutout dimensions (A x B) | 760 x 490 mm |
| Weight | Approx. 22 kg |
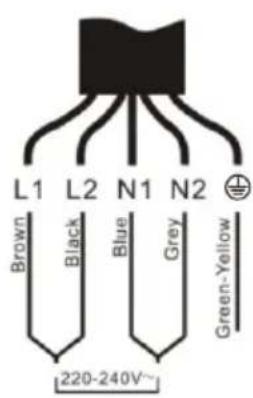
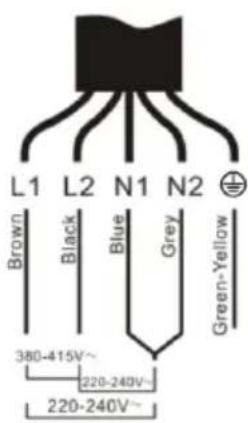
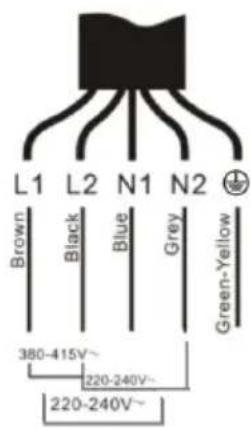
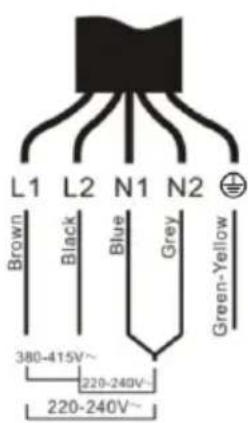
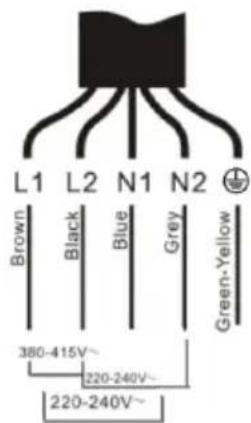
| Supply voltage | 220-240 V ~ 50 Hz |
| Number of cooking zones | 4 (induction) |
| Flexible zones | 2 (left and right combinable) |
| Power per zone (normal / boost) | 1800 W / 2100 W (individual zones) |
| Flexible zone power (max / boost) | 3000 W / 3600 W |
| Integrated extractor hood | Yes, downdraft extraction |
| Hood speeds | 3 manual + automatic + boost (5 min) |
| Cooking functions | Boost, Pause, Keep Warm, Timer, Child Lock |
| Display | Touch screen with zone indicators |
| Safety | Automatic shut-off, pan detection, overheating protection, residual heat indicator |
| Surface material | Ceramic glass |
| Filters | Metal grease filter (washable), charcoal filter (for recirculation) |
| Cleaning | Ceramic glass surface with scraper and suitable cleaner |
| Installation | Built-in, requires qualified electrician |
| Warranty | According to manufacturer's conditions |
Frequently Asked Questions - Velaire Flex Klarstein
User questions about Velaire Flex Klarstein
0 question about this device. Answer the ones you know or ask your own.
Ask a new question about this device
Download the instructions for your Cooker in PDF format for free! Find your manual Velaire Flex - Klarstein and take your electronic device back in hand. On this page are published all the documents necessary for the use of your device. Velaire Flex by Klarstein.
USER MANUAL Velaire Flex Klarstein
Extractor hood and induction hob
KLARSTEIN
www.klarstein.com

area
| Category | Value | | -------- | ----- | | A | 100 | | B | 100 | | C | 100 | | D | 100 | | E | 100 | | F | 100 | | G | 100 | | H | 100 | | I | 100 | | J | 100 | | K | 100 | | L | 100 | | M | 100 | | N | 100 | | O | 100 | | P | 100 | | Q | 100 | | R | 100 | | S | 100 | | T | 100 | | U | 100 | | V | 100 | | W | 100 | | X | 100 | | Y | 100 | | Z | 100 |Lieber Kunde, liebe Kundin,
INHALT

natural_image
Two rectangular electronic components with vertical and horizontal lines, no visible text or symbolsnatural_image
Pure electrical circuit lines without any symbols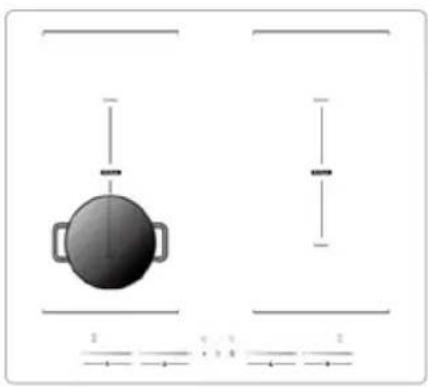
natural_image
Simple diagram showing a circular object with two handles and horizontal lines, no text or symbols present.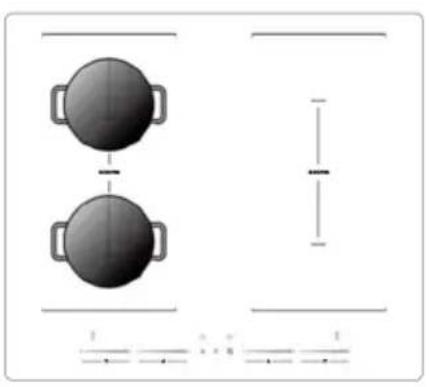
natural_image
Diagram showing two circular objects with handles placed above and below a vertical dimension line, no text or symbols present.10. PRODUKTDATENBLATT
INDUKTIONSKOCHFELD
natural_image
Symbol of a trash bin with crossed lines indicating no waste or discharge (no text or labels)Berlin Brands Group UK Limited
35 Ballards Lane
London, N3 1XW
United Kingdom
Kontakt: info@electronic-star.de
Dear customer,
Congratulations on your purchase. Please read the following instructions carefully and follow them to prevent potential damage. We accept no liability for damage caused by disregarding the instructions and improper use. Please scan the QR code to access the latest operating instructions and further information about the product.

CONTENTS
- Technical Data 49
- Safety Instructions 50
- Product Overview 54
- Installation 58
- Operation 63
- Device Protection 78
- Cleaning and maintenance 79
- Troubleshooting 85
- Product Data Sheet induction hob 88
- Disposal Considerations 91
- Manufacturer & Importer (UK) 91
1. TECHNICAL DATA
| Article number 10047 | 372 | 10047 | 373 | 10047 | 374 | 10047465 |
| Model | Velaire Basic | Velaire Hybrid | Velaire Flex | Verosteel | ||
| Supply Voltage extractor hood | 220-240 V ~50 Hz | |||||
Note: Technical specifications are subject to change without notice as part of product improvement. Refer to the rating label on the appliance for detailed electrical specifications. For any questions about the technical details of your extractor hood, please contact Klarstein customer service. For Technical Data sheet of the product with more information, please consult the official EPREL - European Product Registry for Energy Labelling via https://eprel.ec.europa.eu/ and search for the following Registration Numbers: 10047372 - 2327278/10047373 - 2329122/10047374 - 2329118
2. SAFETY INSTRUCTIONS
Your safety and the safety of others are very important. Please read all safety instructions and warnings below before installation or use.
2.1 Electrical Safety and Installation
• Installation by Qualified Professional: This appliance must be installed and connected by a qualified electrician. Incorrect installation or wiring can lead to electric shock, injury, or product damage and will void the warranty.
- Disconnect from Mains: Always switch off the circuit breaker and unplug or isolate the hob from the mains before installing, cleaning, or servicing the unit.
- Proper Grounding: The hob must be properly earthed. Connect it to a dedicated, grounded circuit according to local electrical codes. An isolating switch (all-pole disconnection with at least 3 mm contact gap) must be incorporated into the fixed wiring for safety.
- Electrical Supply: Ensure the voltage and frequency of your power supply correspond to the ratings on the appliance nameplate. Use an appropriate circuit breaker/fuse as specified. Do not use extension cords, multi-plug adapters or portable power plugs to connect the hob – this is a fire and safety hazard.
- Cable Safety: Use the specified power supply cable type and diameter. The cable should not be bent, pinched, or come into contact with any hot surfaces. If the supply cord is damaged, it must be replaced by the manufacturer, an authorized service agent, or similarly qualified persons to avoid danger.
- No DIY Alterations: Do not modify the plug, power cord or internal wiring yourself. Do not attempt to repair or replace any electrical components of the appliance. All repairs must be performed by qualified service technicians using original spare parts.
2.2 Operational Safety
- Intended Use: This induction hob with integrated extractor is intended for indoor domestic use only. It is not designed for commercial or outdoor use. Using the appliance in a commercial setting or for any purpose not outlined in this manual may result in injury, damage, and will void the warranty.
- Supervision Required: CAUTION: Never leave the appliance unattended during operation. Boil-overs, spills, or overheated oil/fat can ignite and cause fire.
- Suitable Cookware Only: Only use cookware that is compatible with induction hobs (ferrous-metal bottoms). The hob will automatically shut off or not activate if incompatible or undersized cookware is used (see Section 6.1.6 Choosing the Right Cookware).
- No External Timer: WARNING: The appliance is not intended to be operated by means of an external timer or separate remote-control system. Always switch it off manually as described in this manual.
- No Worksurface: Do not use the hob surface as a cutting board, worktop, or for storage. Placing heavy objects can scratch or crack the glass, and objects left on the hob (even when off) may heat up or melt if the hob is accidentally turned on.
- Hot Surfaces: WARNING – Burn Hazard: During use, the cooking zones and certain accessible parts of the hob will become very hot. Do not touch the ceramic glass surface or nearby metal parts until they have fully cooled. Even after switching off, the surface remains hot for some time and is indicated by an “H” (hot) on the display.
- Keep clothing, paper, curtains and other flammable materials away from the hob. They may catch fire from residual heat or if accidentally placed on an active cooking zone.
- Handles of pots and pans should be turned inward so they do not extend over the edge of the hob or over other active zones. This helps prevent knocks, spills, and burns.
- Child Safety
- WARNING: Keep children under 8 years old away from the hob unless constantly supervised. The appliance and its accessible parts become hot during use, which can cause serious burns.
- This appliance can be used by children aged 8+ and by persons with reduced physical, sensory or mental capabilities only if they are given supervision or instruction concerning safe use and understand the hazards.
- Do not let children play with the appliance, sit or climb on it, or operate any controls.
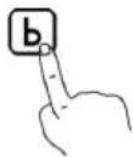
• Children must not perform cleaning or maintenance unsupervised. - The hob features a Child Lock function (see Section 5.1.4) – engage it to prevent unintended activation by children.
- Cooking with Oil /Grease: WARNING – Fire Hazard: Oil and fat can overheat rapidly and catch fire.
- When heating oil for frying:
- Do not leave the hob unattended.
- Do not attempt to extinguish an oil fire with water! In case of fire, switch off the hob and use a pan lid, metal tray or fire blanket to smother flames.
-
Never flambé (flame-cook with alcohol) under the extractor intake – the flames could be drawn into the ventilation system and cause fire.
-
Flammable Items: WARNING: Do not store items on the hob's cooking surface. Objects such as plastic utensils, dishcloths, packaging or other flammable materials can melt or ignite if placed on a hot cooking zone or near the extractor inlet.
- After Use: Always turn off all cooking zones using the controls after cooking. Do not rely only on the automatic pan detection or safety shut-off alone. When finished, also switch off the hob using the main power (ON/OFF) button to fully deactivate the appliance.
- No Room/Ambient Heating: Do not use the appliance for space heating or to dry clothes. It is designed for cooking food only.
2.3 Appliance and component safety
- Glass ceramic surface: Do not cook on a broken or cracked hob surface. If you notice a crack in the glass, even a small one, unplug the hob immediately and do not use it until it has been repaired or replaced by a qualified technician. A cracked surface may allow water to penetrate, or sharp edges may present a risk of electric shock or injury.
- Pan detection & auto shut-off: This induction hob is equipped with safety features such as pan detection and auto shut-off. If no pan is detected on an active zone, or if you forget to switch off a zone, the hob will automatically switch off that zone after a preset time (see section 5.1.7 Auto shut-off times). However, do not rely on this – always switch off the hob manually after use.
- Cooling fan and ventilation: An internal cooling fan runs during cooking and may continue to run for a short time after the hob is switched off to cool the electronics. This is normal. Do not disconnect the power supply while the fan is running. Ensure that the ventilation openings (air intake and outlet) are not blocked. Good airflow is essential for safe operation.
- Ventilation filters: The integral extractor contains grease filters (and possibly charcoal filters if recirculation mode is used). Keep the filters clean (see section 6 Maintenance) to prevent grease build-up, which is a fire hazard, and to maintain proper ventilation performance.
- Use hob guards: WARNING: Only use a hob guard that has been designed or approved by Klarstein for this model. Use of an incompatible guard may result in an accident.
- Sharp edges: Be careful when handling the appliance during installation - the metal edges of the cooktop or cut-out may be sharp. Wear suitable gloves to avoid cuts. Similarly, if you use a scraper to clean the glass (for burnt-on spills), be extremely careful - the scraper blade is very sharp (cut hazard).
2.4 Health Advice
- This appliance complies with electromagnetic safety standards.
• However, persons with pacemakers or other electrical implants (such as insulin pumps) should consult their physician or implant manufacturer before using this appliance to ensure that their implants are not affected by the electromagnetic field. - Failure to follow this advice may result in death.
2.5 Cleaning and Maintenance Safety
- Disconnect the power supply: Always switch off the hob and disconnect it from the power supply before cleaning or carrying out any maintenance (e.g. removing filters, wiping the control panel).
- Allow to cool: Clean the hob only after all surfaces have cooled down. Cleaning a hot glass surface can cause burns or damage to your cleaning tools.
- No steam cleaners: Do not use steam or high pressure cleaners to clean the hob or the extractor fan. Steam can reach electrical components and cause a short circuit or electric shock.
- Gentle cleaning: Do not use abrasive sponges, steel wool or harsh scouring powders on the glass or stainless steel parts. They can scratch or damage the finish. Use only non-scratching cleaners and follow the guidelines in Section 6 for proper cleaning techniques.
- Filter handling: Handle with care when cleaning or replacing the extractor hood filters. Some edges may be sharp. Ensure that the filters are replaced correctly before using the extractor hood again. Do not operate the extractor hood without filters.
- Service: There are no user serviceable parts inside the appliance (except for routine cleaning of accessible components as described). Do not attempt to disassemble or modify internal components. If the unit requires service or repair, contact Klarstein Customer Service or an authorised technician.
IMPORTANT: Failure to follow the safety instructions and warnings may result in electric shock, fire, serious injury, or damage to the appliance. Incorrect installation or misuse will void your warranty. Keep these safety instructions for future reference and share them with any person who will be operating the appliance.
3. PRODUCT OVERVIEW
3.1 Appliance Description - Top View
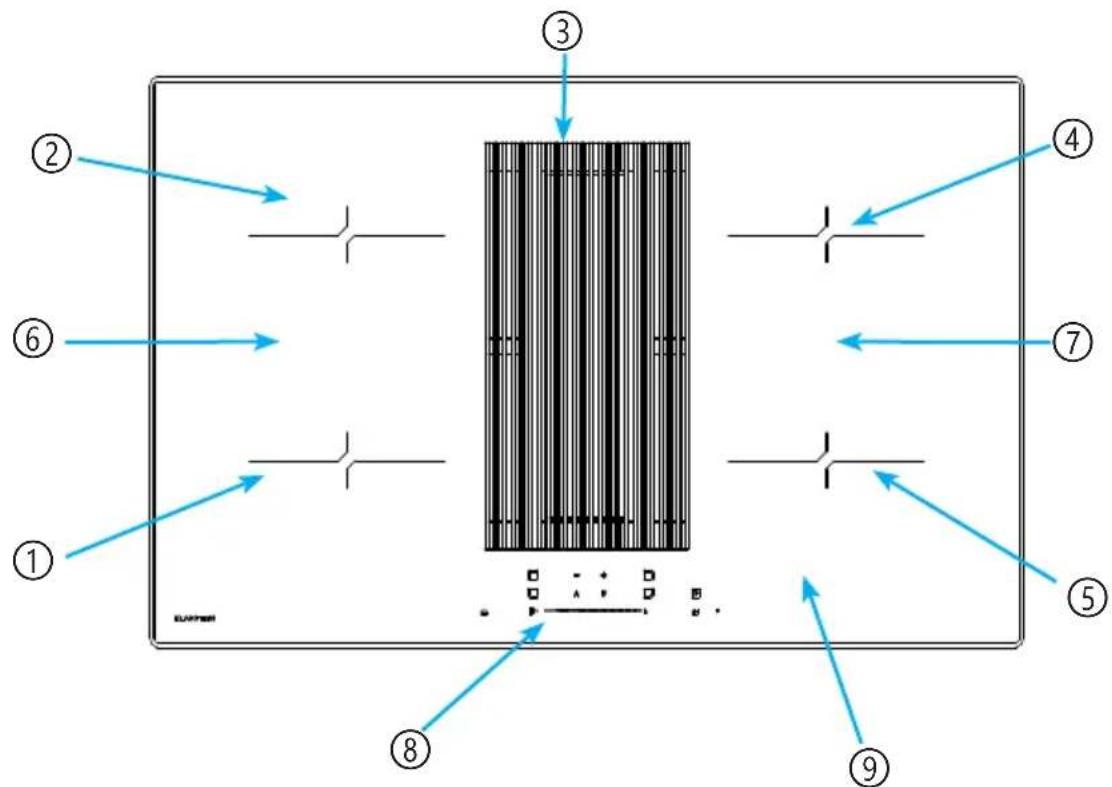
| Number Function Description | |
| 1 Left front cooking zone Induction hob zone (∅ ~180 mm, 1800 W normal / 2100 W boost) | |
| 2 Left rear cooking zone (∅ ~180 mm, 1800 W / 2100 W boost) | |
| 3 Central air intake (extractor inlet) | Draws cooking fumes downward into the extractor system. Located centrally between the cooking zones. Contains grease filters beneath. |
| 4 Right rear cooking zone Induction hob zone (∅ ~180 mm, 1800 W / 2100 W boost). | |
| 5 Right front cooking zone Induction hob zone (∅ ~180 mm, 1800 W / 2100 W boost). | |
| 6 Flexible cooking zone area (left)Only for 10047374 | When enabled, the left front (1) and left rear (2) zones can be combined to form one large flexible heating area for big cookware (up to 3000 W / 3600 W boost).(The flex zones allow heating of oversize pots, griddles, or multiple small pots.) |
| 7 Flexible cooking zone area (right)Only for 10047373, 10047374 and 10047465) | Likewise, the right front (5) and right rear (4) can be combined into a single-large zone if needed (up to 3000 W / 3600 W boost).(The flex zones allow heating of oversize pots, griddles, or multiple small pots.) |
| 8 Control panel Touch control interface for both the hob and the extractor functions (detailed description below). | |
| 9 Glass ceramic surface Durable vitro-ceramic cooking surfacethat is easy to clean. The cooking zones are marked on the surface. | |
3.2 Control panel Layout
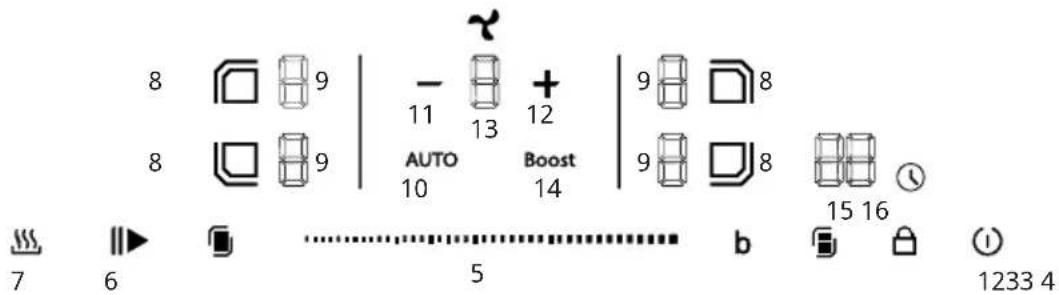
Note: The control panel will beep to acknowledge touches. The power indicator (10) for each active cooking zone shows its level or an error code if applicable. The status of the extractor hood is shown on the fan level indicator (13) and via the Auto/Boost indicator lights next to buttons 11 and 15.
| Nr. Reference Function Description | |||
1 ON/OFF  | |||
2 Childloc | |||
| 3 |  | Flex zone selectorOnly for 10047373,10047374 and10047465 | |
4 Boost (Pc  Boost) Boost) | |||
| 5 | ********** | Slider control (power/timer adjustment) | |
6 Pause  | |||
7 Keep wa  | |||
| 8 | [TX37] | [2282] | Zone selectors: leftfront, left rear, rightfront, right rear |
| [TX4H] |  | ||
| 9 |  | Cooking zone power level display | |
 | |||
| 10 |  | Extractor hood auto mode | |
| 11 |  | Extractor hood decrease (minus) | |
| 12 | [6x74] | Extractor hood fan level display | |
| 13 |  | Extractor hood increase (plus) | |
| 14 | Boost and boost | ||
| 15 | Timer  | ||
| 16 | Timer [good] | ||
5. INSTALLATION
IMPORTANT: Installation of this equipment must comply with local building and electrical codes. Improper installation, adjustment or maintenance can cause personal injury or property damage. Have the hob and extractor installed by a qualified engineer. Klarstein is not responsible for damage or injury caused by improper installation.
Before starting the installation, read this entire section carefully and make sure you have the necessary tools and materials.ä
5.1 Installation requirements
5.1.1 Installation Location & Cut-out
- Suitable cabinetry: This hob is designed for installation into a countertop or worktop. Ensure that the mounting surface is flat, level and structurally sound enough to support the weight of the hob.
- Clearances: Maintain the required clearances around the hob for safety and ventilation. There must be at least 50 mm clearance on all sides of the cut-out (under the worktop) to allow for heat dissipation and airflow. No structural supports, beams or appliances should obstruct the space directly beneath the hob.
- Cut-out dimensions: Cut an opening in the worktop to the following dimensions in the table below. Use a suitable jigsaw or router with a straight edge to ensure a clean cut. It is recommended that the edges of the cut-out are lightly sanded or filed. (See Figure 3 for cut-out diagram.) The thickness of the worktop should be 30–50 mm for secure installation.
- Heat resistant surface: The worktop material around the cut-out must be heat resistant (>= 90°C) to avoid warping. WARNING: Do not install on a combustible surface that hasn't been properly insulated. The use of heat reflective tape or a heat resistant barrier around the edges of the cut-out is recommended for wood or laminate worktops.
- Ventilation duct (if applicable): If you plan to vent the exhaust air, ensure that there is space under the cabinet for ducting to an external vent. In recirculation mode (with charcoal filter), ensure that the air outlet under the cabinet is not obstructed.
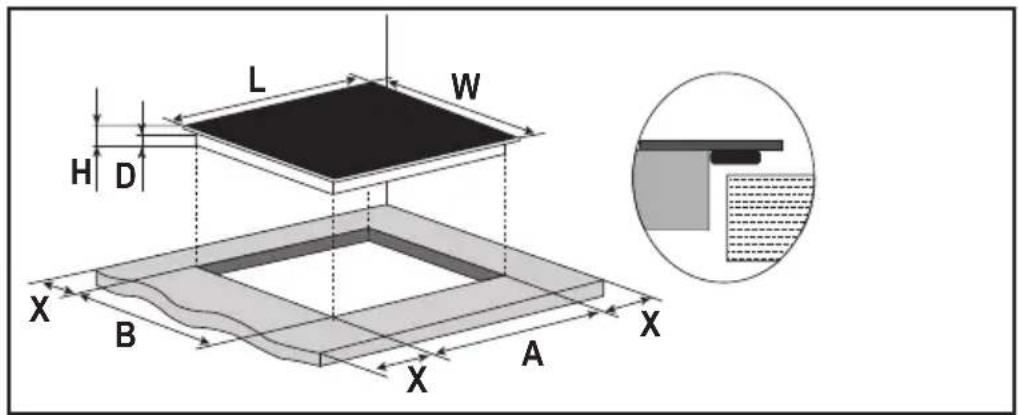
Note: The dimensions given in the table are "mm".
Dimensions table (10047372, 10047373, 10047374 and 10047465)
| LWH | DABX | |||
| 800 520 225 | 55 760 490 min. 50 |
5.1.2 Before Installation Checks
Before installing the hob in the cut-out, verify that
- The mains wiring and the isolation switch (or socket) are in place and accessible. You should be able to easily connect and disconnect the hob after installation.
- The ambient temperature of the installation area does not exceed 50°C (e.g. don't install above a dishwasher or refrigerator without proper insulation, as these appliances can transfer heat or moisture). Do not install the hob directly above a washing machine, tumble dryer or refrigerator.
- If installing above a built-in oven, ensure that the oven has its own cooling fan and that the oven and hob combination is approved by the manufacturer. (Typically, this hob can be installed above an oven if there is an air gap or insulating partition between them - check the oven manual for compatibility with the above induction hob).
- Check that the supplied mounting brackets and screws are available to secure the hob.
5.2 Securing the hob in the countertop
5.2.1 Mounting Brackets Installation
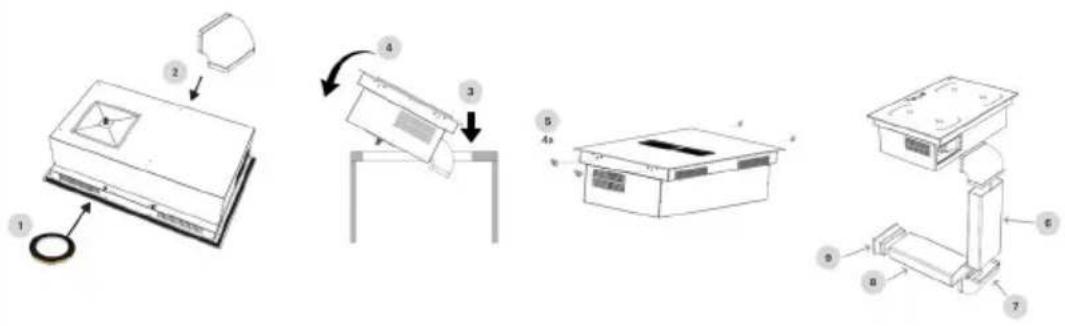
1 Assemble Seal Gasket – Assemble the supplied seal gasket in the full perimeter of the product. Do not use additional sealant (such as silicone). Check if worktop is level and cut-out is correct to assure prefect leveling.
2 Assemble Elbow pipe - Assemble the first elbow pipe directly into the product prior to installation.
3 Insert the Hob – With help of another person, carefully lower the hob into the prepared cut-out. Caution: The hob is heavy, take care and wear gloves to avoid injury or scratching the appliance. Do not push on the control panel or glass surface. Be careful not to get your fingers caught between the appliance and the worktop.
4 Positioning - Rotate the hob into place and align final position. Be careful to not damage the seal gasket. If that happens, please replace the gasket with a new one.
5 Tighten the screws - Manually tighten the screws and supplied brackets. Do not overtighten as this could deform the hob frame or worktop.
6-8 Exhaust connection – depending on your configuration install the remaining exhaust tubes and elbow. Using a plastic saw, adjust the length of the rectangular tubes as needed.
9 Carbon Filter – When using recirculation method ALWAYS install the carbon filter at the end. Make sure to leave the carbon filter in an accessible location as it will require replacement during usage for high performance. Avoid locating the exhaust area to normal standing location as it can be inconvenient air flow in the feet.
Note: Avoid extending the exhaust with longer/different tubes and adding additional elbows as this affects the product extraction performance.
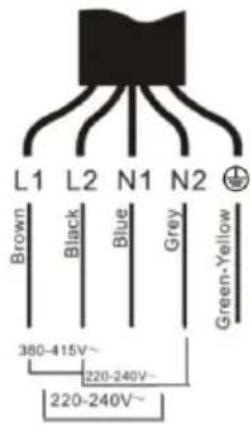
5.3 Electrical connection
WARNING
Risk of electric shock! Check with an electrician whether the domestic wiring system is suitable without alterations. Any alterations must only be made by a qualified electrician.
- This hob must be connected to the mains power supply only by a suitably qualified person. Before connecting the hob to the mains power supply, check that:
- The domestic wiring system is suitable for the power drawn by the hob.
- The voltage corresponds to the value given in the rating plate.
- The power supply cable sections can withstand the load specified on the rating plate. To connect the hob to the mains power supply, do not use adapters, reducers, or branching devices, as they can cause over heating and fire.
Note: If the power cable is too short or needs replacing, it must be replaced with an equivalent type by a qualified technician. The new cable should be routed and clamped exactly as the original to maintain safety. Do not replace the cable without proper validation by a qualified technician.
5.4 Ventilation setup
The integrated extractor can be used in two modes: Ducted extraction (exhausting to the outside) or recirculation (exhausting back into the room through filters). Set the ventilation according to the configuration of your kitchen:
- Ducted mode: In this mode the extracted air is guided to the outside of your home and there is no need for Carbon Filter. Follow prior instructions and install the exhaust pipes towards the outside and do NOT install the end Carbon Filter. Assure that you use the supplier tubes and keep same size of the outlet connection. Any reduction or change in shape and size can affect
the extraction performance.
- Recirculation mode: When using recirculation, keep kitchen windows open if possible to improve ventilation.
- Air outlet clearance: Don't block the air outlet grille of the extractor hood (whether it is a duct or a recirculation air outlet). Leave at least 100 mm clearance in front of the outlet.
6. OPERATION
6.1 Using the Induction Hob
6.1.1 Basic operation – switching on and cooking
| 1. Power On the Hob: Ensure the appliance is connected to the mains and the isolation switch is on. Touch the ON/OFF button (control panel reference 1) once. You will hear a beep and all zone displays will light up briefly and then show “-” or “0”. This indicates the hob is in standby mode, ready for zone selection. | 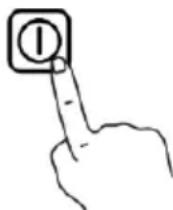 |
| 2. Place Cookware: Put a suitable induction-compatible pan in the center of the desired cooking zone. The bottom of the pan should cover the zone completely. Make sure the pan base and the hob surface are clean and dry. |  |
| 3. Select a Cooking Zone: Touch one of the Zone Selector keys corresponding to the zone you want to use (e.g. front left zone 8, rear right zone 16, etc.). The LED indicator next to that zone's control will illuminate or its power display will flash, indicating it's selected. | 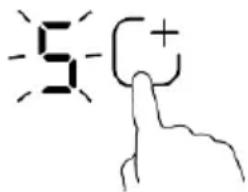 |
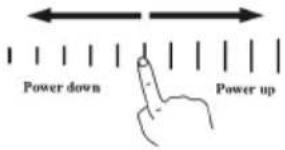
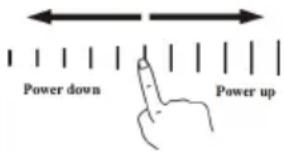
| 4. Set the Heat Level: Using the Slider control (or the “+ / -” buttons), adjust the heat setting for the selected zone. Levels range from 1 (lowest heat) to 9 (highest heat). The chosen power level will show on that zone's display.For gentle heating or simmering, use lower settings (1-3). For normal cooking or boiling, medium settings (4-6). High heat (7-9) is for searing or rapidly boiling. You can adjust up or down at any time by sliding or tapping the control. | 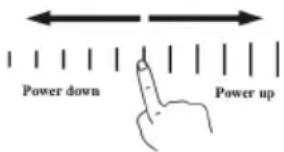 |
| 5. Cooking: The induction zone will start heating the pan immediately once a level is set. You may see the numbers on the display alternately flash if the zone is cycling on/off to maintain that level (normal operation). If no pan is detected or if the pan is not induction-compatible, the display for that zone may flash an error (often a “U” or pan symbol) and the zone will not heat (see Troubleshooting).You can cook as usual. If you need to adjust heat, just touch the zone selector of the zone you want to change (if not already active) and then adjust the slider to the new level. Each zone's display always shows its current setting. | |
Note: If you do not select a heat setting within 1 minute of switching on the hob (step 1), the hob will automatically switch to standby (off) as a safety measure. In this case, simply switch on again if you still wish to cook.
6.1.2 Finish cooking and switching off
| 1. Turn off a single zone: When your food is cooked and you wish to turn off a particular cooking zone, first ensure that the zone is selected (press its selector button). Then either slide the power control down to “0” or press the “-” until the display shows 0. The zone is now off. Its display will likely show “H” if the zone is hot, or turn off completely if cool. | 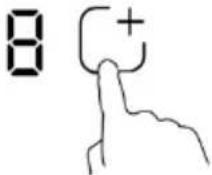 |
| 2. Repeat for other zones: If you have multiple zones on and want to turn them all off, adjust each one’s setting to 0 as above. | 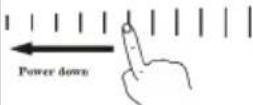 |
| 3. Main Power Off: To completely switch off the hob, touch the ON/OFF button (control 1) again. All zone displays will go dark (except any “H” indicating hot zones). The appliance is now in off mode. If you forget, the hob will also turn itself off if all zones are 0 for a while. | 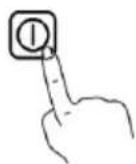 |
| 4. Residual Heat Warning: After cooking, do not touch the cooking zones until the residual heat indicator has gone off. An “H” on a zone display means that zone’s glass is still above 60°C (hot enough to cause burns). The “H” will disappear once the surface cools to a safe temperature. You can use the residual heat to keep food warm or start heating another pan (energy-saving tip), but exercise caution. | 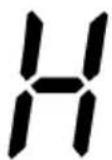 |
6.1.3 Power boost function
The Boost function allows an individual cooking zone to run at above its nominal maximum power for a short time. This is useful for rapidly heating a large pot of water or bringing a dish to boil quickly.
| Activating the boost function | |
| Select the desired cooking zone by touching its zone selector. Make sure there is a pot on that zone. Then touch the Boost button (B) (control panel reference 4). The power level display for that zone will show 'P' (or another Boost indicator) to confirm that Boost mode is on. The hob will provide extra power to that zone for up to 5 minutes.Automatic time-out:Boost mode will automatically deactivate after approximately 5 minutes. The power level will then drop back to level 9 (or the highest non-boost level) and continue to heat at that level. This prevents the cookware and the hob from overheating. | 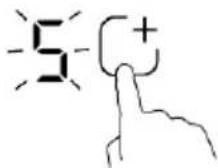 |
 | |
| Cancelling the boost function | |
| To Cancel Boost Manually: You can cancel the boost before the 5 minutes are up by either touching the Boost button again (if the control allows toggling), or simply adjusting the slider to a different power level. Setting a different level (1-9) will exit Boost mode immediately. The display will revert from “P” to the chosen level. | 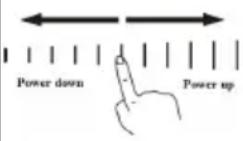 |
| 2.Touch the “boost” key, then the display shows “P”. | 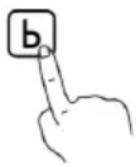 |
Boost restrictions: The boost function can typically only be used on one zone at a time (per side). If you attempt to activate the boost function on two zones that share power (e.g., on the same side of the hob), the hob may automatically reduce one of them or disallow the second boo st. This is to stay within the total power limit. Also, the boost function will not be activated on a zone if the other paired zone is already at high power or boosting (power management logic).
Note: During boost function, it is normal to hear a humming sound from the hob. The fan is running at high speed to keep electronics cool. If the hob gets too hot, it may automatically exit the boost function early.
6.1.4 Pause function (temporary stop)
The pause function (control panel reference 6) allows you to temporarily stop all cooking activity on the hob without losing your settings. This can be useful if you need to step away or do something urgent.
| To pause: Touch the Pause button. All active zones will go into pause mode – their displays may flash (often "II" or another pause indicator) and the heating will stop. If the extractor fan was running, it may also switch to low speed. |  |
| During the pause state: The controls (except the ON/OFF and possibly the pause button) are locked, effectively freezing the cooktop state. You can safely wipe up a quick spill on the control panel during pause (be careful as surfaces may still be hot). | |
| To resume cooking: Touch the Pause button again (or it may require a specific sequence, such as touching Pause then unlocking – check any indicators on the display). The hob will restart all the zones at the power levels they were set to before the pause. Cooking continues as normal. |  |
Auto-off reminder: The pause function is intended for short interruptions (a few minutes). Do not leave the hob on pause for long periods. After a certain amount of time (about 10 minutes, depending on the model), the hob may beep and switch off as a safety measure. If this happens, you'll need to switch it back on and reset your cooking settings.
Note: Always remember to restart or switch off – do not rely on the hob to remain paused indefinitely.
6.1.5 Keep warm function
The Keep Warm function (control panel reference 7) maintains a low, constant heat on a hob, useful for keeping food warm or gently melting chocolate or butter. Typically, this function maintains the temperature at around 60-70°C.
| Activate keep warm function: With the desired zone selected (press its zone button), press the keep warm button. The zone display may show a special symbol (such as " | | " or a low setting) to indicate that the keep warm mode is active. The hob will control the power to maintain a very low simmering temperature on that zone. | 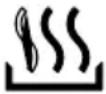 |
| Use cases: This mode prevents food from burning or sticking after cooking. It's great for keeping sauces, soups or stews at serving temperature, or reheating dinner plates. You can also use it to slowly melt ingredients without boiling. | |
| Duration: The keep warm mode can typically operate for up to 2–3 hours continuously (some models allow up to 8 hours) unless switched off. Our model has an extended keep warm function of up to 8 hours as a safety feature – it will automatically switch off the zone after 8 hours to prevent it being left on indefinitely. | |
| Cancel Keep Warm: To exit Keep Warm mode, either move the slider to a different power level or press the Keep Warm button again (if it is toggled). Setting the zone to 0 will also turn it off completely. | 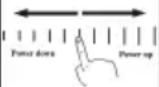 |
Note: Always use a lid on your cookware during keep-warm to conserve heat and avoid drying out the food. This also helps the extractor, as less steam will need to be drawn in.
6.1.6 Using the Flexible Zone (Flex Area) - ONLY FOR MODELS WITH FLEX ZONE! See Technical data sheet.
The flexible zone feature allows two adjacent cooking zones to be combined into one larger heating area. This is ideal for griddles, large pots or several small pots. Depending on the model, the two zones on the left and/or the two zones on the right can be combined to form a flexible zone.
| Activating a Flex Zone: Ensure that no individual settings are running on the zones you wish to combine. Press the Flex Zone Select button (control 3). An indicator will light up to show that the flex zone is active. For example, if you press the Flex button for the left side, the left front and rear zones will operate together. The displays may show a linked symbol, or both may show the same power level. |  |
| Select Flex Area Power: Once activated, set the heat level using the slider as normal. Both zones in this Flex Zone will heat together at this level. You can now place a large piece of cookware that will cover both zones, or even two pots in this area (the whole area will heat evenly). |  |
Optimal cookware for flex zone
natural_image
Pure electrical circuit lines without any symbolsWhen using as one big zone, use cookware roughly as large as the combined area:
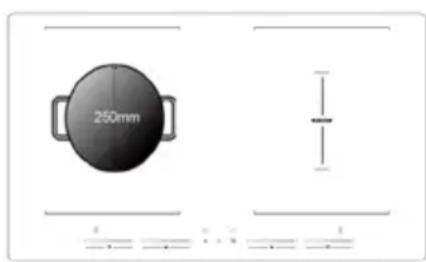
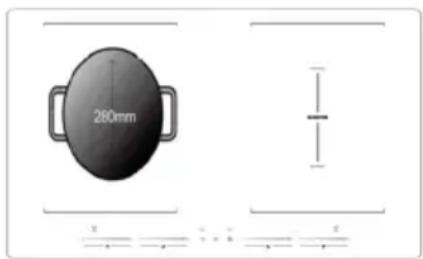
- Recommended minimum size: a pot or pan at least 25 cm x 25 cm if rectangular, or a round pot of ∅ 250 mm. Oval, rectangular, or elongated pans (like a grill plate) work well. Using much smaller cookware in the middle of a flex zone may not be detected or heat evenly.
- Avoid placing a single small pan on one portion of a flex area when it's in combined mode; if you only need one small pan, it's better to disable flex and use a single zone for efficiency.
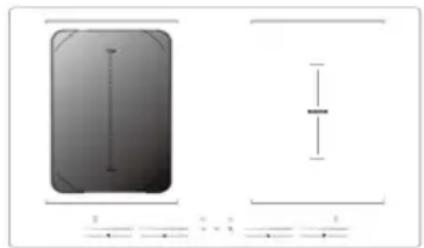
Using Flex zone as two independent zones:
natural_image
Pure electrical circuit lines without any symbols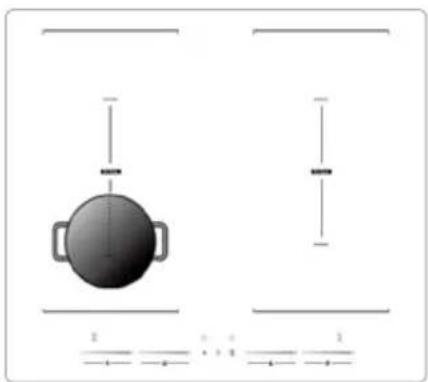
natural_image
Simple diagram showing a central object with two handles and horizontal lines, no text or symbols present.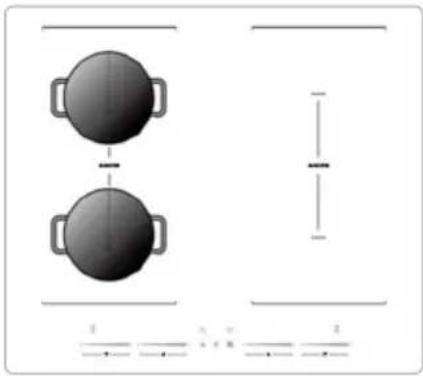
natural_image
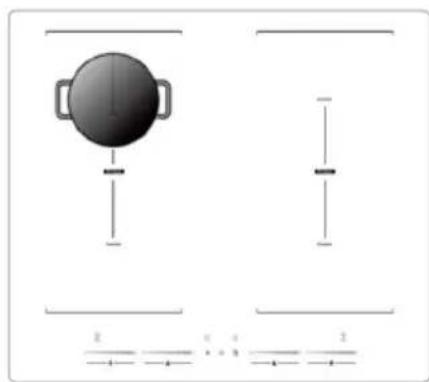
Diagram showing two circular objects with handles placed above and below a vertical scale bar, no text or symbols present.If you prefer to use the zones separately (normal mode), make sure the Flex function is switched off. Simply select and adjust the power for each zone individually. Alternatively, on some models you can leave Flex on and still use two separate pans: the hob can automatically adjust to the heat under each pan (pan detection in Flex zone). For the sake of simplicity, however, it's best to think of Flex mode as being for one large pan and Normal mode as being for two separate pans.
Automatic pan detection: This hob can detect pan placement in the flex area:
- If you place a large pan that covers both parts, use Flex mode for best results.
- If you place a pan only on the front part of the flex zone, the hob may automatically heat only that part (some models do this). But to be on the safe side, switch off flex when using different pans.
- If two pans are placed on a flex zone (front and back), you may be able to use them as two normal zones, not as flex.
Deactivate Flex mode: To return the paired zones to individual control, touch the Flex Zone button again. The display will turn off. Each zone can now be controlled individually. Any power level set in Flex Mode will normally apply to both zones when they are split, so you may wish to adjust or turn off one of the zones if not required.
Note: When flex is active and you are heating a large piece of cookware, ensure that the cookware covers as much of the combined area as possible. Uneven coverage may result in less efficient heating or the hob may reduce power to avoid overheating an empty area. Also, the use of boost in flex mode may be limited – often only one portion can be boosted at a time.
6.1.7 Timer functions
This mode counts down a set time, but doesn't switch any zone off at the end of the time – it's just an audible reminder (like an alarm). Use it when you need to time something independently of the hob operation (e.g. steeping tea or reminding yourself of cooking time while you are manually monitoring).
| 1.Ensure that you have finished setting the power levels for any zones. (The minute timer can be set when zones are on or even when none are on.) |  |
| 2.Touch the Timer button (control 19). The timer display will show -- or 00 and then usually "10" with one of the digits flashing (some models default to 10 minutes). The flashing indicates that you can adjust that digit. | 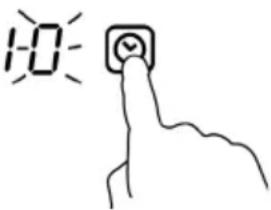 |
| 3.Use the slider or +/- controls to set the desired time. The timer is set in minutes. Often you set the tens of minutes first and then the ones of minutes: For example, if "10" is displayed and the 0 is flashing, slide or tap to change it to the desired ones. Then touch the Timer button again to switch to the tens digit (1 will flash) and adjust if necessary. (On some models, touching Timer will toggle between the tens and ones settings). Alternatively, on simpler interfaces, each press of + may increase the timer in 1 minute increments (or 10 minutes if held). Whichever method your cooker uses, the display will reflect the changes. | 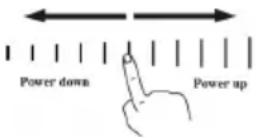 |
 | |
| 4.When the desired time is set (e.g. 45 for 45 minutes), wait a second or two. The timer will start to count down. You can confirm it's active when the numbers start to decrease after one minute and a countdown dot or indicator remains lit. | |
| 5.When the set time has elapsed, the hob will beep for approximately 30 seconds and the timer display will flash 00 or --. Press any button (such as Timer or ON/OFF) to stop the beep. |  |
Using the timer to automatically switch off a cooking zone
You can programme a hob to switch itself off after a set time. This is very useful for simmering or long cooking processes - for example, you can put soup on the simmer and set it to turn off after 30 minutes so you don't overcook, or boil eggs for 10 minutes and set it to turn off automatically.
| Decide which zone you want to time. Start by heating this zone to the desired power level (select the zone and set a heat level). | 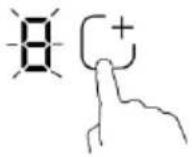 |
 | |
| With the zone still selected (its indicator should be lit), touch the Timer button. The timer display will show -- or 00 as before. You are now setting the timer specifically for the selected zone (the hob will usually indicate this by illuminating a small red dot in the corner of the power display for that zone, or a similar marker). | 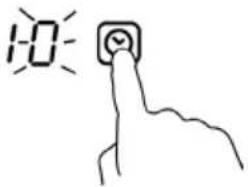 |
| Use the slider or +/- buttons to set the desired sleep time as described above. For example, set 20 minutes. If necessary, touch Timer to confirm. The timer is now associated with this zone (note the small dot or indicator next to the zone's display to indicate that it has a timer). | 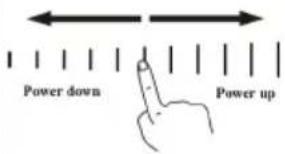 |
| If you want to set another zone with a different timer, repeat the process: select the other zone, press Timer, set time. | 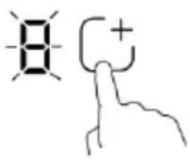 |
 | |
| When a zone's countdown reaches zero, the zone will automatically switch off. Its power indicator will show 0 and/or an 'H' if it is hot. The timer will beep to let you know that the cooking time for that zone has ended. Other zones without timers will continue to cook if they were on. |  |
| Check the display to see which zone has finished (the dot on the zone display will flash or the zone display may flash).Press any button to stop the beep. If other zone timers are still running, the timer display will show the next shortest time remaining. |
If multiple zones have timers
The timer display will always show the time for the zone that will finish first (small lights often indicate which zone corresponds to the time shown). For example, if Zone A has 5 minutes remaining and Zone B has 15 minutes, the display will show 5 and a dot by Zone A. When A finishes, it will change to 15 (for B) until B finishes. You can check the remaining time for a particular zone by touching the selector for that zone; the timer display will briefly show the remaining time for that zone.
| To set a running timer, select the relevant zone, press Timer and use the slider to change the minutes as required. The new value will take effect after a moment. |  |
| To cancel a timer, either use the slider to set it to "00" minutes, or press and hold the "-" until it reaches 0. Another method: select the zone again, press Timer and set it to 0, then wait - the timer will be cancelled. The indicator dot should disappear, meaning the zone is no longer timed. |  |
| If you wish to cancel the minute counter (if it is set), press Timer, set to 00 and wait for it to register. The display should return to -- and then turn off. |  |
Important timer tips:
- You must have a cooking zone active in order to set an auto-off timer for it. If you press Timer without selecting a zone when zones are active, you'll usually set the minute timer by default.
- A zone with an auto-off timer will stop heating when the time is up, but remember that food can still be overcooked or burned if the residual heat is high or left on for a long time. Always check your food when the timer has finished.
- The maximum programmable time is 99 minutes (1 hour 39 minutes). For longer cooking times, you may need to reset another timer after the first one has finished.
- The timer will continue to count down even if you change the heat setting of the zone during cooking. Setting a timer does not lock the power controls for that zone.
6.2 Using the integrated extractor fan
The integrated downdraft extractor fan draws cooking fumes, steam and odours downwards through the central inlet (3) to keep the air in your kitchen clean. It has several operating modes. You can use the extractor independently or together with the hob.
6.2.1 Basic Fan On/Off Control
| Switching on the extractor fan: The extractor fan is controlled by touch buttons on the control panel. When the hob is off, you can first touch the main ON/OFF F button (1) to turn the controls on (you can operate the fan with the zones off if you wish). | 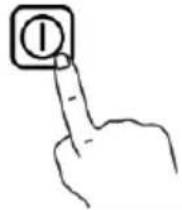 |
 | |
| Then a simple touch of either the Auto (A) button (11) or the Fan Speed + button (14) will normally start the fan. On some models, there may also be a dedicated fan ON/OFF symbol F - in this case, press it. On our model, turning on Auto mode or a manual speed will start the fan. The fan speed display (13) will show a level of "1", "2" or "3" when running. | 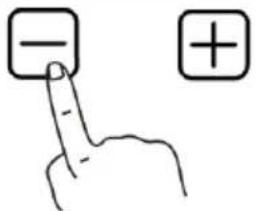 |
| Switching off: To switch off the extractor hood, press the fan speed "-" button (12) repeatedly until the fan speed display shows "0". A "0" on the fan display or an indicator light off means that the fan motor is switched off. Alternatively, the fan can be switched off by pressing the main ON/OFF switch (1) to switch off the whole appliance (although it's best to leave the fan running for a while after cooking to remove any residual vapours). | 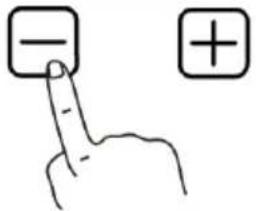 |
6.2.2 Auto mode (automatic fan operation)
In Auto mode, the extractor fan automatically adjusts its speed according to the cooking activity on the hob. This intelligent feature uses sensors or the power level of the hob to determine the correct fan speed, so you don't have to change it manually while you're cooking.
| Activate the Auto mode: Press the Auto (A) button(control 11). An indicator LED near this button will light up and the fan will start to run. The fan speed display (13) will show "A" or the current speed. As you cook, the fan will monitor the use of the hob:At low heat settings or when no zones are on,the fan may run at a low speed (1).If you increase the power of a zone (especially multiple zones or high heat), the fan will increase to medium (2) or high (3) to cope with more steam.Boiling water or frying can trigger higher speeds.Transitions are usually gradual. |  |
| Hands-free ventilation: In automatic mode, you do not need to adjust the fan manually. For example, if you switch off all the cooking zones, the fan may drop to the lowest speed after a short time or even switch off automatically (depending on the model's programming), as no more fumes are detected. | |
| Overriding Auto: If you wish to manually control the fan while Auto is active, pressing Speed + or - or Boost will usually override Auto. For example, pressing Boost (B) will put the fan in Boost mode (manual) and override Auto (the Auto indicator may go out). |  |
Auto mode is ideal for multi-tasking - it ensures adequate extraction at all times without requiring your attention. Remember that extremely smoky or smelly food may still require manual enforcement of boost mode for best results.
6.2.3 Manual fan speed control
You can manually set the extractor fan to your preferred speed at any time (except when the automatic mode is active - you would switch off the automatic mode first).
- Speeds: There are three default fan speeds: 1 (low), 2 (medium), 3 (high). Low is quiet and is used for light simmering or post cooking ventilation. High is louder and is used for heavy frying, grilling or when there's a lot of steam/smoke.
- Increase speed: Touch the + button (14) to increase the fan speed by one level. Each touch increases the speed by one level (1 -> 2 -> 3). The fan speed display will show the new level and you will hear the fan motor speed up.
- Reduce speed: Press the "-" button (12) to reduce the speed (3 -> 2 -> 1 -> 0). If you press "-" when the fan is at speed 1, it will stop (0 means off).
- Indicator: The current manual speed is shown on the display (13) as "1", "2" or "3". The letter "A" is not displayed because Auto is not active.
- You can adjust the fan speed at any time during cooking to suit your requirements (e.g. increase the speed when searing meat or reduce it to a low level when simmering). It works independently of the hob power settings in manual mode.
6.2.4 Boost mode (extractor fan)
The extractor hood's boost (B) function (control 15) provides a short burst of maximum ventilation power to quickly remove heavy smoke or strong odours.
| To activate the Boost fan: Touch the Boost button (B) for the extractor. The LED next to the 'B' symbol will light up. The fan increases to its highest possible speed (higher than level 3). On the display (13) you may see a "b", "B" or it may still show "3" but with the understanding that it's in boost; some models flash "3" or similar during boost. |   |
| Duration: The fan boost mode is limited to 5 minutes. This is to prevent excessive noise and to protect the engine from overheating. After 5 minutes, the fan automatically returns to speed 3 (high). The boost indicator will turn off. If further boost is required, allow a few minutes of normal operation before reactivating to give the engine a rest. | |
| Cancel boost earlier: If you no longer require the extra power, you can manually cancel the boost by either pressing the Boost (B) button again (if the control is switched off) or by pressing one of the speed adjustment buttons. Pressing "-" or "+" while in boost mode will reduce the fan to an appropriate manual speed and exit boost mode. For example, pressing "-" will immediately set the fan to speed 3. |   |
 | |
| Automatic exit from Auto: Note that activating Boost will override and exit Auto mode if it was active. You will need to press Auto again after Boost if you want to return to automatic control. |
Use boost for scenarios such as a sudden smoky mishap (burnt food) or when you are frying something that produces a lot of smoke. Remember that the hob boost (for the cooking zones) and the fan boost are separate functions.
6.2.5 Turning the extractor hood off
| If the fan is in manual mode (speeds), press the " - " button until the fan display goes to 0 and the fan stops. |  |
| If the fan is in Auto mode, you can either tap the Auto button to turn it off (some models toggle Auto on/off), or manually press "-" to bring the fan down to 0. In Auto mode, turning off the main ON/OFF switch will also stop the fan. |  |
  | |
 |
When cooking is finished or ventilation is no longer required:
It's a good idea to leave the extractor hood running for a few minutes after you've finished cooking, especially if there's any residual moisture or odour. This helps to evacuate the last of the steam and dry out the filters. Many people just leave it on Auto and let it decide when to switch off.
7. DEVICE PROTECTION
Over-temperature protection
A built-in temperature sensor can monitor the temperature inside the induction and infrared hob. When an excessive temperature is monitored, the induction hob will stop operation automatically.
Detection of small articles
When an unsuitable size or non-magnetic pan (e.g. aluminium), or some other small item (e.g. knife, fork, key) has been left on the hob, flashes on the display and the hob automatically go on to standby in 1 minute. The fan will keep cooling down the induction hob for a further 2 minutes.
Auto Shutdown protection
Auto shut down is a safety protection function for your induction hob. The hob will shut down automatically if you forget to finish your cooking. The default working time for various power levels are shown in the below table:
| Power level | 1-3 4-6 | 7-9 | |
| Default working time (hours) | 8 4 2 |
When the pot is removed, the induction hob can stop heating immediately and the hob automatically switch off after 1 minute.

Caution! Danger of personal injury
People with a pacemaker should consult with their doctor before using this unit.
8. CLEANING AND MAINTENANCE
Regular maintenance will ensure that your machine operates efficiently and safely for many years. Always follow safety precautions when cleaning (see Safety Information). Ensure that the appliance is switched off and has cooled down sufficiently before cleaning.
8.1 Cleaning the cooking surface
The cooking surface is made of high quality ceramic glass. It should be cleaned after each use to prevent food from sticking or burning. Prompt cleaning makes it easier to remove spills.
Recommended cleaning materials: soft cloth or sponge, cooktop cream cleaner or mild soapy water, paper towels and a scraper for stubborn residues. Avoid abrasive cleaners or metal scouring pads as they can scratch the glass.
The table below outlines cleaning methods for different types of spillage:
| Type of soiling How to clean Important Tips | ||
| Light daily soiling (fingerprints, water marks, minor stains) | After switching off the hob, wait until the glass is only warm (not hot).Apply a few drops of ceramic hob cleaner or a mild detergent to the glass.Wipe with a soft cloth or paper towel to remove any residue.Rinse the cloth and wipe again to remove any cleaner residue.Dry the surface with a clean, lint-free cloth or paper towel. | |
| Type of soiling How to clean Important Tips | ||
| Stubborn spills or slightly burnt residue | 1. Follow steps 1-3 above(use warm soapy water or detergent).2. Leave the cleaner on the stain for a minute to soften it.3. Scrub gently with a nylon scrubber (non-scratch) if necessary.4. Wipe and dry as in steps 4-5. | ·Persistent stains may require repeating the cleaning process.·Do not use sharp objects to remove dirt, use the correct scraper if necessary (see below). |
| Boil-overs, melted sugar or syrup, heavily burnt spills (e.g. milk or starchy foods) | 1. Immediate action (while the hob is still hot but switched off):2. Wearing oven gloves for protection, use a hob scraper at a low angle of 30° to the glass. Gently scrape most of the spill away from the hot area to a cooler part of the hob.3. Still carefully, use paper towels to gently wipe up the spill from the cooler area.4. When the hob has cooled down, apply cooktop cleaner and clean as normal (steps above) to remove any film. | WARNING: Risk of burns and cuts: Work carefully to avoid touching the hot surface or cutting yourself with the scraperSugar spills (sugar, jam, sauces) can permanently damage glass if not removed immediately. They can etch the surface. Act quickly but safely; keep a scraper handy when cooking sugary foods. |
| Type of soiling How to clean Important Tips | |
| Spillage on touch controls (liquid or food on buttons / display area) | 1. Switch off the hob immediately (if it hasn't already switched off - liquid may cause the controls to beep).2. Use a soft cloth or sponge to absorb the spill from the control panel.3. Wipe the controls with a damp cloth to remove any residue.4. Dry the area thoroughly with a paper towel.5. Do not switch on the hob until the control panel is completely dry. |
Additional cleaning reminders:
- Never use steel wool, scouring powder or harsh oven cleaners on the ceramic glass. They can scratch or dull the surface.
- For limescale or mineral deposits (white, cloudy stains), you can use a little vinegar or a special glass-ceramic cleaner. Apply, leave to soak and then wipe off.
- Make sure the base of your cookware is clean. Deposits on pan bottoms can be transferred to the hob and burn on.
- After cleaning, make sure the hob surface is completely dry before next use. Even a small amount of water on the surface can cause the controls to beep or the pan detection to malfunction when the hob is switched on.
8.2 Maintaining the extractor hood - cleaning the filter and drip tray
The integrated extractor hood requires regular cleaning, especially the grease filter, to maintain performance and safety. A clogged filter can reduce ventilation and create a fire hazard due to grease build-up.
8.2.1 Grease filter cleaning
- Type of filter: The extractor hood is equipped with a metal aluminium grease filter that traps grease from cooking vapours. This filter is located bellow the top grid and can be easily replaced by lifting the top grid and removing each of the 2 rectangular filters
- Cleaning frequency: Clean the grease filter about every 2 weeks with regular use, or at least once a month. If you cook daily, especially frying, you may need to clean it more often. Some signs that it needs cleaning: visible grease stains, drips or reduced airflow/noise change.
-
Cleaning procedure: You can wash the filter by hand or in the dishwasher:
-
By hand: Use hot water and dish soap or a degreasing detergent. Soak the filter in a sink of hot soapy water for 10-15 minutes. Then use a soft brush to scrub off any grease. Rinse well with hot water.
-
Dishwasher: Place the filter in the dishwasher on a normal cycle. It may discolour slightly (cosmetic change) which is normal. Be sure to secure it so it doesn't rattle against other items.
-
Shake off any excess water and allow the filter to dry completely (air dry or pat dry with paper towels) before replacing.
- Refit: Replace the clean, dry filter in its slot, making sure it clicks or snaps into place. Refit the intake grille if you have removed it.
Always have the grease filter in place when operating the extractor hood. Never operate the extractor hood without the grease filter - grease will build up in the fan and ductwork, creating a hazard.
8.2.2 Charcoal filter (for recirculation, if applicable)
- Maintenance: Charcoal filters are not washable (they do not tolerate water). Instead, they must be replaced when they become saturated. They should normally be replaced every 3 to 6 months, depending on use. If you notice persistent cooking odours or the charcoal filter looks oily/greasy, it's time to replace it.
- Replacement: Please follow instructions on your new filter on how to replace. On the end of the extraction pipe, remove the front metal grid by pulling it towards you. Once removed inside you can find the Carbon filter, pull it and replace with a new filter.
- Use only Klarstein recommended charcoal filters for proper fit and performance. (Contact Customer Service or check our website for the correct filter model number).
8.2.3 Drip Tray / Liquid Collection
The downdraft extractor hood may have a drip tray or reservoir to collect liquids (such as condensation or accidental spillage that runs down the inlet).
- Drain water: Over time, water can build up from the steam. Locate the small drain plug at the bottom of the machine (accessible from inside the cabinet under the hob).
- Ensure that the appliance is switched off and cool. Place a container under the drain outlet. Gently pull out the drain plug - water will start to drip out. Allow all the water to drain from the internal reservoir. When empty, replace the drain plug firmly.
- Do this regularly (e.g. once a month) or whenever you notice water sloshing around or reduced fume extraction. Especially after very humid cooking (e.g. boiling large pots without lids), draining the condensation water can be useful.
- Cleaning up spills: If a large spill (soup, milk, etc.) gets into the extractor hood, switch everything off immediately. When it has cooled down, remove and clean the grease filter. Wipe all accessible wet interior surfaces with a cloth. Empty the drip tray as described above. For sticky spills, you may need a service technician to properly clean the interior if inaccessible areas are soiled. Avoid this by being careful with open pots.
8.2.4 Cleaning the surfaces of extractor hood parts
- Wipe the air intake grille and visible surfaces of the extractor hood with a damp cloth and mild detergent. These are usually stainless steel or coated surfaces - do not use abrasive cleaners. Dry after wiping to avoid water stains or corrosion.
- If the grill is stainless steel, you can use a stainless steel cleaner or a little vinegar to polish it, then buff with a soft cloth. Always wipe in the direction of any grain if present.
8.3 General Maintenance Tips
- Inspect regularly: Note any unusual noise or vibration from the fan, or if any of the touch control buttons become unresponsive - see Troubleshooting. Sometimes cleaning the control panel with a damp cloth (with the power off) and drying it can restore responsiveness if it is greasy.
- Ventilation duct (if ducted): Check the external vent cap from time to time to ensure it isn't blocked by debris, leaves or grease. Clean if necessary to maintain air flow.
-
Checks after cleaning: Before using the hob after cleaning, make sure that:
-
all parts (filters, etc.) are correctly refitted.
- There is no cleaning residue or spillage on the hob surface or control panel.
- The area around and under the hob is dry (especially any electrical parts).
- Professional maintenance: Other than cleaning, this appliance doesn't require routine user maintenance. If you experience any persistent problems (e.g. the fan doesn't work even after cleaning the filter or the hob error codes don't reset), please contact Klarstein Customer Service. Do not open the unit or electronics yourself.
Keeping the hob and extractor hood clean will ensure optimum heating and ventilation performance and extend the life of the appliance. Always prioritise safety – if in doubt, disconnect from the mains before carrying out any maintenance.
9. TROUBLESHOOTING
| Problem Possible cause Solution | ||
| The cooktop cannot be turned on (no lights on display). | No power to the appliance Verify the hob is connected to the power supply and that the circuit breaker or fuse hasn't tripped. Make sure the wall switch (isolation switch) is on. Check for a general power outage in your home. If power is definitely present and the hob still shows no sign of life, do not attempt to fix internally - call a technician. | |
| The touch controls are unresponsive (pressing buttons does nothing). | The controls may be locked by the Child Lock feature. | Check the control panel for a keylock icon or the letters "Lo"/"L" on the display. If so, unlock the hob by touching and holding the Child Lock button (2) for 3 seconds (until the lock indicator goes off). Once unlocked, try the controls again. |
| The touch controls are difficult to operate or not registering taps. | There might be a thin film of water or grease on the control panel; or you may be touching with the fingertip at an angle rather than the flat of your finger. | Ensure the control area is clean and dry. Wipe away any moisture or spills (with the hob off). When using the controls, use the pad of your finger (not a fingernail or tip) and press straight down for about half a second per input. If you still have trouble, power off the hob for a minute, then turn it on and try again once fully dry. |
| The glass surface is being scratched. | Using rough or uneven-bottomed cookware (e.g., ceramic or cast iron with burrs); or cleaning with abrasive scourers/chemicals | Use cookware with flat, smooth bases - check that your pots/pans have no rough edges. Lift cookware slightly when moving it on the hob, don't drag it. For cleaning, use recommended non-scratch methods (see Section 9.1). Minor scratches cannot be removed, but they usually don't affect function. For future prevention, be mindful of cookware and cleaning tools. |
| You hear a crackling or clicking noise from the cookware during cooking. | This is often due to the construction of the cookware - layers of different metals expanding at different rates can create sounds. It can also occur with certain types of cookware on induction. | This is generally normal and not a fault. You can continue cooking. If the noise is very loud or bothersome, consider trying a different pan. Using heavy, high-quality pans tends to produce less noise. |
| A low humming noise is heard, especially on high heat settings. | The induction system can hum when drawing a lot of power, and the cooling fan also makes a steady hum. | This is normal for induction hobs. The hum should reduce when you decrease the heat setting. Ensure the appliance is installed correctly with proper ventilation, as restricted airflow can make the fan louder. |
| The internal cooling fan keeps running for several minutes after I turned the hob off. | The hob's electronics are cooling down. The fan is designed to run until a safe temperature is reached. | This is normal. Do not switch off power at the wall until the fan stops on its own. Just let it finish (usually no more than 5-10 minutes). If the fan runs excessively long (beyond 15 minutes after use) every time, check that the air intakes and outlets aren't blocked by dust or an object. |
| A cooking zone suddenly turned itself off during use. (Also maybe a beep sounded.) | Several possibilities: - The zone may have automatically shut off because no pan was detected (e.g., if the pan was lifted or is non-inductive). - The built-in timer turned it off (check if you had a timer set and forgot). - The hob overheated or detected an electrical fault, triggering a safety shutdown. In that case, an error code might be displayed. | If it's the pan detection, the display would show a flashing pan symbol or similar. Ensure your pan is induction-compatible and properly centered. The zone will resume heating once a proper pan is detected and you turn it back on. If it was the timer, the zone display will show "0" and possibl y an "H". Simply restart the zone if more cooking is needed, or realize that the programmed time elapsed. If it was a technical fault (with an error code or all zones off), see Error Codes below. In such a case, turn the hob off, wait a few minutes for cooling, then turn it on and try again. If it repeats, call a technician. |
9.1 Errorcodes
| Errorcode Possible cause Solution | ||
| ≥slant U ≤slant No pan or pan unsuitable | The hob cannot detect the pan or the pan material is not induction friendly. | Use a magnetic (ferrous) pan of the correct size.Ensure the pan is centered on the zone. Once a proper pan is recognized,the indicator will stop flashing and heating will commence. If you remove a pan intentionally, the zone will show the pan-missing indicator and then shut off after a minute. (Some models don’t show a code but have an indicator;if the display is flashing something like U or the power level flashing when a pan is present) |
| E2/E3Abnormal supply voltage | Abnormal supply voltage. Please check that the power supply is normal.Switch on after the power supply is normal. | |
| E4/E5IGBT Over-temperature | IGBT temperature sensor failure. | Please contact the supplier. |
| E7/E8Temperature Sensor Failure | Temperature sensor failure. Please contact the supplier. | |
| E6/E9Induction hob heat radiation problem | Bad induction hob heat radiation. | Please let the induction hob cool down and restart afterwards. |
| EC/ E0Communicat ion error between components | PCBA communication failure. Please contact the supplier. | |
- PRODUCT DATA SHEET INDUCTION HOB
| Symbol Value Unit | ||||
| Model identification 10047372 | ||||
| Type of hob Built-In Hob | ||||
| Number of cooking zones and/or areas | 4 | |||
| Heating technology (induction cooking zones and cooking areas, radiant cooking zones, solid plates) | Induction cooking zone | |||
| For circular cooking zones or area: diameter of useful surface area per electric heated cooking zone, rounded to the nearest 5 mm | ∅ | Left Front Left Rear Right Front Right Rear | 18 14 14 18 | cm |
| For non-circular cooking zones or areas: length and width of useful surface area per electric heated cooking zone or area, rounded to the nearest 5 mm | L W | cm | ||
| Energy consumption per cooking zone or area calculated per kg | EC Electric Cooking Hob | Left Front Left Rear Right Front Right Rear | 196 187 187 203 | Wh/kg |
| Energy consumption for the hob calculated per kg | EC Electric Cooking Hob | 193,3 Wh/kg | ||
| Model identification 10047373 | ||||
| Type of hob Built-In Hob | ||||
| Number of cooking zones and/or areas | 4 | |||
| Heating technology (induction cooking zones and cooking areas, radiant cooking zones, solid plates) | Induction cooking zone | |||
| For circular cooking zones or area: diameter of useful surface area per electric heated cooking zone, rounded to the nearest 5 mm | ∅ | Left Front Left Rear Right Front Right Rear | 18 14 14 18 | cm |
| For non-circular cooking zones or areas: length and width of useful surface area per electric heated cooking zone or area, rounded to the nearest 5 mm | L W | cm | ||
| Energy consumption per cooking zone or area calculated per kg | EC Electric Cooking Hob | Left Front Left Rear Right Front Right Rear | 196 187 187 203 | Wh/kg |
| Energy consumption for the hob calculated per kg | EC Electric Cooking Hob | 193,3 Wh/kg | ||
| Model identification 10047374, 10047465 | ||||
| Type of hob Built-In Hob | ||||
| Number of cooking zones and/or areas | 4 | |||
| Heating technology (induction cooking zones and cooking areas, radiant cooking zones, solid plates) | Induction cooking zone | |||
| For circular cooking zones or area: diameter of useful surface area per electric heated cooking zone, rounded to the nearest 5 mm | ∅ | Left Front Left Rear Right Front Right Rear | 18 14 14 18 | cm |
| For non-circular cooking zones or areas: length and width of useful surface area per electric heated cooking zone or area, rounded to the nearest 5 mm | L W | cm | ||
| Energy consumption per cooking zone or area calculated per kg | EC Electric Cooking Hob | Left Front Left Rear Right Front Right Rear | 196 187 187 203 | Wh/kg |
| Energy consumption for the hob calculated per kg | EC Electric Cooking Hob | 193.3 Wh/kg | ||
11. DISPOSAL CONSIDERATIONS
natural_image
Symbol of a trash bin with crossed lines indicating no waste or discharge, and a solid black rectangle below (no text or labels)If there is a legal regulation for the disposal of electrical and electronic devices in your country, this symbol on the product or on the packaging indicates that this product must not be disposed of with household waste. Instead, it must be taken to a collection point for the recycling of electrical and electronic equipment. By disposing of it in accordance with the rules, you are protecting the environment and the health of your fellow human beings from negative consequences. For information about the recycling and disposal of this product, please contact your local authority or your household waste disposal service.
12. MANUFACTURER & IMPORTER (UK)
Manufacturer:
Chal-Tec GmbH, Mühlenstrasse 25, 10243 Berlin, Germany.
Importer for Great Britain:
Berlin Brands Group UK Limited
35 Ballards Lane
London, N3 1XW
United Kingdom
Contact: info@electronic-star.de
Estimado cliente:
ÍNDICE


natural_image
Two rectangular electronic components with vertical and horizontal lines, shown without any text or symbols.natural_image
Pure electrical circuit lines without any symbols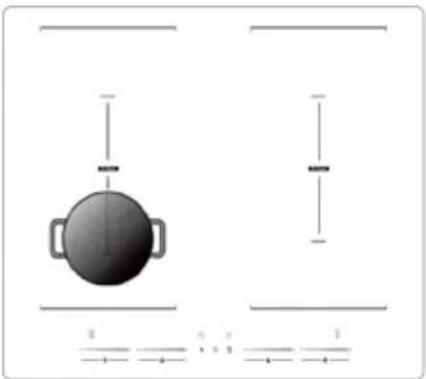
natural_image
Simple diagram showing a circular object with two handles and horizontal lines, no text or symbols present.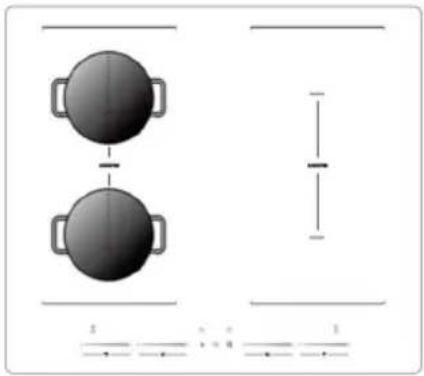
natural_image
Diagram showing two circular objects with handles connected by a horizontal line, alongside a vertical dimension line and arrows below (no text or symbols)natural_image
Hand pointing at a target symbol (no text or labels)6.2.4 Modo Boost (extractor)
natural_image
Symbol of a trash bin with crossed lines indicating no waste or discharge, and a solid black rectangle below (no text or labels)Berlin Brands Group UK Limited
35 Ballards Lane
London, N3 1XW
United Kingdom
Contacto: info@electronic-star.de
Chère cliente, cher client,
SOMMAIRE
3. APERÇU DU PRODUIT
natural_image
Pure electrical circuit lines without any symbolsnatural_image
Simple diagram showing a circular object with two handles and vertical lines, no text or symbols present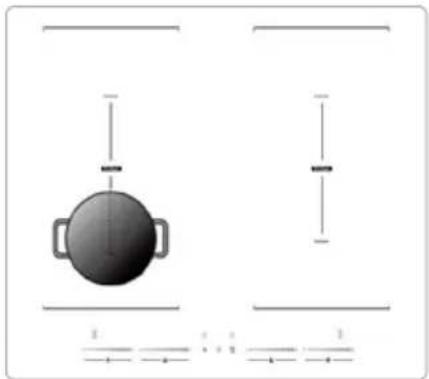
natural_image
Simple diagram showing a circular object with two handles and horizontal lines, no text or symbols present.
natural_image
Two circular objects with handles placed above and below a horizontal line, with no visible text or symbols.natural_image
Symbol of a trash bin with crossed x and y axes, no text or labels presentBerlin Brands Group UK Limited
35 Ballards Lane
London, N3 1XW
United Kingdom
Contact: info@electronic-star.de
Gentile cliente,
INDICE

natural_image
Pure electrical circuit lines without any symbolsnatural_image
Simple diagram showing a circular object with two handles and vertical lines below, no text or symbols present.
natural_image
Simple diagram showing a central object with two handles and horizontal lines, no text or symbols present.
natural_image
Diagram showing two circular objects with side handles connected by a horizontal line, alongside a vertical dimension line labeled 'x' (no text or symbols on the objects themselves)natural_image
Symbol of a trash bin with crossed x and y axes, no text or numbers presentBerlin Brands Group UK Limited
35 Ballards Lane
London, N3 1XW
United Kingdom
Contatto: info@electronic-star.de
KLARSTEIN

- Lieber Kunde, liebe Kundin,
- PRODUKTDATENBLATT
- INDUKTIONSKOCHFELD
- Dear customer,
- CONTENTS
- TECHNICAL DATA
- SAFETY INSTRUCTIONS
- Electrical Safety and Installation
- Operational Safety
- - Child Safety
- Appliance and component safety
- Health Advice
- Cleaning and Maintenance Safety
- PRODUCT OVERVIEW
- Control panel Layout
- INSTALLATION
- Installation requirements
- Installation Location & Cut-out
- Before Installation Checks
- Securing the hob in the countertop
- Mounting Brackets Installation
- Electrical connection
- WARNING
- Ventilation setup
- OPERATION
- Using the Induction Hob
- Basic operation – switching on and cooking
- Finish cooking and switching off
- Power boost function
- Pause function (temporary stop)
- Keep warm function
- Using the Flexible Zone (Flex Area) - ONLY FOR MODELS WITH FLEX ZONE! See Technical data sheet.
- Optimal cookware for flex zone
- Using Flex zone as two independent zones:
- Timer functions
- Using the timer to automatically switch off a cooking zone
- If multiple zones have timers
- Important timer tips:
- Using the integrated extractor fan
- Basic Fan On/Off Control
- Auto mode (automatic fan operation)
- Manual fan speed control
- Boost mode (extractor fan)
- Turning the extractor hood off
- DEVICE PROTECTION
- Over-temperature protection
- Detection of small articles
- Auto Shutdown protection
- Caution! Danger of personal injury
- CLEANING AND MAINTENANCE
- Cleaning the cooking surface
- Additional cleaning reminders:
- Maintaining the extractor hood - cleaning the filter and drip tray
- Grease filter cleaning
- Charcoal filter (for recirculation, if applicable)
- Drip Tray / Liquid Collection
- Cleaning the surfaces of extractor hood parts
- General Maintenance Tips
- TROUBLESHOOTING
- Errorcodes
- DISPOSAL CONSIDERATIONS
- MANUFACTURER & IMPORTER (UK)
- Manufacturer:
- Importer for Great Britain:
- Estimado cliente:
- Modo Boost (extractor)
- APERÇU DU PRODUIT
- Gentile cliente,
- KLARSTEIN
Brand : Klarstein
Model : Velaire Flex
Category : Cooker