
Smartlift Pro - Bottle warmer Luvion - Free user manual and instructions
Find the device manual for free Smartlift Pro Luvion in PDF.


| Product Type | Bottle Warmer |
| Brand | Luvion |
| Model | Smartlift Pro |
| Supply Voltage | 220 V ~ 50 Hz |
| Heating Power | 500 W |
| Dimensions (L x W x H) | 11 x 11,5 x 17 cm |
| Weight | 0,72 kg |
| Materials | PP (basket, body, base), heat-resistant up to 120 °C |
| Maximum Water Capacity | Up to the MAX line (approx. 210 ml) |
| Heating Modes | Refrigerated milk, room temperature milk, frozen milk thawing, DIY (keep warm) |
| Compatible Container Types | Plastic, silicone, milk bag, glass (except for thawing) |
| Additional Functions | Night light, automatic basket lifting at end of cycle, memory settings, time and temperature adjustment |
| Display | LED screen with countdown and temperature |
| Keep Warm Temperatures | 37°C (breast milk), 45-50°C (formula), 70°C (food) |
| Keep Warm Duration | Up to 24 hours in Frozen and DIY modes |
| Timer | Adjustable countdown with + and - buttons |
| Cleaning and Maintenance | Use distilled water; descale every 4 weeks with citric acid or vinegar; do not immerse base |
| Safety | Automatic shut-off, basket lifting after heating to prevent overheating, burn protection |
| Recommended Use | Domestic use only, flat and stable surface, out of reach of children |
| Package Contents | Smartlift Pro bottle warmer, anti-scald basket, user manual |
Frequently Asked Questions - Smartlift Pro Luvion
User questions about Smartlift Pro Luvion
0 question about this device. Answer the ones you know or ask your own.
Ask a new question about this device
Download the instructions for your Bottle warmer in PDF format for free! Find your manual Smartlift Pro - Luvion and take your electronic device back in hand. On this page are published all the documents necessary for the use of your device. Smartlift Pro by Luvion.
USER MANUAL Smartlift Pro Luvion
NL Handleiding & Veiligheidsinstructies 2
EN Manual & Safety Instructions 10
FR Manuel d'utilisation & Consignes de sécurité 18
DE Bedienungsanleitung & Sicherheitshinweise 26
WELKOM / WELCOME / BIENVENUE / WILLKOMMEN
EN Thank you for purchasing the LUVION® Smartlift Pro. With this instruction manual you have all the information to quickly start using your LUVION® product. Please preserve this guide for further reference.
• DIY function (keep warm, food heating):
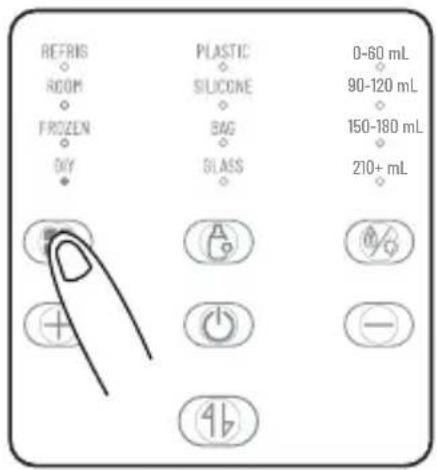
- Place the machine on a flat surface, out of reach of infants and young children.
- Do not touch the plug with wet hands.
- Do not place the product near flammable or explosive materials.
- Keep children away from the product packaging bag to prevent the risk of suffocation.
- Avoid touching the hot water inside the machine during the heating process to prevent burns.
- Ensure the container is filled with water before connecting the power supply, and avoid dry-burning. If the machine or power cord is damaged, it must be replaced by the manufacturer, a maintenance department, or similar professionals to prevent danger.
- Do not place the product near a heat source.
- Test the milk temperature on the back of your hand before feeding to avoid scalding the baby.
- When fast warming is complete, the bottle warmer will automatically lift and emit a prompt sound. Simply take out the bottle to feed the baby.
• People with disabilities or lack of relevant experience and knowledge must use this product under supervision and guidance. - Before connecting the product to the power supply, check that the voltage marked on the product matches the power supply voltage.
- Keep the power cord, plug and product away from high-temperature surfaces and sharp edges. Do not use the product if the plug, power cord, or product is damaged.
- Disconnect the power supply before cleaning and allow the product to cool before handling.
- Unplug the power cord and clean and dry the product promptly when not in use.
• This product is for indoor household use only. - Use the product in a dry, well-ventilated environment.
- Do not use the product in humid environments, such as bathrooms or near swimming pools.
- Do not immerse the product base in water to avoid damage and danger.
- Do not exceed the maximum water level line when adding water to the container.
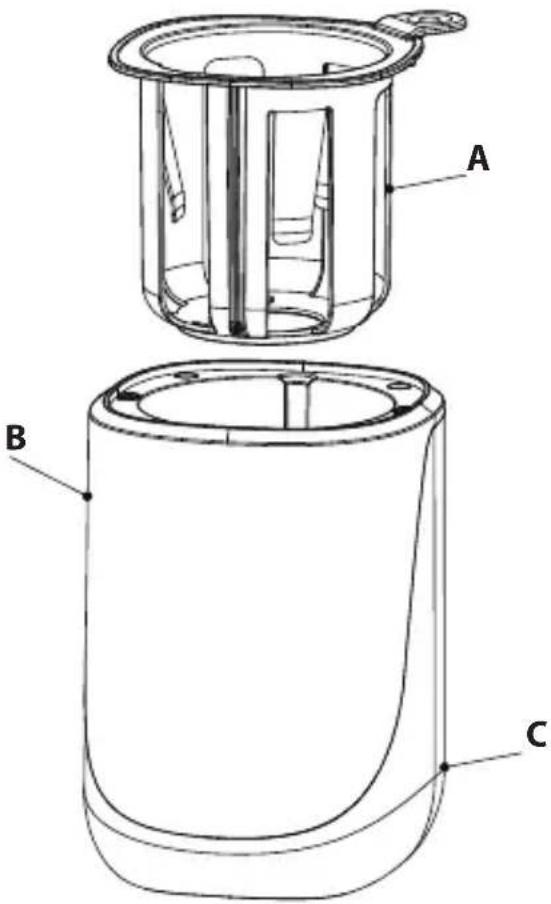
PRODUCT OVERVIEW
| Name Material Heat | Resistance Temperature | Cold Resistance Temperature | ||
| A Anti- | scald basket | PP 120°C | 20°C | |
| B Main | body | PP 120°C | 20°C | |
| C Base PP | 120°C -20°C | |||




Power on
After powering on, the buzzer will sound for one second, the bottle basket will reset, and the device will enter standby mode with the display flashing.

Power Button
- Touch the button in the power-off state: Enter standby mode.
- Touch the button in standby mode:
• (a) Enter memory state.
• (b) Enter mode selection state. - Touch the button in working mode: Exit and return to standby mode.
BUTTONS

Power Button: During function selection or operation, press the "Power" button to exit the current and return to standby mode.

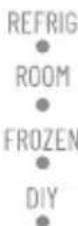
Function Button: After powering on, press the function button to cycle through the four functions: hing refrigerated milk, room-temperature milk, frozen milk, and DIY.

Material Button: After selecting a function, press the material button to cycle through the four ns: Plastic, Silicone, Milk Bag, and Glass bottles.

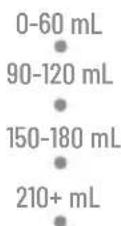
Milk Volume Button: After selecting the material, press the milk volume button to cycle through the options: 0-60ml, 90-120ml, 150-180ml and 210ml+.

Night light: Long press the Night Light/Milk Volume button to turn the night light on or off.

Manual lift button: Use this button to lift the basket during Frozen and DIY functions. (The basket t be lifted during Refrig and Room modes.)


• Plus/Minus buttons:
(a) In "Refrig" and "Room" modes, press the + or - button to adjust the countdown time.
(b) The Plus/Minus buttons are inactive in "Frozen" mode.
(c) In "DIY" mode, use the + or - button to adjust the target temperature.
(d) Long press to quickly adjust the time or temperature.
Note: The "Frozen" function cannot be used with glass bottles, as they may break during thawing.
INSTRUCTIONS
- Add distilled water to the machine up to the MAX line. Then, place the bottle with the basket into the machine and press the Power button to turn it on.
![graph LR A["MAX"] --> B["Add liquid into beaker"] B --> C["Add container with lid"] C --> D["Refrigeration: REFRIG + ROOM + FROZEN + DIY"] D --> E["Refrigeration: Plastic + 0-60 mL + 90-120 mL + 150-180 mL + 210+ mL"] E --> F["Refrigeration: Plastic + 90-120 mL + 150-180 mL + 210+ mL"]](/content/2026/05/755216/images/cd3aa569fc81210b3f109f0f75dae159d9f2dc7708833884ef2ec32444225456.jpg)
• Fast Warming Refrigerated milk:
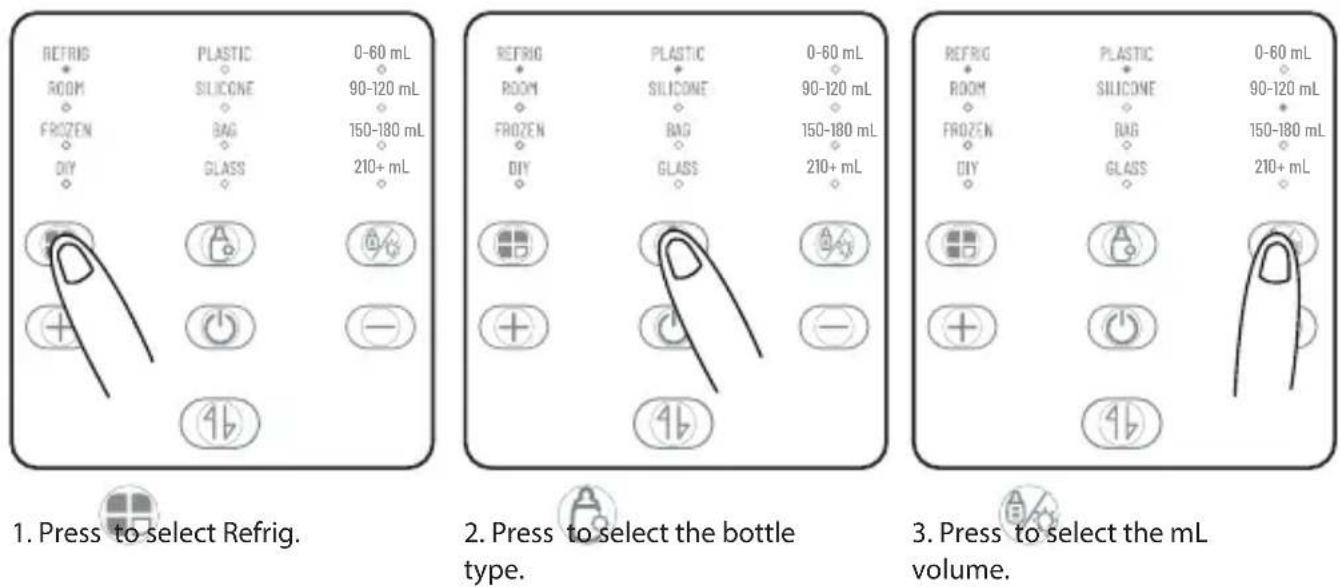
After selecting the mode, a short beep will indicate that the corresponding program is executing, and the countdown will appear on the screen. When the countdown reaches 00:00, the machine will return to standby mode, and the milk bottle basket will automatically rise with three short beeps from the buzzer.
Note: If you find the default timer is not accurate after use, you can press the + or - button to adjust the working time after selecting the mode. This machine has a memory function, so it will remember your custom settings and timer for the next use.
- Fast Warming Room temperature milk:
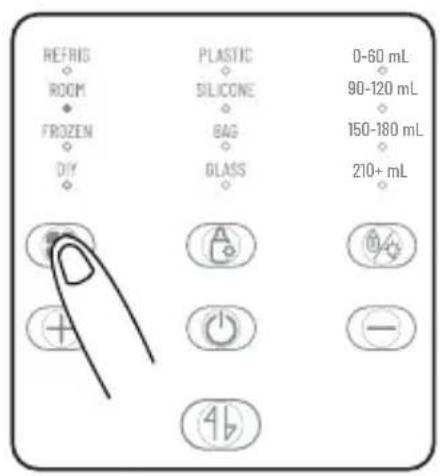
- Press to select Room.
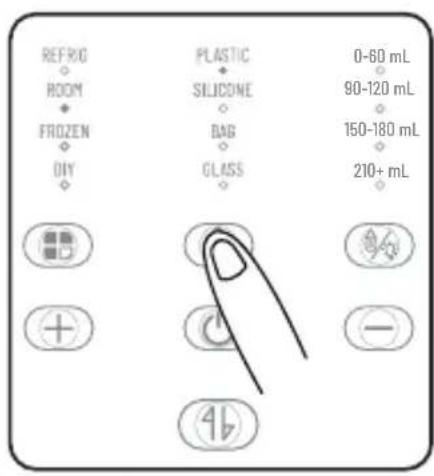
- Press to select the bottle type.
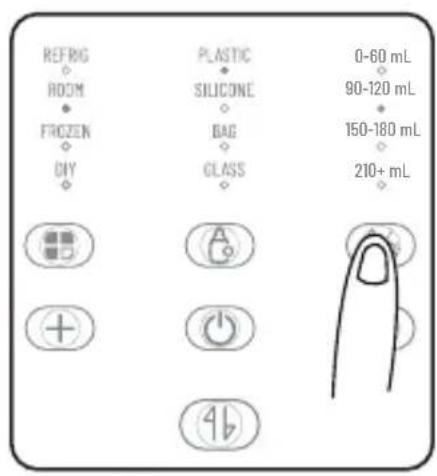
- Press to select the mL volume.
After selecting the mode, a short beep will indicate that the corresponding program is executing, and the countdown will appear on the screen. When the countdown reaches 00:00, the machine will return to standby mode, and the milk bottle basket will automatically rise with three short beeps from the buzzer.
If the milk is not warm enough, place the bottle back into the bottle warmer and press the lift button manually to soak it in water for an additional 30 seconds to 1 minute.
If the milk is overheated, allow it to cool down before feeding.
After the Refrig/Room heating process is completed, the basket will automatically rise to prevent overheating. However, the basket cannot be lifted manually during this process.
- Thaw Frozen milk:
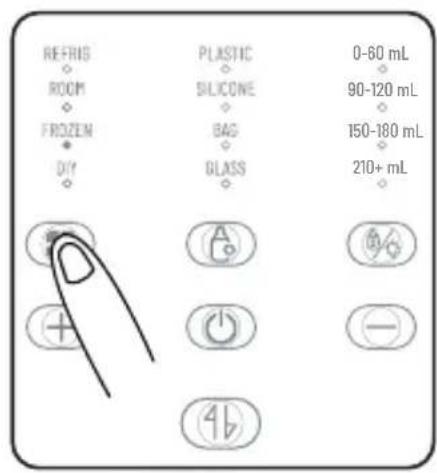
- Press to select Frozen.
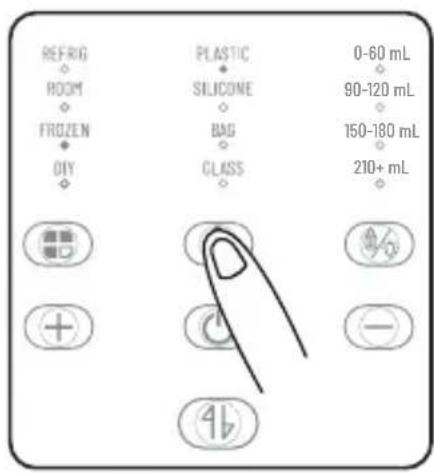
- Press to select the bottle type. (Note: Glass can't be selected)
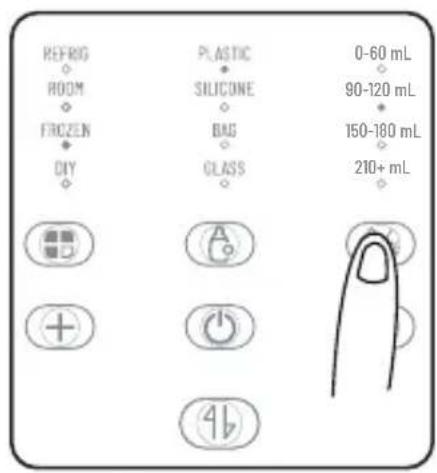
- Press to select the mL volume.
After selecting the mode, a short beep will indicate that the corresponding program is running. The screen will alternately display 37° C. Once the heating process is complete, the buzzer will beep three times, and the display will remain at 37° C. The bottle will then stay warm for up to 24 hours. After 24 hours, a long beep will sound, and the machine will return to standby mode.
Note: The milk bottle basket will not rise after completing the process in Frozen mode.
• DIY function (keep warm, food heating):
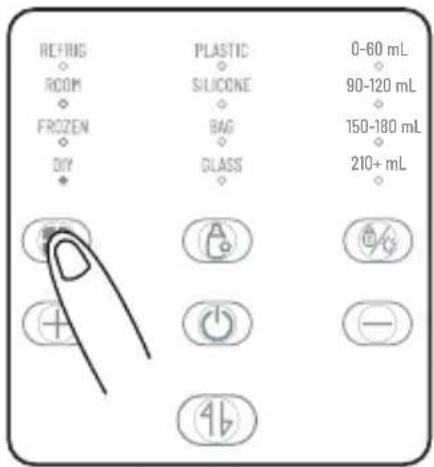
- Press to select DIY.
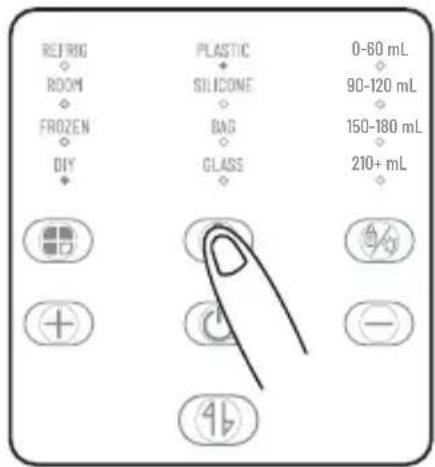
- Press to select the bottle type. (Note: Glass can't be selected)
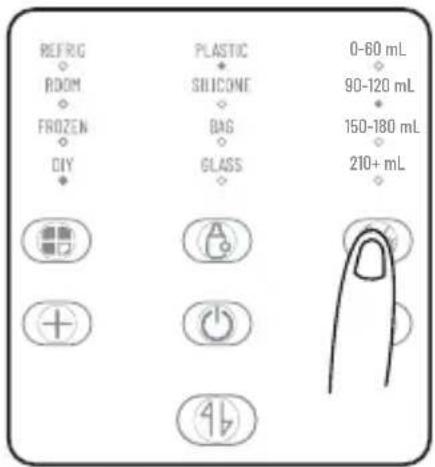
- Press to select the mL volume.
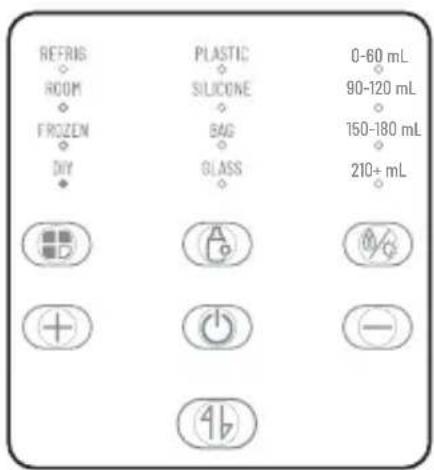
- Use the Plus/Minus buttons to set the temperature, or long press the DIY button to quickly cycle through 37°C, 45°C, 50°C, and 70°C.
After selecting the mode, a short beep will indicate that the corresponding program is executing. The screen will alternately display a marquee and the target temperature. When the heating process is complete, the buzzer will beep three times, and the display will remain at the target temperature.
Note: The milk bottle basket will not rise after completing the process in DIY mode.
Suggested temperature settings:
| Suggested temperature Working time | |
| Breast milk 37°C 24 hours | |
| Formula 45-50°C 24 hours | |
| Food 70°C 24 hours |
Time chart for Refrig/Room/Frozen function
| Mode | Bottle material | Milk Volume | Initial Temp. | Time/min |
| REFRIG Plastic 0-60ml 5°C 3:40 | ||||
| 90-120ml 5°C 5:05 | ||||
| 150-180ml | 5°C 6:00 | |||
| 200+ml | 5°C 8:05 | |||
| Silicone | 0-60ml 5°C 5:55 | |||
| 90-120ml 5°C 7:30 | ||||
| 150-180ml | 5°C 8:25 | |||
| 200+ml | 5°C 10:00 | |||
| Milk bag | 0-60ml 5°C 2:15 | |||
| 90-120ml 5°C 2:40 | ||||
| 150-180ml | 5°C 3:20 | |||
| 200+ml | 5°C 3:50 | |||
| Glass | 0-60ml 5°C 2:35 | |||
| 90-120ml 5°C 3:15 | ||||
| 150-180ml | 5°C 4:05 | |||
| 200+ml | 5°C 4:55 | |||
| ROOM Plastic 0-60ml | 25°C 2:45 | |||
| 90-120ml 25°C 3:40 | ||||
| 150-180ml 25°C 4:30 | ||||
| 200+ml 25°C 5:00 | ||||
| Silicone 0-60ml 25°C | 3:25 | |||
| 90-120ml 25°C 4:15 | ||||
| 150-180ml 25°C 4:55 | ||||
| 200+ml 25°C 5:50 | ||||
| Milk bag 0-60ml 25°C | 2:00 | |||
| 90-120ml 25°C 2:20 | ||||
| 150-180ml 25°C 3:00 | ||||
| 200+ml 25°C 3:10 | ||||
| Glass 0-60ml 25°C 2:10 | ||||
| 90-120ml 25°C 2:45 | ||||
| 150-180ml 25°C 3:05 | ||||
| 200+ml 25°C 3:20 |
| FROZEN Plastic 0-60ml Frozen 1h 30mins | |||
| 90-120ml Frozen | |||
| 150-180ml Frozen | |||
| 200+ml Frozen | |||
| Silicone 0-60ml Frozen 1h 55mins | |||
| 90-120ml Frozen | |||
| 150-180ml Frozen | |||
| 200+ml Frozen | |||
| Milk bag 0-60ml Frozen 45mins | |||
| 90-120ml Frozen | |||
| 150-180ml Frozen | |||
| 200+ml Frozen |
CLEANING AND MAINTENANCE
Replace the water in the water tank daily. Use pure or distilled water.
Cleaning:
If limescale builds up, soak the affected area in acetic acid or citric acid to dissolve the scale. Rinse thoroughly and wipe clean with a cloth.
Descaling:
To maintain efficient operation, descale the bottle warmer every four weeks.
Using Citric Acid Cleaner:
Mix 10g of citric acid cleaner with 200ml of cold water.
Turn on the bottle warmer, select the disinfection function, and let it boil for 2–3 minutes to complete the descaling process.
Using Vinegar Solution:
Mix 50ml of vinegar with 100ml of cold water.
Turn on the bottle warmer, select the disinfection function, and let it run for 10 minutes.
Leave the solution in the bottle warmer and continue heating until all the limescale dissolves.
Disconnect the power and allow the device to cool down before cleaning.
Do not immerse the base in water. Use a clean cloth to wipe it. Avoid using corrosive detergents, chemical cleaning agents, or hard metal brushes. The lifting basket and shelf can be cleaned with dish soap.
To prevent limescale buildup inside the container, use distilled water only. If scale has formed, soak the container in acetic acid or a scale cleaning agent before cleaning.
TECHNICAL SPECIFICATION
Voltage: 220V \~ 50Hz Heating power: 500W
Dimension: L11*W11,5*H17cm Weight: 0,72kg
CONSIGNES DE SÉCURITÉ
Delft, The Netherlands
Visit us on www.Luvion.com



- WELKOM / WELCOME / BIENVENUE / WILLKOMMEN
- DIY FUNCTION (KEEP WARM, FOOD HEATING)
- PRODUCT OVERVIEW
- POWER ON
- POWER BUTTON
- BUTTONS
- INSTRUCTIONS
- FAST WARMING ROOM TEMPERATURE MILK
- THAW FROZEN MILK
- CLEANING AND MAINTENANCE
- CLEANING
- DESCALING
- USING CITRIC ACID CLEANER
- USING VINEGAR SOLUTION
- TECHNICAL SPECIFICATION
- CONSIGNES DE SÉCURITÉ
Brand : Luvion
Model : Smartlift Pro
Category : Bottle warmer