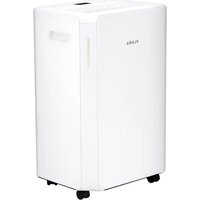
1329FL - Dehumidifier Flama - Free user manual and instructions
Find the device manual for free 1329FL Flama in PDF.


| Product type | Dehumidifier |
| Brand | Flama |
| Model | 1329FL |
| Dehumidification capacity | 20 L/day (at 30°C / 80% RH) |
| Power supply | 220-240 V~, 50 Hz |
| Rated power | 330 W (at 30°C / 80% RH) |
| Refrigerant | R290 (propane), 54 g |
| Water tank capacity | 4.5 L |
| Dimensions (L × W × H) | 345 × 275 × 515 mm |
| Net weight | 12.5 kg |
| Operating temperature | 5°C to 38°C |
| Minimum required area | 4 m² |
| Operating modes | Automatic, continuous drying, sleep |
| Humidity setting | 30% to 80% (in 5% increments) |
| Timer | 0 to 24 hours |
| Fan speed | High and low (adjustable in automatic mode) |
| Child lock | Yes (via LOCK button) |
| Continuous drainage | Possible with drain hose (not included) |
| Filter cleaning | Every 15 days (vacuum cleaner or soapy water) |
| Full tank indicator | Yes (LED and beep) |
| Noise level | < 70 dB(A) |
Frequently Asked Questions - 1329FL Flama
User questions about 1329FL Flama
0 question about this device. Answer the ones you know or ask your own.
Ask a new question about this device
Download the instructions for your Dehumidifier in PDF format for free! Find your manual 1329FL - Flama and take your electronic device back in hand. On this page are published all the documents necessary for the use of your device. 1329FL by Flama.
USER MANUAL 1329FL Flama
natural_image
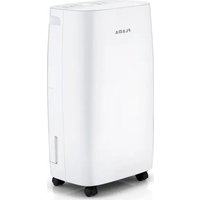
White FLAMA water purifier device with black wheels and ventilation slots (no visible text or symbols on body)1329FL
PT DESUMIDIFICADOR DIGITAL 12 LT 1
ES DESHUMIDIFICADOR DIGITAL 12 LT 11
EN 12LT DIGITAL DEHUMIDIFIER 21
FR DÉSHUMIDIFICATEUR DIGITAL 12LT 31
DESUMIDIFICADOR DIGITAL 20 LT
ADVERTÊNCIAS
natural_image
Front view of a white appliance front panel with a digital display showing 48, and control buttons above (no readable text or symbols on the device itself)natural_image
Front view of a white appliance front panel with a digital display showing 48, and control buttons above (no readable text or symbols)These symbols are present in the appliance:
| SYMBOL DESCRIPTION | ||
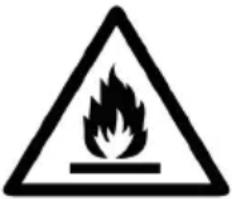 | WARNING(Risk of fire) | This appliance contains R290 propane gas.This appliance uses a flammable refrigerant gas. If the refrigerant gas leaks and comes into contact with a source of heat or ignition, it generates harmful gases and can cause a fire. |
 | Strictly follow the instructions in this manual regarding operation and maintenance. | |
 | Before using the appliance, carefully read the whole instruction manual. | |
 | Do not install, operate, or store the appliance in a space smaller than 4 m2. | |
SAFETY INSTRUCTIONS
Please read these instructions carefully before using the appliance for the first time and keep them for future reference. Use that does not comply with the instructions releases FLAMA from all responsibilities.
After transport or cleaning and maintenance, let the unit rest for 12 hours before connecting the unit to the power supply.
Check that the power supply voltage of the installation corresponds to that stated on the rating plate of the appliance.
This appliance must be connected to an earthed socket.
This appliance is intended to be used by specialists or trained shop users. In light industry and on farms, or for commercial use by lay people.
Do not install this appliance near sources of heat, water, windows or doors leading to the outside.
This appliance is designed to dehumidify areas with excess moisture.
As with any appliance, its use by children must be properly supervised.
This appliance can be used by children aged 8 years and over and by persons with limited physical, sensory or mental capabilities or lack of experience and knowledge, if they are supervised or have received instructions concerning use of the appliance in a safe way and understand the risks involved.
Children must not play with the appliance.
Cleaning and user maintenance must not be carried out by children without supervision.
The appliance must be installed in compliance with national installation regulations.
Do not use the appliance in a potentially explosive environment containing combustible liquids, gases or dust. Do not use paint, cleaning sprays, anti-insect sprays or the like near the appliance.
Do not pull the plug out of the socket by pulling the power cord.
Avoid using "T" sockets or extension cords.
Disconnect the appliance from the power supply after each use.
Unplug the appliance from the electrical socket whenever cleaning or maintenance is carried out.
When switching off the appliance, always wait at least 3 minutes before switching it on again.
Clean the air filter at least once a week.
This appliance must be transported in an upright position. Always empty the water tank before transporting.
It is important to leave a surrounding space of approximately 50 cm for good air circulation, away from combustible objects.
Do not use the appliance if it is not working properly or if it is damaged in any way. Any intervention other than cleaning must be carried out at an Authorized Flama Technical Assistance Service.
Do not attempt to replace the power cord or plug, as this is a dangerous operation. If the power cord is damaged, it must be replaced by Authorized Flama Technical Assistance Service or similarly qualified personnel.
The weighted sound pressure level is less than 70 dB.
This product complies with the Electromagnetic Compatibility and Low Voltage Directives.
This instruction manual is also available in PDF format at www.flama.pt.
SAFETY ADVICE REGARDING THE R290 REFRIGERANT
Carefully read all warnings.
This appliance contains 45 g of R290 refrigerant gas.
R290 is a gas that is in compliance with European environmental directives. Do not puncture any of the refrigeration circuit components.
For the defrosting process and to clean the appliance, do not use any instruments other than those recommended in this manual (“Cleaning and maintenance”).
The appliance must be placed in an environment free from continuously operating sources of ignition (for example: open flames, gas or electric devices in operation).
Do not puncture and do not burn the appliance.
The refrigerant gases may be odorless.
The appliance should be installed, used, and stored in an environment larger than 4 m2.
If the appliance is installed, used, or stored in an unventilated space, prevent the pooling of any possible refrigerant leaks, as this carries a danger of fire or explosion if the refrigerant is ignited by electric heaters, ovens or other sources of ignition.
The appliance should be stored in a way that avoids mechanical damage.
Technicians who perform work on refrigeration circuits should hold appropriate certification, issued by a credentialed authority, attesting to their competence in handling refrigerants in accordance with a specific standard recognized by the trade associations.
Repair services should be performed based on the recommendations of the appliance manufacturer.
Maintenance and repair services requiring assistance from multiple qualified technicians should be done under the supervision of the person specialized in handling flammable refrigerants.
GENERAL INFORMATION
For optimal performance of your dehumidifier:
Place the dehumidifier on a solid and level surface in an area with at least 50 cm (20 in) of open space on all sides to allow for adequate air flow.
Do not place near a radiator or any other heat source.
Ensure that all windows are closed for maximum efficiency.
Ensure that the filter is kept clean. This prevents excess electricity consumption and ensures optimal efficiency.
To prevent noise and/or vibration, do not place the appliance on a soft or irregular surface while in operation.
To prevent damage, never insert any kind of rod or other soft or hard object into the structure of the appliance.
The capacity of the dehumidifier depends on the temperature and the humidity of the room.
At lower temperatures, less humidity will be removed.
If there is an interruption to the power supply, the dehumidifier will restart after 3 minutes (depending on the model).
This automatic interval period protects the compressor.
ATTENTION:
The dehumidifier must be placed in a vertical position for at least 12 hours before use.
Do not attempt to replace the power cord or plug, as this is a dangerous operation. Have them replaced immediately by a Flama-authorized technical assistance service or by similarly qualified technicians to prevent danger.
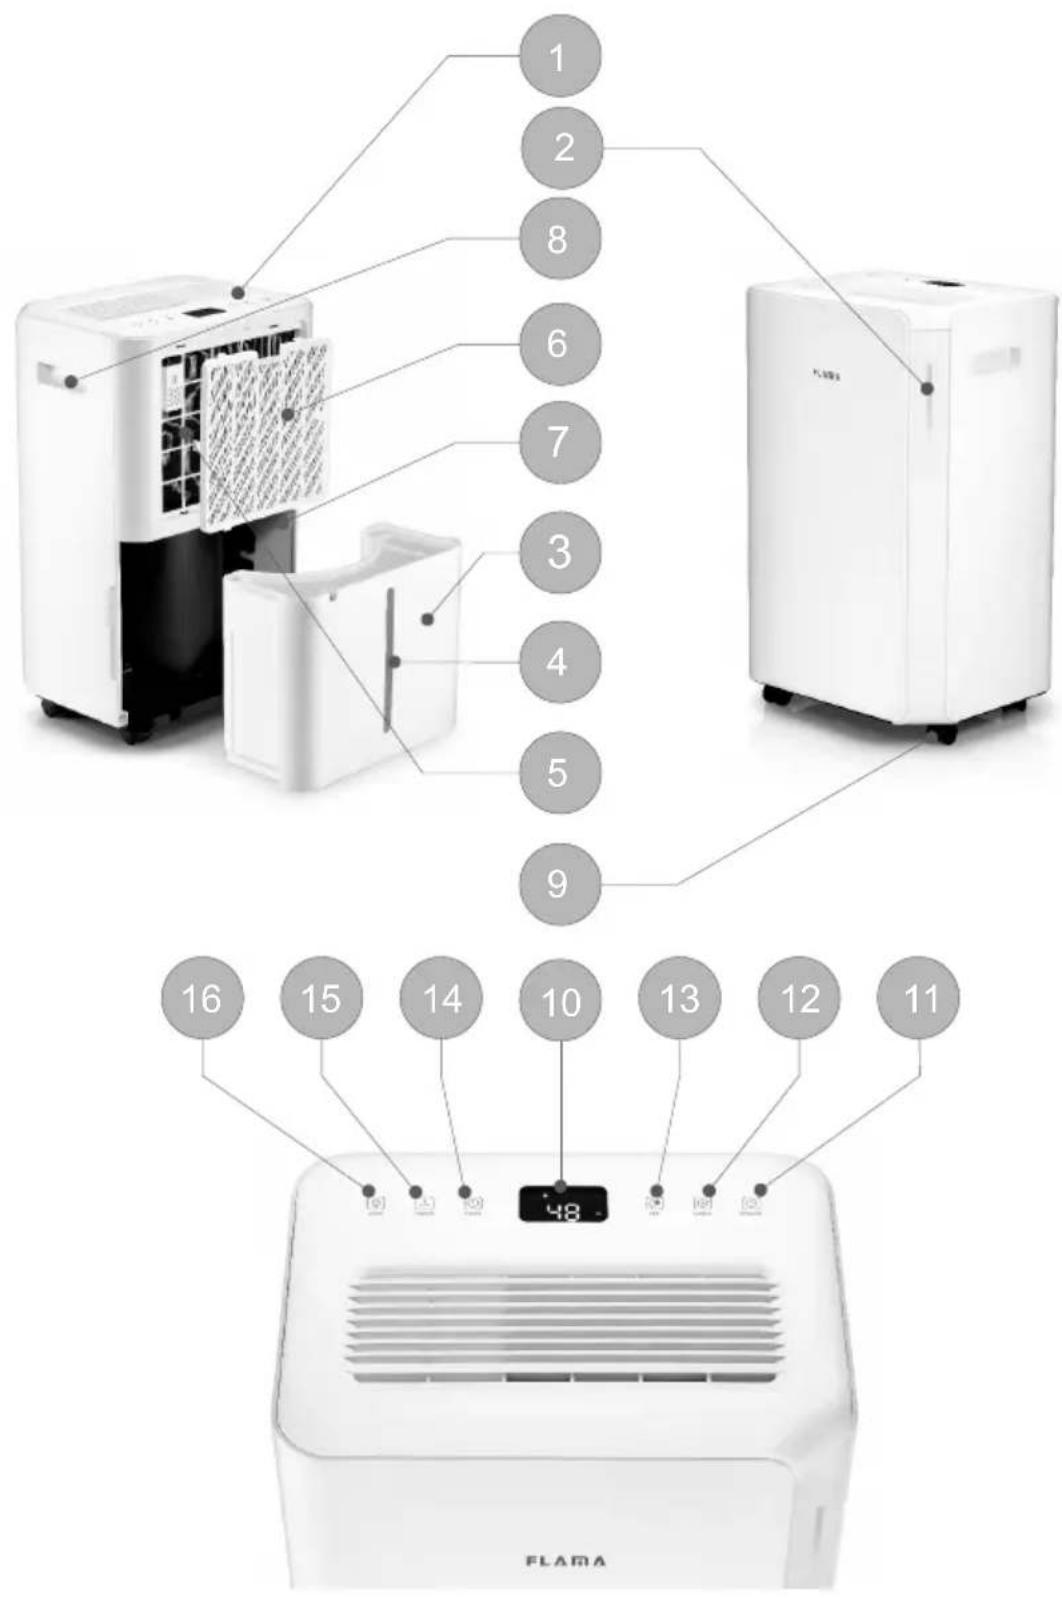
DESCRIPTION
- Control panel
- Indicator light
- Water tank
- Water level indicator
- Filter compartment
- Filter
- Plug for continuous drainage
- Handle
- Wheels
- Display
- Power button ON/OFF
- Mode button MODE
- Humidity control button SET
- Timer button TIMER
- Fan speed button SPEED
- Lock button LOCK
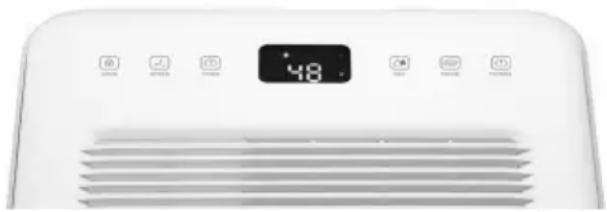
OPERATING INSTRUCTIONS CONTROL PANEL
natural_image
Front view of a white appliance front panel with a digital display showing 48, and control buttons above (no readable text or symbols on the device itself)POWER button (11) - turning the appliance on and off
Ensure that the water tank is in the correct position (after turning on the appliance for the first time, if the full tank indicator lights up, remove the tank and return it to the correct position).
Check that the appliance is plugged into the wall outlet.
After connecting to the power source, all the indicators and the display will light up for 1 second and then turn off. Following an alert sound, the power indicator will light up and the dehumidifier will enter standby mode.
Press the POWER button and the dehumidifier will begin working, with an initial humidity of 60%, in standard automatic mode and high fan mode.
Press the POWER button again and the dehumidifier will stop working.
Disconnect the appliance from the power supply, unplugging it from the wall outlet.
MODE button 12
Press the button to change the appliance's use mode; the corresponding indicator will light up.
Automatic mode
When the ambient humidity ≥ the defined humidity + 3%, the fan will begin to
operate and the compressor will start up after 3 seconds.
When the ambient humidity ≤ the defined humidity -3%, the compressor will stop.
The speed and humidity of the fan can be adjusted in automatic mode.
Continuous drying mode
The dehumidifier continues working, but the humidity cannot be adjusted.
Rest mode
Press the MODE button, which will light up and start the rest function. If no operation occurs within 10 seconds, all the indicators will gradually turn off and the fan speed will automatically change from high to low. Press any button to activate the indicator. Press the MODE button again to leave rest mode.
The humidity is adjustable in rest mode.
Humidity control button SET (13)
In automatic mode or rest mode, this button can be pressed to adjust the defined humidity.
Each time the button is pressed, the defined humidity increases by 5% within the range of 30%–80%.
Press and hold this button to see the current ambient temperature. 5 seconds later, the screen will return to showing the current humidity.
Timer button TIMER (14)
Press this button to define the timer function for between 0-24 hours. Each interval is of 1 hour. Each time the button is pressed, the time increases by 1 hour and the corresponding time is shown on the screen. Setting the value to "00" will cancel the timer function. The indicator will turn off.
After the timer is set and finished, the timer LED will remain lit during the set period of time. After the time is up, the timer LED will turn off automatically.
When operating, set the time for the dehumidifier to turn off;
In rest mode, set the time for the dehumidifier to turn on.
Fan speed button SPEED (15)
The speed of the fan can only be adjusted in automatic mode.
Press this button to alternate the fan speed between low and high. The corresponding fan speed indicator will light up.
Lock button LOCK (16)
Press and hold this button to activate the child lock function. The child lock indicator light will turn on. All the buttons will be locked and non-operational.
Press the button again and the indicator light will turn off and the button will be deactivated.
Turning off the dehumidifier will automatically cancel the child lock function.
Indicator light (2)
Ambient humidity <45% - blue light.
45≤ ambient humidity ≤65% - green light.
Ambient humidity > 65% - red light.
If the display shows E0, E2, CL, CH, LO or HI, the light will be red.
EMPTYING THE WATER TANK
When the tank is full, the dehumidifier will make a buzzing sound and the “full tank” light will turn on.
Press the POWER button to turn off the dehumidifier.
Pull on the water tank and simply slide it out of the dehumidifier.
Empty the water down a drain or outside.
Clean the interior and exterior of the tank.
Return the empty tank to the dehumidifier.
Press the POWER button to continue operation.
If the “full tank” light does not turn off, check that the tank and the float are correctly positioned.
Notice
Do not discard the water tank magnets and plastic rivets. Otherwise, the dehumidifier will not automatically stop working when the water tank is full, and the condensed water will overflow and damage the floor of the room it is in.
Make sure to clean the condensed water in the water tank before restarting operation of the dehumidifier.
If the water tank is dirty, rinse it with clean water. Avoid using detergents, chemical dust removers, diesel oil, benzene, thinners or other solvents. These will damage the water tank and cause leaks.
Return the empty tank to the dehumidifier. Otherwise, the full tank indicator will remain red and the dehumidifier cannot restart.
CONTINUOUS DRAINAGE
For continuous operation or automatic dehumidification, connect the drain hose to the dehumidifier. The condensed water can automatically flow to a bucket or drain by gravity.
Straighten the drainage tube.
Insert one end of the hose into the cistern orifice and connect the other end to the bathtub, outdoors, a bucket-like recipient, or to a designated drainage area.
How to correctly place the drainage hose
In continuous drainage mode, the hose should be placed below the drainage orifice. Avoid uneven surfaces and do not bend the hose.
WARNING
Do not block the drain or drainage tube.
Do not bend the drainage tube. The height of the drain should be lower than the outlet.
The drainage tube should be safely connected to the outlet.
CLEANING AND MAINTENANCE
For safety reasons, ensure that the dehumidifier is turned off before cleaning or repairing it.
Cleaning the exterior of the dehumidifier
Clean the exterior with a clean and dry cloth.
If the dehumidifier is very dirty, clean it with a neutral detergent and then remove the detergent with a damp cloth.
Do not wash the appliance with a hose as this will cause energy leaks and risk of electric shock.
Cleaning the air filter (every 2 weeks)
Dust accumulates in the filter and restricts air flow. Restricted air flow reduces the efficiency of the system and, if blocked, can damage the dehumidifier.
The air filter requires regular cleaning. The air filter is removable to facilitate cleaning.
Do not plug in the dehumidifier without the air filter or it may become contaminated.
Remove the water tank from the body of the appliance and then remove the filter from the lower part of the rear lid.
Use a vacuum cleaner to gently suction the dust from the surface.
If the filter is very dirty, wash it with water and a mild detergent, then dry it very well.
Return the filter to place.
PRECAUTIONS AND WARNINGS
Empty the water tank when full or when the full tank indicator appears on the screen. After emptying the removable water tank, return it to its original position. The appliance will resume operation.
Whenever the appliance stops, you should wait for at least 3 minutes before restarting it to prevent damage to the compressor.
If the appliance does not start or if it intermittently stops working for unknown reasons, check the power cord and plug. If these are in normal working condition, unplug the appliance from the wall outlet and wait 10 minutes before restarting it.
If after 10 minutes the appliance does not restart, contact FLAMA (customer support line) or an authorized technical support service.
While the appliance is working, the compressor produces heat, which can raise the temperature of the room. This is normal and does not affect the operation of the appliance.
STORAGE
If you will not use the appliance for a long period of time, follow the following steps:
Remove the plug from the wall outlet and empty the water tank. Allow the water tank and dehumidifier to dry completely.
Clean the air filter.
Store the appliance vertically in a dust-free location, preferably covered with a plastic covering.
TROUBLESHOOTING
| ANOMALY PROBALE CAUSE SOLUTION | ||
| The appliance does not turn on. | It is not connected to a power source. | Plug it into the wall outlet. |
| The water tank is full. Empty the water tank. | ||
| The water tank is not correctly placed. | Reposition the water tank. | |
| Temperature < 5°C or >35°C. | Appliance protection. | |
| Poor performance. | The air filter is clogged. Clean the air filter. | |
| The intake or outlet ducts are obstructed. | Remove the obstruction from the intake or outlet ducts. | |
| Little dehumidifying capacity. | Dirty air filter. Clean the filter. | |
| Air intake or outlet blocked. | Unblock the air intake or outlet. | |
| Noise. | The appliance is unstable. | Check that the appliance is in a stable position. |
| The air filter is clogged. Clean the air filter. | ||
| E2 Humidity sensor. Contact technical assistance. | ||
| LO | Ambient humidity below 20%. | The dehumidifier turns off to protect itself. |
| Oi | Ambient humidity above 90%. | |
| Cl | Protection against low temperature. | |
| Ch | Protection against high temperature. | |
REQUIRED INFORMATION
| Power supply 220V-240V~, 50Hz | |
| Dehumidification capacity (30°C/RH80%) 20L/day | |
| Nominal input power 330W (30°C/80%) | |
| Refrigerant / Load R290 / 0.054 kg | |
| Operating temperature 5°C- 38°C | |
| Tank capacity 4.5 L | |
| Dimensions (L x D x H) mm 345x275x515mm | |
| Net weight 12.5 kg |
ANOMALIES AND REPAIR
In case of malfunction, please take the appliance to an authorized Technical Assistance Service. Do not attempt to disassemble or repair the appliance, as this may be dangerous.
PROTECTING THE ENVIRONMENT
natural_image
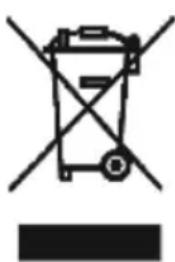
Symbol of a trash bin with crossed lines and a solid black rectangle below (no text or labels)This symbol indicates the separate collection of electrical and electronic equipment.
The main objective of the separate collection of this waste is to reduce the quantity to be disposed of, promote re-
use, recycling and other forms of recovery in order to reduce its negative effects on the environment.
When it is no longer in use, this appliance must not be disposed of together with other unsorted municipal waste.
The user is responsible for delivering it free of charge to the selective collection facilities available for that purpose.
Pieces of equipment that are no longer in use can also be taken back at points of sale, by purchasing new pieces of equipment that are equivalent and have the same functions.
For more detailed information on collection points, please contact your City Council or a point of sale for this equipment.
DÉSHUMIDIFICATEUR DIGITAL 20LT
AVERTISSEMENTS
natural_image
Front view of a white appliance front panel with a digital display showing 48, and control buttons below (no readable text or symbols)DYSFONCTIONNEMENTS ET RÉPARATIONS
natural_image
Symbol of a trash bin with crossed lines indicating no waste or discharge, and a solid black rectangle below (no text or labels)This page has been deliberately left blank
- Keep the proof of purchase (receipt) for this product carefully. When a repair is made under these conditions, the technician will require proof of purchase. This assistance can only be provided once you have proven, with the proof of purchase, that your appliance is within the warranty period.
- The warranty period for this appliance is defined by the respective EU Directive in force on the date of purchase/delivery.
- Within the guarantee period, we will repair or replace, free of charge, any parts which, during the normal use of the appliance, have deteriorated as a result of a proven material or manufacturing defect.
- This warranty does not cover consumable items, light bulbs, easily breakable parts made of glass or plastic, or any other defects that do not impair its proper functioning.
- We accept no liability for damage caused by incorrect or careless use of the appliance, by its connection to an electrical current other than that indicated on the appliance's rating plate, by faulty electrical installation, or by atmospheric, chemical or electrochemical causes. Other claims or demands for compensation relating to objects which are not an integral part of the appliance will be denied.
- The provision of assistance under warranty does not extend the warranty period. Only within this period will assistance be provided under warranty. The right to assistance is only granted to the first purchaser of the device and cannot be transferred to a third party.
- The warranty expires when unauthorized persons have attempted to repair, modify or replace parts of the appliance.
- All expenses and risks of transportation to our factory or vice versa will always be borne by the buyer.
WARRANTY CONDITIONS
To benefit from the Technical Assistance service during the 36-month warranty period after the date of purchase, you will need to:
Present the Invoice/Proof of Purchase, stating the model and the manufacturing number of the product (whenever possible).
Note: Failure to present the aforementioned documents will be grounds for not providing services under warranty.
CONDITIONS DE GARANTIE
CONDITIONS DE GARANTIE
- DESUMIDIFICADOR DIGITAL 20 LT
- ADVERTÊNCIAS
- SAFETY INSTRUCTIONS
- SAFETY ADVICE REGARDING THE R290 REFRIGERANT
- GENERAL INFORMATION
- ATTENTION:
- DESCRIPTION
- OPERATING INSTRUCTIONS CONTROL PANEL
- POWER button (11) - turning the appliance on and off
- MODE button 12
- Automatic mode
- Continuous drying mode
- Rest mode
- Humidity control button SET (13)
- Timer button TIMER (14)
- Fan speed button SPEED (15)
- Lock button LOCK (16)
- Indicator light (2)
- EMPTYING THE WATER TANK
- CONTINUOUS DRAINAGE
- How to correctly place the drainage hose
- WARNING
- CLEANING AND MAINTENANCE
- Cleaning the exterior of the dehumidifier
- Cleaning the air filter (every 2 weeks)
- PRECAUTIONS AND WARNINGS
- STORAGE
- ANOMALIES AND REPAIR
- PROTECTING THE ENVIRONMENT
- DÉSHUMIDIFICATEUR DIGITAL 20LT
- AVERTISSEMENTS
- DYSFONCTIONNEMENTS ET RÉPARATIONS
- WARRANTY CONDITIONS
- CONDITIONS DE GARANTIE
Brand : Flama
Model : 1329FL
Category : Dehumidifier