
PC-HM 1335 - Hand blender PROFICOOK - Free user manual and instructions
Find the device manual for free PC-HM 1335 PROFICOOK in PDF.

| Product type | Hand mixer (electric beater) |
| Brand | ProfiCook |
| Model | PC-HM 1335 |
| Power consumption | 400 W |
| Power supply | 220-240 V ~ 50 Hz |
| Net weight | Approximately 1 kg |
| Protection class | II |
| Number of speeds | 5 levels + Turbo function |
| Included accessories | 2 dough hooks, 2 whisks |
| Eject button | Yes, to release accessories |
| Intended use | Mixing, whisking, beating food in domestic quantities |
| Maximum usage duration | 3 minutes per cycle, then 10 minutes cooling |
| Maximum quantity (heavy dough) | 500 g flour |
| Maximum quantity (light dough) | 750 g mixture |
| Cleaning the housing | Slightly damp cloth, do not immerse |
| Cleaning accessories | Dishwasher safe |
| Safety | Do not touch moving parts, do not use metal utensils during operation, unplug before cleaning |
| Storage | In a dry, well-ventilated place, out of reach of children |
| Standby consumption | ≤ 0.3 W |
| Cable length | Not specified in the manual |
Frequently Asked Questions - PC-HM 1335 PROFICOOK
User questions about PC-HM 1335 PROFICOOK
0 question about this device. Answer the ones you know or ask your own.
Ask a new question about this device
Download the instructions for your Hand blender in PDF format for free! Find your manual PC-HM 1335 - PROFICOOK and take your electronic device back in hand. On this page are published all the documents necessary for the use of your device. PC-HM 1335 by PROFICOOK.
USER MANUAL PC-HM 1335 PROFICOOK
natural_image
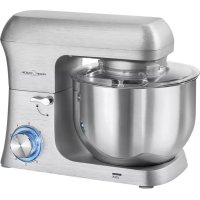
Close-up of a stainless steel electric hand mixer with a whisk, no visible text or symbolsHandmixer PC-HM 1335
Be sure to read the separately enclosed safety instructions first.
Instruction Manual
Thank you for choosing our product. We hope you will enjoy using the appliance.
Read the instruction manual and the separately enclosed safety instructions very carefully before using this appliance. Keep these documents, including the warranty certificate, receipt and, if possible, the box with the inner packaging in a safe place. If you pass the appliance on to a third party, always include all the relevant documents.
Symbols in this Instruction Manual
Important information for your safety is specially marked. It is essential to comply with these instructions in order to avoid accidents and prevent damage to the appliance:

WARNING:
This warns you of dangers to your health and indicates possible injury risks.

CAUTION:
This refers to possible hazards to the appliance or other objects.
Content
Overview of the Components ....3
Intended Use....7
Unpacking the Appliance 7
Overview of the Components/Scope of Delivery .....7
Warnings for the Use of the Appliance ....7
Notes for Use 7
Electrical Connection 8
Operation 8
Cleaning 8
Storage....9
Technical Data....9
Disposal....9
Intended Use
This appliance is used for mixing, whisking or beating foods. It is suitable for processing common household quantities.
It is intended for the use in private households and similar applications. It is only to be used as instructed in this user manual. The appliance is not intended for commercial use.
No other use is intended and can cause damage or personal injuries.
The manufacturer is not responsible for any damages incurred due to improper use.
Unpacking the Appliance
- Remove the appliance from its packaging.
- Remove all packaging material, such as foils, filling material, cable ties and cardboard packaging.
- Check the scope of delivery for completeness.
- If the contents of the packaging are incomplete or if damage can be detected, do not operate the appliance. Return it to the dealer immediately.
- There may still be dust or production residues on the appliance. We recommend that you clean the appliance as described under "Cleaning".
Overview of the Components / Scope of Delivery
1 Eject button
2 5-stage speed switch
3 TURBO button
4 Mains cable
5 Housing
6 Dough hook
7 Ring marking
8 Whisk
Warnings for the Use of the Appliance
WARNING: Risk of Injury!
- Do not touch any moving parts of the appliance. Always wait for the appliance to come to a standstill.
- There should never be spoons, dough scrapers or similar items in the bowl during operation.
- Make sure that long hair does not get caught in the appliance during operation.
Notes for Use
- To achieve optimum results, use thick-walled and not too large containers.
- To avoid splashing, always immerse the dough hooks or whisks completely in the food to be mixed before switching on. Switch off the appliance before removing the dough hooks or whisks from the food to avoid splashing as well.
- Short-time operation: Do not operate the appliance for longer than 3 minutes. Then allow it to cool down for approx. 10 minutes before using it again.
- The appliance is only designed for processing small quantities! Therefore, do not fill more than the quantities specified in the table into one container!
Fitting the Accessories
- The dough hook with the ring marking on the shaft can only be inserted into the right-hand (larger) socket. The other dough hook is intended for the left-hand socket. Please note the markings on the sockets.
-
The whisks can be inserted randomly into the sockets.
-
Make sure that the switch is in the 0 position and the appliance is disconnected from the power supply.
-
Press the end of the dough hooks or whisks into the openings provided on the mixer until they click into place. Inserting the accessories is made easier by turning them slightly.
Releasing Dough Hooks/Whisks
To release the accessories, press the eject button.
Switching On/Off
- The appliance is switched off when the switch is in the 0 position.
- The appliance is switched on by moving the switch to the 1 to 5 position.
Speed Levels
Position 1 = lowest speed
Position 5 = highest speed (TURBO)
You have the option of briefly switching to the highest speed at any speed level. To do this, press the TURBO button during operation.
Select the accessories and speed for the intended use according to the following table:
Table
| Product/Preparation Type | Maximum Quantity | Tool Speed | Level | Maximum Operating Time |
| Heavy dough (e.g. yeast dough) | 500 g | Dough hook | 1–4 | 3 minutes |
| Sponge dough, light crêpe batter | 750 g | Whisks | 2–5 (or TURBO) | 3 minutes |
| Sponge cake batter, waffle batter, cream | 750 g | Whisks | 2–5 (or TURBO) | 3 minutes |
Electrical Connection
Check that the mains voltage matches that of the appliance. The details can be found on the rating plate.
Operation
- Place the container with the ingredients on a level work surface.
- Make sure that the switch is in the 0 position and the appliance is disconnected from the mains.
-
Fit the accessories.
-
Connect the appliance to a properly installed earthed socket.
- Immerse the dough hooks or whisks in the mixture. Set the desired speed with the speed switch. Start with a low speed (level 1–2) and then increase it if necessary.
- Move the appliance up and down slightly.
- Always switch off the appliance before removing it from the jug.
Ending Operation
- Set the switch to the 0 position. Wait for the motor to come to a standstill.
- Pull the mains plug out of the socket.
Cleaning

WARNING:
- Always switch off the appliance before cleaning and disconnect the mains plug from the socket.
- Never immerse the appliance in water for cleaning. This could lead to an electric shock or fire.

CAUTION:
- Do not use a wire brush or other abrasive objects.
- Do not use harsh or abrasive cleaning agents.
- Clean the appliance immediately after each use.
- Only use a slightly damp cloth to clean the housing.
- Dough residue that may be on the power cable should also only be wiped off with a cloth.
- The dough hooks and whisks can be cleaned in the dishwasher.
Storage
- Clean the appliance as described. Allow the accessories to dry completely.
• We recommend storing the appliance in its original packaging if you do not intend to use it for a longer period of time.
• Always store the appliance out of the reach of children in a well-ventilated and dry place.
Technical Data
Model: PC-HM 1335
Power supply: 220–240 V\~, 50 Hz
Power consumption: 400 W
Power consumption in off-mode: ≤0.3W
Protection class:......II
Net weight: .... approx. 1 kg
The right to make technical and design modifications in the course of continuous product development remains reserved.
This appliance has been tested according to all applicable, current CE directives and built according to the latest safety regulations.
Disposal
Meaning of the "Dustbin" Symbol

Protect our environment: do not dispose of electrical equipment in the domestic waste.
Please return any electrical equipment that you will no longer use to the collection points provided for their disposal.
This helps avoid the potential effects of incorrect disposal on the environment and human health.
This will contribute to the recycling and other forms of re-utilisation of electrical and electronic equipment.
Information concerning where the equipment can be disposed of can be obtained from your local authority. Your dealer and contractual partner is also obliged to take back the old appliance free of charge.
BELANGRIJK:
CTC Clatronic Sp. z o.o
Ul. Brzeska 1
45-960 Opole
Usuwanie

- Handmixer PC-HM 1335
- Be sure to read the separately enclosed safety instructions first.
- Instruction Manual
- Symbols in this Instruction Manual
- WARNING:
- CAUTION:
- Content
- Intended Use
- Unpacking the Appliance
- Overview of the Components / Scope of Delivery
- Warnings for the Use of the Appliance
- WARNING: Risk of Injury!
- Notes for Use
- Fitting the Accessories
- Releasing Dough Hooks/Whisks
- Switching On/Off
- Speed Levels
- Electrical Connection
- Operation
- Ending Operation
- Cleaning
- Storage
- Technical Data
- Disposal
- Meaning of the "Dustbin" Symbol
- BELANGRIJK:
- Usuwanie
Brand : PROFICOOK
Model : PC-HM 1335
Category : Hand blender