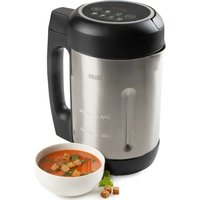
DO739BL - Soup maker DOMO - Free user manual and instructions
Find the device manual for free DO739BL DOMO in PDF.


| Product type | Soup maker |
| Brand | DOMO |
| Model | DO739BL |
| Minimum capacity | 1200 ml |
| Maximum capacity | 2000 ml |
| Cooking and blending functions | Extra smooth, Smooth, Chunky, Blend/Clean, Jam, Juice |
| Automatic keep warm | 30 minutes after program end (Extra smooth, Smooth, Chunky) |
| Memory function | 2 minutes after opening the lid |
| Blade type | Stainless steel blade |
| Container material | Stainless steel |
| Control panel | LED screen, SELECT and START/STOP buttons |
| Safety | Overflow sensor, dry cooking safety, automatic shut-off |
| Cleaning | Do not immerse, cleaning with Blend function, soft sponge, not dishwasher safe |
| Warranty | 2 years |
| Customer service | +32 14 21 71 91, info@linea2000.be |
| Program durations | Extra smooth: 30 min, Smooth: 21 min, Chunky: 28 min, Jam: 25 min, Juice: 2 min |
| Keep warm temperature | Keeps soup warm without specifying temperature |
Frequently Asked Questions - DO739BL DOMO
User questions about DO739BL DOMO
0 question about this device. Answer the ones you know or ask your own.
Ask a new question about this device
Download the instructions for your Soup maker in PDF format for free! Find your manual DO739BL - DOMO and take your electronic device back in hand. On this page are published all the documents necessary for the use of your device. DO739BL by DOMO.
USER MANUAL DO739BL DOMO
natural_image
Electric water heater with black lid and red broth, accompanied by a bowl of soup containing tofu and herbs (no visible text or symbols)EN Instruction booklet Soup maker
Read all instructions carefully.
Save this instruction manual for future reference.
⚠PRODUCTSPECIFIEKE WAARSCHUWINGEN

natural_image
Symbol of a trash bin with crossed lines indicating no waste or discharge, and a solid black rectangle below (no text or labels)⚠AVERTISSEMENTS SPÉCIFIQUES AU PRODUIT

natural_image
Symbol of a trash bin with crossed lines indicating no waste or discharge, and a solid black rectangle below (no text or labels)natural_image
Diagram of a connector or cable assembly with directional arrows indicating movement (no text or symbols)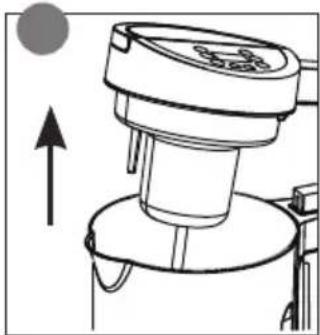
natural_image
Diagram of a mechanical device with an upward arrow indicating motion (no text or symbols present)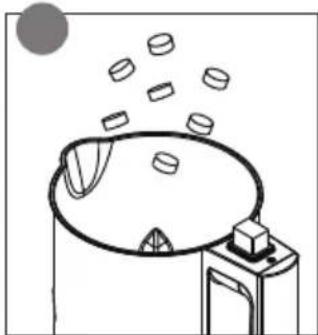
natural_image
Simple line drawing of a mechanical device with a circular component and floating objects (no text or symbols)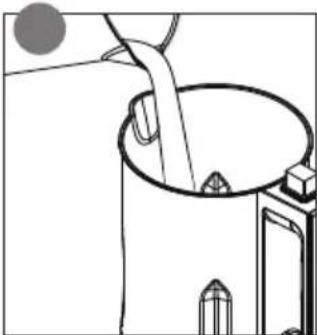
natural_image
Simple line drawing of a container pouring liquid into a cylindrical tank (no text or symbols)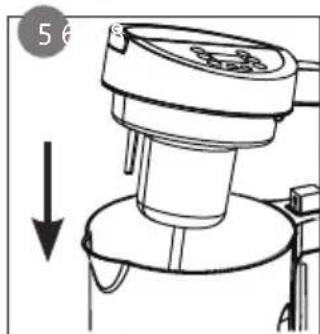
natural_image
Diagram of a mechanical device with a downward arrow indicating motion (no text or symbols present)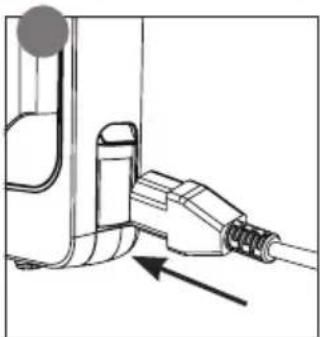
natural_image
Diagram of a mechanical assembly with a pipe fitting and directional arrow (no text or symbols)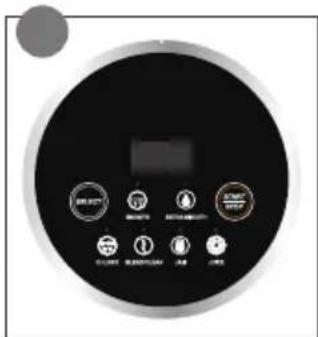
natural_image
Simple line drawing of a funnel pouring liquid into a circular tank (no text or symbols)Thank you for your confidence in DOMO. We do hope you enjoy your new purchase. Before reaching you, all our products undergo a strict quality inspection. Should you still encounter problems with your appliance, then we are truly sorry and will do everything possible to resolve the situation quickly. Do not hesitate to contact our customer service. Our staff will do all they can to help you!
+32 14 21 71 91 info@linea2000.be

Monday - Thursday: 8.30 - 12.00 and 13.00 - 17.00
Friday: 8.30 - 12.00 and 13.00 - 16.30
This device has a warranty period of 2 years from the date of purchase. During this warranty period, the distributor will assume responsibility for any defects that can be shown to be the result of material, construction or manufacturing errors. Such defects will be remedied by repair or replacement of the device. The 2-year warranty period will be suspended during the repair period and will continue after the repair has taken place for the remaining duration of the warranty period. The warranty will be honoured if proof of purchase clearly showing the date of purchase is provided. If your device becomes defective within the 2-year warranty period, please return it with your proof of purchase to the store you purchased it from or follow the procedure of the relevant webshop if you bought it online.
The warranty does not cover damage to the device, accessories or parts caused by:
• normal wear and tear from use;
• non-compliance with the instructions for use, maintenance and cleaning in the manual;
- incorrect connection, e.g. electrical voltage too high;
- incorrect, heavy-handed or abnormal use;
• repairs or alterations carried out by the consumer or unauthorised third parties;
- use of parts or accessories not recommended nor supplied by the distributor.
SAFETY INSTRUCTIONS
When using electrical appliances, basic safety precautions should always be taken, including the following. Any injury or damage caused by failure to comply with these rules are at your own risk. Neither the manufacturer, importer, or the supplier may be held liable.
- Read all instructions carefully.
- Make sure all packaging materials and promotional stickers have been removed before using the appliance for the first time. Make sure children cannot play with the packaging materials.
-
This appliance is only suitable for use in domestic and similar environments, such as:
-
staff kitchen areas in shops, offices and other working environments;
- farm houses;
- by clients in hotels, motels and other residential type environments;
- bed and breakfast type environments.
- Children should be supervised to ensure that they do not play with the appliance.
- This appliance can be used by children aged from 16 years and above and persons with reduced physical, sensory or mental capabilities or lack of experience and knowledge if they have been given supervision or instruction concerning use of the appliance in a safe way and understand the hazards involved.
• Children shall not play with the appliance.
- Cleaning and user maintenance shall not be made by children unless they are older than 16 or supervised.
- Keep the appliance and its cord out of reach of children younger than 16 years.
- All repairs should be carried out by the manufacturer or its aftersales service.
▲ELECTRICAL WARNINGS
- In order to avoid a hazard this appliance must not be supplied through an external switching device, such as a timer or a
separate remote control, or connected to a circuit that is regularly switched on and off by the utility.
- The appliance must be disconnected from its power source when not in use, during service and when replacing parts. If present, first turn all the buttons to the 'off' position, then pull the plug out of the socket by grasping the plug itself. Never pull the cord or appliance to remove the plug from the socket.
- Before use, check carefully that the electric tension and frequency of the power net at your home match the indications on the rating label of the appliance.
- The appliance must be plugged into an appropriate outlet that is installed and grounded in accordance with local installation regulations.
- Do not let the power supply cord hang over the edge of a counter, or touch hot surfaces.
- Keep the power cord away from hot parts and don't cover the appliance.
- Unwrap the cord completely to prevent overheating of the cord. Do not allow the power cord supply to run underneath or around the unit.
- For safety reasons, never use the appliance if the cord, plug, or appliance itself is damaged, or after a malfunction of the appliance. Return the appliance to the DOMO Service Department or its service agent for examination, repair, or electrical or mechanical adjustment. Do not try to repair the appliance yourself.
⚠️INSTALLATION
- Do not place near flammable materials, gases or explosives.
- Do not use or store this appliance outdoors.
• Always use the appliance on a steady, dry and level surface.
- Never place this appliance near a gas stove or electrical stove or in a place where it may come into contact with a warm appliance.
⚠ USE
- Do not use this appliance for other than intended use.
- Never leave the appliance unattended while it is functioning.
- Do not operate the appliance with wet hands.
- The use of accessories that are not recommended or sold by the manufacturer can cause fire, electrical shock or injuries. Only use the utensils delivered with the appliance.
⚠ CLEANING AND MAINTENANCE
- To protect against electrical shock or burns, do not immerse unit, cord, or plug in water or other liquid.
- Failure to maintain this appliance in a clean condition could adversely affect the life of the appliance and possibly result in a hazardous situation.
⚠️PRODUCTSPECIFIC WARNINGS

The device gets hot during operation.
Avoid burning yourself by only touching the appliance's handles.
Keep the electric cord away from hot parts.
- Do not use the appliance without ingredients.
- Handle with great care when using sharp accessories like knives. Only touch the accessories when they stopped moving inside the appliance.
- Do not use the appliance to grind, chop, or powder dry ingredients. Always fill with enough liquid during use.
- Always use the appliance on a flat, stable, dry surface. Place the appliance at least 10 cm back from the edge of the table or kitchen counter.
- Do not place the device in a damp room or use it near a fire or heat source. The distance should be at least 30 cm.
- Do not remove the lid until the blades have come to a complete stop.
• Always unplug the power supply cord and remove it from the appliance before cleaning the appliance. - Avoid anything spilling on the power cord connector.
- Be careful when pouring hot liquid into the soup maker.
• Always keep hands, fingers, loose clothing and other objects away from the rotating blades.
• Always disconnect the appliance before adding food and liquids.
SAVE THESE INSTRUCTIONS FOR FUTURE REFERENCE
All images and descriptions in this manual are purely indicative and may differ slightly from the actual device.
PARTS
- Lid
- Overfill sensor
- Jug
- Hand grip
- Control panel
- Blade
- Power socket
CONTROL PANEL
- LED Display
- Setting button 'SELECT'
- On-off button 'START/STOP'
- Indication smooth-function
- Indication extra smooth-function
- Indication chunky-function
- Indication blend/clean-function
- Indication jam-function
- Indication juice-function
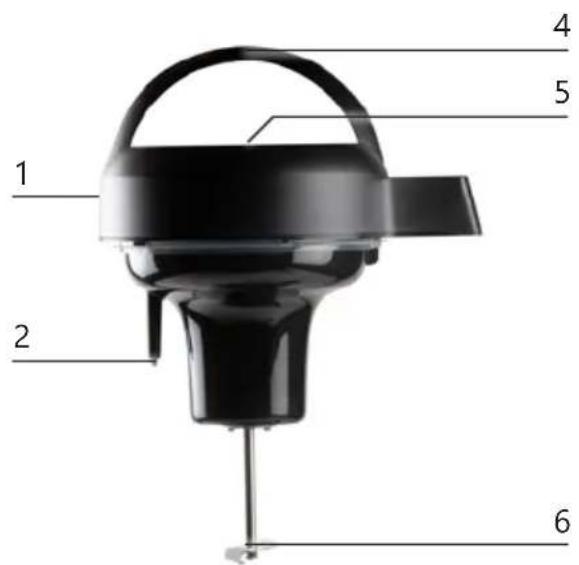
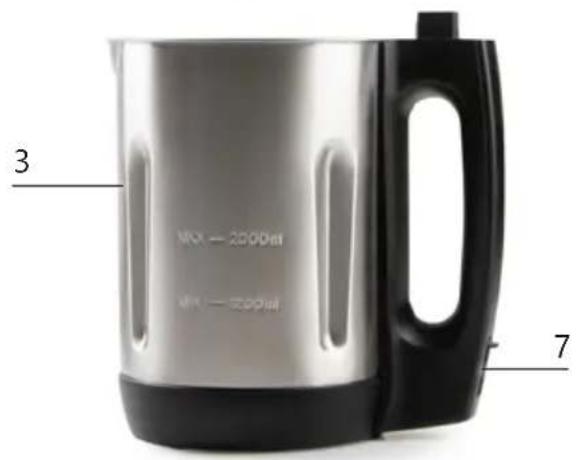
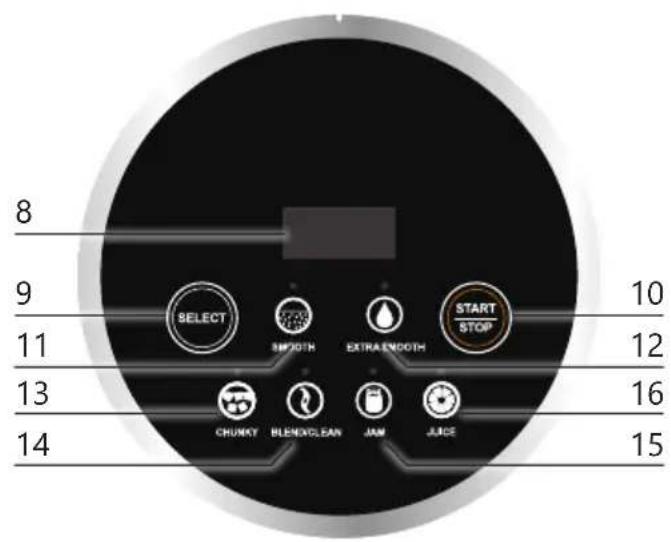
BEFORE THE FIRST USE
- Make sure all packaging materials and promotional stickers have been removed before using the appliance for the first time.
- Before using the device, clean it with a moist cloth.
USE
-
Ensure the soup maker is unplugged before adding the ingredients.
-
Remove the lid. Be careful not to touch the blade.
-
Place all the ingredients in the soup maker.
-
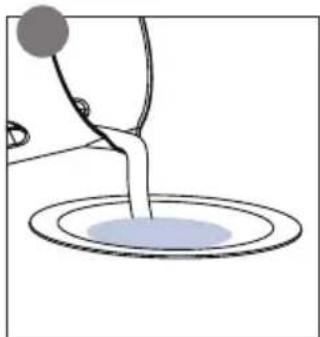
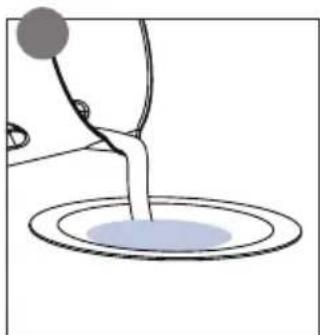
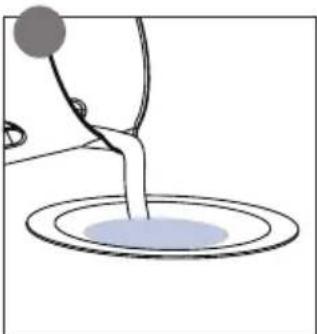
Add the water or broth last, filling it up to between the min and max indication lines. Make sure that the appliance is always filled between the minimum (1200 ml) and maximum (2000 ml) indicators. Make sure there is enough liquid so that the starch in the ingredients cannot burn. Take into account a ratio of 40% vegetables to 60% moisture.
-
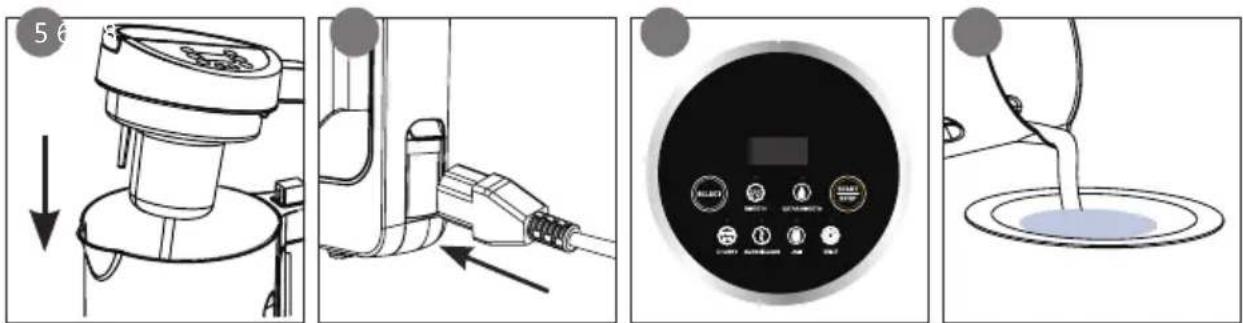
Place the lid back onto the jug. Ensure it is securely in place.
-
Plug the cable in the power socket of the appliance. Insert the mains plug into the power socket. The indicator lights will blink one by one.
-
Select the required programme by pressing the setting button 'SELECT'. The indicator light for the selected programme lights up. Confirm with the start button. The indicator light for the selected programme will remain lit and the time on the display will count down.
-
When the programme is finished, a signal will sound for one minute. Unplug the appliance and remove the power cable from the appliance. Remove the lid and be careful with the blade. Be careful when you pour out the soup!
- Jam - Juice: After one minute, the appliance will turn itself off automatically.
- Extra smooth - Smooth - Chunky: The appliance switches to the automatic warming function after one minute. (more info: Automatic keep-warm function).
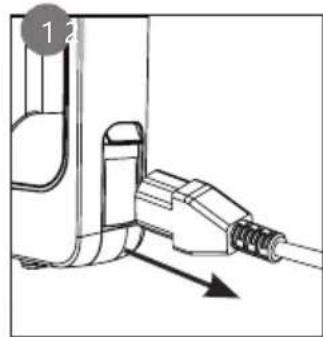
natural_image
Technical line drawing of a mechanical component with an arrow indicating direction (no text or symbols)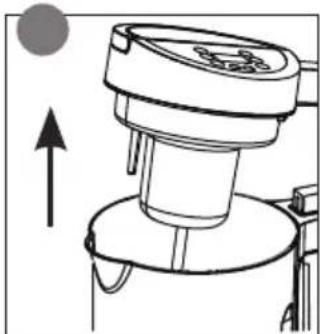
natural_image
Diagram of a mechanical device with an upward arrow indicating motion or force (no text or symbols present)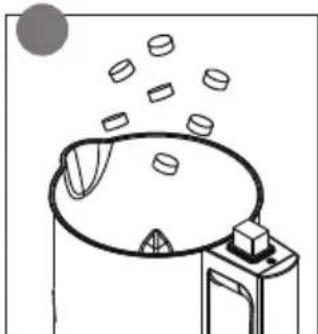
natural_image
Simple line drawing of a mechanical device with a circular component and floating pills (no text or symbols)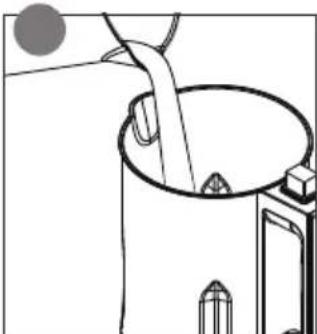
natural_image
Simple line drawing of a container pouring liquid into a cylindrical tank (no text or symbols)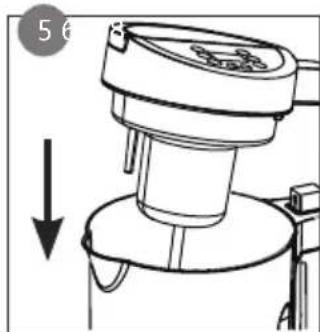
natural_image
Diagram of a mechanical device with a downward arrow indicating force or movement (no text or symbols present)
natural_image
Diagram of a cable connector with an arrow indicating direction (no text or symbols present)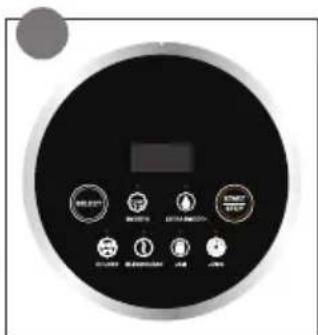
natural_image
Simple line drawing of a funnel pouring liquid into a circular tank (no text or symbols)The jug will heat up (except for programmes 'juice' and 'blend/clean').
⚠️ If you want to turn the appliance off during the programme or want to change the programme, press and hold the on/off button for a few seconds.
⚠️Do not use the appliance without ingredients.
⚠️ Steam may come out of the appliance during heating. This is normal. Be careful; the steam is hot. Never cover the device during operation.
⚠️ Allow the device to rest for 30 minutes after a cycle. Switching the soup maker on again too soon can drastically reduce the service life of the appliance.
SETTINGS

Extra smooth
The extra smooth function ensures that you get a very finely blended soup. Using this function, you can easily whip up a velouté. The programme takes 30 minutes. In that time, the machine cooks the vegetables and regularly mixes them, so that the soup is finely blended when finished.

Smooth
The smooth-function is perfect for a soup with a smooth consistency. The programme lasts for 21 minutes. In that time, the machine cooks the vegetables and regularly mixes them.

Chunky
The chunky-function is perfect for soups requiring a chunkier consistency. For chunky soup there is no blending process, just heating. It is therefore recommended that you cut the vegetables into the desired size. The device does not mix the soup but only cooks it. The programme lasts for 28 minutes. If you are not satisfied with the consistency of your soup, you can use the blend-function afterwards.

Blend/clean
If your soup does not have the desired consistency, you can continue to mix the soup with this function. Select the 'Blend' programme and confirm by pressing the start button. Press and hold the start button until you have the desired consistency. The blender does not heat with this programme. We advise you not to use the blend function for longer than 20 seconds at a time. This is also how you can clean the appliance after use.

Do not use this function to mix hard or dry ingredients, this may damage the blades.

Juice
The juice function is ideal for preparing a smoothie, milkshake or other cold drinks. The programme takes 2 minutes. This programme mixes only and therefore does not heat up the ingredients.

Attention: do not use ice cubes.

Jam
The jam function is perfect for preparing a delicious jam. The programme takes 25 minutes. During this time, the machine regularly heats and blends so you achieve the correct structure for a delicious jam.

Note: This function is not suitable for making soup, because the mixing and heating time is set differently.
MEMORY FUNCTION
If you have forgotten to add an ingredient, you can still do this while the appliance is running by just removing the lid from the appliance. The soup maker will remember the current programme for 2 minutes. Add the forgotten ingredients and replace the lid. The programme will continue.
AUTOMATIC KEEP-WARM FUNCTION
This function automatically keeps the soup warm for 30 minutes once the selected programme has finished (Extra smooth - Smooth - Chunky). The appliance will switch itself off after 30 minutes and so will no longer keep the soup warm.

Note: The appliance will mix the soup regularly to maintain the right consistency. This process applies to the smooth and extra smooth programmes only.
CLEANING AND MAINTENANCE
- Pull the plug out of the socket before cleaning the appliance.
- Allow the appliance to cool down for cleaning.
- Remove the lid and clean with a damp cloth.
- Be careful when cleaning the blade.
- Fill the jug with warm water and a little bit of soap. Clean your appliance with the blend function (see the section on use). Clean the inside of the jug with a soft sponge. Do not use a scouring pad as this will scratch the base.
• After cleaning, dry all parts thoroughly.
⚠️Do not immerse unit, cord, or plug in water or other liquid.
⚠️ Never use aggressive or abrasive cleaning agents.
⚠️Do not place the appliance in the dishwasher.
PROBLEMS AND SOLUTIONS
| PROBLEMS SOLUTIONS | |
| The lights on the display are off. • There is a problem with the connection.Check if the power cord is properly connected.There are too many ingredients in the jug, the lid is not in place. Remove some of the ingredients. Ensure the lid is in place. | |
| The light of the chosen setting is on, but the appliance doesn’t work. | • You didn’t confirm the setting with the start button. Press the start button. |
| The appliance stops working. • There is not enough liquid in the jug. The appliance has a boil dry protection. The appliance will shut down when there is not enough liquid used. | |
| The error message ‘E1’ appears on the display. • There is too much liquid in the appliance.The appliance has a sensor to make sure it doesn’t overflow. Pour some of the liquid from the jug.The overfill sensor is dirty. Clean the sensor with a damp cloth. | |
| The food is burned. • The jug wasn’t filled between the min and max indication lines. Ensure the base is always covered with liquid, between the min and max indication. Take into account a ratio of 40% vegetables to 60% moisture. | |
GUIDELINES
natural_image
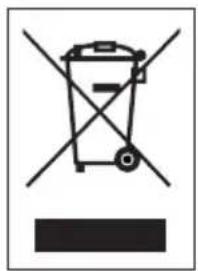
Symbol of a trash bin crossed with two crossed lines and a solid black rectangle below (no text or labels)This symbol on the product or on its packaging indicates that this product may not be treated as household waste. Instead it must be brought to the applicable collection point for recycling of electrical and electronic equipment. By ensuring this product is disposed of correctly, you will help prevent potential negative consequences for the environment and human health, which could otherwise be caused by inappropriate waste handling of this product. For more detailed information about recycling of this product, please contact your local city office, your household waste disposal service or the shop where you purchased the product.

The packaging is recyclable. Please treat the packaging ecologically.

This appliance conforms to all European requirements in the areas of safety, health, and environmental protection.
The EU declaration concerning this appliance can be requested at any time from info@linea2000.be
GARANTIA
Estimado cliente,
natural_image
Technical line drawing of a mechanical component with directional arrows indicating movement (no text or symbols)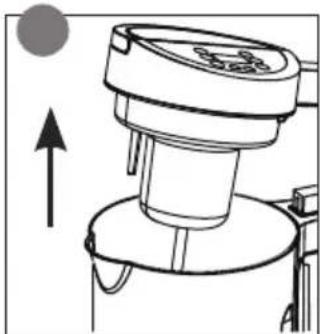
natural_image
Diagram of a mechanical device with an upward arrow indicating motion or force (no text or symbols present)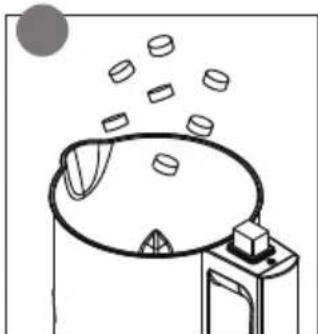
natural_image
Simple line drawing of a mechanical device with a circular component and floating pills (no text or symbols)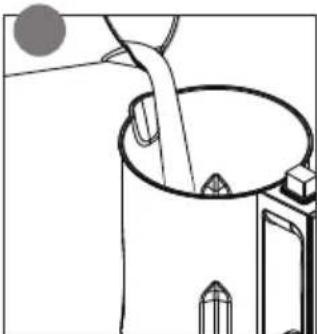
natural_image
Simple line drawing of a container pouring liquid into a cylindrical tank (no text or symbols)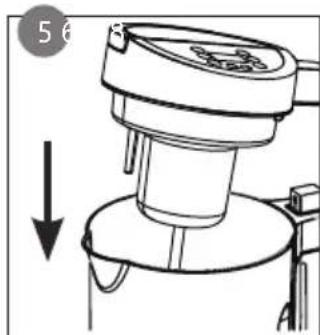
natural_image
Diagram of a mechanical device with a downward arrow indicating motion or force (no text or symbols present)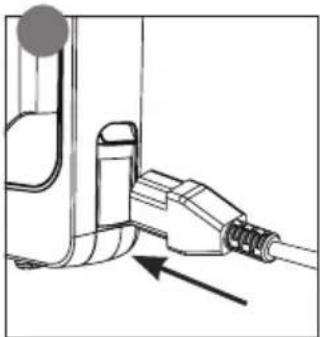
natural_image
Diagram of a mechanical assembly with a connector and directional arrow (no text or symbols)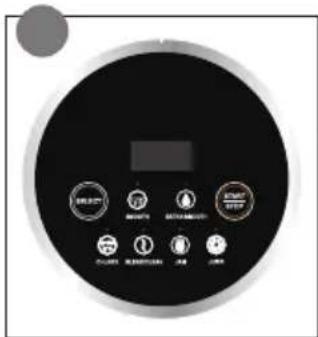
natural_image
Simple line drawing of a container pouring liquid into a circular tank (no text or symbols)natural_image
Symbol of a trash bin crossed with no text or numbers, representing waste sorting or disposal (no text present)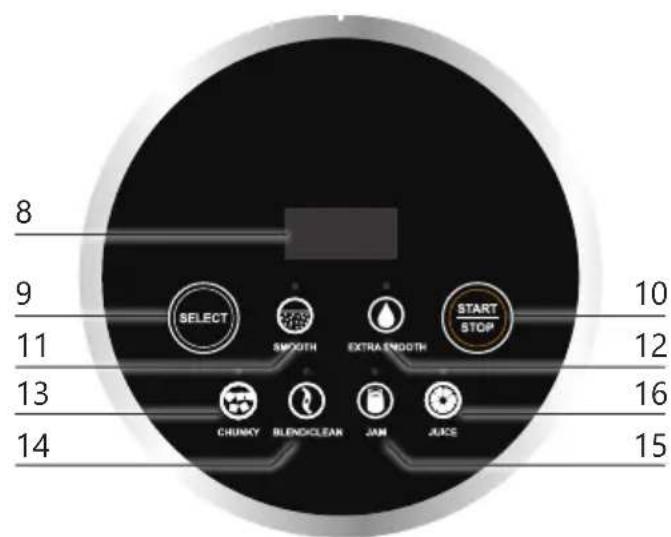
PRIMA DELL'USO
natural_image
Symbol of a trash bin crossed with no text or numbers, representing waste sorting or disposal (no text present)natural_image
Diagram of a mechanical device with a downward arrow indicating motion (no text or symbols present)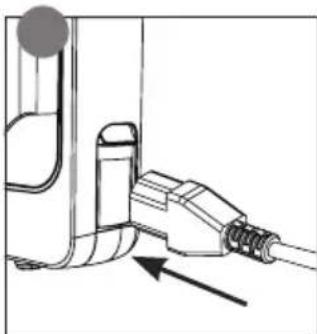
natural_image
Technical line drawing of a mechanical component with an arrow indicating direction (no text or symbols)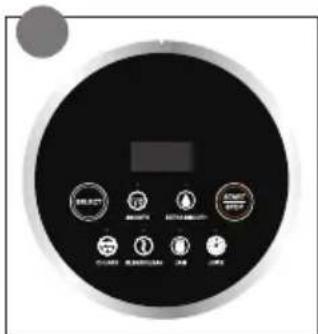
natural_image
Simple line drawing of a container pouring liquid into a circular tank (no text or symbols)natural_image
Symbol of a trash bin crossed with two crossed lines, no text or numbers presentnatural_image
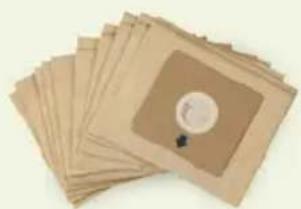
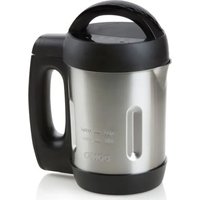
Symbol of a trash bin with crossed lines indicating no waste or discharge, and a solid black rectangle below (no text or labels)Looking for extra accessories or you have a broken piece?
ORDER the original DOMO accessories and parts on our webshop.
Webshop

natural_image
Stack of sheets of paper with a circular inset showing a small object, no visible text or symbols
natural_image
Two white plastic electrical connectors with mounting holes (no text or symbols visible)
natural_image
White cylindrical container with black interior, no visible text or symbols
natural_image
Clear glass coffee maker with black handle and lid (no text or symbols visible)
- ⚠PRODUCTSPECIFIEKE WAARSCHUWINGEN
- ⚠AVERTISSEMENTS SPÉCIFIQUES AU PRODUIT
- SAFETY INSTRUCTIONS
- ▲ELECTRICAL WARNINGS
- ⚠️INSTALLATION
- ⚠ USE
- ⚠ CLEANING AND MAINTENANCE
- ⚠️PRODUCTSPECIFIC WARNINGS
- SAVE THESE INSTRUCTIONS FOR FUTURE REFERENCE
- PARTS
- CONTROL PANEL
- BEFORE THE FIRST USE
- USE
- SETTINGS
- Extra smooth
- Smooth
- Chunky
- Blend/clean
- Juice
- Jam
- MEMORY FUNCTION
- AUTOMATIC KEEP-WARM FUNCTION
- CLEANING AND MAINTENANCE
- GUIDELINES
- GARANTIA
- PRIMA DELL'USO
Brand : DOMO
Model : DO739BL
Category : Soup maker