OX9771B - Oven Atag - Free user manual and instructions
Find the device manual for free OX9771B Atag in PDF.


User questions about OX9771B Atag
0 question about this device. Answer the ones you know or ask your own.
Ask a new question about this device
Download the instructions for your Oven in PDF format for free! Find your manual OX9771B - Atag and take your electronic device back in hand. On this page are published all the documents necessary for the use of your device. OX9771B by Atag.
USER MANUAL OX9771B Atag
natural_image
Pure technical diagram showing a structural component with arrows indicating direction (no text or symbols)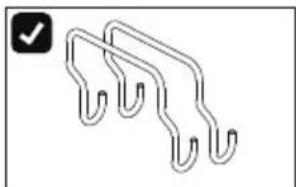
natural_image
Pure line drawing of three curved pipe or hook components without any text, numbers, or symbols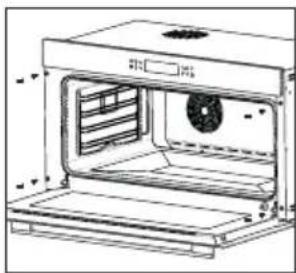
natural_image
Line drawing of an open oven with ventilation duct and lid (no text or symbols)natural_image
Isometric line drawing of a rectangular frame with dashed inner lines (no text or symbols)natural_image
Isometric line drawing of a rectangular tray or container with multiple compartments (no text or symbols)natural_image
Isometric view of a rectangular metal grate or rack structure with evenly spaced slots (no text or symbols)natural_image
Technical line drawing of a modular shelving unit with structural ribs and a magnified inset showing hand connections (no text or symbols)Deur
natural_image
Diagram of an oven with internal rack structure and a magnified inset showing a small component (labeled A), no text or symbols present.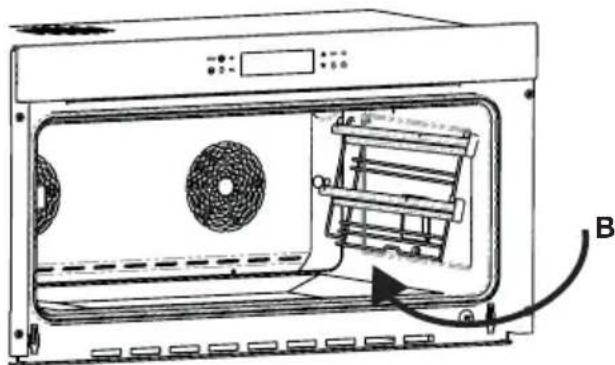
natural_image
Technical line drawing of an oven with internal components and a labeled component 'B' (no text or symbols beyond label)natural_image
Technical line drawing of a microwave oven with internal components and airflow direction (no text or symbols)
text_image
45° Bnatural_image
Pure technical line drawing of a mechanical assembly with no text, numbers, or symbolstext_image
Prohibition sign with crossed-out trash bin and no text or symbolstext_image
Warning symbol with exclamation mark inside a trianglenatural_image
Pure technical diagram of a structural component with arrows indicating direction (no text or symbols)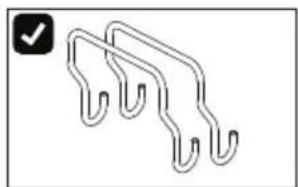
natural_image
Simple line drawing of three curved metal hooks or clips (no text or symbols)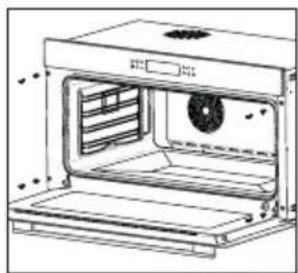
natural_image
Line drawing of an open oven with ventilation slots and a lid (no text or symbols)natural_image
Technical line drawings of rectangular and grid-like components with a curved wire or filament (no text or symbols)natural_image
Technical line drawing of a modular shelving unit with metal racks and structural supports, showing an inset close-up of hand joints (no text or symbols)Porte
natural_image
Technical diagram of an oven with internal rack structure and labeled component A (no text or symbols beyond label)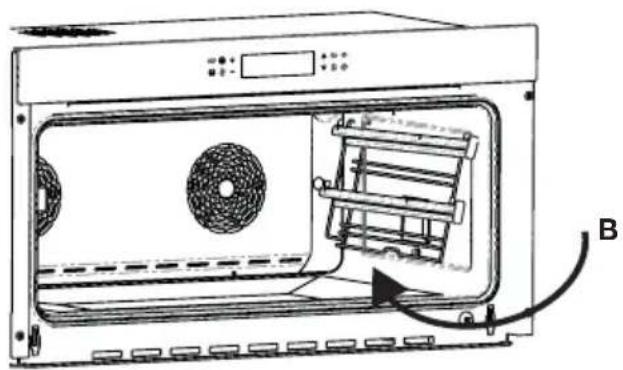
natural_image
Technical line drawing of an oven with internal components and a labeled component 'B' (no text or symbols beyond label)natural_image
Technical line drawing of a mechanical assembly with an inset showing a detailed detail (no text or symbols)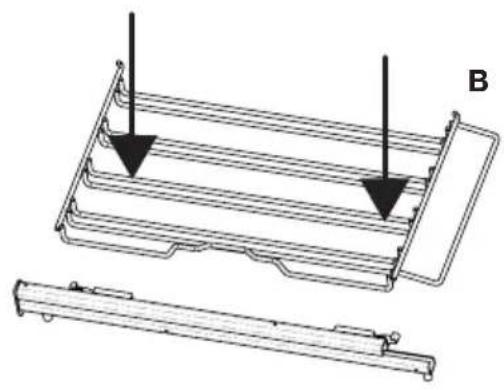
natural_image
Technical line drawing of a mechanical component with two downward arrows indicating features, plus a separate view of a bracket (no text or symbols)natural_image
Technical line drawing of an oven with internal components and airflow direction (no text or symbols)
text_image
45° Bnatural_image
Technical line drawing of a mechanical assembly with dimension labels C (no text or symbols present)text_image
Prohibition sign with crossed-out trash bin and no text or symbolstext_image
Warning symbol with exclamation mark inside a trianglenatural_image
Pure technical diagram showing a structural component with arrows indicating direction (no text or symbols)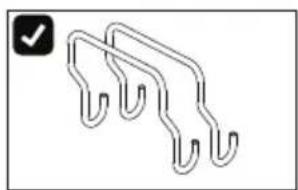
natural_image
Pure line drawing of three curved metal hooks without any text or symbols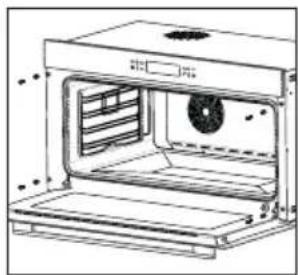
natural_image
Line drawing of an oven with a lid and ventilation slots (no text or symbols)natural_image
Technical line drawings of rectangular and grid-like components with a schematic symbol below (no text or labels)natural_image
Technical line drawing of a modular rack structure with a magnified inset showing hand positioning (no text or symbols)Tür
natural_image
Technical diagram of an oven with internal rack and fan assembly, labeled A (no text or symbols beyond label)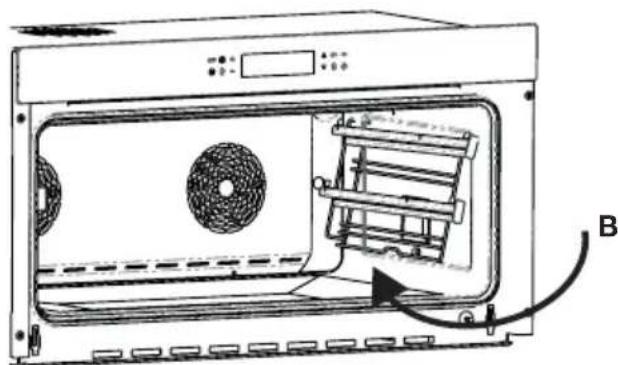
natural_image
Technical line drawing of an oven with internal structure and labeled component B (no text or symbols beyond label)natural_image
Technical line drawing of a mechanical assembly with an inset showing a detailed detail (no text or symbols)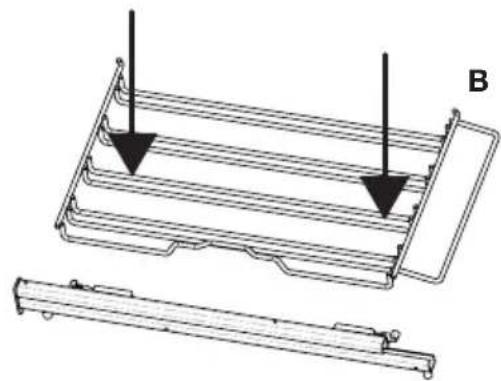
natural_image
Technical line drawing of a mechanical component with two downward arrows indicating features, plus a separate view of a bracket (no text or symbols)natural_image
Technical line drawing of an oven with internal fan and door mechanism (no text or symbols)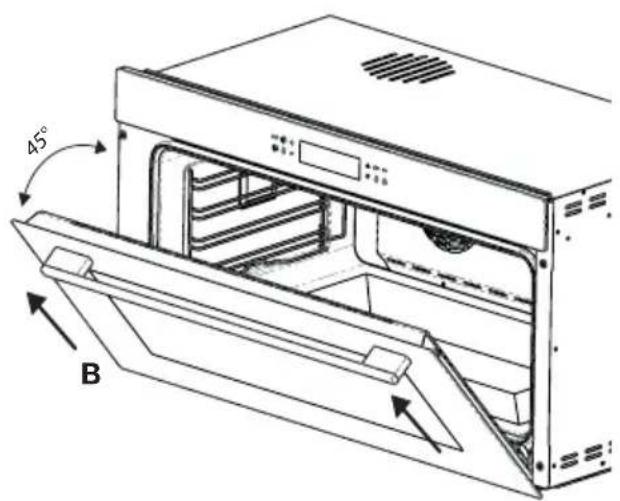
text_image
45° Bnatural_image
Technical line drawing of a mechanical assembly with labeled components and directional arrows (no text or symbols)natural_image
Technical line drawing of a device interior with labeled component ABC (no text or symbols beyond label)
natural_image
Technical line drawing of a cabinet or enclosure with internal components and directional arrows (no text or symbols)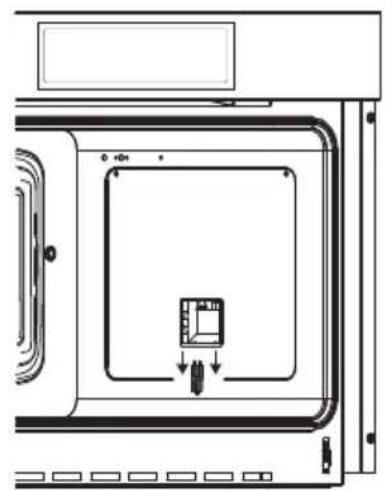
natural_image
Diagram of a device interior showing a central component with arrows indicating movement or force (no text or symbols present)Fehlersuche
text_image
Prohibition sign with crossed-out trash bin and no text, likely indicating no waste or disposal.text_image
Warning symbol with exclamation mark inside a triangleInstructions for use
Oven
ATAG
OX97__B
EN Manual EN 3 - EN 27
Pictograms used

Important information

Nice to know
Your oven
Introduction
4
Building in 5
Description of the appliance 6
Control panel 9
Oven functions table 10
First use
Before using the appliance for the first time 11
Operation
Using oven functions 12
Setting the oven 17
Maintenance
Cleaning the appliance 18
Replacing the oven lamp 20
Faults
Troubleshooting
22
Technical specifications
Product specifications 25
Environmental aspects
Disposal of the appliance and packaging 26
Introduction
Congratulations on choosing this appliance. This product is designed with simple operation and optimum comfort in mind.
These instructions for use explain how you can make best use of this appliance. These instructions contain information about the operation of the appliance and background information that may be of help to you during its use.

Read the separate safety instructions before using the appliance!
Read this user manual thoroughly before you first use the appliance, and keep the manual for future use.
Enjoy cooking!
You can find the latest version of the user manual on our website.
Building in
natural_image
Diagram of a window with horizontal lines and arrows indicating direction, no text or symbols present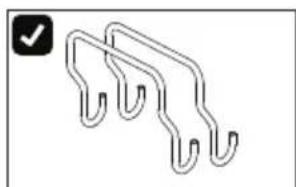
natural_image
Simple line drawing of three curved hooks or clips with a checkmark icon (no text or symbols)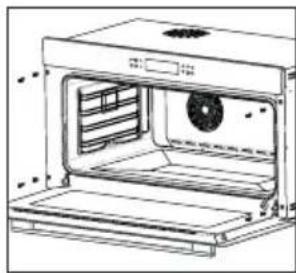
natural_image
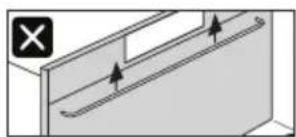
Line drawing of an open oven with internal compartments and a circular vent (no text or symbols)CAUTION! To prevent the door handle from breaking, DO NOT pull the oven by the handle to install it.
To handle the product, use the supplied handles. Remember to remove the supplied handles before encasing the product to avoid noise during operation.
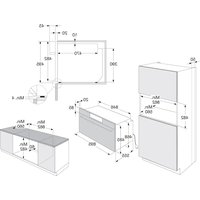
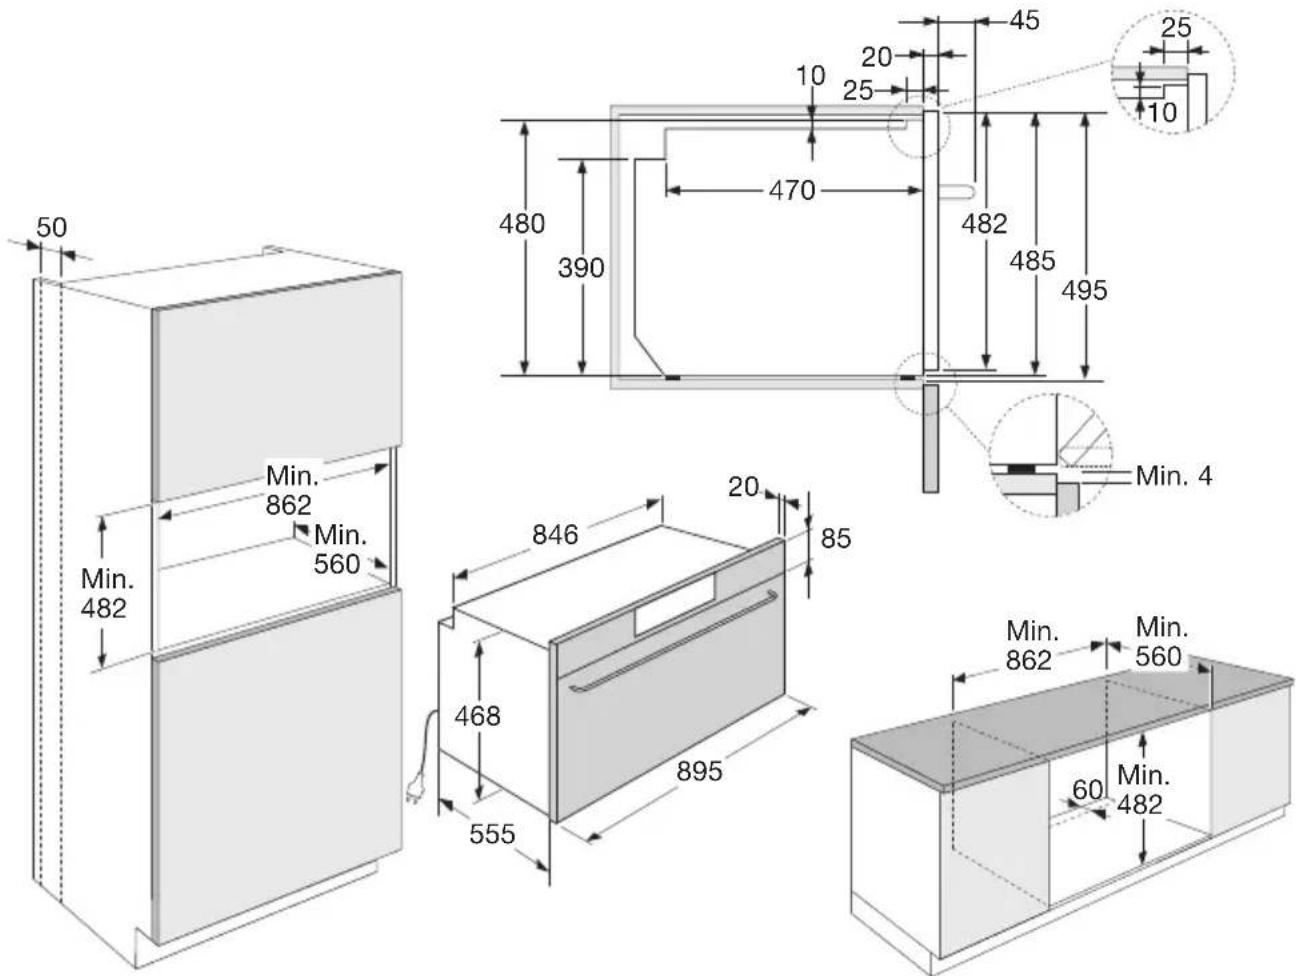
- The oven can be installed under a hob or in an upper cabinet.
- The dimensions of the oven housing are shown in the drawing below. All dimensions are in mm.
- Make sure surrounding materials are heat resistant.
- It is advisable to leave a space of at least 60 mm on the back for the kitchen unit in which the oven is installed.
- Position the oven in the middle of the cabinet, and secure it with screws.
text_image
50 Min. 482 862 Min. 560 468 555 480 390 846 20 85 470 482 485 495 45 10 20 25 25 10 Min. 4 Min. 862 Min. 560 60 Min. 482Description of the appliance
text_image
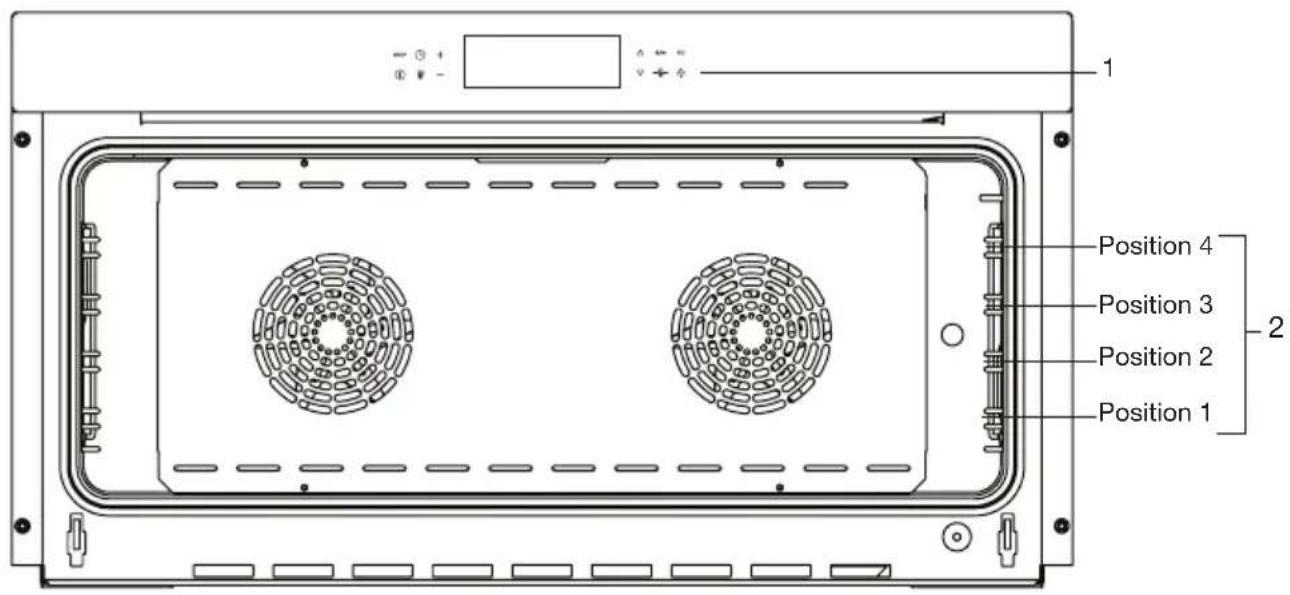
Position 4 Position 3 Position 2 Position 1- Control panel
- Rack positions
The following accessories are supplied with your oven:
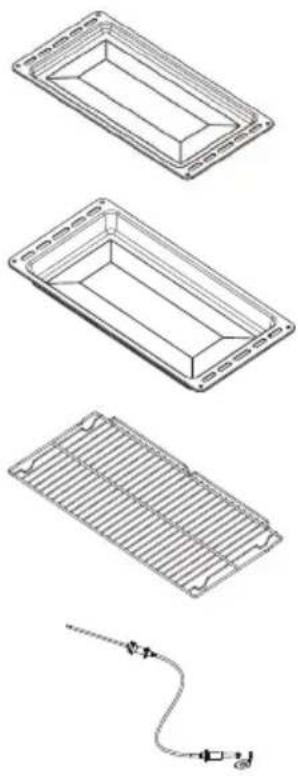
Baking tray: used for pastries and cakes.
Roasting tray: used for roasting meat and baking moist pastries. The roasting tray can also be used as a drip tray. Place the roasting tray in the first position to use as a drip tray during grilling.
Oven rack (2x): mainly used for grilling. The oven rack can also be used to place a dish or pan of food on.
Penetration thermometer: used to measure the core temperature of food.
Guide rails / Telescopic guide rails
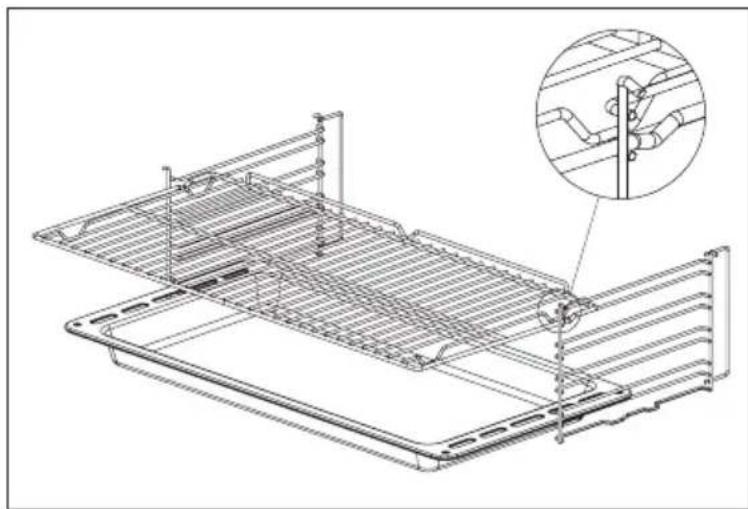
- The oven has four guide rails (positions 1 to 4). Position 1 is mainly used with bottom heat. The two upper positions are mainly used for grilling.
- Place the oven rack or tray in the space between the rail guides.
- Two of the rack positions have fully extendable telescopic guide rails:
Pull the telescopic guide rails until they are fully extended from the oven compartment, and place the oven rack or tray on them. Then slide the telescopic guide rails with oven rack/tray into the oven compartment.
Do not close the oven door until the telescopic guide rails have slid all the way into the oven compartment.

Do not use the telescopic guide rails on position 1!
Racks and trays have to be inserted into the guide rails until they come to a complete stop. The safety notches of the oven rack should point downwards and towards the back of the oven.
natural_image
Technical line drawing of a modular shelving unit with structural framework and a magnified inset showing hand positioning (no text or symbols)Door
- The door switches interrupt oven operation when the oven door is opened during use. ▶Operation resumes when the door is closed.
- This oven has a soft close door system. When the oven door is closed, this system dampens the closing force once the door reaches a certain angle so the door does not slam shut.
Cooling fan
The oven is equipped with a cooling fan that cools the housing and control panel.
Control panel
text_image
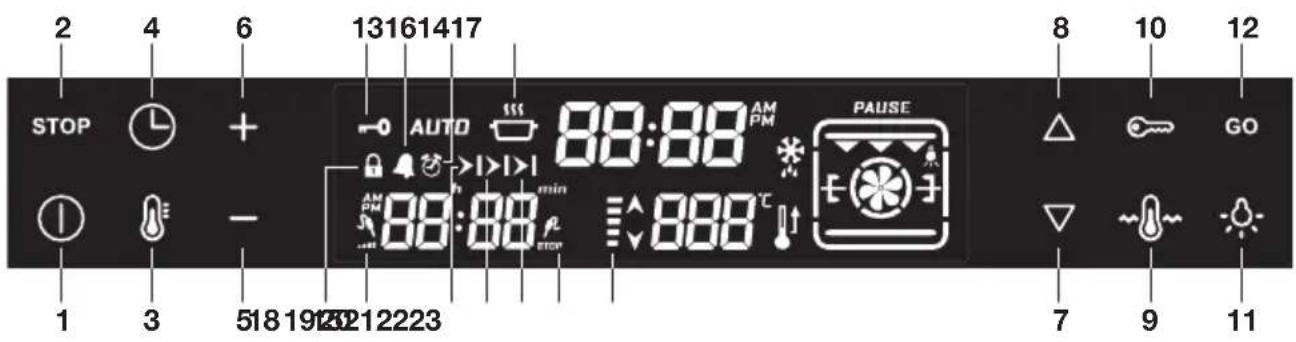
2 4 6 13161417 8 10 12 STOP AUTO 88:88 AM PM PAUSE Δ GO - 88:88 min 88:88 °C 1 3 518 19 20 21 22 23 7 9 11Buttons:
- On/off button
- Stop button
- Temperature button
- Timer button
- Button to decrease value
- Button to increase value
- Up navigation button
- Down navigation button
- Hold temperature button
- Child lock button
- Light button
- Start button
Symbols on the display:
- Child lock symbol
- Cooking symbol
- Lock symbol
- Cooking timer symbol
- Alarm symbol
- Cooking time symbol
- Change cooking time symbol
- Set cooking time symbol
- Current core temperature symbol
- Set core temperature symbol
- Temperature bars

For best results, press the buttons with as much of the fingertip as possible. Each time you press a button during operation a short tone sounds.
Oven functions table
Refer to the table below to choose the appropriate function. Also read the instructions on the packaging before preparing the food.

Use only oven dishes that can withstand a temperature of 250 °C .
| Function Description | |
 | Top heat + bottom heat• Heating with the top and bottom heating elements.• This mode can be used for traditional baking and roasting.• Place the oven rack/tray in position 2.• Preheating is recommended.• 50 - 250 °C |
 | Bottom heat• Heating with the bottom heating element only.• This mode can be used for casseroles and baked dishes that need a real bottom crust or browning.• Place the oven rack/tray in position 2.• Use this just before the end of the baking or roasting time.• 50 - 250 °C |
 | Top heat• Heating with the top heating element only.• This setting can be used when you want to bake/roast the top layer of your dish.• Place the oven rack/tray in position 2 or 3.• 50 - 250 °C |
 | Grill• Heating with the grill element.• This mode can be used for grilling sandwiches, baking pigs in the blanket, or toasting bread.• Place the oven rack in position 4/5 and the oven tray in position 2.• Monitor the cooking process regularly. The high temperature can cause the food to burn quickly.• Preheating is recommended. |
  | Top heat + grill• This function combines the top heat and grill functions.• Place the oven rack in position 4/5 and the oven tray in position 2.• Monitor the cooking process regularly. The high temperature can cause the food to burn quickly.Grill + fan• Heating with the grill element. The heat is circulated by the fan.• This setting can be used for grilling meat, fish, and vegetables.• Place the oven rack in position 4/5 and the oven tray in position 2.• Monitor the cooking process regularly. The high temperature can cause the food to burn quickly.• 50 - 250 °C |
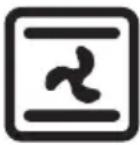 | Top heat + bottom heat + fan• Heating with the top and bottom heating elements. The heat is circulated by the fan.• Even temperature distribution allows simultaneous baking/roasting on two or even three different levels.• 50 - 250 °C |
 | Top heat + bottom heat + hot air• Heating with the top and bottom heating elements and the circular heating element (built into the back of the oven). The heat is circulated by the fan.• Even temperature distribution allows simultaneous baking/roasting on two or even three different levels.• 50 - 250 °C |
 | Hot air• Heating with the circular heating element (built into the back of the oven). The heat is circulated by the fan.• Even temperature distribution allows simultaneous baking/roasting on two or even three different levels.• 50 - 250 °C |
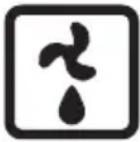 | Defrost• This function allows you to defrost food.• Place food without packaging in a dish without a lid in position 1. |
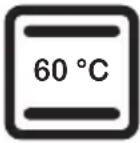 | Maintain temperature• This function is used to maintain a constant temperature of between 0 and 95 °C.• Used to keep food warm. |
 | Eco• Optimizes power consumption during cooking.• This function is mainly used for smaller amounts of food.• Baking times may be longer.• 60 - 200 °C |
Before using the appliance for the first time
- Open the door, remove all packaging material, and check the oven for damage. Do not install the oven if it is damaged; contact your supplier.
- Remove the protective film from the housing.
- Clean the oven compartment and accessories with a damp cloth. Do not use abrasive or strong-smelling detergents.
- Connect the oven to the mains.
The clock symbol and time 0:00 will flash. - Set the current time with the ‘-’ and ‘+’ buttons. Hold the ‘-’ and ‘+’ keys to change the time more quickly.
- Wait 5 seconds for the flashing to stop.
- Turn on your oven for an hour at 250 °C, top heat + bottom heat.
- Open the door to let the oven cool down. This way, the oven is ventilated and odours are eliminated from the inside.
- When the oven has cooled, clean it with warm water.

Smoke and odours are produced during this initial operation. Therefore, make sure the kitchen is well ventilated.
- Preparation times are rough estimates and may vary depending on several conditions.
- Some recipes require the oven to be preheated.
- If you use baking parchment, it must be able to withstand high temperatures.
- While cooking larger pieces of meat or food containing dough, such as a pasty pie, a lot of steam is released that can condense on the oven door. This is a normal occurrence that does not affect the functioning of the appliance. After the cooking process is finished, wipe the door and glass dry.
Note!
- When the oven is heated to high temperature for the first time you will notice a new appliance smell. This is normal.
- The temperature can be changed during cooking.
- Avoid the formation of condensation, and do not let heated food cool in a closed oven.
Using oven functions
The oven has 12 oven functions. Refer to the oven functions table to choose the right oven function for preparing the food.
Selecting an oven function
- Select an oven function using the navigation buttons.
The selected function flashes on the function display for 7 seconds, and the temperature display shows the default temperature assigned to that function. (Note that for certain functions temperature control is not possible and the temperature display is therefore blank.)
If the preparation symbol is constantly lit on the status display while the pause symbol is flashing, this indicates that it is possible to start preparation, but that preparation has not yet started.
Changing the default temperature setting
The default temperature can be changed as follows.
- Press the temperature button.
The temperature display starts flashing.
- Set the desired value in 5-degree increments with the ‘-’ or ‘+’ key.

To permanently change the default temperature for this function, press and hold the temperature button for about 5 seconds after setting until you hear a beep. The factory-set temperature for this function is now permanently changed.
Starting and stopping the preparation process
- Once a function has been selected and a different temperature set if required, the cooking process can be started by pressing the start button.
▶ Cooking continues until manually ended or until the end of the maximum allowed cooking time, which depends on the selected temperature.
Pausing, changing, or ending cooking
- Press the stop button to interrupt cooking.
The pause symbol starts flashing. All oven heating elements and the fan are temporarily switched off.
The settings (function, temperature, etc.) can now be changed.
▶ Press the start button to resume cooking with the changed settings.
- Press the stop button twice to end cooking.
All settings on the display disappear. The temperature display shows the residual heat level, if any (see: residual heat indicator).

After cooking is finished, pressing the start button will show the last set function and temperature on the display; pressing the start button again will resume cooking.
Setting the cooking time
By setting the cooking time, the oven will automatically stop when this time has elapsed.
-
Select the desired function and (if necessary) adjust the temperature as described previously.
-
Press the timer button.
The change cooking time symbol on the timer display flashes.
- Set the desired cooking time using the '-' and '+' buttons.
The auto symbol appears on the status display. (If the duration is shortened to 0:00, two warning beeps sound).
- When you press the start button, the pause symbol disappears and cooking begins.
The end of the cooking time is displayed together with the set cooking time symbol on the timer display.
Delayed start
Use the delayed start function to start cooking at a later time by setting the desired end time.
-
Perform steps 1 to 3 of 'Setting the cooking time'.
-
Press the timer button again.
The set cooking time symbol flashes on the timer screen along with the current end time.
-
Set the desired end time with the '-' and '+' buttons.
-
Press the start button. Cooking will start automatically at the calculated start time.
The end of the cooking time is displayed together with the set cooking time symbol on the timer display.
Penetration thermometer
If the penetration thermometer is connected, the oven is heated until the set core temperature of the food is reached.
- Plug the penetration thermometer into the socket (top-right corner inside the oven) and fully insert the penetration thermometer into the food.
- Select the desired function.
- Press the timer button.
The timer display shows two temperatures: the current core temperature on the left, and the desired core temperature (flashing) on the right.
- Set the desired core temperature with the '-' and '+' buttons.
- Press the start button to start cooking.
▶Cooking stops when the set core temperature is reached.
Changing settings during cooking with core temperature
- Press the timer button to change the set core temperature during cooking.
The pause symbol starts flashing.
Adjust the set core temperature using the '-' or '+' button.
▶Press the start button to resume cooking.
- Press the temperature button to change the set oven temperature during cooking.
The pause symbol starts flashing.
Adjust the set oven temperature using the '-' or '+' button.
▶Press the start button to resume cooking.
- Press one of the navigation buttons to change the set oven function during cooking.
▶ Press the up or down navigation button until the desired oven function is selected.
▶Press the start button to resume cooking.

- Always place the metal sensor of the penetration thermometer completely into the food.
- Use the penetration thermometer in the oven only.
- The penetration thermometer must not come into contact with the heating element during the cooking process.
- After the cooking process the core thermometer is very hot. Be careful! Prevent burns.
Temperature bars
- During cooking, the 5 bars on the temperature display indicate the current oven temperature.
Each bar represents one-fifth of the set temperature.
- The up arrow next to the bars flashes if the heating elements are currently active.
End of the set cooking time
- After cooking ends automatically, the temperature bars indicate the residual heat, if any (see: residual heat indicator).
The auto symbol flashes and the alarm sounds for 7 minutes.
- Pressing the stop button stops the sound.
Residual heat indicator
- If the temperature inside the oven is over 60 °C after cooking, the down arrow to the right of the temperature bars flashes every two seconds and ‘hot’ is shown on the temperature display.
▶Each of the five temperature bars now represents 60 °C.
- This indication remains on until the oven temperature drops below 60^ .
Maintain temperature
It is possible to set a constant temperature between 0 and 95 °C for keeping dishes warm.
- Press the hold temperature button.
- Press the temperature button.
- Set the desired temperature between 0 and 95 °C with the '+' and '-' buttons.

Maintain temperature is only possible in top+bottom heat mode. If maintain temperature is selected in any other mode, the top+bottom heat function is shown on the display.
Locking function
The oven control panel can be locked with the child lock to prevent unintended use of the oven.
- The child lock can be activated by pressing the child lock button for one second until the lock symbol appears on the display.
- When the child lock is activated, only the on/off button can be used.
- The child lock can be deactivated by pressing the child lock button again for one second.
Oven light
- The oven light turns on automatically when the oven door is opened or the oven is switched on.
• After the cooking process is finished the light stays on for another minute. - You can switch the oven light on or off by pressing the light button.
Cooking timer
The cooking timer can be used independently of the oven.
- Press the timer button until the cooking timer symbol starts flashing on the display.
- Set the time in minutes with the '-' and '+' buttons.
- The flashing stops after 7 seconds and the time starts running.
- After the set time elapses, an audible alarm sounds for 7 minutes. This alarm can be stopped by pressing the ‘-’ or ‘+’ key.
Alarm
- Press the timer button until the alarm symbol starts flashing on the display.
- Set the alarm time using the '-' and '+' buttons.
- The flashing stops after 7 seconds and the time starts running.
- After the set time expires, an audible alarm sounds. This alarm can be stopped by pressing the '-' or '+' key.
Setting the oven
Setting alarm tone
3 alarm tones are available.
- Press the '-' button for 5 seconds.
The time display shows the currently set alarm tone as ‘tn 1’ (high), ‘tn 2’ (medium), or ‘tn 3’ (low).
- The set alarm tone can be changed by pressing the '-' button again within 7 seconds.
The default alarm tone is 'tn 1'.
Setting button tone
3 button tones are available.
- Press the '+' button for 5 seconds.
The time display shows the currently set tone as 'bt tn' (beep tone), 'cl tn' (click tone), or 'nt' (no tone).
- The set button tone sound can be changed by pressing the '+' key again within 7 seconds.
The default button tone is 'bt tn'.
Setting 24h/12h mode
- Press the '+' and '-' buttons simultaneously for 5 seconds to set the 12h AM/PM mode.
The time display mode changes and a tone sounds.
- To switch back, perform the same action.
The default mode is 24 hours.
Cleaning the appliance
Clean the appliance regularly to prevent grease and food residues from accumulating, especially on the interior and exterior surfaces, door, and seal.
- Clean the exterior surfaces with a soft cloth and warm soapy water.
- Wipe with a clean wet cloth afterwards and dry the surfaces.
- Remove splashes and stains on interior surfaces with a soapy cloth.
- Wipe with a clean wet cloth afterwards and dry the surfaces.
- Clean the guide rails with warm soapy water and dry them before placing them back in the oven.

Important:
• Make sure NO water gets into the vent openings.
- NEVER use abrasive cleaning agents or chemical solvents.
- DO NOT use abrasives or metal scrapers to clean the glass oven door. This scratches the surface, which can cause the glass to crack.
• DO NOT use a pressure washer or steam cleaner to clean the oven.
- If the oven seal is heavily soiled, the door will not close properly. Adjacent cabinet fronts may be damaged. Keep the seal clean.
Remove all accessories, including the guide rails, before every cleaning.
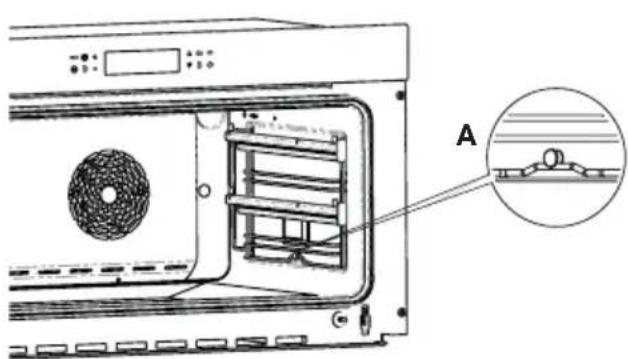
Removing the guide rails
- Push the rack support down to release it from the pin (A).
- Lift up the rack support (B).
natural_image
Technical diagram of an oven with internal structure and labeled component A (no text or symbols beyond label)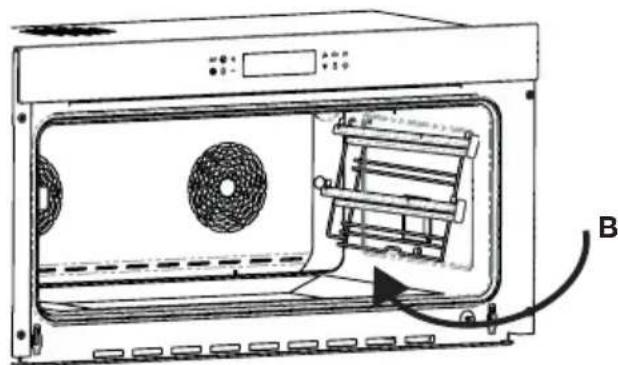
natural_image
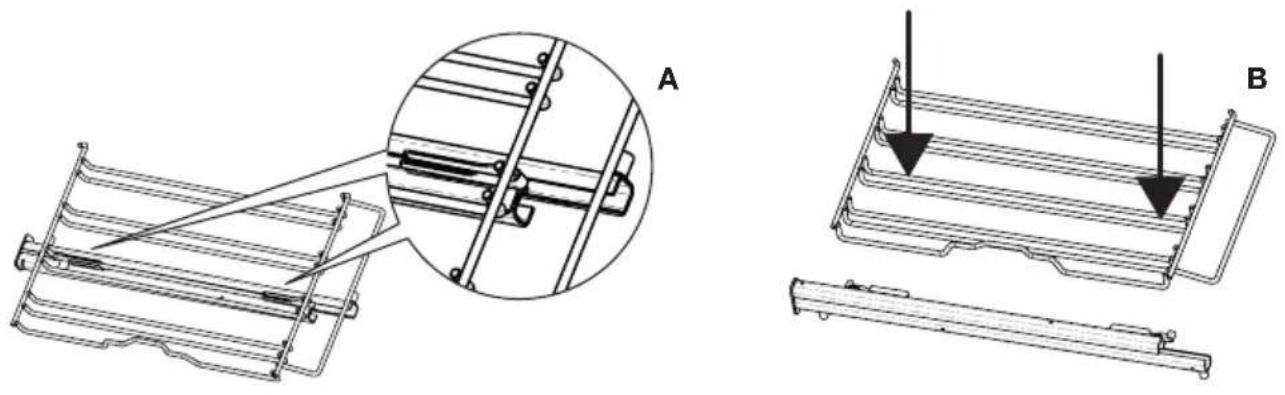
Technical line drawing of an oven with fan and cooling unit (no text or symbols)Removing the telescopic guide rails
- Turn the rack support and press the hooks on both sides with your finger to remove the telescopic guides (A).
- Push against the telescopic guide rail to remove it from the rack support (B).
natural_image
Technical line drawings of mechanical components, showing assembly and disassembly views (no text or symbols)Removing and fitting the oven door
To make cleaning easier, it is recommended to remove the door.
- Open the door until it is fully open.
- Lift both locking levers slightly and pull them towards the oven door (A).
- The hinges are locked at a 45^ angle.
-
Carefully close the door slightly until it is at a 45^ angle.
-
Remove the door by lifting it and tilting it towards the oven (B). The hinges should come out of the slots in the oven.

natural_image
Technical line drawings of a microwave oven with labeled components (A and B) and 45° angle annotation (no text or symbols beyond labels)To reinstall the door, insert the hinges into the corresponding mounting points and then return the two levers to the closed position.
Removing and fitting the oven door glass
To clean the inner glass in the oven door, the glass must first be removed from the oven door.
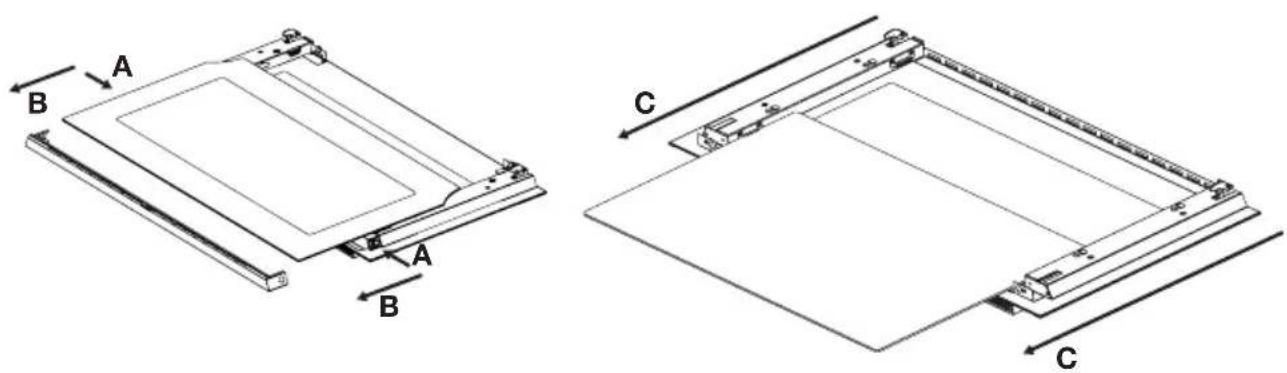
- Press the two buttons on the sides of the door (A), remove the top profile (B), and carefully remove the glass.
The oven has a third pane of glass, located between the oven door and the inner glass.
• After removing the inner glass, the third pane of glass can be removed in the same way, in the direction of the arrows (C).
- Fitting the glass is done in reverse order. Then press the top profile in place until you hear a click.
natural_image
Technical line drawings of two mechanical components with labeled dimensions (A, B) and alignment arrows (C), no readable text or symbols present.Replacing the oven lamp

- Disconnect power to the oven by unplugging the power lead or switching off the circuit breaker in the meter cupboard.
- Note: The bulb can be very hot! Use gloves or other protection when removing the bulb.
- First, remove the oven tray, oven rack, and guide rails.

This product contains a light source of energy efficiency class G.
Light on the back wall of the oven
- Turn the glass protection cover anti-clockwise to remove it.
- Pull the bulb out of the socket, and insert a new one (25W, G9 halogen type).
- Fit the glass protection cover
Light on the side wall of the oven
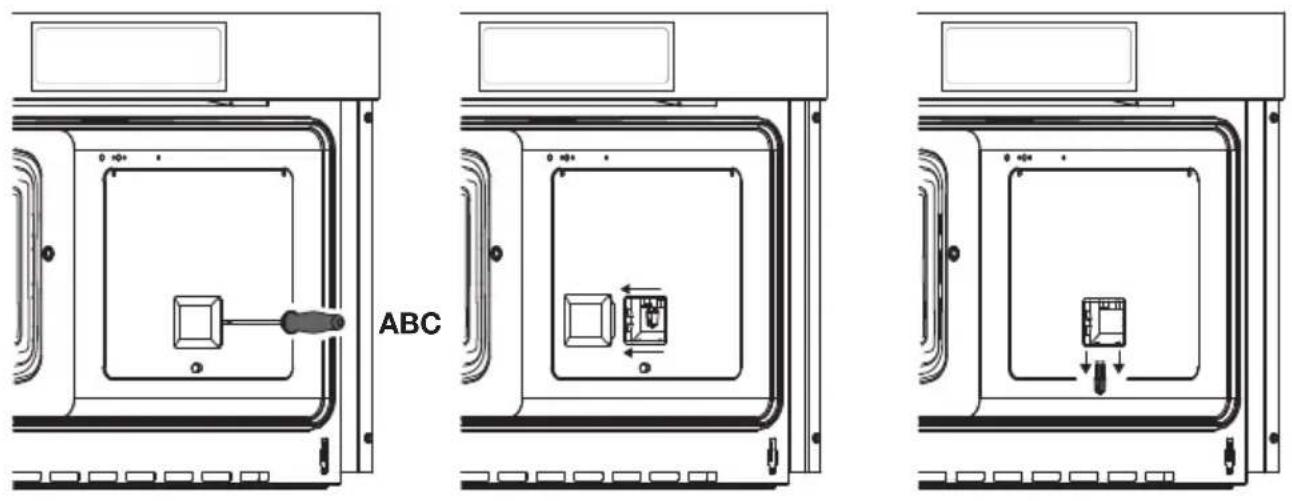
- Use a flathead screwdriver to snap off the cover (A), and remove it from the holder (B).
- Carefully pull down the bulb (C), and insert a new one (25W, G9 halogen type).
- Replace the cover.
text_image
ABCTroubleshooting
Try the solutions below if you have problems with your oven. You may save yourself the time and effort of an unnecessary call to customer service.
The food remains raw
- Check that the cooking timer is set correctly.
- Check that the door is closed properly.
- Check whether mains voltage is present (circuit breaker in meter cupboard/plug in socket).
The food is overcooked or not cooked enough
- Check that the correct oven function and temperature have been selected.
- Check that the correct cooking time has been set.
Condensation forms in the oven
- This is normal. Wipe the oven clean after use.
Fan continues to operate after oven is switched off
- This is normal. The cooling fan continues to operate for some time after the oven is switched off.
Airflow is felt near the door and the outside the appliance
- This is normal.
Steam escapes around the door or vents
- This is normal.
The circuit breaker trips frequently
- Consult a service technician.
The display shows an error code: ERR XX
(XX indicates the number of the error)
When situations occur that prevent normal operation, the appliance goes into error mode. The appliance is in standby mode, and an error code is displayed on the time display.
- Try to clear the error code by pressing the stop button.
- If this does not work, try disconnecting the oven from the power supply, and reconnect it after 2 minutes.
- Consult a service technician if the error persists.
Storing and repairing the oven
- Repairs may only be carried out by a qualified service technician. If maintenance is required, unplug the appliance and contact customer service.
Please have the following information to hand when calling:
- The model number and serial number (shown on the inside of the oven door).
- Warranty details.
- A clear description of the problem. The data plate shows the power rating and the required voltage and frequency.
This device complies with all relevant CE directives.
| Model OX97 | __B |
| Supply power 220-240 V~ at 50-60 Hz | |
| Power consumption | |
| Lighting | 50 W |
| Maximum power | 3150 W |
| Grill | 1800 W |
| Top element | 1200 W |
| Bottom element | 1800 W |
| Hot-air element | 3000 W |
| Cooling method Motor cooling fan | |
| Dimensions | |
| Appliance dimensions: W 895 x H 485 x D 555 mm | |
| Volume (net) 103 L | |
Disposal of the appliance and packaging
This product is made from sustainable materials. However, the appliance must be disposed of responsibly at the end of its useful life. The government can provide you with information about this.
The appliance packaging can be recycled. The following materials have been used:
- cardboard;
• polyethylene film (PE);
• CFC-free polystyrene (hard PS foam).
Dispose of these materials responsibly in accordance with legal provisions.
text_image
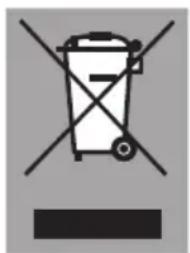
Prohibition sign with a trash bin and crossed-out lines, indicating no waste or discharge.The product has a pictogram of a crossed-out waste container. This indicates that household appliances must be disposed of separately. This means that the appliance may not be processed via the regular waste flow at the end of its useful life. You should take it to a special municipal waste depot or a sales outlet that offers to do this for you.
Collecting household equipment separately prevents harm to the environment and public health. The materials used in manufacturing this appliance can be recycled, which provides considerable savings in energy and raw materials.

Declaration of conformity
We hereby declare that our products conform to the applicable European directives, decrees, and regulations, as well as all requirements in the standards to which reference is made.

text_image
Warning symbol with exclamation mark inside a triangleThe appliance identification plate is located inside the appliance.
When contacting the service department, have the complete type number at hand.
Addresses and telephone numbers of the service organization can be found on the warranty card.
www.atag.nl
www.atag.be
ATAG

919565
