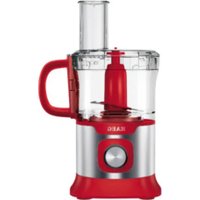
EASYCOMPACT FP5200 - Food processor AEG - Free user manual and instructions
Find the device manual for free EASYCOMPACT FP5200 AEG in PDF.


User questions about EASYCOMPACT FP5200 AEG
0 question about this device. Answer the ones you know or ask your own.
Ask a new question about this device
Download the instructions for your Food processor in PDF format for free! Find your manual EASYCOMPACT FP5200 - AEG and take your electronic device back in hand. On this page are published all the documents necessary for the use of your device. EASYCOMPACT FP5200 by AEG.
USER MANUAL EASYCOMPACT FP5200 AEG
natural_image
Exterior view of a modern kitchen blender with visible brand logo and control panel (no text or symbols on the device itself)FOOD PROCESSOR EASYCOMPACT FP5XX
GB Instruction book 21–27
Before using the appliance for the first time, please read the safety advice on page 22 carefully.
text_image
Exploded view diagram of a blender with labeled parts including blender, blender, and various kitchen appliancesD
Teile
A. Motorgehäuse
B. Mixerbehälter*
C. Mixerdeckel*
D. Messbecher*
natural_image
Product catalog image showing various kitchen appliances including a blender, water dispenser, and kitchen utensils (no text or labels visible)
natural_image
Illustration of a blender with a cup pouring into it, accompanied by three circular insets showing food items (no text or symbols)-
Stellen Sie die Küchenmaschine auf eine ebene Fläche. Setzen Sie die Achse in den Zapfen in der Mitte der Universalschüssel. Setzen Sie die Universalschüssel ein und verriegeln Sie sie im Motorgehäuse. Wenn der Pfeil mit der Markierung „Locked“ übereinstimmt, ist die Schüssel fest arretiert. Setzen Sie, je nach Verwendungszweck, den ausgewählte Einsatz auf die Achse.
-
Τοποθετήστε το μπλέντερ σε μια επίπεδη επιφάνεια. Τοποθετήστε τον άξονα στον υποδοχέα στο κέντρο του μπολ γενικής χρήσης. Τοποθετήστε το μπολ γενικής χρήσης στη θέση του και ασφαλίστε το στο περίβλημα του κινητήρα. Όταν το βέλος έχει ευθυγραμμιστεί με την ένδειξη «Locked», το μπολ έχει ασφαλίσει στη θέση του. Ανάλογα με τη χρήση, τοποθετήστε το επιλεγμένο εργαλείο στον άξονα.
-
Plaats de keukenrobot op een vlak oppervlak. Bevestig de spil op het insteekeinde in het midden van de universele kom. Plaats de universele kom op zijn plaats en bevestig deze aan het motorhuis. Als de pijl is uitgelijnd met de "Locked" (gesloten)-aanduiding, is de kom op zijn plaats vergrendeld. Afhankelijk van het doel, bevestig het hulpmiddel op de spil.
-
Installez le robot ménager sur une surface plane. Installez la tige de rotation sur le couplage d'entraînement situé au centre du bol multi-usages. Posez le bol multi-usages sur le bloc moteur et verrouillez-le. Lorsque la flèche est alignée avec l'indicateur « verrouillé », le bol se verrouille en place. En fonction de votre utilisation du robot, placez l'outil choisi sur la tige de rotation.
natural_image
Illustration of a blender with labeled parts A and B, showing a brush and handle assembly (no text or symbols beyond labels)-
Geben Sie die Zutaten in die Schüssel. (Überschreiten Sie nicht die maximale Füllmenge: Flüssigkeit 400 ml, feste Zutaten 1000 ml.) Schließen Sie den Deckel (A), setzen Sie den Stopfer in den Einfüllschacht (B) ein und verriegeln Sie ihn. Stecken Sie den Stecker in die Steckdose.
-
Προσθέστε τα υλικά στο μπολ. (Μην υπερβαίνετε το μέγιστο όγκο πλήρωσης: υγρά 400 ml, στερεά 1000 ml.) Κλείστε το καπάκι (Α) και τοποθετήστε το έμβολο στομίου τροφοδοσίας στο στόμιο τροφοδοσίας (Β) και ασφαλίστε το στη θέση του. Συνδέστε το φις στην πρίζα τοίχου.
-
Doe de ingrediënten in de kom. (Overschrijd het maximumvolume niet: vloeistof 400 ml, vaste ingrediënten 1000 ml.) Sluit het deksel (A) en steek de duwer in de toevoertoren (B) en vergrendel deze op zijn plaats. Steek de stekker in het stopcontact.
-
Mettez les ingrédients dans le bol. (Ne dépassez pas le volume de remplissage maximal : ingrédients liquides 400 ml, ingrédients solides 1 000 ml.) Fermez le couvercle (A), insérez le poussoir dans la cheminée de remplissage (B) et verrouillez-le en place. Branchez l'appareil.
natural_image
Illustration of a blender with a funnel and handle (no text or symbols)natural_image
Illustration of a blender with a circular inset showing a dial labeled 0, 1, 2 (no text or symbols on the main device)-
Schalten Sie die Küchenmaschine durch Drehen des Geschwindigkeitsreglers auf die Position „0“ aus. Drehen Sie nach dem Gebrauch den Deckel entgegen dem Uhrzeigersinn und entfernen Sie ihn. Nehmen Sie erst den Deckel ab, wenn der Einsatz zum Stillstand gekommen ist. Nehmen Sie den Einsatz heraus, drehen Sie die Schüssel gegen den Uhrzeigersinn und entfernen Sie sie. Entfernen Sie die Achse.
-
Απενεργοποιήστε το μπλέντερ, στρέφοντας τον επιλογέα ταχύτητας στη θέση «0». Μετά τη χρήση, στρέψτε το καπάκι προς τα αριστερά και αφαιρέστε το. Αφαιρείτε το καπάκι μόνον αφού έχει σταματήσει πλήρως η περιστροφή του εργαλείου. Αφαιρέστε το εργαλείο, στρέψτε το μπολ προς τα αριστερά και αφαιρέστε το. Αφαιρέστε τον άξονα.
-
U kunt de keukenrobot uitschakelen door de snelheidselector naar de stand "0" te draaien. Na gebruik draait u het deksel naar links en verwijdert u het deksel. Verwijder het deksel niet wanneer het hulpmiddel nog aan het draaien is. Verwijder het hulpmiddel, draai de kom naar links en verwijder deze. Verwijder de spil.
-
Éteignez le robot en mettant le sélecteur de vitesse sur « 0 ». Lorsque vous avez terminé, tournez le couvercle vers la gauche et enlevez-le. Ne retirez le couvercle que si l'appareil s'est totalement arrêté. Retirez l'accessoire, tournez le bol vers la gauche et enlevez-le. Enlevez la tige de rotation.
natural_image
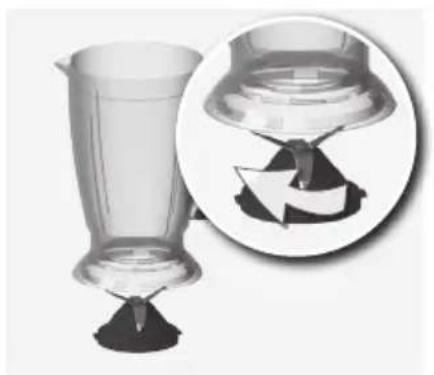
Illustration of a blender with a circular inset showing a recycling symbol (no text or labels)- Zusammenbau des Mixers: Halten Sie den Mixerbehälter nach oben und setzen Sie die Messereinheit ein. Drehen Sie die Messereinheit im Uhrzeigersinn fest. Vorsicht! Die Messer sind sehr scharf!
- Συναρμολόγηση του μπλέντερ: κρατήστε την κανάτα του μπλέντερ όρθια και εισαγάγετε τη διάταξη λεπίδων. Στρέψτε τη διάταξη λεπίδων προς τα δεξιά για να την ασφαλίσετε. Προσοχή! Οι λεπίδες είναι πολύ αιχμηρές!
- De blender monteren: houd de blenderkan rechtop en breng het messengeheel in. Draai het messengeheel naar rechts om het vast te zetten. Let op! De messen zijn zeer scherp!
- Montage du mixeur : maintenez le bol mixeur à la verticale et insérez le bloc de la lame. Tournez le bloc de la lame vers la droite pour le fixer. Attention ! Les lames sont très coupantes !
natural_image
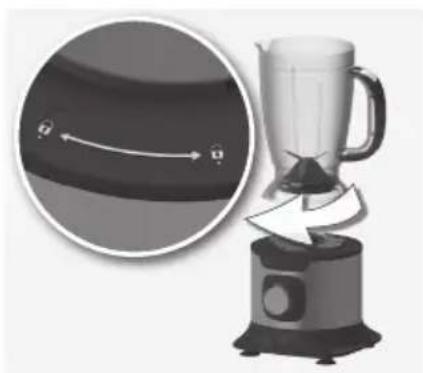
Illustration of a blender on a base with a magnified inset showing the blade edge (no text or symbols)- Rasten Sie den Mixerbehälter im Motorgehäuse ein. Wenn der Pfeil mit der Markierung „Locked“ übereinstimmt, ist der Behälter arretiert. Geben Sie die Zutaten in den Behälter. (Überschreiten Sie nicht die maximale Füllmenge von 1,2 Litern)
- Ασφαλίστε την κανάτα του μπλέντερ στη θέση της πάνω στο περίβλημα του κινητήρα. Όταν το βέλος έχει ευθυγραμμιστεί με την ένδειξη «Locked», η κανάτα έχει ασφαλίσει στη θέση της. Προσθέστε τα υλικά στην κανάτα. (Μην υπερβαίνετε το μέγιστο όγκο πλήρωσης των 1,2 λίτρων)
- Vergrendel de blenderkan op het motorhuis. Als de pijl is uitgelijnd met de "Locked" (gesloten)-aanduiding, is de kan op zijn plaats vergrendeld. Doe de ingrediënten in de kan. (Overschrijd het maximumvolume van 1,2 liter niet)
- Verrouillez le bol mixeur en place sur le bloc moteur. Lorsque la flèche est alignée avec l'indicateur « verrouillé », le bol mixeur est verrouillé en position. Mettez les ingrédients dans le bol mixeur. (Ne dépassez pas le volume de remplissage maximal de 1,2 litres.)
natural_image
Illustration of a blender with a handle and lid, no text or symbols presentnatural_image
Exterior view of a modern blender with handle and lid (no text or symbols visible)natural_image
Illustration of a blender with a circular inset showing a drop labeled '0 1 2' (no text or symbols on the main objects)natural_image
Illustration of a kitchen brush with a paper roll and a small electrical outlet (no text or symbols)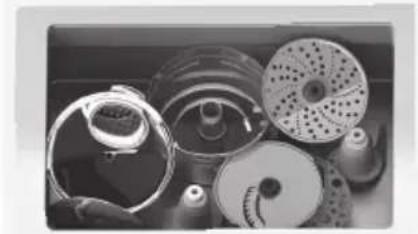
natural_image
Black-and-white photo of various mechanical components including gears, spools, and a wheel (no visible text or symbols)D
natural_image
Illustration of a blender with a plastic bottle beside it (no text or symbols)natural_image
Illustration of a blender with a side view showing its interior design (no text or symbols)- Sie können den Behälter auch im Geschirrspüler reinigen, müssen dann aber erst die Messereinheit herausnehmen.
Drehen Sie die Messereinheit gegen den Uhrzeigersinn, um sie zu entfernen. Neigen Sie sie dabei leicht. Reinigen Sie die Messereinheit nicht im Geschirrspüler. Reinigen Sie die Messereinheit mit Wasser und Spülmittel.
Vorsicht! Seien Sie vorsichtig, die Messer sind sehr scharf! - Μπορείτε επίσης να πλύνετε την κανάτα στο πλυντήριο πιάτων, αλλά πρέπει πρώτα να αφαιρέσετε τις λεπίδες. Για να αφαιρέσετε τη διάταξη των λεπίδων, στρέψτε την προς τα αριστερά και αφαιρέστε την, ενώ την κρατάτε ελαφρώς υπό γωνία. Μην πλένετε τη διάταξη των λεπίδων στο πλυντήριο πιάτων. Ξεπλύνετε τη διάταξη των λεπίδων με νερό και απορρυπαντικό.
Προσοχή! Χειριστείτε τις λεπίδες με προσοχή, καθώς είναι πολύ αιχμηρές! - U kunt de kan ook in de vaatwasser schoonmaken, maar u dient eerst de messen te verwijderen. Om de messen te verwijderen, draait u deze naar links terwijl u deze in een lichte hoek houdt. Reinig het messengeheel niet in de afwasautomaat. Spoel het messengeheel in water en afwasmiddel.
Let op! Wees voorzichtig, de messen zijn erg scherp! - Vous pouvez aussi nettoyer le bol mixeur au lave-vaisselle mais vous devez d'abord enlever les lames.
Pour libérer le bloc de lame, tournez-le vers la gauche et retirez-le en le tenant légèrement incliné. Ne nettoyez pas le bloc de lame au lave-vaisselle. Rincez le bloc de lame à l'eau et au produit à vaisselle.
Attention ! Manipulez les lames avec précaution car elles sont très coupantes !
D
text_image
Exploded view diagram of a blender with labeled parts including blender, blender, and various kitchen appliancesGB
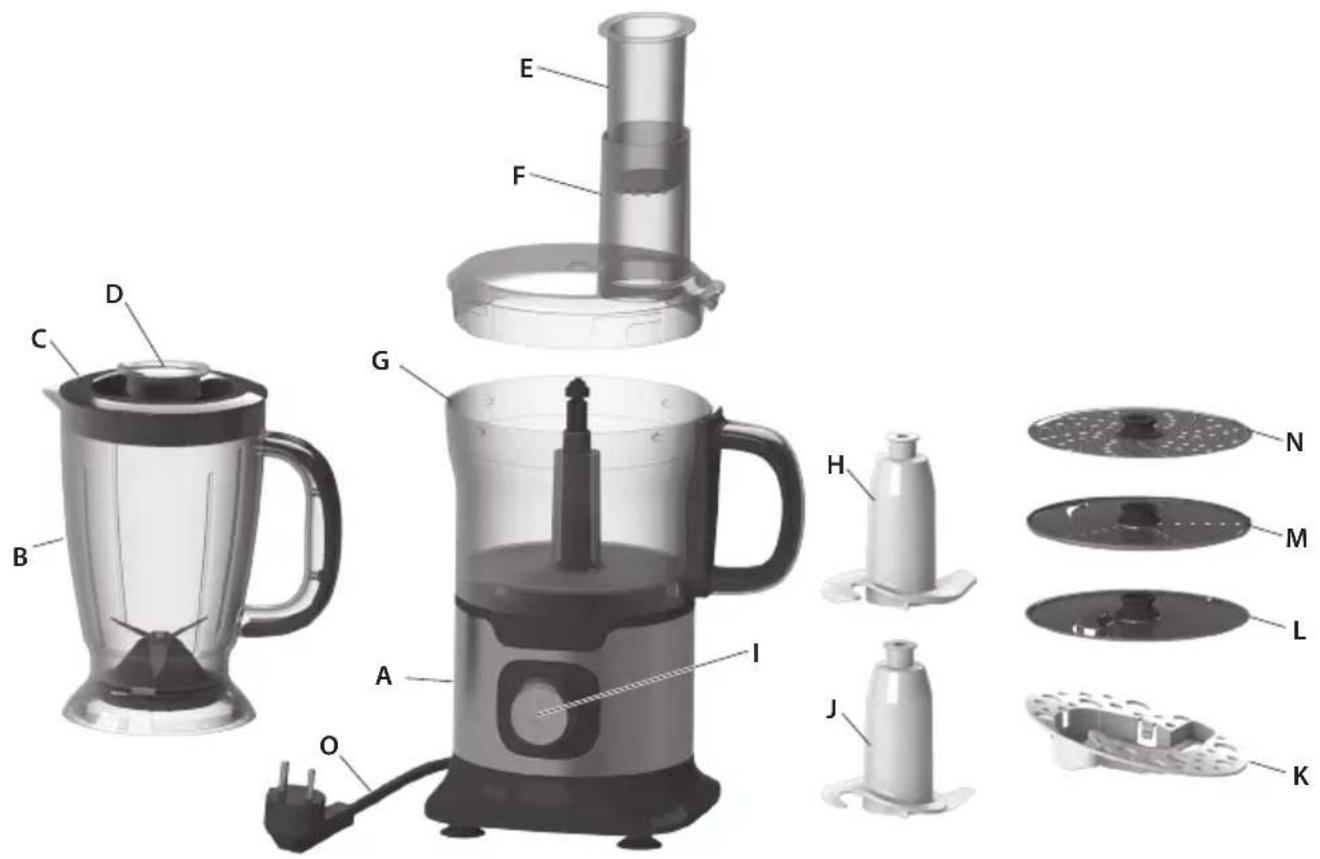
Components
A. Motor housing
B. Blender jug*
C. Lid for the blender*
D. Measuring cup*
E. Feed tower pusher
F. Feed tower
G. All-purpose bowl
H. Dough knife
I. Speed selector with PULSE function
J. Multi knife
K. Whisk disc
L. French fries disc
M. Reversible shredding/cutting disc
N. Potato disc/Course shredding disc
O. Power cord
* Depending on model
Safety advice
GB
Read the following instruction carefully before using the appliance for the first time.
- This appliance is not intended for use by persons (including children) with reduced physical, sensory or mental capabilities, or lack of experience and knowledge, unless they have been given supervision or instruction concerning use of the appliance by a person responsible for their safety.
• Children should be supervised to ensure that they do not play with the appliance. - The appliance may only be connected to a power supply whose voltage and frequency comply with the specifications on the rating plate!
- Never use or pick up the appliance if – the supply cord is damaged, – the housing is damaged.
- The appliance must only be connected to an earthed socket. If necessary an extension cable suitable for 10 A can be used.
- If the appliance or the supply cord is damaged, it must be replaced by the manufacturer, its service agent or similarly qualified person, in order to avoid hazard.
• Always place the appliance on a flat, level surface.
• Always disconnect the appliance from the supply if it is left unattended and before assembling, disassembling or cleaning.
- Never touch the blades or inserts with your hand or any tools while the appliance is plugged in.
- The blades and inserts are very sharp! Danger of injury! Caution when assembling, disassembling after use or when cleaning! Ensure that the appliance is disconnected from the mains supply.
• Do not immerse the appliance in water or any other liquid.
- Do not let the blender run for more that 2 minutes at a time using heavy loads. After running for 2 minutes with heavy loads, the blender should be left to cool for at least 3 minutes.
- Do not exceed the maximum filling volume as indicated on the appliances.
- Never process boiling liquids (max 60 degrees).
- Do not use this appliance to stir paint. Danger, could result in an explosion!
• Never operate appliance without lid.
- This appliance is intended for domestic use only. The manufacturer cannot accept any liability for possible damage caused by improper or incorrect use.
Disposal
Disposal
Packaging materials
The packaging materials are environmentally friendly and can be recycled. The plastic components are identified by markings, e.g. >PE<, >PS<, etc. Please dispose of the packaging materials in the appropriate container at the community waste disposal facilities.
Old appliance

The symbol ■ on the product or on its packaging indicates that this product may not be treated as household waste. Instead it shall be handed over to the applicable collection point for the recycling of electrical and electronic equipment. By ensuring this product is disposed of correctly, you
will help prevent potential negative consequences for the environment and human health, which could otherwise be caused by inappropriate waste handling of this product. For more detailed information about recycling of this product, please contact your local city office, your household waste disposal service or the shop where you purchased the product.
Getting started
natural_image
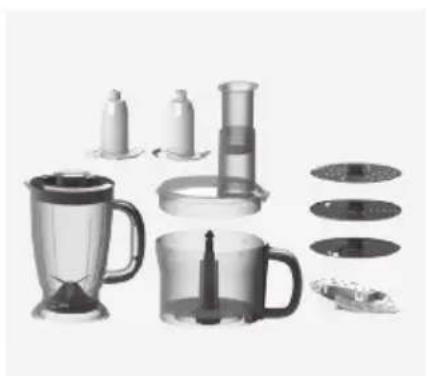
Product photo of kitchen utensils including blender, condenser, and cleaning tools (no text or labels visible)- Before using the food processor for the first time, wash all parts except for the motor housing.
natural_image
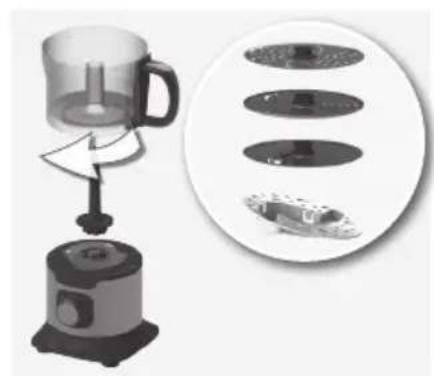
Illustration of a blender with a handle and control panel, alongside three circular insets showing different food items (no text or symbols)- Place the food processor on a flat surface. Place the spindle on spigot in centre of all-purpose bowl. Place the all-purpose bowl into position and lock into the motor housing. When the arrow is aligned with the "Locked" indicator, the bowl is locked in position. Depending on purpose place the selected tool on the spindle.
natural_image
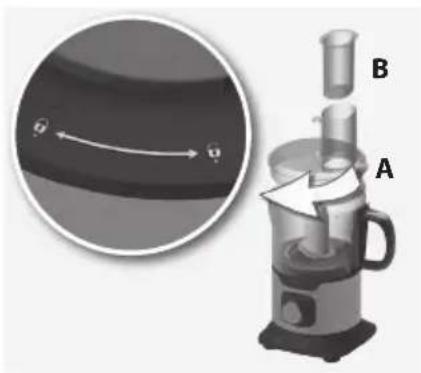
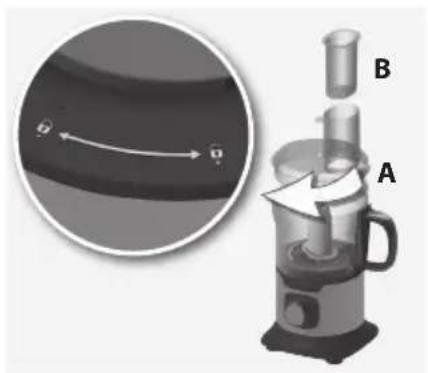
Illustration of a blender with labeled parts A and B, showing internal components and a magnified view of the lid (no text or symbols beyond labels)- Put the ingredients in the bowl. (Do not exceed the maximum filling volume: liquid 400 ml, solid 1000 ml.) Close the cover (A) and insert the feed tower pusher into the feed tower (B) and lock into position. Insert the plug in the main socket.
natural_image
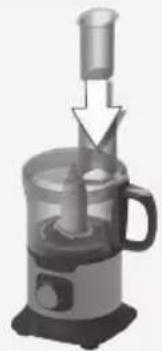
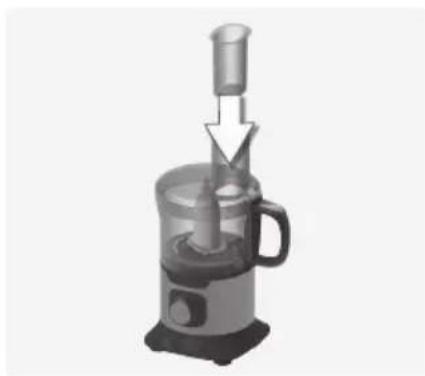
3D rendering of a kitchen blender with handle and spout (no text or symbols visible)- Further ingredients can be added during operation through the feed tower. Close the feed tower immediately after, to avoid splashing. Use the feed tower pusher exclusively to compress the cutting items!

text_image
PULSE 0 1 2- Start the food processor by turning the speed selector to required speed. For using the PULSE function turn the Speed selector to position "PULSE". Use speed setting 1-2 for normal work, the food processor can be used up to 3 minutes without stopping. For heavy work, (bread dough) the appliance should not be switched on more than 90 seconds without stopping.
natural_image
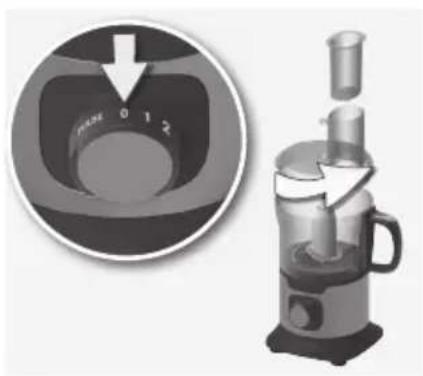
Illustration of a blender with a circular dial and a side-view inset showing the interior (no text or symbols)- Switch off the food processor by turning the speed selector to the "0" position. After use, turn the cover counter-clockwise and remove. Only remove the cover when the tool has stopped completely. Remove the tool, turn the bowl counter-clockwise and remove. Remove the spindle.
Getting started
natural_image
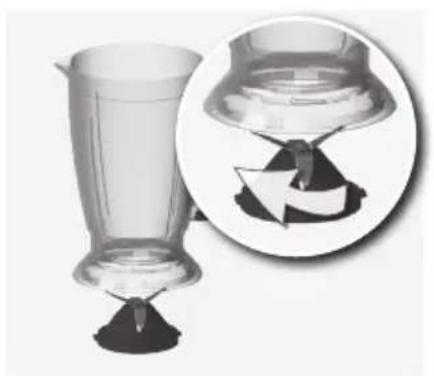
Illustration of a glass with a drop in liquid and a magnified inset showing a circular arrow symbol (no text or labels)- Assembling the blender: hold the blender jug upwards and insert the blade assembly. Turn the blade assembly clockwise to fasten. Caution! The blades are very sharp!
natural_image
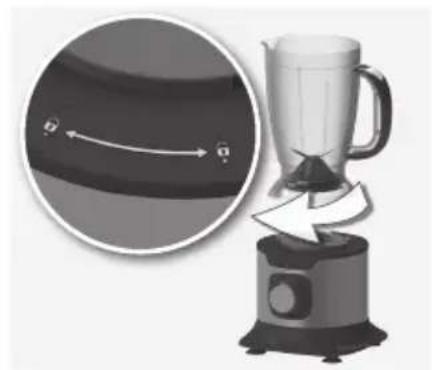
Illustration of a blender with a directional arrow and magnified view of its interior (no text or symbols)- Lock the blender jug into position on the motor housing. When the arrow is aligned with the "Locked" indicator, the jug is locked in position. Put the ingredients in the jug. (Do not exceed the maximum filling volume of 1,2 litres)
natural_image
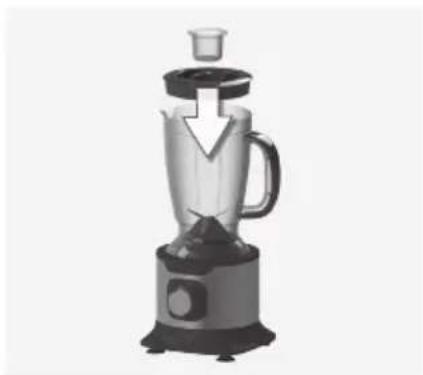
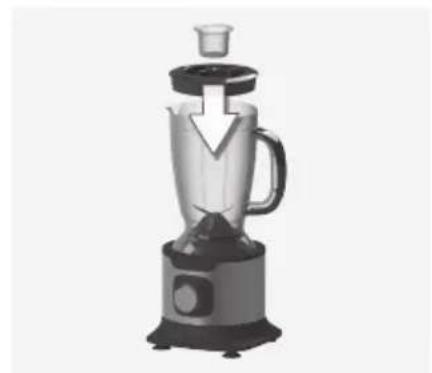
Illustration of a blender with a handle and lid, no text or symbols present- Close the lid and insert the measuring cup in the filler hole. (The measuring cup can be used to add ingredients during operation.) Close the filler hole immediately after, to avoid splashing. Caution! When processing hot liquids, see paragraph 10.
natural_image
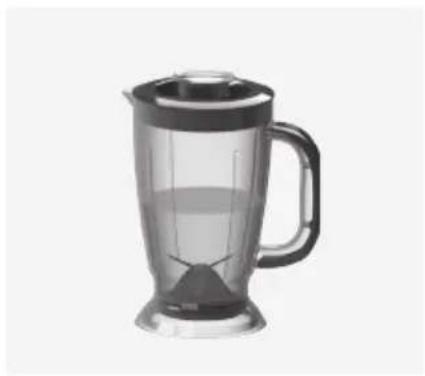
Exterior view of a modern kitchen blender with handle and lid (no text or symbols visible)- Processing hot liquids: allow hot liquids to cool down until lukewarm before filling the blender jug. Fill the blender jug half full and start processing on low speed. The blender jug can become very warm – take care to protect your hands and to ventilate steam out through the filler hole. Always close the lid before use.
text_image
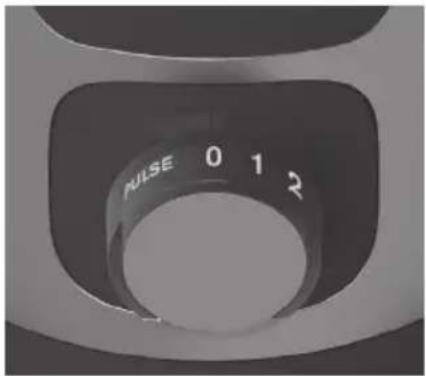
PULSE 0 1 2- Start the blender by turning the speed selector to required speed. Start at low speed, then progress to a higher speed if required. For using the PULSE function turn the Speed selector to position "PULSE".
natural_image
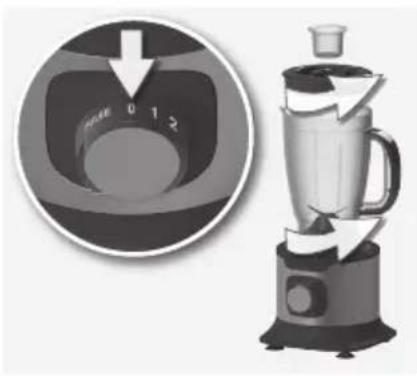
Illustration of a blender with a circular dial showing 0, 1, and 2 units, alongside a magnified view of the lid (no text or symbols)- Switch off the blender by turning the speed selector to position "0". After mixing, turn the blender jug counter-clockwise and remove.
Cleaning the all-purpose bowl and the accessories
natural_image
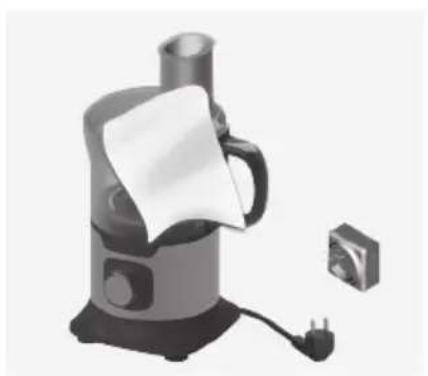
Illustration of a portable kitchen blender with a paper roll and a small electrical plug nearby (no text or symbols)- Switch the appliance off, remove the plug from the wall socket and wait until the tools have stopped completely. Wipe the motor housing with a damp cloth. Never immerse the motor housing in water or clean it under running water!
natural_image
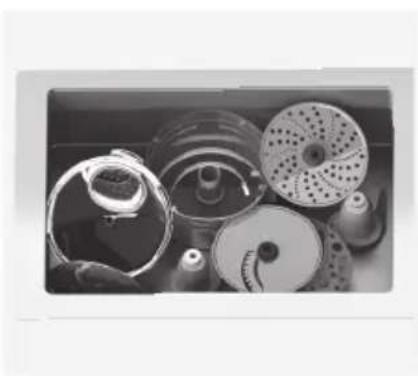
Black-and-white photo of various mechanical components including gears, spools, and a drum (no visible text or symbols)- The all-purpose bowl and all the accessories can we washed under the rinsing water or in the dishwasher.
Cleaning the blender jug
natural_image
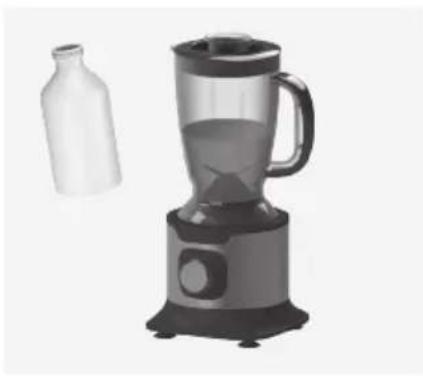
Illustration of a blender with a plastic bottle beside it (no text or symbols)- Clean the blender jug and blade easily by using the Pulse function. Fill the blender jug half full with warm water and add a few drops of detergent. Turn the Speed selector to position "PULSE". Then rinse the blender jug under running water. The lid and measuring cup can be washed in the dishwasher.
natural_image
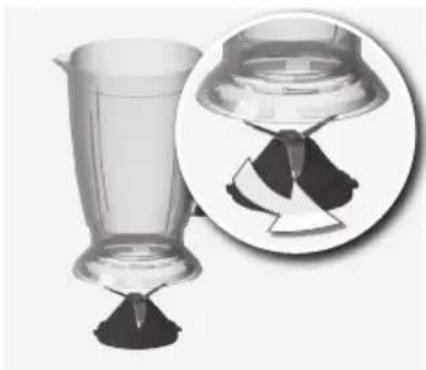
Illustration of a glass pitcher with a side view showing its interior (no text or symbols)- You can also clean the jug in the dishwasher but you need to firstly remove the blades. To release the blade unit turn counter-clockwise and remove while holding slightly at an angle. Do not clean the blade unit in the dishwasher. Rinse the blade assembly in water and detergent. Caution! Handle carefully, the blades are very sharp!
| Maximum Processing time with heavy load | 2 min |
| Whisking/Whipping quantities and Processing Times | |||
| Ingredients | Quantity | Time | Speed |
| Cream | 200-400 g | 40~60 sec | 1 |
| Egg-white | 120-220 g | ≥ 120 sec | 1 |
| Recommended blending speed | ||||
| Recipe Ingredients Quantity Time Speed | ||||
| Pureeing raw vegetables | Carrots 80 g | 20~30 sec 2 | ||
| Potatos 80 g | ||||
| Onions 80 g | ||||
| Water 160 g | ||||
| Strawberries margaritas (Cocktail) | Tequila 240 ml | ≤120 sec 2 | ||
| Triple sec 60 ml | ||||
| Frozen strawberries 225 g | ||||
| Frozen Lemonade concentrate 145 g | ||||
| Ice cubes 150 g | ||||
| Pineapple-apricots Smoothie | Pineapple in slices 250 g | ≤120 sec 2Dried Apricots 40 g | ||
| Yoghurt | 300 g | |||
| Milkshake | Milk | 150-300 ml | 20~30 sec 1 | |
| Vanilla Ice cream | 200-400 g | |||
| Banana | 14 - 12 pcs | |||
| Chocolate syrup | 30-60 g | |||
| Potato leek soup | Potatoes | 200 g | 50~60 sec 2Leek | |
| Water 400 g | ||||
| Pancake (Batters) | Wheat flour | 110 g | 40~50 sec 2 | |
| Salt | 1 Pinch | |||
| Eggs | 2 pcs | |||
| Milk | 200 ml | |||
| Water 75 ml | ||||
| Butter | 50 g | |||
| Nut | Peanuts | 200 g | 3 s for 3 times | Pulse |
| Chopping quantities and Processing Times | ||||||||
| Ingredients | Quantity | Quality | Time | Quality | Time | Quality | Time | Speed |
| Bread crumbs 100 g | Coarse | - | Medium | 5 sec | Fine | 10 sec | Pulse | |
| Almonds | 200-300 g | 10 sec | 20 sec | 30 sec | Pulse | |||
| 300-400 g | 10 sec | 20 sec | 30 sec | Pulse | ||||
| Meat (Beef) | 200 g | - | - | 10 sec | Pulse | |||
| Troubleshooting | ||
| Problem Possible cause Solution | ||
| Slices are slanted or un-even. | The food is light, it jumps during slicing. Load food in the filler hole. Place stopper onto food and apply pressure. Then start. | |
| Some food remained on the disc after processing. | It is normal for small pieces to remain after processing. | Always clear any blocked food from chipper disc by yourself. |
| The motor slows down during operation. | Amount of dough may exceed maximum capacity. | Remove half and process in two batches. |
| Dough may be too wet, it sticks onto the side of the bowl. | Add more flour, 1 tablespoon at a time until the motor speeds up. Process until dough cleans the side of the bowl. | |
| The motor slows to start with S-blade. | Amount of meat may exceed maximum capacity. | Remove the meat and process in two batches. |
| Too much fat in the meat. Note that for best result trim the meat of fat before processing. | ||
| The motor does not work. There is a safety interlock switch to prevent the motor from starting if it is not properly assembled. | Make sure the processing bowl, lid are securely locked into position. | |
| Make sure to plug in the appliance before operation. | ||
| The food processor shuts off during operation. | The lid may have become unlocked. Check to make sure it is securely in position. | |
| The food processor vibrates/moves during operation. | The rubber feet are wet. Make sure the rubber feet at the bottom of the unit are clean and dry. | |
| It is normal for heavy loads (e.g heavy dough, cheese). | Remove half and process in two batches. | |
