
CE4104 - Compressor Campbell Hausfeld - Free user manual and instructions
Find the device manual for free CE4104 Campbell Hausfeld in PDF.


User questions about CE4104 Campbell Hausfeld
0 question about this device. Answer the ones you know or ask your own.
Ask a new question about this device
Download the instructions for your Compressor in PDF format for free! Find your manual CE4104 - Campbell Hausfeld and take your electronic device back in hand. On this page are published all the documents necessary for the use of your device. CE4104 by Campbell Hausfeld.
USER MANUAL CE4104 Campbell Hausfeld
CH CAMPBELL HAUSFELD®
Single Stage Air Compressor
Operating Instructions and Parts Manual
natural_image
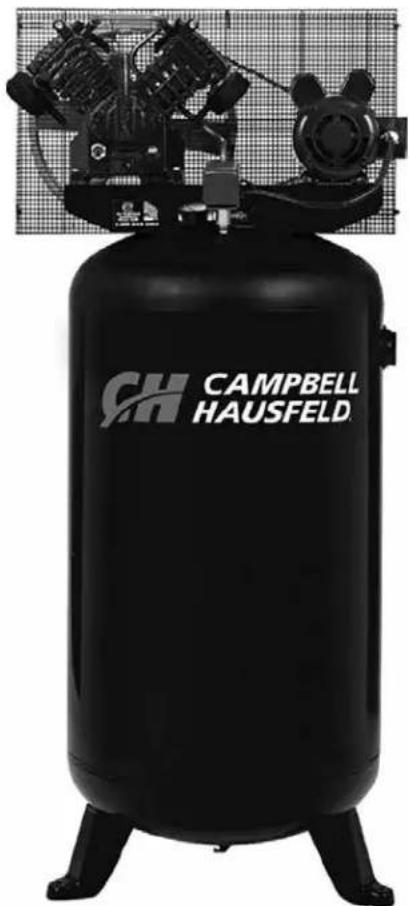
Black industrial air compressor with visible branding (CH CAMPBELL HAUSFELD) and mechanical components above it (no text-heavy elements)Models: CE4104 and TQ3104

CAMPBELL HAUSFELD.
Please read and save these instructions. Read carefully before attempting to assemble, install, operate or maintain the product described.
Protect yourself and others by observing all safety information. Failure to comply with instructions could result in personal injury and/or property damage! Retain instructions for future reference.
REMINDER: Keep your dated proof of purchase for warranty purposes! Attach it to this manual or file it for safekeeping.
Model #: ____
Serial #: ____
Purchase Date: ____
For parts, product & service information visit www.campbellhausfeld.com
Campbell Hausfeld
100 Production Drive
Harrison, Ohio 45030
BEFORE YOU BEGIN
Introduction
Air compressor units are intended to provide compressed air to power pneumatic tools, operate spray guns and supply air for pneumatic valves and actuators. The pumps supplied with these units have oil lubricated bearings. A small amount of oil carryover is present in the compressed air stream. Applications requiring air free of oil vapor should have the appropriate filters installed. The air compressor units are to be mounted per the instructions provided on a solid floor. Any other use of these units will void the warranty and the manufacturer will not be responsible for problems or damages resulting from such misuse.
| QUICK REFERENCE |
| Recommended Oil (2 Options) |
| Single viscosity SAE 30 ISO100 nondetergent compressor oil. Part number ST126700AV. |
| 10W30 synthetic oil such as Mobil 1 ^® . |
| Oil Capacity |
| Approximately 40 oz. |
UNPACKING
CAUTION
Do not lift or move unit without appropriately rated equipment. Be sure the unit is securely attached to lifting device used. Do not lift unit by holding onto tubes or unit to lift other attached equipment.
After unpacking the unit, inspect carefully for any damage that may have occurred during transit. Check for loose, missing or damaged parts. Check to be sure all supplied accessories are enclosed with the unit. In case of questions, damaged or missing parts, please visit www.campbellhausfeld.com for customer assistance.
WARNING
Do not operate unit if damaged during shipping, handling or use. Damage may result in bursting and cause injury or property damage.
Required Items - Not Included
- Oil
GENERAL SAFETY INSTRUCTIONS
Safety Guidelines
This manual contains information that is very important to know and understand. This information is provided for SAFETY and to PREVENT EQUIPMENT PROBLEMS. To help recognize this information, observe the following symbols.
A DANGER
imminently hazardous situation which, if not avoided, WILL result in death or serious injury.
Warning
potentially hazardous situation which, if not avoided, COULD result in death or serious injury.
Caution in the
potentially hazardous situation which, if not avoided, MAY result in minor or moderate injury.
NOTICE
Notice indicates important information, that if not followed, may cause damage to equipment.
IMPORTANT: Information that requires special attention.
Safety Symbols
The following Safety Symbols appear throughout this manual to alert you to important safety hazards and precautions.

Wear Eye and Mask Protection

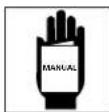
Read
Manual
First

Risk of Fire

Risk of Moving Parts

Risk of Hot Parts
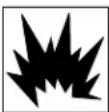
Risk of Explosion

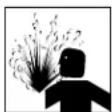
Risk of Fumes
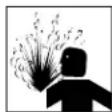
Risk of Pressure

Risk of Shock
California Proposition 65
This WARNING
power cord may contain chemicals known to the State of California to cause cancer and birth defects or other reproductive harm. Wash hands after handling.
You WARNING
when you cut, sand, drill or grind materials such as wood, paint, metal, concrete, cement, or other masonry. This dust often contains chemicals known to fects, or other reproductive harm. Wear protective gear.

Important Safety Information
Please read and save these instructions. Read carefully before attempting to assemble, install, operate or maintain the product described. Protect yourself and others by observing all safety information. Failure to comply with instructions could result in personal injury and/or property damage! Retain instructions for future reference.
This manual contains important safety, operational and maintenance information. If you have any questions, please visit www.campbellhausfeld.com for customer assistance.
Since the air compressor and other components (material pump, spray guns, filters, lubricators, hoses, etc.) used make up a high pressure pumping system, the following safety precautions must be observed at all times:
DANGER
BREATHABLE AIR WARNING
This compressor/pump is not equipped and should not be used "as is" to supply breathing quality air. For any application of air for human consumption, the air compressor/pump will need to be fitted with suitable in-line safety and alarm equipment. This additional equipment is necessary to properly filter and purify the air to meet minimal specifications for Grade D breathing as described in Compressed Gas Association Commodity Specification G 7.1, OSHA 29 CFR 1910. 134, and/or Canadian Standards Associations (CSA).
DISCLAIMER OF WARRANTIES
In the event the compressor is used for the purpose of breathing air application and proper in-line safety and alarm equipment is not simultaneously used, existing warranties shall be voided, and Campbell Hausfeld disclaims any liability whatsoever for any loss, personal injury or damage.
General Safety
- Read all manuals included with this product carefully. Be thoroughly familiar with the controls and the proper use of the equipment.
- Follow all local electrical and safety codes as well as the United States National Electrical Codes (NEC) and Occupational Safety and Health Act (OSHA).
- Only persons well acquainted with these rules of safe operation should be allowed to use the compressor.
- Keep visitors away and NEVER allow children in the work area.
- Wear safety glasses and use hearing protection when operating the unit.
- Do not stand on or use the unit as a handhold.
- Before each use, inspect compressed air system and electrical components for signs of damage, deterioration, weakness or leakage. Repair or replace defective items before using.
- Check all fasteners at frequent intervals for proper tightness.
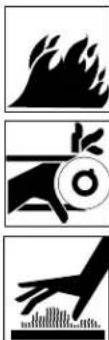
⚠ WARNING Motors, electrical equipment and controls can cause electrical arcs that will ignite a flammable gas or vapor. Never operate or repair in or near a flammable gas or vapor. Never store flammable liquids or gases in the vicinity of the compressor.
A WARNING New compressor without a beltguard. This unit can start automatically without warning. Personal injury or property damage could occur from contact with moving parts.
- Do not wear loose clothing or jewelry that will get caught in the moving parts of the unit.
CAUTION Compressor parts may be hot even if the unit is stopped.
- Keep fingers away from a running compressor; fast moving and hot parts will cause injury and/or burns.
- If the equipment should start to vibrate abnormally, STOP the engine/motor and check immediately for the cause. Vibration is generally an indication of trouble.
• To reduce fire hazard, keep engine/motor exterior free of oil, solvent, or excessive grease.
⚠ WARNING An ASME code safety relief valve with a setting no higher than the Maximum Allowable Working Pressure (MAWP) of the tank MUST be installed in the air lines or in the tank for this compressor. The ASME safety valve must have sufficient flow and pressure ratings to protect the pressurized components from bursting. The flow rating can be found in the parts manual. The safety valve in the intercooler does not provide system protection.
Maxim on rating pressure is 140 psi for single stage compressors. Do not operate with pressure switch or pilot valves set higher than 140 psi (single stage).
- Never attempt to adjust ASME safety valve. Keep safety valve free from paint and other accumulations.
Important Safety Information (Continued)
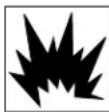
WARNING
Never attempt to repair or modify a tank! Welding, drilling or any other modification will weaken the tank resulting in damage from rupture or explosion. Always replace worn, cracked
or damaged tanks.
NOTICE
Drain liquid from tank daily.
- Tanks rust from moisture build-up, which weakens the tank. Make sure to drain tank regularly and inspect periodically for unsafe conditions such as rust formation and corrosion.
- Fast moving air will stir up dust and debris which may be harmful. Release air slowly when draining moisture or depressurizing the compressor system.
Spraying Precautions

Do not spray flammable materials in vicinity of open flame or near ignition sources including the compressor unit.
- Do not smoke when spraying paint, insecticides, or other flammable substances.
- Use a face mask/respirator when spraying and spray in a well ventilated area to prevent health and fire hazards.
- Do not direct paint or other sprayed material at the compressor. Locate compressor as far away from the spraying area as possible to minimize overspray accumulation on the compressor.
- When spraying or cleaning with solvents or toxic chemicals, follow the instructions provided by the chemical manufacturer.
Save These Instructions Do Not Discard
The DANGER, WARNING, CAUTION, and NOTICE notifications and instructions in this manual cannot cover all possible conditions and situations that may occur. It must be understood by the operator that caution is a factor which cannot be built into this product, but must be supplied by the operator.
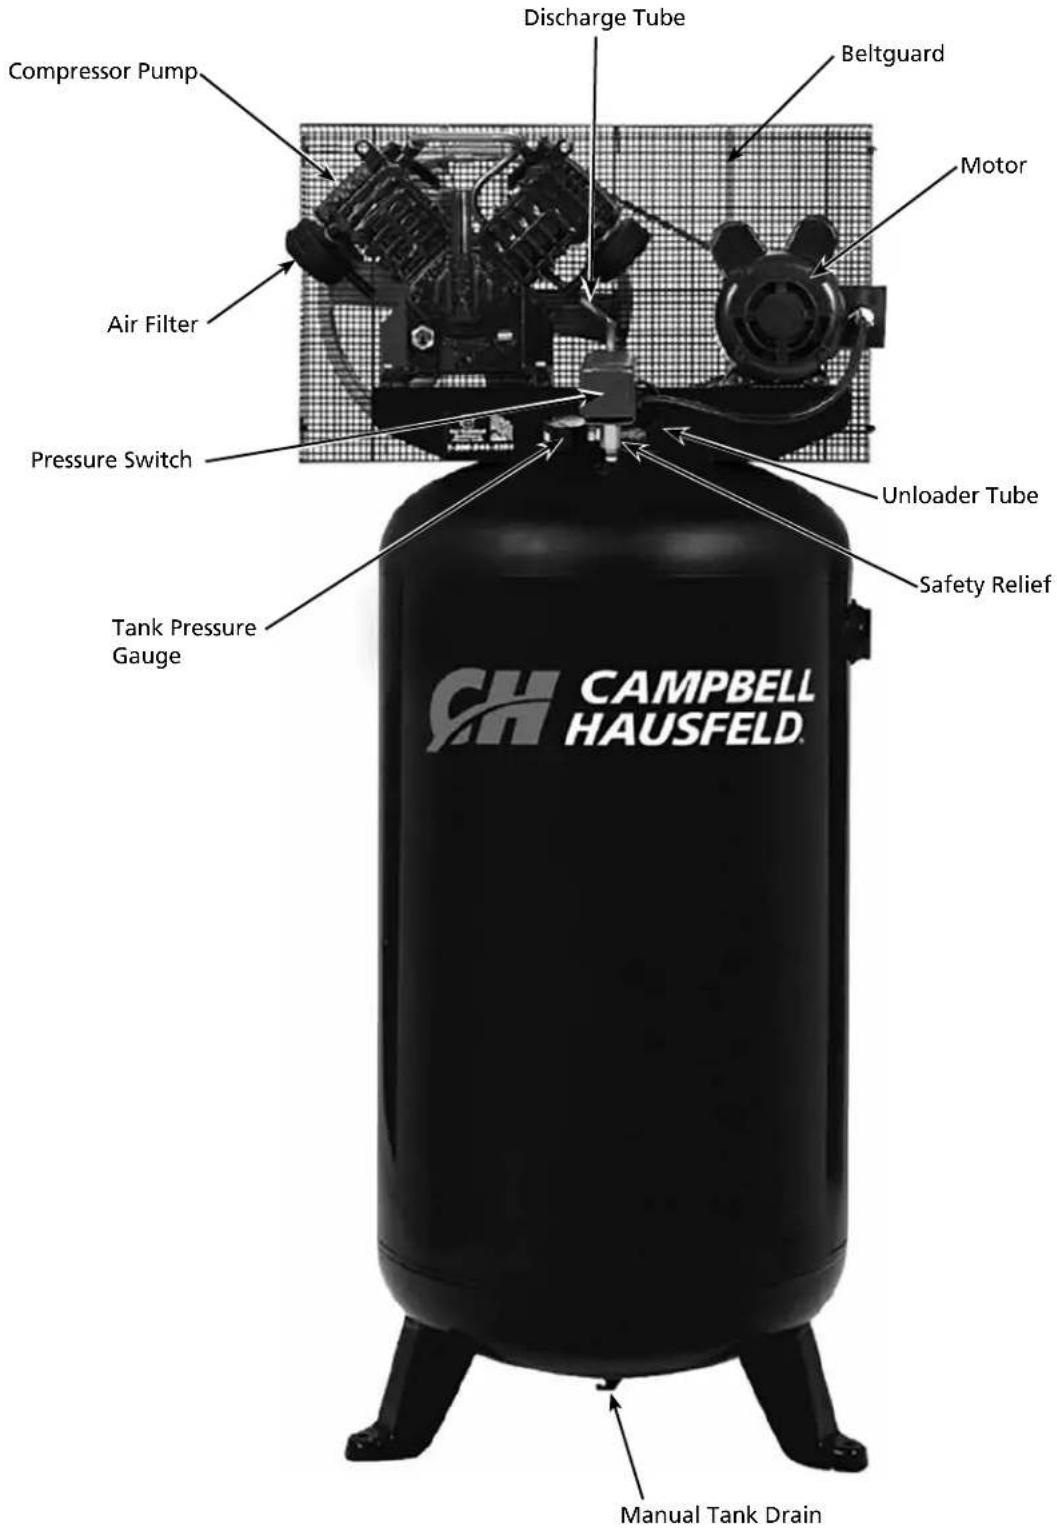
Getting To Know Your Compressor
text_image
Discharge Tube Beltguard Compressor Pump Motor Air Filter Pressure Switch Unloader Tube Safety Relief Tank Pressure Gauge CH CAMPBELL HAUSFELD. Manual Tank DrainFigure 1 - Vertical Unit Identification
SPECIFICATIONS
| CE4104 and TQ3104 | |
| Motor HP 5 | |
| Power 208-230V | |
| Phase 1 | |
| Displacement CFM 26.24 | |
| Air Delivery CFM @ 90 PSI 17.3 | |
| Air Delivery CFM @ 140 PSI 14.2 | |
| Max PSI 140 | |
| Pump RPM 950 | |
| Tank Capacity 80 gallons | |
| Unit Weight 410 lbs | |
| Amp Draw | 21.0 |
| Max Duty Cycle | 80/20 |
| Tank Outlet | 3/4 inch (F) NPT |
DIMENSIONS
| CE4104 and TQ3104 | |
| Length | 23 inches |
| Width | 31 inches |
| Height | 71 inches |
INSTALLATION INSTRUCTIONS
WARNING
Disconnect, tag and lock out power source then release all pressure from the system before attempting to install, service, relocate or perform any maintenance.
CAUTION
Do not lift or move unit without appropriately rated equipment. Be sure the unit is securely attached to lifting device used. Do not lift unit by holding onto tubes or coolers. Do not use unit equipment.
to lift other attached equipment.
CAUTION
Never use the wood shipping skids for mounting the compressor.
Picking the Location
Install and operate unit at least 18 inches from any obstructions in a clean, well ventilated area. The surrounding air temperature should not exceed 100^ F. This will ensure an unobstructed flow of air to cool compressor and allow adequate space for maintenance.
Do caution
compressor air inlet near steam, paint spray, sandblast areas or any other source
of contamination.
NOTE: If compressor operates in a hot, moist environment, supply compressor pump with clean, dry outside air. Supply air should be piped in from external sources.
Tank Mounting
The tank should be bolted into a flat, even, concrete floor or on a separate concrete foundation. Vibration isolators should be used between the tank leg and the floor. Part number MP345700AJ isolator pads are recommended for units.
When using isolator pads, do not draw bolts tight. Allow the pads to absorb vibrations. When isolators are used, a flexible hose or coupling should be installed between the tank and service piping.
Fail wettwnery WARNING
install the tank can lead to cracks at the welded joints and possible
bursting.
Piping
Me WARNING
/C) pipe for compressed air. Serious injury or death could result.
Any tube, pipe or hose connected to the unit must be able to withstand the temperature generated and retain the pressure. All pressurized components of the air system must have a pressure rating of 200 psi or higher. Incorrect selection and installation of any tube, pipe or hose could result in bursting and injury. Connect piping system to tank using the same size fitting as the discharge port.
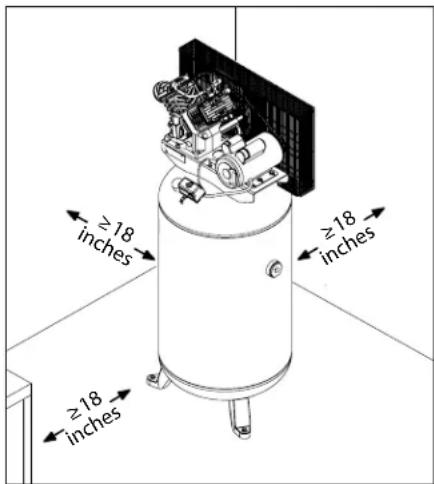
text_image
≥18 inches ≥18 inchesFigure 2 - Location
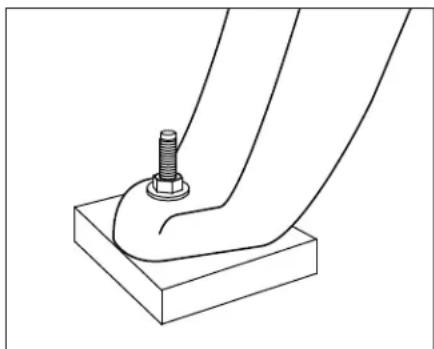
natural_image
Technical line drawing of a mechanical joint or bracket with a bolt and nut (no text or symbols)Figure 3 - Isolator Pad
Minimum Pipe Size For Compressed Air Line
| CFM | LENGTH OF PIPING SYSTEM | |||
| 25 FEET 50 FEET 100 FEET 250 FEET | ||||
| 10 | 1/2 inch | 1/2 inch | 3/4 inch | 3/4 inch |
| 20 | 3/4 inch | 3/4 inch | 3/4 inch | 1 inch |
| 40 | 3/4 inch | 1 inch | 1 inch | 1 inch |
| 60 | 3/4 inch | 1 inch | 1 inch | 1 inch |
| 100 | 1 inch | 1 inch | 1 inch | 1-1/4 inch |
INSTALLATION INSTRUCTIONS (CONTINUED)
Installing A Shut-Off Valve
A shut-off valve should be installed on the discharge port of the tank to control the air flow out of the tank. The valve should be located between the tank and the piping system.
WARNING
Never install a shut-off valve between the compressor pump and the tank. Personal injury and/or equipment damage may occur. Never use reducers in discharge piping.
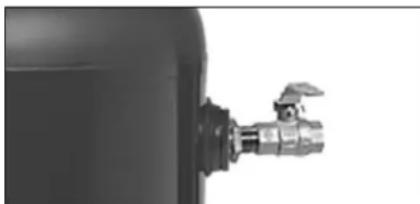
natural_image
Close-up of a black industrial valve with a metallic fitting (no visible text or symbols)Figure 4 - Shut-off Valve
When creating a permanently installed system to distribute compressed air, find the total length of the system and select pipe size from the chart on page 7. Bury underground lines below the frost line and avoid pockets where condensation can gather and freeze.
Apply air pressure to the piping installation and make sure all joints are free from leaks BEFORE underground lines are covered. Before putting the compressor into service, find and repair all leaks in the piping, fittings and connections.
Wiring
All wiring and elec WARNING
rical connections must be performed by a qualified electrician familiar with induction motor controls. Installations must be in accordance with local and
national codes.
WARNING
Overheating, short circuiting and fire damage will result from inadequate wiring.
Wiring must be installed in accordance with National Electrical Code and local codes and standards that have been set up covering electrical apparatus and wiring. These should be consulted and local ordinances observed. Be certain that adequate wire sizes are used, and that:
- Service is of adequate ampere rating.
- The supply line has the same electrical characteristics (voltage, cycles and phase) as the motor. Refer to motor name plate for electrical ratings and specifications.
- The line wire is the proper size and that no other equipment is operated from the same line. The chart gives minimum recommended wire sizes for compressor installations.
Minimum Wire Size (Use 75°C Copper Wire)
Make sure voltage is correct with the motor wiring.
NOTE: If using 208 volts single phase, make sure the motor name plate states it is rated for 208 volts single phase. 230 volt single phase motors do not work on 208 volts unless they have the 208 volt rating.
SINGLE PHASE
HP AMPS 230V
1-4 HP UP TO 22.0 10 AWG
5.0 8 AWG
Recommended wire sizes may be larger than the minimum set up by local ordinances. If so, the larger size wire should be used to prevent excessive line voltage drop. The additional wire cost is very small compared with the cost of repairing or replacing a motor electrically "starved" by the use of supply wires which are too small.
INSTALLATION INSTRUCTIONS (CONTINUED)

Grounding
Improvely grounded electrical components are shock hazards. Make sure all the components are properly grounded to prevent death or serious injury.
This product must be grounded. Grounding reduces the risk of electrical shock by providing an escape wire for the electric current if short circuit occurs. This product must be installed and operated with a power cord or cable that has a grounding wire.
Breakers and Fuses
The entire electrical system should be checked by a certified electrician. Time delay breakers and fuses are required for this compressor. A tripped breaker or blown fuses may indicate a direct short to ground, high current draw, improper wiring, incorrect fuse or breaker size and/or type. This needs to be evaluated by a certified electrician.
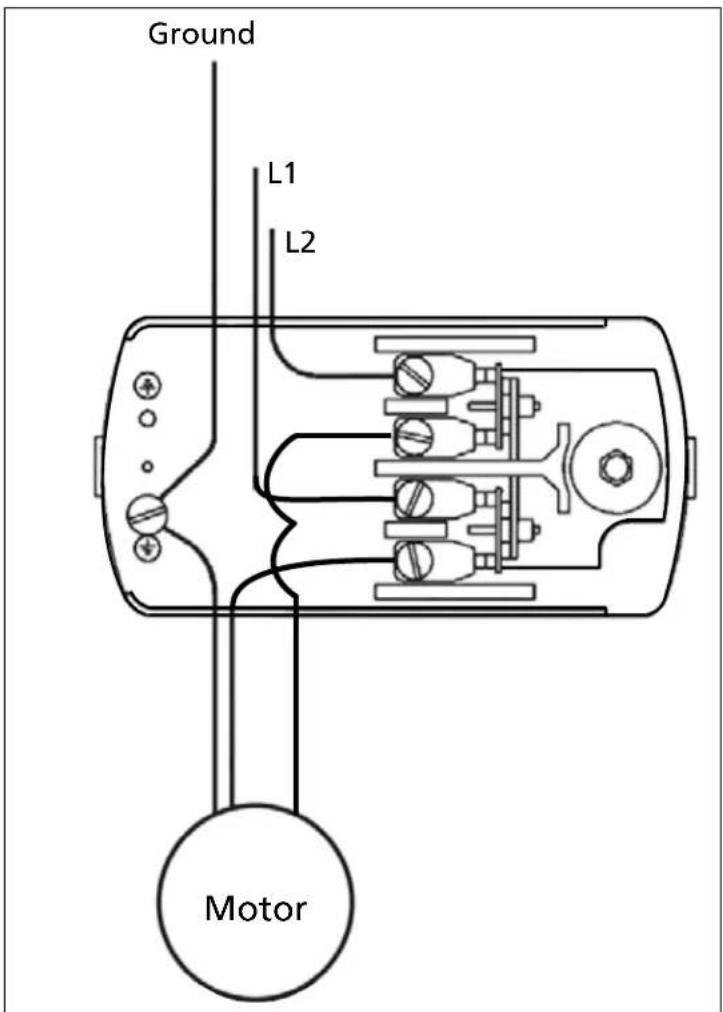
text_image
Ground L1 L2 MotorFigure 5 - Wiring Diagram
Installation Instructions (CONTINUED)
Lubrication
no oil. Before
operating compressor, fill to the center
of the sight gauge (see Figure 6).

be of oil may
shorten pump life and damage valves.
Recommended Oil (2 Options)
| Single viscosity SAE 30 ISO100 nondetergent compressor oil. Part number ST126700AV. |
| 10W30 synthetic oil such as Mobil 1 ^ . |
Oil Capacity
Approximately 40 oz.
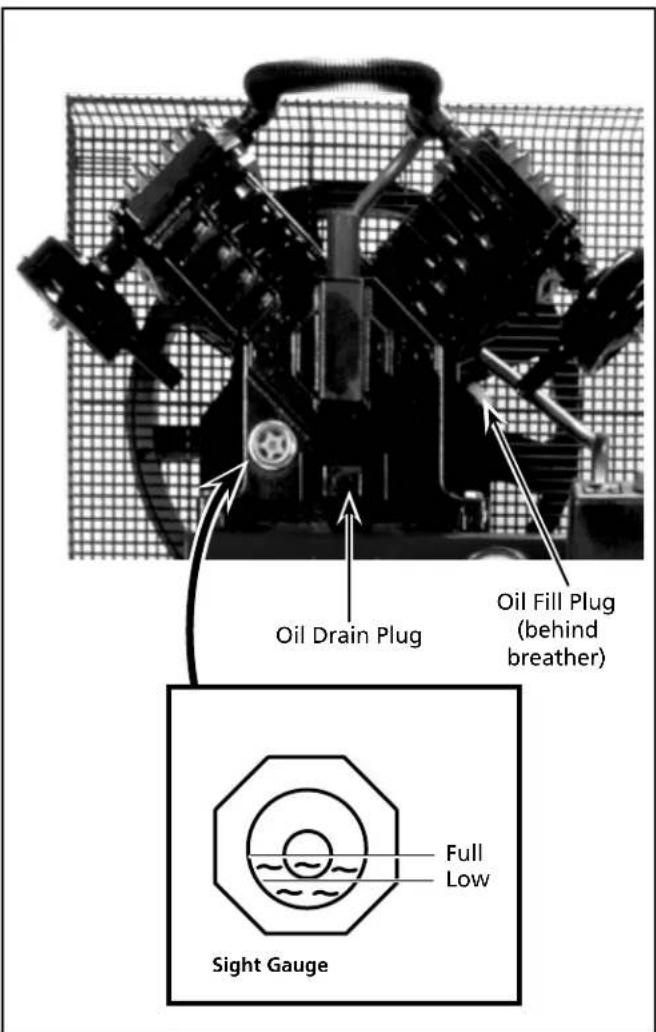
Fill the pump with oil to the center of the sight gauge using oil fill opening (see Figure 6). Do NOT fill the pump through the breather cap opening as this may cause oil to leak and spray out during operation.
NOTE: Some residual oil may still be in the pump from factory testing leaving a thin coat on the sight gauge; however, there is not enough oil to operate the unit.
OPERATING INSTRUCTIONS
IMPORTANT: Check motor rotation before operating the compressor.
All lubricated compressor pumps discharge some condensed water and oil with the compressed air. Install appropriate water/oil removal equipment and controls as necessary for the intended application.

propriate
water/oil removal equipment may result
in damage to machinery or workpiece.
Guarding
vided must be
installed before operating the unit.
All moving parts must be guarded. All electrical covers must be installed before turning on the power.
text_image
Oil Drain Plug Oil Fill Plug (behind breather) Full Low Sight GaugeFigure 6 - Lubrication
OPERATING INSTRUCTIONS (CONTINUED)
Recommended Break-In Period
The compressor should be run continuously at 90 PSI or lower for one hour to allow proper seating of the piston rings.
- Open drain cock completely and run the compressor for 60 minutes.
- Turn off the compressor and close drain cock. The compressor is now ready for use.
If the compressor is run under humid conditions for short periods of time, the humidity will condense in the crankcase and cause the oil to look creamy. Oil contaminated by condensed water will not provide adequate lubrication and must be changed immediately. Using contaminated oil will damage bearings, pistons, cylinders and rings and is not covered under warranty. To avoid water condensation in the oil, periodically run the compressor with tank pressure near 120 psi for single stage compressors by opening the drain valve or an air valve connected to the tank or hose. Run the pump for an hour at a time at least once a week or more often if the condensation reoccurs.
IMPORTANT: Change oil after first 50 hours of operation and every 200 hours afterwards.
Pressure Switch, Start - Stop
NOTE: Single stage compressors have a maximum operating pressure of 140 psi. Do not alter pressure settings on control components above this limit.
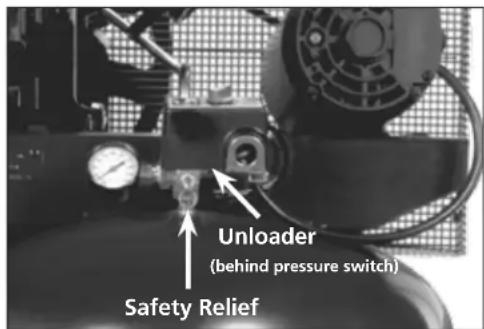
The compressor unit starts and stops based on preset pressure switch settings of 110 psi cut-in and 140 psi cut-out. The pressure switch contains an unloader which is a small valve that vents air to allow the motor to start easily (see Figure 7).
The unloader valve on the pressure switch should hiss for a short period of time when the compressor shuts off. This relieves the head and the exhaust tubing of any pressure and allows the compressor to start under no load. Because compressors have high starting torque the unloader is necessary for proper starting of the compressor.
The check valve is a one way valve that keeps the air in the tank when the unit shuts off. The easiest way to determine if the check valve is working properly is to make sure that
text_image
Unloader (behind pressure switch) Safety ReliefFigure 7 - Pressure Switch
the pressure switch unloader quits hissing after the compressor shuts off. The hissing should last for several seconds and then quit.
Crankcase Breather
During severe operating conditions or initial start-up, some oil may accumulate at the crankcase breather opening. This is normal and will diminish as the pump accumulates run time and the piston rings become fully seated.
Draining Tank
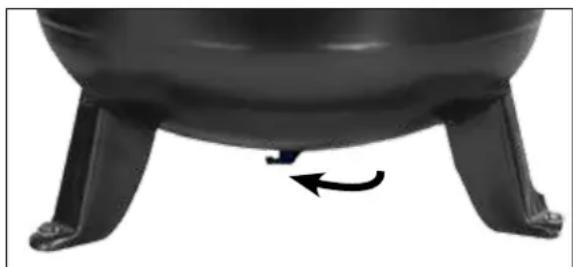
Condensate must be drained from the tank daily, use manual tank drain (see Figure 8).
natural_image
Close-up of a black portable stove burner with three legs and a curved arrow indicating rotation (no text or symbols)Figure 8 - Manual Tank Drain
TROUBLESHOOTING GUIDE
SYMPTOM POSSIBLE CAUSE(S) CORRECTIVE ACTION
| Excessive noise in operation 1. Loose pulley, flywheel, belt, beltguard, etc2. Lack of oil in crankcase 2. Check for damage to bearings, replenish oil3. Compressor floor mounting loose 3. Shim to level and tighten or place on isolator pads4. Malfunctioning check valve 4. Replace check valve5. Unit not on vibration pads 5. Install vibration pads under compressor feet | ||
| Milky oil in oil reservoir Water condensing in crankcase due to high humidity | Pipe air intake to less humid air source. Run pump continuously for one hour | |
| Excessive oil consumption or oil in air lines | 1. Be sure there is a problem2. Restricted air intake 2. Clean or replace air filter3. Wrong oil viscosity4. Worn piston rings5. Oil leaks6. Scored cylinder | 1. Diagnose oil contamination problems by testing the discharge air or measuring oil consumption from the crankcase3. Drain oil. Refill with oil of proper viscosity4. Replace rings5. Tighten bolts, replace gaskets or o-rings6. Replace cylinder |
| Water in discharge air | 1. Excessive water in tank 1. Drain tank2. Hot, humid weather | 2. Purchase dryer |
| Air blowing out of inlet | 1. Broken first stage inlet valve (two-stage unit)2. Broken inlet valve (single stage unit) | 1. Replace valve assembly2. Replace valve assembly |
| Insufficient pressure | 1. Air demand too high2. Leaks or restrictions in hoses or piping3. Slipping belts | 1. Limit air usage2. Check for leaks or restriction in hose or piping3. Tighten belts |
| Tank does not hold pressure when compressor is off and shutoff valve is closed | 1. Worn check valve 1. Replace check valve2. Check all connections and fittings for tightness3. Check tank for cracks or pin holes | Do not disassemble check valve with air in tank2. Tighten3. Replace tank. Never repair a damaged tank |
| Excessive belt wear. (Light dust from start is normal. Worn belts separate at layers) | 1. Pulley out of alignment2. Belts too tight or too loose | 1. Realign motor pulley2. Adjust tension |
| Tank pressure builds slowly | 1. Dirty air filter2. Blown cylinder head gasket3. Worn/broken intake/discharge valves4. Air leaks | 1. Clean or replace filter element2. Install new gasket3. Install new valve plate assembly4. Tighten joints |
| Tank pressure builds up quickly on compressor | Excessive water in tank | Drain tank, check speed. See Performance table |
| ASME safety valve pops open while compressor is running | 1. Wrong pressure switch setting2. Malfunctioning ASME safety valve3. Pressure switch contacts welded | 1. Adjust to lower pressure 140 psi for single stage unit (See Operation)2. Replace ASME safety valve3. Replace pressure switch |
| Pressure switch continuously blows air out the unloader valve | Malfunctioning check valve | Replace the check valve if the unloader valve bleeds off constantly |
| Pressure switch unloader valve does not release air when the unit shuts off | Malfunctioning unloader valve on pressure switch | Replace the pressure switch if the unit does not hiss for a short period of time when the unit shuts off |
TROUBLESHOOTING GUIDE (CONTINUED)
SYMPTOM POSSIBLE CAUSE(S) CORRECTIVE ACTION
| Motor hums and runs slowly or not at all | 1. Low voltage or no voltage 1. Check with voltmeter, check line voltage to unit. If overload or reset switch trips repeatedly, find and correct the cause. See next item2. Shorted or open motor winding 2. Replace motor3. Malfunctioning check valve or unloader valve4. Malfunctioning pressure switch - contacts will not close | 3. Replace check valve or unloader valve4. Repair or replace pressure switch |
| Reset mechanism cuts out repeatedly or fuses blow repeatedly | 1. Pressure switch set too high 1. Adjust or replace2. Malfunctioning check valve 2. Clean or replace faulty valve3. Incorrect breaker/disconnect size 3. Be sure that breakers/disconnect are rated properly4. Malfunctioning motor 4. Replace motor5. Loose Wiring 5. Check all electrical connections | |
MAINTENANCE AND INSPECTION INSTRUCTIONS
WARNING
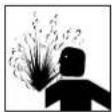
Disconnect, tag and lock out power source then release all pressure from the system before attempting to install, service, relocate or perform any maintenance.
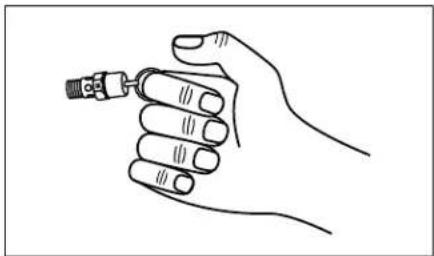
In order to maintain efficient operation of the compressor system, check the air filter and oil level before each use. The ASME safety valve should also be checked daily (see Figure 9). Pull ring on safety valve and allow the ring to snap back to normal position. This valve automatically releases air if the tank pressure exceeds the preset maximum. If air leaks after the ring has been released, or the valve is stuck and cannot be actuated by the ring, the ASME safety valve must be replaced.
WARNING
Do not tamper with the ASME safety valve.
natural_image
Line drawing of a hand holding a small mechanical component (no text or symbols)Figure 9 - ASME Safety Valve
Tank
WARNING
Never attempt to repair or modify a tank! Welding, drilling or any other modification will weaken the tank resulting in damage from rupture or explosion. Always replace worn, cracked
or damaged tanks.
NOTICE
Drain liquid from tank daily.
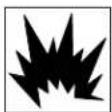
The tank should be carefully inspected at a minimum of once a year. Look for cracks forming near the welds. If a crack is detected, remove pressure from tank immediately and replace.
Compressor Lubrication
See Installation. Add oil as required. The oil should be changed every three months or after every 200 hours of operation; whichever comes first.
If the compressor is run under humid conditions for short periods of time, the humidity will condense in the crankcase and cause the oil to look creamy. Oil contaminated by condensed water will not provide adequate lubrication and must be changed immediately. Using contaminated oil will damage bearings, pistons, cylinders and rings and is not covered under warranty. To avoid water condensation in the oil, periodically run the compressor with tank pressure near 120 psi for single stage compressors by opening the drain cock or an air valve connected to the tank or hose. Run the pump for an hour at a time at least once a week or more often if the condensation reoccurs.
IMPORTANT: Change oil after first 50 hours of operation.
Air Filter
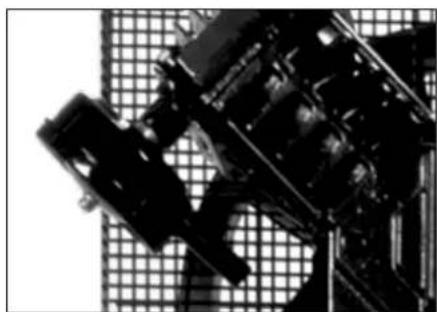
Never run the compressor pump without an intake air filter or with a clogged intake air filter. The air filter element should be checked monthly (see Figure 10). Operating compressor with a dirty filter can cause high oil consumption and increase oil contamination in the discharge air. If the air filter is dirty it must be replaced.
natural_image
Close-up of mechanical components mounted on a grid-patterned surface (no visible text or symbols)Figure 10 - Air Filter Element
MAINTENANCE AND INSPECTION INSTRUCTIONS (CONTINUED)
Components
Turn off all power and clean the cylinder head, motor, fan blades, air lines, aftercooler and tank on a monthly basis.
Belts
Lock out and tag the power then release all pressure from the tank to prevent unexpected movement of the unit.
Check belt tension every 3 months. Adjust belt tension to allow 3/8 inch to 1/2 inch deflection with normal thumb pressure. Also, align belts using a straight edge against the face of the flywheel and touching the rim on both sides of the face. The belts should be parallel to this straight edge (see Figure 11). Dimension A should be the same as B and C to ensure proper alignment of the belts.
Slots in the bed-plate allow for sliding the motor back and forth to adjust belt tension.

text_image
Air Compressor Flywheel Straight Edge A B Motor Motor Drive Pulley Setscrew CFigure 11 - Top View
Storage
If compressor is to be stored for a short period of time, make sure that it is stored in a normal position and in a cool protected area.
Maintenance Schedule
| OPERATION DAILY MONTHLY 3 MONTHS | |
| Check Safety Valve | ● |
| Drain Tank (see Figure 8) | ● |
| Check Oil Level | ● |
| Clean or Change Air Filter | ● |
| Check Intercooler | ● |
| Clean Unit Components | ● |
| Check Belt Tightness | ● |
| Change Oil (see Figure 6) | ● |
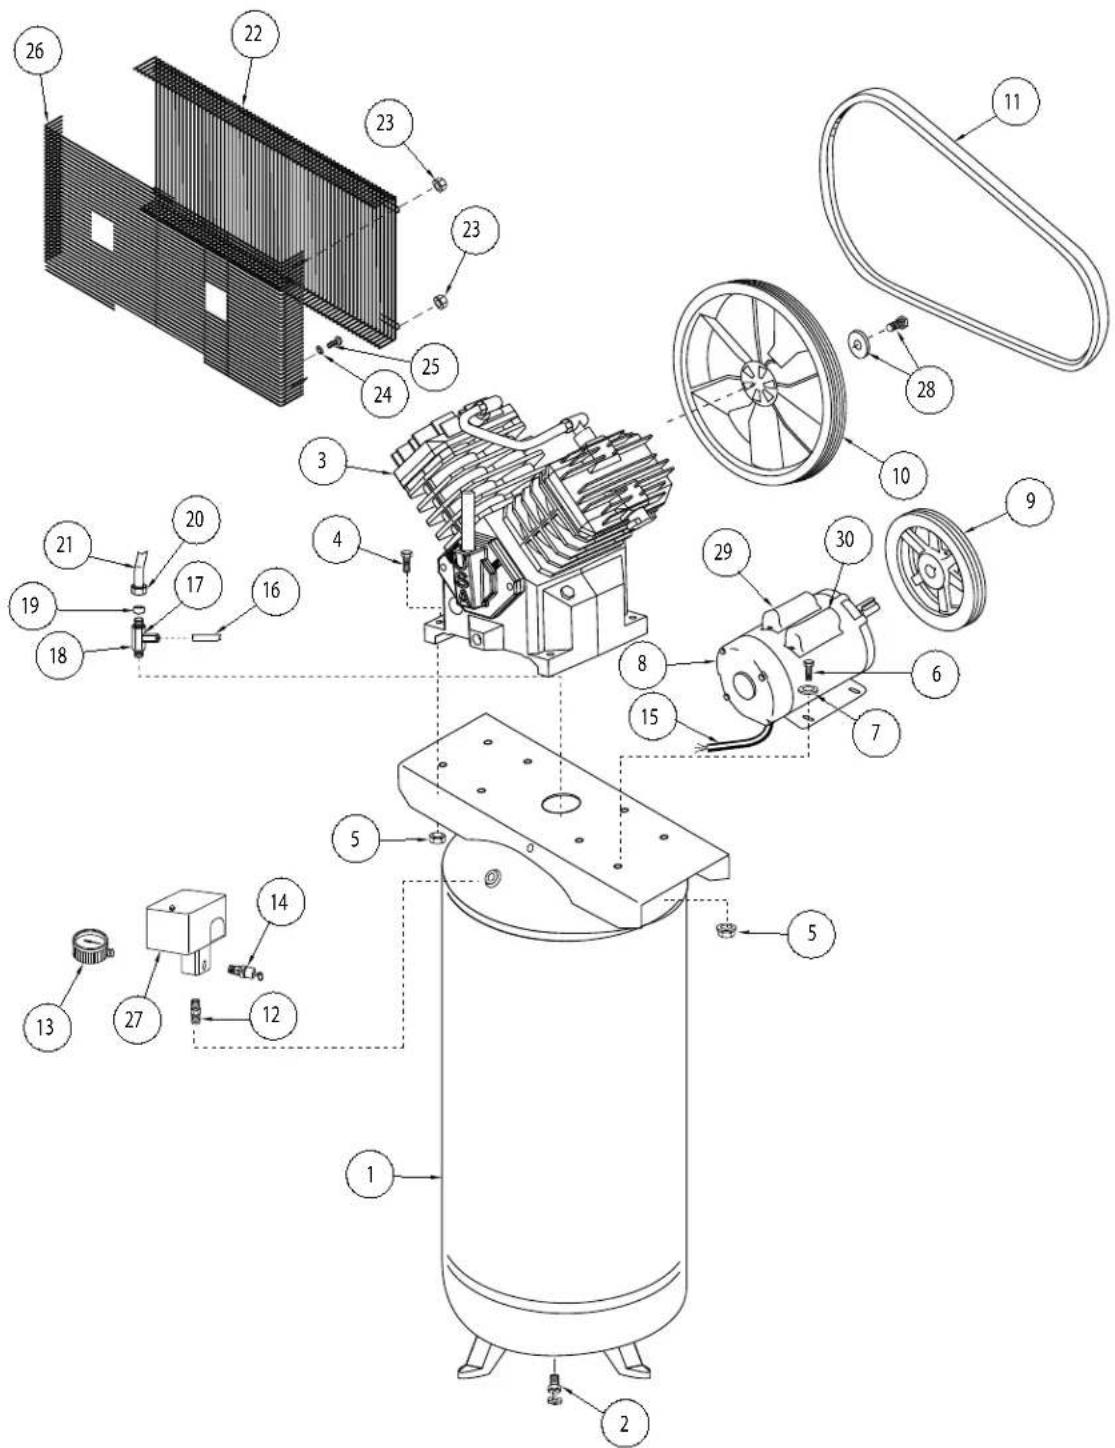
REPAIR PARTS ILLUSTRATION FOR CE4104 AND TQ3104
text_image
Exploded view diagram of a mechanical assembly with numbered components for identificationFor Repair Parts, visit www.campbellhausfeld.com
24 hours a day - 365 days a year
Please provide following information:
- Model number
- Serial number (if any)
- Part description and number as shown in parts list
Ref
No Description Part Number Qty
| 1 AIR TANK AG232401CG 1 | |||
| 2 DRAIN VALVE ST127700AV 1 | |||
| 3 AIR COMPRESSOR PUMP WITH FLYWHEEL TQ3010 1 | |||
| 4 5/16 INCH - 18 X 1-1/2 INCH HEX HEAD BOLT | † | 4 | |
| 5 5/16 IN - 18 LOCKNUT | † | 8 | |
| 6 5/16 INCH - 18 X 3/4 INCH HEX HEAD BOLT | † | ||
| 7 5/16 INCH WASHER | † | 4 | |
| 8 ELECTRIC MOTOR | MC035700AV | 1 | |
| 9 MOTOR PULLEY | PU017001AV | 1 | |
| 10 FLYWHEEL | PU017100AV | 1 | |
| 11 BELT | BT013101AV 1 | ||
| 12 PIPE NIPPLE | HF002401AV ▲ | 1 | |
| 13 PRESSURE GAUGE | GA031900AV ▲ | 1 | |
| 14 SAFETY VALVE | V-215105AV ▲ | 1 | |
| 15 ELECTRIC CORD | EC014800AV 1 | ||
| 16 UNLOADER TUBE | ST117802AV 1 | ||
| 17 STRAIGHT PUSH CONNECT | ST081301AV 1 | ||
| 18 CHECK VALVE | CV223300AV | 1 | |
| 19 1/2 INCH COMPRESSION SLEEVE | ST032900AV | 1 | |
| 20 1/2 INCH COMPRESSION NUT | ST033001AV | 1 | |
| 21 DISCHARGE TUBE | TQ901600AP | 1 | |
| 22 FRONT BELTGUARD | BG307400AV | 1 | |
| 23 10 - 24 HEX-FLANGE NUT | ST116201AV | 5 | |
| 24 5/16 INCH WASHER | ST011200AV 2 | ||
| 25 5/16 INCH SELF-TAPPING SCREW | ST016500AV | 4 | |
| 26 BACK BELTGUARD | BG307500AV | 1 | |
| 27 PRESSURE SWITCH (WITH UNLOADER VALVE) | CW212201AV ▲ | 1 | |
| 28 FLYWHEEL FASTNER KIT | TQ901400AV | 1 | |
| 29 CAPACITOR - START | MC507025AV | 1 | |
| 30 CAPACITOR - RUN | MC506912AV | 1 | |
| WARNING DECAL (NOT SHOWN) | DK747600AV 1 | ||
| PRESSURE SWITCH UNLOADER VALVE(NOT SHOWN) | CW210001AV ▲ | 1 | |
| PRESSURE SWITCH COVER (NOT SHOWN) | CW217800AV ▲ | 1 | |
| ▲ MULTI-PORT PRESSURE SWITCH ASSEMBLY | |||
| -- NOT AVAILABLE | |||
| † AVAILABLE AT LOCAL HARDWARE STORE | |||
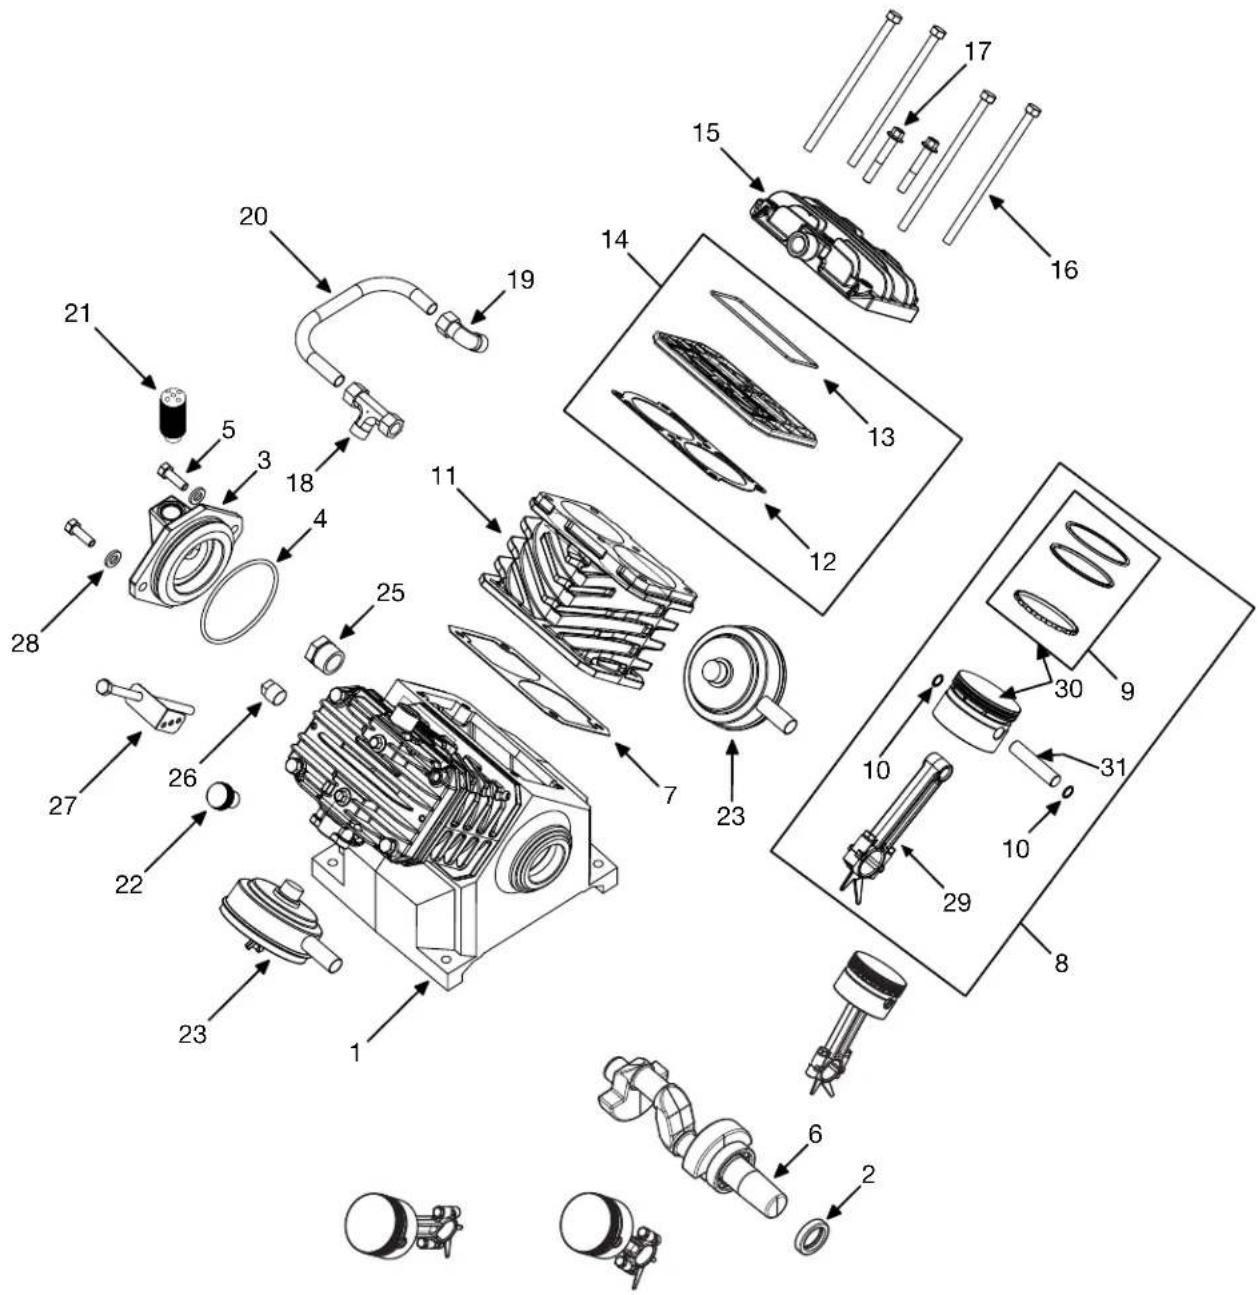
REPAIR PARTS ILLUSTRATION FOR TQ3010
text_image
Exploded view diagram of a mechanical assembly with numbered parts for identificationFor Repair Parts, visit www.campbellhausfeld.com
24 hours a day - 365 days a year
Please provide following information:
-Model number
-Serial number (if any)
-Part description and number as shown in parts list
REPAIR PARTS LIST FOR TQ3010
| Ref. No. | Description | Part Number: | Qty. |
| 1 CRANKCASE TQ010001AV 1 | |||
| 2 OIL SEAL ST120000AV 1 | |||
| 3 BEARING CAP TQ010201AV 1 | |||
| 4 O-RING | ● | 1 | |
| 5 HEX HEAD CAP SCREW M8 X 1-1/4 INCH X 25 MM †2 | |||
| 6 CRANKSHAFT AND BEARING ASSEMBLY TQ900201AJ 1 | |||
| 7 CRANKCASE GASKET | ● | 2 | |
| 8 CONNECTING ROD ASSEMBLY | ■ | 4 | |
| 9 PISTON RING SETS (TWO SETS) | VT911200AV ■ | 2 | |
| 10 | INTERNAL RETAINING RING | ■ | 8 |
| 11 | CYLINDER | VT040915AV | 2 |
| 12 | CYLINDER GASKET | ● | 2 |
| 13 | MOLDED O-RING | ● | 2 |
| 14 | VALVE PLATE KIT | VT470800AJ | 2 |
| 15 | CYLINDER HEAD | ▲ | 2 |
| 16 | HEX HEAD CAPSCREW M8 X 150 MM | ▲ | 8 |
| 17 | FLANGE HEAD SCREW | ▲ | 4 |
| 18 | EXHAUST TEE FITTING | TQ901100AV 1 | |
| 19 | EXHAUST ELBOW FITTING | TQ901200AV 1 | |
| 20 | EXHAUST TUBE | TQ901300AV 1 | |
| 21 | BREATHER | VH901100AV | 1 |
| 22 | OIL FILL PLUG VH900800AV 1 | ||
| 23 | AIR FILTER WITH ELEMENT | VH901700AV | 2 |
| 24 ▼ | AIR FILTER ELEMENT ONLY | VH901800AV | 2 |
| 25 | SIGHT GLASS | VH901000AV | 1 |
| 26 | PIPE PLUG 1/4 INCH NPT | ST072915AV | 1 |
| 27 | BELT GUARD BRACKET | TQ012000AV 1 | |
| 28 | BRASS WASHER | ST070925AV 2 | |
| 29 | CONNECTING ROD | TQ010901AJ 4 | |
| 30 | PISTON WITH RINGS KIT | TQ901700AV 4 | |
| 31 | WRIST PIN KIT (INCLUDES #10(2)) | TQ901800AV | 4 |
REPLACEMENT PARTS KITS
| ▲ | CYLINDER HEAD AND FASTENERS KIT | TQ900800AJ |
| ■ | CONNECTING ROD / PISTON RING ASSEMBLY KIT | TQ901500AV |
| ● | GASKET KIT | TQ901001AJ |
| ▼ | NOT SHOWN |
†
Reminder: Keep your dated proof of purchase for warranty purposes! Attach it to this manual or file it for safekeeping.
LIMITED WARRANTY
- DURATION: The compressor pump and air receiver is warranted for one year from the date of purchase by the original purchaser. The balance of the compressor package is warranted for one year from the date of purchase by the original purchaser.
- WHO GIVES THIS WARRANTY (WARRANTOR): Campbell Hausfeld a Marmon/Berkshire Hathaway Company, 100 Production Drive, Harrison, Ohio, 45030. Visit www.campbellhausfeld.com
- WHO RECEIVES THIS WARRANTY (PURCHASER): The original purchaser (other than for purposes of resale) of the Campbell Hausfeld air compressor.
- WHAT PRODUCTS ARE COVERED BY THIS WARRANTY: Campbell Hausfeld CE4104 and TQ3104 air compressors.
- WHAT IS COVERED UNDER THIS WARRANTY: Parts and Labor to remedy defects in material and/or workmanship with the exceptions noted below.
- WHAT IS NOT COVERED UNDER THIS WARRANTY:
A. Implied warranties, including those of merchantability and FITNESS FOR A PARTICULAR PURPOSE ARE LIMITED FROM THE DATE OF ORIGINAL PURCHASE AS STATED IN THE DURATION. Some States do not allow limitations on how long an implied warranty lasts, so the above limitations may not apply to you.
B. ANY INCIDENTAL, INDIRECT, OR CONSEQUENTIAL LOSS, DAMAGE, OR EXPENSE THAT MAY RESULT FROM ANY DEFECT, FAILURE, OR MALFUNCTION OF THE CAMPBELL HAUSFELD PRODUCT. Some States do not allow the exclusion or limitations of incidental or consequential damages, so the above limitation or exclusion may not apply to you.
C. Any failure due to:
-
Accident or purchaser's abuse
-
Improper installation
-
Equipment that has not been operated or maintained in accordance with Campbell Hausfeld's instructions as detailed in the operating manual provided with the compressor.
-
Equipment that has been repaired or modified without authorization from Campbell Hausfeld.
D. Pre-delivery service, i.e. assembly, oil or lubricants, and adjustment.
E. The effects of normal wear and tear.
F. Gasoline engines and components are expressly excluded from coverage under this limited warranty. The Purchaser must comply with the warranty given by the engine manufacturer which is supplied with the product.
G. Equipment that has been damaged in transit.
-
RESPONSIBILITIES OF WARRANTOR UNDER THIS WARRANTY: Repair or replace, at Warrantor's option, compressor or component which is defective, has malfunctioned and/or failed to conform within duration of the warranty period. Warranted repairs will be made at the Purchaser's location.
-
RESPONSIBILITIES OF PURCHASER UNDER THIS WARRANTY:
A. Provide dated proof of purchase and maintenance records.
B. Use reasonable care in the operation and maintenance of the products as described in the owner's manual(s).
C. Repairs requiring overtime, weekend rates, or anything beyond the standard manufacturer warranty repair labor reimbursement rate.
D. Time required for any security checks, safety training, or similar for service personnel to gain access to facility.
E. Location of unit must have adequate clearance for service personnel to perform repairs and easily accessible.
- WHEN WARRANTOR WILL PERFORM REPAIR OR REPLACEMENT UNDER THIS WARRANTY: Repair or replacement will be scheduled and serviced according to the normal work flow at the servicing location, and depending on the availability of replacement parts.
This Limited Warranty applies in the U.S., Canada and Mexico only and gives you specific legal rights. You may also have other rights which vary from State to State or country to country.
NOTES
TING STARTED
SPECIFICATIONS
INSTALLATION
natural_image
Black industrial air compressor with visible branding (CH CAMPBELL HAUSFELD) and mechanical components above it (no text-heavy elements)natural_image
Three black-and-white illustrations showing a fire, a circular object, and a hand holding a bar chart (no text or symbols)natural_image
Technical line drawing of a mechanical joint or bracket with a bolt and base (no text or symbols)Figure 3 - Coussinet isolant
natural_image
Close-up of a metallic valve assembly with a handle, shown against a plain background (no text or symbols visible)1-4 HP JUSQU'À 22,0 10 AWG
5.0 8 AWG
CE MODELE NE CONTIENT PAS ATTENTION
Recommended Oil (2 Options)
natural_image
Close-up of a black spherical object with four legs and a curved arrow indicating rotation (no text or symbols)natural_image
Line drawing of a hand holding a small mechanical component (no text or symbols)natural_image
Close-up of mechanical components mounted on a grid-patterned surface (no visible text or symbols)text_image
Exploded view diagram of a mechanical assembly with numbered components for identificationtext_image
Exploded view diagram of a mechanical assembly with numbered parts for identificationnatural_image
Black industrial air pressure vessel with 'CH CAMPBELL HAUSFELD' branding, no visible text or symbols on the device itself.Modelos: CE4104 y TQ3104
CH CAMPBELL HAUSFELD.
Harrison, Ohio 45030
ANTES DE COMENZAR
Introducción
natural_image
Three black-and-white icons showing fire, hand, and hand with abstract shapes (no text or symbols)natural_image
Technical line drawing of a mechanical joint or bracket with a bolt and nut (no text or symbols)natural_image
Close-up of a mechanical valve assembly with a handle and housing (no visible text or symbols)natural_image
Close-up of a black metal grill with three legs and a curved arrow indicating rotation (no text or symbols)natural_image
Line drawing of a hand holding a small mechanical component (no text or symbols)natural_image
Close-up of mechanical components mounted on a grid-patterned surface (no visible text or symbols)Figura 10 - Filtro de aire


