
K-13686 - Sanitary faucets KOHLER - Free user manual and instructions
Find the device manual for free K-13686 KOHLER in PDF.

User questions about K-13686 KOHLER
0 question about this device. Answer the ones you know or ask your own.
Ask a new question about this device
Download the instructions for your Sanitary faucets in PDF format for free! Find your manual K-13686 - KOHLER and take your electronic device back in hand. On this page are published all the documents necessary for the use of your device. K-13686 by KOHLER.
USER MANUAL K-13686 KOHLER
natural_image
Technical line drawing of a rectangular electronic device with ventilation slots and a button labeled 'K-13686' (no other text or symbols)Mproduct numbers are for Mexico (i.e. K-12345M)
We appreciate your commitment to Kohler quality. Please take a few minutes to review this manual before you start installation. If you encounter any installation or performance problems, please don't hesitate to contact us. Our phone numbers and website are listed on the back cover. Thanks again for choosing Kohler Company.
ToolsandMaterials

Strap Wrench
Assorted
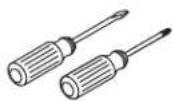
Screwdrivers
Plus:
• (4) C-Size Alkaline Batteries
- Wire Cutter
BeforeYouBegin
□ Observe all local plumbing and building codes.
□ Refer to local codes and manufacturer's instructions for flush valve requirements.
□ Shut off the main water supply.
☐ No additional plumbing or electrical connections are required to install the valve.
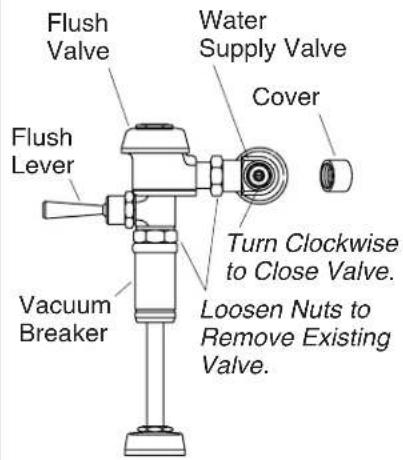
1. ReplacetheValve
□ Remove the cover from the water supply valve. Using a screwdriver, turn the screw clockwise to close the valve.
□ Activate the flush lever to drain any water from the flush valve assembly.
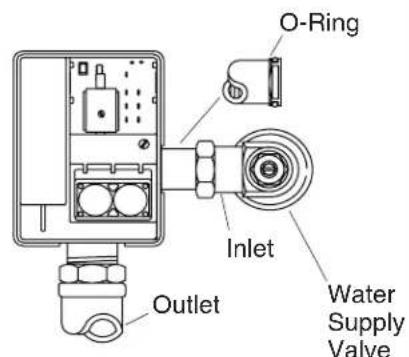
☐ Loosen the inlet and outlet nuts with a wrench and remove the old flush valve assembly.
□ Clean the threads on the water supply valve and vacuum breaker.
☐ Install the battery-operated flush valve by inserting its inlet fitting into the water supply valve, and then lining up its outlet fitting with the vacuum breaker unit.
NOTE: Make sure the O-ring is on the inlet fitting.
□ Tighten the inlet and outlet connections securely with a wrench.
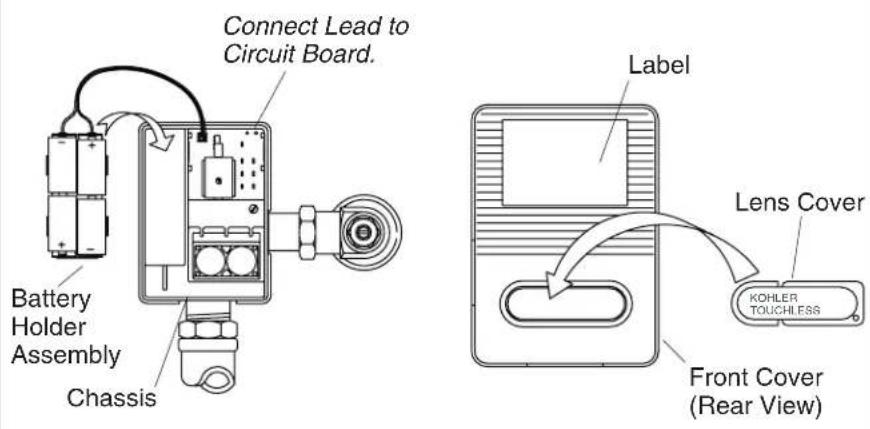
2. InstallBatteryHolderandLensCover
☐ Install four "C" size alkaline batteries in the battery holder assembly.
□ Align and connect the battery holder lead to the circuit board. Align the assembly into the chassis.
□ Install the lens cover.
3. Complethethel Installation
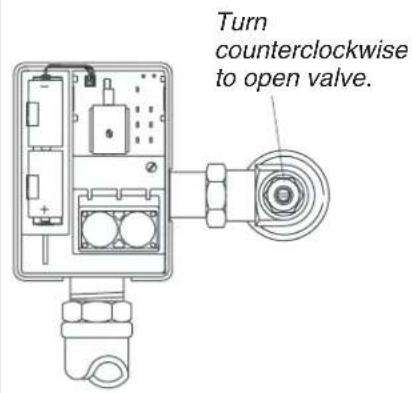
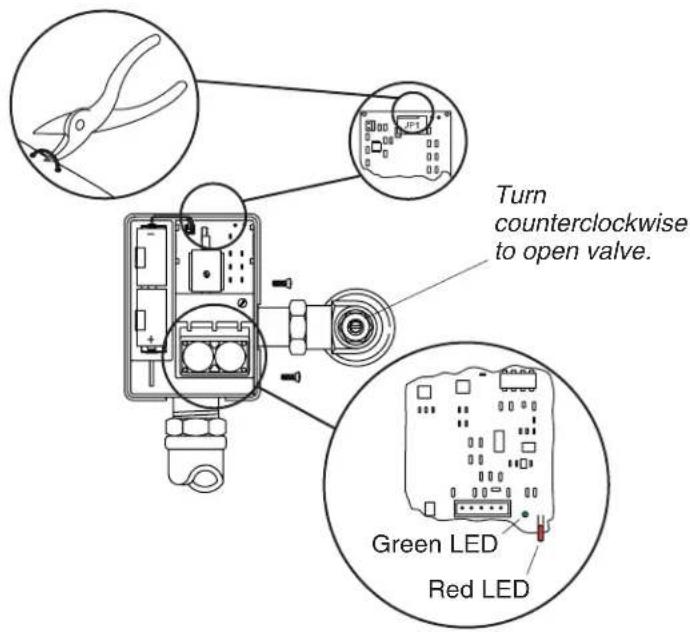
□ Using a screwdriver, turn the screw on the water supply valve counterclockwise to open the valve.
☐ Test the assembly by covering the lens for at least 30 seconds. Uncover the lens. The valve should flush after a few seconds.
□ Inspect for leakage.
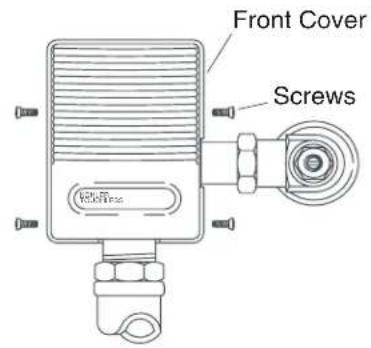
☐ Place the front cover on the unit, aligning the lens cover into the rectangular lens housing on the flush valve.
☐ Install four socket head screws. Do not overtighten screws.
□ Replace water supply valve cover.
4.Troubleshooting
To view the indicator, you must remove the faceplate and move the circuit board in the back until you can see the LED lights.
GlobalUrinalWithCourtesyFlush
Cut the courtesy flush jumper wire (JP1) on the circuit board.
After the unit has powered up for 10 minutes, check the following:
☐ The greenLED indicator is on constantly when the urinal sensor detects an object.
□ A flush occurs 3 seconds after the urinal sensor detects an object.
☐ If the urinal sensor detects an object for more than one minute, the greenLED flashes until the object is removed. The urinal flushes once after the object has been removed.
DomesticUrinalWithoutCourtesyFlush
After the unit has powered up for 10 minutes, check the following:
Troubleshooting(cont.)
☐ The greenLED indicator is on constantly when the urinal sensor detects an object.
☐ If the urinal sensor detects an object for more than one minute, the greenLED flashes until the object is removed. The urinal flushes once after the object has been removed.
BothTypesofUrinals
☐ The urinal flush valve features a redLED low battery indicator. This indicator flashes when batteries need to be replaced. Replace with C-cell alkaline batteries only.
☐ If the valve fails to operate, first check the redLED low battery indicator. If the indicator is not flashing, check that the water supply is on. If the valve still fails to operate, replace the C-cell alkaline batteries.