P260004 - Lighting Progress Lighting - Free user manual and instructions
Find the device manual for free P260004 Progress Lighting in PDF.


User questions about P260004 Progress Lighting
0 question about this device. Answer the ones you know or ask your own.
Ask a new question about this device
Download the instructions for your Lighting in PDF format for free! Find your manual P260004 - Progress Lighting and take your electronic device back in hand. On this page are published all the documents necessary for the use of your device. P260004 by Progress Lighting.
USER MANUAL P260004 Progress Lighting
| AA Screw Qty:4 | BB Cage Screw Qty:4 | |
| Missing parts? Please contact Customer Service at 1-800-447-0573 or customerservice@progresslighting.com, 8am-8pm (Eastern), Monday - Friday 93165614 Page:1 | ||
| 1 Remove Fan Parts 1a 1b 93165614 Page:2 | 1a. Remove the Decorative Cover (D) on the fan by twisting it counterclockwise and then pulling down. 1b. Identify the Mounting Plate (E) on the fan that the Decorative Cover (D) was attached to. Remove the three fan screws from the Mounting Plate (E). Remove Mounting Plate (E) completely. Mounting Plate (E) must be taken off the fan in order to install the light kit. Mounting Plate (E) |
ASSEMBLY INSTRUCTIONS
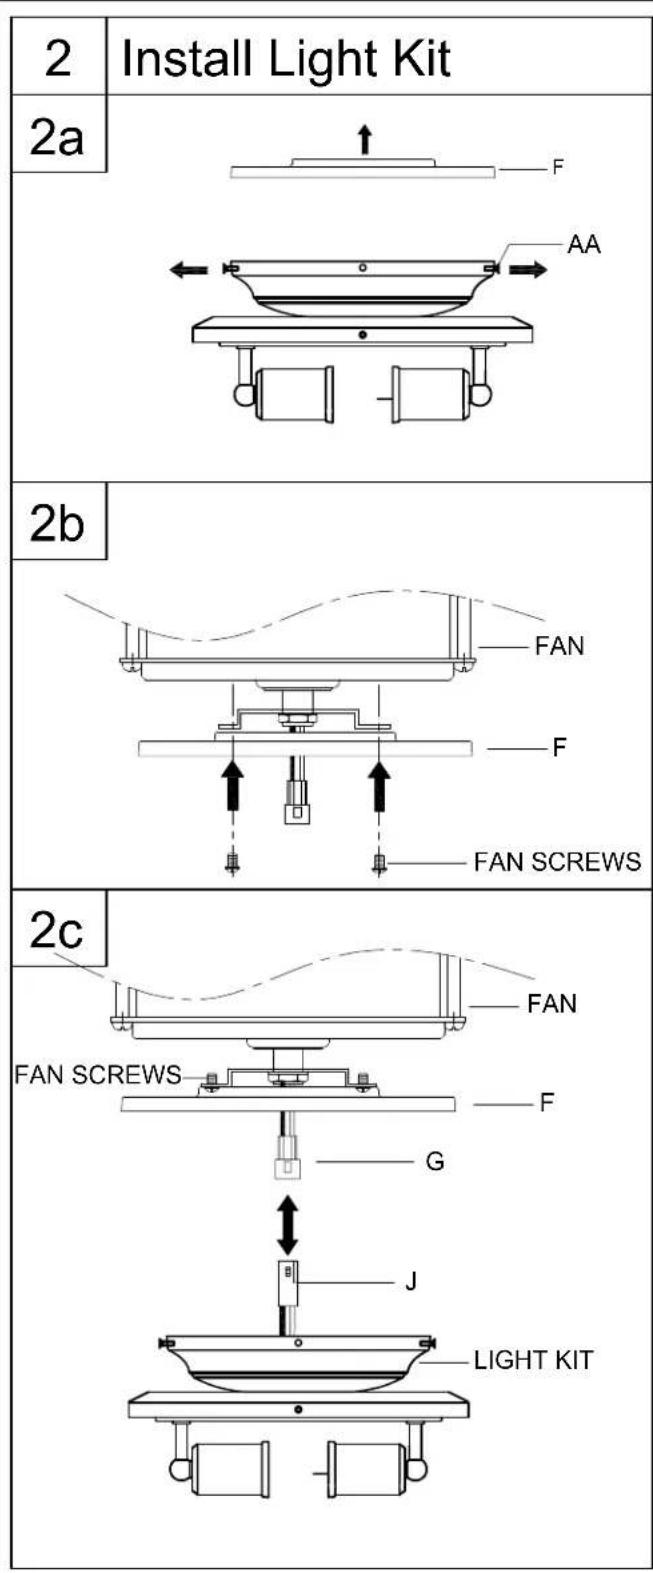
2a. Loosen Screws (AA) and remove Light Kit Pan (F) from the light kit.


Screws
X4
2b. Use the three fan screws removed in step 1b to attach the Light Kit Pan (F) to the fan.
2c. Connect the Fan Wire Connector (G) to the Light Kit Wire Connector (J).
ASSEMBLY INSTRUCTIONS
2d
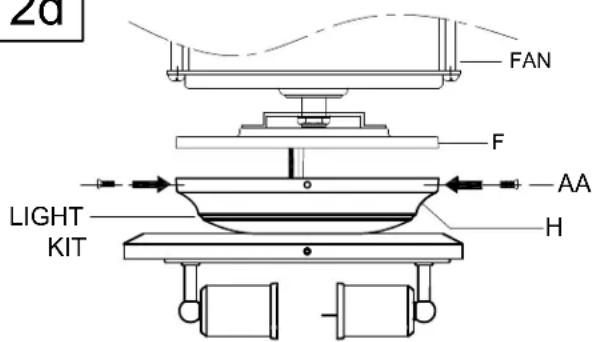
2d. Use Screws (AA) to attach the Light kit Housing (H) onto the Light Kit Pan (F).


Screws
X4
2e
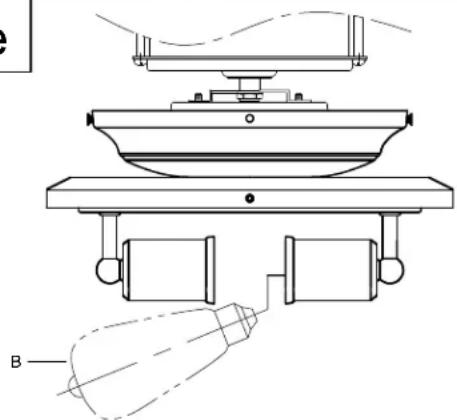
2e. Screw Lamps (B) into the lamp sockets. Make sure the Lamps (B) do not exceed the maximum wattage specified on the fixture's wattage rating label.
2f
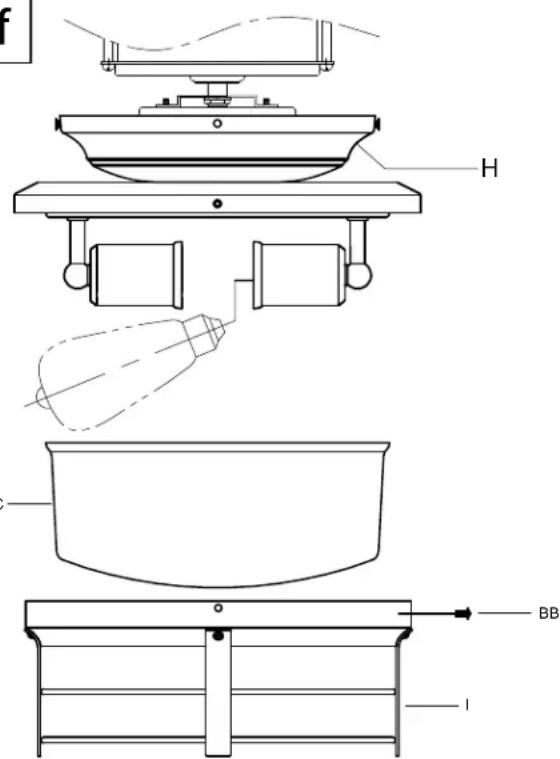
2f. Slide the GLASS SHADE (C) into the CAGE (I). Tighten the Cage SCREW (BB) until the CAGE (I) is secured to the Light kit Housing (H).

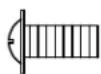
Cage Screws
X4