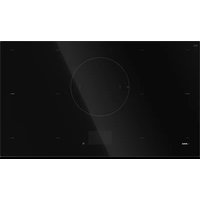
HI39571TF - Cooker Atag - Free user manual and instructions
Find the device manual for free HI39571TF Atag in PDF.


User questions about HI39571TF Atag
0 question about this device. Answer the ones you know or ask your own.
Ask a new question about this device
Download the instructions for your Cooker in PDF format for free! Find your manual HI39571TF - Atag and take your electronic device back in hand. On this page are published all the documents necessary for the use of your device. HI39571TF by Atag.
USER MANUAL HI39571TF Atag
natural_image
Cooking setup with a pan of broccoli, a pot of boiling sauce, and a roasted steak on a black induction cooktop (no text or symbols visible)Gebruiksaanwijzing
Inductiekookplaat
HI38571TF
HI39571TF
natural_image
Pure electrical circuit lines without any symbolsnatural_image
3D rendered image of two metallic circular devices on a black tray, one with a handle and the other with a hexagonal top (no text or symbols visible)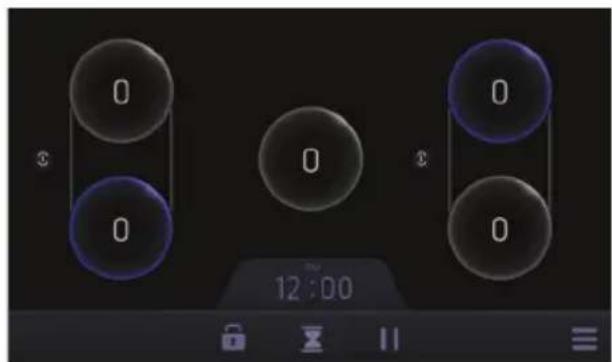
text_image
0 0 0 0 12:00
natural_image
Simple diagram showing two cooking pots with a checkmark indicating the difference between them (no text or symbols present)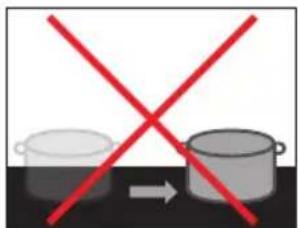
natural_image
Two cooking pots with red X marks, one crossed out, on a dark surface (no text or symbols)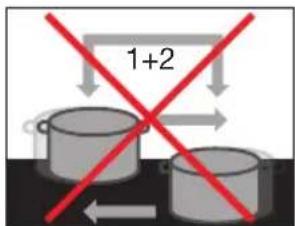
text_image
1+2
Let op
natural_image
Simple illustration of a glowing sphere with the number 0 inside, no text or symbols present.natural_image
Simple black sphere with a white letter 'H' on its surface against a dark background (no additional text or symbols)text_image
00 MINUTES 01text_image
00 MINUTES 01natural_image
Hand pointing at a play button icon on a dark background (no text or symbols)natural_image
Illustration of a cooking pot icon with a hand pointing at a cross symbol (no text or symbols present)text_image
2 PROGRAMS Temperature holding Waterbolling Pasta Frying Streamingtext_image
PROGRAMS Temperature boiling Water boiling Posttext_image
PROGRAMS Temperature holding Waterboiling Pasttext_image
PROGRAMS Pasta Frying Steamingtext_image
PROGRAMS Frying Steamingtext_image
Hand interacting with a digital interface showing playback controls and a button labeled '1'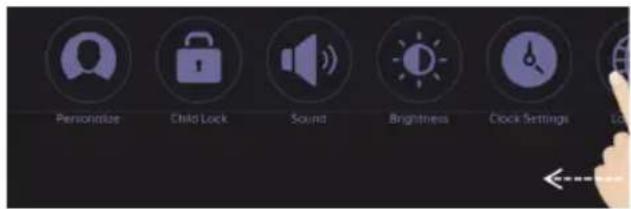
text_image
Personalize Clock Lock Sound Brightness Clock Settings Locknatural_image
Hand pointing at three control icons: lock, hourglass, and double vertical bar (no text or symbols)
natural_image
Three simple icons: hourglass, double vertical bar, and lock on dark background (no text or symbols)
text_image
12:00natural_image
Hand holding a slider with sun icons on both sides (no text or symbols)
Klok
text_image
Reset all settings?
text_image
Prohibition sign with crossed-out trash bin and no text or symbolsnatural_image
Cooking setup on a black electric stove with a digital kitchen scale and a roasted meat dish, no visible text or symbols.natural_image
Pure electrical circuit lines without any symbolsnatural_image
Three glowing purple spheres with white '0' labels on black background, no text or symbols present
text_image
0 2 5 9 0natural_image
Two metallic cylindrical devices on a black tray, one emitting a droplet (no text or symbols visible)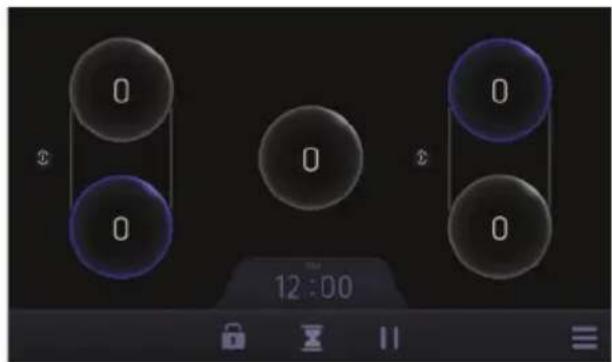
text_image
0 0 0 0 12:00
natural_image
Simple diagram showing two cooking pots with a checkmark indicating the difference between them (no text or symbols present)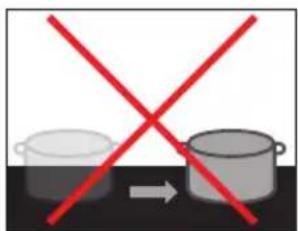
natural_image
Two cooking pots with red X marks, one increasing and the other decreasing (no text or symbols)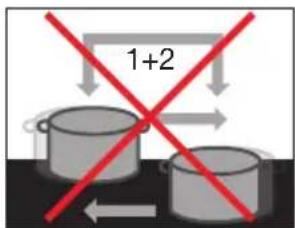
text_image
1+2
natural_image
Simple illustration of a glowing sphere with a small question mark at its top (no text or symbols)natural_image
Simple black sphere with a white letter 'H' on its surface against a dark background (no additional text or symbols)text_image
00 MINUTES 01text_image
00 MINUTES 01natural_image
Hand pointing at a play button icon on a dark background (no text or symbols)text_image
Press 3 secnatural_image
Illustration of a hand pointing at a cooking pot icon with steam and a cross mark (no text or symbols)text_image
PROGRAMS Temperature Heating WaterBoiling Posttext_image
PROGRAMS A mixture holding Water boiling Pastatext_image
PROGRAMS Pasta Frying Steamingtext_image
PROGRAMS Frying Streamingnatural_image
Hand interacting with a black electronic device interface (no visible text or symbols)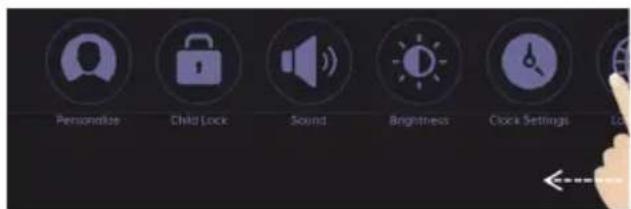
text_image
Personalize Child Lock Sound Brightness Clock Settings Locktext_image
Hand pointing at three control icons: lock, hourglass, and double vertical bar on dark background
natural_image
Three circular icons: hourglass, double vertical bars, and lock on dark background (no text or symbols)
text_image
12:00natural_image
Hand pressing a button on a dark background with sun icons (no text or symbols)
Heure
text_image
Reset all settings?
text_image
Warning symbol for a trash bin with crossed lines indicating no waste or discharge, and a solid black rectangle below.natural_image
Cooking setup on a black electric stove with a digital kitchen scale and a roasted steak dish (no visible text or symbols)Bedienungsanleitung
Induktionskochfeld
HI38571TF
HI39571TF
natural_image
Pure electrical circuit lines without any symbols- Bridge-Induktionskochzone 220 x 195 mm / 2,1 kW (Boost 3,7 kW)
- Display / Bedienfeld
- Ein/Aus-Taste
- 'Dual Ring' Induktionskochzone ∅ 280 mm / 2,6 kW (Boost 5,5 kW)
- Induktionskochzone 220 x 195 mm / 2,1 kW (Boost 3,7 kW)
natural_image
Two metallic kitchen utensils on a black tray, one with a handle and the other with a lid (no text or symbols visible)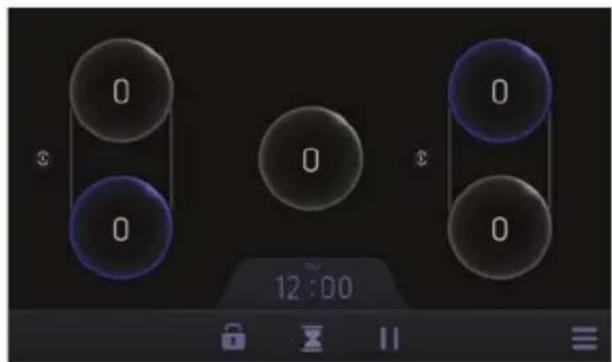
text_image
0 0 0 0 12:00
natural_image
Simple diagram showing two cooking pots with a checkmark indicating the difference between them (no text or symbols present)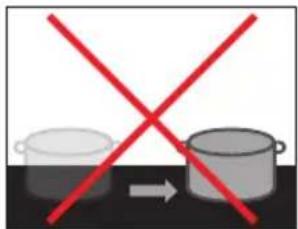
natural_image
Two cooking pots with red X marks, one increasing and the other decreasing (no text or symbols)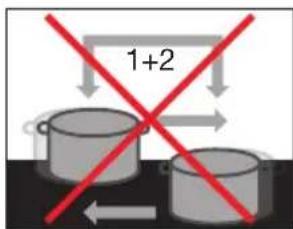
text_image
1+2
natural_image
Simple circular diagram with a question mark at the top and an internal oval shape, set against a black background (no text or symbols)natural_image
Simple black sphere with a white letter 'H' on its surface against a dark background (no additional text or symbols)text_image
00 MINUTES 01natural_image
Circular digital display with number 2 and time stamp 00:07 (no readable text or symbols beyond the number)text_image
00 MINUTES 01natural_image
Hand pointing at a play button icon on a black background (no text or symbols)text_image
PROGRAMS Temperature Heating WaterBoiling Posttext_image
PROGRAMS Mortgage holding Waterboiling Pastetext_image
PROGRAMS Pasta Frying Steamingtext_image
PROGRAMS Frying Streamingtext_image
Personalize Child Lock Sound Brightness Clock Settingsnatural_image
Hand pointing at three control icons: lock, hourglass, and double vertical bar (no text or symbols)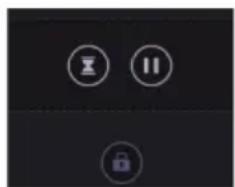
natural_image
Three simple icons: hourglass, double vertical bars, and lock on dark background (no text or symbols)
text_image
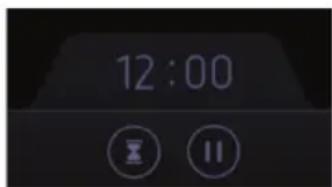
12:00natural_image
Hand pressing a button on a dark background with sun icons (no text or symbols)
Uhrzeit
text_image
Reset all settings?
Achtung
text_image
Prohibition sign with crossed-out trash bin and no text or symbolsnatural_image
Cooking setup on a black electric stove with a digital kitchen scale and a roasted meat dish, no visible text or symbols.Instructions for use
Induction hob
HI38571TF
HI39571TF
Your induction hob
Introduction 4
Description of the appliance 5
Pan selection mode 6
'Pot move' function 7
Safety
Temperature protection 8
Cooking time limiter 8
Power limiter 8
Before first use
Induction noises 9
Appropriate pans 9
Pan detection 10
Cooking settings 11
Operation
Switch the appliance on / Switch the appliance to standby mode 12
Set the power level 12
Power level boost (B) and double boost (B2) 13
Stop cooking 13
A 'quick stop' 13
Residual heat indication 13
Start a cooking timer 14
Change the setting of a cooking timer / Stop a cooking timer 14
Start the minute minder 15
Change the setting of the minute minder / Stop the minute minder 15
Pause function 16
Lock function 16
Connecting the Bridge induction cooking zones 17
Start a program 17
Stop a program 18
Close the program menu 18
Automatic cooking functions 18
Settings
| Settings menu 23 | ||
| Personalise | 23 | |
| Child safety lock 24 | ||
| Sound | 24 | |
| Brightness | 25 | |
| Clock | 25 | |
| Language | 25 | |
| Factory reset 25 |
Service menu
| Power limiter 26 | ||
| Maintenance | Cleaning | 28 |
Trouble shooting
| General | 29 | |
| Warning messages 30 | ||
| Error codes 31 |
Technical specifications
| Information according regulation (EU) 66/2014 32 |
Environmental aspects
| Disposal of packaging and appliance 33 |


Important information
Nice to know
Electrical connection
Introduction
Congratulations on your choice of this Atag appliance. This product was designed with simple operation and optimum comfort in mind.
This manual describes the best way to use this appliance. In addition to information on operation, you will also find background information that may come in handy when using the appliance.

Please read the separate safety instructions carefully before using the appliance.
Read this manual before using the appliance and keep it in a safe place for future use.
This manual serves as reference material for the service department. Please, stick the appliance rating label in the rectangle on the back of the manual. The appliance rating label contains all the information that the service department will need in order to respond appropriately to your needs and questions.
You can find the most recent version of the instructions for use on our website.
Description of the appliance
HI39571TF
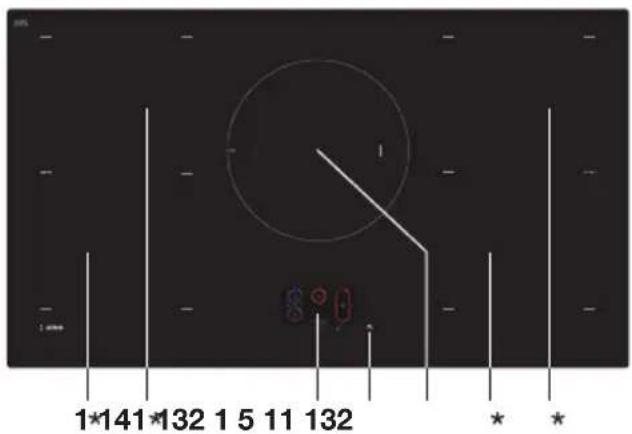
text_image
1*141*132 1 5 11 132 * *HI38571TF
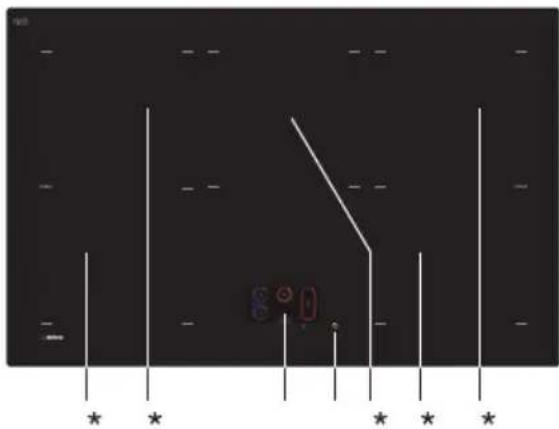
natural_image
Pure electrical circuit lines without any symbols- Bridge induction cooking zone 220 x 195 mm / 2,1 kW (boost 3,7 kW)
- Display / Control panel
- On/Off key
- Dual ring induction cooking zone ∅ 280 mm / 2,6 kW (boost 5,5 kW)
- Induction cooking zone 220 x 195 mm / 2,1 kW (boost 3,7 kW)
★ The automatic cooking functions can be used on these cooking zones.
Main screen
The main screen shows on the display when you switch on the appliance with the On/Off key.
- Connection symbol
- Zone indication
- Clock (current time)
- Control panel lock
- Minute minder
- Pause
- Settings menu
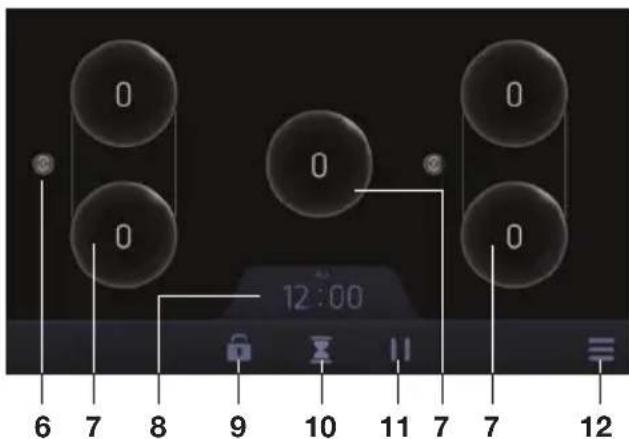
text_image
0 0 0 0 12:00 6 7 8 9 10 11 7 7 12
Attention
Hot pans can cause damage to the display and the On/Off key. Don't put pans on the display / control panel. Always place a pan in the centre of a cooking zone.
Intuitive operation
The graphical user interface allows an easy and intuitive operation by the user. The display shows all the information the user needs during operation in a nice and simple way. Actions of the user lead to adapted displays with other functions. The software works with different visual effects like animations and colors to increase the usability. Operate one touch key at a time.

Touch a pan shape or a symbol on the display; the corresponding options show on the display.
Pan selection mode
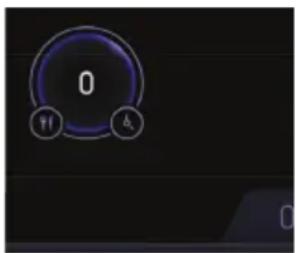
The pan selection mode shows when you touch a pan shape on the main screen.
- Programs
- Timer
- Slide control with power levels
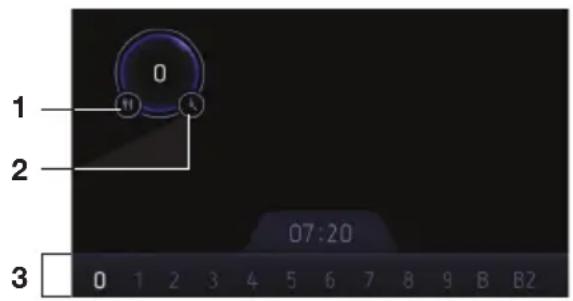
text_image
0 1 2 3 07:20 0 1 2 3 4 5 6 7 8 9 B B2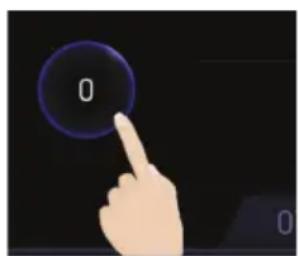
text_image
0 0Touch Pan selection mode
text_image
0 Y A B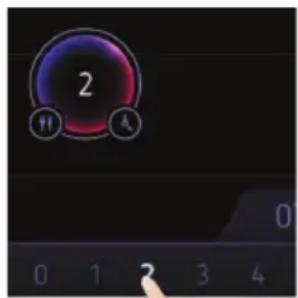
text_image
2 11 A 0 0 1 2 3 4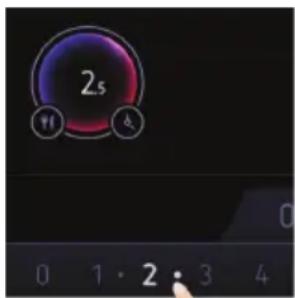
Touch the number of a power level or select half a power level between the numbers. You can also move your fingertip from the left side to the right side or vice versa. A little dot indicates a half power level.
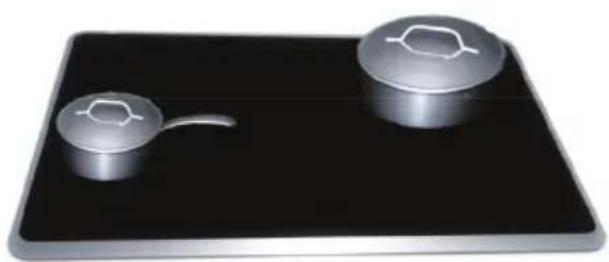
The display shows the pan position and pan size. There are 2 or 3 pan sizes implemented in the user interface (depending on the hob model): small, medium and big. These sizes are always shown with a round shape and they can have different colors.

natural_image
Three glowing purple spheres with white '0' labels, arranged horizontally on a black background (no text or symbols beyond the '0' values)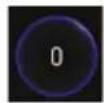
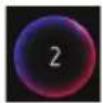
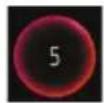

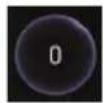
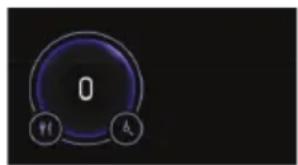
| Power level 0 Blue | |
| Power level 1 to 3.5 Purple | |
| Power level 4 to 6.5 Red | |
| Power level 7 to B2 | Orange |
| When you lift a pan or no pan Grey | |
natural_image
Two metallic kitchen utensils on a black tray, one with a handle and the other with a hexagonal top (no text or symbols visible)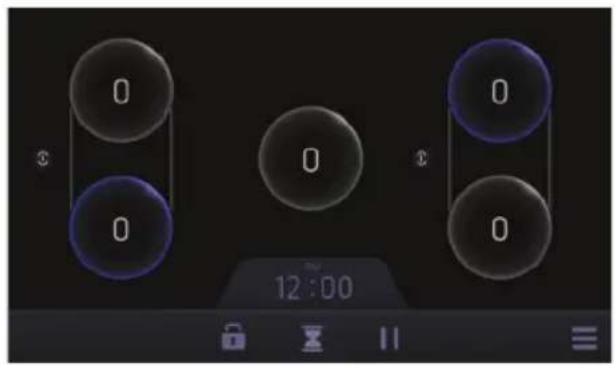
text_image
0 0 0 0 12:00
The round shape that most closely matches the size of the pan shows on the display.
'Pot move' function
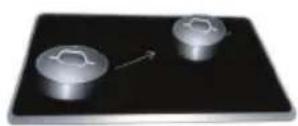
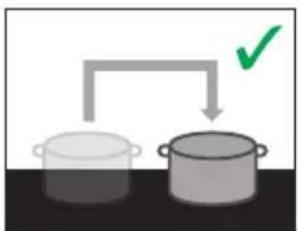
A pan can be moved to another cooking zone on the hob. Pan settings (power level / program / timer) move to the new pan position automatically. The display shows the new pan position, including the settings for that pan. It is important to always move one pan at a time.
• Automatic cooking functions do not move along but are switched off.

When you lift a pan, the pan information shows on the display for 10 seconds. During that time you can put the pan on a new position and all pan settings move to the new pan position automatically.
natural_image
Simple diagram showing two cooking pots with a checkmark indicating the difference between them (no text or symbols present)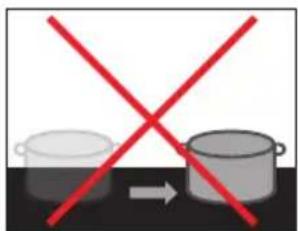
natural_image
Two cooking pots with red X marks, one crossed out and the other unmarked, against a black background (no text or symbols)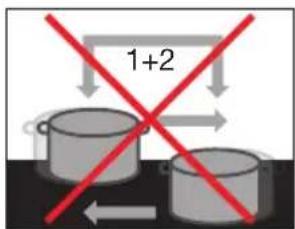
text_image
1+2
Attention
Grains of sand may cause scratches which cannot be removed. Only put pans with a clean bottom on the hob. We recommend that you lift pans and not slide them over the hob.

Read the separate safety instructions before you first use the appliance!
Temperature protection
A sensor continuously monitors the temperature of certain parts of the hob. Each cooking zone has a sensor that continuously monitors the temperature of the bottom of the pan to prevent risk of overheating when a pan boils dry. If the temperature is too high, the hob power is automatically reduced or the hob is automatically switched off.
Cooking time limiter
The cooking time limiter is a safety feature of your hob. This limiter is activated when the cooking time, as indicated in the table, is exceeded. Depending on the program or power level you have chosen, the cooking time will be limited as follows:
| Program / Power level Automatic switch off after a cooking time of: | |
| Melting / Keep warm / Simmering 2 hours | |
| 1 / 1.5 10 hours | |
| 2 /2.5 / 3 / 3.5 5 hours | |
| 4 / 4.5 4 hours | |
| 5 / 5.5 3 hours | |
| 6 / 6.5 / 7 / 7.5 / 8 / 8.5 2 hours | |
| 9 1 hour | |
| B/B^2 | 15 minutes (then it switches back to level 9) |
Power limiter
Cooking zones that are on the same phase affect each other. When these cooking zones are switched on at the same time, the power is distributed automatically. When the boost function, an automatic cooking function or a programme is used, the power limiter may reduce settings or deactivate a function. If one cooking zone is set to boost and you want to switch the other to setting 9 or boost, the cooking zone with boost will automatically switch to a lower setting.
For HI39571TF: If the hob is connected to two-phase power and the power limiter is set to matching configuration (see service menu), the middle and right cooking zones also affect each other.
• See 'Service menu / Power limiter'.
Induction noises
A ticking sound
This is caused by the power limiter on the cooking zones. You may also hear a ticking sound at lower cooking levels.
Pans make noise
Pans can make noise while cooking. This is caused by the energy flowing from the hob to the pan. At high levels, this is perfectly normal for some pans. This does not harm the pans or the hob.
The fans make noise
The appliance is equipped with several fans to prolong the life of the electronics. If you use the appliance intensively, the fans switch on to cool the appliance and you will hear a humming noise. The fans continue to work for a few minutes after the hob is switched off.
Appropriate pans
Induction cooking requires a pan with a thick flat bottom (minimum 2.25 mm). Use pans made of ferromagnetic material or pans with a sandwich bottom. Other pans provide a lower performance. Pans made of copper, aluminum or ceramic material are not appropriate.
natural_image
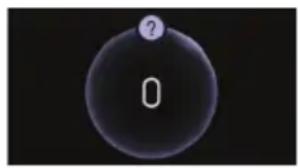
Simple dark circular shape with a white oval and a small question mark at the top (no text or symbols)In pan selection mode, an unsuitable pan is displayed in a grey colour and a question mark is shown. Touch the question mark to display the information.

The minimum pan diameter you can use for the 220 x 195 mm cooking zone is ∅ 12 cm. The minimum pan diameter you can use for the 'Dual ring' induction cooking zone (∅ 280 mm) is ∅ 24 cm for the outer coil and ∅ 12 cm for the inner coil.

Only use pans with a flat bottom. A hollow or rounded bottom can interfere with the operation of the empty cooking protection, causing the appliance to become too hot. This may lead to damages. Damage caused by using pans that are not appropriate or that boil dry is excluded from the guarantee.

Pans that have been used on a gas hob cannot be used on an induction hob.

Be careful with thin enamelled sheet-steel pans! The enamel may become damaged at high settings if the pan is too dry. High power level settings may cause the bottom of the pan to warp.

Attention
Hot pans can cause damage to the display and the On/Off key. Don't put pans on the display / control panel. Always place a pan in the centre of a cooking zone.

Attention
Grains of sand may cause scratches which cannot be removed. Only put pans with a clean bottom on the hob. We recommend that you lift pans and not slide them over the hob.

Do not place metal objects such as knives, forks, spoons and lids on the surface of the hop, they may become hot.
Pan detection
A suitable pan is indicated by a pan shape with a blue colour.
If, after setting the power level, the hob does not detect a pan (containing iron), the display will indicate this with a grey pan shape. The cooking zone switches off after 1 minute.
If you remove a pan from the cooking zone during cooking, a grey pan shape appears. The cooking zone switches off. The coloured pan shape appears again when you replace the pan. The cooking zone switches on with the previously set power level.
Cooking settings
As the ideal settings depend on the quantity and consistency of the dish in the pan, the following are merely guidelines.
Use the boost settings for:
- quickly bringing food or liquid to a boil
Use setting 8.5 - 9 for:
- searing meat
- preparing fish
- frying omelettes
- frying boiled potatoes
- deep frying food
Use setting 7 - 8 for:
- frying thick pancakes
- frying thick pieces of breaded meat
- frying bacon (or heating bacon fat)
- boiling raw potatoes
- frying French toast
- frying breaded fish
- boiling pasta
Use setting 4 - 6.5 for:
• boiling large quantities
• defrosting hard vegetables
- frying thin pieces of breaded or unbreaded meat
Use setting 1 - 3.5 for:
• simmering to make broth
- stewing meat
• gentle boiling of vegetables
- melting chocolate
- poaching
- melting cheese

Please read the chapter 'Before first use' very carefully before you start cooking. This prevents incorrect use of the hob.
Switch the appliance on / Switch the appliance to standby mode
text_image
12:00- Touch the On/Off key until you hear an audio signal.
The appliance switches on; the main screen shows on the display. - Touch the On/Off key again until you hear an audio signal.
The appliance switches to standby mode. The real time clock shows on the display for several seconds.

The appliance switches to standby mode automatically after 20 seconds when all power levels are set to '0' and no operation is done by the user.

You can adjust the time of the real time clock in the settings menu, see chapter 'Settings / Clock'.
Set the power level
Use high power levels to boil water or vegetables or to fry meat and fish. Use low power levels to simmer and for gently cooking/heating.
text_image
0 甲 乙- Put a pan on the hob.
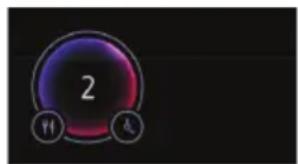
- In pan selection mode; set a power level.
The power level shows on the display for the pan in selection mode and the heating starts.
text_image
2 11 4
If you put a pan on the hob, the pan selection mode automatically shows for 4 seconds. If a pan is not in pan selection mode, touch the corresponding pan shape.
Power level boost (B) and double boost ( B^2 )
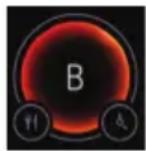

Use power level boost or double boost to heat with the highest power level for a short period of time. After 15 minutes, power level boost is set to level 9 automatically.

Risk of fire
Only use power level boost or double boost to heat up or boil a large amount of water. Oil or fat may reach extremely high temperatures with power level boost. Risk of fire!
Stop cooking
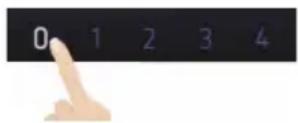
In pan selection mode; set the power level to '0' to stop the cooking.
The residual heat indication shows on the display.
A 'quick stop'
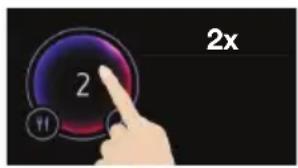
text_image
2x 2In pan selection mode; touch a pan shape twice.
The power level is set to '0' immediately. The residual heat indication shows on the display.
Residual heat indication
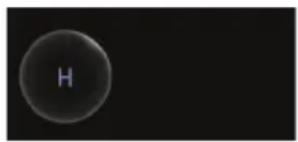
natural_image
Simple black sphere with a white letter 'H' on its surface against a dark background (no additional text or symbols)The hob has a residual heat indicator for each cooking zone that shows which cooking zones are still hot. Even when the hob is switched off, the 'H' indicator remains on as long as the cooking zone is still hot! Do not touch the cooking zones when this indicator is on.

Danger! Risk of burns and fire.
As long as the residual heat indicators are on, don't touch the heating zones and don't put any heat sensitive object on them.
Start a cooking timer
The cooking timer is used to set the power level to '0' automatically after a period of time. You can set a cooking timer for every pan on the hob (from 1 minute to 9 hours and 59 minutes).

text_image
2 11 4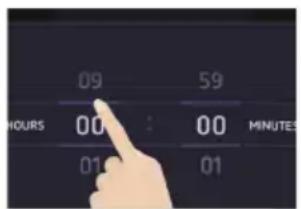
text_image
09 59 HOURS 00 : 00 MINUTES 01 01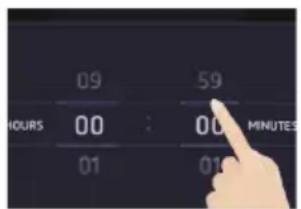
text_image
09 59 HOURS 00 : 00 MINUTES 01 01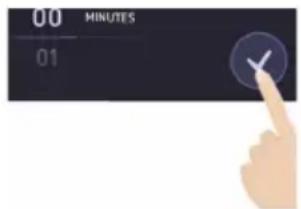
text_image
00 MINUTES 01Set the hours and the minutes and touch the confirm key to save the settings.
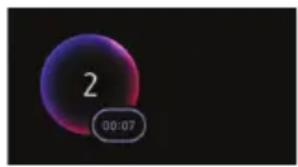
text_image
2 00:07The cooking timer shows in the pan shape for the pan in selection mode and starts counting rearward.

When the cooking timer expires, you hear an audio signal and the cooking timer starts flashing. The power level is set to '0'.

text_image
0 00:0Touch the flashing cooking timer or remove the pan.
The audio signal stops and the display shows the pan selection mode for a few seconds.

After 30 seconds, the audio signal stops automatically and the display shows the pan selection mode for a few seconds.
Change the setting of a cooking timer / Stop a cooking timer
During cooking, you can always change the setting of a cooking timer or stop a cooking timer.
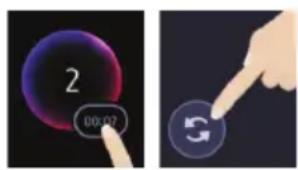
text_image
2 00:07 5- Touch the cooking timer and adjust the hours and/or minutes. Touch the reset symbol to set the cooking timer to '00:00'.
- Touch the confirm key to save the settings.
Start the minute minder
You can set the minute minder from 1 minute to 9 hours and 59 minutes. The minute minder works independently and has no effect on a cooking zone.
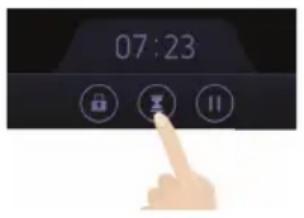
text_image
07:23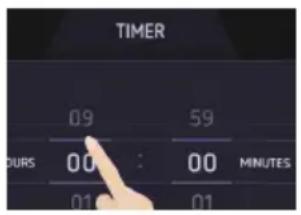
text_image
TIMER 09 59 OURS 00 : 00 MINUTES 01 01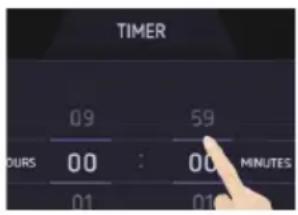
text_image
TIMER 09 59 OURS 00 : 00 MINUTES 01 01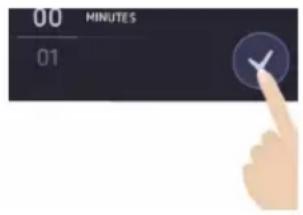
text_image
00 MINUTES 01Set the hours and the minutes and touch the confirm key to save the settings.
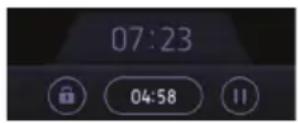
The minute minder shows on the display and starts counting rearward.

When the minute minder expires, you hear an audio signal and the minute minder starts flashing.
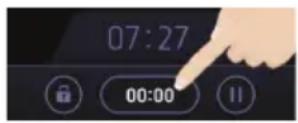
Touch the flashing minute minder.
The audio signal stops and the display shows the minute minder symbol.

After 30 seconds, the audio signal stops automatically and the display shows the minute minder symbol.

In standby mode, a minute minder in operation continues counting rearward and shows on the display. Also the real time clock shows on the display during the operation of the minute minder.
Change the setting of the minute minder / Stop the minute minder
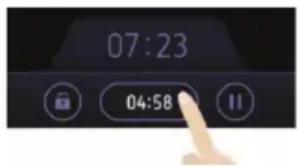
text_image
07:23 04:58-
Touch the minute minder and adjust the hours and/or minutes. Touch the reset symbol to set the minute minder to '00:00'.
-
Touch the confirm key to save the settings.
Pause function
This function stops the cooking activity temporarily (max. 10 minutes); cooking timers and the minute minder are also paused.

When the pause function lasts longer than 10 minutes, the hob switches to standby mode.
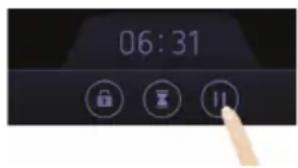
text_image
06:31- Touch the pause key.
The pause function is active; the display shows the 'continue' symbol.
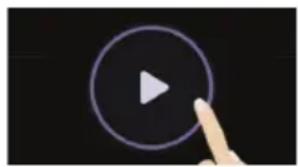
natural_image
Hand pointing at a play button icon on black background (no text or symbols)- Touch the 'continue' symbol to stop the pause function.
The hob continues all cooking activities with the same settings as before.
Lock function
To avoid accidentally activating or interfering with the setting of the cooking zones, in particular during cleaning, the control panel can be locked (with exception of the On/Off key).
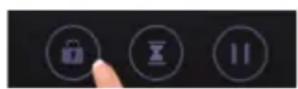
- Touch the lock key.
A lock symbol appears in the screen; the control panel is locked. If you try to do an action, the display will inform you that the locking function is activated.
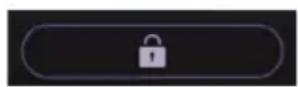
An acoustic feedback can be heard, and a message will appear at the bottom of the screen.
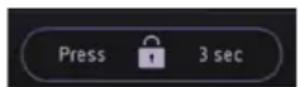
In the case where cooking processes are activated, they still be running but can't be modified.
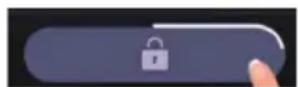
- Touch the lock key for three seconds (until the animation around the lock symbol is complete) to unlock the control panel.
Connecting the Bridge induction cooking zones
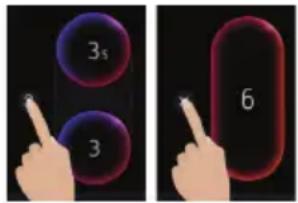
Two Bridge induction cooking zones can be connected to each other. This creates one large zone that can be used, for example, with a grill plate or a fish pan on the same power level. The pan must be large enough to cover the centres of the two left or the two right bridge induction cooking zones (at least 230 mm).
text_image
3s 3 6- In pan selection mode; touch the connection symbol between the two bridge induction cooking zones.
The zones are combined as one big cooking zone. - In pan selection mode; set a power level.
The power level shows on the display for the pan in selection mode and the heating starts. - Touch the connection symbol between the two bridge induction cooking zones again to disconnect the cooking zones.

The bridge zones are automatically connected if both zones already have a pan or grill plate on them when the hob is switched on
Start a program
You can select three different programs. The programmes can be used on any cooking zone and move with the ‘Pot move’ function. The temperature accuracy depends on the quality of the pan used.
- Melting: used for melting chocolate / ± 44 °C.
- Keep warm / ± 70 °C.
- Simmering / ± 94 °C.

flowchart
graph LR
    A["2"] --> B["PROGRAMS"]
    B --> C["Warning"]
    B --> D["Temperature holding"]
    B --> E["Waterboiling"]
    B --> F["Pasta"]
    B --> G["×"]
    G --> H["PROGRAMS"]
    H --> I["Warning"]
    H --> J["Melting"]
    H --> K["Keep worm"]
    H --> L["Simmering"]
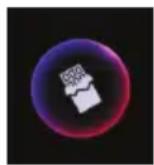
Touch the symbol ‘Heating’ and then touch the symbol of the desired program.
The symbol shows in the pan shape for the pan in selection mode and the program starts.
Stop a program
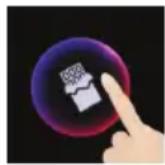
Touch the pan shape with the program and select power level ‘0’. You can also touch the pan shape twice for a ‘quick stop’.
Close the program menu
natural_image
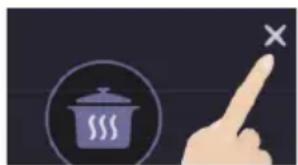
Illustration of a hand pointing at a cooking pot with steam inside, next to a cross mark (no text or symbols)Touch the symbol 'x' on the display.
Automatic cooking functions
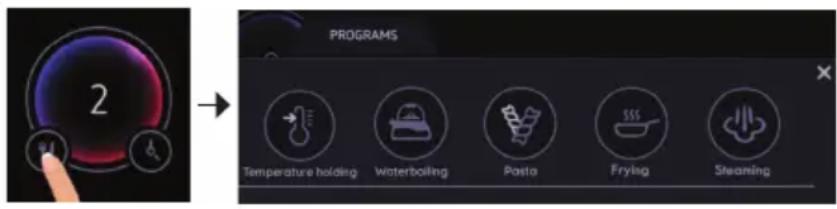
text_image
2 PROGRAMS Temperature holding Waterboiling Pasta Frying SheamingThis hob features 5 automatic cooking functions.
• Temperature holding.
- Waterboiling.
- Pasta.
- Frying.
- Steaming.

The automatic cooking functions cannot be selected/used with connected zones and the 'Dual ring' induction cooking zone of the HI39571TF.
Automatic cooking functions do not move with you to another cooking zone but are switched off when you move the pan.
The actual performance of these cooking functions greatly depends on the cookware used and certain other parameters:
- The automatic cooking functions work most accurately when using stainless steel pans with sandwich bottoms.
- The automatic cooking functions work less accurately for cookware containing aluminium or multi-layer pans.
- The use of cast iron and steel cookware is not recommended.
- For boiling, steaming, pasta, and frying, make sure you use a pan that is cooler than 40 °C and a zone without residual heat (cooler than 60 °C).
- The ‘pan move’ function cannot be used with the automatic cooking functions. If the pan is moved from one zone to another, the automatic cooking function switches off and an exclamation mark appears in the cooking zone display.
- If the pan is lifted for more than 20 seconds, the activated automatic cooking functions are cancelled.
- You can use multiple automatic cooking functions simultaneously on different zones.
- The timer can be used with the automatic cooking functions.
The 'Temperature holding' function
This feature automatically maintains the current cooking temperature of your food. When new (cold) food is added, the power is automatically raised to the set temperature again.

This function can only be selected after the cooking zone has heated up. Therefore, first bring the pan to the desired temperature. Once the desired temperature has been reached, this button can be operated and the temperature is held. If the pan is still cold, this function cannot be selected.
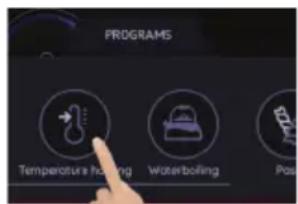
text_image
PROGRAMS Temperature boiling Water boiling PostTouch the symbol of the automatic cooking function.
The symbol shows in the pan shape for the pan in selection mode and the function starts.
The temperature of the selected zone is analysed.
After a few seconds, you hear a sound signal to confirm that the temperature is being maintained.

When the temperature is analysed, touch the pan shape with the function during the 'Temperature holding' function and then use the slider to adjust the temperature slightly more.

A cooking timer can also be started for this function.

To stop the automatic cooking functioning prematurely: touch the pan shape with the function and select 'OFF'. You can also touch the pan shape twice for a 'quick stop'.
The 'Waterboiling' function
This function automatically brings water to a boil. Once the boiling point is reached, the selected zone switches off.
Warning
- No ingredients such as salt or food should be present in the pan during boiling.
- The water level in the pan must be between 3 cm and 9 cm.
- Preferably let the reheating process take place with a lid.
- Topping up with water during the 'Waterboiling' function reduces accuracy.
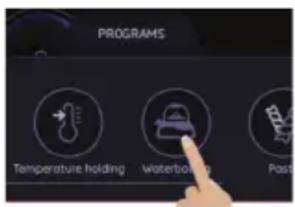
text_image
PROGRAMS Temperature holding Waterboiling PastTouch the symbol of the automatic cooking function.
The symbol shows in the pan shape for the pan in selection mode and the function starts.
The selected zone will heat up and bring the water to a boil.
When the boiling point is reached, you hear a sound signal. The cooking zone switches off.

To stop the automatic cooking functioning prematurely: touch the pan shape with the function and select power level '0'. You can also touch the pan shape twice for a 'quick stop'.
The 'Pasta' function
This function automatically brings water to a boil. After the pasta and salt are added, the function maintains the boiling point without boiling the water over.
Warning
- During pre-boiling, no ingredients such as salt or food should be present in the pan.
- The water level in the pan must be between 3 cm and 13 cm.
- The pre-boil process must be done with a lid.
- Do not top up the water at any point in the process.
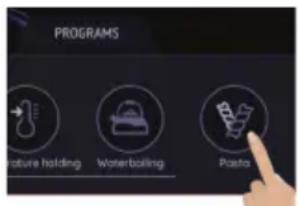
text_image
PROGRAMS Feature holding Woner boiling Poats- Touch the symbol of the automatic cooking function.
The symbol shows in the pan shape for the pan in selection mode and the function starts.
The selected zone will heat up and bring the water to a boil.
When the boiling point is reached, you hear a sound signal. -
Remove the lid from the pan and add the pasta and optionally some salt.
-
Set a cooking time and touch the confirm key to save the setting. The cooking timer shows in the pan shape. When the cooking timer expires, you hear an audio signal and the cooking timer starts flashing. The cooking zone switches off.
-
Touch the pan shape to switch off the audio signal.

To stop the automatic cooking functioning prematurely: touch the pan shape with the function and select power level '0'. You can also touch the pan shape twice for a 'quick stop'.
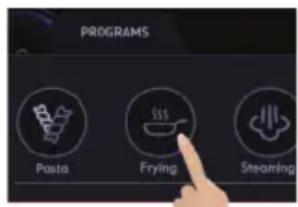
The 'Frying' function
This function automatically brings the pan to the right temperature for frying different types of food. After the oil and food are added, the function maintains the right temperature without burning the food.
| Frying level Application | |
| 1 Melting butter, fried egg, omelette (without crust), breaded food. | |
| 2 Vegetables (peppers, onions), steamed vegetables. | |
| 3 Frozen potato wedges, rösti, schnitzel. | |
| 4 Pancakes, frozen potato wedges, rösti, bacon. | |
| 5 Stew (e.g. goulash), bacon, popcorn, sausages. |
Warning
During the preheating process, no oil or other ingredients should be present in the pan.
text_image
PROGRAMS Pasta Frying Steaming- Touch the symbol of the automatic cooking function.
The symbol shows in the pan shape for the pan in selection mode. -
Select a frying level with the slide control
The function starts. The selected zone heats up and brings the pan to the right temperature.
When the temperature has been reached, you hear a sound signal. -
Add the oil and food.

When the correct temperature is reached, touch the pan shape with the function during the 'Frying' function and then use the slider to choose another application.

A cooking timer can also be started for this function.

To stop the automatic cooking functioning prematurely: touch the pan shape with the function and select 'OFF'. You can also touch the pan shape twice for a 'quick stop'.
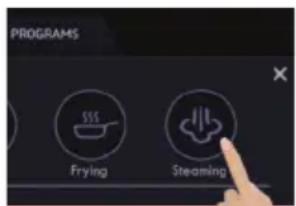
The 'Steaming' function
This function automatically brings the water to the boiling point and keeps it there, creating enough steam to cook vegetables or other food. You can change the amount of steam at any time by changing the power level on the slide control. When all the water has evaporated, the power level is switched off.
Warning
- The vegetables (or other food) must be in the pan with at least 3 cm of water before steaming is activated.
- The pan must be covered with a lid.
text_image
PROGRAMS Frying SteamingTouch the symbol of the automatic cooking function.
The symbol shows in the pan shape for the pan in selection mode and the function starts.
The selected zone will heat-up and bring the water to the boiling point.
When the boiling point is reached, you hear a sound signal.
A cooking time counter starts automatically.
By default, once the boiling point is reached, the boiling will be held to keep a certain amount of steam.

When the water is boiling, touch the pan shape with the function during the ‘Steaming’ function and then use the slider to adjust (the amount of steam as required.

A cooking timer can also be started for this function.

To stop the automatic cooking functioning prematurely: touch the pan shape with the function and select 'OFF'. You can also touch the pan shape twice for a 'quick stop'.
Settings menu
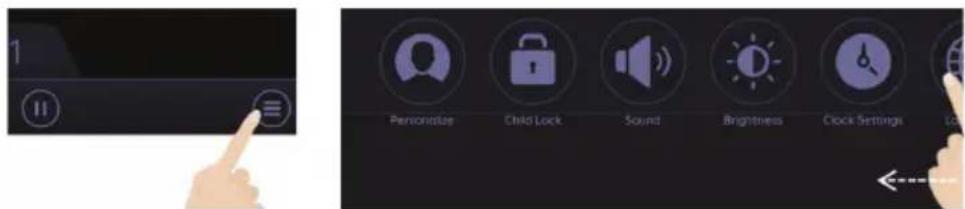
This menu contains various settings which you can adjust. Move your fingertip from the left side to the right side or vice versa to see the available settings.
text_image
1 Personalize Child Lock Sound Brightness Clock SettingsTouch the symbol of a setting.
The corresponding sub menu shows on the display.

The menu closes when you do not touch a setting within 10 seconds.

Touch the confirm key in the sub menu if you want to save your changes.

Touch the symbol 'x' key to close a menu. Any changes you made in the menu are cancelled. Previous settings will be kept.
Personalise
You can select which (and in which order) the symbols show on the main screen:
- Child safety lock.
- Minute minder.
- Pause.
Remove a symbol from the main screen
The sub menu shows the symbols which show on the main screen. Touch a symbol to remove it. The symbol shows below.

text_image
Personalization 12:00Add a symbol to the main screen
To add a symbol that shows below, touch it (in the required order if you want to add more symbols). The symbol is added to the main screen.
Child safety lock
Set the child safety lock to ‘on’. Now the main screen does not immediately show when the hob switches on; this prevents the hob from being operated accidentally.

Every time you switch on the hob, the display shows the child safety lock symbol first. Touch the symbol for three seconds; then the main screen shows on the display.

Sound
You can set the volume of the audio signals.


Audio signals for errors always have the maximum volume.
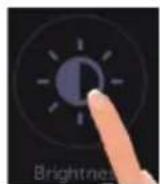
Brightness
You can set the brightness of the display.
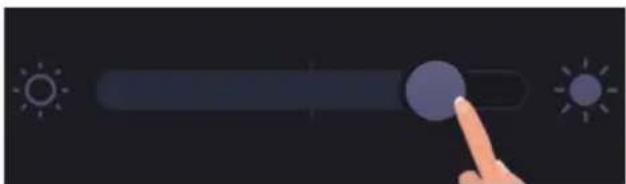
natural_image
Hand pressing a button on a dark background with sun icons (no text or symbols)
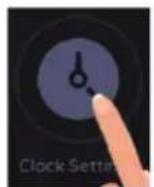
Clock
You can adjust the time of the clock that shows on the main screen. It is possible to choose between a 12 hours or 24 hours format display.
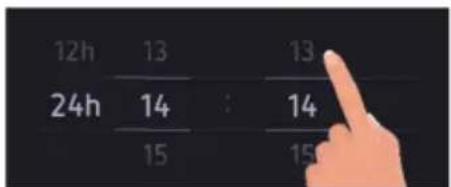
text_image
12h 13 13 24h 14 : 14 15 15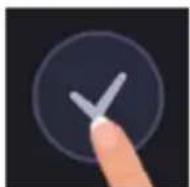

Show the clock in standby mode
In standby mode, it is possible to show the clock on the display. You do not have to switch on the hob. Touch the display anywhere; the clock shows on the display for 15 seconds.
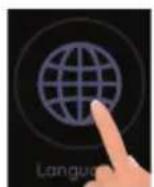
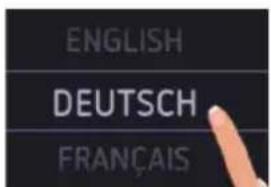
Language
You can set the language you prefer.
text_image
ENGLISH DEUTSCH FRANÇAIS
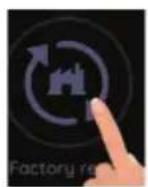
Factory reset
You can reset all settings to default.

text_image
Reset all settings?
Attention
The service menu is intended exclusively for an authorized, qualified installer.
Power limiter

Setting the configuration and the power limiter should only be carried out by a registered and qualified installer. Please read the safety regulations and the installation instructions carefully.
The limiter is factory set at 11100W, but this setting can be changed to 9000W, 7400W or 6000W during installation.
Prepare the hob to open the service menu
- Disconnect the hob from the power supply and wait a few seconds.
- Then, connect it again to the power supply.
Do not switch on the appliance; the hob must be in standby mode.
- Within 2 minutes, touch the On/Off key three times in a row (for >150 msec. <1 sec.).
- Finally, within 10 seconds after step 3, touch and hold the On/Off key for 4 seconds.
The service menu shows in the display.
Configuration (multi-phase connection)
In the ‘Configuration’ menu, you can check and change the configuration of the multi-phase connection of the power limiter. Use this Configuration setting for setting 2 or 3 phase connections.
| HI38571TF | ||
| CFG 0* 11 | 100W 3 phase zones | left 3700Wcentre zone 3700Wzones right 3700W |
| CFG 1 900 | 0W 3 phase zones left | left 3000Wcentre zone 3000Wzones right 3000W |
| CFG 2 740 | 0W 2 phase zones left | left 3700Wcentre zone and zones right 3700W |
| CFG 3 600 | 0W 2 phase zones left | left 3000Wcentre zone and zones right 3000W |
* Factory default setting
| HI39571TF | ||
| CFG 12* | 1100W 3 phase zone | left front and middle zone outer coil 3700Wzone rear left and centre zone inside coil 3700Wzones right 3700W |
| CFG 13 | 9000W 3 phase zone left | left front and middle zone outer coil 3000Wzone rear left and centre zone inside coil 3000Wzones right 3000W |
| CFG 14 | 7400W 2 phase rear left | left zone and middle zone inner coil 3700Wfront left zone, middle zone outer coil and right zones 3700W |
| CFG 15 | 6000W 2 phase rear left | left zone and middle zone inner coil 3000Wfront left zone, middle zone outer coil and right zones 3000WWith 5 pans at a time (large pan on middle zone outer coil), all zones at the same time can operate at a maximum setting of 6.5! |
* Factory default setting
- Touch the confirmation key to save the setting.
- Touch the symbol ‘x’ to close the service menu without changing anything.
Power limitation (1 phase)
Use the ‘Power limitation’ menu only when the appliance is connected to 1 phase. In the ‘System Power’ menu, you can select the power limitation level for single phase connections.
- Adjustable from 2.4kW to 11.1kW in increments of 100W.
Set at 11.1kW by default.
Close the service menu
Touch the symbol 'x' to close the service menu; the hob switches to standby mode.

Service Menu

The service menu closes automatically if there is no operation during 2 minutes; the hob switches to standby mode.
Cleaning

Nice to know
Activate the lock function before you start cleaning the appliance.
We recommend that you clean the appliance each time after use.
- Use a damp cloth and a mild cleaning agent such as washing-up liquid.
- Dry the appliance with a paper towel or cloth.
- Remove water marks and limescale with vinegar.
- Use a glass scraper to remove remaining food, melted plastic or burned sugar.
- Metal marks (for instance caused by pans) can be difficult to remove. Use a special cleaning agent to remove metal marks.

Attention
Do not use abrasive cleaning agents, steelwool, scourers or any type of sharp object to clean your appliance; this can cause scratches.
General

Attention
If you see a crack in the glass top (however small), switch off the hob immediately and disconnect it from the power mains. Contact the service department.
If the appliance does not work properly, this does not always mean that it is defective. Try to deal with the problem yourself first by checking the table below. You can also take a look on our website for more information. If the problem continues, contact the service department.
| Problem Possible cause Solution | ||
| The fan operates for several minutes after the hob has been switched off. | The hob is cooling. Normal operation. | |
| A slight smell is noticeable the first times the hob is used. | The new appliance is heating up. | This is normal and will disappear once it has been used a few times. Ventilate the kitchen. |
| I hear noises during cooking. | Generally, induction cooking may cause some audible noises, e. g. chirping, wheezing and humming. | These noises cannot be avoided completely.Try to move the pans a little bit.Be sure the bottom of the pan is clean.Try other pans. Especially pans made of a compound material can cause noises.Use pans with a flat bottom to prevent pans to move during cooking. |
| A fan is cooling the appliance. | This is normal. | |
| The hob is not working and nothing shows on the display. | There is no power supply. Check the fuses. Check if the connecting cable is plugged into the socket. | |
| The hob or a cooking zone is not working. | The hob has been wrongly connected. | Check the electrical connections. |
| The hob is locked. Unlock the hob. | ||
| The display / control panel is covered with grease or water or an object is put on a touch key. | Clean the display / control panel or remove the object. | |
| A fuse blows as soon as the hob is switched on. | The hob has been wrongly connected. | Check the electrical connections. |
| The controls respond poorly. There is water or dirt on the display. | Clean the display. | |
| A message that cookware is too close to the display appears. | A pan is too hot on the hob or too close to the display. | Remove the pan and allow the appliance to cool down. Always place a pan in the centre of a cooking zone. |
| One or all cooking zones cut-off. | The safety system is activated.You forgot to switch off the cooking zone for a long time.One or more keys are covered.The pan is empty and its bottom overheated.The hob also has an automatic reduction of power level to prevent overheating | |
| An automatic cooking function does not start, the cooking zone switches off. | Only 1 automatic cooking function can be switched on at a time on the same phase. The last added zone is switched off by the power limiter. | |
Warning messages
The display shows information if there is a problem. Touch the exclamation mark to show the warning message. You get information about the problem and how to solve it. Touch the symbol 'x' to close the message.
Error codes
This hob shows error codes in combination with an error message in the display for a quick and efficient trouble shooting.

First try to reset an error code by de-energising the hob and switching it back on after 1 minute. If the code persists, contact the service department.
| Error code Possible cause Solution | ||
| E The electronic system | is defective. | Disconnect and reconnect the hob at the circuit breaker. |
| E881-3 | Fan fault. Check aeration and venting. | |
| E881-6 | ||
| E881-9 | ||
| E681-3 | The electrical connection is wrong, a phase is missing. | Check the electrical connection. |
| E681-6 | ||
| E682-0 | ||
| Er21 The temperature of the appliance is too high. | Switch the appliance to standby mode.Remove all pans. Let the appliance cool down. If the problem continues; contact the service department. | |
| ER31 X | Internal error, communication fault. | Reset the appliance. If this does not help, contact the service department. |
| ER61 X | ||
| U400 Over voltage. De-energise the unit as soon | as possible (no longer than 30 minutes) and check the connection. | |
Information according regulation (EU) 66/2014
Measurements according EN60350-2
| Model designation HI38571TF | |
| Hob type Induction hob | |
| Number of electric cooking zones and/or cooking areas 5 | |
| Heating technology | Induction cooking zones/areas |
| For non-round cooking zones or areas: the length and width of the usable area per electrically heated cooking zone/area in mm. | 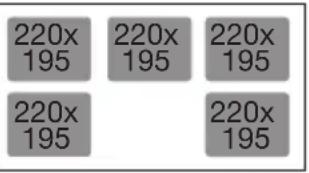 |
| Energy consumption per cooking zone/area calculated per kg (ECelectric hob) in Wh/kg | 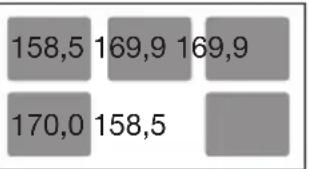 |
| Energy consumption for the hob calculated per kg (ECelectric hob) in Wh/kg | 165,4 |
| Model designation HI39571TF | |
| Hob type Induction hob | |
| Number of electric cooking zones and/or cooking areas 5 | |
| Heating technology | Induction cooking zones/areas |
| For non-round cooking zones or areas: the length and width of the usable area per electrically heated cooking zone/area in mm.For round cooking zones: the diameter of the usable area per electrically heated cooking zone/area in mm. | 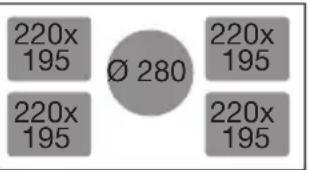 |
| Energy consumption per cooking zone/area calculated per kg (ECelectric hob) in Wh/kg | 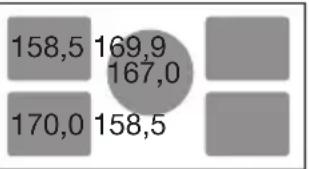 |
| Energy consumption for the hob calculated per kg (ECelectric hob) in Wh/kg | 164,9 |
Information according regulation (EU) 2023/826
P_off ≤ 0.5 W.
The hob automatically goes to the Off position in less than 20 minutes after all functions are completed.
Disposal of packaging and appliance
Sustainable materials have been used during manufacture of this appliance. This appliance must be disposed of responsibly at the end of its service life. Ask your local authorities for more information about how to do this.
The appliance packaging is recyclable. The following materials may have been used:
- Cardboard.
• Polyethylene film (PE).
• CFC-free polystyrene (PS rigid foam).
Dispose of these materials in a responsible manner and in accordance with government regulations.
text_image
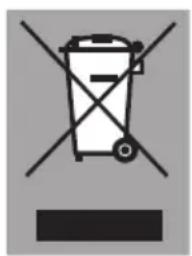
Warning symbol for a trash bin with crossed lines indicating no waste or discharge, and a black rectangle below.The product has been marked with a crossed-out dustbin symbol to remind you of the obligation to dispose of electrical household appliances separately. This means that the appliance may not be included with normal domestic refuse at the end of its service life. The appliance must be taken to a special municipal centre for separated waste collection or to a dealer providing this service.
Separate collection of household appliances helps to prevent any potential negative impact on the environment and on human health caused by improper disposal. It ensures that the materials of which the appliance is composed can be recovered to obtain significant savings in energy and raw materials.

Declaration of Conformity
We hereby declare that our products satisfy the applicable European Directives, Orders and Regulations, as well as the requirements stated in the referenced standards.
The appliance rating label is located on the bottom of the appliance.
Stick the appliance rating label here.
When contacting the service department, have the complete type number to hand.
You will find the addresses and phone numbers of the service organisation on the guarantee card.
You can find the most recent version of the instructions for use on our website. www.atag.nl www.atag.be

932710
Visiting address and head office ATAG
and ATAG Experience Center:
ATAG Service and sales
Postbus 249
