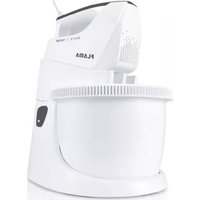
1416FL - Mixer Flama - Free user manual and instructions
Find the device manual for free 1416FL Flama in PDF.


| Product Type | Stand Mixer |
| Brand | Flama |
| Model | 1416FL |
| Power Supply | 220-240 V ~ 50/60 Hz |
| Number of Speeds | 5 speeds + Turbo |
| Included Accessories | Whisks for beating, dough hooks, rotating bowl, spatula, stand |
| Main Functions | Beating, kneading, whisking |
| Bowl Capacity | Not specified |
| Power | Not specified |
| Bowl Material | Not specified |
| Care and Cleaning | Whisks and bowl washable in hot water with mild detergent. Body and stand cleaned with a damp cloth. Do not immerse the main unit. |
| Safety | Unplug after use. Do not use if cord is damaged. Do not immerse. Surface may become hot. |
| Warranty | 36 months |
| Usage | Household and indoor use only |
Frequently Asked Questions - 1416FL Flama
User questions about 1416FL Flama
0 question about this device. Answer the ones you know or ask your own.
Ask a new question about this device
Download the instructions for your Mixer in PDF format for free! Find your manual 1416FL - Flama and take your electronic device back in hand. On this page are published all the documents necessary for the use of your device. 1416FL by Flama.
USER MANUAL 1416FL Flama
natural_image
White FLAMA blender with a side arm and control panel, no visible text or symbols on the device itself.1416FL
PT BATEDEIRA COM TAÇA ROTATIVA 1
ES BATIDORA AMASADORA CON BOL GIRATORIO 6
EN HAND MIXER WITH BOWL 11
FR MIXEUR AVEC BOL ROTATIF 16
natural_image
Symbol of a trash bin with crossed lines indicating no waste or discharge, and a solid black rectangle below (no text or labels)natural_image
Symbol of a trash bin with crossed lines indicating no waste or discharge, and a solid black rectangle below (no text or labels)Please read these instructions carefully before using the appliance for the first time and keep them for future reference. Any use not in accordance with the instructions releases FLAMA from all responsibility.
Check that the power supply voltage for the electrical installation in your home corresponds to that stated on the appliance's nameplate. This appliance must be connected to an earthed socket.
The appliance is not intended to be operated using an external timer or a separate remote control system.
This appliance is designed for domestic use only, and indoors.
This device is intended to be used in domestic and similar applications such as:
- Kitchen areas reserved for staff in stores, workshops and other professional environments
- Country houses
- By customers of hotels, motels and other residential environments
- Hotel room type environments
This appliance can be used by children 8 years of age and older and people with physical, sensory or mental disabilities or lack of experience and knowledge if they have received supervision or instruction in using the appliance in a safe manner and understand the risks involved. Children must not play with the appliance. The cleaning and maintenance of the appliance must not be carried out by children unless they are over 8 years old and are under supervision.
Keep the appliance and power cord out of reach of children under 8 years of age.
Warning - The temperature of accessible surfaces may be high when the appliance is in operation.
Disconnect the appliance from the power supply by removing the plug from the socket after each use and when cleaning.
Allow it to cool down before carrying out any cleaning or storage operation.
Before connecting the appliance, make sure you place it on a flat, stable and horizontal surface.
Do not use the appliance if the power cord or plug is damaged, have them replaced immediately by an authorized FLAMA Technical Assistance Service.
If the power cord is damaged, it must be replaced by the manufacturer, its after-sales service or similarly qualified personnel in order to avoid a hazard.
The appliance must never be used near flammable or combustible materials.
Never leave the device unattended.
Do not cover the appliance while it is in operation.
Do not disassemble the device.
The appliance must only be used for cooking food. Its use for other purposes may cause irreparable damage.
Never immerse the device in water or any other liquid.
WARNING: Charcoal or other combustibles must not be used with this appliance.
This product complies with the Electromagnetic Compatibility and Low Voltage Directives.
This instruction manual is also available in PDF format at www.flama.pt.
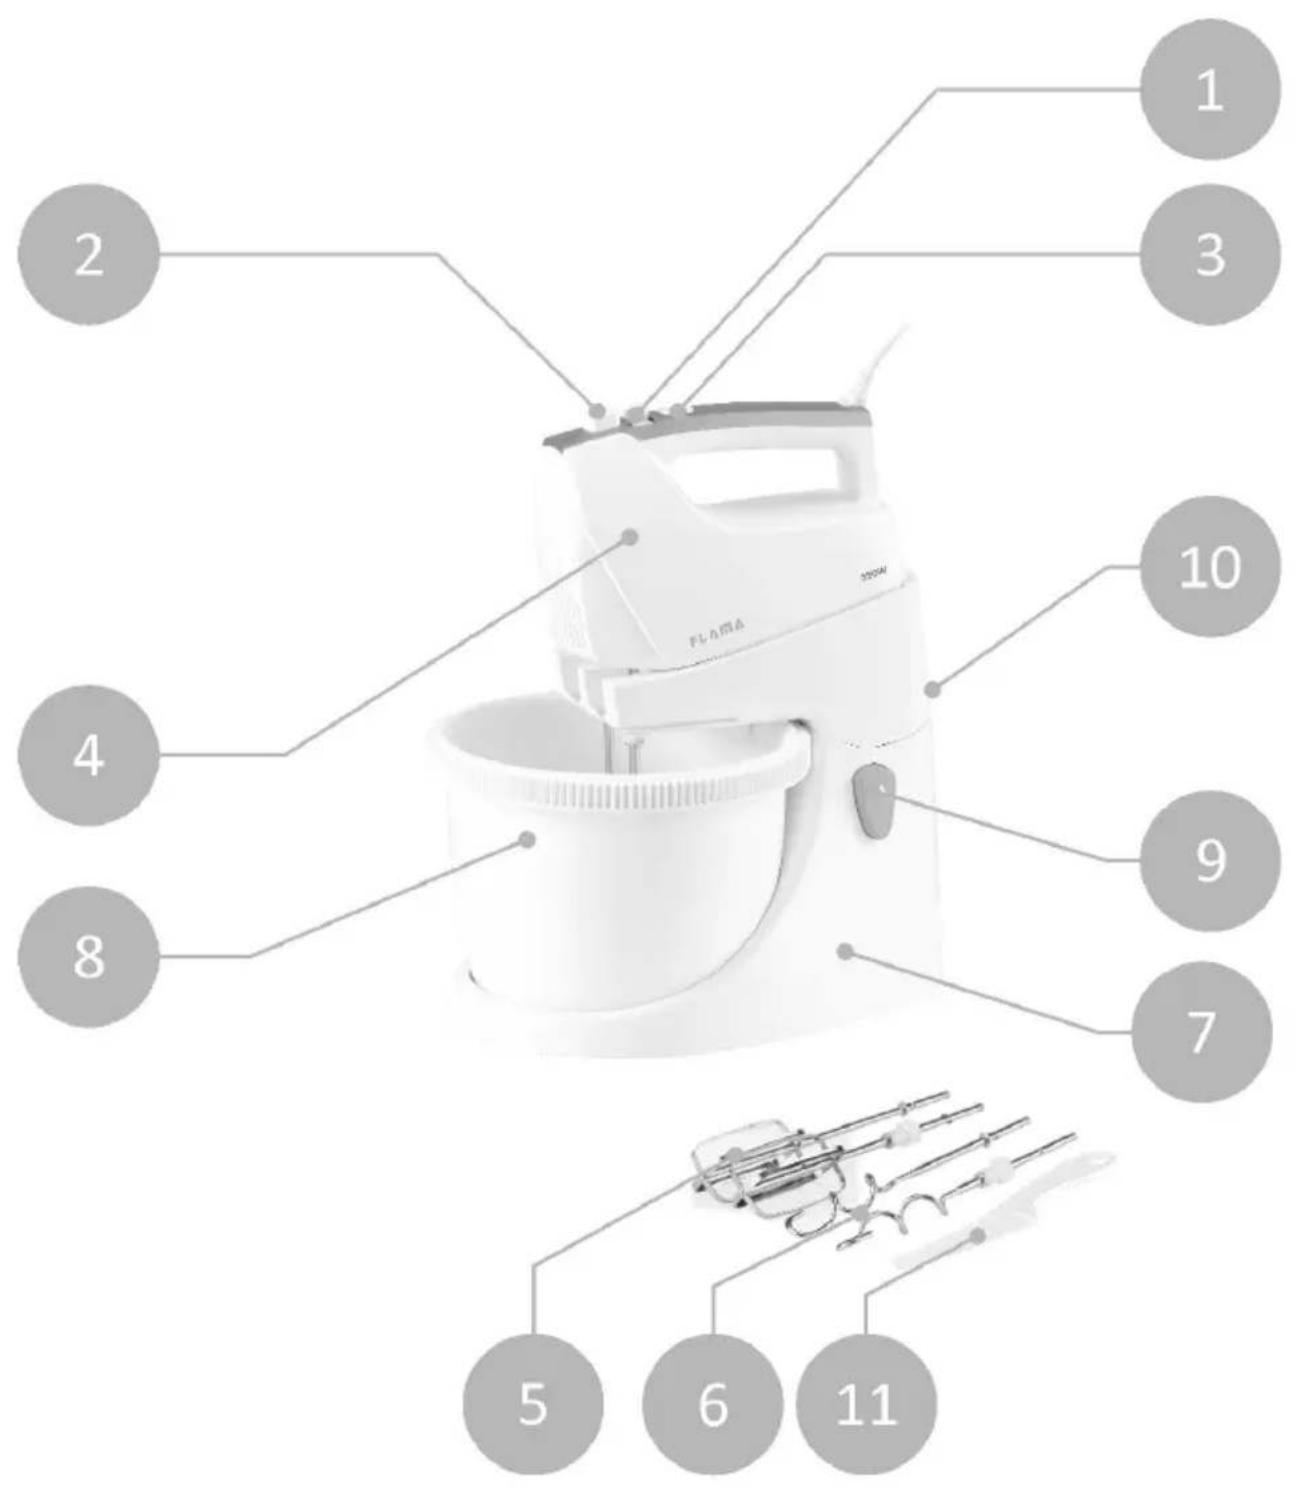
DESCRIPTION
- Speed selector
- Sticks ejection knob
- TURBO button
- Mixer body
- Stirring whisks
- Kneading hooks
- Mixer holder
- Rotating bowl
- Arm unlock button
- Mixer de-docking button
- Spatula
OPERATION
Before first use
Remove the appliance and accessories from the housing. Remove protective stickers, films or plastics from the appliance, except for the technical characteristics plate.
Before using the appliance for the first time, wash and clean the parts that will be in contact with food.
Clean the remaining parts with a damp cloth. Never use abrasive products.
Use
The mixer allows you to stir, knead and beat ingredients.
For the functions described above is equipped with:
- Stirring whisks - for light pasta, castle whites, creams, whipped cream, mayonnaise and purees.
These sticks are also especially suitable for the preparation of sauces and puddings.
- Kneading hooks - for the preparation of light doughs and pasta for cakes. The masses for pies and pancakes, are also, easier and faster prepared with these sticks.
WARNING - The maximum continuous operating time must not exceed 10 minutes. The rest time between two continuous cycles should be at least 20 minutes.
Mounting the sticks in the mixer
Before inserting the rods, check that the mixer is disconnected from the mains and that the speed selector is in position 0.
In order for the rotating bowl to rotate automatically during the use of the appliance, it is important that the rods are well inserted into the mixer.
Insert the sticks holding the mixer handle with one hand and the end of the stick with the other hand.
Insert the end into its hole, turn and press carefully until it snaps into place. The end of the stick with the sprocket must be fitted to the respective hole.
To remove the sticks, press the eject button on the sticks.
Mixer mount on support body
Before mounting the mixer, check that the mixer is disconnected from the mains and the speed selector is in position 0.
Press the arm unlock button and raise your arm.
Place the bowl on the mixer holder, press the arm release button down until it is properly seated in the mixer holder.
Take the mixer with the rods mounted and fit the arm, first on the front side of the sticks and then on the back.
To undock the mixer from the stand, press the mixer undock button.
Select speed
Move the speed selector to choose one of the 5 speed levels, according to the type of preparation you want.
Speed 1 and 2 - These are the speeds indicated for the start of any preparation. Wrap, beat and mix liquids with other ingredients. To wrap the egg whites with the dough.
Speed 3 and 4 - Especially recommended for thicker and heavier masses.
Speed 5 - Speed suitable for the preparation of egg whites, pasta for cakes and sauces.
TURBO - press the TURBO button to trigger the maximum speed. When you stop pressing the button, the mixer will return to the selected speed.
Move the speed selector to position 0 to stop operation.
MAINTENANCE AND CLEANING
It is recommended to clean the appliance regularly and remove any remaining ingredients.
Unplug the appliance and allow it to cool down before starting any cleaning operation.
Parts that have been in contact with food should be washed immediately after use.
Wash the sticks with hot water and mild non-abrasive detergent and then din.
Wash the bowl with hot water and mild non-abrasive detergent and then din.
Clean the mixer and stand with a soft, damp cloth with water and a few drops of detergent and then dry it.
Do not use solvents such as bleach or abrasive products for cleaning the appliance.
Do not allow water or other liquid to enter through the mixer vents to prevent damage to the interior sparts.
Never immerse the mixer in water or any other liquid, or place it under the tap.
Sift all the parts properly before assembling and storing the appliance.
PRACTICAL ADVICE
To avoid splashing, dip the sticks in the ingredients and then turn on the mixer.
Whenever using the spatula, stop the movement of the sticks. Set the Speed Selector to position 0.
Use the spatula to wrap the ingredients that are attached to the bowl walls. The operating speed can be changed during operation.
For thick masses it is recommended the maximum speed.
How to raise egg whites in castle:
- The sticks and bowl must be perfectly cleaned;
- Check that there is no egg yolk mixed with the egg whites;
- To achieve maximum volume, eggs must be at room temperature;
- Beat at maximum speed until the clear ones reach the desired consistency;
- The beating time varies depending on the freshness of the eggs;
How to make whipped cream:
- The cream should be as cold as possible. The sticks and bowl should be completely clean and dry.
- Start hitting at minimum speed (to avoid splashing).
- As the cream thickens, gradually increase
the speed.
- The preparation time varies depending on the quality of the cream, the amount of fat, the temperature and even the expiration date.
It is recommended to clean the appliance regularly and remove the remaining ingredients.
Unplug the appliance and let it cool down before starting any cleaning operation.
ANOMALIES AND REPAIR
In case of malfunction, please take the appliance to an authorized Technical Assistance Service. Do not attempt to disassemble or repair the appliance, as this may be dangerous.
PROTECTING THE ENVIRONMENT
natural_image
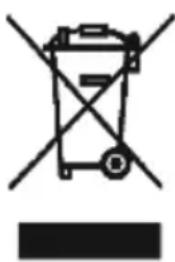
Symbol of a trash bin with crossed lines indicating no waste or discharge, and a solid black rectangle below (no text or labels)This symbol means that electrical and electronic equipment are to be collected separately.
The main goal of collecting this type of waste separately is to reduce the amount to
be disposed of, and to promote reuse, recycling, and other forms of waste-to-value in order to reduce
their negative impacts on the environment.
When out of use, this appliance should not be disposed with the rest of the non-recyclable urban waste.
The user is responsible for delivering them to the selected collection points that exist for this purpose.
Out-of-use equipment can also be accepted by retailers, when purchasing a new piece of equipment that is equivalent and has the same functions.
For more detailed information on collection points, you should go to your local Council or to a retailer of this equipment.
MIXEUR AVEC BOL ROTATIF
CONSIGNES DE SÉCURITÉ
natural_image
Symbol of a trash bin with crossed lines indicating no waste or discharge (no text or labels)This page has been deliberately left blank
This page has been deliberately left blank
- Keep the proof of purchase (receipt) for this product carefully. When a repair is made under these conditions, the technician will require proof of purchase. This assistance can only be provided once you have proven, with the proof of purchase, that your appliance is within the warranty period.
- The warranty period for this appliance is defined by the respective EU Directive in force on the date of purchase/delivery.
- Within the guarantee period, we will repair or replace, free of charge, any parts which, during the normal use of the appliance, have deteriorated as a result of a proven material or manufacturing defect.
- This warranty does not cover consumable items, light bulbs, easily breakable parts made of glass or plastic, or any other defects that do not impair its proper functioning.
- We accept no liability for damage caused by incorrect or careless use of the appliance, by its connection to an electrical current other than that indicated on the appliance's rating plate, by faulty electrical installation, or by atmospheric, chemical or electrochemical causes. Other claims or demands for compensation relating to objects which are not an integral part of the appliance will be denied.
- The provision of assistance under warranty does not extend the warranty period. Only within this period will assistance be provided under warranty. The right to assistance is only granted to the first purchaser of the device and cannot be transferred to a third party.
- The warranty expires when unauthorized persons have attempted to repair, modify or replace parts of the appliance.
- All expenses and risks of transportation to our factory or vice versa will always be borne by the buyer.
WARRANTY CONDITIONS
To benefit from the Technical Assistance service during the 36-month warranty period after the date of purchase, you will need to:
Present the Invoice/Proof of Purchase, stating the model and the manufacturing number of the product (whenever possible).
Note: Failure to present the aforementioned documents will be grounds for not providing services under warranty.
CONDITIONS DE GARANTIE
CONDITIONS DE GARANTIE
Brand : Flama
Model : 1416FL
Category : Mixer