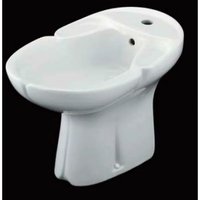
Pillow K-4858 - Bidet KOHLER - Free user manual and instructions
Find the device manual for free Pillow K-4858 KOHLER in PDF.

| Brand | Kohler |
| Model | Pillow K-4858 |
| Product type | Bidet |
| Material | Vitreous china |
| Installation | Floor mounting with floor bolts |
| Water supply | Hot and cold water, 3/8 in. connection |
| Drainage | Drain with trap, floor outlet |
| Necessary tools | Tape measure, pencil, drill, safety goggles, adjustable wrench, level, Phillips screwdriver, silicone sealant |
| Required clearance | 15.2 cm (6 in.) from wall to back of fixture |
| Mounting hardware | Floor bolts included, nuts, washers |
| Safety instructions | Handle with care (risk of breakage), wear safety goggles, follow plumbing codes |
| Maintenance | Periodically check for leaks after installation; clean with a soft cloth |
| Reparability | Spare parts available from the manufacturer (include manual) |
Frequently Asked Questions - Pillow K-4858 KOHLER
User questions about Pillow K-4858 KOHLER
0 question about this device. Answer the ones you know or ask your own.
Ask a new question about this device
Download the instructions for your Bidet in PDF format for free! Find your manual Pillow K-4858 - KOHLER and take your electronic device back in hand. On this page are published all the documents necessary for the use of your device. Pillow K-4858 by KOHLER.
USER MANUAL Pillow K-4858 KOHLER
M product numbers are for Mexico (i.e. K-12345M)
THE BOLD LOOK OF KOHLER.
1020409-2-A
Tools and Materials

Tape Measure
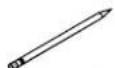
Pencil

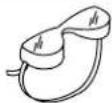
Safety
Glasses

Adjustable Wrench

Level
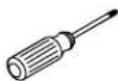
Phillips
Screwdriver

Plus:
• 3/16" Drill Bit
• 3/8" Shut-Off Valves
Thank You For Choosing Kohler Company
We appreciate your commitment to Kohler quality. Please take a few minutes to review this manual before you start installation. If you encounter any installation or performance problems, please don't hesitate to contact us. Our phone numbers and website are listed on the back cover. Thanks again for choosing Kohler Company.
Before You Begin

CAUTION: Risk of personal injury or product damage. Handle with care. Vitreous china can break or chip if the bolts and nuts are overtightened, or if the product is handled carelessly.
□ Observe all local plumbing and building codes.
□ Carefully inspect the new bidet for damage.
☐ The bidet must be installed with 3/8" hot and cold shut-off valves.
☐ The drain outlet must exit through the floor.
☐ Install the trap in the drain line below the floor.
☐ Hot and cold supply locations should be installed from the floor.
☐ A 6" (15.2cm) clearance from the wall to the back of the fixture is required to make supply and drain connections.
☐ Refer to the roughing-in book for dimensional information.
□ Site preparation may require additional tools and hardware.
1. Preparation
□ Turn the water supply off.
☐ Install the hot and cold water supplies, shut-off valves, and trap outlet as necessary to conform to roughing-in dimensions.
Preparation (cont.)
☐ The trap can be installed in the drain line below or above the floor.
2. Install the Bidet
□ Install the bidet faucet and drain according to the manufacturer's instructions.
☐ Refer to the roughing-in dimensions to determine the mounting hole locations, and mark the floor accordingly.
☐ Drill two 3/16" holes at the marked mounting hole locations.
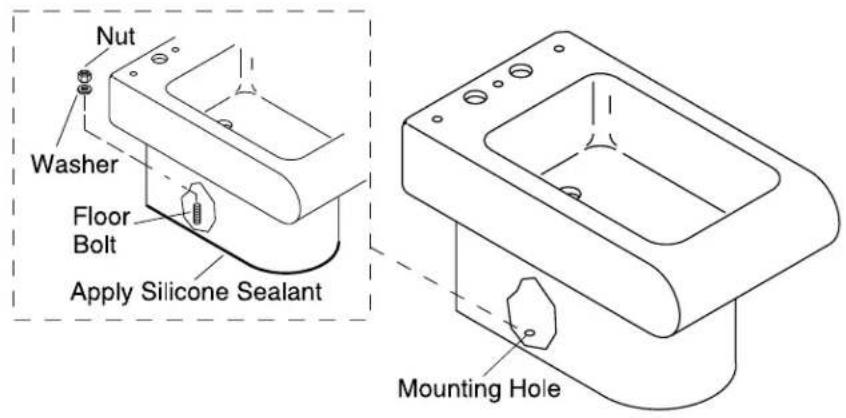
☐ Thread the floor bolts (included) into the mounting holes.
□ Apply a bead of sealant around the base of the bidet.
☐ Position the bidet in the mounting location so both floor bolts extend through the bidet mounting holes.

CAUTION: Risk of personal injury or product damage. Vitreous china can break or chip if the nuts are overtightened or the product is handled carelessly.
☐ Assemble the washers and nuts. Hand-tighten the nuts, then tighten an additional 1/2-turn with a wrench.
☐ Position the cover on the bidet so the threaded posts extend through the bidet holes.
□ Securely hand tighten the plastic nuts.
Complete the Installation
□ Connect the water supplies and drain.
☐ Turn on the hot and cold shut-off valves. Check the entire installation for leaks. Repair as required.
□ Check all the connections for leaks for several days.