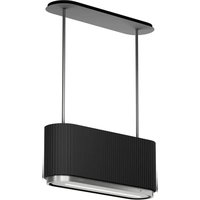
CDW9001B - Range hood Ciarko Design - Free user manual and instructions
Find the device manual for free CDW9001B Ciarko Design in PDF.


| Brand | Ciarko Design |
| Model | CDW9001B |
| Product type | Kitchen hood |
| Operating mode | Extraction or recirculation (with optional charcoal filter) |
| Power supply | 220-240 V ~ 50 Hz |
| Motor power | Not specified |
| Suction speeds | 4 speeds including Boost (automatic return to 3rd after 5 min) |
| Control | Gesture, touch, radio remote control |
| Lighting | Dynamic LED (adjustable color temperature), 4-level dimming |
| Timer | Yes, 10 minutes (remote control) or 15 minutes (touch panel) |
| Refresh function | Yes, automatic ventilation 10 min every 50 min |
| Grease filter | Dishwasher-safe metal filter, monthly cleaning |
| Long-life filter (optional) | Wash every 2 months, replace every 3 years |
| Charcoal filter (optional) | Required in recirculation mode |
| Minimum installation distance | 45 cm (electric), 65 cm (gas/mixed) |
| Induction compatibility | Compatible with Ciarko Design induction hobs and others subject to verification |
| Adapt Flow function | Yes, optimizes airflow with charcoal/long-life filters or reduced duct |
| Energy consumption | Not specified |
| Noise level | Not specified |
| Dimensions (W x D x H) | Not specified |
| Weight | Not specified |
| Care and cleaning | Clean exterior with damp cloth and mild detergent, no alcohol |
| Safety | Unplug before maintenance, do not use open flame, avoid oil overheating |
| Spare parts and repairability | Filters, LED bulbs, remote control available |
| General information | Domestic use, compliant with WEEE, warranty of compatibility with Ciarko Design induction |
Frequently Asked Questions - CDW9001B Ciarko Design
User questions about CDW9001B Ciarko Design
0 question about this device. Answer the ones you know or ask your own.
Ask a new question about this device
Download the instructions for your Range hood in PDF format for free! Find your manual CDW9001B - Ciarko Design and take your electronic device back in hand. On this page are published all the documents necessary for the use of your device. CDW9001B by Ciarko Design.
USER MANUAL CDW9001B Ciarko Design
natural_image
Abstract geometric logo with blue leaf-like shapes forming a stylized 'Y' shape (no text or symbols)CIARKO®
DESIGN
PL: INSTRUKCJA MONTAŻU I OBSŁUGI
EN: INSTRUCTION ON MOUNTING AND USE
CZ: POKYNY PRO MONTÁŽ A POUŽITÍ
SK: NÁVOD NA MONTÁŽ A POUŽITIE
FL: OHJEET ASENNUS- JA KÄYTTÖÖNOTTOON
SV: INSTRUKTIONER FÖR MONTERING OCH ANVÄNDNING
natural_image
Technical line drawing of a rectangular electronic device with mounting brackets and internal grating (no text or symbols)MONO W
Polski 12
Deutsch 20
English 28
Čeština 35
Slovenský 43
Suomi 50
Svenska 57
64
Eesti 71
Magyar 78
Latviešu 86
Hrvatski 94
Français 102

natural_image
Simple line drawing of a roof structure with directional arrows indicating airflow or movement (no text or symbols)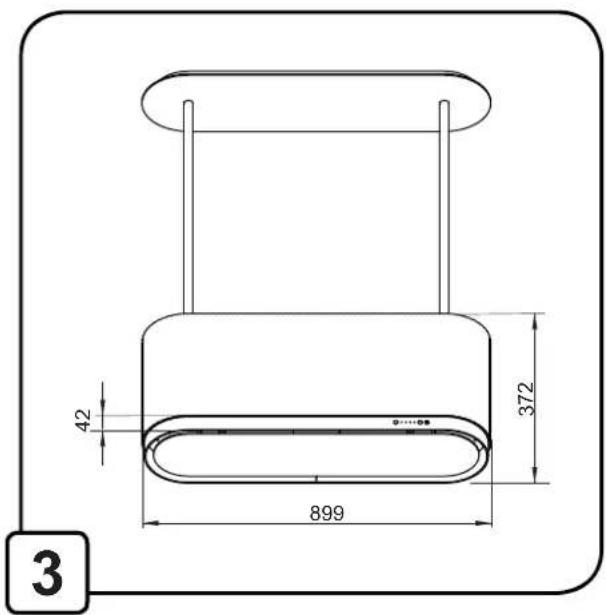

natural_image
Diagram of a handheld electronic device with a hand holding a screwdriver, showing wiring connections (no text or symbols)
natural_image
Isometric diagram of a device casing with internal compartments and a red arrow indicating a component (no text or symbols)
natural_image
Technical line drawing of a mechanical device with a hand holding a tool, showing internal components and assembly (no text or symbols)
natural_image
Technical diagram of a mechanical component with internal structure and highlighted section (no text or symbols)
natural_image
Diagram of a device with two vertical rods and red arrows indicating motion or rotation (no text or symbols)
natural_image
Diagram of a device casing with internal components and a red directional arrow indicating rotation (no text or symbols)
natural_image
Technical illustration of a mechanical component with a red downward arrow indicating a process or operation (no text or symbols present)
natural_image
Technical line drawing of a mechanical assembly with a hand holding a spring and a pointer, no text or symbols present.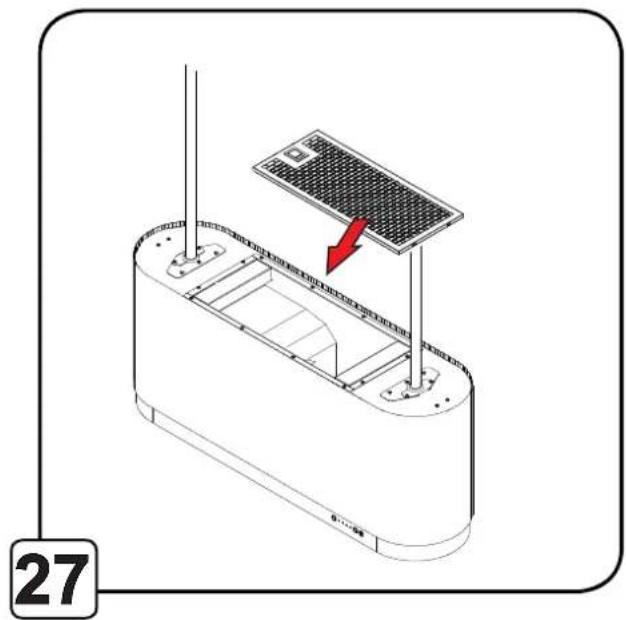
natural_image
Diagram of a device with a solar panel mounted on top, showing internal components and a red arrow indicating direction (no text or symbols)
* Uwaga: Elementy oznaczone symbolem „(*)” są zawarte tylko w wybranych modelach, w przeciwnym razie należy je zakupić osobno
* Achtung: Die mit dem Symbol „(*)" gekennzeichnete Artikel sind nur in ausgewählten Modellen enthalten, andernfalls müssen sie separat erworben werden.
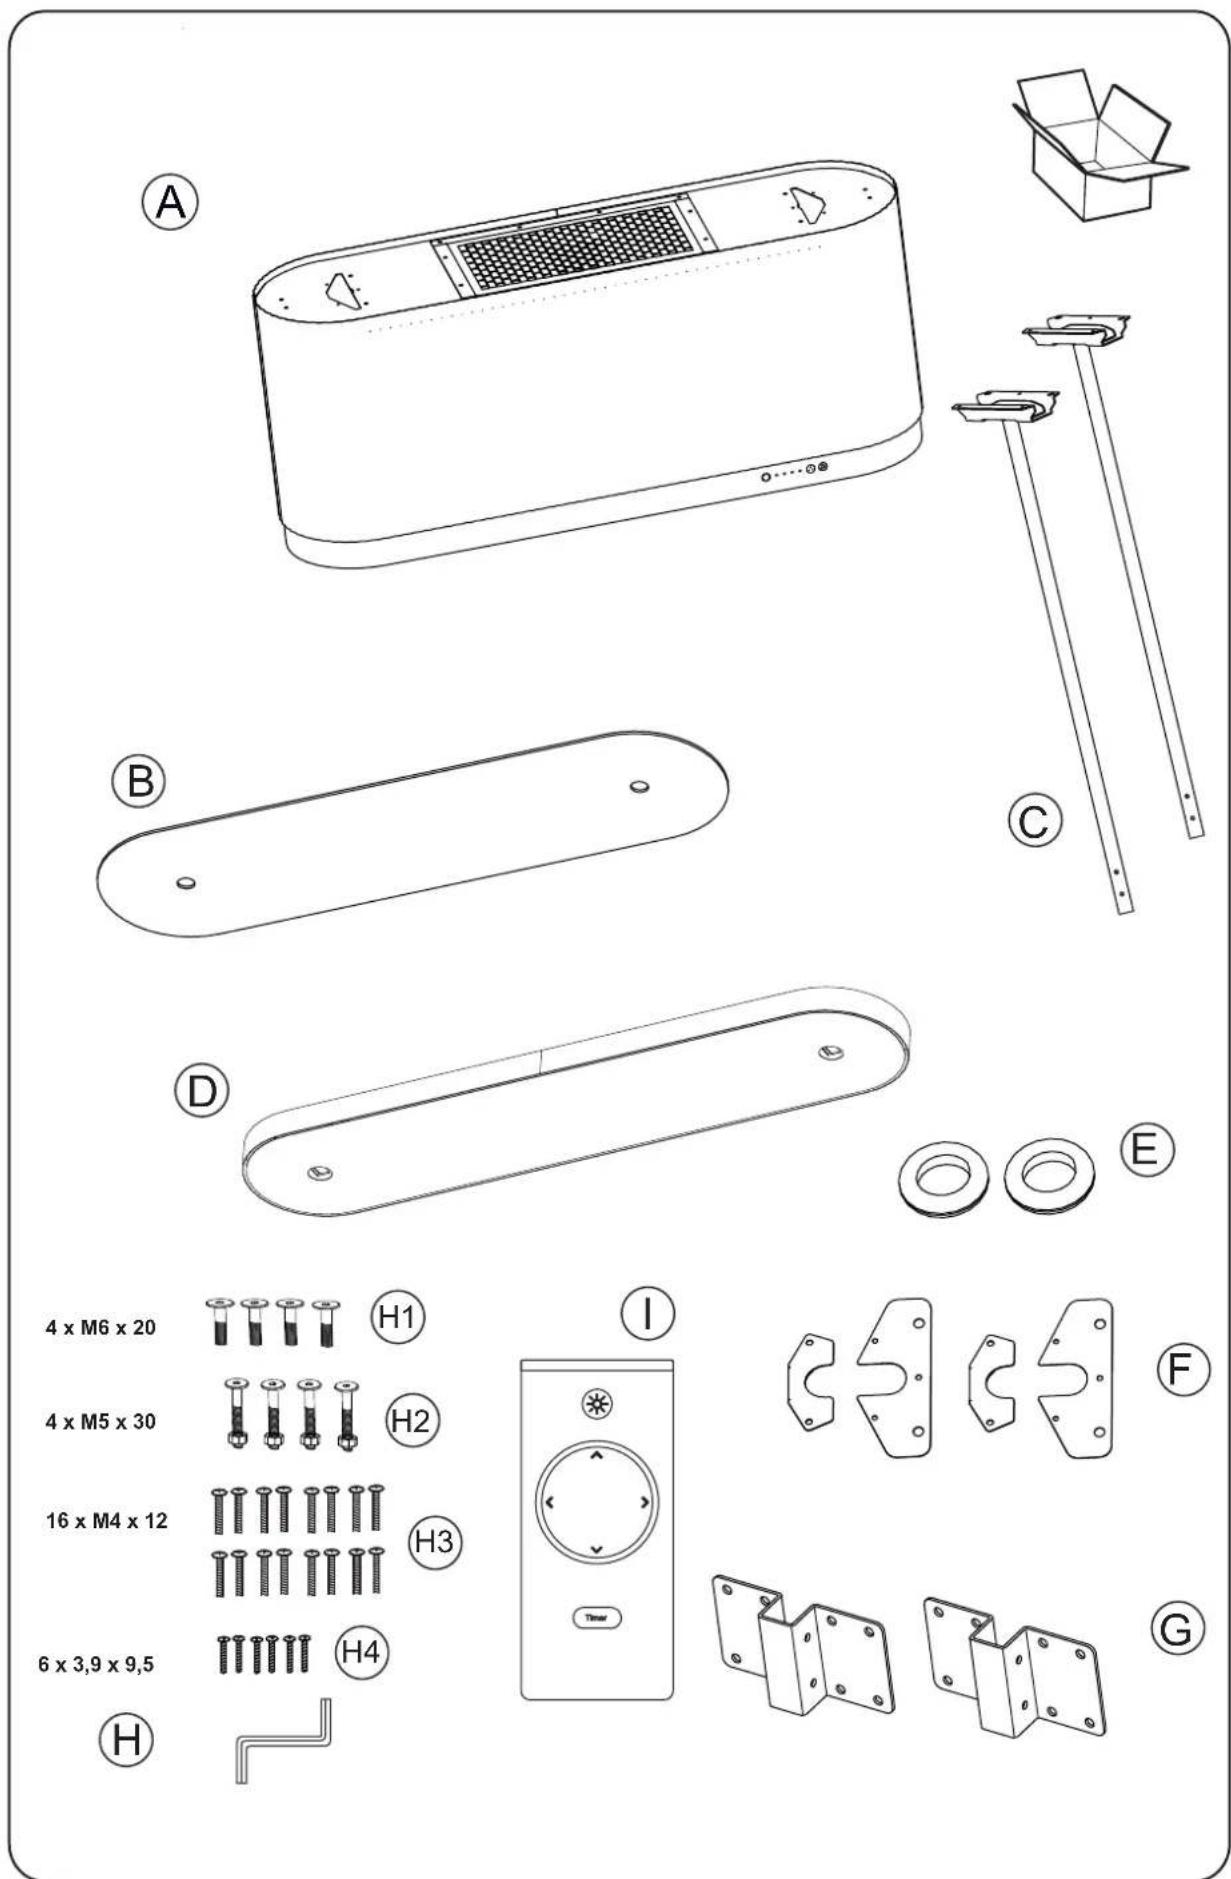
* Note: Elements marked with the symbol „(*)” are only included in selected models, in other cases, they should be purchased separately.
* Poznámka: Symbolem jsou označeny „(*)” díly/příslušenství, které nejsou standardní součástí dodávky a (v případě potřeby) je nutné jejich dokoupení.
* Poznámka: Symbolom „(*)“ sú označené diely/príslušenstvo, ktoré nie sú štandardnou súčasťou balenia a (v prípade potreby) je nutné ich dokúpiť.
* Huomio: Symbolilla " (*) " merkityt osat sisältyvät vain valittuihin malleihin, muissa tapauksissa ne tulee ostaa erikseen.
* Observera: Element märkta med symbolen "(*)" ingår endast i utvalda modeller, i andra fall bör de köpas separat.
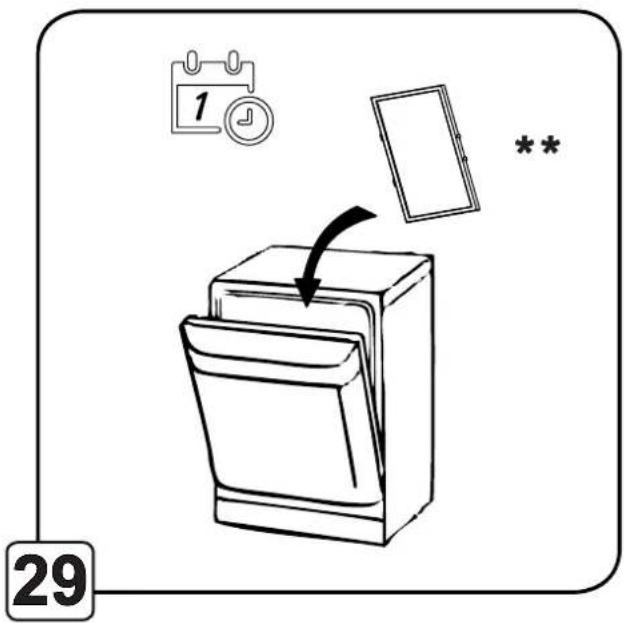
** Remember to clean your grease filters regularly.
You have become users of the latest generation of cooker hoods. This hood was designed and manufactured specifically to meet your expectations and will certainly form part of a modern fitted kitchen. Its innovative design and use of modern production technology, ensure its high functionality and aesthetics.
Please read the following manual carefully before installing the hood. This avoids incorrect installation and operation of the hood.
We wish you satisfaction and happiness with your choice of the hood of our company.
When installing the device, follow the instructions given in this manual.
The manufacturer shall not be liable for damage resulting from installation not complying with the information contained in the manual. The hood was designed exclusively for domestic use. The hood may vary in appearance from the hood shown in the drawings in this manual, but the recommendations for operation, maintenance and installation remain unchanged.
! Keep the user manual so that you can refer to it at any time. In the case of selling the device or moving, ensure that the manual is included.
! Carefully read the contents of the operating manual, which provide precise information on installation, use and care of the device.
! Do not make any electrical or mechanical changes to the device or to the discharging pipes.
Note: Elements marked with the symbol „(*)” are only included in selected models, in other cases, they should be purchased separately.
! Warning
Attention! Do not connect the device to the mains before installation is complete.
Before performing any cleaning or maintenance operations, disconnect the hood from the power by removing the plug from the socket or by switching off the main power switch.
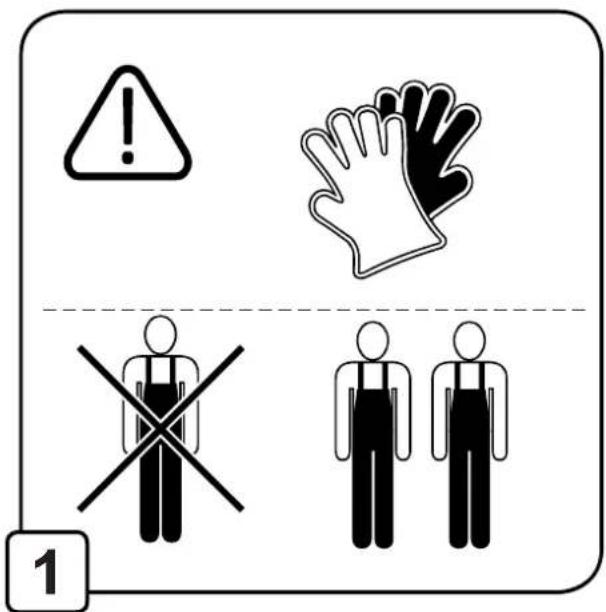
Wear protective gloves for all installation and maintenance work.
This device is not intended for use by persons (including children) with limited physical, sensory or mental abilities, and lacking knowledge or experience in the use of such equipment, unless they are supervised or instructed in the use of this device by a responsible person for their safety.
Never use a hood without properly installed filters!
The hood should NEVER be used as a backrest plane unless this option has been clearly indicated. Room in which the hood is used together with other devices burning gas or other fuel should have adequate ventilation. The air drawn in should not be discharged into a duct used for the discharge of flue gases produced by gas devices or other fuels. It is strictly prohibited to prepare food using an open flame under the hood (flambéing).
The use of open flames is hazardous to the filters and poses a risk of fire, so this must not be done under any circumstances. Care should be taken during frying to avoid overheating of the oil and subsequent self-ignition. Accessible parts can become very hot if used together with appliances designed for cooking. As far as the necessary technical and security measures regarding the regulations issued by the competent local authorities must be strictly observed.
The hood should be cleaned frequently, both inside and out (AT LEAST ONCE A MONTH), observing the maintenance instructions given in this manual).
Failure to comply with the rules for cleaning the hood and replacing and cleaning the filters causes a fire hazard.
To avoid electric shock, do not use or leave the hood without properly installed bulbs. The manufacturer shall not be held liable for any damages or fires caused by the device and resulting from non-compliance with the instructions given in this manual.
This device is marked in accordance with EU Directive 2012/19/EU on waste electrical and electronic equipment (WEEE).
By ensuring that your device is disposed of correctly, you will contribute to reducing the risk of the product having a negative impact on the environment and human health, which could occur if the device is disposed of incorrectly.

The symbol ■ on the device or packaging indicates that this product cannot be treated as other municipal waste. Return it to the appropriate collection and recycling centre for electrical and electronic equipment. Proper disposal and scrapping help to eliminate the adverse effects of scrapped equipment on the environment and health. For details of how this appliance can be recycled, please contact your local town hall, town cleaning service or the shop where you purchased the product.
Operation
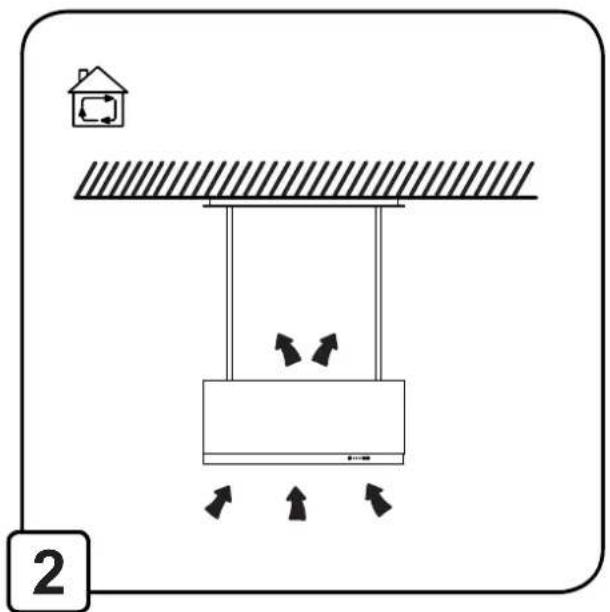
The device can be used as an extractor (vapour extraction to the outside) or an absorber (vapours are filtered and discharged back into the room). Hood models that do not have an extractor fan, function only as an extractor and must be connected to the extraction device (not included).
Connection instructions are supplied with the external extractor unit.
When the air in the kitchen area is particularly polluted, use the hood set at the highest speed. It is recommended that the hood is put into operation 5 minutes before cooking any food and leaving it on for about 15 minutes after the end of cooking.

Hood operating as an absorber
A charcoal filter must be installed to use the hood in this version. It can be purchased from the seller. The air drawn in is cleaned of grease and odours before it is returned into the room
Hood installation
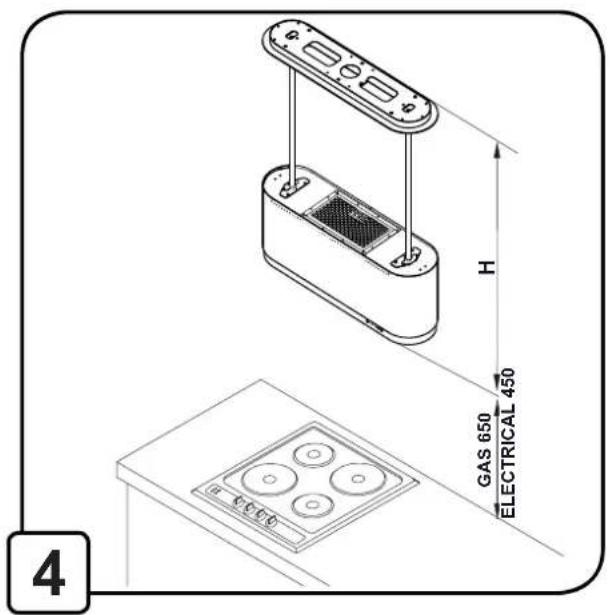
Minimum distance between the surface on which vessels are placed on the heating device and the lowest part of the cooker hood shall be not less than 45 cm in the case of electric cookers and not less than 65 cm for gas or mixed type cookers. If a greater distance is specified in the instructions for installing the gas cooker, adjust to such indications.
Electrical connection
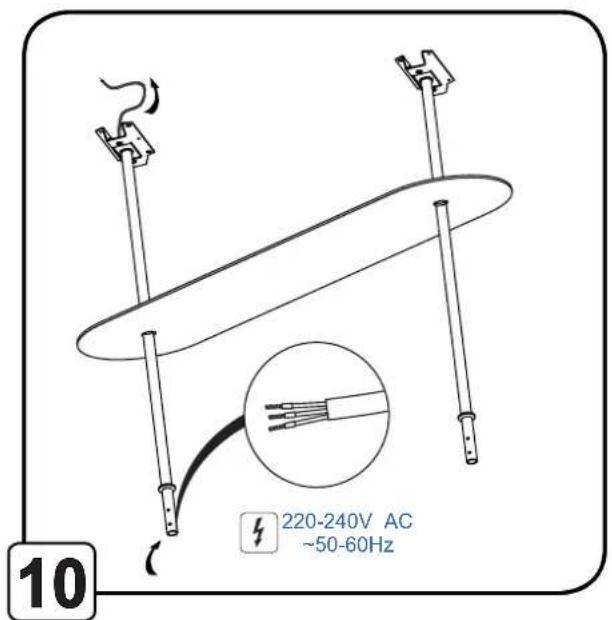
The mains voltage must correspond to the voltage indicated on the plate on the internal part of the hood. If the hood is equipped with a plug, it must be plugged into a compliant outlet in accordance with applicable standards and placed in an easily accessible place, even after the completion of the installation. If the hood is not equipped with a plug (direct connection to the mains) or the plug is not located in an easily accessible place, even after installation has been completed, use a standardised two-pole switch to allow complete isolation from the mains supply under category III overcurrent conditions, in accordance with the installation rules.
Attention! Before reconnecting the hood circuit to the power supply and checking for correctness of its operation, you should always make sure that the power cord is correctly installed.
The hood is equipped with a special power cable.
If this cable is damaged, it must be replaced.
Maintenance
Attention! Before performing any cleaning or maintenance operations, disconnect the hood from the power supply by removing the plug from the socket or turning off the main power supply.
Cleaning the hood
The hood should be cleaned frequently inside as well as outside (at least with the same frequency, with which the grease filters are cleaned) using a cloth moistened with mild agents. Abrasives should not be used.
DO NOT USE ALCOHOL!
Note: Failure to comply with the regulations for cleaning the device and changing filters causes a fire hazard. It is therefore advisable to follow the advice given. The manufacturer assumes no responsibility for possible engine damage or fires resulting from noncompliance with the maintenance rules and the aforementioned instructions.
Grease filter
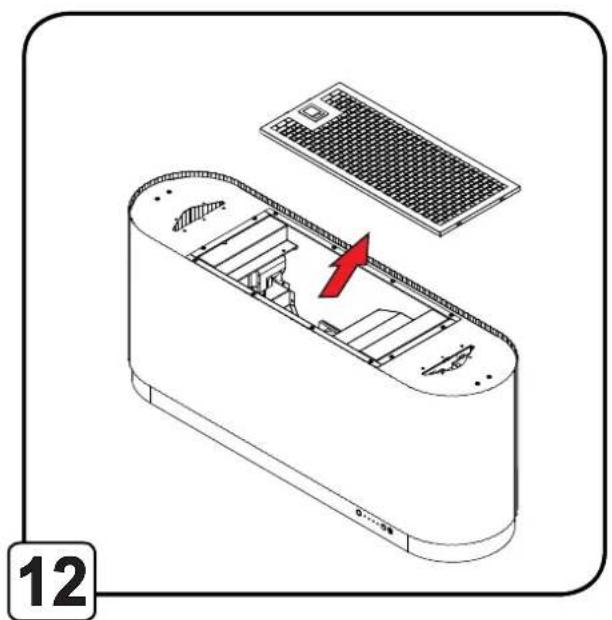
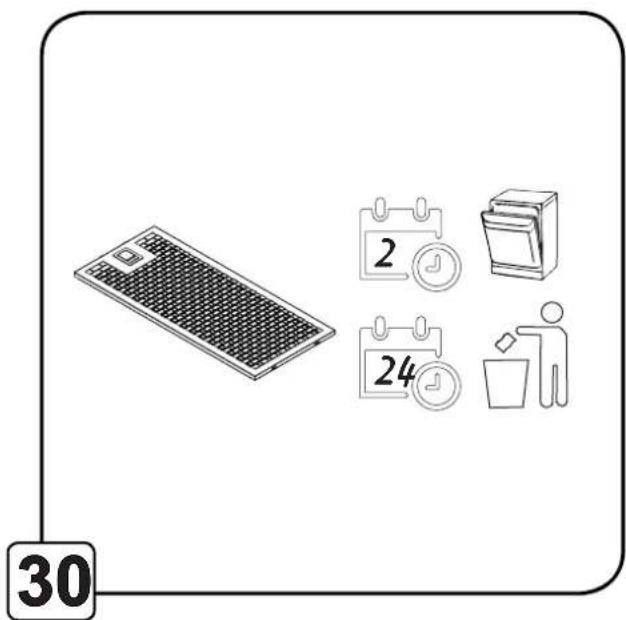
Retains fat particles from cooking. It must be cleaned at least once a month (or when the filter contamination indicator – if Your model of hood has an indicator - it tells you when it needs to be replaced), by means of a nonaggressive cleaning agent, either manually or in the dishwasher at low temperature and on a short washing cycle. When washing in the dishwasher, the metal grease filter may discolour, but it will not change its characteristic filtering features. To remove the grease filter, pull the spring-loaded handle.
Long-life filter
The filter should be cleaned regularly. This procedure is recommended every two months. It involves washing the filter in hot water with detergent or in the dishwasher (full programme 65°C). After washing, DO NOT squeeze water out of the filter - this may result in damage to the filter. To dry and reactivate the filter, place it in the oven set at 70°C for 15-20 minutes. The filter should be replaced once every 3 years or when mechanical damage is visible. Long-life-Filter (*) (can be purchased from your dealer). The use of such a filter depends on the model.
Adapt Flow mode optimises motor operation and airflow, increasing filtration efficiency with carbon or long-life filters. It is also recommended to activate it when reducing the air duct to ∅125. To activate, hold your hand for 10 seconds on the centre of the Gesture Control sensor - the LED panel will blink three times. To deactivate, repeat the procedure - the LED panel will blink twice.
Lighting
If the lights do not work, first check that the lights have been properly installed. If the lighting still does not work after this check, please contact the service center.
Compatibility with Ciarko Design induction hobs
When combining a Ciarko Design induction hob and a Ciarko Design hood, the company guarantees the compatibility of these devices.
However, this warranty is valid provided that the following requirements are met:
- Avoid exposing the hood panel to direct sunlight, which may lead to its damage or malfunction.
- Halogen light should not be directed directly at the hood panel, so as not to negatively affect its functions.
- The control panel of the induction hob must remain uncovered and not covered by any objects that could impair its accessibility or readability.
- Do not disturb the signal between the hob and the hood, for example by covering it with your hand, the handle of a cookware or placing a tall vessel on the hob.
Compatibility with induction hobs from manufacturers other than Ciarko Design
Controlling the Ciarko Design kitchen hood using an induction hob control panel from a manufacturer other than Ciarko Design requires making sure that both devices are compatible with each other. We recommend that customers, before purchasing, physically compare the devices - Ciarko Design cooker hood and induction hob - and directly check whether their cooperation works properly. This live verification will allow you to assess the compatibility and operation of the wireless control function. We also encourage you to consult the manufacturer's sales advisors or service to make sure that the selected device models are compatible. Ciarko emphasizes that if the kitchen hood is free from defects, it is not responsible for any lack of communication between the devices.
Gestures and description of remote control functions
Innovative gesture control system - allows full touchless control of the device with just a hand movement. The cooker hood is extremely intuitive and works according to the 3 gestures, so that your extractor hood fulfills its function.
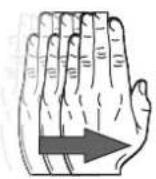
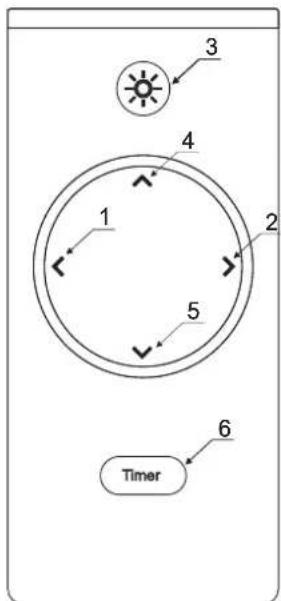
To switch on the extractor hood, move your hand horizontally from left to right about 3-5 cm below the sensor. In this way, the power level changes to a higher gear (2).
On/Off Motor:
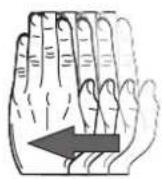
To switch off the hood or change the speed mode to a lower one, pull the hand from the right side to the left (1).
Press and hold (1) for 2 seconds to turn off the engine.
Press and hold (2) for 2 seconds to turn on 4th gear.
Boost:
Power level 4 is a boost function, which means that after 5min of operation, the hood automatically reverts to power level 3
LED On/Off:
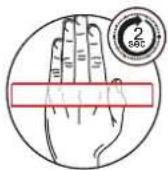
To switch the lighting on or off hold down your hand for approx. 2 seconds or press the button (3) on the remote control.
Dynamic Light:
To adjust the light temperature (warm/cold), hold the Button (4) or (5) on the remote control pressed.
Light dimming:
To adjust the light intensity, press and hold down button (3) on the remote control for approx. 2-3 sec. The light dimming can also be adjusted by pressing buttons (4) and (5). Three levels of light intensity are available.
Timer: To use this function, select a power level (button 1 and 2), and then press the Timer button (6). The duration of the timer is 10 minutes. The function is indicated by a blinking LED.
flowchart
graph TD
    A["1"] --> B["2"]
    B --> C["3"]
    C --> D["4"]
    D --> E["5"]
    E --> F["6"]
    F --> G["Timer"]
Radio remote control operation:
The radio remote control pairing mode is activated automatically after a power reset and is active for 60 seconds but is not signaled in any way. During this time, press any key on the remote control. Pressing the key will connect the cooker hood with the radio remote control. (If you need a new radio remote control, you will need to reconnect it to the hood).
Disconnect the hood from the power supply for 15 seconds. Then reconnect the power supply of the hood. Press any button on the new remote control within 60 seconds.
The hood is now linked to the new radio remote control)
Attention! It may happen that the IR remote control responds to another household appliance
Control panel
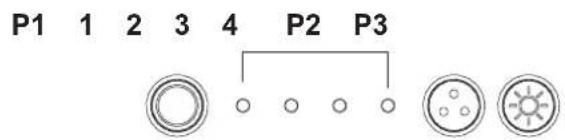
P1 ON/OF button
Press the P1 button to turn on the cooker hood. Pressing again switches to the next higher
1: Gear (suction power) 1
2: Gear (suction power) 2
3: Gear (suction power) 3
4: Gear, intensive suction speed "BOOST".
After 5 minutes of the "BOOST" function, the hood switches back to suction power 3.
P2 - Functional button
P3 - Light on/off button
Timer:
- When the engine is running, press P2 to activate the timer
- The LED starts blinking constantly
- The cooker hood switches off after 15 minutes
- Press and hold P2 (at least 1 second) to turn off the timer
Operation – Touch control:
Dynamic Light:
- Press P2 and P3 for at least 1 second (no display).
- The light color changes smoothly (Kelvin)
- Release P2 or P3 to save the current light setting
Light dimming:
- Press P3 for at least 1 second
- By holding down the button, the lighting switches on in 4 stages (100%/75%/50/25%).
- Release P3 to save the light intensity
Refresh Mode:
Automatic ventilation function - When the function is activated, the extractor hood will automatically switch on in first gear every 50 minutes and will thoroughly ventilate the room for 10 minutes at a time. (can be deactivated at any time).
Activation/deactivation of the Ventilation function:
Press and hold P1 and P2 for at least 1 second to enable or disable the Ventilation function.
Active mode (rinse 10 minutes): LED D2 is bright and flashes slowly.
Standby mode (50 minutes standby): LED D1 glows softly and flashes slowly.
Milí uživatelé!
NEPOUŽÍVAJTE ALKOHOL!
.הכלההוּרָהוּרָהוּרָהוּרָהוּרָהוּרָהוּרָהוּרָהוּרָהוּרָהוּרָהוּרָהוּרָהוּרָהוּרָה:2
natural_image
Pure electrical circuit lines without any symbolsUpravljanje – Touch control:
Dinamičko svjetlo:
- Pritisnite P2 i P3 najmanje 1 sekundu (bez prikaza).
- Boja svjetla se glatko mijenja (Kelvini)
- Otpustite P2 ili P3 za spremanje trenutne postavke svjetla
- CIARKO®
- DESIGN
- ! Warning
- Operation
- Hood operating as an absorber
- Hood installation
- Electrical connection
- Maintenance
- Cleaning the hood
- DO NOT USE ALCOHOL!
- Grease filter
- Long-life filter
- Lighting
- Compatibility with Ciarko Design induction hobs
- Compatibility with induction hobs from manufacturers other than Ciarko Design
- Gestures and description of remote control functions
- On/Off Motor:
- Boost:
- LED On/Off:
- Dynamic Light:
- Light dimming:
- Radio remote control operation:
- Control panel
- P1 ON/OF button
- Timer:
- Operation – Touch control:
- Refresh Mode:
- Activation/deactivation of the Ventilation function:
- Milí uživatelé!
- NEPOUŽÍVAJTE ALKOHOL!
- Upravljanje – Touch control:
- Dinamičko svjetlo:
Brand : Ciarko Design
Model : CDW9001B
Category : Range hood